wheel SKODA OCTAVIA 2005 1.G / (1U) Owner's Manual
[x] Cancel search | Manufacturer: SKODA, Model Year: 2005, Model line: OCTAVIA, Model: SKODA OCTAVIA 2005 1.G / (1U)Pages: 315, PDF Size: 11.8 MB
Page 6 of 315
Contents5
Contents
Layout of this Owner's Manual
(explanations)
. . . . . . . . . . . . . . . . . . .
Using the system . . . . . . . . . . . . . . .
Cockpit . . . . . . . . . . . . . . . . . . . . . . . . . . . . . . .
An overview . . . . . . . . . . . . . . . . . . . . . . . . . .
Instruments and Indicator/Warning LightsGeneral view of the instrument cluster . . . . . .
Engine revolutions counter . . . . . . . . . . . . . . .
Coolant temperature gauge . . . . . . . . . . . . . .
Fuel gauge . . . . . . . . . . . . . . . . . . . . . . . . . . .
Speedometer . . . . . . . . . . . . . . . . . . . . . . . . .
Counter for distance driven . . . . . . . . . . . . . .
Service Interval Display . . . . . . . . . . . . . . . . .
Digital clock . . . . . . . . . . . . . . . . . . . . . . . . . .
Multi-functional indicator (onboard computer)*
Information display* . . . . . . . . . . . . . . . . . . . .
Audio . . . . . . . . . . . . . . . . . . . . . . . . . . . . . . .
Navigation system* . . . . . . . . . . . . . . . . . . . .
Auto Check Control . . . . . . . . . . . . . . . . . . . .
Settings . . . . . . . . . . . . . . . . . . . . . . . . . . . . .
Warning lights . . . . . . . . . . . . . . . . . . . . . . . . .
Unlocking and locking . . . . . . . . . . . . . . . . . .
Keys . . . . . . . . . . . . . . . . . . . . . . . . . . . . . . . .
Key with light* . . . . . . . . . . . . . . . . . . . . . . . . .
Changing the battery of the radio remote
control . . . . . . . . . . . . . . . . . . . . . . . . . . . . . .
Electronic immobiliser . . . . . . . . . . . . . . . . . .
Child safety locks . . . . . . . . . . . . . . . . . . . . . .
Central locking system . . . . . . . . . . . . . . . . . .
Remote control* . . . . . . . . . . . . . . . . . . . . . . . Synchonisation of the remote control . . . . . . .
Anti-theft alarm system* . . . . . . . . . . . . . . . . .
Power windows* . . . . . . . . . . . . . . . . . . . . . . .
Electric sliding/tilting roof* . . . . . . . . . . . . . . .
Lights and Visibility . . . . . . . . . . . . . . . . . . . .
Lights . . . . . . . . . . . . . . . . . . . . . . . . . . . . . . .
Interior lighting . . . . . . . . . . . . . . . . . . . . . . . .
Visibility . . . . . . . . . . . . . . . . . . . . . . . . . . . . .
Windshield wiper and wash system . . . . . . . .
Rear-view mirror . . . . . . . . . . . . . . . . . . . . . .
Seats and Stowage . . . . . . . . . . . . . . . . . . . .
Front seats . . . . . . . . . . . . . . . . . . . . . . . . . . .
Adjusting front seats electrically* . . . . . . . . . .
Head restraints . . . . . . . . . . . . . . . . . . . . . . . .
Heating the front seats* . . . . . . . . . . . . . . . . .
Rear seats . . . . . . . . . . . . . . . . . . . . . . . . . . .
Pedals . . . . . . . . . . . . . . . . . . . . . . . . . . . . . .
Luggage compartment . . . . . . . . . . . . . . . . . .
Net partition (Estate)* . . . . . . . . . . . . . . . . . . .
Roof rack* . . . . . . . . . . . . . . . . . . . . . . . . . . .
Cup holder . . . . . . . . . . . . . . . . . . . . . . . . . . .
Note holder . . . . . . . . . . . . . . . . . . . . . . . . . .
Ashtrays . . . . . . . . . . . . . . . . . . . . . . . . . . . . .
Cigarette lighter*, power sockets . . . . . . . . . .
Storage compartments . . . . . . . . . . . . . . . . . .
Heating and air conditioning system . . . . .
Heating . . . . . . . . . . . . . . . . . . . . . . . . . . . . . .
Climatic* (semi-automatic air conditioning
system) . . . . . . . . . . . . . . . . . . . . . . . . . . . . .
Climatronic* (automatic air conditioning) . . . .
Auxiliary heating (auxiliary heating and
ventilation)* . . . . . . . . . . . . . . . . . . . . . . . . . .
Starting-off and Driving. . . . . . . . . . . . . . . . .
Setting steering wheel position . . . . . . . . . . .
Ignition lock . . . . . . . . . . . . . . . . . . . . . . . . . .
Starting engine . . . . . . . . . . . . . . . . . . . . . . . .
Switching the engine off . . . . . . . . . . . . . . . .
Shifting (manual gearbox) . . . . . . . . . . . . . . .
Handbrake . . . . . . . . . . . . . . . . . . . . . . . . . . .
Rear parking aid* . . . . . . . . . . . . . . . . . . . . . .
Front and rear parking aid* . . . . . . . . . . . . . .
Cruise control system (CCS)* . . . . . . . . . . . .
Automatic gearbox. . . . . . . . . . . . . . . . . . . . .
6-speed automatic gearbox* . . . . . . . . . . . . .
Automatic gearbox DSG . . . . . . . . . . . . . . .
Automatic gearbox DSG* . . . . . . . . . . . . . . .
Communication . . . . . . . . . . . . . . . . . . . . . . .
Multifunction steering wheel* . . . . . . . . . . . . .
Universal telephone preinstallation with voice
control* . . . . . . . . . . . . . . . . . . . . . . . . . . . . .
Phone Phonebook* . . . . . . . . . . . . . . . . . . . .
Bluetooth™* . . . . . . . . . . . . . . . . . . . . . . . . .
Mobile phones and two-way radio systems . .
The CD changer* . . . . . . . . . . . . . . . . . . . . . .
Safety. . . . . . . . . . . . . . . . . . . . . . . . . . . . . .
Passive Safety . . . . . . . . . . . . . . . . . . . . . . . .
Basic information . . . . . . . . . . . . . . . . . . . . . .
Correct seated position . . . . . . . . . . . . . . . . .
Seat belts. . . . . . . . . . . . . . . . . . . . . . . . . . . . .
Why seat belts? . . . . . . . . . . . . . . . . . . . . . . .
The physical principle of a frontal collision . .
8
9
11
11
13
13
14
14
14
15
15
16
17
18
23
25
26
26
28
30
42
42
43
44
45
45
46
52 53
54
56
59
63
63
70
72
75
79
82
82
84
87
88
89
91
92
99
102
103
104
105
106
108
11 9
11 9
123
128
134 138
138
139
140
141
142
143
144
145
146
149
149
156
156
163
163
165
171
173
175
176
177
177
177
179
183
183
184
s24s.book Page 5 Thursday, November 24, 2005 12:27 PM
Page 7 of 315
Contents
6
Important safety information regarding the use
of seat belts . . . . . . . . . . . . . . . . . . . . . . . . . .
How are seat belts correctly fastened? . . . . .
Belt tensioners . . . . . . . . . . . . . . . . . . . . . . . .
Airbag system. . . . . . . . . . . . . . . . . . . . . . . . .
Description of the airbag system . . . . . . . . . .
Front airbags . . . . . . . . . . . . . . . . . . . . . . . . .
Side airbags* . . . . . . . . . . . . . . . . . . . . . . . . .
Head airbags* . . . . . . . . . . . . . . . . . . . . . . . .
Deactivating an airbag . . . . . . . . . . . . . . . . . .
Transporting children safely. . . . . . . . . . . . .
What you should know about transporting
children! . . . . . . . . . . . . . . . . . . . . . . . . . . . . .
Child seat . . . . . . . . . . . . . . . . . . . . . . . . . . . .
Attaching child seat using the “ISOFIX” system
Driving Tips . . . . . . . . . . . . . . . . . . . . . .
Intelligent Technology . . . . . . . . . . . . . . . . . .
Electronic stability programme (ESP)* . . . . . .
Brakes . . . . . . . . . . . . . . . . . . . . . . . . . . . . . .
Brake booster . . . . . . . . . . . . . . . . . . . . . . . .
Antilock brake system (ABS) . . . . . . . . . . . . .
Brake Assist* . . . . . . . . . . . . . . . . . . . . . . . . .
Uphill-Start off-Assist* . . . . . . . . . . . . . . . . . .
Electromechanical power steering . . . . . . . . .
Tyre inflation pressure-control system* . . . . .
Driving and the Environment. . . . . . . . . . . .
The first 1 500 kilometres and then afterwards
Catalytic converter . . . . . . . . . . . . . . . . . . . . .
Driving in an economical and environmentally
conscious manner . . . . . . . . . . . . . . . . . . . . .
Environmental compatibility . . . . . . . . . . . . . .
Motoring abroad . . . . . . . . . . . . . . . . . . . . . . .
Avoiding damage to your vehicle . . . . . . . . . .
Towing a trailer. . . . . . . . . . . . . . . . . . . . . . . .
Towing a trailer . . . . . . . . . . . . . . . . . . . . . . .
Detachable ball head* . . . . . . . . . . . . . . . . . .
General Maintenance. . . . . . . . . .
Taking care of your vehicle and cleaning the
vehicle . . . . . . . . . . . . . . . . . . . . . . . . . . . . . . .
General . . . . . . . . . . . . . . . . . . . . . . . . . . . . .
Care of the exterior of vehicle . . . . . . . . . . . .
Care of the interior of vehicle . . . . . . . . . . . . .
Fuel. . . . . . . . . . . . . . . . . . . . . . . . . . . . . . . . . .
Petrol . . . . . . . . . . . . . . . . . . . . . . . . . . . . . . .
Diesel . . . . . . . . . . . . . . . . . . . . . . . . . . . . . .
Refuelling . . . . . . . . . . . . . . . . . . . . . . . . . . .
Inspecting and Replenishing. . . . . . . . . . . .
Engine compartment . . . . . . . . . . . . . . . . . . .
Engine oil . . . . . . . . . . . . . . . . . . . . . . . . . . . .
Cooling system . . . . . . . . . . . . . . . . . . . . . . .
Brake fluid . . . . . . . . . . . . . . . . . . . . . . . . . . .
The battery . . . . . . . . . . . . . . . . . . . . . . . . . .
Windscreen Wiper and Washer System . . . .
Wheels and Tyres . . . . . . . . . . . . . . . . . . . . .
Wheels . . . . . . . . . . . . . . . . . . . . . . . . . . . . .
Accessories, changes and replacement of
parts . . . . . . . . . . . . . . . . . . . . . . . . . . . . . . . . .
Accessories and replacement parts . . . . . . .
Technical changes . . . . . . . . . . . . . . . . . . . . .
Breakdown assistance . . . . . . . .
Breakdown assistance . . . . . . . . . . . . . . . . .
First-aid box* and warning triangle* (Octavia)
First-aid box* and warning triangle* (Estate
car) . . . . . . . . . . . . . . . . . . . . . . . . . . . . . . . . Fire extinguisher* . . . . . . . . . . . . . . . . . . . . .
Vehicle tool kit . . . . . . . . . . . . . . . . . . . . . . . .
Tyre repair kit* . . . . . . . . . . . . . . . . . . . . . . . .
Spare wheel . . . . . . . . . . . . . . . . . . . . . . . . .
Changing a wheel . . . . . . . . . . . . . . . . . . . . .
Jump-starting . . . . . . . . . . . . . . . . . . . . . . . .
Tow-starting and towing vehicle . . . . . . . . . .
Fuses and light bulbs . . . . . . . . . . . . . . . . . .
Electric fuses . . . . . . . . . . . . . . . . . . . . . . . . .
Bulbs . . . . . . . . . . . . . . . . . . . . . . . . . . . . . . .
Te c h n i c a l D a ta . . . . . . . . . . . . . . . . . .
General . . . . . . . . . . . . . . . . . . . . . . . . . . . . . .
Identification data . . . . . . . . . . . . . . . . . . . . .
Index . . . . . . . . . . . . . . . . . . . . . . . . . . . . . .
185
186
188
190
190
192
195
197
199
202
202
206
210
213
213
213
216
217
218
218
219
219
220
221
221
222
223
227
228
228 229
229
231
233
233
233
233
239
242
242
242
245
247
247
250
253
256
258
262
263
263
270
270
270
273
273
273
273274
274
275
275
276
281
283
288
288
294
303
303
303
305
s24s.book Page 6 Thursday, November 24, 2005 12:27 PM
Page 12 of 315
Cockpit11
Using the systemSafetyDriving TipsGeneral MaintenanceBreakdown assistanceTechnical Data
Cockpit
An overview
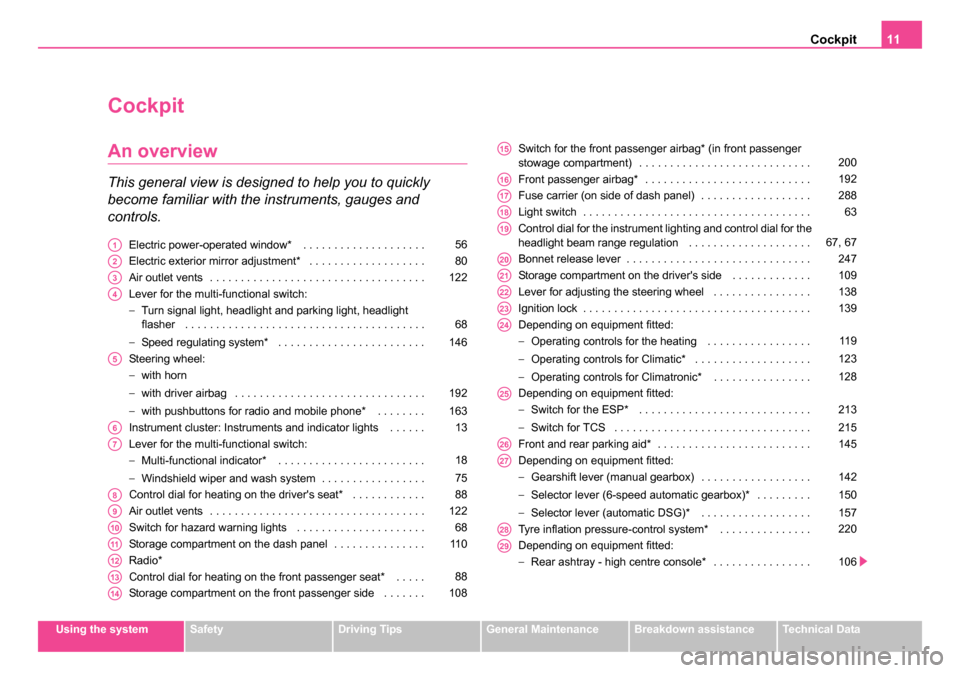
This general view is designed to help you to quickly
become familiar with the instruments, gauges and
controls.
Electric power-operated window* . . . . . . . . . . . . . . . . . . . .
Electric exterior mirror adjustment* . . . . . . . . . . . . . . . . . . .
Air outlet vents . . . . . . . . . . . . . . . . . . . . . . . . . . . . . . . . . . .
Lever for the multi-functional switch:
−Turn signal light, headlight and parking light, headlight
flasher . . . . . . . . . . . . . . . . . . . . . . . . . . . . . . . . . . . . . . .
− Speed regulating system* . . . . . . . . . . . . . . . . . . . . . . . .
Steering wheel:
− with horn
− with driver airbag . . . . . . . . . . . . . . . . . . . . . . . . . . . . . . .
− with pushbuttons for radio and mobile phone* . . . . . . . .
Instrument cluster: Instruments and indicator lights . . . . . .
Lever for the multi-functional switch:
− Multi-functional indicator* . . . . . . . . . . . . . . . . . . . . . . . .
− Windshield wiper and wash system . . . . . . . . . . . . . . . . .
Control dial for heating on the driver's seat* . . . . . . . . . . . .
Air outlet vents . . . . . . . . . . . . . . . . . . . . . . . . . . . . . . . . . . .
Switch for hazard warning lights . . . . . . . . . . . . . . . . . . . . .
Storage compartment on the dash panel . . . . . . . . . . . . . . .
Radio*
Control dial for heating on the front passenger seat* . . . . .
Storage compartment on the front passenger side . . . . . . . Switch for the front passenger airbag* (in front passenger
stowage compartment) . . . . . . . . . . . . . . . . . . . . . . . . . . . .
Front passenger airbag* . . . . . . . . . . . . . . . . . . . . . . . . . . .
Fuse carrier (on side of dash panel) . . . . . . . . . . . . . . . . . .
Light switch . . . . . . . . . . . . . . . . . . . . . . . . . . . . . . . . . . . . .
Control dial for the instrument lighting and control dial for the
headlight beam range regulation . . . . . . . . . . . . . . . . . . . .
Bonnet release lever . . . . . . . . . . . . . . . . . . . . . . . . . . . . . .
Storage compartment on the driver's side . . . . . . . . . . . . .
Lever for adjusting the steering wheel . . . . . . . . . . . . . . . .
Ignition lock . . . . . . . . . . . . . . . . . . . . . . . . . . . . . . . . . . . . .
Depending on equipment fitted:
−
Operating controls for the heating . . . . . . . . . . . . . . . . .
− Operating controls for Climatic* . . . . . . . . . . . . . . . . . . .
− Operating controls for Climatronic* . . . . . . . . . . . . . . . .
Depending on equipment fitted:
− Switch for the ESP* . . . . . . . . . . . . . . . . . . . . . . . . . . . .
− Switch for TCS . . . . . . . . . . . . . . . . . . . . . . . . . . . . . . . .
Front and rear parking aid* . . . . . . . . . . . . . . . . . . . . . . . . .
Depending on equipment fitted:
− Gearshift lever (manual gearbox) . . . . . . . . . . . . . . . . . .
− Selector lever (6-speed automatic gearbox)* . . . . . . . . .
− Selector lever (automatic DSG)* . . . . . . . . . . . . . . . . . .
Tyre inflation pressure-control system* . . . . . . . . . . . . . . .
Depending on equipment fitted:
− Rear ashtray - high centre console* . . . . . . . . . . . . . . . . A156
A280
A3122
A4
68
146
A5
192
163
A613
A7
18
75
A888
A9122
A1068
A1111 0
A12
A1388
A14108
A15200
A16192
A17288
A1863
A1967, 67
A20247
A21109
A22138
A23139
A24
11 9
123
128
A25
213
215
A26145
A27
142
150
157
A28220
A29
106
s24s.book Page 11 Thursday, November 24, 2005 12:27 PM
Page 16 of 315

Instruments and Indicator/Warning Lights15
Using the systemSafetyDriving TipsGeneral MaintenanceBreakdown assistanceTechnical Data
The fuel tank has a capacity of about 55 litres (on vehicles with four-wheel
drive approx. 60 litres). The warning symbol
in the instrument cluster
lights up when the pointer reaches the reserve marking. There are now
about 8 litres of fuel remaining in the tank. This symbol is a reminder for
you, that you must refuel .
The following will be displayed in the information display*:
Please refuel! (Please refuel!)
A peep sounds as an additional warning signal.
Caution
Never run the fuel tank completely empty! An irregular fuel supply can
result in poor ignition or misfiring. Unburnt fuel may get into the exhaust
system and damage the catalytic converter.
Speedometer
Warning against excessive speeds*
An acoustic warning signal will sound when the vehicle speed exceeds
120 kilometres per hour. The acoustic warning signal will switch off again
when the vehicle speed goes below this speed limit.
Note
This function is only valid for some countries.
Counter for distance driven
The distance which you have driven with your vehicle is shown in kilom-
eters (km). On certain model versions, the readout is shown in “miles”.
The kilometer counter for distance driven is shown on the display when
the ignition is switched off. The trip counter for distance driven is shown
on the display after switching on the ignition. You can then switch over to
the counter display with the reset button.
Reset button
By briefly pressing the reset button ⇒page 13, fig. 2 you can switch
over from the trip counter to the kilometer counter. In order to recognize
which counter for the distance driven is shown on the display at that
moment, trip ⇒ fig. 3 appears after the trip counter.
If you hold the reset button pressed for about 1 second, the trip counter
is set back to zero.
If you hold the reset button pressed for longer than 2 seconds when
the ignition is switched on, a display regarding the kilometers still to be
Fig. 3 Display: Trip
counter for distance
driven
A6
A6
A6
s24s.book Page 15 Thursday, November 24, 2005 12:27 PM
Page 37 of 315
Instruments and Indicator/Warning Lights
36
In this case stop and switch the engine off and check the coolant level;
top up the coolant as necessary.
Do not continue your journey if for some reason it is not possible under
the conditions prevailing to top up with coolant. Keep the engine
switched off and obtain professional assistance from a specialist garage,
otherwise it could lead to severe engine damages.
If the coolant is within the specified range, the increased temperature may
be caused by an operating problem at the coolant fan. Check the fuse for
the coolant fan, replace it if necessary ⇒page 290, “Fuse assignment in
engine compartment - version 1” or ⇒page 291, “Fuse assignment in
engine compartment - version 2”.
Do not continue driving if the warning light does not go off although the
fluid is at the correct level and also the fuse of the fan is in proper order.
Contact a specialist garage to obtain assistance.
Please also refer to the additional instructions ⇒page 253, “Cooling
system”.
The following text will be displayed in the information display*:
STOP Check coolant! Owner's manual (STOP! Check coolant!
Owner's manual)
WARNING
•If you must stop for technical reasons, then park the vehicle at
a safe distance from the traffic and switch off the engine and switch
on the hazard warning light system ⇒page 68.
•Take care when opening the coolant expansion bottle. If the
engine is hot, the cooling system is pressurized - risk of scalding!
It is best to allow the engine to cool down before removing the cap.
•Do not touch the coolant fan The coolant fan may switch on
automatically even if the ignition is off.
Thickness of the brake pads*
The warning light comes on for a few seconds 3) when the ignition is
switched on.
If the warning light
comes on, contact a specialist garage immediately
and have the brake pads on all of the wheels inspected.
A peep sounds as an additional warning signal.
The following text will be displayed in the information display*: Check brake pads!
Windshield washer fluid level*
The warning light comes on when the ignition is switched on if there is
insufficient fluid in the windshield washer system. Top up with liquid
⇒ page 262.
A peep sounds as an additional warning signal.
The following text will be displayed in the information display*: Top up wash fluid!
Fuel reserve
The warning light comes on, if the fuel level is still below 8 litres.
A peep sounds as an additional warning signal.
3)The warning light on vehicles fitted with information display does not come on
after switching the ignition on, but only if a fault exists.
s24s.book Page 36 Thursday, November 24, 2005 12:27 PM
Page 40 of 315
Instruments and Indicator/Warning Lights39
Using the systemSafetyDriving TipsGeneral MaintenanceBreakdown assistanceTechnical Data
The warning light comes on for a few seconds after the ignition has been
switched on or when starting the engine. The warning light goes out after
an automatic check sequence has been completed.
A fault in the ABS
If the ABS warning light
does not go out within a few seconds after
switching on the ignition or does not light up at all or lights up while driving,
the system is not functioning properly and the vehicle will be braked
without the aid of ABS. The vehicle will only be braked by the normal brake
system. Visit a specialist garage as quickly as possible and adjust your
style of driving in the meantime since you will not know how great the
damage is.
Three additional warning tones will sound if there is a major fault in the
ABS.
Further information about ABS ⇒page 218, “Antilock brake system
(ABS)”.
A fault in the entire brake system
If the ABS warning light
comes on together with the brake system
warning light (handbrake must be released), there is a fault not only in
the ABS but also in another part of the brake system ⇒.
WARNING
•If the brake system warning light comes on together with the
ABS warning light stop the vehicle immediately and check the
brake fluid level in the reservoir ⇒page 256, “Brake fluid”. If the
fluid level has dropped below th e MIN marking, do not drive any
further - risk of accident! Contact a Škoda dealer to obtain profes-
sional assistance.
•Pay attention to the following instructions ⇒page 248, “Working
in the engine compartment” before checking the brake fluid level
and opening the bonnet.
•If the brake fluid is at the correct level, the ABS control function
has failed. The rear wheels may then block very rapidly when
braking. In certain circumstances, this can result in the rear end of
the car breaking away - risk of skidding! Drive carefully to the
nearest specilaist garage and have the fault rectified.
Traction control system (TCS)
The warning light comes on for a few seconds when the ignition is
switched on.
The warning light comes on when driving when a control cycle is acti-
vated.
The warning light will come on and remains on if the TCS is switched off
or if there is a fault in the system.
The fact that the TCS system operates together with the ABS means that
the TCS warning light will also come on if the ABS system is not operating
properly.
If the warning light
comes on immediately after starting the engine, the
TCS system can be switched off for technical reasons. In this case, the
TCS system can be switched on again by switching the ignition on and off.
If the warning light goes out, the TCS system is fully functional again.
Further information about the TCS ⇒page 215, “Traction control system
(TCS)”.
WARNING (continued)
s24s.book Page 39 Thursday, November 24, 2005 12:27 PM
Page 70 of 315
Lights and Visibility69
Using the systemSafetyDriving TipsGeneral MaintenanceBreakdown assistanceTechnical Data
The turn signal and main beam lever perform the following func-
tions:
Right
and left turn signal light
– Push the lever upwards or downwards ⇒page 68, fig. 47 .
– If you only wish to flash three times* (the so-called conven- ience turn signal), push the lever briefly up to the upper or
lower pressure point and release it.
– Turn signal for changing lanes, in order to only flash briefly - move the lever up or down to the pressure point and hold it in
this position.
Main beam
– Switch on the low beam.
– Push the lever forwards.
– Pull the lever back into the initial position in order to switch the main beam off again.
Headlight flasher
– Pull on the lever of the steering wheel (sprung position) - the main beam and warning light in the instrument cluster come
on.
Parking light
– Switch off the ignition.
– Push the lever up or down - the right-hand or left-hand parking light is switched on.
Information concerning the function of the lights.
•The turn signal system only operates when the ignition is switched
on. The corresponding indicator light or in the instrument cluster also
flashes.
•The turn signal is automatically cancelled after negotiating a curve.
•The indicator light flashes at twice its normal rate if a bulb of the turn
signal light fails.
•The side light and rear light on the appropriate side of the vehicle are
switched on when the parking light is selected. The parking light function
only operates if the ignition is switched off.
•An acoustic warning signal will sound when the driver's door is opened
if the lever is not in the middle position after removing the ignition key. The
acoustic warning signal will stop just as soon as the driver's door is closed.
Caution
Use main beam or the headlight flasher only if this does not risk dazzling
other road users.
Note
•Use only in accordance with the legal requirements the described
lighting and signal systems.
s24s.book Page 69 Thursday, November 24, 2005 12:27 PM
Page 76 of 315

Lights and Visibility75
Using the systemSafetyDriving TipsGeneral MaintenanceBreakdown assistanceTechnical Data
Windshield wiper and wash system
Windscreen wipers
You can operate the windscreen wipers and automatic
wipe/wash using the windscreen wiper lever.
The windscreen wiper lever ⇒fig. 55 has the following positions:
Finger-operated wiping
– If you wish to wipe the windscreen only briefly, push the lever
into the sprung position . If you hold the lever in the lower
position for more than 1 second, the wiper wipes faster.
Intermittent wipe
– Position the lever up into position . – Set with the switch the desired break between the indi-
vidual wiper strokes
Slow wipe
– Position the lever up into position .
Fast wipe
– Position the lever up into position .
Automatic wipe/w ash for windscreen
– Pull the lever towards the steering wheel into sprung position , the wash system sprays immediately, the windscreen
wiper starts wiping a little later. The wash system and the
windscreen wiper operate simultaneously at a speed of more
than 120 km/h.
– Release the lever. The windscreen wash system stops and the wiper continues for another 3 - 4 wiper strokes (depending
on the period of spraying of the windscreen). At a speed of
more than 120 km/h, the wiper wipes once again 5 seconds
after the last wiper stroke in order to wipe the last drops from
the windscreen.
Rain sensor*
– Move the lever into position .
– You can set the sensitivity of the sensor individually with switch .
Wiping the rear window pane*
– Push the lever away from the steering wheel into position - the widescreen wiper will operate every 6 seconds.
Fig. 55 Windscreen
wiper lever
A4
A1
AA
A2
A3
A5
A1
AA
A6
s24s.book Page 75 Thursday, November 24, 2005 12:27 PM
Page 77 of 315
Lights and Visibility
76
Automatic wipe/wash for the rear window pane*
– Press the lever from the steering wheel forward into the sprung position , the wash system sprays immediately, the
windscreen wiper starts wiping a little later. As long as you
hold the lever in this position, the wiper operates as well as the
wash system.
– Letting go of the lever will cause the windscreen wash system to stop and the wiper to continue for another 2 - 3 wiper
strokes (depending on the period of spraying of the wind-
screen). The lever will stay in position after releasing it .
Switching windscreen wipers off
– Move the lever back into its home position .
After the windscreen wiper switches off for the second time or the ignition
switches off for the fifth time, the rest position of the windscreen wiper
changes - this counteracts an early fatigue of the wiper rubbers.
The windscreen wipers and the wash system only operate if the ignition is
switched on and the bonnet is closed.
If the intermittent wipe is switched on, the intervals are also controlled
depending on speed.
The rain sensor* automatically regulates the break between the individual
wiper strokes depending on the intensity of the rain.
The rear window will be wiped again if the front window wipers are on
when reverse gear is selected.
The windscreen washer nozzles are heated* when the ignition is switched
on.
Top up with wash liquid ⇒page 262. Winter position
If the windscreen wipers are in rest position, they cannot be folded out
from the windscreen. For this reason we recommend adjusting the wind-
screen wipers in winter so that they can be folded out from the windscreen
easily. You can set this rest position as follows:
•Switch on the windscreen wipers.
•Switch off the ignition. The windscreen wipers remain in the position in
which they were when switching off the ignition.
You can also use the service position ⇒page 77 as a winter position.
WARNING
•Properly maintained windscreen wiper blades are essential for
clear visibility and safe driving ⇒page 77, “Replacing wiper blades
for the windscreen wipers”.
•Do not use the windscreen washer system at low temperatures,
without heating the windscreen beforehand. Otherwise the window
cleaner could freeze on the windscreen and restrict the view to the
front.
•The rain sensor only operates as a support. The driver is not
released from the responsibility to set the function of the wind-
screen wipers manually depending on the visibility conditions.
Caution
In frosty weather, please first of all check whether the windscreen wiper
blades are not frozen to the windscreen before switching them on.
Switching on windscreen wipers when the blades are frozen to the wind-
screen may result in damage both to the blades and the motor of the wind-
screen wipers!
A7
A6
A0
s24s.book Page 76 Thursday, November 24, 2005 12:27 PM
Page 83 of 315
Seats and Stowage
82
Seats and Stowage
Front seats
Basic information
The front seats have a wide range of different settings and can thus be
matched to the physical characteristics of the driver and front passenger.
Correct adjustment of the seats is particularly important for
•safely and quickly reaching the controls,
•a relaxed, fatigue-free body position,
•achieving the maximum protection offered by the seat belts and
the airbag system.
WARNING
•Never transport more occupants than the maximum seating in
the vehicle.
•Each occupant must correctly fasten the seat belt belonging to
the seat. Children must be fastened ⇒page 202, “Transporting chil-
dren safely” with a suitable restraint system.
•The front seats and the head restraints must always be adjusted
to match the body size of the seat occupant as well as the seat belts
must always be correctly fastened in order to provide an optimal
protection for you and your occupants.
•Always keep your feet in the footwell when the car is being
driven - never place your feet on the instrument panel, out of the
window or on the surfaces of the seats. This is particularly impor-
tant for the front seat passenger. You will be exposed to increased
risk of injury if it becomes necessary to apply the brake or in the event of an accident. If an airbag is deployed, you may suffer fatal
injuries when adopting an incorrect seated position!
•It is important for the driver and front passenger to maintain a
distance of at least 25 cm from the steering wheel or dash panel.
Not maintaining this minimum distance will mean that the airbag
system will not be able to properly protect you - hazard! The front
seats and the head restraints must always also be correctly
adjusted to match the body size of the occupant.
•Ensure that there are no objects in the footwell as any objects
may get behind the pedals during a driving or braking manoeuvre.
You would then no longer be able to operate the clutch, to brake or
accelerate.
WARNING (continued)
s24s.book Page 82 Thursday, November 24, 2005 12:27 PM