navigation SKODA OCTAVIA 2007 1.G / (1U) Cruise Navigation System Manual
[x] Cancel search | Manufacturer: SKODA, Model Year: 2007, Model line: OCTAVIA, Model: SKODA OCTAVIA 2007 1.G / (1U)Pages: 20, PDF Size: 1.15 MB
Page 1 of 20
SIMPLY CLEVER
www.skoda-auto.com
Navigace Cruise
Fabia, Roomster anglicky 07.08
1Z0 012 006 AN
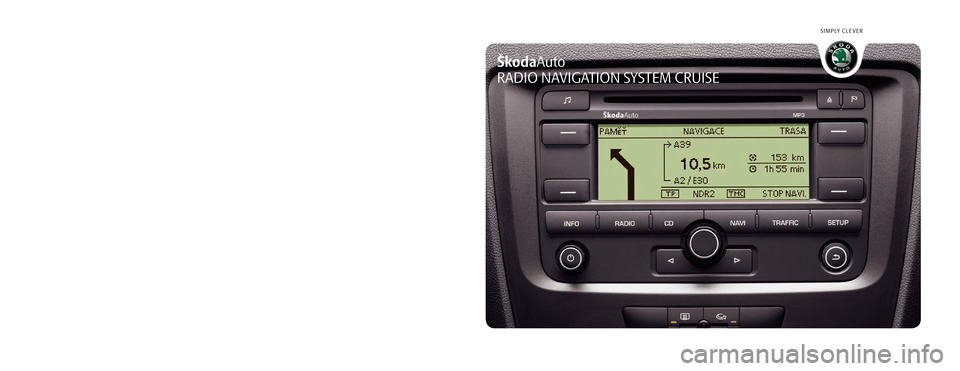
ŠkodaAuto
RADIO NAVIGATION SYSTEM CRUISE
Cruise.indd 13.4.2009 13:25:20
Page 3 of 20
Contents1
ContentsRadio
. . . . . . . . . . . . . . . . . . . . . . . . . . . . . . . . . . . . . . .
Equipment overview
. . . . . . . . . . . . . . . . . . . . . . . . . .
Important information
. . . . . . . . . . . . . . . . . . . . . . . .
Anti-theft protection
. . . . . . . . . . . . . . . . . . . . . . . . . .
Basic setting
. . . . . . . . . . . . . . . . . . . . . . . . . . . . . . . . . . .
Radio
. . . . . . . . . . . . . . . . . . . . . . . . . . . . . . . . . . . . . . . . . .
CD player
. . . . . . . . . . . . . . . . . . . . . . . . . . . . . . . . . . . . . .
Navigation
. . . . . . . . . . . . . . . . . . . . . . . . . . . . . . .
Overview
. . . . . . . . . . . . . . . . . . . . . . . . . . . . . . . . . . . . . .
Route guidance
. . . . . . . . . . . . . . . . . . . . . . . . . . . . . . . 2
2
2
3
4
6
9
11
11
13
s28k.book Page 1 Friday, May 16, 2008 10:17 AM
Page 4 of 20
Radio
2RadioEquipment overview
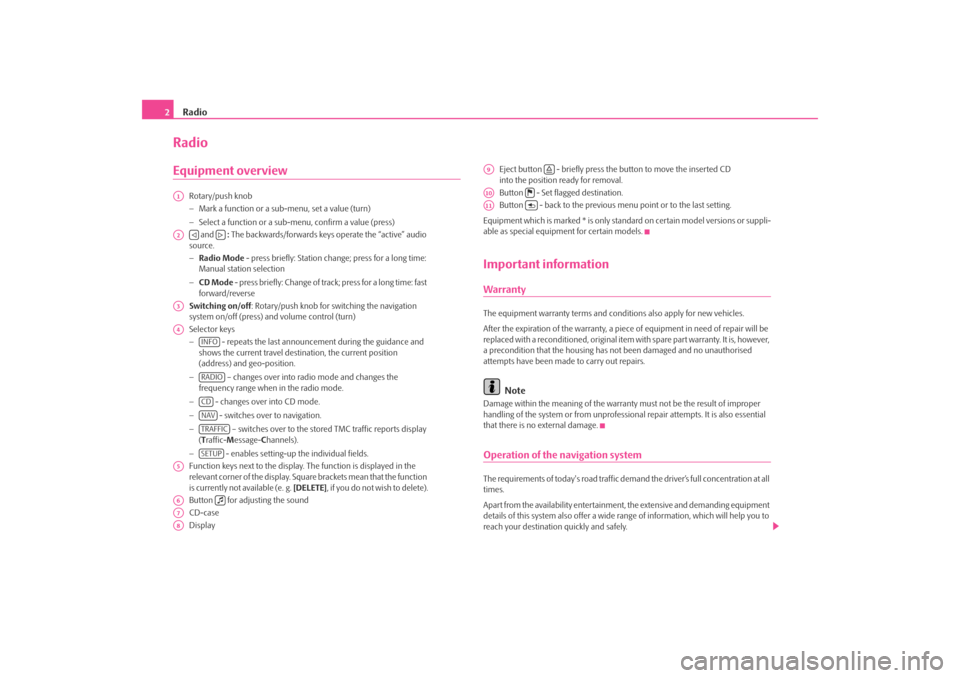
Rotary/push knob
− Mark a function or a su b-menu, set a value (turn)
− Select a function or a sub-menu, confirm a value (press)
and : The backwards/forwards keys operate the “active” audio
source.
− Radio Mode - press briefly: Station change; press for a long time:
Manual station selection
− CD Mode - press briefly: Change of track; press for a long time: fast
forward/reverse
Switching on/off : Rotary/push knob for switching the navigation
system on/off (press) and volume control (turn)
Selector keys
− - repeats the last announceme nt during the guidance and
shows the current travel destination, the current position
(address) and geo-position.
− – changes over into radio mode and changes the
frequency range when in the radio mode.
− - changes over into CD mode.
− - switches over to navigation.
− – switches over to the stored TMC traffic reports display
( T raffic- Message- Channels).
− - enables setting-up the individual fields.
Function keys next to the display. The function is displayed in the
relevant corner of the display. Square brackets mean that the function
is currently not available (e. g. [DELETE], if you do not wish to delete).
Button for adjusting the sound
CD-case
Display Eject button - briefly press the button to move the inserted CD
into the position ready for removal.
Button - Set flagged destination.
Button - back to the previous me
nu point or to the last setting.
Equipment which is marked * is only stan dard on certain model versions or suppli-
able as special equipment for certain models.
Important informationWarrantyThe equipment warranty terms and conditions also apply for new vehicles.
After the expiration of the warranty, a piec e of equipment in need of repair will be
replaced with a reconditioned, original item with spare part warranty. It is, however,
a precondition that the housing has not been damaged and no unauthorised
attempts have been made to carry out repairs.
Note
Damage within the meaning of the warranty must not be the result of improper
handling of the system or from unprofession al repair attempts. It is also essential
that there is no external damage.Operation of the navigation systemThe requirements of today's road traffic demand the driver’s full concentration at all
times.
Apart from the availability entertainmen t, the extensive and demanding equipment
details of this system also offer a wide range of information, which will help you to
reach your destination quickly and safely.
A1A2
A3A4
INFORADIOCDNAVTRAFFICSETUP
A5A6
A7A8
A9
A10
A11
s28k.book Page 2 Friday, May 16, 2008 10:17 AM
Page 5 of 20
Radio3
But you should only operate the navigation system with its wide range of
possibilities when the traffic situation allows.
The volume settings must be selected in such a way that audible signals from the
outside, e.g. a Martins horn from utility vehicles (police cars, ambulances and fire
brigade), can be heard at all times.
WARNING
Please concentrate fully at all times on your driving! As the driver you are
fully responsible for road safety. Only use the functions in such a way that
you are always in full control of your vehicle in all traffic situations!Before using the navigation system•
Please observe the respective traffic regulations when driving.
•
Street and location names can be change d. It is therefore possible that the
names stored on the CD might not correspond to the changed names.
•
The route calculated by the navigation system is a recommendation for
reaching the intended destination. While driving please pay attention to stopping
restrictions, traffic lights, one-way streets, lane change restrictions, canals and
ferries.
WARNING
Road traffic legislation (StVO) applies at all times, even if a driving recom-
mendation contradicts the StVO.
Caution
•
Inserting a second CD while a CD is being ejected can destroy the CD drive in
the unit. Please note that the CD ejecti on lasts a few seconds after pressing the
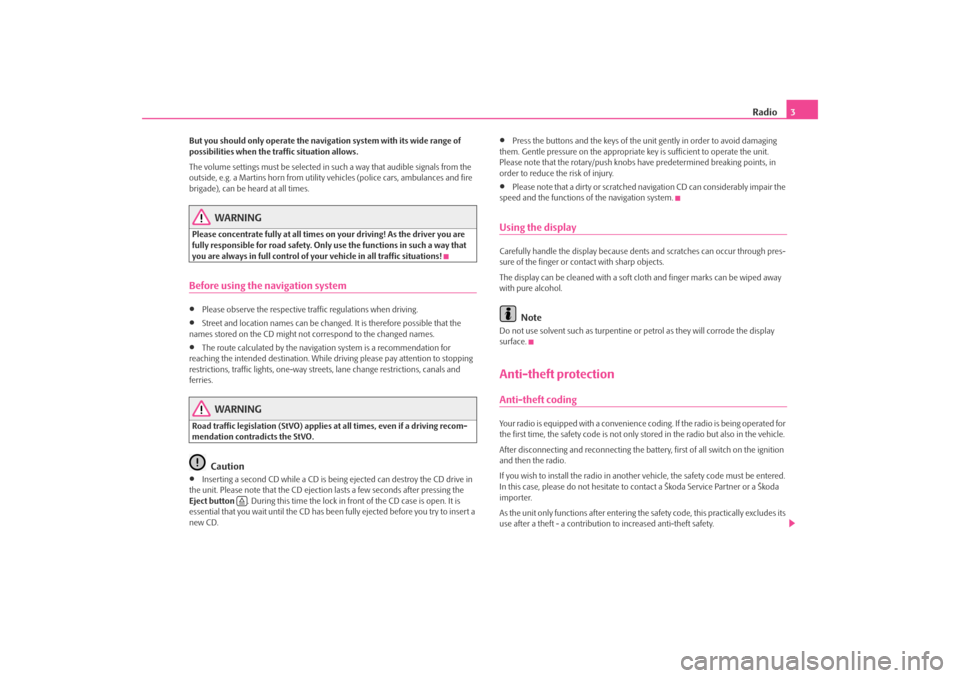
Eject button . During this time the lock in fr ont of the CD case is open. It is
essential that you wait until the CD has been fully ejected before you try to insert a
new CD.
•
Press the buttons and the keys of the unit gently in order to avoid damaging
them. Gentle pressure on the appropriate key is sufficient to operate the unit.
Please note that the rotary/push knobs have predetermined breaking points, in
order to reduce the risk of injury.
•
Please note that a dirty or scratched na vigation CD can considerably impair the
speed and the functions of the navigation system.
Using the displayCarefully handle the display because dent s and scratches can occur through pres-
sure of the finger or contact with sharp objects.
The display can be cleaned wi th a soft cloth and finger marks can be wiped away
with pure alcohol.
Note
Do not use solvent such as turpentine or petrol as they will corrode the display
surface.Anti-theft protectionAnti-theft codingYour radio is equipped with a convenience coding. If the radio is being operated for
the first time, the safety code is not only st ored in the radio but also in the vehicle.
After disconnecting and reconnecting the battery, first of all switch on the ignition
and then the radio.
If you wish to install the radio in another vehicle, the safety code must be entered.
In this case, please do not hesitate to contact a Škoda Service Partner or a Škoda
importer.
As the unit only functions afte r entering the safety code, this practically excludes its
use after a theft - a contribution to increased anti-theft safety.
s28k.book Page 3 Friday, May 16, 2008 10:17 AM
Page 7 of 20
Radio5
Mark and select menu point
– Turn the button until the desired menu point is highlighted with an
upper and lower line ⇒ page 4, fig. 2 .
– Press the button to select the menu point.
Set value
– Turn the button until the desired value is set.
– Press the button in order to confirm the set value.
The “scroll bar” ⇒page 4, fig. 2 shows that further menu points become visible
if the sliding regulator is moved completely to the bottom.
Square brackets mean that the functi on is currently not available (e. g. [Fader] on
vehicles without rear loudspeakers).
An entry with a
opens an additional sub-menu.
A
next to an entry shows the presently selected set-up (e.°g currently played
station).
Some functions can only be switched on or off. A filled out box behind an entry
means that the function is switched on, an “empty” box means that it is switched
off.
System SetupsPress the button and select the function key .You can select between the following parameters:•
Menu language - Menu language for the displays and the language messages.
•
Measuring unit - determining if the distances are displayed in miles or kilom-
eters.
•
Time setting - manual time setting. Normally the navigation unit takes over the
time from the instrument cluster of the vehicle.
•
Fa ct or y se t tin g - Factory setting. Display Settings
- Set display brightness.
- Switching off the display. Press the function key or any unit button
for switching on again.
Audio settings– Press the button and set the de sired value using the aid of the
button .You can select between the following parameters:•
Balance - Setting of the volume ratio between the left and right side;
•
Fade r * - Setting of the volume ratio between the front and the rear;
•
Tre b l e - Treble setting;
•
Midtone* - Midtone setting;
•
Bass - Bass setting;
•
Volume settings - individual volume settings for different audio sources.
Volume settings
•
Traffic announcement - Volume of the incoming traffic announcements;
•
Navigation volume - Volume of the navigation announcements;
•
Phone volume* - Volume of the mobile phone calls;
•
Switch on volume - Volume after switching on;
•
GALA - Speed dependent volume adaptation. The radio increases automati-
cally its volume with the increasing vehicle speed.
A1
AA
A1A1A1
AB
SETUP
SYSTEM
BRIGHTNESSDISPLAY OFF
A1
s28k.book Page 5 Friday, May 16, 2008 10:17 AM
Page 10 of 20
Radio
8Traffic information function TP– Press the button and then the function key .
– The function traffic information is switched ( on) or (off) using the
button .Irrespective of which radio station is heard, an additional receiver part in the unit
ensures that a traffic information station can always be received as long as the traffic
information function is switched on.
In the info field of the display, a traffic announcement is shown with traffic
announcement .
Incoming traffic announcement
If you wish to interrupt the transmission of the traffic announcement, press on the
button (Read out in display:
cancel ). However the TP function still remains
available.
A short signal tone sounds if you select a station without TP function when the TP
function is switched on or if no tra ffic information station is selected when
switching on the TP f unction. Instead of TP ⇒page 6, fig. 3 only two lines are
displayed in the frame. However the TP function remains switched on. If now you
change to another audio source (e.°g CD), the unit in the background automatically
switches over to another TP station and the traffic announcements of the station
are replayed.
Displaying TMC traffic reportsTMC traffic reports are used during route guidance, depending on set-up
for the automatic optimization of the route, to report possible traffic
problems.
– Press the function key to display the current traffic reports in a list. – You can call up further informatio
n in addition to the announced
reports with the button . You can be informed about the traffic situ-
ation on your route and if necessary change the route when the route
guidance begins.
During route guidance all se t-up depending TMC traffic reports are displayed in the
surrounding area of the location or only th ose specified on the calculated route list.
Note
•
During route guidance all set-up depending TMC traffic reports are displayed in
the surrounding area of the location or on ly those specified on the calculated route
list.
•
The unit has a continuous background of TMC traffic reports providing a TMC
station at the current location can be rece ived. The station you are listening to does
not have to be a TMC station.
•
TMC traffic reports can only be evaluate d and stored by the unit if the naviga-
tion data for the currently driven area is stored in the unit memory or can be called
up via an inserted navigation CD.
•
The quality of the dynamic route guidance depends on the transmitted traffic
announcements. The radio stations broadc asting this information are responsible
for the content.
RADIO
SETUP
A1
A1
AD
TRAFFIC
A1
s28k.book Page 8 Friday, May 16, 2008 10:17 AM
Page 13 of 20
Navigation11
NavigationOverviewSafety information regarding the use of the navigation systemThe route is recalculated each time if you ignore driving recommendations or
change the route. This process takes only a few seconds. Driving recommendations
can only then be re-transmitted.
Incomplete navigation data
The navigation system cannot receive any data from GPS satellites if you drive for
longer periods under thick forest canopy or when your vehicle is in a garage, under-
pass or tunnel. In this case, the navigation system orientates itself solely with the
help of the vehicle sensors.
In regions not at all or only partially digitalised and stored as such on the navigation
CD, the navigation system will try to prov ide guidance to the destination. Please
note that under these circumstances the guidance to the destination may not be
completely correct if, for example, one-wa y streets and road categories (motorway,
country road etc.) are not at all or only partially included in the navigation data
used.
WARNING
Please observe the legal requirements for road traffic when following the
driving recommendations provided by your radio navigation system.•
The driving recommendations provided may vary from current situa-
tions, e.g. due to road works or out of date navigation data. In such a case,
always observe the traffic regulations and ignore the driving recommenda-
tions.
•
Traffic signs and traffice regulations al ways have priority over the driving
recommendations provided by the navigation system.
•
Route guidance is subject to consta nt changes despite the information
about one-way streets, pedestrian zone s etc. stored on the navigation CD.
Information on traffic lights, stop and right of way signs, parking and stop- ping restrictions as well as lane constrictions and speed restrictions is not
included in the radio navigation system.
Navigation CDInserting the navigation CD
– Insert the CD into the CD case . The program stored on the naviga-
tion CD is loaded. Do not remove the navigation CD before the
loading process is finished.After route guidance has started, the na vigation CD may not be taken out under
certain circumstances, e.°g in order to play an Audio CD.
Up to date navigation data and new navigation CD
Road guidance is subject to constant changes (e.g. new streets, changes of street
names and house numbers). A navigation CD is a huge data store, which unfortu-
nately will not be up to date after a certai n time. This can lead to complaints during
route guidance.
It is for this reason that you must regula rly update the navigation data on your unit
with a current navigation CD.GeneralYou can continue to listen to the radio or play CDs during the route guidance
When entering an address (town, street), only those letters or symbols which make
up a logical entry will be presented. A list of possible names will be shown. Do not
forget to enter the blank space in names made up of more than one word, such as
High Wycombe.
WARNING (continued)
A7
s28k.book Page 11 Friday, May 16, 2008 10:17 AM
Page 14 of 20
Navigation
12The route will be recalculated if you leave or disregard the route that was originally
calculated. This process takes only a few seconds.
The last voice response can be repeated by pressing the button . The volume
of a navigation recommend ation can be changed whilst it is being made.
If the text Off Road appears on the display, it means you are located on a non-digi-
talised street, e.°g. on a farm track. The GPS satellites will not be able to reach the
aerial once you are in a tunnel or undergr ound garage. The unit will orientate itself
via the wheel sensors. If you try to carry out a route calculation in this situation, you
may hear the message: “You are located on a non-digitalised road”. Drive on until
the display Off Road disappears.Navigation settings– Press the button and then the button .
– The desired setup of the navigation can be selected and confirmed
using the button .You can select the following settings:
Spoken information
On - you will obtain acoustic driving re commendations for the route during the
route guidance.
Off - the acoustic driving recommendations are switched off during a route guid-
ance.
Auto - the acoustic driving recommendations are switched off during a phone
conversation. The route is only displayed.
Demo mode
If the demo mode is switched on, a rout e guidance can be started via the naviga-
tion. Then the unit simulates the journey fr om the accepted location to the entered
destination. First of all you can enter manually the lo cation for a journey demon-
stration. Time display
Driving time - displays the estimated driving time until the time of arrival at the
destination or at the next stopover destination.
Arrival
- displays the clock until the estimated time of arrival or the next stopover
destination is reached.
Deleting last destinations
erase individually - opens the list of the last destinations whenever you select
manually the destination to be deleted.
erase all - erases all the last destinations after further confirmation.
Delete tours
erase individually - opens the list of the stored tours whenever you select manu-
ally the tour to be deleted.
erase all - erases all the stored tours after further confirmation.
Tyre ch a n g e
While driven distances are measured by the navigation system via the turning of the
wheels, the changed tyre sizes affect the a ccuracy of the navigation e.°g during the
announcement of the navigation re commendations. If you select tyre calibration,
the navigation adapts to the changed tyre size.
Enter your location manually
The navigation system will need some time for an exact definition of your position
if you have transported your vehicle using th e train or a ferry. Your position can be
entered manually if the automati c definition is not successful.
INFO
NAV
SETUP
A1
s28k.book Page 12 Friday, May 16, 2008 10:17 AM
Page 15 of 20
Navigation13
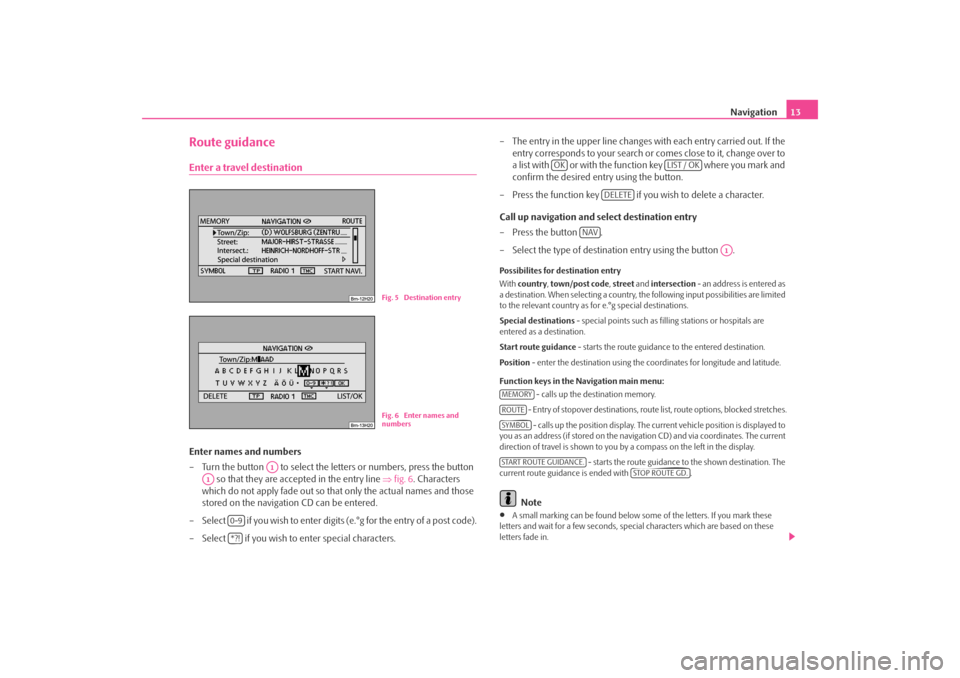
Route guidanceEnter a travel destinationEnter names and numbers
– Turn the button to select the letters or numbers, press the button
so that they are accepted in the entry line ⇒fig. 6 . Characters
which do not apply fade out so that only the actual names and those
stored on the navigation CD can be entered.
– Select if you wish to enter digits (e.°g for the entry of a post code).
– Select if you wish to enter special characters. – The entry in the upper line changes with each entry carried out. If the
entry corresponds to your search or comes close to it, change over to
a list with or with the function key where you mark and
confirm the desired entry using the button.
– Press the function key if yo u wish to delete a character.
Call up navigation and select destination entry
–Press the button .
– Select the type of destination entry using the button .
Possibilites for destination entry
With country , town/post code , street and intersection - an address is entered as
a destination. When selecting a country, th e following input possibilities are limited
to the relevant country as for e.°g special destinations.
Special destinations - special points such as fill ing stations or hospitals are
entered as a destination.
Start route guidance - starts the route guidance to the entered destination.
Position - enter the destination using the c oordinates for longitude and latitude.
Function keys in the Navigation main menu: - calls up the destination memory.
- Entry of stopover destinations, route list, route options, blocked stretches. - calls up the position display. The current vehicl e position is displayed to
you as an address (if stored on the navigation CD) and via coordinates. The current
direction of travel is shown to you by a compass on the left in the display.
- starts the route guidance to the shown destination. The
current route guidance is ended with .
Note
•
A small marking can be found below some of the letters. If you mark these
letters and wait for a few seconds, special characters which are based on these
letters fade in.
Fig. 5 Destination entryFig. 6 Enter names and
numbers
A1
A1
0-9*?!
OK
LIST / OK
DELETE
NAV
A1
MEMORYROUTESYMBOLSTART ROUTE GUIDANCE.
STOP ROUTE GD.
s28k.book Page 13 Friday, May 16, 2008 10:17 AM
Page 16 of 20
![SKODA OCTAVIA 2007 1.G / (1U) Cruise Navigation System Manual Navigation
14•
Entries in square brackets [ ... ] cannot be selected or edited at present because
e.°g all of the necessary data have not yet been entered. First of all a country and a
city mus SKODA OCTAVIA 2007 1.G / (1U) Cruise Navigation System Manual Navigation
14•
Entries in square brackets [ ... ] cannot be selected or edited at present because
e.°g all of the necessary data have not yet been entered. First of all a country and a
city mus](/img/3/4083/w960_4083-15.png)
Navigation
14•
Entries in square brackets [ ... ] cannot be selected or edited at present because
e.°g all of the necessary data have not yet been entered. First of all a country and a
city must be selected when e.°g entering an address before the street can be
entered.
To u r p l a nCall up tour plan
– Press the button .
– If the tour plan is not displaye d, press the function key and
select the menu point route with stopover destinations .
– Press the button and select the menu point insert new
destination . If a destination has already been displayed, you must
decide if this destination should be part of your tour. Otherwise you
must delete this destination.
– In the menu point insert new destination you can select the type of
destination entry and the destination.
– An existing address in the tour plan can be accepted with the menu point accept (e.°g for a round trip as a starting and finishing point).
– The newly entered destination is included in your tour with the menu point end entry .
– You can determine the position where the newly entered destination shall be stored using the button . The position determines the
order of the destinations of the tour and if a newly entered destination
shall be added to the tour as a stopover destination or a main travel
destination.During a current route guidance, you can inse rt additional stopover destinations in
your tour (maximum six per tour). Edit a tour or drive to a determined stopover destination
If you have selected a destination from the tour plan, you can call up the following
functions:
•
Change
- e.°g change the street name;
•
Move - change the order of the destinatio ns. If you move a stopover destina-
tion to the end of your tour, it becomes automatically a destination and the original
destination becomes the last stopover destination;
•
DELETE - deletes the destination from the tour;
•
Starting off now - starts the route guidance directly to this destination. Inter-
mediate destinations are ignored. If this is a stopover destination, the tour is
continued at this point after re aching the stopover destination.
Route setups– Press the button and the function key .Route with stopover destinations
If this function has not been switched on, several destinations can be entered.
Route list
During a current route guidance, you can l ook up all the stretches of the route for
the present tour up to the next de stination or stopover destination.
NAV
ROUTE
A1
A1
Fig. 7 Route setups
NAV
ROUTE
s28k.book Page 14 Friday, May 16, 2008 10:17 AM