boot SKODA OCTAVIA 2010 2.G / (1Z) User Guide
[x] Cancel search | Manufacturer: SKODA, Model Year: 2010, Model line: OCTAVIA, Model: SKODA OCTAVIA 2010 2.G / (1Z)Pages: 275, PDF Size: 16.43 MB
Page 46 of 275
Unlocking and locking45
Using the system
Safety
Driving Tips
General Maintenance
Breakdown assistance
Technical Data
Once you unlock the vehicle by inserting the ke
y into the driver door you then have to
insert the key into the ignition lock and switch the ignition on within 15 seconds after
opening the door in order to deactiva te the anti-theft alarm system. The alarm will be
triggered if you do not switch on the ignition within 15 seconds.
When is the alarm triggered?
The following security areas of the locked vehicle are monitored:
Bonnet,
Boot lid,
Doors,
Ignition lock,
Angle of the vehicle* page 45,
Vehicle interior* page 45,
A drop in voltage of the on-board power supply.
An alarm is immediately triggered if either of the two battery terminals is disconnected
while the anti-theft alarm system is activated.
How is the alarm switched off?
You switch the alarm off if you unlock the vehi cle with the radio remote control or if you
switch the ignition on.Note
The working life of the alarm siren is 6 years. More detailed information is available
by a specialist garage.
Before leaving the car, check that all the doors, windows and the electric
sliding/tilting roof* are properly closed in order to ensure that the anti-theft alarm
system is fully operational.
Coding of the radio remote control and th e receiver unit precludes the use of the
radio remote control from other vehicles.
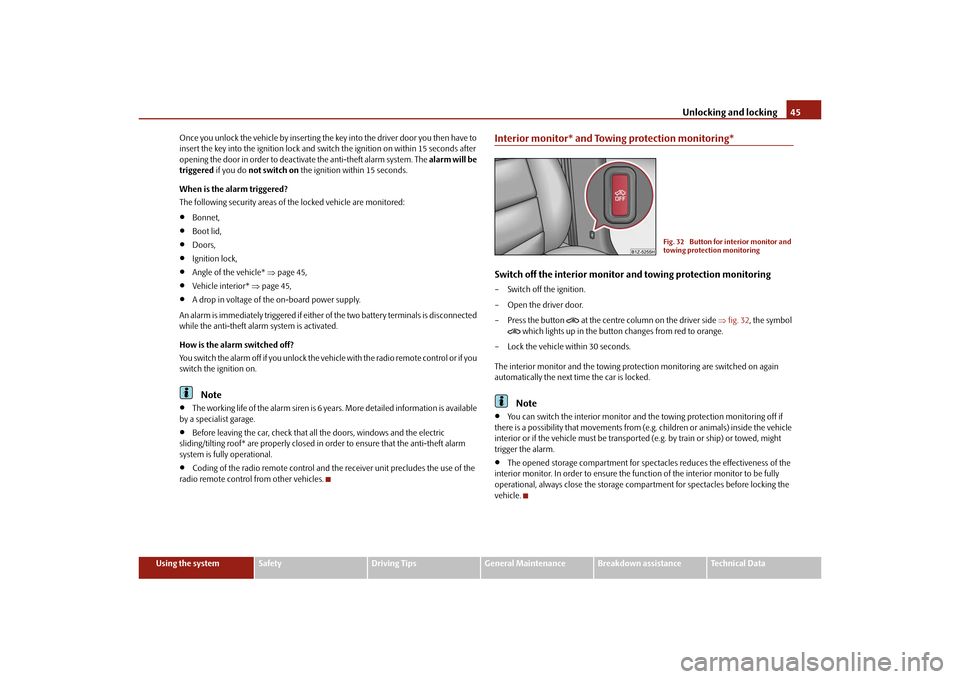
Interior monitor* and Towing protection monitoring*Switch off the interior monitor and towing protection monitoring– Switch off the ignition.
– Open the driver door.
–Press the button
at the centre column on the driver side fig. 32 , the symbol
which lights up in the button changes from red to orange.
– Lock the vehicle within 30 seconds.
The interior monitor and the towing protec tion monitoring are switched on again
automatically the next ti me the car is locked.Note
You can switch the interior monitor and th e towing protection monitoring off if
there is a possibility that movements from (e.g. children or animals) inside the vehicle
interior or if the vehicle must be transported (e.g. by train or ship) or towed, might
trigger the alarm.
The opened storage compartment for spectacles reduces the effectiveness of the
interior monitor. In order to ensure the func tion of the interior monitor to be fully
operational, always close the storage comp artment for spectacles before locking the
vehicle.
Fig. 32 Button for interior monitor and
towing protection monitoring
s43s.1.book Page 45 Thursday, May 13, 2010 1:21 PM
Page 54 of 275
Lights and Visibility53
Using the system
Safety
Driving Tips
General Maintenance
Breakdown assistance
Technical Data
Rain lights
If you switch on the windscreen wipe in th
e operation rain sensor* for longer than 10
seconds or in the operation permanent wipe (position 2 or 3) page 61 switching on
for longer than 15 seconds, the side lights and low beam are switched on automati-
cally. The light switches off if the windscreen wipe is in operation rain sensor* for more
than 4 minutes or is not switched on in the operation permanent wipe.
WARNING
The automatic light control only operat es as a support. The driver is not
released from his responsibility to inspect the light and if necessary to switch on
the light depending on the light conditions. The light sensor cannot detect for
example rain or snow. For these conditions we recommend to switch on the low
beam
!
Note
Do not affix any stickers in front of the light sensor, so that you do not impair its
function or put it out of operation.
The same principles as for using the automa tic light control also apply to the light
which is switched on manually page 51.
Cornering lights*The cornering lights are used to illuminate the curves by means of the cone of light
swiveling together with the front headlight with Xenon lights*. This function is active
when the speed of the car increases to more than 10km/h.
The swiveling function of the headlights ca n be switched off / on via the menu point
Assistants in the main menu of the information display* page 23.
WARNING
If the cornering ligh ts are defective, the headlights are automatically lowered to
the emergency position, which prevents a possible dazzling of oncoming traffic.
Thus the illuminated length of the road is shortened. Drive carefully and have
the car inspected immediatel y by a specialist garage.
Coming Home FunctionThe function makes it possible to switch on the lights in the darkness for a short time
after leaving the vehicle.Switching on Coming Home Function– The light switch is in the position automatic driving lamp control
and the low
beam illuminates.
– Switch off the ignition.
– After opening the driver's door, the function Coming Home is switched on.
– Close all the doors and the boot lid and lo ck the vehicle. After a short time, switch
all lights off.
Depending on equipment fitted the function Coming Home switches on the following
lights:
Parking lights,
Low beam,
Entry lighting in the exterior mirrors,
Licence plate light.
Coming Home Function
The lights go out 10 seconds after cl osing all the doors and the boot lid.
If a door or the boot lid re mains open, the lights go out 60 seconds after switching off
the ignition.
The function Coming Home is controlled with the light sensor in the mount of the inte-
rior rear mirror. If the light intensity is higher than the set value of the light sensor, the
Coming Home Function is not switched on after switching off the ignition.Note
If the Coming Home Function is switched on constantly, the battery will be heavily
discharged particularly in short-haul traffic.
The switching on of the described lights should only be undertaken in accordance
with the legal requirements.
s43s.1.book Page 53 Thursday, May 13, 2010 1:21 PM
Page 60 of 275
Lights and Visibility59
Using the system
Safety
Driving Tips
General Maintenance
Breakdown assistance
Technical Data
Lighting of the storage compartment on front passenger side*– When opening the flap of the storage comp artment on the front passenger side the
lighting in the storage compartment comes on.
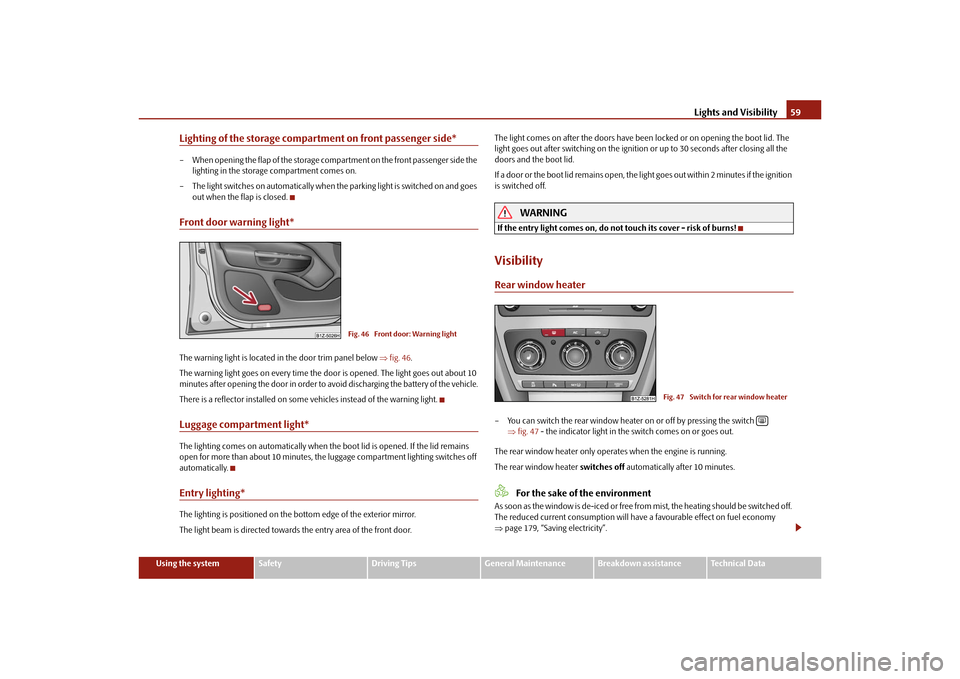
– The light switches on automatically when the parking light is switched on and goes out when the flap is closed.Front door warning light*The warning light is located in the door trim panel below fig. 46 .
The warning light goes on every time the door is opened. The light goes out about 10
minutes after opening the door in order to avoid discharging the battery of the vehicle.
There is a reflector installed on some vehicles instead of the warning light.Luggage compartment light*The lighting comes on automatically when th e boot lid is opened. If the lid remains
open for more than about 10 minutes, the luggage compartment lighting switches off
automatically.Entry lighting*The lighting is positioned on the bottom edge of the exterior mirror.
The light beam is directed towards the entry area of the front door. The light comes on after the doors have been
locked or on opening the boot lid. The
light goes out after switching on the ignition or up to 30 seconds after closing all the
doors and the boot lid.
If a door or the boot lid remains open, the light goes out within 2 minutes if the ignition
is switched off.
WARNING
If the entry light comes on, do not touch its cover - risk of burns!VisibilityRear window heater– You can switch the rear window heater on or off by pressing the switch
fig. 47 - the indicator light in the switch comes on or goes out.
The rear window heater only operates when the engine is running.
The rear window heater switches off automatically after 10 minutes.
For the sake of the environment
As soon as the window is de-iced or free from mist, the heating should be switched off.
The reduced current consumption will have a favourable effect on fuel economy
page 179, “Saving electricity”.
Fig. 46 Front door: Warning light
Fig. 47 Switch for rear window heater
s43s.1.book Page 59 Thursday, May 13, 2010 1:21 PM
Page 76 of 275
Seats and Stowage75
Using the system
Safety
Driving Tips
General Maintenance
Breakdown assistance
Technical Data
weight. This means that it results in a weight of approx. 90 kg. You can imagine the inju-
ries that can occur, if this “bullet” is fl
ying through the interior compartment and hits
an occupant.
WARNING
Stow the objects in the luggage compartment and attach them to the
lashing eyes.
Loose objects in the passenger compartment can be thrown forward during
a sudden manoeuvre or in case of an accident and can injure the occupants or
other oncoming traffic. This risk is still increased, if the objects which are flying
around are hit by a deployed airbag. In this case, the objects which are thrown
back can injure the occupants - hazard.
Please note that the handling properti es of your vehicle may be affected
when transporting heavy objects as a result of the displacement of the centre of
gravity. The speed and style of driv ing must be adjusted accordingly.
The items carried in the luggage compar tment should be stowed in such a
way that no objects are able to slip fo rward if there are any sudden driving or
braking manoeuvres undertaken - risk of injury!
Never drive with the boot lid fully open ed or slightly ajar otherwise exhaust
gases may get into the interior of the vehicle - risk of poisoning!
On no account exceed the permissible axle loads and the permissible gross
weight of the vehicle - risk of accident!
Never transport occupants in the luggage compartment!Caution
Please ensure that the heating elements of the rear window heater are not damaged
as a result of objects sliding in this area.
Note
Tyre pressure must be adjusted to the load page 208.
Vehicles of category N1On vehicles of the category N1, which are no t fitted with a protective grille, a lashing
set which complies with the standard EN 12195 (1 - 4) must be used for fastening the
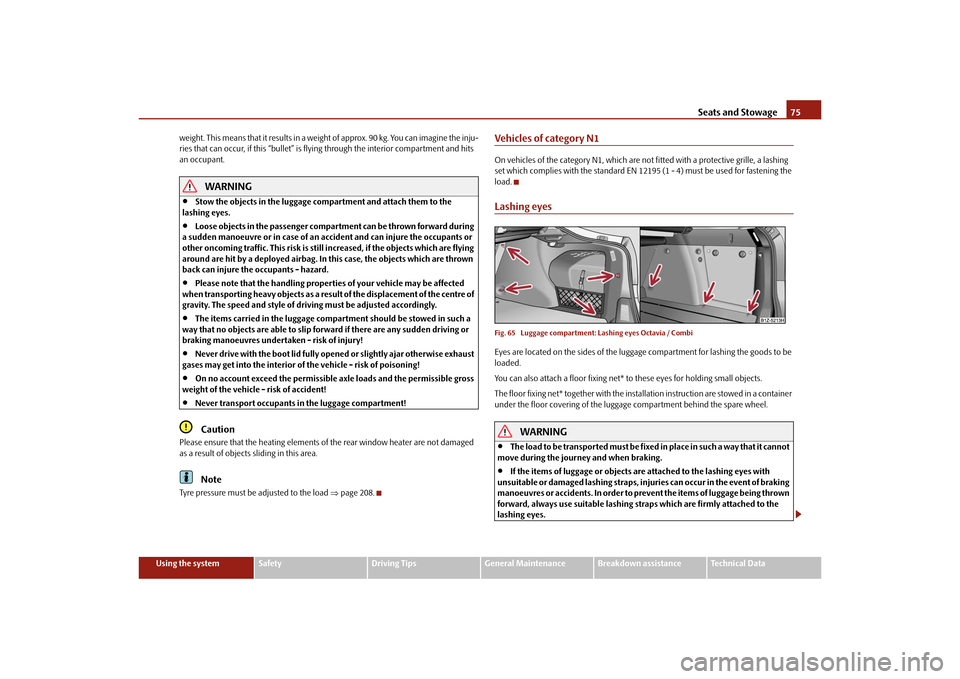
load.Lashing eyesFig. 65 Luggage compartment: Lashing eyes Octavia / CombiEyes are located on the sides of the luggage compartment for lashing the goods to be
loaded.
You can also attach a floor fixing net* to these eyes for holding small objects.
The floor fixing net* together with the installation instruction are stowed in a container
under the floor covering of the luggage compartment behind the spare wheel.
WARNING
The load to be transported must be fixed in place in such a way that it cannot
move during the journey and when braking.
If the items of luggage or objects are attached to the lashing eyes with
unsuitable or damaged lashing straps, inju ries can occur in the event of braking
manoeuvres or accidents. In order to prevent the items of luggage being thrown
forward, always use suitable lashing st raps which are firmly attached to the
lashing eyes.
s43s.1.book Page 75 Thursday, May 13, 2010 1:21 PM
Page 78 of 275
Seats and Stowage77
Using the system
Safety
Driving Tips
General Maintenance
Breakdown assistance
Technical Data
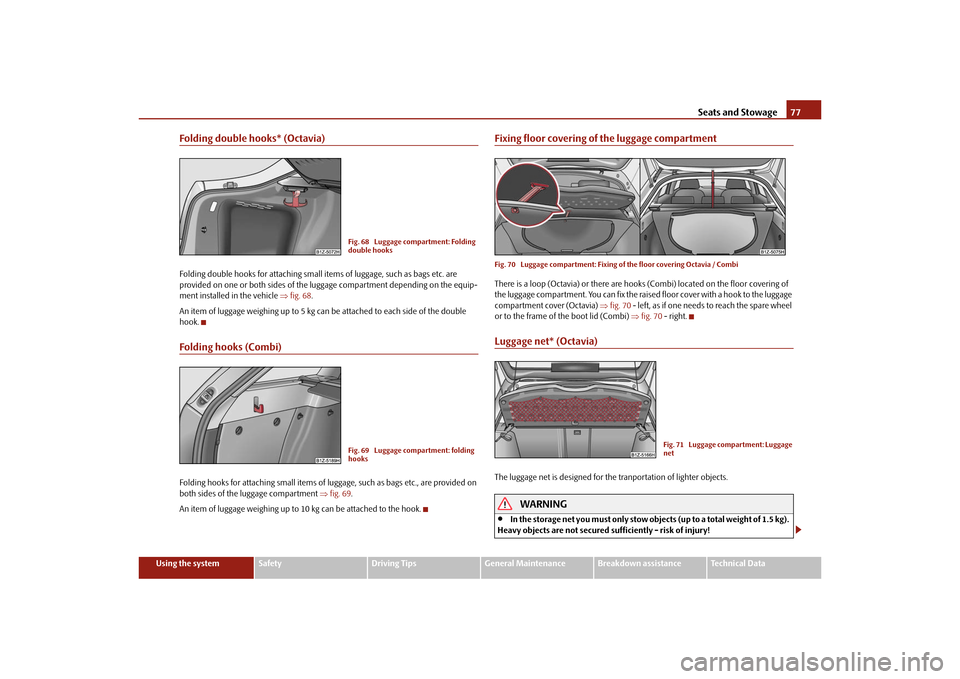
Folding double hooks* (Octavia)Folding double hooks for attaching small items of luggage, such as bags etc. are
provided on one or both sides of the luggage compartment depending on the equip-
ment installed in the vehicle fig. 68 .
An item of luggage weighing up to 5 kg ca n be attached to each side of the double
hook.Folding hooks (Combi)Folding hooks for attaching small items of luggage, such as bags etc., are provided on
both sides of the luggage compartment fig. 69 .
An item of luggage weighing up to 10 kg can be attached to the hook.
Fixing floor covering of the luggage compartmentFig. 70 Luggage compartment: Fixing of the floor covering Octavia / CombiThere is a loop (Octavia) or there are hook s (Combi) located on the floor covering of
the luggage compartment. You can fix the raised floor cover with a hook to the luggage
compartment cover (Octavia) fig. 70 - left, as if one needs to reach the spare wheel
or to the frame of the boot lid (Combi) fig. 70 - right.Luggage net* (Octavia)The luggage net is designed for the tranportation of lighter objects.
WARNING
In the storage net you must only stow objects (up to a total weight of 1.5 kg).
Heavy objects are not secured sufficiently - risk of injury!
Fig. 68 Luggage compartment: Folding
double hooksFig. 69 Luggage compartment: folding
hooks
Fig. 71 Luggage compartment: Luggage
net
s43s.1.book Page 77 Thursday, May 13, 2010 1:21 PM
Page 79 of 275
Seats and Stowage
78
No objects with sharp edges should be stowed in the luggage net, because
they can damage the luggage net.
Luggage compartment cover* (Octavia)
You can use the luggage compartment cover behind the head
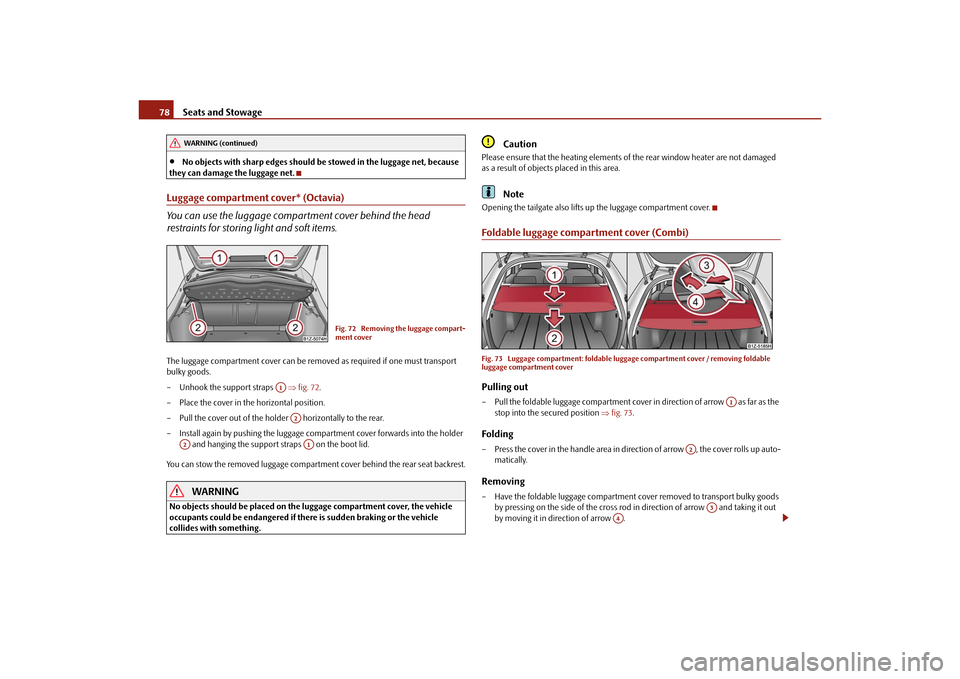
restraints for storing light and soft items.The luggage compartment cover can be removed as required if one must transport
bulky goods.
– Unhook the support straps fig. 72 .
– Place the cover in the horizontal position.
– Pull the cover out of the holder horizontally to the rear.
– Install again by pushing the luggage compartment cover forwards into the holder and hanging the support straps on the boot lid.
You can stow the removed luggage compartment cover behind the rear seat backrest.
WARNING
No objects should be placed on the luggage compartment cover, the vehicle
occupants could be endangered if ther e is sudden braking or the vehicle
collides with something.
Caution
Please ensure that the heating elements of the rear window heater are not damaged
as a result of objects placed in this area.
Note
Opening the tailgate also lifts up the luggage compartment cover.Foldable luggage compartment cover (Combi)Fig. 73 Luggage compartment: foldable lugg age compartment cover / removing foldable
luggage compartment coverPulling out– Pull the foldable luggage compartment cover in direction of arrow as far as the
stop into the secured position fig. 73 .Folding– Press the cover in the handle area in di rection of arrow , the cover rolls up auto-
matically.Removing– Have the foldable luggage compartment cover removed to transport bulky goods by pressing on the side of the cross rod in direction of arrow and taking it out
by moving it in direction of arrow .
WARNING (continued)
Fig. 72 Removing the luggage compart-
ment cover
A1
A2
A2
A1
A1
A2
A3
A4
s43s.1.book Page 78 Thursday, May 13, 2010 1:21 PM
Page 82 of 275
Seats and Stowage81
Using the system
Safety
Driving Tips
General Maintenance
Breakdown assistance
Technical Data
Pay attention that the rear seat backrest is correctly interlocked. It is only
then that the three-point seat belt for th e middle seat can reliably fulfil its func-
tion.
First check for yourself that the cross road is inserted into the mounts in
the front position!
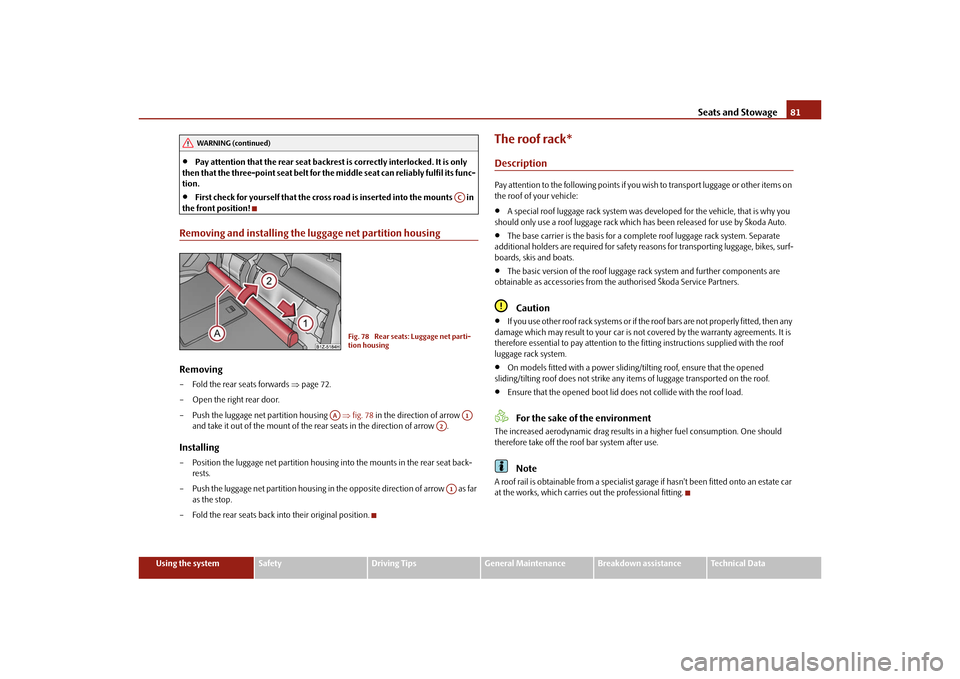
Removing and installing the luggage net partition housingRemoving– Fold the rear seats forwards page 72.
– Open the right rear door.
– Push the luggage net partition housing fig. 78 in the direction of arrow
and take it out of the mount of the rear seats in the direction of arrow .Installing– Position the luggage net partition housing into the mounts in the rear seat back- rests.
– Push the luggage net partition housing in the opposite direction of arrow as far as the stop.
– Fold the rear seats back into their original position.
The roof rack*DescriptionPay attention to the following points if you wish to transport luggage or other items on
the roof of your vehicle:
A special roof luggage rack system was de veloped for the vehicle, that is why you
should only use a roof luggage rack which has been released for use by Škoda Auto.
The base carrier is the basis for a comple te roof luggage rack system. Separate
additional holders are required for safety reasons for transporting luggage, bikes, surf-
boards, skis and boats.
The basic version of the roof luggage rack system and further components are
obtainable as accessories from the authorised Škoda Service Partners.Caution
If you use other roof rack systems or if the roof bars are not properly fitted, then any
damage which may result to your car is not covered by the warranty agreements. It is
therefore essential to pay attention to the fitting instructions supplied with the roof
luggage rack system.
On models fitted with a power sliding/ tilting roof, ensure that the opened
sliding/tilting roof does not strike any items of luggage transported on the roof.
Ensure that the opened boot lid do es not collide with the roof load.For the sake of the environment
The increased aerodynamic drag results in a higher fuel consumption. One should
therefore take off the roof bar system after use.
Note
A roof rail is obtainable from a specialist garage if hasn't been fitted onto an estate car
at the works, which carries out the professional fitting.
WARNING (continued)
AC
Fig. 78 Rear seats: Luggage net parti-
tion housing
AA
A1
A2A1
s43s.1.book Page 81 Thursday, May 13, 2010 1:21 PM
Page 92 of 275

Seats and Stowage91
Using the system
Safety
Driving Tips
General Maintenance
Breakdown assistance
Technical Data
Seat backrest with opening for skis*Fig. 100 Rear seats: Handle of lid / luggage compartment: Unlock buttonAfter folding open the armrest and the lid, an opening in the seat backrest becomes
visible through which you can push long objects e.g. skis etc. You can fold open the
armrest and the lid from the passenger or luggage compartment.Opening from passenger compartment– Fold down the armrest of the rear seat at the loop page 73.
– Pull the handle up to the stop in upward direction and fold open the lid downwards fig. 100 - left.Opening from luggage compartment– Push the unlock button downwards fig. 100 - right and fold the lid (with armrest)
to the front.Closing– Fold the lid and the armrest up to the stop in upward direction - the lid must click into place audibly.
Ensure that the armrest is always locked into place after closing. You can recognize this
on the fact that the red field above the unlocking button of the luggage compart-
ment is not visible.
Removeable through-loading bag*The removeable through-loading bag is solely used for transporting
skis.Loading– Open the boot lid.
– Fold the rear armrest and the cover in the seat backrest downwards page 91,
“Seat backrest with opening for skis*”.
– Place the empty through-loadi ng bag in such a way that the end of the bag with the
zip lies in the boot.
– Push the skis into the through-loadi ng bag from the luggage compartment .Securing– Tighten the strap on the free end around the skis in front of the bindings
fig. 101 .
– Fold the seat backrest a little forward.
– Guide the securing strap through the op ening in the seat backrest around the
upper part of the seat backrest.
– Then push the seat backrest back into th e upright position until the locking button
clicks into place - check by pulling on the seat backrest.
– Insert the securing strap into the lock until it is heard to lock in place.
AA
Fig. 101 Securing the removeable
through-loading bag
AA
ABAB
AC
s43s.1.book Page 91 Thursday, May 13, 2010 1:21 PM
Page 189 of 275
Taking care of your vehicle and cleaning the vehicle
188
Do not use window leathers which you have us ed to polish the vehicle body to dry off
the windows. Residues of preservatives in the window leather can dirty the window
and reduce visibility.
Do not affix any stickers over the inside of the rear window to avoid damage to the
heating elements of the rear window heater .
We recommend using a preserva tive from Škoda genuine accessories offered by your
Škoda dealer.
Caution
Never remove snow or ice from the glass parts with warm or hot water - risk of forma-
tion of cracks in the glass!The headlight lensesPlease do not use any aggressi ve cleaning or chemical solvent products for cleaning
the front headlights - risk of damage to the plastic lenses. Please use soap and clean
warm water.
Caution
Never wipe the headlights dry and do not use any sharp objects for cleaning the plastic
lenses, this may result in damage to the protective paintwork and consequently in
formation of cracks on the headlight lenses, e.g through effect of chemical products.Door and window sealsThe rubber seals on the doors, boot lid, bonnet and windows remain supple and last
longer if you treat them from time to time with a rubber care product (e.g. with a spray
with silicone-free oil). You also avoid premature wear of the seals and prevent leakages
in this way. It is also easier to open the doors. Rubber seals which are well cared for also
do not stick together in cold winter weather.Locking cylinderWe recommend that you use the spray from Škoda original accessories with regreasing
and anticorrosive effect for de-icing locking cylinders.
Note
When washing your vehicle, ensure that as little water as possible gets into the locking
cylinders.WheelsSteel wheels
You should also thoroughly wash the wheels and wheel trims when giving your vehicle
its regular wash. This prevents any brake dust, dirt and road salt from sticking to the
wheel hubs. You can remove stubborn brake abrasion adhering to the wheels with an
industrial cleaner. Touch up any damage to the paintwork on the wheels before rust is
able to form.
Light alloy wheels
Regular care of light alloy wh eels is necessary in order to retain their decorative
appearance over long periods. It is particul arly important to remove regularly any road
salt and brake abrasion from light alloy wheels, otherwise the light metal will suffer.
Wash thoroughly and then treat the wheels with a protective product for light alloy
wheels which does not cont ain any acidic components. We recommend to apply a
hard wax layer onto the wheel hubs every three months. You must not use any prod-
ucts which cause abrasion when treating the wheel hubs. Any damage to the paint
layer on the wheel hubs must be touched up immediately.
We recommend using a preservative from Šk oda genuine accessories offered by your
Škoda dealer.
WARNING
One should remember when cleaning th e wheels that moisture, ice and road
salt may adversely affect braking ef ficiency - risk of an accident!
Note
Severe layers of dirt on the wheels can also result in wheel imbalance. This may show
itself in the form of a wheel vibration which is transmitted to the steering wheel which,
in certain circumstances, can cause premature wear of the steering. This means it is
necessary to remove the dirt.
s43s.1.book Page 188 Thursday, May 13, 2010 1:21 PM
Page 264 of 275
Index263
Using the system
Safety
Driving Tips
General Maintenance
Breakdown assistance
Technical Data
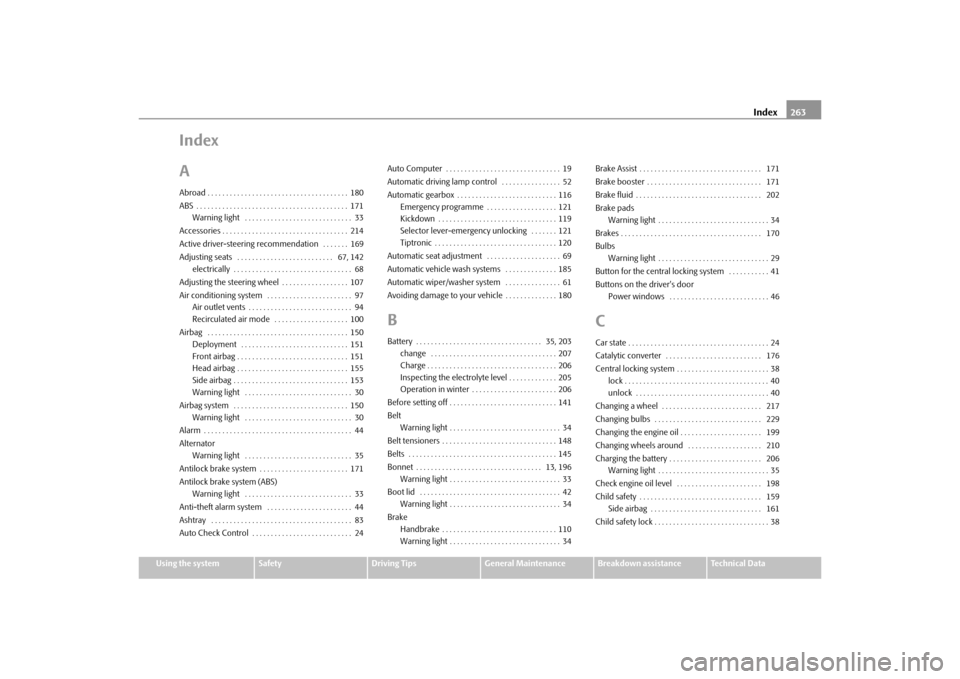
Index
AAbroad . . . . . . . . . . . . . . . . . . . . . . . . . . . . . . . . . . . . . . 180
ABS . . . . . . . . . . . . . . . . . . . . . . . . . . . . . . . . . . . . . . . . . 171
Warning light . . . . . . . . . . . . . . . . . . . . . . . . . . . . . 33
Accessories . . . . . . . . . . . . . . . . . . . . . . . . . . . . . . . . . . 214
Active driver-steering recommendation . . . . . . . 169
Adjusting seats . . . . . . . . . . . . . . . . . . . . . . . . . . 67, 142 electrically . . . . . . . . . . . . . . . . . . . . . . . . . . . . . . . . 68
Adjusting the steering wheel . . . . . . . . . . . . . . . . . . 107
Air conditioning system . . . . . . . . . . . . . . . . . . . . . . . 97 Air outlet vents . . . . . . . . . . . . . . . . . . . . . . . . . . . . 94
Recirculated air mode . . . . . . . . . . . . . . . . . . . . 100
Airbag . . . . . . . . . . . . . . . . . . . . . . . . . . . . . . . . . . . . . . 150 Deployment . . . . . . . . . . . . . . . . . . . . . . . . . . . . . 151
Front airbag . . . . . . . . . . . . . . . . . . . . . . . . . . . . . . 151
Head airbag . . . . . . . . . . . . . . . . . . . . . . . . . . . . . . 155
Side airbag . . . . . . . . . . . . . . . . . . . . . . . . . . . . . . . 153
Warning light . . . . . . . . . . . . . . . . . . . . . . . . . . . . . 30
Airbag system . . . . . . . . . . . . . . . . . . . . . . . . . . . . . . . 150 Warning light . . . . . . . . . . . . . . . . . . . . . . . . . . . . . 30
Alarm . . . . . . . . . . . . . . . . . . . . . . . . . . . . . . . . . . . . . . . . 44
Alternator Warning light . . . . . . . . . . . . . . . . . . . . . . . . . . . . . 35
Antilock brake system . . . . . . . . . . . . . . . . . . . . . . . . 171
Antilock brake system (ABS) Warning light . . . . . . . . . . . . . . . . . . . . . . . . . . . . . 33
Anti-theft alarm system . . . . . . . . . . . . . . . . . . . . . . . 44
Ashtray . . . . . . . . . . . . . . . . . . . . . . . . . . . . . . . . . . . . . . 83
Auto Check Control . . . . . . . . . . . . . . . . . . . . . . . . . . . 24 Auto Computer . . . . . . . . . . . . . . . . . . . . . . . . . . . . . . . 19
Automatic driving lamp control . . . . . . . . . . . . . . . . 52
Automatic gearbox . . . . . . . . . . . . . . . . . . . . . . . . . . . 116
Emergency programme . . . . . . . . . . . . . . . . . . . 121
Kickdown . . . . . . . . . . . . . . . . . . . . . . . . . . . . . . . . 119
Selector lever-emergency unlocking . . . . . . . 121
Tiptronic . . . . . . . . . . . . . . . . . . . . . . . . . . . . . . . . . 120
Automatic seat adjustment . . . . . . . . . . . . . . . . . . . . 69
Automatic vehicle wash systems . . . . . . . . . . . . . . 185
Automatic wiper/washer system . . . . . . . . . . . . . . . 61
Avoiding damage to your vehicle . . . . . . . . . . . . . . 180
BBattery . . . . . . . . . . . . . . . . . . . . . . . . . . . . . . . . . . 35, 203 change . . . . . . . . . . . . . . . . . . . . . . . . . . . . . . . . . . 207
Charge . . . . . . . . . . . . . . . . . . . . . . . . . . . . . . . . . . . 206
Inspecting the electrolyte level . . . . . . . . . . . . . 205
Operation in winter . . . . . . . . . . . . . . . . . . . . . . . 206
Before setting off . . . . . . . . . . . . . . . . . . . . . . . . . . . . . 141
Belt Warning light . . . . . . . . . . . . . . . . . . . . . . . . . . . . . . 34
Belt tensioners . . . . . . . . . . . . . . . . . . . . . . . . . . . . . . . 148
Belts . . . . . . . . . . . . . . . . . . . . . . . . . . . . . . . . . . . . . . . . 145
Bonnet . . . . . . . . . . . . . . . . . . . . . . . . . . . . . . . . . . 13, 196 Warning light . . . . . . . . . . . . . . . . . . . . . . . . . . . . . . 33
Boot lid . . . . . . . . . . . . . . . . . . . . . . . . . . . . . . . . . . . . . . 42 Warning light . . . . . . . . . . . . . . . . . . . . . . . . . . . . . . 34
Brake Handbrake . . . . . . . . . . . . . . . . . . . . . . . . . . . . . . . 110
Warning light . . . . . . . . . . . . . . . . . . . . . . . . . . . . . . 34 Brake Assist . . . . . . . . . . . . . . . . . . . . . . . . . . . . . . . . . 171
Brake booster . . . . . . . . . . . . . . . . . . . . . . . . . . . . . . . 171
Brake fluid . . . . . . . . . . . . . . . . . . . . . . . . . . . . . . . . . . 202
Brake pads
Warning light . . . . . . . . . . . . . . . . . . . . . . . . . . . . . . 34
Brakes . . . . . . . . . . . . . . . . . . . . . . . . . . . . . . . . . . . . . . 170
Bulbs Warning light . . . . . . . . . . . . . . . . . . . . . . . . . . . . . . 29
Button for the central locking system . . . . . . . . . . . 41
Buttons on the driver's door Power windows . . . . . . . . . . . . . . . . . . . . . . . . . . . 46
CCar state . . . . . . . . . . . . . . . . . . . . . . . . . . . . . . . . . . . . . . 24
Catalytic converter . . . . . . . . . . . . . . . . . . . . . . . . . . 176
Central locking system . . . . . . . . . . . . . . . . . . . . . . . . . 38lock . . . . . . . . . . . . . . . . . . . . . . . . . . . . . . . . . . . . . . . 40
unlock . . . . . . . . . . . . . . . . . . . . . . . . . . . . . . . . . . . . 40
Changing a wheel . . . . . . . . . . . . . . . . . . . . . . . . . . . 217
Changing bulbs . . . . . . . . . . . . . . . . . . . . . . . . . . . . . 229
Changing the engine oil . . . . . . . . . . . . . . . . . . . . . . 199
Changing wheels around . . . . . . . . . . . . . . . . . . . . 210
Charging the battery . . . . . . . . . . . . . . . . . . . . . . . . . 206 Warning light . . . . . . . . . . . . . . . . . . . . . . . . . . . . . . 35
Check engine oil level . . . . . . . . . . . . . . . . . . . . . . . 198
Child safety . . . . . . . . . . . . . . . . . . . . . . . . . . . . . . . . . 159 Side airbag . . . . . . . . . . . . . . . . . . . . . . . . . . . . . . 161
Child safety lock . . . . . . . . . . . . . . . . . . . . . . . . . . . . . . . 38
s43s.1.book Page 263 Thursday, May 13, 2010 1:21 PM