air conditioning SKODA OCTAVIA 2012 2.G / (1Z) User Guide
[x] Cancel search | Manufacturer: SKODA, Model Year: 2012, Model line: OCTAVIA, Model: SKODA OCTAVIA 2012 2.G / (1Z)Pages: 222, PDF Size: 13.52 MB
Page 88 of 222
›Press the button
again, the warning light underneath the button goes out.
Recirculated air mode is switched off automatically if the air distribution controlC
» Fig. 85 on page 84 is turned to position . Recirculated air mode can be
switched on again from this setting by repeatedly pressing the button .
WARNINGDo not leave recirculated air mode on over a longer period of time, as “stale”
air can cause fatigue of the driver and passengers, reduce attention levels andalso cause the windows to mist up. The risk of having an accident increases.
Switch off recirculated air mode as soon as the windows start to mist up.
Climatronic (automatic air conditioning system)
Introductory information
The Climatronic in automatic mode ensures the best-possible setting of the tem-
perature of the outflowing air, the blower stage and air distribution.
The system also takes sunlight into account, which eliminates the need to alter
the settings manually.
Recommended setting for all periods of the year:
›
Set the desired temperature, we recommend 22 °C.
›
Press the button AUTO
» Fig. 86 on page 86.
›
Move the air outlet vents 3 and 4 » Fig. 82 on page 82 so that the air flow is
directed slightly upwards.
Cooling conditions
The cooling system only operates if the following conditions are met: › engine running;
› outside temperature above approx. +2 °C;
›
» Fig. 86 on page 86 switched on.
The AC compressor is switched off at a high coolant temperature in order to pro-
vide cooling at a high load of the engine.
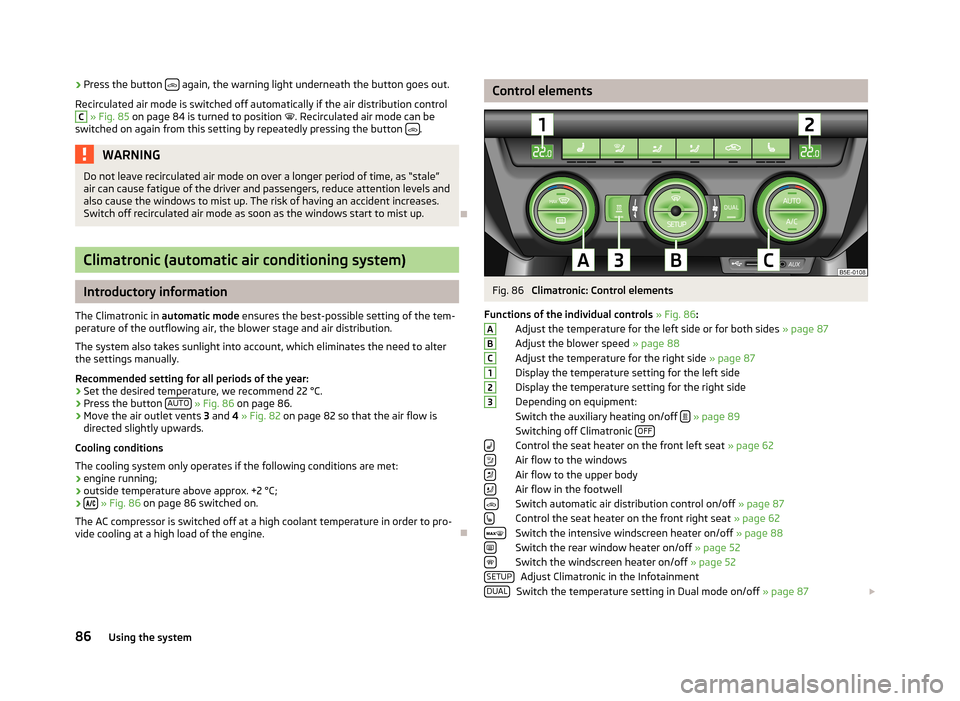
Control elementsFig. 86
Climatronic: Control elements
Functions of the individual controls » Fig. 86 :
Adjust the temperature for the left side or for both sides » page 87
Adjust the blower speed » page 88
Adjust the temperature for the right side » page 87
Display the temperature setting for the left side
Display the temperature setting for the right side
Depending on equipment:
Switch the auxiliary heating on/off
» page 89
Switching off Climatronic OFF
Control the seat heater on the front left seat
» page 62
Air flow to the windows
Air flow to the upper body
Air flow in the footwell Switch automatic air distribution control on/off » page 87
Control the seat heater on the front right seat » page 62
Switch the intensive windscreen heater on/off » page 88
Switch the rear window heater on/off » page 52
Switch the windscreen heater on/off » page 52
Adjust Climatronic in the Infotainment
Switch the temperature setting in Dual mode on/off » page 87
ABC123SETUPDUAL86Using the system
Page 89 of 222
Switch automatic mode on/off » page 87
Switch the cooling system on/off » page 87
Note
The interior temperature sensor is located between the buttons and SETUP.
Do not stick anything on or cover the sensor, otherwise it could have an unfav-
ourable effect on the Climatronic.
Automatic mode
Automatic mode works in three modes - weak, medium, and intensive.
Information on the setting » Bedienungsanleitung Infotainment, chapter Addi-
tional functions (CAR button) .
Switching on
›
Set the temperature between +16 °C and +29 °C using the control dials
A
and
C
» Fig. 86 on page 86.
›
Press the button AUTO and the indicator light in the button illuminates.
Switching off
›
Press any button for the air distribution or increase/reduce the blower speed.
After the Climatronic is switched on, it works in the last selected mode. The currently selected mode is displayed in the Infotainment display.Climatronic is set to the medium setting by default.
Note
We recommend that you adjust the air outlet vents 3 and 4 » Fig. 82 on page 82,
so that the air flow is directed slightly upwards.
Switch cooling system on/off
›
Press the button and the indicator light in the button illuminates.
›
Pressing the button
again switches off the cooling system - the indicator
light in the button goes out.
After the cooling system is switched off, only the ventilation function remains ac-
tive whereby the minimum temperature that can be reached is the outside tem-
perature.
AUTOSetting temperature
The interior temperature for the left and right side can be set separately or to-
gether.
For both sides›
Turn the control dial
A
» Fig. 86 on page 86 to the left or right to increase or
decrease the temperature.
The warning light in the button DUAL
goes out.
For the right side
›
Turn the control dial
C
» Fig. 86 on page 86 to the left or right to increase or
decrease the temperature.
The indicator light lights up in the DUAL
button.
If the indicator light in the button DUAL
is illuminated, the temperature for both
sides cannot be set with the control dial
A
. This function can be restored by
pressing the button DUAL. The warning light in the button goes out.
The interior temperature can be set between +16 ℃ and +29 ℃. The interior tem-
perature is regulated automatically within this range.
If a temperature lower than +16 ℃ is selected, a blue symbol lights up on the con-
trol dial.
If a temperature higher than +29 ℃ is selected, a red symbol lights up on the con-
trol dial.
At both end positions, Climatronic runs at maximum cooling/heating output and
the temperature is automatically not regulated.
CAUTION
Lengthy and uneven distribution of the air flow out of the vents (especially
around the feet) and large differences in temperature, for example, when getting
out of the vehicle, can cause susceptible individuals to catch a cold.
Automatic recirculated air mode
Recirculated air mode largely prevents polluted air from outside the vehicle get- ting into the vehicle, for example, when driving through a tunnel or when stand-
ing in a traffic jam.
87Heating and air conditioning system
Page 90 of 222
If a considerable increase in concentration of pollutants is recognised by the air
quality sensor, recirculated air mode will temporarily be switched off.
If the concentration of pollutants decreases to the normal level, the air distribu-
tion control is automatically switched off so that fresh air can be guided into the
vehicle interior.
In recirculated air mode air is sucked out of the interior of the vehicle and then
fed back into the interior. When the automatic air distribution control is switched on, an air quality sensor measures the concentration of pollutants in the drawn inair.
If the air quality sensor does not switch on automatic recirculated air mode when there is an unpleasant smell, you can switch in on manually.
Switching on/off›
Press the button and the warning light underneath the button illuminates.
›
Press the button again, the warning light underneath the button goes out,
where necessary press the button AUTO.
You can also switch the system on/off in he Infotainment » Bedienungsanleitung
Infotainment, chapter Setting vehicle systems (CAR button) .
WARNINGDo not leave recirculated air mode on over a longer period of time, as “stale”
air can cause fatigue of the driver and passengers, reduce attention levels and
also cause the windows to mist up. The risk of having an accident increases.
Switch off recirculated air mode as soon as the windows start to mist up.
Note
■ If the windscreen mists up, press the button . Press the button AUTO when
the windscreen is demisted.■
The automatic air distribution control operates only if the outside temperature
is higher than approx. 2 °C.
Controlling blower
The blower stage can be manually adapted to suit your particular needs.
›
Turn the control dial
B
» Fig. 86 on page 86 to the left or right to increase or
decrease the blower speed.
If the blower speed is reduced to a minimum, Climatronic is switched off.
The set blower speed is displayed in the control dial B when the respective num-
ber of warning lights come on.WARNING■ “Stale air” may result in fatigue in the driver and occupants, reduce attention
levels and also cause the windows to mist up. The risk of having an accident
increases.■
Do not switch off the Climatronic system for longer than necessary.
■
Switch on the Climatronic system as soon as the windows mist up.
Defrosting windscreen
Switching on/off
›
Press the button
» Fig. 86 on page 86.
›
Press the button or the button
AUTO again.
More air flows out of the air outlet vents 1 » Fig. 82 on page 82. The temperature
control is controlled automatically.
Auxiliary heating (auxiliary heating and ventilation)
Introduction
This chapter contains information on the following subjects:
Switching on/off
89
setting
90
Remote control
90
Replacing the battery in the remote control
91
Function prerequisites when switching on:
› Comfort temperature has been set;
› The blower is switched on;
› the air outlet vents are opened;
› The air outlet is set to position
or
.
Auxiliary heating (parking heating) › It can be used when stationary, when the engine is switched off to preheat the
vehicle and while driving (e.g. during the heating phase of the engine);
› It works in tandem with the hearer, air-conditioning system or Climatronic;
88Using the system
Page 91 of 222
›The engine is also preheated when the vehicle is stationary and the engine is
not running;
› It warms up the coolant by burning fuel from the vehicle tank. The coolant
warms up the air, which (if the blower speed is not set to zero) flows into the passenger compartment.
Auxiliary ventilation
The auxiliary ventilation enables fresh air to flow into the vehicle interior by
switching off the engine, whereby the interior temperature is effectively de-
creased (e.g. with the vehicle parked in the sun).WARNING■ The auxiliary heating must never be operated in closed rooms - risk of poi-
soning!■
The auxiliary heating must not be running during refuelling - risk of fire.
■
The exhaust pipe of the auxiliary heating is located on the underside of the
vehicle. Therefore, if you wish to operate the auxiliary heating, do not park the vehicle in such a way that the exhaust gases can come into contact with high-
ly flammable materials (e.g. dry grass) or easily inflammable substances (e.g.
spilt fuel).
CAUTION
■ The running auxiliary heater consumes fuel from the vehicle tank and automati-
cally controls the filling level. If only a low quantity of fuel is present in the fuel
tank, the function of the auxiliary heating is blocked.■
The exhaust pipe of the auxiliary heating, which is located on the underside of
the vehicle, must not be clogged and the exhaust flow must not be blocked.
■
If the auxiliary heating and ventilation is running, the vehicle battery discharges.
If the auxiliary heating and ventilation has been operated several times over a
longer period, the vehicle must be driven a few kilometres in order to recharge
the vehicle battery.
Note
■ The auxiliary heating only switches the blower on, if it has achieved a coolant
temperature of approx. 50 °C.■
At low outside temperatures, this can result in a formation of water vapour in
the area of the engine compartment. This is quite normal and is not an operating problem.
■
The air inlet in front of the windscreen must be free of e.g. ice, snow or leaves
to ensure that the auxiliary heating and cooling system operates properly.
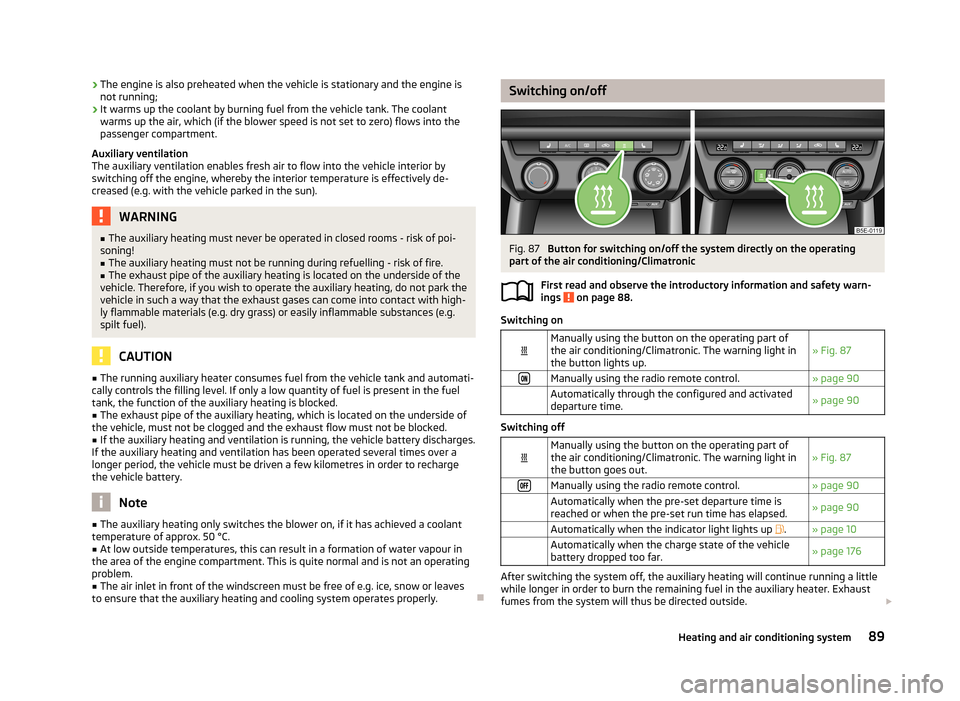
Switching on/offFig. 87
Button for switching on/off the system directly on the operating
part of the air conditioning/Climatronic
First read and observe the introductory information and safety warn-ings
on page 88.
Switching on
Manually using the button on the operating part of
the air conditioning/Climatronic. The warning light in the button lights up.» Fig. 87Manually using the radio remote control.» page 90 Automatically through the configured and activated
departure time.» page 90
Switching off
Manually using the button on the operating part of
the air conditioning/Climatronic. The warning light in the button goes out.» Fig. 87Manually using the radio remote control.» page 90 Automatically when the pre-set departure time is
reached or when the pre-set run time has elapsed.» page 90 Automatically when the indicator light lights up .» page 10 Automatically when the charge state of the vehicle
battery dropped too far.» page 176
After switching the system off, the auxiliary heating will continue running a little
while longer in order to burn the remaining fuel in the auxiliary heater. Exhaust
fumes from the system will thus be directed outside.
89Heating and air conditioning system
Page 93 of 222
CAUTIONThe radio remote control comprises electronic components and must therefore be
protected against water, severe impacts and direct sunlight.
Replacing the battery in the remote control
First read and observe the introductory information and safety warn-
ings
on page 88.
If the indicator light
C
» Fig. 88 on page 90on the radio remote control indicates
a weak or discharged battery, it must be replaced.
The battery is located under a cover
B
» Fig. 88 on page 90 on the back of the
radio remote control.
›
Insert a flat, blunt object, such as a coin, into the gap of the battery cover.
›
Turn the cover against the direction of the arrow up to the mark to open the cover.
›
Replace the battery.
›
Return the battery cover.
›
Turn the cover in the direction of the arrow up to the initial marking, engage.
When replacing the battery, pay attention to the correct polarity.
The replacement battery must have the same specification as the original battery.
For the sake of the environment
Dispose of the used battery in accordance with national legal provisions.
91Heating and air conditioning system
Page 104 of 222
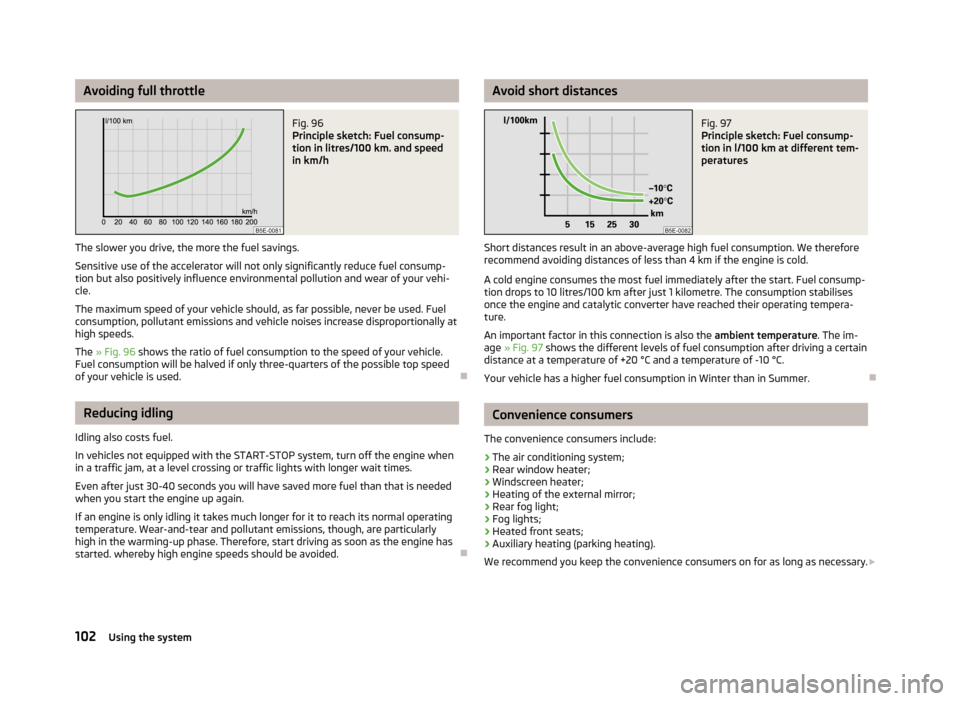
Avoiding full throttleFig. 96
Principle sketch: Fuel consump-
tion in litres/100 km. and speed
in km/h
The slower you drive, the more the fuel savings.
Sensitive use of the accelerator will not only significantly reduce fuel consump- tion but also positively influence environmental pollution and wear of your vehi-
cle.
The maximum speed of your vehicle should, as far possible, never be used. Fuel
consumption, pollutant emissions and vehicle noises increase disproportionally at
high speeds.
The » Fig. 96 shows the ratio of fuel consumption to the speed of your vehicle.
Fuel consumption will be halved if only three-quarters of the possible top speed
of your vehicle is used.
Reducing idling
Idling also costs fuel.
In vehicles not equipped with the START-STOP system, turn off the engine when
in a traffic jam, at a level crossing or traffic lights with longer wait times.
Even after just 30-40 seconds you will have saved more fuel than that is needed
when you start the engine up again.
If an engine is only idling it takes much longer for it to reach its normal operating
temperature. Wear-and-tear and pollutant emissions, though, are particularly
high in the warming-up phase. Therefore, start driving as soon as the engine has
started. whereby high engine speeds should be avoided.
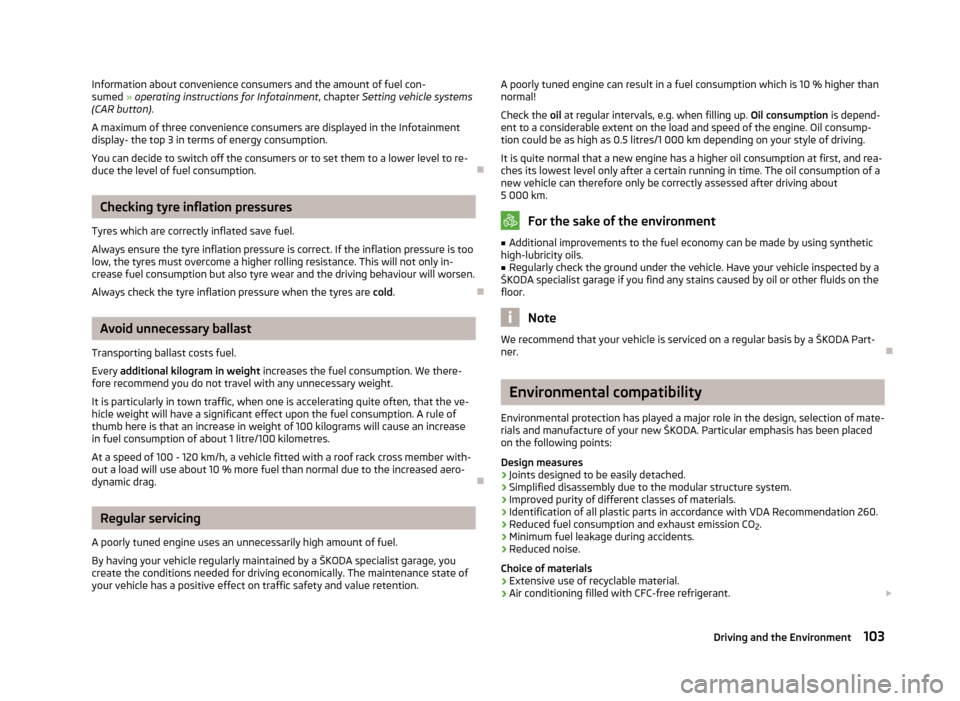
Avoid short distancesFig. 97
Principle sketch: Fuel consump-
tion in l/100 km at different tem-
peratures
Short distances result in an above-average high fuel consumption. We therefore recommend avoiding distances of less than 4 km if the engine is cold.
A cold engine consumes the most fuel immediately after the start. Fuel consump- tion drops to 10 litres/100 km after just 1 kilometre. The consumption stabilises once the engine and catalytic converter have reached their operating tempera-
ture.
An important factor in this connection is also the ambient temperature. The im-
age » Fig. 97 shows the different levels of fuel consumption after driving a certain
distance at a temperature of +20 °C and a temperature of -10 °C.
Your vehicle has a higher fuel consumption in Winter than in Summer.
Convenience consumers
The convenience consumers include:
› The air conditioning system;
› Rear window heater;
› Windscreen heater;
› Heating of the external mirror;
› Rear fog light;
› Fog lights;
› Heated front seats;
› Auxiliary heating (parking heating).
We recommend you keep the convenience consumers on for as long as necessary.
102Using the system
Page 105 of 222
Information about convenience consumers and the amount of fuel con-sumed » operating instructions for Infotainment , chapter Setting vehicle systems
(CAR button) .
A maximum of three convenience consumers are displayed in the Infotainment
display- the top 3 in terms of energy consumption.
You can decide to switch off the consumers or to set them to a lower level to re-duce the level of fuel consumption.
Checking tyre inflation pressures
Tyres which are correctly inflated save fuel.
Always ensure the tyre inflation pressure is correct. If the inflation pressure is too
low, the tyres must overcome a higher rolling resistance. This will not only in-
crease fuel consumption but also tyre wear and the driving behaviour will worsen.
Always check the tyre inflation pressure when the tyres are cold.
Avoid unnecessary ballast
Transporting ballast costs fuel.
Every additional kilogram in weight increases the fuel consumption. We there-
fore recommend you do not travel with any unnecessary weight.
It is particularly in town traffic, when one is accelerating quite often, that the ve-
hicle weight will have a significant effect upon the fuel consumption. A rule of
thumb here is that an increase in weight of 100 kilograms will cause an increase
in fuel consumption of about 1 litre/100 kilometres.
At a speed of 100 - 120 km/h, a vehicle fitted with a roof rack cross member with-
out a load will use about 10 % more fuel than normal due to the increased aero- dynamic drag.
Regular servicing
A poorly tuned engine uses an unnecessarily high amount of fuel.
By having your vehicle regularly maintained by a ŠKODA specialist garage, you
create the conditions needed for driving economically. The maintenance state of your vehicle has a positive effect on traffic safety and value retention.
A poorly tuned engine can result in a fuel consumption which is 10 % higher than normal!
Check the oil at regular intervals, e.g. when filling up. Oil consumption is depend-
ent to a considerable extent on the load and speed of the engine. Oil consump-
tion could be as high as 0.5 litres/1 000 km depending on your style of driving.
It is quite normal that a new engine has a higher oil consumption at first, and rea- ches its lowest level only after a certain running in time. The oil consumption of anew vehicle can therefore only be correctly assessed after driving about5 000 km.
For the sake of the environment
■ Additional improvements to the fuel economy can be made by using synthetic
high-lubricity oils.■
Regularly check the ground under the vehicle. Have your vehicle inspected by a
ŠKODA specialist garage if you find any stains caused by oil or other fluids on the
floor.
Note
We recommend that your vehicle is serviced on a regular basis by a ŠKODA Part-
ner.
Environmental compatibility
Environmental protection has played a major role in the design, selection of mate-
rials and manufacture of your new ŠKODA. Particular emphasis has been placed
on the following points:
Design measures › Joints designed to be easily detached.
› Simplified disassembly due to the modular structure system.
› Improved purity of different classes of materials.
› Identification of all plastic parts in accordance with VDA Recommendation 260.
› Reduced fuel consumption and exhaust emission CO
2.
› Minimum fuel leakage during accidents.
› Reduced noise.
Choice of materials › Extensive use of recyclable material.
› Air conditioning filled with CFC-free refrigerant.
103Driving and the Environment
Page 125 of 222
The automatic start procedure takes place again. The warning light goes out.
Further information on automatic transmission Engine shut down takes place when the selector lever is in positions P, D/S , N
and in Tiptronic mode.
When the selector lever is in position P the engine remains shut down after you
release the brake pedal. Start the engine by pressing the gas pedal or by choosing
a different gear and releasing the brake pedal.
If the selector lever is moved into position R during the STOP phase , the engine
will re-start.
To prevent the engine from starting unintentionally when selecting the position
R , switch rapidly from the position D/S to position P.
The system detects a movement of the vehicle due to the large steering angle or
when the selector lever is moved into position R (e.g. when parking) - no auto-
matic engine shutdown takes place.
The type of braking procedure can influence whether the STOP phase takes place
or not. No STOP phase takes place when the vehicle is moving at low speed (e.g.
during a traffic jam or when tuning) and remains stationary after pressing the
brake pedal lightly. Engine shutdown takes place if you press the brake pedal
down with more force.
Operational conditions of the system
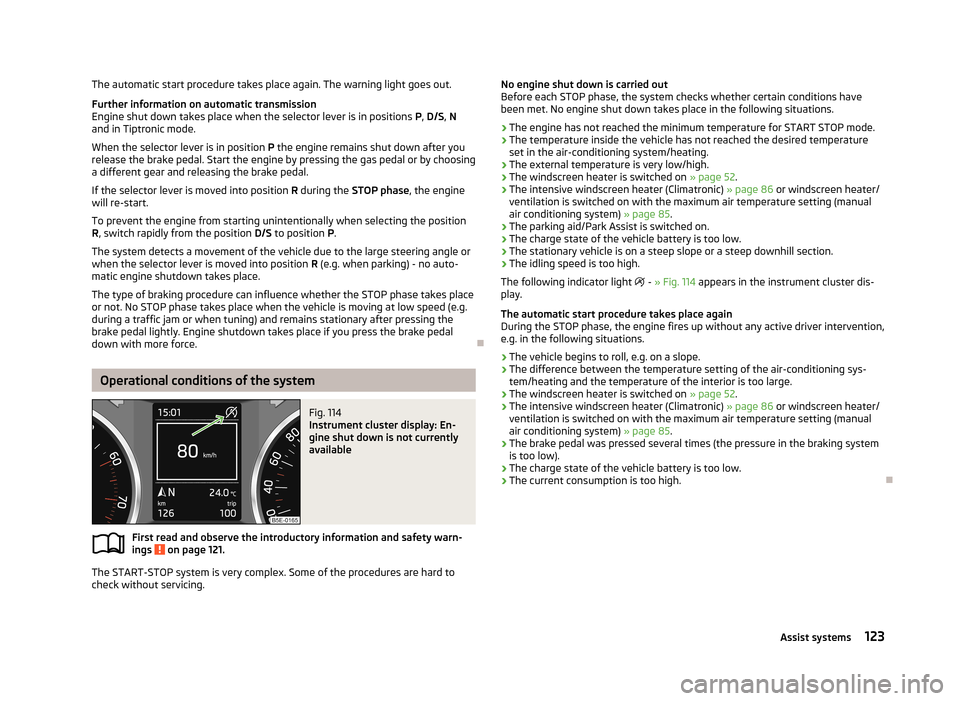
Fig. 114
Instrument cluster display: En-
gine shut down is not currently
available
First read and observe the introductory information and safety warn- ings on page 121.
The START-STOP system is very complex. Some of the procedures are hard to
check without servicing.
No engine shut down is carried out
Before each STOP phase, the system checks whether certain conditions have
been met. No engine shut down takes place in the following situations.
› The engine has not reached the minimum temperature for START STOP mode.
› The temperature inside the vehicle has not reached the desired temperature
set in the air-conditioning system/heating.
› The external temperature is very low/high.
› The windscreen heater is switched on
» page 52.
› The intensive windscreen heater (Climatronic)
» page 86 or windscreen heater/
ventilation is switched on with the maximum air temperature setting (manual
air conditioning system) » page 85.
› The parking aid/Park Assist is switched on.
› The charge state of the vehicle battery is too low.
› The stationary vehicle is on a steep slope or a steep downhill section.
› The idling speed is too high.
The following indicator light
- » Fig. 114 appears in the instrument cluster dis-
play.
The automatic start procedure takes place again
During the STOP phase, the engine fires up without any active driver intervention,
e.g. in the following situations.
› The vehicle begins to roll, e.g. on a slope.
› The difference between the temperature setting of the air-conditioning sys-
tem/heating and the temperature of the interior is too large.
› The windscreen heater is switched on
» page 52.
› The intensive windscreen heater (Climatronic)
» page 86 or windscreen heater/
ventilation is switched on with the maximum air temperature setting (manual
air conditioning system) » page 85.
› The brake pedal was pressed several times (the pressure in the braking system
is too low).
› The charge state of the vehicle battery is too low.
› The current consumption is too high.
123Assist systems
Page 126 of 222
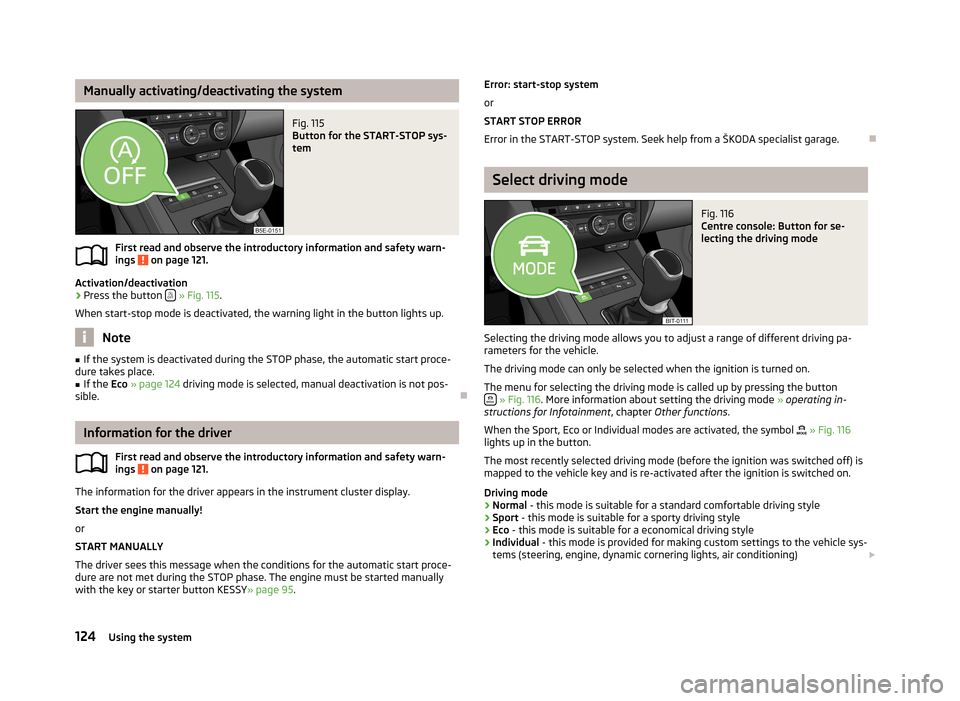
Manually activating/deactivating the systemFig. 115
Button for the START-STOP sys-
tem
First read and observe the introductory information and safety warn-
ings on page 121.
Activation/deactivation
›
Press the button
» Fig. 115 .
When start-stop mode is deactivated, the warning light in the button lights up.
Note
■ If the system is deactivated during the STOP phase, the automatic start proce-
dure takes place.■
If the Eco » page 124 driving mode is selected, manual deactivation is not pos-
sible.
Information for the driver
First read and observe the introductory information and safety warn-ings
on page 121.
The information for the driver appears in the instrument cluster display.
Start the engine manually!
or
START MANUALLY
The driver sees this message when the conditions for the automatic start proce-
dure are not met during the STOP phase. The engine must be started manually
with the key or starter button KESSY » page 95.
Error: start-stop system
or
START STOP ERROR
Error in the START-STOP system. Seek help from a ŠKODA specialist garage.
Select driving mode
Fig. 116
Centre console: Button for se-
lecting the driving mode
Selecting the driving mode allows you to adjust a range of different driving pa-
rameters for the vehicle.
The driving mode can only be selected when the ignition is turned on. The menu for selecting the driving mode is called up by pressing the button
» Fig. 116 . More information about setting the driving mode » operating in-
structions for Infotainment , chapter Other functions .
When the Sport, Eco or Individual modes are activated, the symbol
» Fig. 116
lights up in the button.
The most recently selected driving mode (before the ignition was switched off) is
mapped to the vehicle key and is re-activated after the ignition is switched on.
Driving mode
› Normal
- this mode is suitable for a standard comfortable driving style
› Sport
- this mode is suitable for a sporty driving style
› Eco
- this mode is suitable for a economical driving style
› Individual
- this mode is provided for making custom settings to the vehicle sys-
tems (steering, engine, dynamic cornering lights, air conditioning)
124Using the system
Page 127 of 222
Steering
In the Sport driving mode, the steering force assistance » page 93 is reduced
somewhat. This helps keep the vehicle on the best possible track when driving in
a sporty driving style.
Engine (drive)
The engine and transmission respond more dynamically or more relaxed to move- ments of the gas pedal based on what driving mode was set. In the Eco driving
mode, automatic transmission allows you to drive in the Neutral posi- tion » page 130 . When the Cruise Control System is active, the selected driving
mode can have an influence on driving behaviour when accelerating.
Dynamic cornering lights
The headlights adjust to the more dynamic driving style in the Sport driving
mode. Dynamic cornering lights is deactivated in the Eco driving mode.
Air conditioning (Climatronic)
In the Eco driving mode, the air conditioning system works more efficiently whilst
still maintaining the desired interior temperature.WARNING■ Setting the driving mode while driving can distract you from other traffic -
risk of accident.■
Concentrate fully at all times on your driving! As the driver you are fully re-
sponsible for the operation of your vehicle.
■
Adjust the speed and driving style to the current visibility, weather, road and
traffic conditions.
Note
■ The Eco driving mode is not available when towing a trailer. When the vehicle is
connected electrically to a trailer and is in the Eco driving mode, the Normal driv-
ing mode is configured automatically.■
On vehicles with automatic transmission, the gear is automatically set to mode
S » page 129 when selecting driving mode Sport or, in Eco driving mode, to mode
E .
■
The driver can change some vehicle functions irrespective of the selected driv-
ing mode. For instance, in the driving mode Eco , the driver can switch the auto-
matic transmission to the mode S.
ProActive passenger protection
ProActive passenger protection increases the protection offered to passengers in situations which could lead to a collision or rollover.
The system is automatically activated each time the ignition is switched on and
works at speeds of over 30 km/h.
In critical driving situations (e.g. during an emergency brake or sudden change in direction), the following steps can be taken separately or combined in order to re-
duce the risk of serious injury:
› Front passenger seatbelt or front passenger and driver's seatbelts are automat-
ically tensioned strongly over the body;
› Door panels in the side doors and the sliding/tilting roof (if open) are automati-
cally closed up to a gap of around 5 cm from the edge.
Once the critical driving situation has passed, the tension on the seatbelts will be released again.
All functions of the system are available when:
› the system is activated in Infotainment
» operating instructions for Infotain-
ment , chapter Setting vehicle systems (CAR button) ;
› the TCS is switched on
» page 113;
› the
Sport driving mode is not selected » page 124.
If the system cannot function correctly, the following message will appear in the
instrument cluster display:
ProActive passenger protection not available.
or ProActive passenger protection: funct. restricted.
Seek help from a ŠKODA specialist garage.WARNING■ Adjust the speed and driving style to the current visibility, weather, road and
traffic conditions. The increased safety offered by ProActive passenger pro-
tection must not tempt you to take greater risks than otherwise – risk of an
accident! 125Assist systems