steering wheel SKODA OCTAVIA 2012 2.G / (1Z) User Guide
[x] Cancel search | Manufacturer: SKODA, Model Year: 2012, Model line: OCTAVIA, Model: SKODA OCTAVIA 2012 2.G / (1Z)Pages: 222, PDF Size: 13.52 MB
Page 97 of 222
KESSY system
Introduction
This chapter contains information on the following subjects:
Unlocking and locking the steering
95
Switching on the ignition
96
Switching off the ignition
96
Emergency ignition shutoff system
96
Starting engine
96
Emergency start-up of the engine
97
Switching the engine off
97
The KESSY system makes it possible to switch the ignition on/off and to start/
stop the engine without actively using the key.
A key must be in the vehicle to unlock the steering, switch on the steering andstart the vehicle.
WARNING■ Never switch off the ignition while driving, as the power steering and brake
booster will no longer operate - risk of accident!■
Never leave the keys in the vehicle, if leaving children unattended in the ve-
hicle. Otherwise the children could start the engine - risk of accident!
Note
■ After pressing the starter button while the steering is locked, the steering is un-
locked, the electrical components are activated (e.g. Infotainment, etc.) and the ignition is switched on.■
If you do not leave the vehicle after locking the steering and wish to unlock the
steering again, press the starter button. At the same time, electrical components
are activated (e.g. Infotainment etc.) and the ignition is switched on.
■
The KESSY system is protected against inadvertently switching off the engine
while driving, this means that the engine can only be switched off in an emergen-
cy » page 96 .
■
The steering is not unlocked or locked if the starter button is repeatedly press-
ed at short intervals.
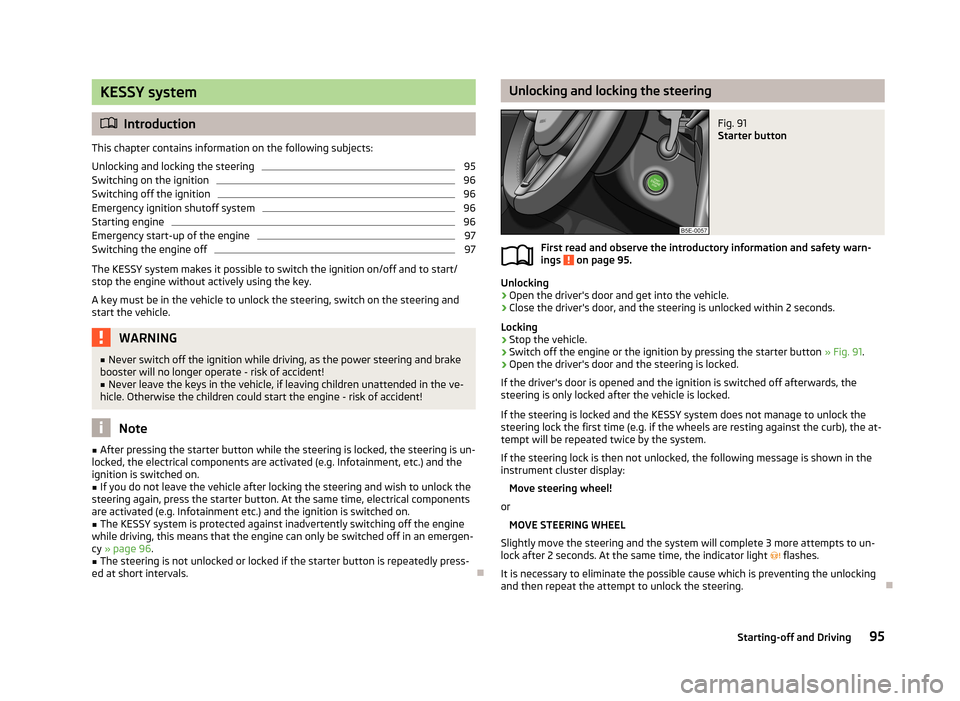
Unlocking and locking the steeringFig. 91
Starter button
First read and observe the introductory information and safety warn-
ings on page 95.
Unlocking
›
Open the driver's door and get into the vehicle.
›
Close the driver's door, and the steering is unlocked within 2 seconds.
Locking
›
Stop the vehicle.
›
Switch off the engine or the ignition by pressing the starter button » Fig. 91.
›
Open the driver's door and the steering is locked.
If the driver's door is opened and the ignition is switched off afterwards, the steering is only locked after the vehicle is locked.
If the steering is locked and the KESSY system does not manage to unlock the steering lock the first time (e.g. if the wheels are resting against the curb), the at-
tempt will be repeated twice by the system.
If the steering lock is then not unlocked, the following message is shown in the
instrument cluster display:
Move steering wheel!
or MOVE STEERING WHEEL
Slightly move the steering and the system will complete 3 more attempts to un-
lock after 2 seconds. At the same time, the indicator light
flashes.
It is necessary to eliminate the possible cause which is preventing the unlocking
and then repeat the attempt to unlock the steering.
95Starting-off and Driving
Page 112 of 222
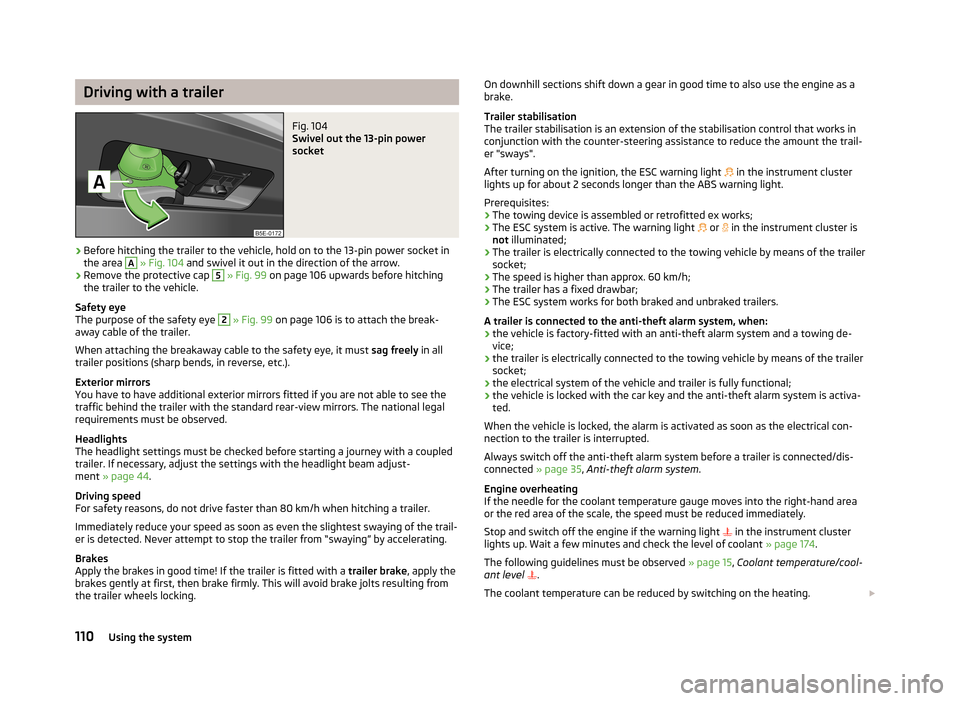
Driving with a trailerFig. 104
Swivel out the 13-pin power
socket
›
Before hitching the trailer to the vehicle, hold on to the 13-pin power socket in the area
A
» Fig. 104 and swivel it out in the direction of the arrow.
›
Remove the protective cap
5
» Fig. 99 on page 106 upwards before hitching
the trailer to the vehicle.
Safety eye
The purpose of the safety eye
2
» Fig. 99 on page 106 is to attach the break-
away cable of the trailer.
When attaching the breakaway cable to the safety eye, it must sag freely in all
trailer positions (sharp bends, in reverse, etc.).
Exterior mirrors
You have to have additional exterior mirrors fitted if you are not able to see the
traffic behind the trailer with the standard rear-view mirrors. The national legal
requirements must be observed.
Headlights
The headlight settings must be checked before starting a journey with a coupled
trailer. If necessary, adjust the settings with the headlight beam adjust-
ment » page 44 .
Driving speed
For safety reasons, do not drive faster than 80 km/h when hitching a trailer.
Immediately reduce your speed as soon as even the slightest swaying of the trail- er is detected. Never attempt to stop the trailer from “swaying” by accelerating.
Brakes
Apply the brakes in good time! If the trailer is fitted with a trailer brake, apply the
brakes gently at first, then brake firmly. This will avoid brake jolts resulting from
the trailer wheels locking.
On downhill sections shift down a gear in good time to also use the engine as a
brake.
Trailer stabilisation
The trailer stabilisation is an extension of the stabilisation control that works in
conjunction with the counter-steering assistance to reduce the amount the trail-
er "sways".
After turning on the ignition, the ESC warning light in the instrument cluster
lights up for about 2 seconds longer than the ABS warning light.
Prerequisites: › The towing device is assembled or retrofitted ex works;
› The ESC system is active. The warning light
or in the instrument cluster is
not illuminated;
› The trailer is electrically connected to the towing vehicle by means of the trailer
socket;
› The speed is higher than approx. 60 km/h;
› The trailer has a fixed drawbar;
› The ESC system works for both braked and unbraked trailers.
A trailer is connected to the anti-theft alarm system, when: › the vehicle is factory-fitted with an anti-theft alarm system and a towing de-
vice;
› the trailer is electrically connected to the towing vehicle by means of the trailer
socket;
› the electrical system of the vehicle and trailer is fully functional;
› the vehicle is locked with the car key and the anti-theft alarm system is activa-
ted.
When the vehicle is locked, the alarm is activated as soon as the electrical con-
nection to the trailer is interrupted.
Always switch off the anti-theft alarm system before a trailer is connected/dis- connected » page 35, Anti-theft alarm system .
Engine overheating
If the needle for the coolant temperature gauge moves into the right-hand area or the red area of the scale, the speed must be reduced immediately.
Stop and switch off the engine if the warning light
in the instrument cluster
lights up. Wait a few minutes and check the level of coolant » page 174.
The following guidelines must be observed » page 15, Coolant temperature/cool-
ant level
.
The coolant temperature can be reduced by switching on the heating. 110Using the system
Page 114 of 222
Assist systems
Brake assist systems
Introduction
This chapter contains information on the following subjects:
Stabilisation Control (ESC)
112
Antilock brake system (ABS)
113
Traction control system (TCS)
113
Electronic differential lock (EDL)
114WARNING■ A lack of fuel can cause irregular engine running or cause the engine to shut
down. The brake assist systems would then be without function – risk of acci-
dent!■
Adjust the speed and driving style to the current visibility, weather, road and
traffic conditions. The increased safety offered by the brake assist systems must not tempt you to take greater risks than otherwise – risk of an accident!
■
In the event of an ABS fault, visit a ŠKODA specialist garage immediately.
Adjust your style of driving according to the damage to the ABS as you will not know how great the damage is and the limitation it is placing on the braking
efficiency.
CAUTION
■ All four wheels must be fitted with the same tyres approved by the manufactur-
er to ensure the brake assist systems operate correctly.■
Changes to the vehicle (e.g. to the engine, brakes, chassis) can influence the
functionality of the brake assist systems » page 165.
Note
If a fault occurs in the ABS system, the ESC, ASR and EDL also do not work. An
ABS fault is indicated with the warning light » page 17 .
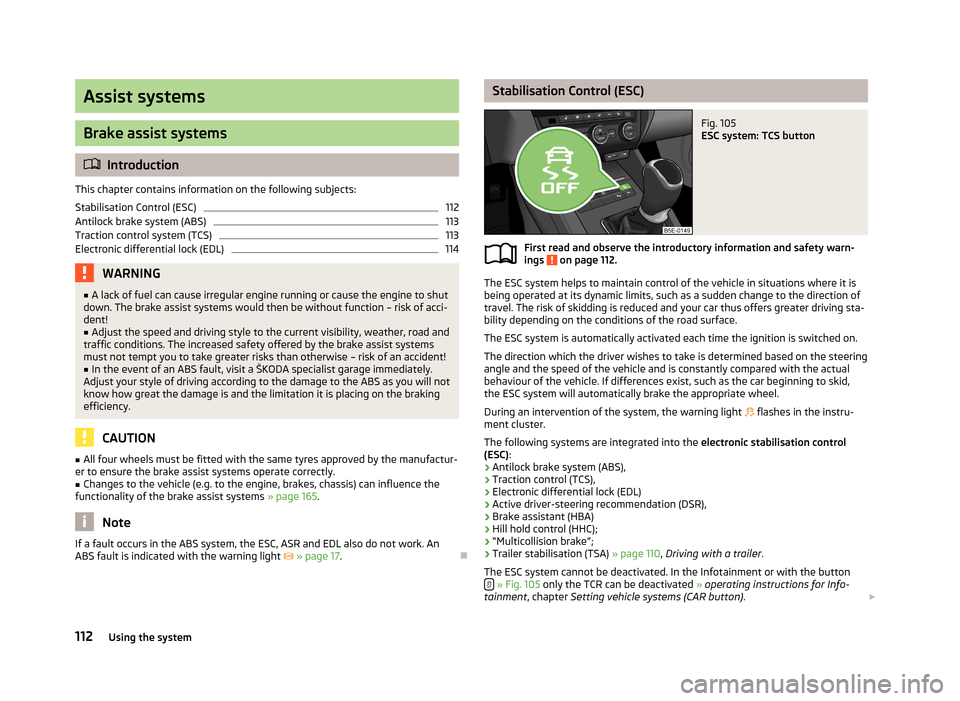
Stabilisation Control (ESC)Fig. 105
ESC system: TCS button
First read and observe the introductory information and safety warn-
ings on page 112.
The ESC system helps to maintain control of the vehicle in situations where it is
being operated at its dynamic limits, such as a sudden change to the direction of
travel. The risk of skidding is reduced and your car thus offers greater driving sta-
bility depending on the conditions of the road surface.
The ESC system is automatically activated each time the ignition is switched on.The direction which the driver wishes to take is determined based on the steering angle and the speed of the vehicle and is constantly compared with the actualbehaviour of the vehicle. If differences exist, such as the car beginning to skid,
the ESC system will automatically brake the appropriate wheel.
During an intervention of the system, the warning light
flashes in the instru-
ment cluster.
The following systems are integrated into the electronic stabilisation control
(ESC) :
› Antilock brake system (ABS),
› Traction control (TCS),
› Electronic differential lock (EDL)
› Active driver-steering recommendation (DSR),
› Brake assistant (HBA)
› Hill hold control (HHC);
› “Multicollision brake”;
› Trailer stabilisation (TSA)
» page 110, Driving with a trailer .
The ESC system cannot be deactivated. In the Infotainment or with the button
» Fig. 105 only the TCR can be deactivated » operating instructions for Info-
tainment , chapter Setting vehicle systems (CAR button) .
112Using the system
Page 115 of 222
The warning light lights up in the instrument cluster when the TCR is deactiva-
ted.
Active driver-steering recommendation (DSR) The DSR indicates to the driver in critical situations a steering recommendation in
order to stabilise the vehicle. The DSR is activated, for example, on the right and
left vehicle side when braking sharply on different road surfaces.
Hydraulic brake assist (HBA)
The HBA is activated by the very quick operation of the brake pedal. HBA increa- ses the braking effect and helps to shorten the braking distance. To achieve the
shortest possible braking distance, the brake pedal must be applied firmly until the vehicle has come to a complete standstill.
The ABS is activated faster and more effectively with the intervention of the HBA. The HBA is automatically switched off when the brake pedal is released.
Hill hold control (HHC)
The HHC makes it easier to start off on steep hills. The system holds the brake
pressure produced by the activation of the brake pedal for approx. 2 seconds af-
ter the brake pedal is released. The driver can therefore move his foot from the
brake pedal to the accelerator pedal and start off on the slope, without having to
actuate the handbrake.
The brake pressure drops gradually the more you operate the accelerator pedal. If the vehicle does not start off within 2 seconds, it starts to roll back.
The HHC is active as of a 5 % slope, if the driver door is closed. HHC is always ac- tive on slopes when in forward or reverse start off. When driving downhill, it is in-
active.
“Multicollision brake”
The multifunction brake deploys automatic braking after a collision in order to re-
duce the risk of further collisions. Automatic braking can only be deployed at
speeds of over 10 km/h in the event of a frontal or side impact.
The vehicle is slowed down automatically by the ESC system as long as the brakes, the ESC and the requisite electrical system remains operational post-im-
pact.
Automatic braking is not applied if the driver presses the accelerator during the
accident.
Antilock brake system (ABS)
First read and observe the introductory information and safety warn-
ings
on page 112.
ABS prevents the wheels locking when braking. Thus helping the driver to main-
tain control of the vehicle.
The intervention of the ABS is noticeable from the pulsating movements of the
brake pedal which is accompanied by noises.
When the ABS system is active, do not brake periodically or reduce the pressure
on the brake pedal.
Traction control system (TCS)
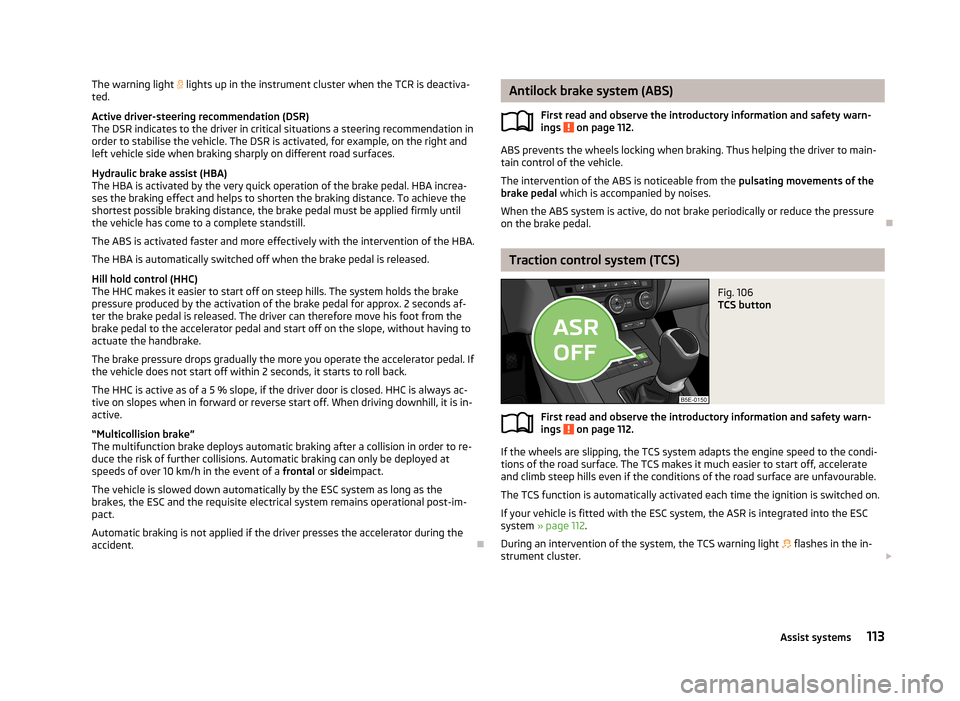
Fig. 106
TCS button
First read and observe the introductory information and safety warn- ings on page 112.
If the wheels are slipping, the TCS system adapts the engine speed to the condi-
tions of the road surface. The TCS makes it much easier to start off, accelerate
and climb steep hills even if the conditions of the road surface are unfavourable.
The TCS function is automatically activated each time the ignition is switched on.
If your vehicle is fitted with the ESC system, the ASR is integrated into the ESC
system » page 112 .
During an intervention of the system, the TCS warning light flashes in the in-
strument cluster.
113Assist systems
Page 118 of 222
CAUTION■If a warning signal sounds for about 3 seconds after activating the system and
there is no obstacle close to your car, this indicates a system fault. The fault is
confirmed additionally when the symbol flashes in the button
.
! is displayed
in the error area of the Infotainment display. Have the fault rectified by a ŠKODA
specialist garage.
■
The sensors must be kept clean (free of ice, etc.) to enable the parking aid to
operate properly.
Note
■ The signal tones for front obstacle recognition are factory-set to be higher than
for rear obstacle recognition.■
If not all fields around the vehicle are shown after the system is activated, the
vehicle will need to be moved a few metres forwards or in reverse.
■
If the parking aid is activated and the selector lever of the automatic gearbox is
in the position P (the vehicle cannot move), the warning signal is interrupted and
no obstacles are displayed.
■
Additional mounted modules, such as a bicycle carrier, can impair the function of
the parking aid.
Park Assist
Introduction
This chapter contains information on the following subjects:
finding a parking space
117
Parking the vehicle
117
Manoeuvring out of a parallel parking space
118
Automatic brake assist
118
Information for the driver
119
The parking aid is part of the park assist system, therefore the information and
safety guidelines » page 114, Parking aid must be read and observed.
Park Assist (in the following referred to as the system) helps drivers park in suita- ble parallel and perpendicular parking places and also to manoeuvre out of paral- lel parking spaces.
The system only operates if the ignition is switched on.
During the parking procedure the system only takes over the steering move- ments, the pedals continue to be operated by the driver.
When the system is activated,
the warning light
» Fig. 109 on page 117 -
lights up in the button.
The traction control system (TCS) must always be switched on when parking.
The function of the system is based on: › the measurement and evaluation of the size of parking spaces when driving,
› the determination of the correct position of the vehicle for parking,
› the calculation of the line on which the vehicle drives backwards into the park-
ing space or forwards from the parking space;
› the automatic turning of the front wheels when parking in, or manoeuvring out
of the parking space.
WARNING■ The system does not exempt the driver from his/her responsibility for park-
ing in and manoeuvring out of the parking space.■
External sound sources can have a detrimental effect on parking in and ma-
noeuvring out of the parking space. Under unfavourable conditions, objects or
people may not be recognised.
■
When parking in, and manoeuvring out of parking spaces, the system auto-
matically executes quick steering movements. While it is doing so, do not place your hands between the steering wheel - risk of injury!
CAUTION
■ If other vehicles are parked behind or on the kerb, the system guides your vehi-
cle beyond the kerb or onto it. Ensure that the wheels or the wheel rims of your
vehicle are not damaged and if necessary intervene in time.■
Under certain circumstances, surfaces or structures of certain objects such as
wire mesh fences, powder snow, etc., cannot be recognised by the system.
■
The evaluation of the parking space and the parking procedure depends on the
circumference of the wheels. The system only works correctly if the vehicle is fit-
ted with the wheel size approved by the manufacturer. If wheels other than those approved by the manufacturer are mounted, the resulting position of the
vehicle in the parking space can differ slightly. This can be avoided by readjusting
the system at a ŠKODA specialist garage. Under certain circumstances, the sys-
tem may not function correctly, for example, if the vehicle is fitted with snow chains or a temporary spare wheel.
116Using the system
Page 119 of 222
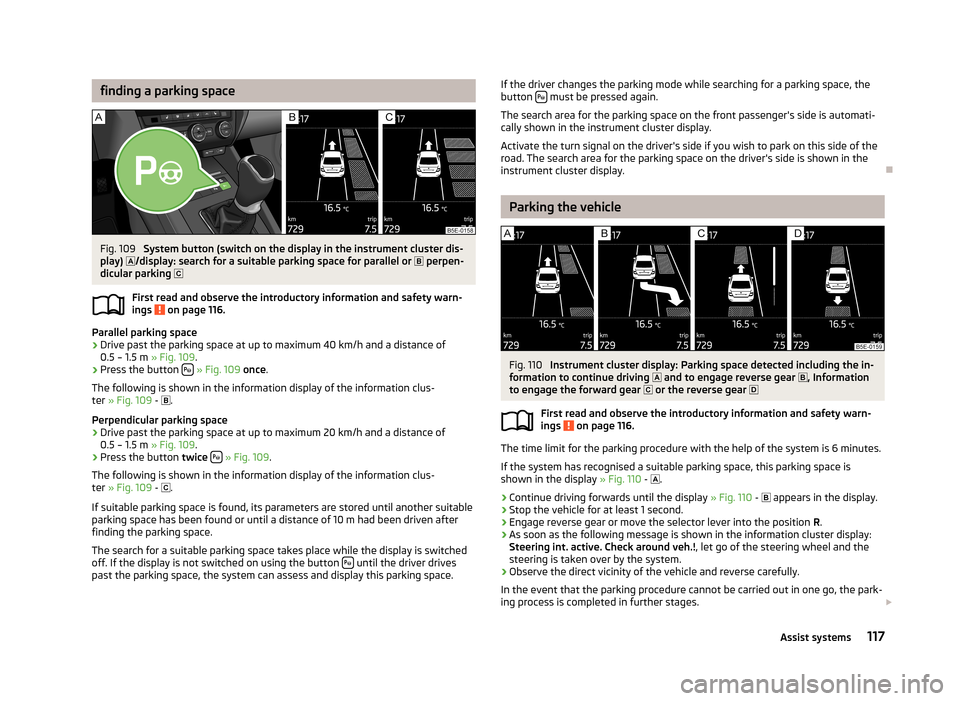
finding a parking spaceFig. 109
System button (switch on the display in the instrument cluster dis-
play) /display: search for a suitable parking space for parallel or
perpen-
dicular parking
First read and observe the introductory information and safety warn- ings
on page 116.
Parallel parking space
›
Drive past the parking space at up to maximum 40 km/h and a distance of 0.5 – 1.5 m » Fig. 109.
›
Press the button
» Fig. 109 once .
The following is shown in the information display of the information clus- ter » Fig. 109 -
.
Perpendicular parking space
›
Drive past the parking space at up to maximum 20 km/h and a distance of 0.5 – 1.5 m » Fig. 109.
›
Press the button twice
» Fig. 109 .
The following is shown in the information display of the information clus-
ter » Fig. 109 -
.
If suitable parking space is found, its parameters are stored until another suitable
parking space has been found or until a distance of 10 m had been driven after finding the parking space.
The search for a suitable parking space takes place while the display is switched
off. If the display is not switched on using the button
until the driver drives
past the parking space, the system can assess and display this parking space.
If the driver changes the parking mode while searching for a parking space, the
button must be pressed again.
The search area for the parking space on the front passenger's side is automati-
cally shown in the instrument cluster display.
Activate the turn signal on the driver's side if you wish to park on this side of the road. The search area for the parking space on the driver's side is shown in the
instrument cluster display.
Parking the vehicle
Fig. 110
Instrument cluster display: Parking space detected including the in-
formation to continue driving and to engage reverse gear
, Information
to engage the forward gear or the reverse gear
First read and observe the introductory information and safety warn- ings
on page 116.
The time limit for the parking procedure with the help of the system is 6 minutes.
If the system has recognised a suitable parking space, this parking space is
shown in the display » Fig. 110 -
.
›
Continue driving forwards until the display » Fig. 110 -
appears in the display.
›
Stop the vehicle for at least 1 second.
›
Engage reverse gear or move the selector lever into the position R.
›
As soon as the following message is shown in the information cluster display:
Steering int. active. Check around veh.! , let go of the steering wheel and the
steering is taken over by the system.
›
Observe the direct vicinity of the vehicle and reverse carefully.
In the event that the parking procedure cannot be carried out in one go, the park- ing process is completed in further stages.
117Assist systems
Page 120 of 222
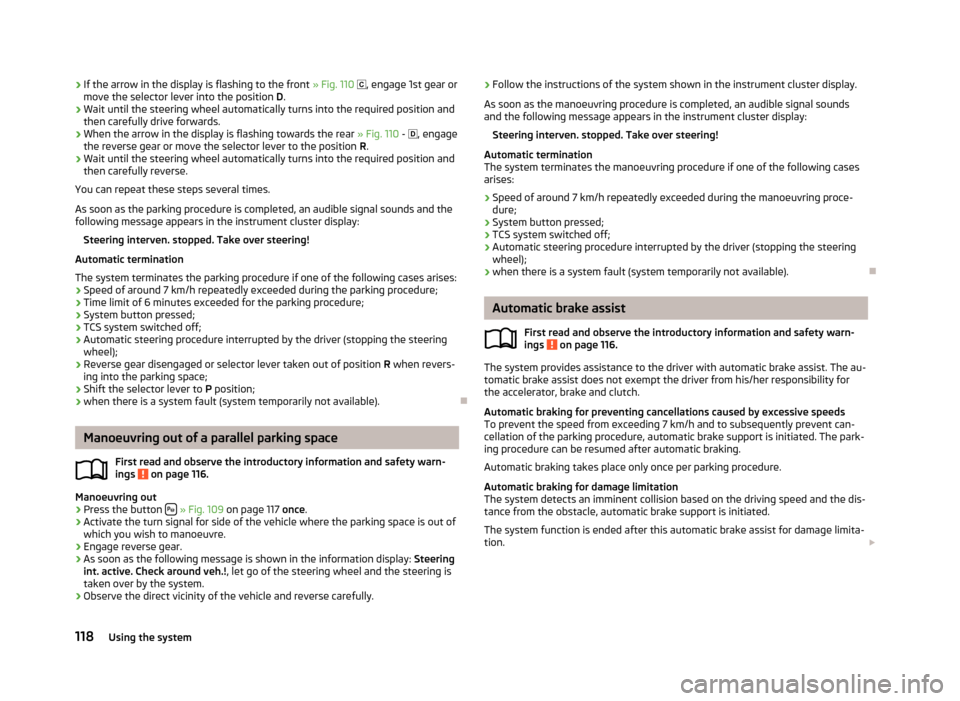
›If the arrow in the display is flashing to the front
» Fig. 110 , engage 1st gear or
move the selector lever into the position D.›
Wait until the steering wheel automatically turns into the required position and
then carefully drive forwards.
›
When the arrow in the display is flashing towards the rear » Fig. 110 - , engage
the reverse gear or move the selector lever to the position R.
›
Wait until the steering wheel automatically turns into the required position and
then carefully reverse.
You can repeat these steps several times.
As soon as the parking procedure is completed, an audible signal sounds and the
following message appears in the instrument cluster display:
Steering interven. stopped. Take over steering!
Automatic termination
The system terminates the parking procedure if one of the following cases arises: › Speed of around 7 km/h repeatedly exceeded during the parking procedure;
› Time limit of 6 minutes exceeded for the parking procedure;
› System button pressed;
› TCS system switched off;
› Automatic steering procedure interrupted by the driver (stopping the steering
wheel);
› Reverse gear disengaged or selector lever taken out of position
R when revers-
ing into the parking space;
› Shift the selector lever to
P position;
› when there is a system fault (system temporarily not available).
Manoeuvring out of a parallel parking space
First read and observe the introductory information and safety warn-
ings
on page 116.
Manoeuvring out
›
Press the button
» Fig. 109 on page 117 once.
›
Activate the turn signal for side of the vehicle where the parking space is out of
which you wish to manoeuvre.
›
Engage reverse gear.
›
As soon as the following message is shown in the information display: Steering
int. active. Check around veh.! , let go of the steering wheel and the steering is
taken over by the system.
›
Observe the direct vicinity of the vehicle and reverse carefully.
› Follow the instructions of the system shown in the instrument cluster display.
As soon as the manoeuvring procedure is completed, an audible signal sounds
and the following message appears in the instrument cluster display:
Steering interven. stopped. Take over steering!
Automatic termination
The system terminates the manoeuvring procedure if one of the following cases
arises:
› Speed of around 7 km/h repeatedly exceeded during the manoeuvring proce-
dure;
› System button pressed;
› TCS system switched off;
› Automatic steering procedure interrupted by the driver (stopping the steering
wheel);
› when there is a system fault (system temporarily not available).
Automatic brake assist
First read and observe the introductory information and safety warn-
ings
on page 116.
The system provides assistance to the driver with automatic brake assist. The au-
tomatic brake assist does not exempt the driver from his/her responsibility for
the accelerator, brake and clutch.
Automatic braking for preventing cancellations caused by excessive speeds
To prevent the speed from exceeding 7 km/h and to subsequently prevent can-
cellation of the parking procedure, automatic brake support is initiated. The park-
ing procedure can be resumed after automatic braking.
Automatic braking takes place only once per parking procedure.
Automatic braking for damage limitationThe system detects an imminent collision based on the driving speed and the dis-
tance from the obstacle, automatic brake support is initiated.
The system function is ended after this automatic brake assist for damage limita-tion.
118Using the system
Page 128 of 222

NoteIf the front passenger front airbag is deactivated » page 151 the belt tensioning
function for the front passenger seat is switched off.
Lane Assist
Introduction
This chapter contains information on the following subjects:
Operating principle
126
Explanations of situations
127
Information for the driver
128WARNING■ Lane Assist only operates as a support- it does absolve the driver of the re-
sponsibility to maintain full control over the vehicle's steering.■
Lane Assist only makes the driver away that the vehicle is approaching the
line between two lanes by means of a steering intervention. The driver retains
responsibility at all times for keeping the vehicle within the lane.
■
Lane Assist can help you keep the vehicle within the lane. However, it does
not steer the vehicle for you. The driver retains full responsibility for steering at all times.
■
The camera need not be able to detect all lane lines. A steering intervention
can only be made when the vehicle approaches a detected line between lanes.
■
Some objects on the road may be incorrectly detected as lines. As a result,
an incorrect steering intervention may take place.
■
The function of adaptive lane guidance Assist system may be restricted
when driving e.g. over rutted roads, on a slope, or if there are lateral winds.
■
Do not use the Assist system in poor weather, e.g. black ice, fog, heavy rain -
risk of accident!
WARNINGThe camera's powers of detection may be limited by a range of external influ-
ences. In this case, the Assist system may not be able to detect the line cor-
rectly, if at all. The camera's powers of detection may be limited, e.g. in the fol- lowing:■
in poor visibility conditions, e.g. fog, heavy rain, thick snowfall;
■
when dazzled by the sun;
■
when dazzled by oncoming traffic;
■
by vehicles ahead;
■
when the camera viewing range is obstructed by an obstacle.
CAUTION
Do not attach any stickers or similar objects to the windscreen to avoid impairing
the functions of the Assist system.
Operating principle
Fig. 117
Windscreen: Camera viewing
window for Lane Assist
First read and observe the introductory information and safety warn- ings on page 126.
Lane Assist (in the following referred to as the system) detects the lines between
lanes using data obtained from the camera (continuous and interrupted) » Fig. 117.
When the vehicle approaches a detected line between lanes, the system makes a
light movement of the steering wheel in the opposite direction to the boundary
line. This corrective steering intervention can be overridden at any time.
The strength of the steering movement can be activated/deactivated in the Info-
tainment » operating instructions for Infotainment , chapter Setting vehicle sys-
tems (CAR button) .
126Using the system
Page 130 of 222
The indicator light is lit. Possible causes:
› the vehicle is travelling at less than 65 km/h;
› no lane boundary exists;
› the lane boundary was not detected;
› the driver's hands are not on the steering wheel;
› the lane is less than 2.5 m in width;
› the radius of the curve is too small.
Information for the driver
First read and observe the introductory information and safety warn-ings
on page 126.
The information for the driver appears in the instrument cluster display.
Lane Assist not available. No sensor view.
The windscreen is dirty, iced over or misted up in the camera viewing range. Clean the windscreen or remove the obstacles.
Lane Assist currently not available.
The system has limited functionality due to a temporary error. Try to re-activate
the machine.
Error: Lane Assist
A system error is present. Seek help from a ŠKODA specialist garage.
Lane Assist: Take over steering!
The system has detected that there are no hands on the steering wheel. In this case, the Assist system is not ready to intervene. Place your hands on the steer-
ing wheel.
128Using the system
Page 131 of 222
Automatic gearbox
Automatic transmission
Introduction
This chapter contains information on the following subjects:
Introductory information
129
Starting-off and driving
130
Selector lever positions
130
Manual shifting of gears (Tiptronic)
131
Selector lever lock
131
Kickdown function
132
Dynamic shift programme
132
Emergency programme
132
Selector lever-emergency unlocking
133WARNING■ Do not depress the accelerator if changing the position of the selector lever
when the vehicle is stationary and the engine is running – risk of accident!■
Never move the selector lever into position R or P when driving – risk of an
accident!
■
When the vehicle is stationery and the engine is running, stopping the vehi-
cle requires you pressing the brake pedal in all selector lever settings. When
the engine is idling, the power transmission is never completely interrupted -
the vehicle creeps.
■
The selector lever must be placed into position P and the handbrake firmly
applied before the bonnet can be opened and work on the running engine can
be completed – risk of accident! The safety guidelines must always be ob-
served » page 169 , Engine compartment .
■
If stopping on a hill (downhill gradient), never try to maintain the vehicle sta-
tionary with the gear engaged by means of the accelerator pedal, i.e. by let-
ting the clutch slip - This can lead to overheating of the clutch. If there is a risk
of overheating of the clutch due to overload, the clutch is opened automati-
cally and the vehicle rolls backward – risk of accident!
WARNING (Continued)■ If you have to stop on a slope, depress and hold the brake pedal to prevent
the vehicle from rolling back.■
On a smooth or slippery road surface using the kickdown function can cause
the driven wheels to spin – risk of skidding!
Note
If the driving mode Sport or Eco » page 124 is selected and the selector lever is in
position D/S, the gearbox is automatically set to mode S or E. The mode is indica-
ted in the instrument cluster display » Fig. 120 on page 130.
Introductory information
First read and observe the introductory information and safety warn-
ings
on page 129.
Starting
The engine can only be started when the selector lever is in position P or N .
When the steering is locked, when the ignition is turned on or off, or when start-
ing the engine, If the selector lever is not in the positions P or N, the following
message appears in the instrument cluster display Move the selector lever to Po-
sition P/N! or ENGAGE N OR P .
Shifting gears
Shifting up and down through the gears is performed automatically. The gearbox
can also be switched to Tiptronic mode. This mode makes it possible for you to
also shift gears manually » page 131.
If the selector lever position N is accidentally selected while driving, it is first nec-
essary to release pressure on the accelerator pedal and wait for the idling speed of the engine to be reached before the selector lever can be engaged in the driveposition.
At temperatures below -10 °C the engine can only be started in the selector lever position P.
Parking
When parking on a level road surface, it suffices to engage selector lever position
P .
129Automatic gearbox