brakes SKODA OCTAVIA 2012 2.G / (1Z) Owner's Manual
[x] Cancel search | Manufacturer: SKODA, Model Year: 2012, Model line: OCTAVIA, Model: SKODA OCTAVIA 2012 2.G / (1Z)Pages: 222, PDF Size: 13.52 MB
Page 5 of 222
Table of Contents
Abbreviations
Using the system
Cockpit
7
Overview
6
Instruments and warning lights
9
Instrument cluster
9
Warning lights
12
Information system
21
Introductory information
21
Outside temperature
21
Recommended gear
21
Door, boot lid and bonnet warning
21
Eco tips
21
Driving data (Multifunction display)
22
Information display
25
Traffic sign recognition
25
Fatigue detection (break recommendation)
27
Unlocking and locking
28
Vehicle key
28
Child safety lock
29
Open door and close
29
Central locking system
29
Locking/unlocking with the key
31
Vehicle locking/unlocking from the inside
32
Remote control
32
KESSY system
33
Anti-theft alarm system
35
Emergency unlocking/locking
36
Luggage compartment lid
37
Electrical power windows
38
Power panoramic sliding/sliding tilting roof
41Lights and visibility43Lights43
Interior light
51
Visibility
52
Windscreen wipers and washers
53
Rear mirror
56
Seats and Stowage
59
Front seats
59
Seat heaters
62
Head restraints
63
Rear seats
63
Boot
64
Roof rack system
68
Cup holder
69
Ashtray
70
Cigarette lighter
70
Sockets
71
Storage compartments
72
Clothes hooks
79
Parking ticket holder
80
Heating and air conditioning system
81
Heating and air conditioning system
81
Air outlets
82
Heating
83
Air conditioning system (manual air conditioning system)
84
Climatronic (automatic air conditioningsystem)
86
Auxiliary heating (auxiliary heating andventilation)
88
Starting-off and Driving
92
Starting and stopping the engine
92
KESSY system
95
Brakes
97
Shifting
99
Pedals
99Driving and the Environment100Running in100
Catalytic converter
100
Economical and environmentally friendly
driving
101
Environmental compatibility
103
Driving abroad
104
Driving through water on the street
104
Towing a trailer
106
Towing device
106
Loading a trailer
109
Driving with a trailer
110
Assist systems
112
Brake assist systems
112
Parking aid
114
Park Assist
116
Cruise control system (CCS)
119
START/STOP
121
Select driving mode
124
ProActive passenger protection
125
Lane Assist
126
Automatic gearbox
129
Automatic transmission
129
Communication
134
Introductory information
134
Declaration of conformity
134
Warning statement
134
Phonebox
135
Multimedia
135
Safety
Passive Safety
138
General information
138
Correct seated position
1393Table of Contents
Page 75 of 222
WARNING■Do not place anything on the dash panel. These objects might slide or fall
down when driving (when accelerating or cornering) and may distract you
from concentrating on the traffic - risk of accident!■
When driving, ensure that no objects from the centre console or from other
storage compartments can get into the driver's footwell. You would then no
longer be able to apply the brakes, operate the clutch or accelerator – risk of accident!
Storage compartment on the front passenger side
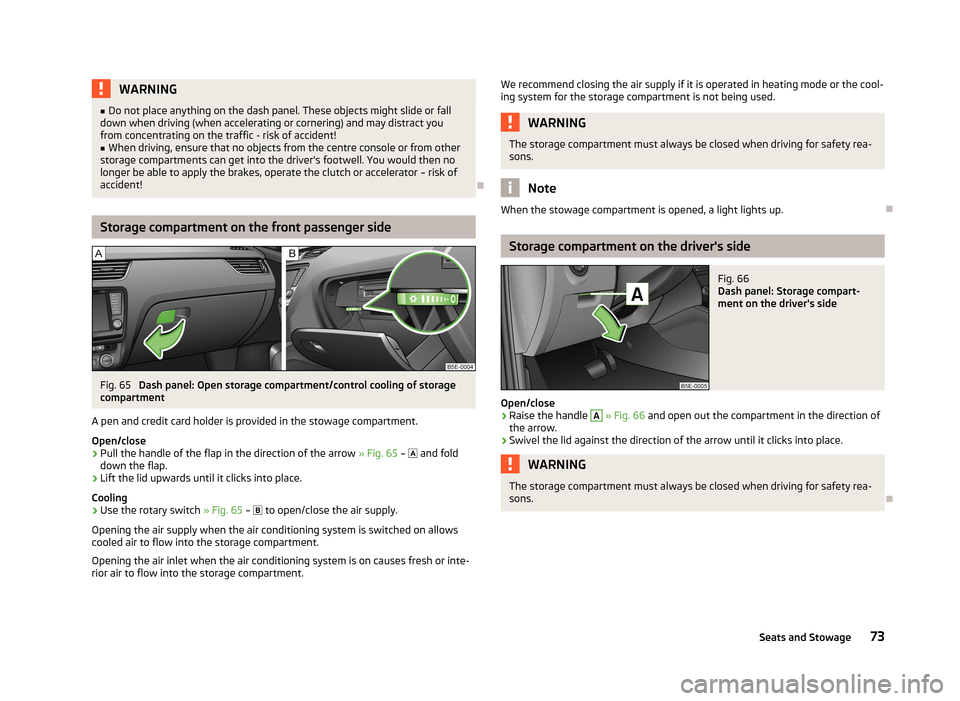
Fig. 65
Dash panel: Open storage compartment/control cooling of storage
compartment
A pen and credit card holder is provided in the stowage compartment. Open/close
›
Pull the handle of the flap in the direction of the arrow » Fig. 65 –
and fold
down the flap.
›
Lift the lid upwards until it clicks into place.
Cooling
›
Use the rotary switch » Fig. 65 –
to open/close the air supply.
Opening the air supply when the air conditioning system is switched on allows
cooled air to flow into the storage compartment.
Opening the air inlet when the air conditioning system is on causes fresh or inte-rior air to flow into the storage compartment.
We recommend closing the air supply if it is operated in heating mode or the cool-ing system for the storage compartment is not being used.WARNINGThe storage compartment must always be closed when driving for safety rea-
sons.
Note
When the stowage compartment is opened, a light lights up.
Storage compartment on the driver's side
Fig. 66
Dash panel: Storage compart-
ment on the driver's side
Open/close
›
Raise the handle
A
» Fig. 66 and open out the compartment in the direction of
the arrow.
›
Swivel the lid against the direction of the arrow until it clicks into place.
WARNINGThe storage compartment must always be closed when driving for safety rea-
sons.
73Seats and Stowage
Page 99 of 222
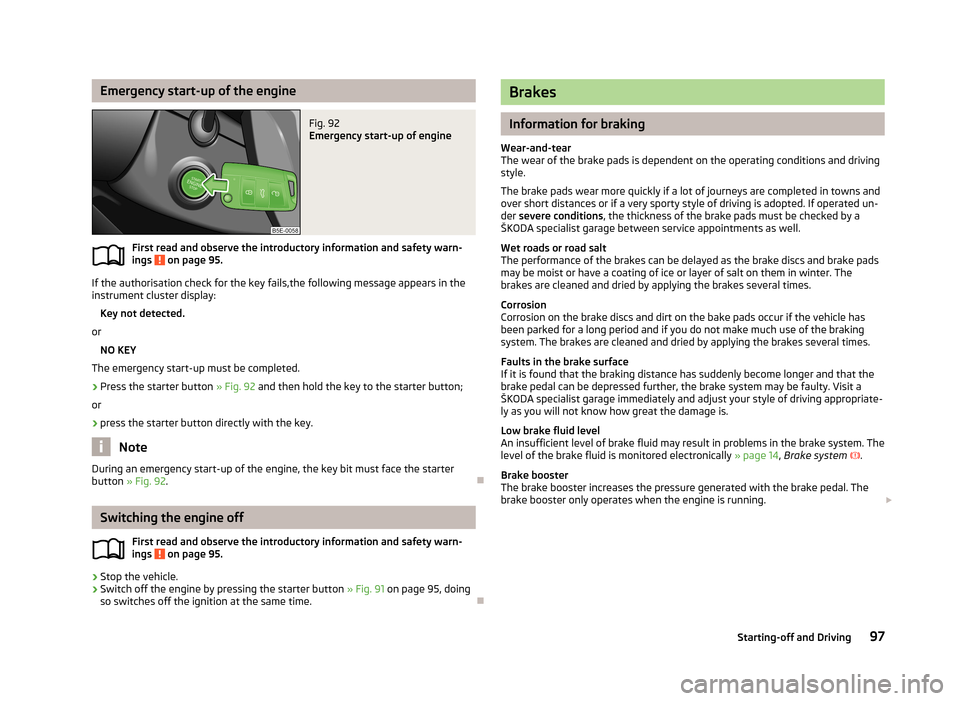
Emergency start-up of the engineFig. 92
Emergency start-up of engine
First read and observe the introductory information and safety warn-ings on page 95.
If the authorisation check for the key fails,the following message appears in the
instrument cluster display:
Key not detected.
or
NO KEY
The emergency start-up must be completed.
›
Press the starter button » Fig. 92 and then hold the key to the starter button;
or
›
press the starter button directly with the key.
Note
During an emergency start-up of the engine, the key bit must face the starter
button » Fig. 92 .
Switching the engine off
First read and observe the introductory information and safety warn-ings
on page 95.
›
Stop the vehicle.
›
Switch off the engine by pressing the starter button » Fig. 91 on page 95, doing
so switches off the ignition at the same time.
Brakes
Information for braking
Wear-and-tear
The wear of the brake pads is dependent on the operating conditions and driving
style.
The brake pads wear more quickly if a lot of journeys are completed in towns and
over short distances or if a very sporty style of driving is adopted. If operated un-
der severe conditions , the thickness of the brake pads must be checked by a
ŠKODA specialist garage between service appointments as well.
Wet roads or road salt
The performance of the brakes can be delayed as the brake discs and brake pads may be moist or have a coating of ice or layer of salt on them in winter. The
brakes are cleaned and dried by applying the brakes several times.
Corrosion
Corrosion on the brake discs and dirt on the bake pads occur if the vehicle has
been parked for a long period and if you do not make much use of the braking
system. The brakes are cleaned and dried by applying the brakes several times.
Faults in the brake surface
If it is found that the braking distance has suddenly become longer and that the brake pedal can be depressed further, the brake system may be faulty. Visit a
ŠKODA specialist garage immediately and adjust your style of driving appropriate-
ly as you will not know how great the damage is.
Low brake fluid level
An insufficient level of brake fluid may result in problems in the brake system. The
level of the brake fluid is monitored electronically » page 14, Brake system
.
Brake booster
The brake booster increases the pressure generated with the brake pedal. The
brake booster only operates when the engine is running.
97Starting-off and Driving
Page 100 of 222
WARNING■Greater physical effort for braking is required when the engine is switched
off – risk of accident!■
During the braking procedure on a vehicle with manual transmission, when
the vehicle is in gear and at low revs, press the clutch pedal. If you fail to do
so, the functionality of the brake booster can be impaired – risk of accident!
■
If a front spoiler, full wheel trim, etc. is mounted retrospectively, it must be
ensured that the air supply to the front wheel brakes is not reduced. The front
brakes may overheat which can have a negative impact on the functioning of
the braking system - risk of accident!
CAUTION
■ Observe the recommendations on the new brake pads » page 100.■Never let the brakes slip with light pressure on the pedal if braking is not neces-
sary. This causes the brakes to overheat and can also result in a longer braking distance and excessive wear.
Note
■ If the brakes are applied in full and the control unit for the braking system con-
siders the situation to be dangerous for the following traffic, the brake light
flashes automatically. After the speed was reduced below around 10 km/h or the vehicle was stopped, the brake light stops flashing and the hazard warning light
system switches on. The hazard warning light system is switched off automatical-
ly after accelerating or driving off again.■
Before negotiating a steep downhill section, reduce the speed, shift down into
the next lower gear (manual gearbox) or select a lower drive position (automatic
gearbox). As a result, the braking effect of the engine will be used, reducing the
load on the brakes. Any additional braking should be completed intermittently, not continuously.
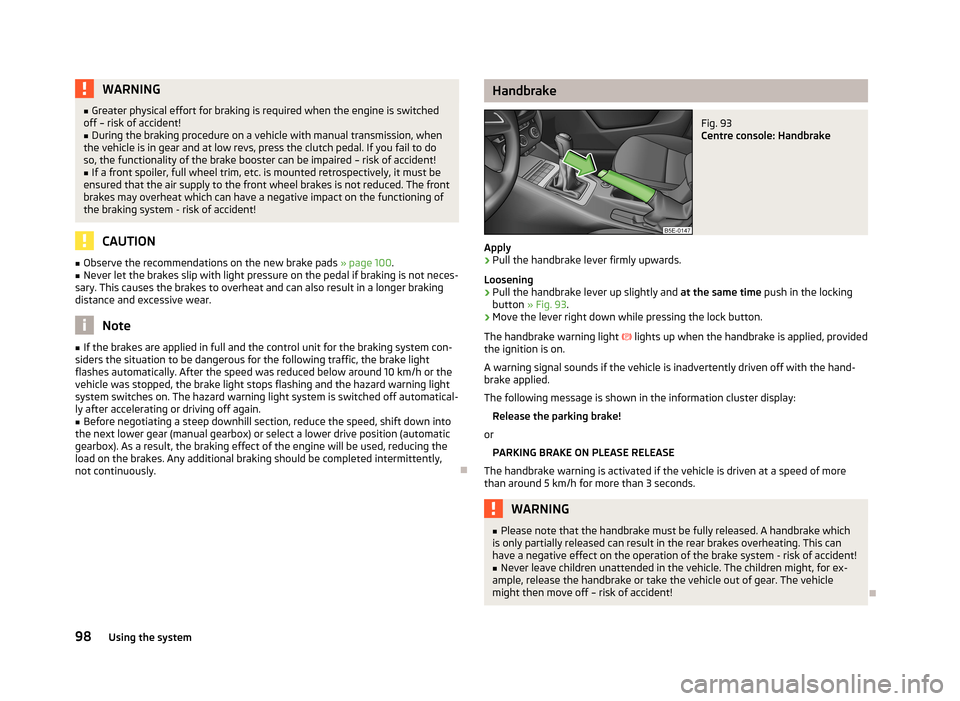
HandbrakeFig. 93
Centre console: Handbrake
Apply
›
Pull the handbrake lever firmly upwards.
Loosening
›
Pull the handbrake lever up slightly and at the same time push in the locking
button » Fig. 93 .
›
Move the lever right down while pressing the lock button.
The handbrake warning light
lights up when the handbrake is applied, provided
the ignition is on.
A warning signal sounds if the vehicle is inadvertently driven off with the hand-
brake applied.
The following message is shown in the information cluster display:
Release the parking brake!
or
PARKING BRAKE ON PLEASE RELEASE
The handbrake warning is activated if the vehicle is driven at a speed of more than around 5 km/h for more than 3 seconds.
WARNING■ Please note that the handbrake must be fully released. A handbrake which
is only partially released can result in the rear brakes overheating. This can
have a negative effect on the operation of the brake system - risk of accident!■
Never leave children unattended in the vehicle. The children might, for ex-
ample, release the handbrake or take the vehicle out of gear. The vehicle
might then move off – risk of accident!
98Using the system
Page 103 of 222
WARNING■In view of the high temperatures which can be produced in the catalytic con-
verter, the vehicle should be parked in such a way that the catalytic converter
cannot come into contact with easily flammable materials under the vehicle –
risk of fire!■
Never use additional underbody protection or anti-corrosion agents for ex-
haust pipes, catalytic converters or heat shields – risk of fire!
CAUTION
■ Never drive until the fuel tank is completely empty! The irregular supply of fuel
can cause misfiring, which can result in considerable damage to parts of the en-
gine and exhaust system.■
Just filling the tank with leaded petrol once will damage the exhaust system!
Economical and environmentally friendly driving
Introductory information
The technical requirements for low fuel usage and economic efficiency of the ve- hicle have already been built into the vehicle at the works. ŠKODA places a partic-
ular emphasis on minimising negative effects on the environment.
It is necessary to take note of the guidelines given in this chapter in order to
make best use of these characteristics and to maintain their effectiveness.
Your fuel consumption, any pollution of the environmental and the wear-and-tear
to the engine, brakes and tyres, depend essentially on three factors:
› your personal style of driving;
› the conditions under which your vehicle is operated;
› technical aspects.
The fuel economy by can be improved by 10 -15 % by always looking ahead and
driving in an economical way.
Fuel consumption is also be influenced by external factors which are beyond the
driver's control. Consumption increases during the winter or under difficult condi-
tions, on poor roads, etc.
Fuel consumption can vary considerably from the manufacturer's data, as a result
of outside temperatures, the weather and driving style.
The optimal engine speed should be obtained when accelerating, in order to
avoid a high fuel consumption and resonance of the vehicle.
Looking ahead when driving
A vehicle's highest fuel consumption occurs when accelerating, therefore unnec-
essary accelerating and braking should be avoided. If looking ahead when driving, less braking and consequently less accelerating are required.
If possible, let your vehicle coast to a stop, or use the engine brake, if you can see that the next set of traffic lights is on red, for example.
Shifting to save energy
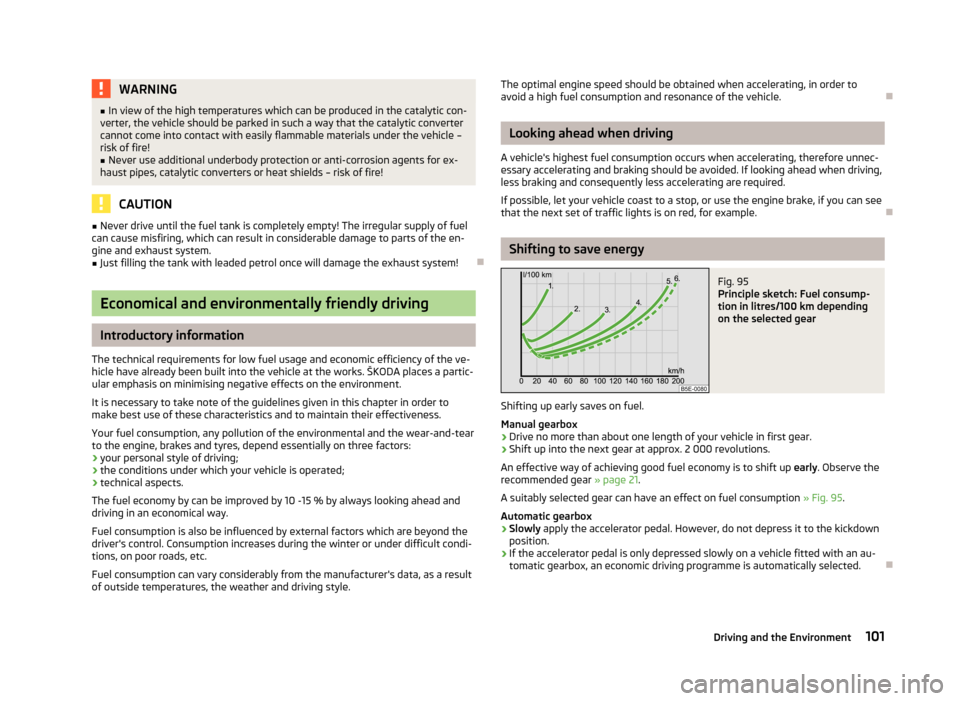
Fig. 95
Principle sketch: Fuel consump-
tion in litres/100 km depending
on the selected gear
Shifting up early saves on fuel.
Manual gearbox › Drive no more than about one length of your vehicle in first gear.
› Shift up into the next gear at approx. 2 000 revolutions.
An effective way of achieving good fuel economy is to shift up early. Observe the
recommended gear » page 21.
A suitably selected gear can have an effect on fuel consumption » Fig. 95.
Automatic gearbox › Slowly
apply the accelerator pedal. However, do not depress it to the kickdown
position.
› If the accelerator pedal is only depressed slowly on a vehicle fitted with an au-
tomatic gearbox, an economic driving programme is automatically selected.
101Driving and the Environment
Page 107 of 222

The following must be observed to avoid damage to the vehicle when driving
through bodies of water (e.g. flooded roads):
› Determine the depth of the water when driving through bodies of water. The
water level must fit around the strut on the side member as a maxi-mum » Fig. 98 ;
› Do not drive any faster than at a walking speed. At a higher speed, a water
wave can form in front of the vehicle which can cause water to penetrate into the air induction system of the engine or into other parts of the vehicle;
› Never stop in the water, do not reverse and do not switch the engine off;
› Deactivate the START-STOP system before driving through water
» page 121.WARNING■
Driving through water, mud, sludge etc. can reduce the braking power and
extend the braking distance – risk of accident!■
Avoid abrupt and sudden braking immediately after water crossings.
■
After driving through bodies of water, the brakes must be cleaned and dried
as soon as possible by intermittent braking. Only apply the brakes for the pur-
pose of drying and cleaning the brake discs if the traffic conditions permit this.
Do not place any other road users in jeopardy.
CAUTION
■ When driving through bodies of water, some parts of the vehicle such as the
engine, gearbox, chassis or electrics can be severely damaged.■
Oncoming vehicles can generate water waves which can exceed the permissible
water level for your vehicle.
■
Potholes, mud or rocks can be hidden under the water making it difficult or im-
possible to drive through the body of water.
■
Do not drive through salt water. The salt can lead to corrosion. Any vehicle parts
that have come into contact with salt water must be rinsed immediately with
fresh water.
Note
After driving through a body of water, we recommend that the vehicle is checked
by a ŠKODA specialist garage.
105Driving and the Environment
Page 112 of 222
Driving with a trailerFig. 104
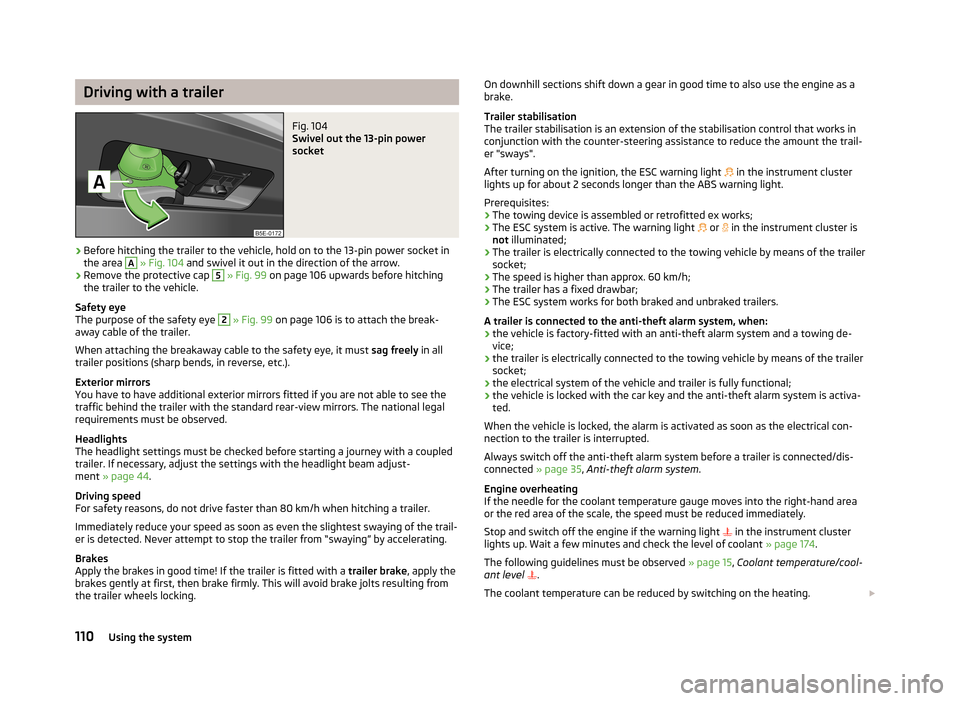
Swivel out the 13-pin power
socket
›
Before hitching the trailer to the vehicle, hold on to the 13-pin power socket in the area
A
» Fig. 104 and swivel it out in the direction of the arrow.
›
Remove the protective cap
5
» Fig. 99 on page 106 upwards before hitching
the trailer to the vehicle.
Safety eye
The purpose of the safety eye
2
» Fig. 99 on page 106 is to attach the break-
away cable of the trailer.
When attaching the breakaway cable to the safety eye, it must sag freely in all
trailer positions (sharp bends, in reverse, etc.).
Exterior mirrors
You have to have additional exterior mirrors fitted if you are not able to see the
traffic behind the trailer with the standard rear-view mirrors. The national legal
requirements must be observed.
Headlights
The headlight settings must be checked before starting a journey with a coupled
trailer. If necessary, adjust the settings with the headlight beam adjust-
ment » page 44 .
Driving speed
For safety reasons, do not drive faster than 80 km/h when hitching a trailer.
Immediately reduce your speed as soon as even the slightest swaying of the trail- er is detected. Never attempt to stop the trailer from “swaying” by accelerating.
Brakes
Apply the brakes in good time! If the trailer is fitted with a trailer brake, apply the
brakes gently at first, then brake firmly. This will avoid brake jolts resulting from
the trailer wheels locking.
On downhill sections shift down a gear in good time to also use the engine as a
brake.
Trailer stabilisation
The trailer stabilisation is an extension of the stabilisation control that works in
conjunction with the counter-steering assistance to reduce the amount the trail-
er "sways".
After turning on the ignition, the ESC warning light in the instrument cluster
lights up for about 2 seconds longer than the ABS warning light.
Prerequisites: › The towing device is assembled or retrofitted ex works;
› The ESC system is active. The warning light
or in the instrument cluster is
not illuminated;
› The trailer is electrically connected to the towing vehicle by means of the trailer
socket;
› The speed is higher than approx. 60 km/h;
› The trailer has a fixed drawbar;
› The ESC system works for both braked and unbraked trailers.
A trailer is connected to the anti-theft alarm system, when: › the vehicle is factory-fitted with an anti-theft alarm system and a towing de-
vice;
› the trailer is electrically connected to the towing vehicle by means of the trailer
socket;
› the electrical system of the vehicle and trailer is fully functional;
› the vehicle is locked with the car key and the anti-theft alarm system is activa-
ted.
When the vehicle is locked, the alarm is activated as soon as the electrical con-
nection to the trailer is interrupted.
Always switch off the anti-theft alarm system before a trailer is connected/dis- connected » page 35, Anti-theft alarm system .
Engine overheating
If the needle for the coolant temperature gauge moves into the right-hand area or the red area of the scale, the speed must be reduced immediately.
Stop and switch off the engine if the warning light
in the instrument cluster
lights up. Wait a few minutes and check the level of coolant » page 174.
The following guidelines must be observed » page 15, Coolant temperature/cool-
ant level
.
The coolant temperature can be reduced by switching on the heating. 110Using the system
Page 114 of 222
Assist systems
Brake assist systems
Introduction
This chapter contains information on the following subjects:
Stabilisation Control (ESC)
112
Antilock brake system (ABS)
113
Traction control system (TCS)
113
Electronic differential lock (EDL)
114WARNING■ A lack of fuel can cause irregular engine running or cause the engine to shut
down. The brake assist systems would then be without function – risk of acci-
dent!■
Adjust the speed and driving style to the current visibility, weather, road and
traffic conditions. The increased safety offered by the brake assist systems must not tempt you to take greater risks than otherwise – risk of an accident!
■
In the event of an ABS fault, visit a ŠKODA specialist garage immediately.
Adjust your style of driving according to the damage to the ABS as you will not know how great the damage is and the limitation it is placing on the braking
efficiency.
CAUTION
■ All four wheels must be fitted with the same tyres approved by the manufactur-
er to ensure the brake assist systems operate correctly.■
Changes to the vehicle (e.g. to the engine, brakes, chassis) can influence the
functionality of the brake assist systems » page 165.
Note
If a fault occurs in the ABS system, the ESC, ASR and EDL also do not work. An
ABS fault is indicated with the warning light » page 17 .
Stabilisation Control (ESC)Fig. 105
ESC system: TCS button
First read and observe the introductory information and safety warn-
ings on page 112.
The ESC system helps to maintain control of the vehicle in situations where it is
being operated at its dynamic limits, such as a sudden change to the direction of
travel. The risk of skidding is reduced and your car thus offers greater driving sta-
bility depending on the conditions of the road surface.
The ESC system is automatically activated each time the ignition is switched on.The direction which the driver wishes to take is determined based on the steering angle and the speed of the vehicle and is constantly compared with the actualbehaviour of the vehicle. If differences exist, such as the car beginning to skid,
the ESC system will automatically brake the appropriate wheel.
During an intervention of the system, the warning light
flashes in the instru-
ment cluster.
The following systems are integrated into the electronic stabilisation control
(ESC) :
› Antilock brake system (ABS),
› Traction control (TCS),
› Electronic differential lock (EDL)
› Active driver-steering recommendation (DSR),
› Brake assistant (HBA)
› Hill hold control (HHC);
› “Multicollision brake”;
› Trailer stabilisation (TSA)
» page 110, Driving with a trailer .
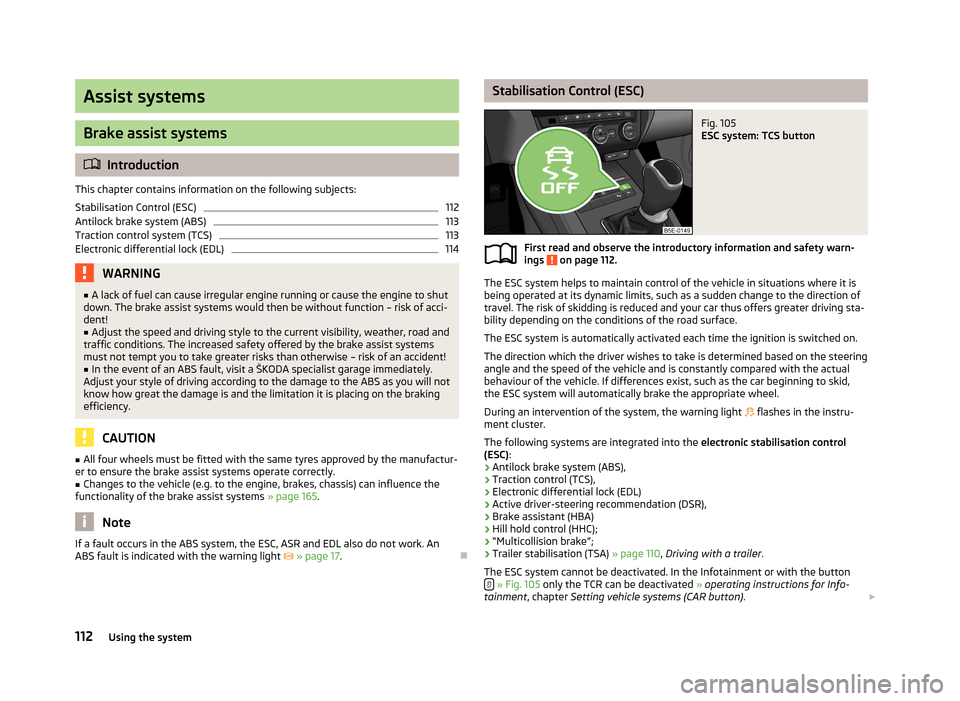
The ESC system cannot be deactivated. In the Infotainment or with the button
» Fig. 105 only the TCR can be deactivated » operating instructions for Info-
tainment , chapter Setting vehicle systems (CAR button) .
112Using the system
Page 115 of 222
The warning light lights up in the instrument cluster when the TCR is deactiva-
ted.
Active driver-steering recommendation (DSR) The DSR indicates to the driver in critical situations a steering recommendation in
order to stabilise the vehicle. The DSR is activated, for example, on the right and
left vehicle side when braking sharply on different road surfaces.
Hydraulic brake assist (HBA)
The HBA is activated by the very quick operation of the brake pedal. HBA increa- ses the braking effect and helps to shorten the braking distance. To achieve the
shortest possible braking distance, the brake pedal must be applied firmly until the vehicle has come to a complete standstill.
The ABS is activated faster and more effectively with the intervention of the HBA. The HBA is automatically switched off when the brake pedal is released.
Hill hold control (HHC)
The HHC makes it easier to start off on steep hills. The system holds the brake
pressure produced by the activation of the brake pedal for approx. 2 seconds af-
ter the brake pedal is released. The driver can therefore move his foot from the
brake pedal to the accelerator pedal and start off on the slope, without having to
actuate the handbrake.
The brake pressure drops gradually the more you operate the accelerator pedal. If the vehicle does not start off within 2 seconds, it starts to roll back.
The HHC is active as of a 5 % slope, if the driver door is closed. HHC is always ac- tive on slopes when in forward or reverse start off. When driving downhill, it is in-
active.
“Multicollision brake”
The multifunction brake deploys automatic braking after a collision in order to re-
duce the risk of further collisions. Automatic braking can only be deployed at
speeds of over 10 km/h in the event of a frontal or side impact.
The vehicle is slowed down automatically by the ESC system as long as the brakes, the ESC and the requisite electrical system remains operational post-im-
pact.
Automatic braking is not applied if the driver presses the accelerator during the
accident.
Antilock brake system (ABS)
First read and observe the introductory information and safety warn-
ings
on page 112.
ABS prevents the wheels locking when braking. Thus helping the driver to main-
tain control of the vehicle.
The intervention of the ABS is noticeable from the pulsating movements of the
brake pedal which is accompanied by noises.
When the ABS system is active, do not brake periodically or reduce the pressure
on the brake pedal.
Traction control system (TCS)
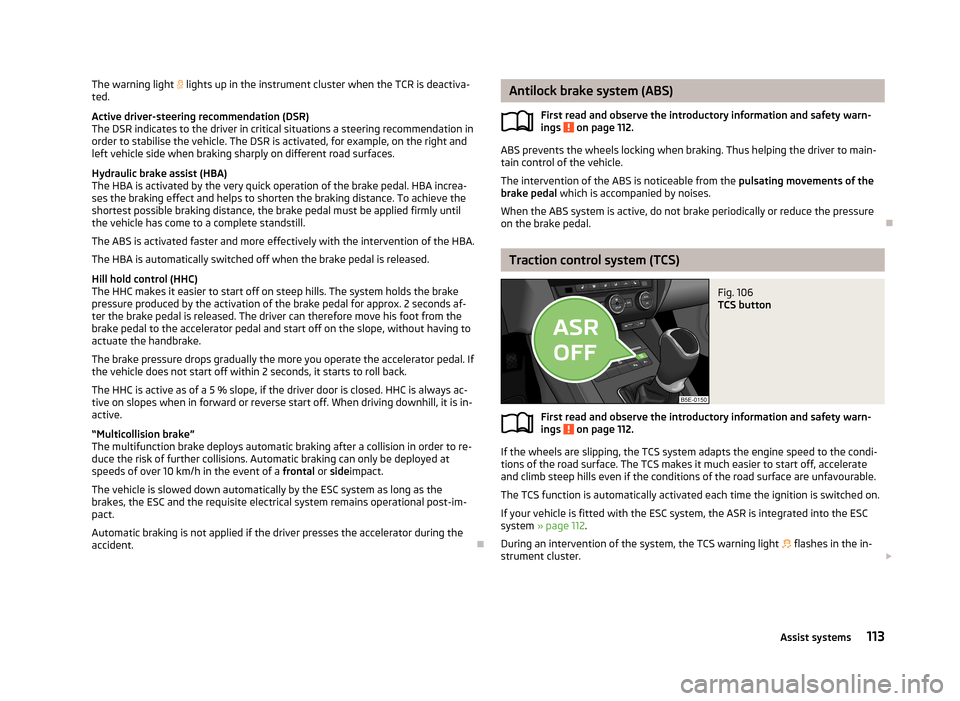
Fig. 106
TCS button
First read and observe the introductory information and safety warn- ings on page 112.
If the wheels are slipping, the TCS system adapts the engine speed to the condi-
tions of the road surface. The TCS makes it much easier to start off, accelerate
and climb steep hills even if the conditions of the road surface are unfavourable.
The TCS function is automatically activated each time the ignition is switched on.
If your vehicle is fitted with the ESC system, the ASR is integrated into the ESC
system » page 112 .
During an intervention of the system, the TCS warning light flashes in the in-
strument cluster.
113Assist systems
Page 116 of 222
The TCS should normally always be switched on. It may be advisable to switch off
the system only in exceptional circumstances, such as:
› when driving with snow chains;
› when driving in deep snow or on a very loose surface;
› when it is necessary to “rock a vehicle free” when it has got stuck.
The TCR can be deactivated in the Infotainment or with the button
» Fig. 106 » operating instructions for Infotainment , chapter Setting vehicle
systems (CAR button) .
The warning light lights up in the instrument cluster when the TCR is deactiva-
ted.
Ensure the TCS is activated again afterwards.
Electronic differential lock (EDL)
First read and observe the introductory information and safety warn-ings
on page 112.
If one of the wheels starts to spin, the EDL system brakes the spinning wheel and transfers the driving force to the other wheels. This ensures the stability of the
vehicle and a quick journey.
The EDL switches off automatically if severe stresses exist in order to avoid ex- cessive heat generation in the disc brake on the wheel which is being braked. The
vehicle can continue to be driven and has the same characteristics as a vehicle
not fitted with EDL. The EDL switches on again automatically as soon as the
brake has cooled down.
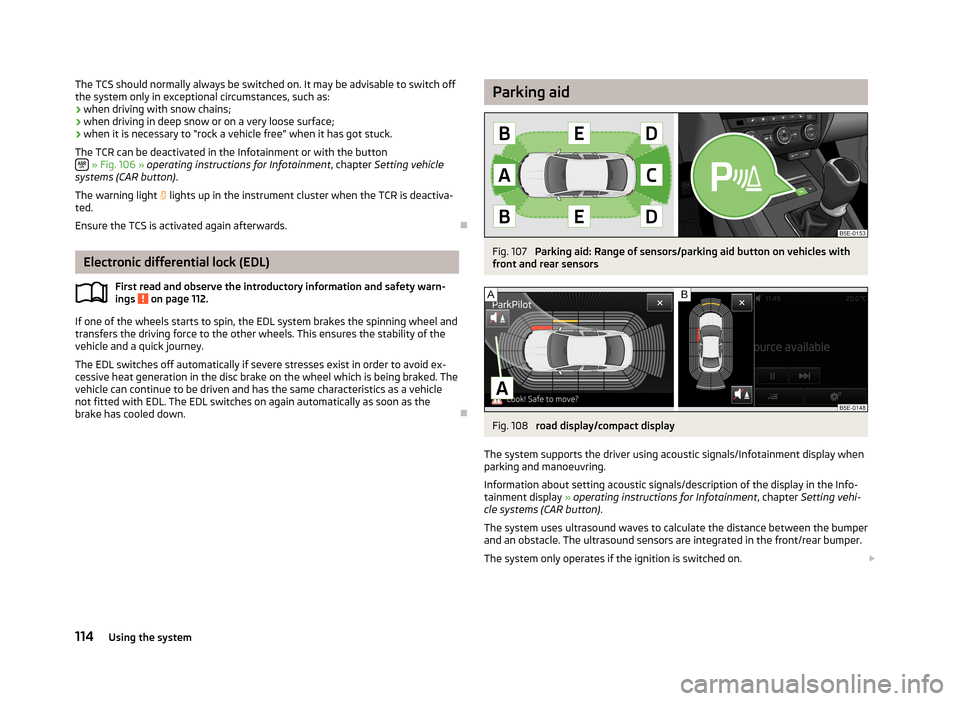
Parking aidFig. 107
Parking aid: Range of sensors/parking aid button on vehicles with
front and rear sensors
Fig. 108
road display/compact display
The system supports the driver using acoustic signals/Infotainment display when parking and manoeuvring.
Information about setting acoustic signals/description of the display in the Info-
tainment display » operating instructions for Infotainment , chapter Setting vehi-
cle systems (CAR button) .
The system uses ultrasound waves to calculate the distance between the bumper
and an obstacle. The ultrasound sensors are integrated in the front/rear bumper.
The system only operates if the ignition is switched on.
114Using the system