key SKODA OCTAVIA 2012 3.G / (5E) Service Manual
[x] Cancel search | Manufacturer: SKODA, Model Year: 2012, Model line: OCTAVIA, Model: SKODA OCTAVIA 2012 3.G / (5E)Pages: 222, PDF Size: 13.52 MB
Page 150 of 222
WARNING (Continued)■Never transport children on the front seat of a vehicle without using a prop-
er restraint system. If airbags are deployed in the event of an accident, the
child might suffer severe or even fatal injuries!■
It is essential to always switch off the front passenger airbag when attach-
ing a child safety seat to the front passenger seat where the child is seated
with its back facing in direction of travel » page 151, Deactivating airbags . If
this is not done, there is a risk of the child suffering severe or even fatal inju- ries if the front passenger airbag is deployed. When transporting a child on
the front passenger seat, pay attention to any relevant national regulations
regarding the use of child safety seats.
■
The steering wheel and the surface of the airbag module in the dash panel
on the passenger side must not have stickers attached, be covered or modi-
fied in any other way. These parts should only be cleaned with a cloth that is
dry or has been moistened with water. No objects such as cup holders, mobile
phone mounts, etc. must be attached to the covers of the airbag modules or
be located within their immediate vicinity.
■
Never place objects on the surface of the front passenger airbag module in
the dash panel.
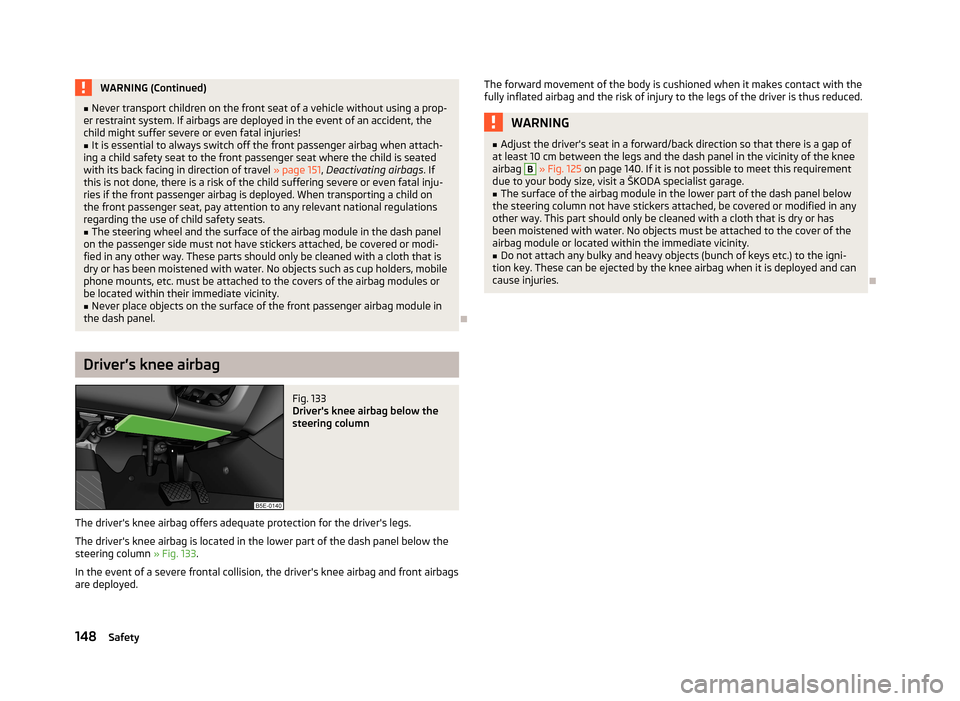
Driver’s knee airbag
Fig. 133
Driver's knee airbag below the
steering column
The driver's knee airbag offers adequate protection for the driver's legs.
The driver's knee airbag is located in the lower part of the dash panel below the steering column » Fig. 133.
In the event of a severe frontal collision, the driver's knee airbag and front airbags are deployed.
The forward movement of the body is cushioned when it makes contact with the
fully inflated airbag and the risk of injury to the legs of the driver is thus reduced.WARNING■ Adjust the driver's seat in a forward/back direction so that there is a gap of
at least 10 cm between the legs and the dash panel in the vicinity of the knee
airbag B
» Fig. 125 on page 140. If it is not possible to meet this requirement
due to your body size, visit a ŠKODA specialist garage.
■
The surface of the airbag module in the lower part of the dash panel below
the steering column not have stickers attached, be covered or modified in any
other way. This part should only be cleaned with a cloth that is dry or has
been moistened with water. No objects must be attached to the cover of the
airbag module or located within the immediate vicinity.
■
Do not attach any bulky and heavy objects (bunch of keys etc.) to the igni-
tion key. These can be ejected by the knee airbag when it is deployed and can
cause injuries.
148Safety
Page 153 of 222

Deactivating airbags
Deactivating airbags
Deactivation of airbags is envisaged only for particular instances, such as if:
› using a child seat on the front passenger seat, in which the child has its back to
the vehicle's direction of travel (in some countries this must be in the direction
of travel due to different legal regulations applying) » page 154, Transporting
children safely ;
› not being able to maintain a distance of at least 25 cm between the middle of
the steering wheel and chest, despite the driver's seat being correctly adjusted;
› special attachments are required in the area of the steering wheel because of a
physical disability;
› other seats have been installed (e.g. orthopaedic seats without side airbags).
The front passenger airbag can be switched off with the key-operated
switch » page 151 , Deactivating the front passenger airbag .
We recommend that you ask a ŠKODA Partner to switch off any other airbags.
Monitoring the airbag system
The functionality of the airbag system is monitored electronically even if one of
the airbags is switched off.
If the airbag was switched off using diagnostic equipment:
› The warning light
lights up for approx. 4 seconds after switching on the igni-
tion and then flashes again for approx. 12 seconds.
The following applies if the front passenger airbag has been switched off using the key switch in the storage compartment:
› The indicator light
comes on for around 4 seconds after the ignition has been
switched on;
› The warning light
3
» Fig. 137 on page 151 comes on after the ignition has
been switched on.
Note
■ The national regulations for switching off airbags must be observed.■A ŠKODA Partner will be able to inform you which airbags in your vehicle can/
must be deactivated.
Deactivating the front passenger airbagFig. 137
Key-operated switch for the front passenger airbag/warning light
for front seat passenger airbag deactivation
Only the front passenger airbag is deactivated with the key switch.
Switching off
›
Switch off the ignition.
›
Open the storage box on the front passenger's side.
›
Use the key to turn the slot of the key switch into position
2
» Fig. 137 OFF .
›
Check whether the airbag indicator light
3
in the display
in the middle of the dash panel remains lit when the ignition is turned on.
Switching on
›
Switch off the ignition.
›
Use the key to turn the slot of the key switch into position
1
» Fig. 137 ON .
›
Close the storage box on the front passenger's side.
›
Check whether the airbag indicator light
3
in the display
in the middle of the dash panel remains lit when the ignition is turned on.
The warning light
goes out 65 seconds after the key switch status has changed
or after the ignition is switched on.
151Airbag system
Page 169 of 222
Inspecting and replenishing
Fuel
Introduction
This chapter contains information on the following subjects:
Refuelling
167
Unleaded petrol
168
Diesel fuel
169
The correct grades of fuel for your vehicle are stated on a sticker affixed to the
inside of the fuel filler flap » Fig. 144 on page 167 -
.
WARNINGThe national legal requirements must be observed if carrying a spare canister
in the vehicle. We do not recommend carrying any fuel canisters in your vehi-
cle for safety reasons. in the event of an accident this can get damaged and fuel may escape - risk of fire!
CAUTION
■ Never drive until the fuel tank is completely empty! The irregular supply of fuel
can cause misfiring, which can result in considerable damage to parts of the en-
gine and exhaust system.■
Immediately remove any fuel that has spilled onto the vehicle's paintwork – risk
of paint damage!
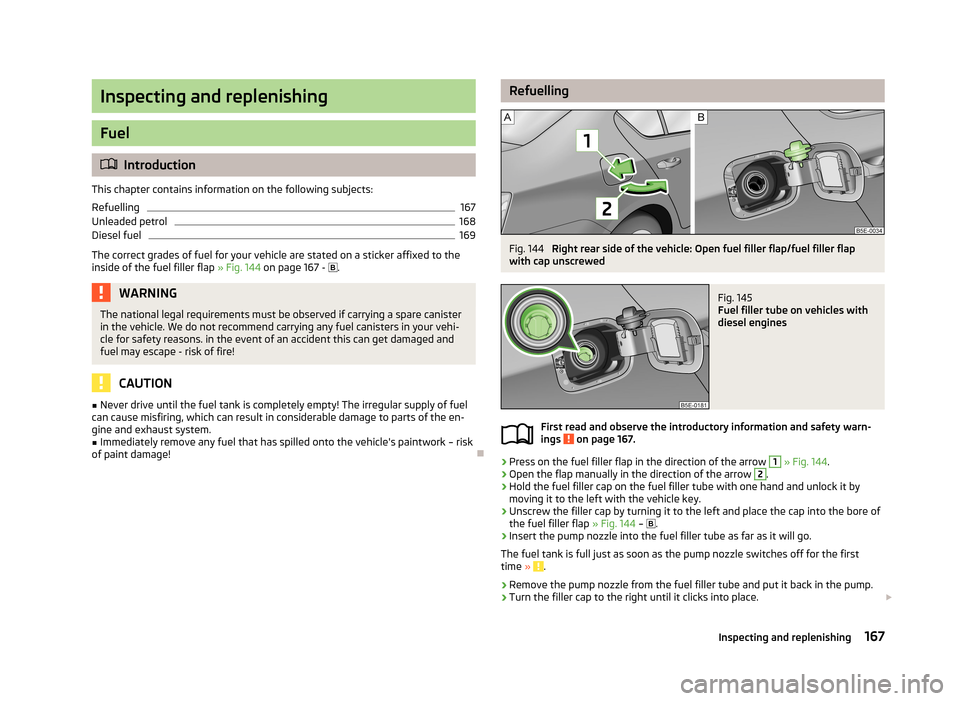
RefuellingFig. 144
Right rear side of the vehicle: Open fuel filler flap/fuel filler flap
with cap unscrewed
Fig. 145
Fuel filler tube on vehicles with
diesel engines
First read and observe the introductory information and safety warn-
ings on page 167.
›
Press on the fuel filler flap in the direction of the arrow
1
» Fig. 144 .
›
Open the flap manually in the direction of the arrow
2
.
›
Hold the fuel filler cap on the fuel filler tube with one hand and unlock it by
moving it to the left with the vehicle key.
›
Unscrew the filler cap by turning it to the left and place the cap into the bore of
the fuel filler flap » Fig. 144 –
.
›
Insert the pump nozzle into the fuel filler tube as far as it will go.
The fuel tank is full just as soon as the pump nozzle switches off for the first time »
.
›
Remove the pump nozzle from the fuel filler tube and put it back in the pump.
›
Turn the filler cap to the right until it clicks into place.
167Inspecting and replenishing
Page 170 of 222
›Hold the fuel filler cap on the fuel filler tube with one hand and lock it by turn-
ing the vehicle key to the right and remove the key.›
Close the fuel filler flap until it clicks into place.
›
Check that the fuel filler flap is closed properly.
Incorrect refuelling guard on vehicles with diesel engines The fuel filler tube on vehicles with diesel engines has been fitted with a incor-
rect refuelling guard » Fig. 145. This guard means it is only possible to refuel with
the diesel pump nozzle.
If the diesel pump nozzle does not sit directly in the fuel filler tube, move it to and fro with slight pressure to insert it correctly.
CAUTION
■ The fuel tank is full just as soon as the pump nozzle switches off for the first
time, provided the nozzle has been operated properly. Do not continue filling the fuel tank otherwise the expansion volume is filled up.■
Before refuelling, switch off the auxiliary heating system (auxiliary heating and
ventilation).
■
Be careful when filling diesel fuel from the spare canister - danger of contami-
nating the body.
Note
The fuel tank has a capacity of about 50 litres, containing a reserve of approx.
7 litres .
Unleaded petrol
First read and observe the introductory information and safety warn-
ings
on page 167.
Your vehicle can only be operated with unleaded fuel that complies with the
standard EN 228 (in Germany: standard DIN 51626-1 or E10 for unleaded fuel with
an octane rating of 95 RON and 91 RON or DIN 51626-2 or E5 for unleaded fuel
with the octane rating 95 RON and 98 RON).
Prescribed fuel – unleaded fuel 95/91 RON Use unleaded fuel with the octane rating 95 RON. Unleaded petrol 91 RON can al-
so be used but results in a slight loss in performance.
Prescribed fuel – unleaded petrol min. 95 RONUse unleaded fuel with the octane rating 95 RON.
In case of necessity, you can refuel with petrol with the octane rating 91 RON if
petrol with the octane rating 95 RON is not available.
Even in the event of an emergency, petrol of a lower octane number than 91 RON
must not be used, otherwise the engine can be severely damaged!
Unleaded petrol with higher octane number
Unleaded petrol that has a higher octane number than that required by the en-
gine can be used without limitations.
On vehicles with prescribed unleaded petrol 95/91 RON, the use of petrol with a
higher octane number than 95 RON does not result in a noticeable power in-
crease or a lower fuel consumption.
On vehicles using prescribed unleaded petrol of min. 95 RON, the use of petrol
with a higher octane number than 95 RON can increase the power and reduce
fuel consumption.
Prescribed fuel – unleaded petrol 98/(95) RON
Use unleaded fuel with the octane rating 98 RON. Unleaded petrol 95 RON can
also be used but results in a slight loss in performance.
In case of necessity, you can refuel with petrol with the octane rating 91 RON of
unleaded fuel with octane rating 98 RON or 95 RON is not available.
Even in the event of an emergency, petrol of a lower octane number than 91 RON
must not be used, otherwise the engine can be severely damaged!
Fuel additives
Only use unleaded petrol, which complies with the standard EN 228 (in Germany:
standard DIN 51626-1 or E10 for unleaded fuel with an octane rating of 95 RON and 91 RON or DIN 51626-2 or E5 for unleaded fuel with an octane rating of
95 RON and 98 RON), as these meet all of the requirements for fault-free engine operation. We therefore recommend that no fuel additives are used.
CAUTION
■ All ŠKODA vehicles with petrol engines must only be operated with unleaded
petrol. Just filling the tank with leaded petrol once will damage the exhaust sys-
tem!■
If, in an emergency, the vehicle has to be refuelled with petrol of a lower octane
number than the one prescribed, the journey must only be continued at medium
engine speeds and a low engine load. Driving at high engine revs or a high engine
load can severely damage the engine! Refuel using petrol of the prescribed oc-
tane number as soon as possible.
168General Maintenance
Page 172 of 222
WARNINGWhen working in the engine compartment, injuries, scolding, accident or fire
hazards may arise. For this reason, it is essential to comply with the warning
instructions stated below and with the general applicable rules of safety. The
engine compartment of your car is a hazardous area!■
Before beginning work in the engine compartment, please read the follow-
ing advice. ■ Turn off the engine and withdraw the ignition key.
■ Firmly apply the handbrake.
■ If the vehicle is fitted with a manual gearbox, move the gearshift lever into
Neutral, or if the vehicle is fitted with an automatic gearbox, move the se- lector lever into position P.
■ Allow the engine to cool.
■ Never open the bonnet if you can see steam or coolant flowing out of the
engine compartment – risk of scalding! Wait until the steam or coolant has stopped escaping.
■
While working in the engine compartment, please read the following advice.
■ Keep children clear of the engine compartment.
■ Never touch the radiator fan while the engine is still warm. The fan might
suddenly start running!
■ Do not touch any hot engine parts – risk of burns!
■ The coolant additive and thus all of the coolant is harmful to your health.
■ Avoid contact with the coolant.
■ Coolant vapours are harmful to health.
■ Never open the end cover of the coolant expansion reservoir while the en-
gine is still warm. The cooling system is pressurized!
■ When opening the end cover of the coolant expansion reservoir, cover it
with a cloth to protect your face, hands and arms from hot steam or hot coolant. ■ If any coolant splashes into your eyes, immediately rinse out your eyes
with clear water and contact a doctor as soon as possible.
■ Always safely store the coolant additive in its original container out of the
reach of children – risk of poisoning!
■ If coolant is swallowed - consult a doctor immediately.
■ Do not leave any items such as cloths or tools in the engine compartment.
■ Never spill fluids on the hot engine. Such fluids (e.g. the antifreeze con-
tained in the coolant) may ignite!
WARNING (Continued)■ Whenever working in the engine compartment while the engine is running,
you must pay heed to the following warning instructions. ■Pay particular attention to moving engine parts (e.g. V-ribbed belt, alterna-
tor, radiator fan) and the high-voltage ignition unit - danger to life! ■ Never touch the electric wiring on the ignition system.
■ Avoid short circuits in the electrical system – particularly on the vehicle's
battery. ■ Always make sure that no jewellery, loose clothing or long hair can get
caught in rotating engine parts – hazard! Always remove any jewellery, tie back long hair and wear tight fitting clothing before completing any work.■
The following warning instructions must be observed if work has to be car-
ried out on the fuel or electrical system. ■ Always disconnect the vehicle battery from the electrical system.
■ Do not smoke.
■ Never work near open flames.
■ Always have a functioning fire extinguisher nearby.
■
Read the information and warning instructions on the fluid containers.
■
Keep fluids in their original containers and keep out of reach of children!
■
If you wish to work under the vehicle, you must secure the vehicle from roll-
ing away and support it with suitable supporting blocks: the car jack is not
sufficient for this – risk of injury!
■
The bonnet must always be properly closed when driving. This is why after
closing the bonnet, the lock must always be checked to ensure it has engaged
properly.
■
If you notice that the lock is not properly engaged while driving, stop the ve-
hicle immediately and close the bonnet – risk of an accident!
CAUTION
■ Always top up using the correct specification of fluids. This may result in major
operating problems and also vehicle damage!■
Never open the bonnet using the locking lever.
For the sake of the environment
In view of the environmentally friendly disposal of fluids, the specials tools and
knowledge required for such work, we recommend that fluids are changed by a
Škoda Partner as part of the inspection service. 170General Maintenance
Page 191 of 222
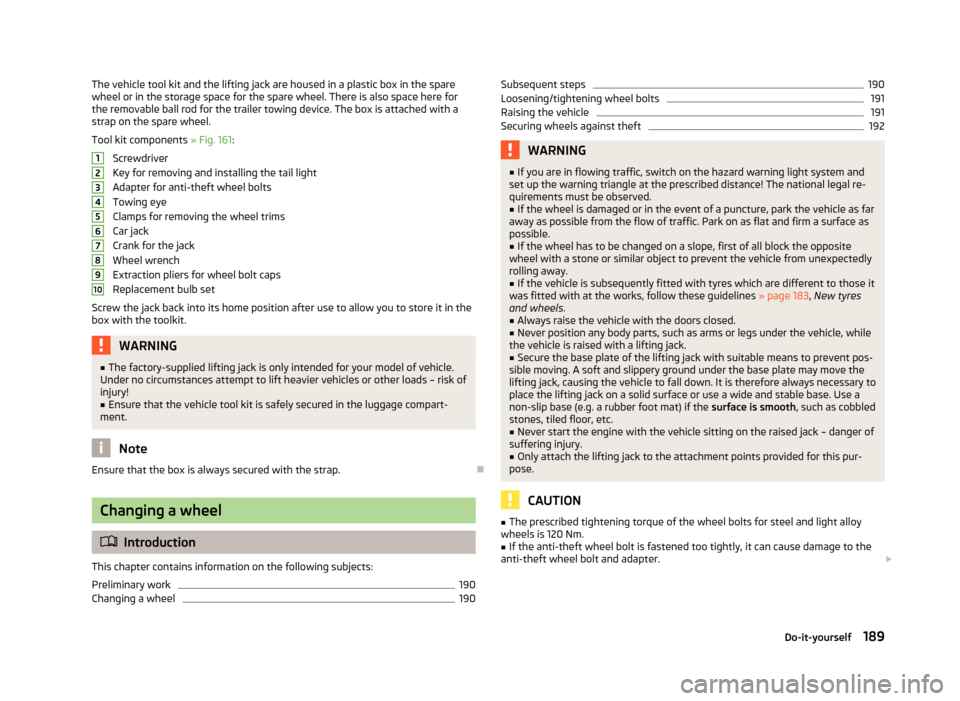
The vehicle tool kit and the lifting jack are housed in a plastic box in the sparewheel or in the storage space for the spare wheel. There is also space here for
the removable ball rod for the trailer towing device. The box is attached with a
strap on the spare wheel.
Tool kit components » Fig. 161:
Screwdriver
Key for removing and installing the tail light
Adapter for anti-theft wheel bolts
Towing eye
Clamps for removing the wheel trims
Car jack
Crank for the jack
Wheel wrench
Extraction pliers for wheel bolt caps
Replacement bulb set
Screw the jack back into its home position after use to allow you to store it in the
box with the toolkit.WARNING■ The factory-supplied lifting jack is only intended for your model of vehicle.
Under no circumstances attempt to lift heavier vehicles or other loads – risk of
injury!■
Ensure that the vehicle tool kit is safely secured in the luggage compart-
ment.
Note
Ensure that the box is always secured with the strap.
Changing a wheel
Introduction
This chapter contains information on the following subjects:
Preliminary work
190
Changing a wheel
19012345678910Subsequent steps190Loosening/tightening wheel bolts191
Raising the vehicle
191
Securing wheels against theft
192WARNING■ If you are in flowing traffic, switch on the hazard warning light system and
set up the warning triangle at the prescribed distance! The national legal re-
quirements must be observed.■
If the wheel is damaged or in the event of a puncture, park the vehicle as far
away as possible from the flow of traffic. Park on as flat and firm a surface as
possible.
■
If the wheel has to be changed on a slope, first of all block the opposite
wheel with a stone or similar object to prevent the vehicle from unexpectedly
rolling away.
■
If the vehicle is subsequently fitted with tyres which are different to those it
was fitted with at the works, follow these guidelines » page 183, New tyres
and wheels .
■
Always raise the vehicle with the doors closed.
■
Never position any body parts, such as arms or legs under the vehicle, while
the vehicle is raised with a lifting jack.
■
Secure the base plate of the lifting jack with suitable means to prevent pos-
sible moving. A soft and slippery ground under the base plate may move the
lifting jack, causing the vehicle to fall down. It is therefore always necessary to
place the lifting jack on a solid surface or use a wide and stable base. Use a
non-slip base (e.g. a rubber foot mat) if the surface is smooth, such as cobbled
stones, tiled floor, etc.
■
Never start the engine with the vehicle sitting on the raised jack – danger of
suffering injury.
■
Only attach the lifting jack to the attachment points provided for this pur-
pose.
CAUTION
■ The prescribed tightening torque of the wheel bolts for steel and light alloy
wheels is 120 Nm.■
If the anti-theft wheel bolt is fastened too tightly, it can cause damage to the
anti-theft wheel bolt and adapter.
189Do-it-yourself
Page 216 of 222
EngineRunning in100
Starting and stopping the engine92
Engine compartment Brake fluid
175
Coolant173
Overview172
Vehicle battery176
Engine oil Capacity
209
Changing173
Checking172
Replenishing173
Specification209
Engine revolutions counter10
Environment101
Environmental compatibility103
Environmentally friendly driving101
ESC Function
112
Warning light17
F
Fatigue detection
27
Fire extinguisher188
First-aid kit188
Footmats99
Force limiter40
Front airbag147
Front seats59
Fuel167
Diesel169
Fuel gauge display10
refer to Fuel167
Refuelling167
Unleaded petrol168
Fuel consumption101
Fuel gauge display
10
FusesAssignment199
Replacing199
G
Gear Recommended gear
21
General view Cockpit
7
Glow plug system Warning light
18
H
Handbrake
98
Head airbag150
Headlight assist47
Headlight cleaning system Headlight cleaning system
55
Headlights Driving abroad
104
Headlight cleaning system55
Head restraint63
Heating Defrosting windows
83
Exterior mirror58
operating83
Recirculated air mode84
Seats62
Windscreen and rear window52
Hill hold control (HHC)112
Horn7
Hydraulic Brake Assist (HBA)112
I
Ignition see Ignition lock
94
Ignition lock94
Immobiliser93
Inertia reel145
Information display25
Instrument cluster9
see Instrument cluster9
Interior monitor36
ISOFIX157
J
Jacking points Raise vehicle
191
Jump-starting195
K
KESSY see Kessy system
33
Starting95
KESSY system Starting
95
Unlocking the vehicle33
Keys Lock the vehicle
31
Unlock the vehicle31
Knee airbag148
L
Lane Assist
126
Lever Main beam
45
Turn signal light45
Windscreen wipers54
Light Adaptive headlights (AHL)
46
Automatic driving lamp control45
Cockpit51
COMING HOME/LEAVING HOME function49
Daylight driving light44
Fog lights48
Fog lights with the function CORNER48
214Index
Page 217 of 222
Hazard warning light system49
Headlight beam adjustment44
Headlight flasher45
Main beam45
parking light45
Parking light44
Rear fog light48
Replacing bulbs202
Tourist light46
Turn signal light45
Lights Low beam
44
switching on and off44
Warning lights12
Loads207
Locking Remote control
32
Locking and unlocking from the inside32
Lock the vehicle Keys
31
Luggage compartment Emergency unlocking
38
Fixing nets66
Folding double hooks66
Unlocking the luggage compartment lid38
M
Mirror Exterior mirror
58
Vanity53
Mobile phone134
Multicollision brake112
Multifunction display Functions
22
Memory22
Select data22
Multimedia135
AUX137
MEDIA IN137
USB137
N
Nets
66
O
Oil refer to Engine oil
172
Onboard computer see Multifunction display
22
Operation in winter De-icing windows
162
Diesel fuel169
Vehicle battery179
Outside temperature21
Overview Engine compartment
172
Warning lights12
P
Paint see Paint damage
161
Paint damage161
Parking automatic brake assist
116
Manoeuvring out of a parallel parking space116
Park Assist116
Parking aid114
Parking ticket holder80
Passive Safety138
Pedals99
Petrol refer to Fuel
168
Polishing the paintwork refer to Taking care of your vehicle
161
Power sockets 12 V
71
230 V71
Power steering93
Power windows Button in the front passenger door40
Preservation refer to Taking care of your vehicle
161
ProActive passenger protection125
R
Radiator fan
175
Radio reception Aerial
162
Functional fault162
Raise vehicle191
Rear mirror56
Exterior mirror58
Interior mirror57
Rear seats Seat backrest
63
Rear window - heating52
Recirculated air mode Climatronic
87
Manual air conditioning system85
Recommended gear21
Refuelling167
Fuel167
Regulation Headlight beam
44
Remote control32
Auxiliary heating (auxiliary heating)90
Synchronisation process33
Remote control key Replacing the battery
28
Replacement of parts165
replacing Vehicle battery
179
Replacing bulbs
202
Fuses199
The rear window wiper blade56
Wiper blades56
215Index
Page 219 of 222
Towing196
Towing a trailer106
Towing device Description
106
Drawbar load106
Towing eye front
197
Rear197
Towing protection36
Traction control system (TCS)113
Traffic sign recognition25
Traffic signs see Traffic sign recognition
25
Trailer106
13-pin power socket110
driving with a trailer110
loading109
Safety eye110
Transport Boot
64
Roof rack system68
Transporting children safely154
Two-way radio systems134
Type plate207
Tyre control display Calibration
185
Tyre load-bearing capacity see Wheels
184
Tyre repair192
Tyres see Wheels
183
U
Underbody protection
163
Unlocking Remote control
32
Unlock the vehicle Keys
31
V
Vehicle battery Automatic load deactivation
180
charging179
Checking the electrolyte level179
Operation in winter179
replacing179
Safety instructions176
Vehicle care Alcantara
164
Artificial leather164
Cloths164
Vehicle Condition see Auto Check Control
12
Vehicle data sticker207
Vehicle dimensions208
Vehicle height208
vehicle identification number - VIN (vehicle body number)
207
Vehicle key28
Vehicle length208
Vehicle tool kit188
Vehicle width208
Vest Holder for reflex vest
74
Visors see Sun screen
53
see Sun visors53
W
Warning lights
12
Warning symbols see Warning lights
12
Warning triangle188
Washing159
Automatic car wash system160
by hand160
Chrome parts161
High-pressure cleaner161
Weights207
Wheel bolts Anti-theft wheel bolt
192
Caps185
Loosening and tightening191
Wheel rims181
Wheels Bolts
186
changing189
Full trim185
General information181
Load index184
Low-profile tyres184
new tyres183
replacing wheels182
Snow chains186
Spare wheel184
Speed symbol183
Store wheels182
Tyre inflation pressure182
Tyre life182
Winter tyres186
Window Interior mirror
57
Window convenience operation40
Windows De-icing
162
See Electrical power windows38
Windscreen heating
52
see Radio reception162
Windscreen washer fluid Checking
176
Replenishing176
Warning light19
Winter176
Windscreen washer system176
Windscreen wipers54
217Index