AUX SKODA OCTAVIA 2015 3.G / (5E) Blues Infotinment Syst
[x] Cancel search | Manufacturer: SKODA, Model Year: 2015, Model line: OCTAVIA, Model: SKODA OCTAVIA 2015 3.G / (5E)Pages: 31, PDF Size: 1.51 MB
Page 8 of 31
Introductory information
Important notes
Introduction
This chapter contains information on the following subjects:
Warning statement
6
Component protection
6WARNING■ Concentrate fully at all times on your driving! As the driver you are fully
responsible for the operation of your vehicle.■
Only use the device in a way that ensures that you are in full control of
your vehicle in every traffic situation - there is a risk of accident!
■
Adjust the volume to ensure that acoustic signals from outside the vehi-
cle, e.g. sirens from emerging vehicles instructing you to give way to, such
as the police, ambulance and fire brigade, can be heard at all times.
■
High volumes can cause hearing damage.
Warning statement
Read and observe
on page 6 first.
FCC § 15.19 Labelling requirements
This device complies with part 15 of the FCC Rules and Industry Canada
license-exempt RSS standard(s). Operation is subject to the following two
conditions:
(1) This device may not cause harmful interference, and
(2) This device must accept any interference received, including interference that may cause undesired operation.
FCC § 15.21 Information to user
Changes or modifications not expressly approved by the party responsible for
compliance could void the user’s authority to operate the equipment.
INDUSTRY CANADA Statements
Le présent appareil est conforme aux CNR d'Industrie Canada applicables aux
appareils radio exempts de licence. L'exploitation est autorisée aux deux
conditions suivantes : (1) l'appareil ne doit pas produire de brouillage, et (2)
l'utilisateur de l'appareil doit accepter tout brouillage radioélectrique subi,
même si le brouillage est susceptible d'en compromettre le fonctionnement.
Component protection
Read and observe
on page 6 first.
Some electronic control units are equipped with protection components, which
serve as protective mechanisms, for example, in cases of theft of the ECUs.
When component protection is activated, the following message appears on
the device display screen: Component theft protection - Restricted function.
Switch on ignition.
If the component protection does not activate by switching on the ignition,
please contact a ŠKODA specialist garage.
Equipment overview
Introduction
This chapter contains information on the following subjects:
Description of the device
7
Switching the device on/off
7
Adjusting the volume
7
This chapter covers the device, the switching on and off and volume control of
the device.
6Introductory information
Page 11 of 31
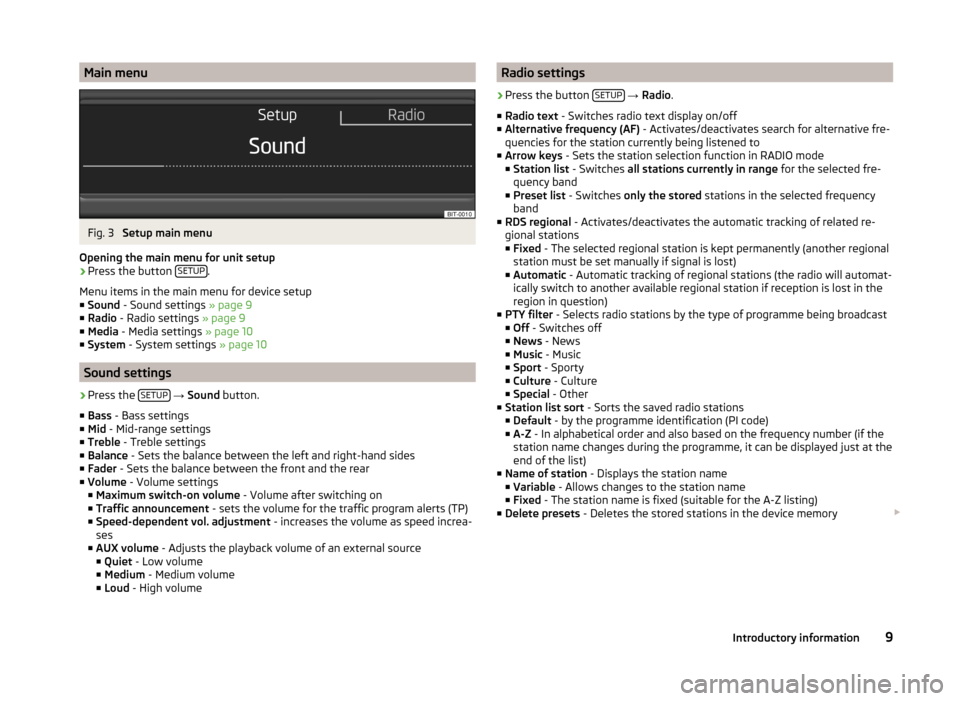
Main menuFig. 3
Setup main menu
Opening the main menu for unit setup
›
Press the button SETUP.
Menu items in the main menu for device setup
■ Sound - Sound settings » page 9
■ Radio - Radio settings » page 9
■ Media - Media settings » page 10
■ System - System settings » page 10
Sound settings
›
Press the SETUP
→ Sound button.
■ Bass - Bass settings
■ Mid - Mid-range settings
■ Treble - Treble settings
■ Balance - Sets the balance between the left and right-hand sides
■ Fader - Sets the balance between the front and the rear
■ Volume - Volume settings
■ Maximum switch-on volume - Volume after switching on
■ Traffic announcement - sets the volume for the traffic program alerts (TP)
■ Speed-dependent vol. adjustment - increases the volume as speed increa-
ses
■ AUX volume - Adjusts the playback volume of an external source
■ Quiet - Low volume
■ Medium - Medium volume
■ Loud - High volume
Radio settings›
Press the button SETUP
→ Radio .
■ Radio text - Switches radio text display on/off
■ Alternative frequency (AF) - Activates/deactivates search for alternative fre-
quencies for the station currently being listened to
■ Arrow keys - Sets the station selection function in RADIO mode
■ Station list - Switches all stations currently in range for the selected fre-
quency band
■ Preset list - Switches only the stored stations in the selected frequency
band
■ RDS regional - Activates/deactivates the automatic tracking of related re-
gional stations
■ Fixed - The selected regional station is kept permanently (another regional
station must be set manually if signal is lost)
■ Automatic - Automatic tracking of regional stations (the radio will automat-
ically switch to another available regional station if reception is lost in the
region in question)
■ PTY filter - Selects radio stations by the type of programme being broadcast
■ Off - Switches off
■ News - News
■ Music - Music
■ Sport - Sporty
■ Culture - Culture
■ Special - Other
■ Station list sort - Sorts the saved radio stations
■ Default - by the programme identification (PI code)
■ A-Z - In alphabetical order and also based on the frequency number (if the
station name changes during the programme, it can be displayed just at the
end of the list)
■ Name of station - Displays the station name
■ Variable - Allows changes to the station name
■ Fixed - The station name is fixed (suitable for the A-Z listing)
■ Delete presets - Deletes the stored stations in the device memory
9Introductory information
Page 12 of 31
Note■The Radio Data System (RDS) is used to transfer additional information. The
RDS enables program identification, program type identification (PTY), the re-
ception of traffic reports (TP) or automatic station tracking, for example. If
there is sufficient reception, RDS-compatible radio stations will be displayed
by station name rather than station frequency.■
The Alternative frequency (AF) function ensures that the best receivable fre-
quency for the selected station is set automatically.
■
In countries where the RDS function is not adequately supported, the device
may not be fully functional. We therefore recommend switching off the RDS
regional setting as well as the Alternative frequency (AF) setting, if applicable.
Otherwise, these settings can affect the functionality of the radio.
Media settings
›
Press the button SETUP
→ Media .
■ Activate AUX - Activates/deactivates AUX input
■ Mix/Repeat including subfolders - Activates/deactivates playback of the
tracks in the Mix and Repeat modes, including subfolders
■ Display ID3 tags - Switches on/off display of the artist, album and track
name in the device display screen 1)
Device system settings
›
Press the button
SETUP
→ System .
■ Language - Set the device language 2)
■ Time/date - Time and date settings
■ Time - Time settings
■ Date - Date settings
■ Summer (DST) - Switches summer time adjustment on/off
■ Time format - Sets the time format
■ Date format - sets the date format
■ DD.MM.YYYY - Day - Month - Year
■ YYYY-MM-DD - Year - Month - Day
■ MM.DD.YYYY - Month - Day - Year
■
Units - Sets the units
■ Distance - Distance units
■ km - Kilometres
■ miles - Miles
■ Temperature - Temperature units
■ °C - Degrees Celsius
■ °F - Degrees Fahrenheit
■ Volume - Volume units
■ l - Litres
■ gall. (UK) - Gallons (UK)
■ gall. (US) - Gallons (US)
■ Speed - Speed units
■ km/h - Kilometres per hour
■ mph - Miles per hour
■ Consumption - Consumption units
■ l/100km - Litres per 100 kilometres
■ km/l - Kilometres per litre
■ mpg (US) - Miles per gallon (US)
■ mpg (UK) - Miles per gallon (UK)
■ Gas consumption - Gas consumption units
■ kg/100km - Kilograms per 100 km
■ km/kg - Kilometres per kilogram
■ Display - screen setting
■ Brightness - Adjusts the brightness of the screen
■ Brightest - brightest level
■ Brighter - brighter level
■ Medium - medium level
■ Darker - darker level
■ Darkest - darkest level
■ Clock in standby mode - Time display on the screen when the ignition is
switched on and the device switched off
■ Remove USB device safely - Safe removal of USB device 3)
■ Factory settings - Restore to factory settings
■ All - All settings
■ Sound - Sound settings
■ Radio - Radio settings 1)
Regardless of the setting, the ID3 tag is always displayed in the
Audio menu in the MAXI DOT display.
2)
The correct display of country-specific characters (e.g. ID3 tag information) can not always be guaran-
teed.
3)
If a sound is currently played from the USB data carrier, this function is not active.
10Introductory information
Page 15 of 31
Briefly pressing the button or prompts the device to switch to the previ-
ous or next radio station.
Press and hold the button
or to start the search in the selected direction
and stop at the next radio station.
or
Turning the menu button
2
» Fig. 1 on page 7 will prompt the device to switch
to the previous or next radio station.
Press the menu button
2
to select the set station.
Five presets are available in each memory group.
In addition to the station name, the type of program broadcast by the radio
station according to PTY 1)
will also be displayed.
If the station is stored in the device memory, then the symbol is also dis-
played.
The device will automatically search for radio stations if no list of available sta-
tions is available.
Activating/deactivating traffic programme TP
Certain radio stations transmit traffic reports. The device enables playback of
these traffic reports.
›
Press the RADIO button
→ menu button
2
» Fig. 1 on page 7 → TP.
Screen display
The functionality of the traffic monitoring system is displayed in the screen by
the symbol in conjunction with the station name (for example, from the sta-
tion or preset lists).
If the radio station does not broadcast traffic reports, or if no traffic stations
can be found (due to a general radio reception interruption, for example), then
the symbol is displayed on the screen.
displayed.
If a radio station is tuned in that does not support traffic reports, then an
appropriate station is automatically set in the background to enable traffic
reports to be continuously received.
The device will function in exactly the same way with the selected frequency
range.
When playing in Media mode, the most recently selected radio station contin-
ues to be received in the background if this station supports traffic reports.
Interrupting/stopping the traffic programme
When the traffic programme is being received, Traffic announcement is dis-
played on the device display screen along with the following options:
■ TP off - Switches off the traffic announcement currently being broadcast
■ Cancel - Deactivates the traffic programme function
Media
Introduction
This chapter contains information on the following subjects:
Select audio source
14
USB input
14
AUX - input
15
Audio sources and file formats supported
15
Operation
16
Adjusting additional functions
16
The device allows you to play audio files in various formats and to connect dif-
ferent source types » page 15.
When the source has been connected, the device starts to automatically play
audio files in alphabetical order.
WARNING■ Never place audio sources close to the airbags. They could be thrown into
the passenger compartment when the airbags are deployed, injuring the
occupants.■
Never place audio sources on the dash panel, in your hand or on your
knees. They could be thrown into the passenger compartment during sud-
den driving manoeuvres, thereby injuring the occupants.
■
Always route the connection cable of the audio source such that is does
not restrict you when driving.
1)
PTY (programme type) - refers to the type of programme transmitted by the radio station.
13Audio
Page 16 of 31
CAUTIONDo not store any important data on the connected sources. ŠKODA assumes
no responsibility for lost or damaged files or connected audio sources.
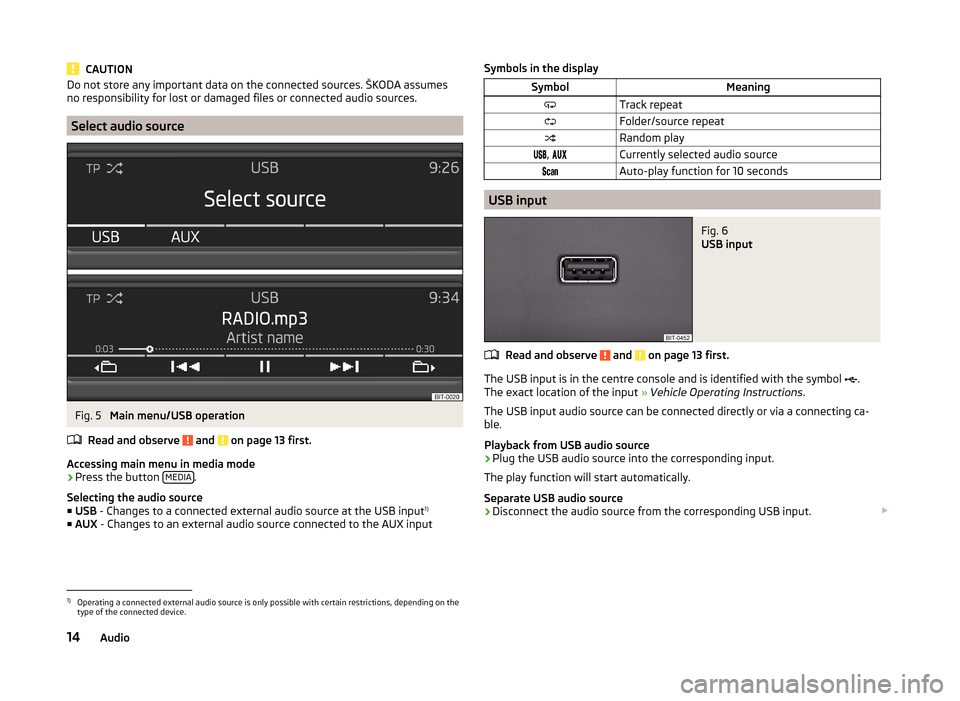
Select audio source
Fig. 5
Main menu/USB operation
Read and observe
and on page 13 first.
Accessing main menu in media mode
›
Press the button MEDIA.
Selecting the audio source ■ USB - Changes to a connected external audio source at the USB input 1)
■ AUX - Changes to an external audio source connected to the AUX input
Symbols in the displaySymbolMeaningTrack repeatFolder/source repeatRandom play, Currently selected audio sourceAuto-play function for 10 seconds
USB input
Fig. 6
USB input
Read and observe and on page 13 first.
The USB input is in the centre console and is identified with the symbol
.
The exact location of the input » Vehicle Operating Instructions .
The USB input audio source can be connected directly or via a connecting ca-
ble.
Playback from USB audio source
›
Plug the USB audio source into the corresponding input.
The play function will start automatically.
Separate USB audio source
›
Disconnect the audio source from the corresponding USB input.
1)
Operating a connected external audio source is only possible with certain restrictions, depending on the
type of the connected device.
14Audio
Page 17 of 31
Charge USB audio source
With the device on after connecting the USB audio source, the charging proc-
ess is automatically started (applies for audio sources where charging via the
USB connector is possible).
Some connected audio sources may not be recognised and cannot be charged.
CAUTION
USB extension cords, or reducers may impair the function of the connected au-
dio source.
Note
We recommend that you use extension cords from ŠKODA Original Accesso-
ries.
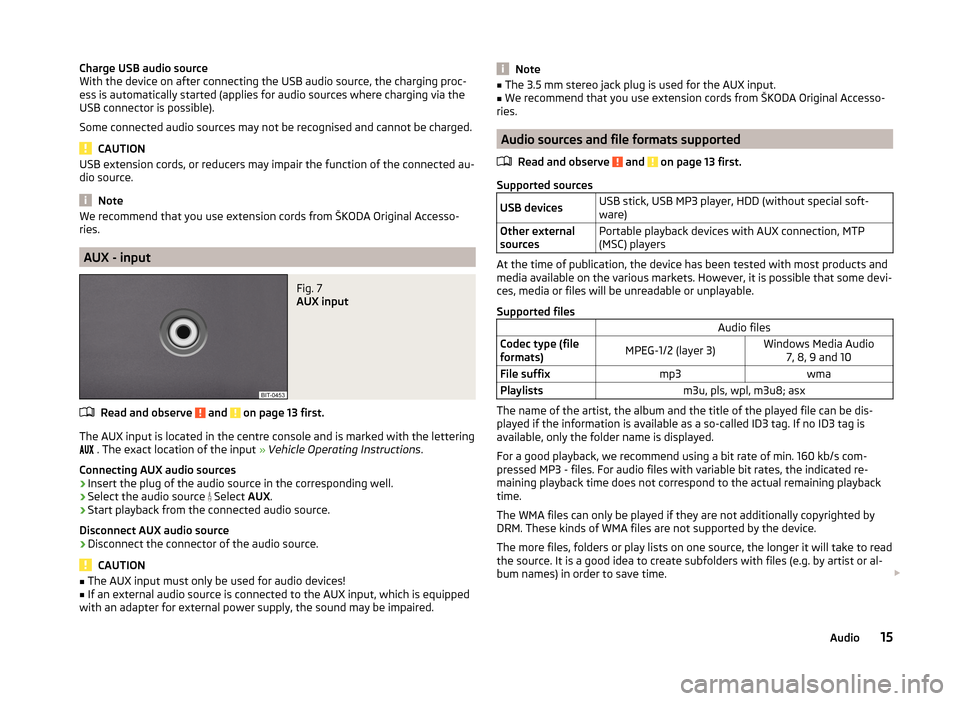
AUX - input
Fig. 7
AUX input
Read and observe and on page 13 first.
The AUX input is located in the centre console and is marked with the lettering
. The exact location of the input » Vehicle Operating Instructions .
Connecting AUX audio sources
›
Insert the plug of the audio source in the corresponding well.
›
Select the audio source
Select AUX.
›
Start playback from the connected audio source.
Disconnect AUX audio source
›
Disconnect the connector of the audio source.
CAUTION
■ The AUX input must only be used for audio devices!■If an external audio source is connected to the AUX input, which is equipped
with an adapter for external power supply, the sound may be impaired.Note■ The 3.5 mm stereo jack plug is used for the AUX input.■We recommend that you use extension cords from ŠKODA Original Accesso-
ries.
Audio sources and file formats supported
Read and observe
and on page 13 first.
Supported sources
USB devicesUSB stick, USB MP3 player, HDD (without special soft-
ware)Other external
sourcesPortable playback devices with AUX connection, MTP
(MSC) players
At the time of publication, the device has been tested with most products and
media available on the various markets. However, it is possible that some devi-
ces, media or files will be unreadable or unplayable.
Supported files
Audio filesCodec type (file
formats)MPEG-1/2 (layer 3)Windows Media Audio 7, 8, 9 and 10File suffixmp3wmaPlaylistsm3u, pls, wpl, m3u8; asx
The name of the artist, the album and the title of the played file can be dis-
played if the information is available as a so-called ID3 tag. If no ID3 tag is
available, only the folder name is displayed.
For a good playback, we recommend using a bit rate of min. 160 kb/s com-
pressed MP3 - files. For audio files with variable bit rates, the indicated re-
maining playback time does not correspond to the actual remaining playback
time.
The WMA files can only be played if they are not additionally copyrighted by
DRM. These kinds of WMA files are not supported by the device.
The more files, folders or play lists on one source, the longer it will take to read the source. It is a good idea to create subfolders with files (e.g. by artist or al-
bum names) in order to save time.
15Audio
Page 20 of 31
Vehicle systems
CAR - vehicle settings
Introduction
This chapter contains information on the following subjects:
Driving assistants
18
Deactivating traction control (ASR)
19
Speed limit for winter tyres
19
Light
19
Visibility
19
Opening and closing
20
Seats
20
Setting Climatronic
20
Auxiliary heating and ventilation
21
Vehicle status
21
Details of the multifunction display
21
Service
22
Resetting to factory settings
22
Note
■ Settings relating to the vehicle systems can only be made when the ignition
is switched on.■
The individual systems are described in the » Vehicle Owner's Manual .
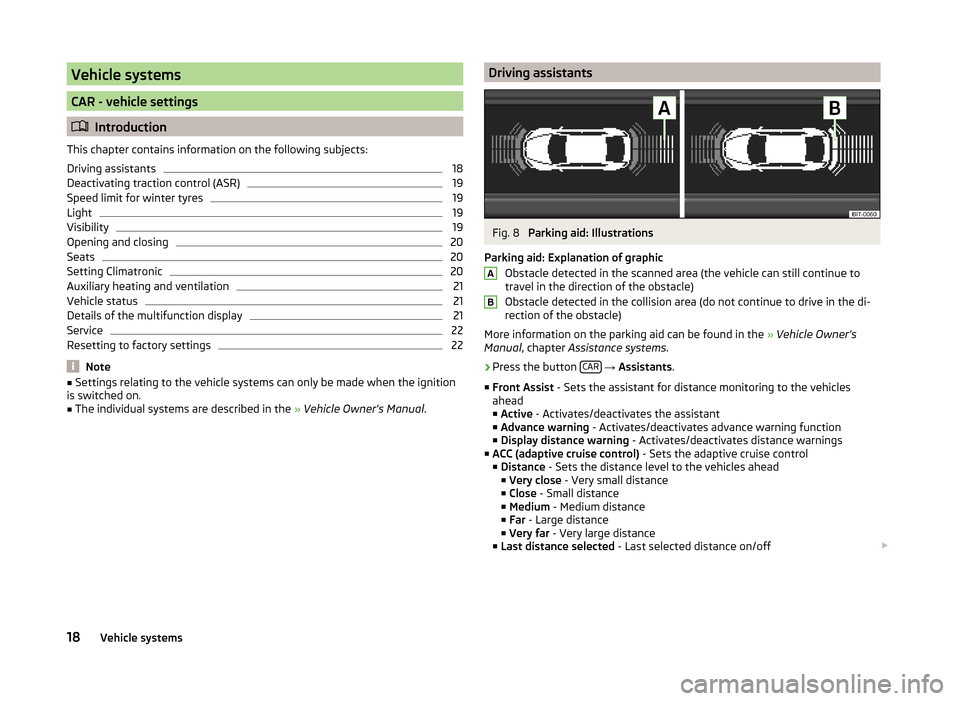
Driving assistantsFig. 8
Parking aid: Illustrations
Parking aid: Explanation of graphic Obstacle detected in the scanned area (the vehicle can still continue to
travel in the direction of the obstacle)
Obstacle detected in the collision area (do not continue to drive in the di-
rection of the obstacle)
More information on the parking aid can be found in the » Vehicle Owner's
Manual , chapter Assistance systems .
›
Press the button CAR
→ Assistants .
■ Front Assist - Sets the assistant for distance monitoring to the vehicles
ahead
■ Active - Activates/deactivates the assistant
■ Advance warning - Activates/deactivates advance warning function
■ Display distance warning - Activates/deactivates distance warnings
■ ACC (adaptive cruise control) - Sets the adaptive cruise control
■ Distance - Sets the distance level to the vehicles ahead
■ Very close - Very small distance
■ Close - Small distance
■ Medium - Medium distance
■ Far - Large distance
■ Very far - Very large distance
■ Last distance selected - Last selected distance on/off
AB18Vehicle systems
Page 22 of 31
■Mirrors - Adjusts the mirrors
■ Synchronous mirror adjustment - Activates/deactivates synchronous mir-
ror adjustment
■ Lowering in reverse - Activates/deactivates the lowering of the front pas-
senger mirror when reversing
■ Fold in while parking - Activation / deactivation of the full collapse of the
mirror housing when the vehicle is locked
■ Wipers - Adjusts the windscreen wipers
■ Automatic wiping in rain - Activates/deactivates automatic windscreen
wiping in rain
■ Automatic rear wiper - Activates/deactivates automatic rear window wip-
ing
Opening and closing
›
Press the button CAR
→ Opening/closing .
■ Windows - Sets the window operation
■ Convenience opening - Sets the convenience opening
■ Off - Deactivates convenience opening
■ All windows - All windows
■ Driver - Driver's window only
■ Central locking - Settings for opening and closing of doors
■ Door unlocking - Sets the door unlocking
■ All - All doors
■ Single door - Driver's or passenger's door (when unlocking via the sensor
in the passenger door handle)
■ Driver side - Doors on the driver or passenger side (when unlocking via
the sensor in the passenger door handle)
■ Automatic locking - Activate/deactivate automatic locking when starting
off
■ Alarm system confirmation - Activates/deactivates acoustic signals when
unlocking/locking a vehicle with an anti-theft alarm system
Seats
›
Press the button CAR
→ Seats .
■ Store driver's seat position on key - Activate/deactivate storing the driver's
seat position and exterior mirror position when locking the vehicle
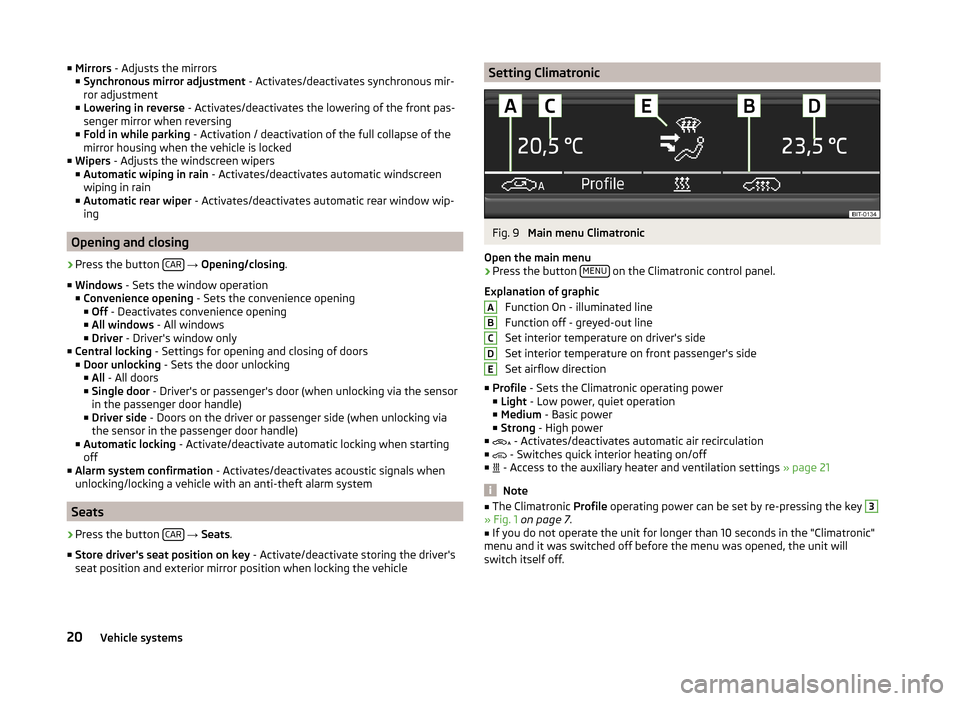
Setting ClimatronicFig. 9
Main menu Climatronic
Open the main menu
›
Press the button MENU on the Climatronic control panel.
Explanation of graphic Function On - illuminated line
Function off - greyed-out line
Set interior temperature on driver's side
Set interior temperature on front passenger's side
Set airflow direction
■ Profile - Sets the Climatronic operating power
■ Light - Low power, quiet operation
■ Medium - Basic power
■ Strong - High power
■ - Activates/deactivates automatic air recirculation
■ - Switches quick interior heating on/off
■ - Access to the auxiliary heater and ventilation settings
» page 21
Note
■
The Climatronic Profile operating power can be set by re-pressing the key 3» Fig. 1 on page 7 .■
If you do not operate the unit for longer than 10 seconds in the "Climatronic"
menu and it was switched off before the menu was opened, the unit will
switch itself off.
ABCDE20Vehicle systems
Page 23 of 31
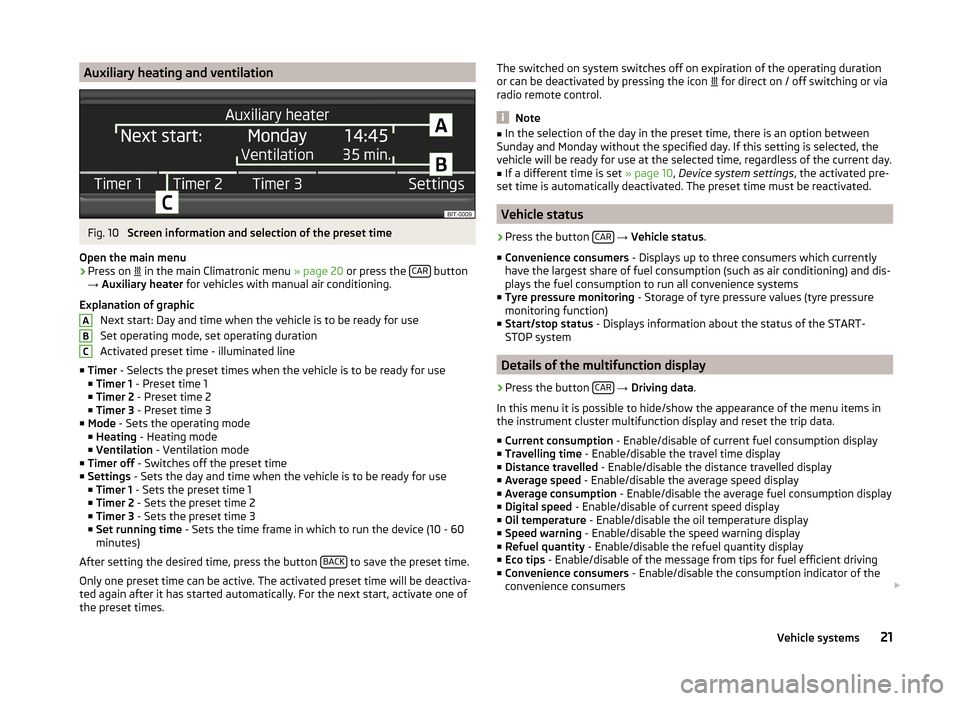
Auxiliary heating and ventilationFig. 10
Screen information and selection of the preset time
Open the main menu
›
Press on in the main Climatronic menu
» page 20 or press the CAR button
→ Auxiliary heater for vehicles with manual air conditioning.
Explanation of graphic Next start: Day and time when the vehicle is to be ready for use
Set operating mode, set operating duration
Activated preset time - illuminated line
■ Timer - Selects the preset times when the vehicle is to be ready for use
■ Timer 1 - Preset time 1
■ Timer 2 - Preset time 2
■ Timer 3 - Preset time 3
■ Mode - Sets the operating mode
■ Heating - Heating mode
■ Ventilation - Ventilation mode
■ Timer off - Switches off the preset time
■ Settings - Sets the day and time when the vehicle is to be ready for use
■ Timer 1 - Sets the preset time 1
■ Timer 2 - Sets the preset time 2
■ Timer 3 - Sets the preset time 3
■ Set running time - Sets the time frame in which to run the device (10 - 60
minutes)
After setting the desired time, press the button BACK
to save the preset time.
Only one preset time can be active. The activated preset time will be deactiva-
ted again after it has started automatically. For the next start, activate one of
the preset times.
ABCThe switched on system switches off on expiration of the operating duration
or can be deactivated by pressing the icon for direct on / off switching or via
radio remote control.
Note
■ In the selection of the day in the preset time, there is an option between
Sunday and Monday without the specified day. If this setting is selected, the
vehicle will be ready for use at the selected time, regardless of the current day.■
If a different time is set » page 10, Device system settings , the activated pre-
set time is automatically deactivated. The preset time must be reactivated.
Vehicle status
›
Press the button CAR
→ Vehicle status .
■ Convenience consumers - Displays up to three consumers which currently
have the largest share of fuel consumption (such as air conditioning) and dis-
plays the fuel consumption to run all convenience systems
■ Tyre pressure monitoring - Storage of tyre pressure values (tyre pressure
monitoring function)
■ Start/stop status - Displays information about the status of the START-
STOP system
Details of the multifunction display
›
Press the button CAR
→ Driving data .
In this menu it is possible to hide/show the appearance of the menu items in
the instrument cluster multifunction display and reset the trip data.
■ Current consumption - Enable/disable of current fuel consumption display
■ Travelling time - Enable/disable the travel time display
■ Distance travelled - Enable/disable the distance travelled display
■ Average speed - Enable/disable the average speed display
■ Average consumption - Enable/disable the average fuel consumption display
■ Digital speed - Enable/disable of current speed display
■ Oil temperature - Enable/disable the oil temperature display
■ Speed warning - Enable/disable the speed warning display
■ Refuel quantity - Enable/disable the refuel quantity display
■ Eco tips - Enable/disable of the message from tips for fuel efficient driving
■ Convenience consumers - Enable/disable the consumption indicator of the
convenience consumers
21Vehicle systems
Page 25 of 31
Index
A
AF
9
AM12
Anti-theft device6
Audio11
Media13
Radio11
Automatic headlight in rain19
Automatic locking20
Automatic rear windscreen wiping19
Automatic windscreen wiping in rain19
AUX10, 15
Auxiliary heating and ventilation Settings
21
C
CAR
18
Climatronic Automatic air recirculation
20
Automatic mode20
Operating mode20
COMING HOME19
Component protection6
Convenience consumers21
D
Date
10
Daytime running lights19
Description of the device7
Device Settings
8
Device operation8
Device screen8, 10
Device settings9
Displayed in the device screen8
E
Eco tips
21
F
Factory settings
10
Fatigue detection18
File formats15
FM12
Folding down the exterior mirrors - folding in while parking
19
Frequency band12
H
Head Light Assist
19
I
ID3 tag
10
Important notes6
Instrument lighting19
Introductory information6
Component protection6
L
Lane change flash
19
Language10
LEAVING HOME19
Light sensor - light switch-on time19
M
Media
13
Adjusting additional functions16
AUX15
File formats15
Operation16
Select audio source14
Settings10
Supported media15
USB14
Mix10, 16
Multifunction display21
Multimedia AUX
15
USB14
Mute7
O
Operating the device
7
P
Parking Aid
18
PI9
ProActive passenger protection
18
PTY9
R
Radio
11
Save radio stations11
Search for radio stations11
Selecting a radio station12
Settings9
Symbols11
Traffic programme (TP)13
RDS9
Remote control key memory function20
Repeat
16
S
Save radio stations
11
Scan Media
16
Radio11
Search for radio stations11
Seats Settings
20
Selecting a radio station12
Select source14
23Index