bluetooth SKODA OCTAVIA 2015 3.G / (5E) Columbus Infotainment System Manual
[x] Cancel search | Manufacturer: SKODA, Model Year: 2015, Model line: OCTAVIA, Model: SKODA OCTAVIA 2015 3.G / (5E)Pages: 100, PDF Size: 11.13 MB
Page 44 of 100
The telephone is in the list of coupled devices
If a telephone is connected with the device then proceed in one of the follow- ing ways.›
Press the key
→
or
D
» Fig. 24 on page 37 and select the desired
phone.
or
›
Press the key
→
Select telephone and select the desired telephone.
or
›
Press the key
→
→ Bluetooth → Paired devices and select the tele-
phone and a Bluetooth ®
- connection profile » page 43.
Pairing - no telephone connected
›
Press the key
→ Find telephone .
A search for available Bluetooth ®
devices takes place.
›
Select the desired select telephone.
›
Confirm the coupling.
After pairing confirmation the telephone is connected to the device as the
main telephone.
Pairing - a telephone is connected
›
Press the key
→
→ Find telephone .
A search for available Bluetooth ®
devices takes place.
›
Select the desired select telephone.
The following menu appears in the screen.
■ Cancel - Cancel the coupling
■ Replace - Pairing and replacement of the main telephone
■ Add - Pairing as additional telephone (the menu is not visible when the tele-
phone is connected via the rSAP profile)
› Select the desired connection type.
› Confirm the coupling.
After pairing confirmation the telephone connects to the device.
Pair the telephone when the main telephone is connected via the rSAP
profile
To connect another telephone to the device, it is necessary to first quit the
connection using the rSAP profile.
› Press the key
→
→ Find telephone .
› Select the desired select telephone.
› Press the function key
Add → Hands-free telephone (HFP) .
The main telephone ends the connection via the rSAP profile and connects to
the device via the HFP profile.
› Confirm the coupling.
The telephone to be connected connects with the device as the additional tel-
ephone.
Pairing - two telephones connected
›
Press the key
→
→ Find telephone .
A search for available Bluetooth ®
devices takes place.
›
Select the desired select telephone.
The following menu appears in the screen.
■ Cancel - Cancel the coupling
■ Main tel. - Changing the main telephone
■ Addition. tel. - Changing the auxiliary telephone
› Select the desired connection type.
› Confirm the coupling.
After pairing confirmation the telephone connects to the device.
If you want to replace a telephone that is also connected to the device as an audio player, then the following message appears on the screen.
Two devices are already connected. Please disconnect at least one of these
devices first in order to connect ….
Disconnect from the telephone to be replaced and repeat the coupling proce-
dure.
Pair the telephone via the rSAP profile › Press the key
→
→ Find telephone .
› Select the telephone you want with the rSAP profile.
41Telephone
Page 45 of 100
›Press the function key
Replace.
› Confirm the coupling.
The connection with the two telephones will be terminated and the rSAP pro-
file paired telephone connects to the device as a main telephone.
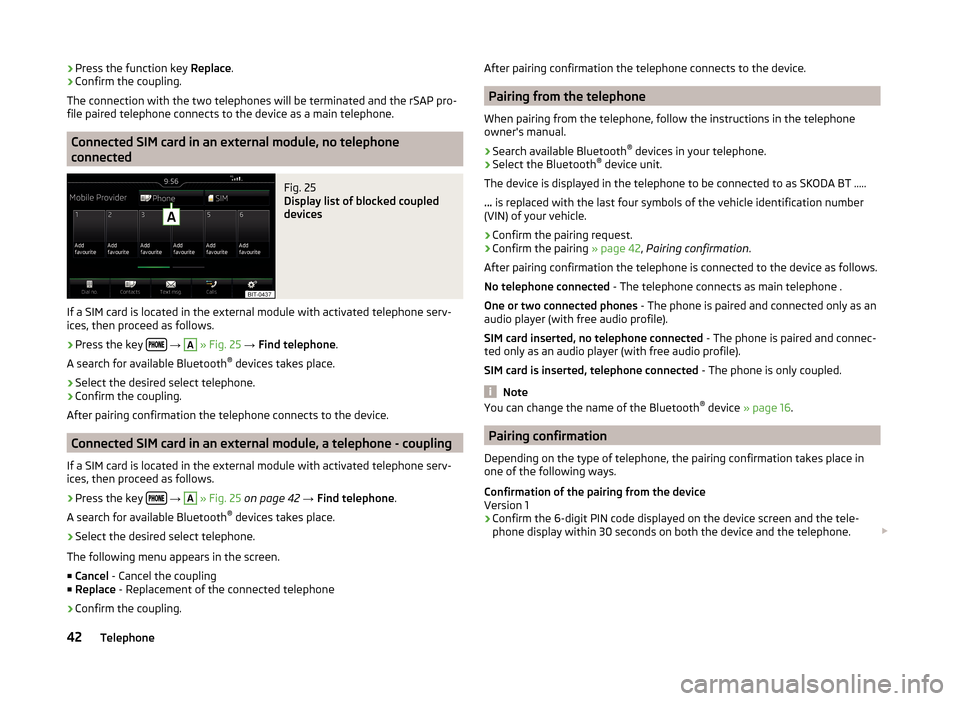
Connected SIM card in an external module, no telephone
connected
Fig. 25
Display list of blocked coupled
devices
If a SIM card is located in the external module with activated telephone serv-
ices, then proceed as follows.
›
Press the key
→
A
» Fig. 25 → Find telephone .
A search for available Bluetooth ®
devices takes place.
›
Select the desired select telephone.
›
Confirm the coupling.
After pairing confirmation the telephone connects to the device.
Connected SIM card in an external module, a telephone - coupling
If a SIM card is located in the external module with activated telephone serv-
ices, then proceed as follows.
›
Press the key
→
A
» Fig. 25 on page 42 → Find telephone .
A search for available Bluetooth ®
devices takes place.
›
Select the desired select telephone.
The following menu appears in the screen.
■ Cancel - Cancel the coupling
■ Replace - Replacement of the connected telephone
› Confirm the coupling.
After pairing confirmation the telephone connects to the device.
Pairing from the telephone
When pairing from the telephone, follow the instructions in the telephone
owner's manual.
›
Search available Bluetooth ®
devices in your telephone.
›
Select the Bluetooth ®
device unit.
The device is displayed in the telephone to be connected to as SKODA BT .....
... is replaced with the last four symbols of the vehicle identification number
(VIN) of your vehicle.
›
Confirm the pairing request.
›
Confirm the pairing » page 42, Pairing confirmation .
After pairing confirmation the telephone is connected to the device as follows. No telephone connected - The telephone connects as main telephone .
One or two connected phones - The phone is paired and connected only as an
audio player (with free audio profile).
SIM card inserted, no telephone connected - The phone is paired and connec-
ted only as an audio player (with free audio profile).
SIM card is inserted, telephone connected - The phone is only coupled.
Note
You can change the name of the Bluetooth ®
device » page 16 .
Pairing confirmation
Depending on the type of telephone, the pairing confirmation takes place in
one of the following ways.
Confirmation of the pairing from the device
Version 1
› Confirm the 6-digit PIN code displayed on the device screen and the tele-
phone display within 30 seconds on both the device and the telephone.
42Telephone
Page 46 of 100
Version 2
› Confirm the pairing request in the telephone.
› Enter the 4 digit or the 16 digit (rSAP) PIN code shown on the unit display in-
to the telephone within 30 seconds 1)
.
Confirmation of the pairing from the telephone
Version 1
› Confirm the pairing request on the device.
› Confirm the 6-digit PIN code displayed on the device screen and the tele-
phone display within 30 seconds on both the device and the telephone.
Version 2
› Enter the 4 - 16 digit PIN code into the telephone.
› Confirm the pairing request on the device.
› Enter the same PIN code into the device that is in the telephone and con-
firm 1 )
.
Version 3
› Confirm the pairing request on the device.
› The device generates a 4 - 16 digit PIN code.
› Enter into the telephone the PIN generated by the device and confirm 1 )
.
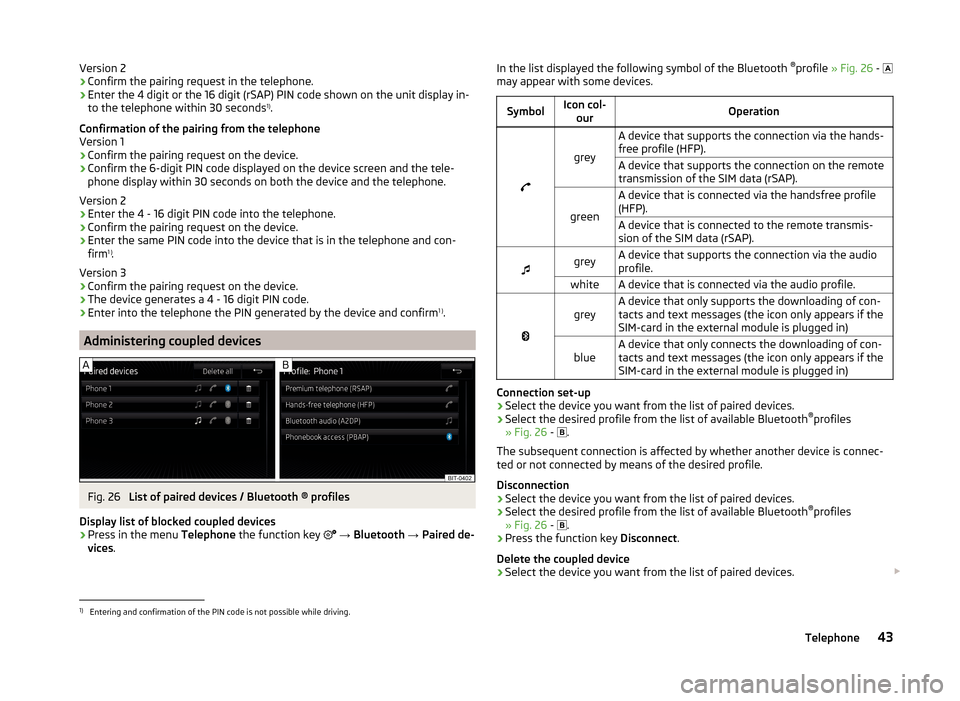
Administering coupled devices
Fig. 26
List of paired devices / Bluetooth ® profiles
Display list of blocked coupled devices
›
Press in the menu Telephone the function key
→ Bluetooth → Paired de-
vices .
In the list displayed the following symbol of the Bluetooth ®
profile » Fig. 26 -
may appear with some devices.SymbolIcon col- ourOperation
grey
A device that supports the connection via the hands-
free profile (HFP).A device that supports the connection on the remote
transmission of the SIM data (rSAP).
green
A device that is connected via the handsfree profile
(HFP).A device that is connected to the remote transmis-
sion of the SIM data (rSAP).
greyA device that supports the connection via the audio
profile.whiteA device that is connected via the audio profile.
greyA device that only supports the downloading of con-
tacts and text messages (the icon only appears if the
SIM-card in the external module is plugged in)blueA device that only connects the downloading of con-
tacts and text messages (the icon only appears if the
SIM-card in the external module is plugged in)
Connection set-up
› Select the device you want from the list of paired devices.
› Select the desired profile from the list of available Bluetooth ®
profiles
» Fig. 26 -
.
The subsequent connection is affected by whether another device is connec-
ted or not connected by means of the desired profile.
Disconnection
› Select the device you want from the list of paired devices.
› Select the desired profile from the list of available Bluetooth ®
profiles
» Fig. 26 -
.
› Press the function key
Disconnect.
Delete the coupled device
› Select the device you want from the list of paired devices.
1)
Entering and confirmation of the PIN code is not possible while driving.
43Telephone
Page 47 of 100
- Delete all device
- Delete the desired device
› Confirm the deletion by pressing the function key
Delete.
Note
The Bluetooth ®
audio profile can be turned off/on by pressing the button →
→ Bluetooth → Bluetooth audio (A2DP/AVRCP) .
Connection using the SIM card in the external module
Introduction
This chapter contains information on the following subjects:
Slot in SIM card and establish connection
44
Remove SIM card
45
The device allows the use of a connection in the external module of the device
by means of the inserted SIM card.
The SIM card can be used for data and telephone services.
The services are available (with the ignition on when the ignition is switched off or if a telephone call is made).
The SIM card slot is located in an external module in the glove box on the front
passenger side.
A SIM card size mini (standard size 25x15 mm) is to be used.
CAUTION
■
When inserting an improperly sized SIM card, there is a risk of damaging the
device.■
Avoid using a an adapter for the SIM card as the SIM card may fall out while
driving due to vehicle vibrations. There is a risk of damage to the external
module.
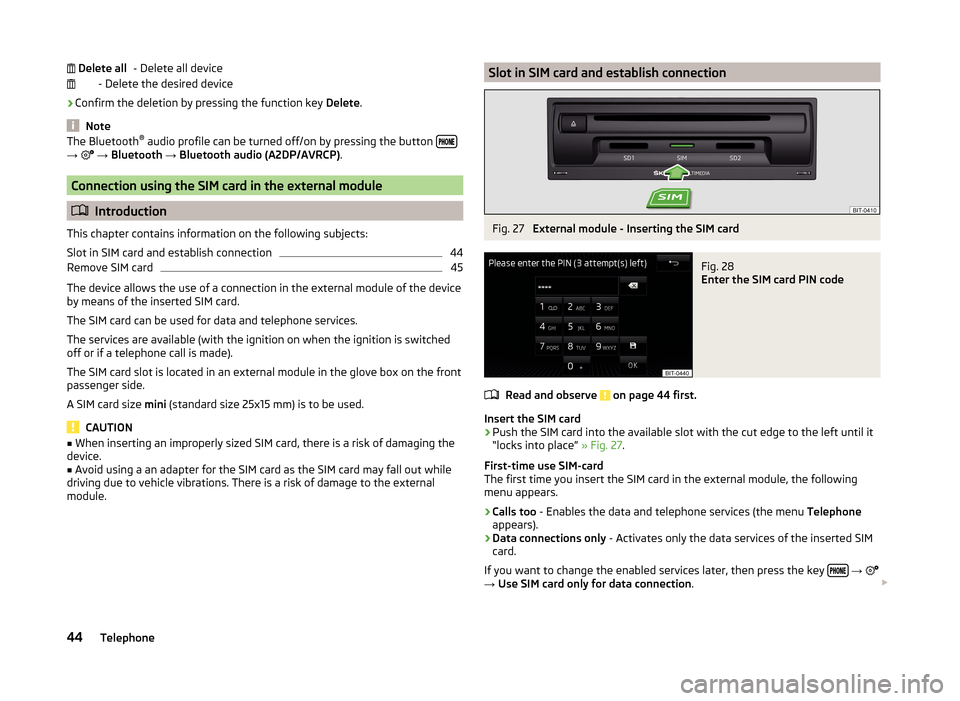
Delete allSlot in SIM card and establish connectionFig. 27
External module - Inserting the SIM card
Fig. 28
Enter the SIM card PIN code
Read and observe on page 44 first.
Insert the SIM card
›
Push the SIM card into the available slot with the cut edge to the left until it
“locks into place” » Fig. 27.
First-time use SIM-card
The first time you insert the SIM card in the external module, the following
menu appears.
›
Calls too - Enables the data and telephone services (the menu Telephone
appears).
›
Data connections only - Activates only the data services of the inserted SIM
card.
If you want to change the enabled services later, then press the key
→
→ Use SIM card only for data connection .
44Telephone
Page 55 of 100
If the device is connected to the external device via WLAN client the following
will appear in the function key
→ → WLAN → WLAN the WLAN name
of the external device.
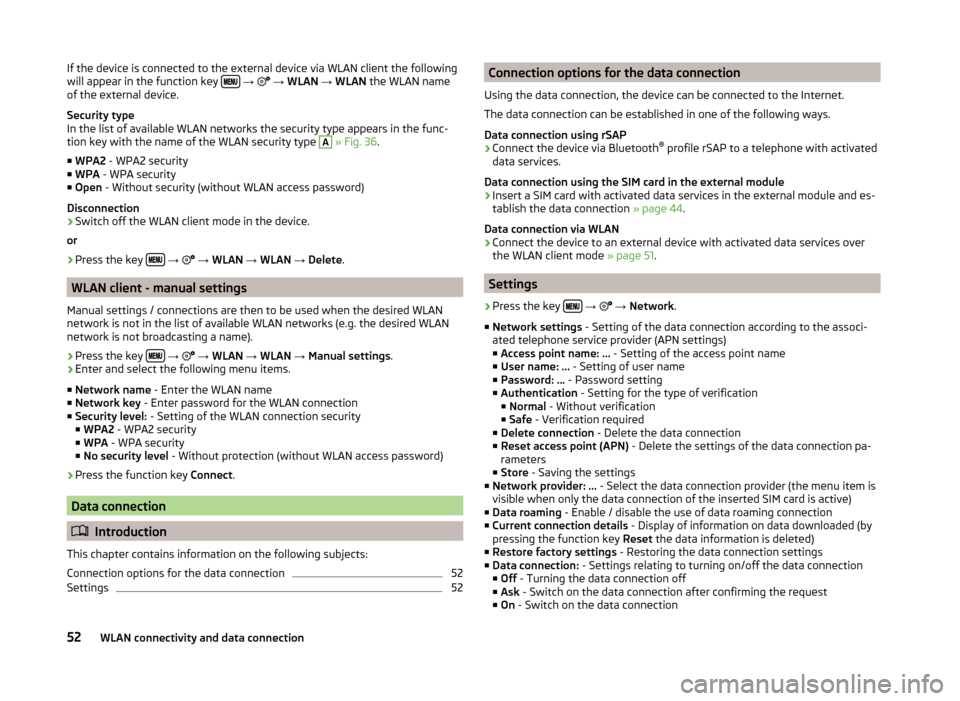
Security type
In the list of available WLAN networks the security type appears in the func-
tion key with the name of the WLAN security type A
» Fig. 36 .
■ WPA2 - WPA2 security
■ WPA - WPA security
■ Open - Without security (without WLAN access password)
Disconnection
› Switch off the WLAN client mode in the device.
or
› Press the key
→
→ WLAN → WLAN → Delete .
WLAN client - manual settings
Manual settings / connections are then to be used when the desired WLAN
network is not in the list of available WLAN networks (e.g. the desired WLAN
network is not broadcasting a name).
›
Press the key
→
→ WLAN → WLAN → Manual settings .
›
Enter and select the following menu items.
■ Network name - Enter the WLAN name
■ Network key - Enter password for the WLAN connection
■ Security level: - Setting of the WLAN connection security
■ WPA2 - WPA2 security
■ WPA - WPA security
■ No security level - Without protection (without WLAN access password)
› Press the function key
Connect.
Data connection
Introduction
This chapter contains information on the following subjects:
Connection options for the data connection
52
Settings
52Connection options for the data connection
Using the data connection, the device can be connected to the Internet.
The data connection can be established in one of the following ways.
Data connection using rSAP›
Connect the device via Bluetooth ®
profile rSAP to a telephone with activated
data services.
Data connection using the SIM card in the external module
›
Insert a SIM card with activated data services in the external module and es-
tablish the data connection » page 44.
Data connection via WLAN
›
Connect the device to an external device with activated data services over
the WLAN client mode » page 51.
Settings
›
Press the key
→
→ Network .
■ Network settings - Setting of the data connection according to the associ-
ated telephone service provider (APN settings)
■ Access point name: ... - Setting of the access point name
■ User name: … - Setting of user name
■ Password: ... - Password setting
■ Authentication - Setting for the type of verification
■ Normal - Without verification
■ Safe - Verification required
■ Delete connection - Delete the data connection
■ Reset access point (APN) - Delete the settings of the data connection pa-
rameters
■ Store - Saving the settings
■ Network provider: ... - Select the data connection provider (the menu item is
visible when only the data connection of the inserted SIM card is active)
■ Data roaming - Enable / disable the use of data roaming connection
■ Current connection details - Display of information on data downloaded (by
pressing the function key Reset the data information is deleted)
■ Restore factory settings - Restoring the data connection settings
■ Data connection: - Settings relating to turning on/off the data connection
■ Off - Turning the data connection off
■ Ask - Switch on the data connection after confirming the request
■ On - Switch on the data connection
52WLAN connectivity and data connection
Page 58 of 100
Some applications require that the data connection in the connected device is
turned on.
By establishing the Android Auto ™
connection all existing Bluetooth ®
connec-
tions are terminated to the device and a Bluetooth ®
connection using the
Android Auto ™
is established to the device.
A device connected using Android Auto ™
cannot be used as an audio source in
the menu Media.
If route guidance is active at this moment in the device, then this is terminated
by starting the route guidance in the Android Auto ™
application. This is also
true reciprocally.
A list of devices and applications that the Android Auto ™
connection supports
can be found on the Google website.
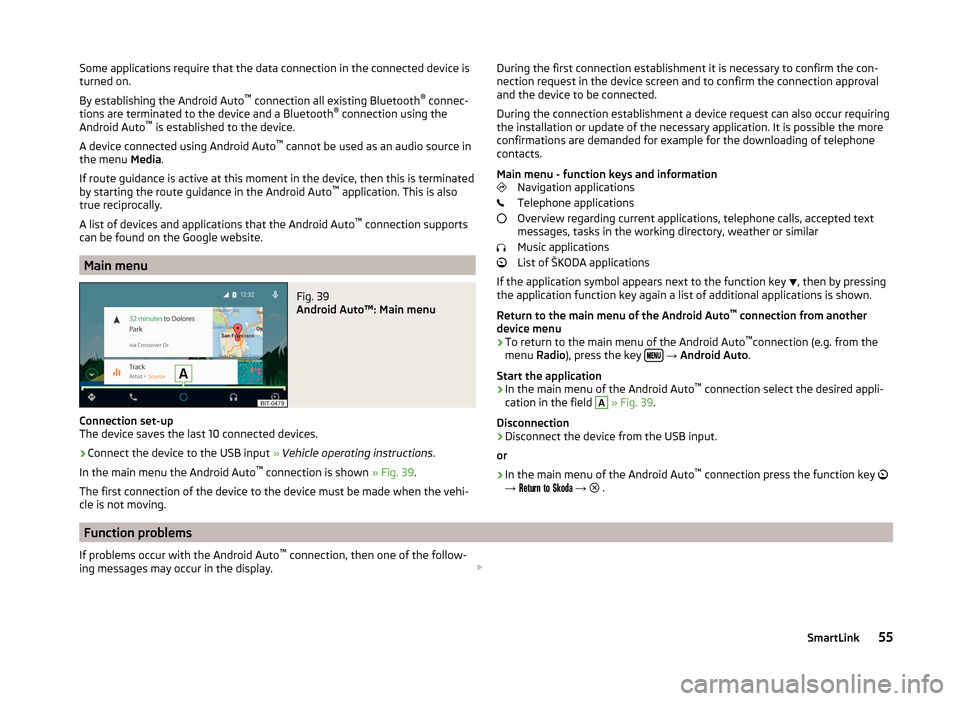
Main menu
Fig. 39
Android Auto™: Main menu
Connection set-up
The device saves the last 10 connected devices.
›
Connect the device to the USB input » Vehicle operating instructions .
In the main menu the Android Auto ™
connection is shown » Fig. 39.
The first connection of the device to the device must be made when the vehi- cle is not moving.
During the first connection establishment it is necessary to confirm the con-
nection request in the device screen and to confirm the connection approval
and the device to be connected.
During the connection establishment a device request can also occur requiring
the installation or update of the necessary application. It is possible the more
confirmations are demanded for example for the downloading of telephone
contacts.
Main menu - function keys and information Navigation applications
Telephone applications
Overview regarding current applications, telephone calls, accepted text
messages, tasks in the working directory, weather or similar
Music applications
List of ŠKODA applications
If the application symbol appears next to the function key , then by pressing
the application function key again a list of additional applications is shown.
Return to the main menu of the Android Auto ™
connection from another
device menu
› To return to the main menu of the Android Auto ™
connection (e.g. from the
menu Radio), press the key
→ Android Auto .
Start the application › In the main menu of the Android Auto ™
connection select the desired appli-
cation in the field
A
» Fig. 39 .
Disconnection
› Disconnect the device from the USB input.
or
› In the main menu of the Android Auto ™
connection press the function key
→
→
.
Function problems
If problems occur with the Android Auto ™
connection, then one of the follow-
ing messages may occur in the display. 55SmartLink
Page 59 of 100
MessageMeaning… Unable to connect to mobile device. … is already connected via Android Au-
to.The device allows only one active connection.Check the setting on the mobile device and the connection.Stop the vehicle, “unlock” the display of the connected device and follow the
instructions displayed on the connected device.Apple CarPlay
Introduction
This chapter contains information on the following subjects:
Home menu
56
Function problems
57
The Apple CarPlay connection can be set up under the following conditions. The ignition is switched on.
The unit is switched on.
The device to be connected is switched on.
The data connection is turned on in the device to be connected.
The Siri voice control is switched on in the device to be connected.
By establishing an Apple CarPlay connection all existing Bluetooth ®
connec-
tions to the device are terminated and a connection using Apple CarPlay to the
connected device is established. During the Apple CarPlay connection the use
of the menu Telephone is not possible.
A device connected with Apple CarPlay cannot be used as an audio source in
the menu Media.
If at this moment the route guidance is active by means of the menu Naviga-
tion , then the guidance by the device is terminated by the start of the route
guidance in the Apple CarPlay application. This is also true reciprocally.
A list of devices, supported regions and applications that the Apple CarPlay
connection supports, can be obtained from the Apple website.
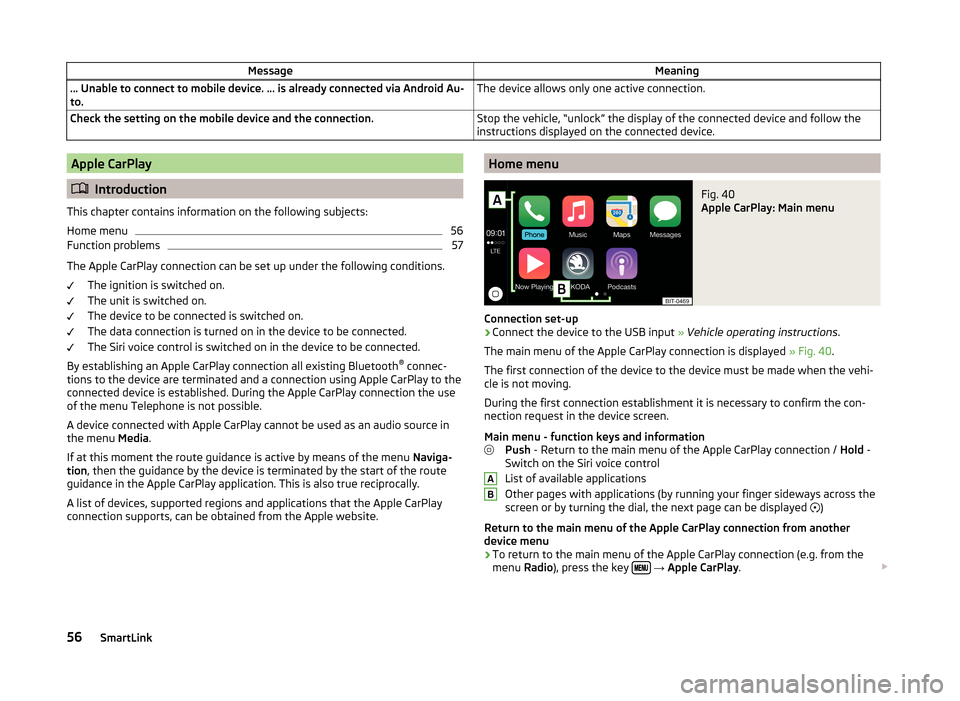
Home menuFig. 40
Apple CarPlay: Main menu
Connection set-up
›
Connect the device to the USB input » Vehicle operating instructions .
The main menu of the Apple CarPlay connection is displayed » Fig. 40.
The first connection of the device to the device must be made when the vehi-
cle is not moving.
During the first connection establishment it is necessary to confirm the con-
nection request in the device screen.
Main menu - function keys and information Push - Return to the main menu of the Apple CarPlay connection / Hold -
Switch on the Siri voice control
List of available applications
Other pages with applications (by running your finger sideways across the
screen or by turning the dial, the next page can be displayed )
Return to the main menu of the Apple CarPlay connection from another device menu
› To return to the main menu of the Apple CarPlay connection (e.g. from the
menu Radio), press the key
→ Apple CarPlay .
AB56SmartLink
Page 90 of 100
Index
A
Abort route guidance
73
ACC82
Adaptive Cruise Control82
Additional keyboard languages15
Address61, 62
Adjust text messages38
Administering coupled devices43
Air conditioning85
Alphanumeric with keyboard10
Alternative routes78
Android Auto™54
Connection establishment55
Disconnection55
Function problems55
Home Page55
Anti-theft protection6
APN52
Apple CarPlay56
Connection establishment56
Disconnection56
Function problems57
Home menu56
Assistance systems82
Audio Media
22
Radio17
Audio source24
Automatic air conditioning85
Automatic air recirculation85
Automatic driving light when raining83
Automatic locking83
Automatic rear window wiper83
Automatic turning off of the device7
Automatic wiping when raining83
AUX28
Settings24
Auxiliary heating86
B
Blind spot monitoring
82
Bluetooth Settings
16
Switch on/off16
Update16
Visibility16
Bluetooth Player28
Bluetooth profile43
Breakdown service45
Broadcasting range see main menu
17
Broadcasting sector17
C
Call list Call list
47
Call settings38
CAR80
CD26
Central locking83
Clear calls38
Climatronic Display
85
Setting85
Closing83
Comfort turn signal83
COMING HOME83
Compatible sources DVD - video
33
Media29
Pictures31
Component protection6
Conditions for coupling40
Conference call48
Convenience consumer80
Cooling system85
Coupled device SIM card is inserted, a connected telephone
42
Couple device no telephone connected
41
Custom destination66
Custom destinations65
Custom POI category66
D
DAB Radio DAB text and image presentation
20
Settings20
Data connection52
Data roaming52
Date15
Daytime running light83
Daytime running light when raining83
Delete destination70
Demo mode79
Description of the device7
Destination Address
61, 62
Custom destination66
Favourite70
GPS coordinates62
Home address63
Image with GPS31
List of stored destinations63
Map point62
Memory70
POI64
Destination details70
Destination management Destination details
70
Favourite70
Storage70
87Index
Page 92 of 100
Operation30
safe removal of the data source16
Select image source30
Settings31
Image viewer30
Important notes6
Import contacts38
Import custom destinations65
Import destinations66
Information service45
Input destination61
Input screen with keyboard10
Inspection84
Instrument cluster84
Instrument lighting83
Interior - Lighting83
Interior lighting83
Introductory information6
IRoute information72
J
Jukebox
25
K
Key - memory function
84
keyboard10
Keyboard15
Key CAR80
L
L-band
21
Lane Assist82
Lane recommendation72
Language characters15
LEAVING HOME83
Light83
Light assistance83
Light sensor - switch-on the lights83
List connected SmartLink devices54
of available channels (TV tuner)35
of telephone contacts46
With folder / track list23
List of available stations (Radio) Radio
18
List of coupled devices43
List of paired telephones40
List of stored destinations63
List of traffic reports76
Locking/unlocking - Warning83
Luggage compartment - opening83
Luggage compartment cover83
M
Main menu CAR
80
DVD video32
Images30
Media22
Navigation60
SmartLink53
SMS49
TV tuner34
Waypoint mode74
Main Menu Radio
17
Manage favourites38
Manage memory79
Manoeuvre graphical driving recommendations
72
Nav. announcements72
Manoeuvring82
Map automatic scale
68
Display67
Display options67
Display options in the split screen67
Fast Map68
Lane recommendation78
Main menu67
Manual scale68
Map alignment69
Operation67
Orientation68
POI68
POI display78
Road sign68
Traffic sign display78
Media22
Audio source24
AUX28
Bluetooth Audio28
Browser23
CD / DVD26
Compatible sources29
File formats29
Foreword22
Jukebox25
List23
Main menu22
Multimedia database24
Operation22
Playback23
safe removal of the data source16
SD card27
Select audio source22
Settings24
USB27
Voice control10
WLAN28
Memory function of remote control key84
Memory list TV tuner
35
Menu CAR80
Mirror Fold in when parked
83
Lower while reversing83
Synchronous adjustment83
89Index
Page 94 of 100
PicturesCompatible sources31
File formats31
Requirements and restrictions31
Supported file formats31
PIN Settings
38
Playback DVD video
32
Media23
POI64
Car parks64
Map68
My POIs66
Quick search64
Restaurants64
Search and selection65
Stations64
Pop-up window Map
67
Pop-up windows Audio
61
Compass61
Manoeuvre61
Map61
Menus61
on/off61
Satellite data61
PPOI66
Preferred contacts47
Premium telephone44
Principles of device operation9
Proactive passenger protection82
R
Radio
17
Broadcasting sector17
DAB settings20
FM - settings20
L-band21
List of available stations18
Main Menu17
Operation17
Preface17
Radio station Logo19
Search for station18
Select station18
Settings20
Store station19
Traffic programme (TP)19
Voice control10
Radio station Logo
19
Search for station18
Select station18
Store station19
Radio station logo19
Rear Traffic Alert82
Rear window - automatic wiping83
Recirculation mode85
Record waypoints75
Reset - vehicle settings84
Road sign68
Route Tour memory
74
Route calculation70
Route guidance Traffic jam ahead
78
Route list72
Route options78
rSAP41
S
Safe removal of the data source
16
Satellite data60
Screen see device screen
7
Screen display9
SD card27
Seats Setting84
Select a video source DVD-Video
32
Select broadcasting range see main menu
17
Select image source Images
30
Select Source Media
22
Select station see main menu
17
Service84
Settings Additional keyboard languages
15
AUX24
Bluetooth16
CANTON sound system14
Codecs24
DAB20
Data connection52
Device language15
Device screen14
DVD video33
FM20
Images31
Keyboard15
Manage favourites47
Media24
Mobile device data transfer15
Navigation78
Network52
of the device14
PIN38
Radio20
Restore factory settings16
SmartLink54
Software update16
Sound14
Telephone38
Time and date15
91Index