SD card SKODA OCTAVIA 2015 3.G / (5E) Columbus Infotainment System Manual
[x] Cancel search | Manufacturer: SKODA, Model Year: 2015, Model line: OCTAVIA, Model: SKODA OCTAVIA 2015 3.G / (5E)Pages: 100, PDF Size: 11.13 MB
Page 50 of 100
Opens the menu for editing the telephone number of the contact before
dialling
Start the route guidance to the contact address
Searching for a contact in the contact list › Press the function key
Search.
› Search for the contact.
Import list
After the first connection of the primary telephone and/or the SIM card with
the device, the import of the telephone contacts to the device memory starts.
The import can take several minutes.
The device telephone book contains 4000 free memory locations for imported
telephone contacts. Each contact can contain up to 5 telephone numbers.
For the last 4 connected telephones an import follows with a maximum of
5000 contact assigned images to the device memory.
The number of contacts imported can be checked in the menu item Import
contacts » page 38 , Settings .
If an error occurs during the import, the following message appears Import
failed. Please try again and check whether the BT device … allows connec-
tions.
Refresh list
If the telephone is connected to the device again the list is updated automati-
cally.
The update can be performed manually as follows.
› Press the key
→
→ User profile → Import contacts .
During updating, the number of imported contacts to the device memory/the number of contacts in the telephone is displayed.
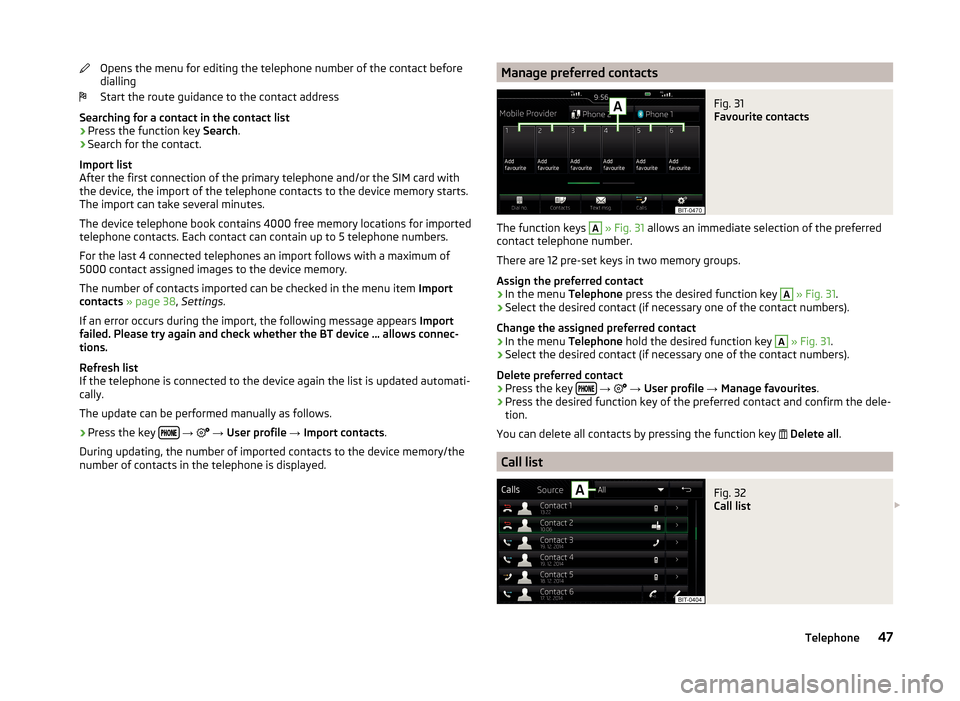
Manage preferred contactsFig. 31
Favourite contacts
The function keys
A
» Fig. 31 allows an immediate selection of the preferred
contact telephone number.
There are 12 pre-set keys in two memory groups.
Assign the preferred contact
›
In the menu Telephone press the desired function key
A
» Fig. 31 .
›
Select the desired contact (if necessary one of the contact numbers).
Change the assigned preferred contact
›
In the menu Telephone hold the desired function key
A
» Fig. 31 .
›
Select the desired contact (if necessary one of the contact numbers).
Delete preferred contact
›
Press the key
→
→ User profile → Manage favourites .
›
Press the desired function key of the preferred contact and confirm the dele-
tion.
You can delete all contacts by pressing the function key
Delete all .
Call list
Fig. 32
Call list
47Telephone
Page 52 of 100
View details of participant
Talk to a participant separately from the conference
End the call to a conference participant
Text messages (SMS)
Introduction
This chapter contains information on the following subjects:
Main menu
49
New text message
49
Received text message
50
Main menu
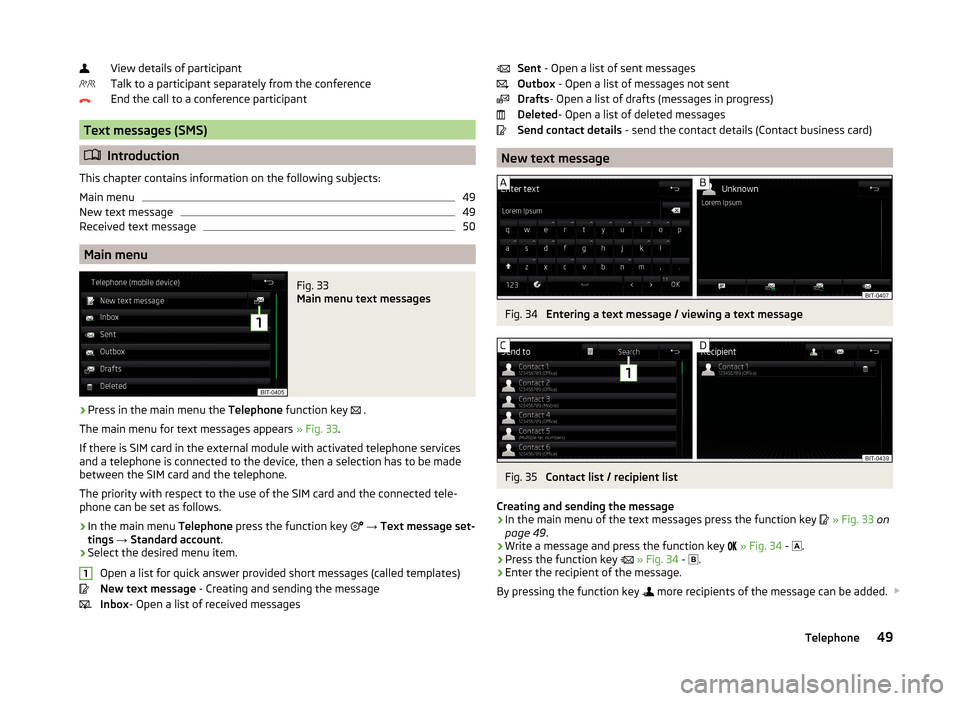
Fig. 33
Main menu text messages
›
Press in the main menu the Telephone function key
.
The main menu for text messages appears » Fig. 33.
If there is SIM card in the external module with activated telephone services
and a telephone is connected to the device, then a selection has to be made
between the SIM card and the telephone.
The priority with respect to the use of the SIM card and the connected tele-
phone can be set as follows.
›
In the main menu Telephone press the function key
→ Text message set-
tings → Standard account .
›
Select the desired menu item.
Open a list for quick answer provided short messages (called templates)
New text message - Creating and sending the message
Inbox - Open a list of received messages
1Sent
- Open a list of sent messages
Outbox - Open a list of messages not sent
Drafts - Open a list of drafts (messages in progress)
Deleted - Open a list of deleted messages
Send contact details - send the contact details (Contact business card)
New text message
Fig. 34
Entering a text message / viewing a text message
Fig. 35
Contact list / recipient list
Creating and sending the message
›
In the main menu of the text messages press the function key
» Fig. 33 on
page 49 .
›
Write a message and press the function key
» Fig. 34 -
.
›
Press the function key
» Fig. 34 -
.
›
Enter the recipient of the message.
By pressing the function key
more recipients of the message can be added.
49Telephone
Page 54 of 100
WLAN connectivity and data connection
WLAN
Introduction
This chapter contains information on the following subjects:
WLAN Hotspot - Connection to the external device with the device WLAN
51
WLAN Client - Connect the device to an external device with WLAN
51
WLAN client - manual settings
52
The requirement for the WLAN function is the ignition is switched on.
After switching on the ignition, the last-used WLAN connection appears.
WLAN can be used to connect to the Internet or as a source for playing audio
files in the menu Media.
The device allows you to set up the WLAN hotspot on which up to 8 external
devices can be connected, or to connect to an external device via WLAN client.
WLAN hotspot and WLAN client are two independent connections, these can
be turned on simultaneously.
If the external module has a SIM card with activated data services or if there is
a connection with the telephone via the rSAP profile then it is not possible to
connect the device to the external device using WLAN.
WLAN Hotspot - Connection to the external device with the device
WLAN
WLAN hotspot switch on/off
›
Press the key
→
→ WLAN → Mobile hotspot → Mobile hotspot .
Connection set-up
›
Set WLAN hotspot in the device » page 16, WLAN Settings .
›
Enable the WLAN in the external device and search for any available WLAN.
›
Select the WLAN hotspot of the device (WLAN name of the device - SSID
» page 16 , WLAN Settings ).
›
Enter the type of security and the access password (if required).
WLAN Client - Connect the device to an external device with
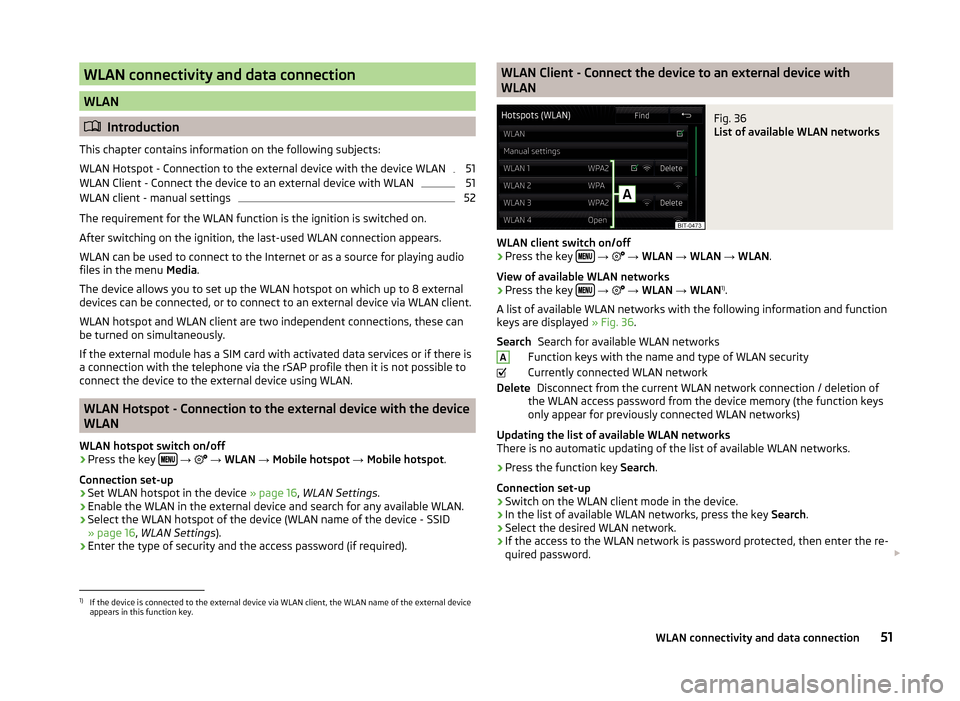
WLANFig. 36
List of available WLAN networks
WLAN client switch on/off
›
Press the key
→
→ WLAN → WLAN → WLAN .
View of available WLAN networks
› Press the key
→
→ WLAN → WLAN 1)
.
A list of available WLAN networks with the following information and function
keys are displayed » Fig. 36.
Search for available WLAN networks
Function keys with the name and type of WLAN security
Currently connected WLAN network Disconnect from the current WLAN network connection / deletion of
the WLAN access password from the device memory (the function keys
only appear for previously connected WLAN networks)
Updating the list of available WLAN networks
There is no automatic updating of the list of available WLAN networks.
› Press the function key
Search.
Connection set-up › Switch on the WLAN client mode in the device.
› In the list of available WLAN networks, press the key
Search.
› Select the desired WLAN network.
› If the access to the WLAN network is password protected, then enter the re-
quired password.
SearchADelete1)
If the device is connected to the external device via WLAN client, the WLAN name of the external device
appears in this function key.
51WLAN connectivity and data connection
Page 55 of 100
If the device is connected to the external device via WLAN client the following
will appear in the function key
→ → WLAN → WLAN the WLAN name
of the external device.
Security type
In the list of available WLAN networks the security type appears in the func-
tion key with the name of the WLAN security type A
» Fig. 36 .
■ WPA2 - WPA2 security
■ WPA - WPA security
■ Open - Without security (without WLAN access password)
Disconnection
› Switch off the WLAN client mode in the device.
or
› Press the key
→
→ WLAN → WLAN → Delete .
WLAN client - manual settings
Manual settings / connections are then to be used when the desired WLAN
network is not in the list of available WLAN networks (e.g. the desired WLAN
network is not broadcasting a name).
›
Press the key
→
→ WLAN → WLAN → Manual settings .
›
Enter and select the following menu items.
■ Network name - Enter the WLAN name
■ Network key - Enter password for the WLAN connection
■ Security level: - Setting of the WLAN connection security
■ WPA2 - WPA2 security
■ WPA - WPA security
■ No security level - Without protection (without WLAN access password)
› Press the function key
Connect.
Data connection
Introduction
This chapter contains information on the following subjects:
Connection options for the data connection
52
Settings
52Connection options for the data connection
Using the data connection, the device can be connected to the Internet.
The data connection can be established in one of the following ways.
Data connection using rSAP›
Connect the device via Bluetooth ®
profile rSAP to a telephone with activated
data services.
Data connection using the SIM card in the external module
›
Insert a SIM card with activated data services in the external module and es-
tablish the data connection » page 44.
Data connection via WLAN
›
Connect the device to an external device with activated data services over
the WLAN client mode » page 51.
Settings
›
Press the key
→
→ Network .
■ Network settings - Setting of the data connection according to the associ-
ated telephone service provider (APN settings)
■ Access point name: ... - Setting of the access point name
■ User name: … - Setting of user name
■ Password: ... - Password setting
■ Authentication - Setting for the type of verification
■ Normal - Without verification
■ Safe - Verification required
■ Delete connection - Delete the data connection
■ Reset access point (APN) - Delete the settings of the data connection pa-
rameters
■ Store - Saving the settings
■ Network provider: ... - Select the data connection provider (the menu item is
visible when only the data connection of the inserted SIM card is active)
■ Data roaming - Enable / disable the use of data roaming connection
■ Current connection details - Display of information on data downloaded (by
pressing the function key Reset the data information is deleted)
■ Restore factory settings - Restoring the data connection settings
■ Data connection: - Settings relating to turning on/off the data connection
■ Off - Turning the data connection off
■ Ask - Switch on the data connection after confirming the request
■ On - Switch on the data connection
52WLAN connectivity and data connection
Page 66 of 100
›Enter destination.›Press the function key
Start→ Stopover .
In the displayed menu of a new tour the order of the stopovers can be
changed by pressing the function key
and moving the stopover to a differ-
ent position.›
Press the function key Calculate.
A route is created by inserting the destination in the route. For more informa-
tion on the tour » page 73.
Note
Up to 20 destinations can be included in a tour.
My Destinations
Introduction
This chapter contains information on the following subjects:
List of registered destinations
63
Home address
63
Current vehicle position Store(flagged destination)
64
This chapter discusses the entry options and selecting the destinations stored
in the device memory.
List of registered destinations
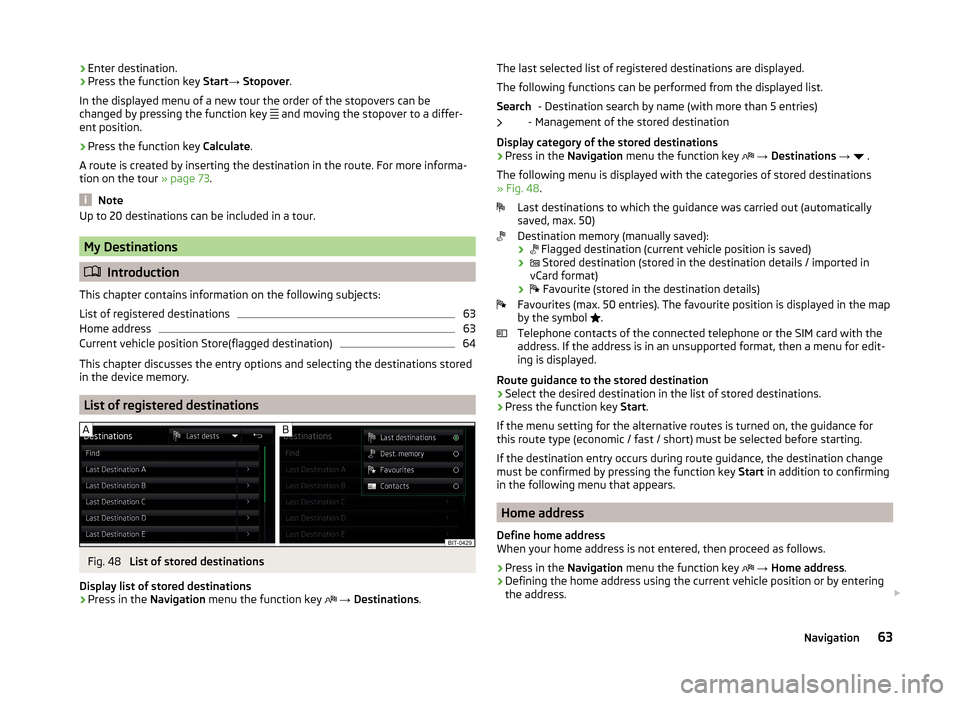
Fig. 48
List of stored destinations
Display list of stored destinations
› Press in the
Navigation menu the function key
→ Destinations .
The last selected list of registered destinations are displayed.
The following functions can be performed from the displayed list. - Destination search by name (with more than 5 entries)
- Management of the stored destination
Display category of the stored destinations
› Press in the
Navigation menu the function key
→ Destinations →
.
The following menu is displayed with the categories of stored destinations
» Fig. 48 .
Last destinations to which the guidance was carried out (automatically
saved, max. 50)
Destination memory (manually saved):
›
Flagged destination (current vehicle position is saved)
›
Stored destination (stored in the destination details / imported in
vCard format)
›
Favourite (stored in the destination details)
Favourites (max. 50 entries). The favourite position is displayed in the map
by the symbol .
Telephone contacts of the connected telephone or the SIM card with the
address. If the address is in an unsupported format, then a menu for edit-
ing is displayed.
Route guidance to the stored destination
› Select the desired destination in the list of stored destinations.
› Press the function key
Start.
If the menu setting for the alternative routes is turned on, the guidance for
this route type (economic / fast / short) must be selected before starting.
If the destination entry occurs during route guidance, the destination change
must be confirmed by pressing the function key Start in addition to confirming
in the following menu that appears.
Home address
Define home address
When your home address is not entered, then proceed as follows.
›
Press in the Navigation menu the function key
→ Home address .
›
Defining the home address using the current vehicle position or by entering
the address.
Search63Navigation
Page 68 of 100
Other POIsFig. 49
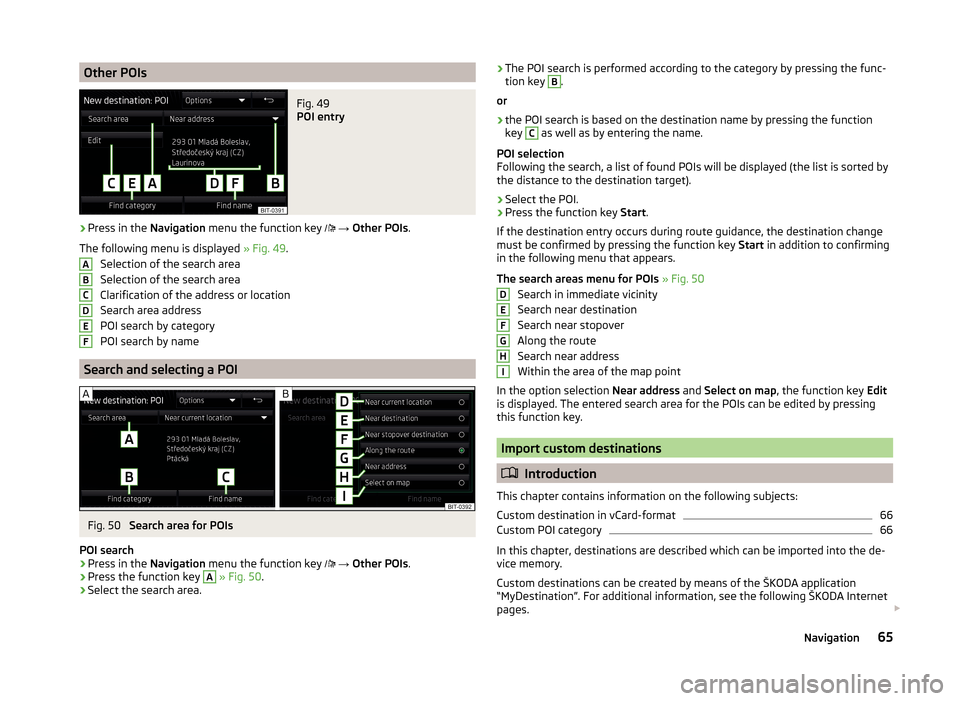
POI entry
›
Press in the Navigation menu the function key
→ Other POIs .
The following menu is displayed » Fig. 49.
Selection of the search area
Selection of the search area
Clarification of the address or location
Search area address
POI search by category
POI search by name
Search and selecting a POI
Fig. 50
Search area for POIs
POI search
›
Press in the Navigation menu the function key
→ Other POIs .
›
Press the function key
A
» Fig. 50 .
›
Select the search area.
ABCDEF›The POI search is performed according to the category by pressing the func-
tion key B.
or›
the POI search is based on the destination name by pressing the function
key
C
as well as by entering the name.
POI selection
Following the search, a list of found POIs will be displayed (the list is sorted by
the distance to the destination target).
›
Select the POI.
›
Press the function key Start.
If the destination entry occurs during route guidance, the destination change
must be confirmed by pressing the function key Start in addition to confirming
in the following menu that appears.
The search areas menu for POIs » Fig. 50
Search in immediate vicinity
Search near destination
Search near stopover
Along the route
Search near address
Within the area of the map point
In the option selection Near address and Select on map , the function key Edit
is displayed. The entered search area for the POIs can be edited by pressing
this function key.
Import custom destinations
Introduction
This chapter contains information on the following subjects:
Custom destination in vCard-format
66
Custom POI category
66
In this chapter, destinations are described which can be imported into the de-
vice memory.
Custom destinations can be created by means of the ŠKODA application
“MyDestination”. For additional information, see the following ŠKODA Internet
pages.
DEFGHI65Navigation
Page 69 of 100
http://infotainment.skoda-auto.com
Custom destination in vCard-format
In the device memory, a custom destination can be imported in the vCard for-
mat (*.vcf) from an SD card or a USB source.
Import
›
Insert the SD card into the device or connect a USB source with the file of
custom destination.
›
Press in the Navigation menu the function key
→ Import destinations .
›
Select the source and confirm the import.
Route guidance
›
Press in the Navigation menu the function key
→ Destinations →
→
.
›
Press the function key of the vCard to start the route guidance.
›
Press the function key
Start.
If the menu setting for the alternative routes is turned on, the guidance for
this route type (economic / fast / short) must be selected before starting.
If the destination entry occurs during route guidance, the destination change
must be confirmed by pressing the function key Start in addition to confirming
in the following menu that appears.
Delete
›
Press in the Navigation menu the function key
→ Destinations →
→
.
›
Press the function key
in the line with the name of your stored custom des-
tination.
›
In the destination details, press the function key Edit → Delete .
›
Confirm the deletion.
Custom POI category
In the device memory, custom POI categories that have been created using the
ŠKODA application “MyDestination” can be imported from the SD card.
Import
›
Insert the SD card with the POI categories into the device.
›
Press in the Navigation menu the function key
→ Version information →
Update .
›
Select the SD card as the source and confirm the import.
If there is already the same POI category name in the device, then it will be
overwritten during import.
Custom POI categories can be displayed on the map.›
Press in the Navigation menu the function key
→ Map → Select catego-
ries for POIs → My points of interest (Personal POI) .
Route guidance to a destination of another category
›
Press in the Navigation menu the function key
→ Other POIs .
›
Press the function key
A
» Fig. 50 on page 65 .
›
Select the search area.
›
Press the function key
B
» Fig. 50 on page 65 → My Points of Interest (Per-
sonal POI) .
›
Select the desired category of own destinations.
›
Press the function key Start.
If the menu setting for the alternative routes is turned on, the guidance for
this route type (economic / fast / short) must be selected before starting.
If the destination entry occurs during route guidance, the destination change
must be confirmed by pressing the function key Start in addition to confirming
in the following menu that appears.
Delete
›
Press in the Navigation menu the function key
→ Manage memory → De-
lete my POIs → Delete .
Map
Introduction
This chapter contains information on the following subjects:
Map description
67
Options for map display
67
Options for map display in the split screen
67
POI on the map
68
Road sign
68
Map Orientation
68
Map scale
68
Map alignment
6966Navigation
Page 77 of 100
With destinations on the tour already reached the note Dest. reached is dis-
played below the destination name. It is not possible to change the position of
these destinations with each other.
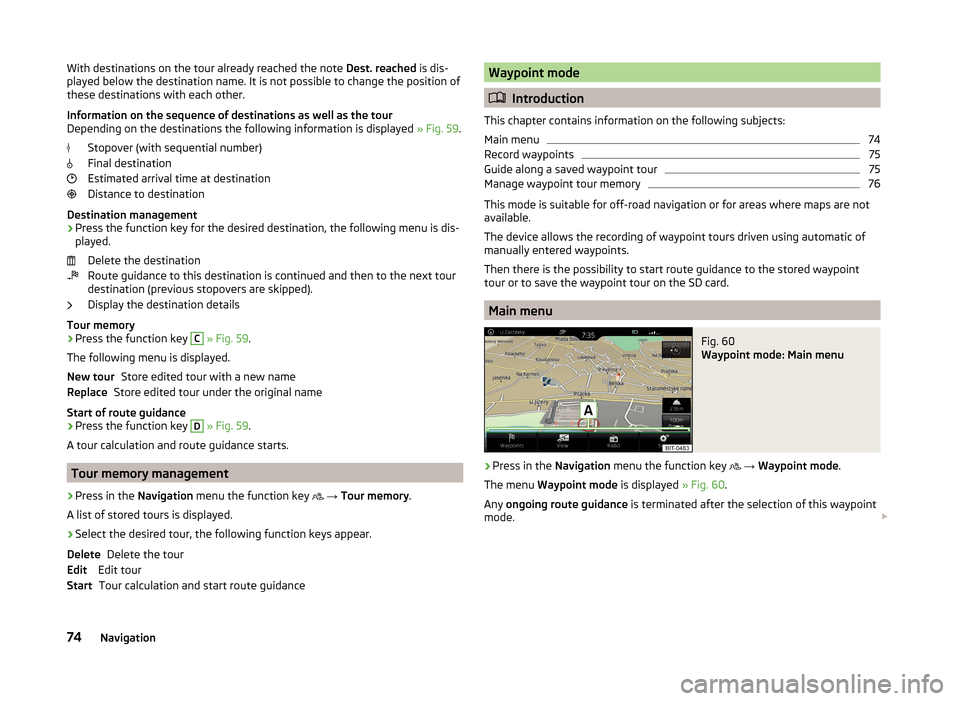
Information on the sequence of destinations as well as the tour
Depending on the destinations the following information is displayed » Fig. 59.
Stopover (with sequential number)
Final destination
Estimated arrival time at destination
Distance to destination
Destination management
› Press the function key for the desired destination, the following menu is dis-
played.
Delete the destination
Route guidance to this destination is continued and then to the next tour
destination (previous stopovers are skipped).
Display the destination details
Tour memory
› Press the function key C
» Fig. 59 .
The following menu is displayed. Store edited tour with a new name
Store edited tour under the original name
Start of route guidance › Press the function key
D
» Fig. 59 .
A tour calculation and route guidance starts.
Tour memory management
›
Press in the Navigation menu the function key
→ Tour memory .
A list of stored tours is displayed.
›
Select the desired tour, the following function keys appear.
Delete the tour
Edit tour Tour calculation and start route guidance
New tourReplaceDeleteEditStartWaypoint mode
Introduction
This chapter contains information on the following subjects:
Main menu
74
Record waypoints
75
Guide along a saved waypoint tour
75
Manage waypoint tour memory
76
This mode is suitable for off-road navigation or for areas where maps are not
available.
The device allows the recording of waypoint tours driven using automatic of
manually entered waypoints.
Then there is the possibility to start route guidance to the stored waypoint
tour or to save the waypoint tour on the SD card.
Main menu
Fig. 60
Waypoint mode: Main menu
›
Press in the Navigation menu the function key
→ Waypoint mode .
The menu Waypoint mode is displayed » Fig. 60.
Any ongoing route guidance is terminated after the selection of this waypoint
mode.
74Navigation
Page 79 of 100
Route guidance
During the guidance along a waypoint tour, no navigation announcements are
made by the device. When driving along the waypoint tour shown, follow as
closely as possible the information shown on the device screen.
While driving along a waypoint tour the split screen shows the Waypoints and
the direction to drive as well as the distance to the next waypoint, the se-
quence number of the next waypoint and the total number of waypoints 1
» Fig. 62 -
.
The waypoint tour from the vehicle location to the next waypoint “reduces”
continuously while driving “ ”
2
» Fig. 62 -
.
If you drive past but very close to the next waypoint, the route guidance will
continue with the subsequent waypoint.
If you drive past a waypoint and this does “not disappear” from the waypoint tour (e.g. because the distance to this waypoint is too large), then there is the
possibility to “skip” over this waypoint and continue the guidance to the next
waypoint.
› Press the function key
→ Skip waypoint .
Exit navigation
› Press the function key
→ Stop route guidance .
The guidance also stops when the waypoint mode is exited.
Manage waypoint tour memory
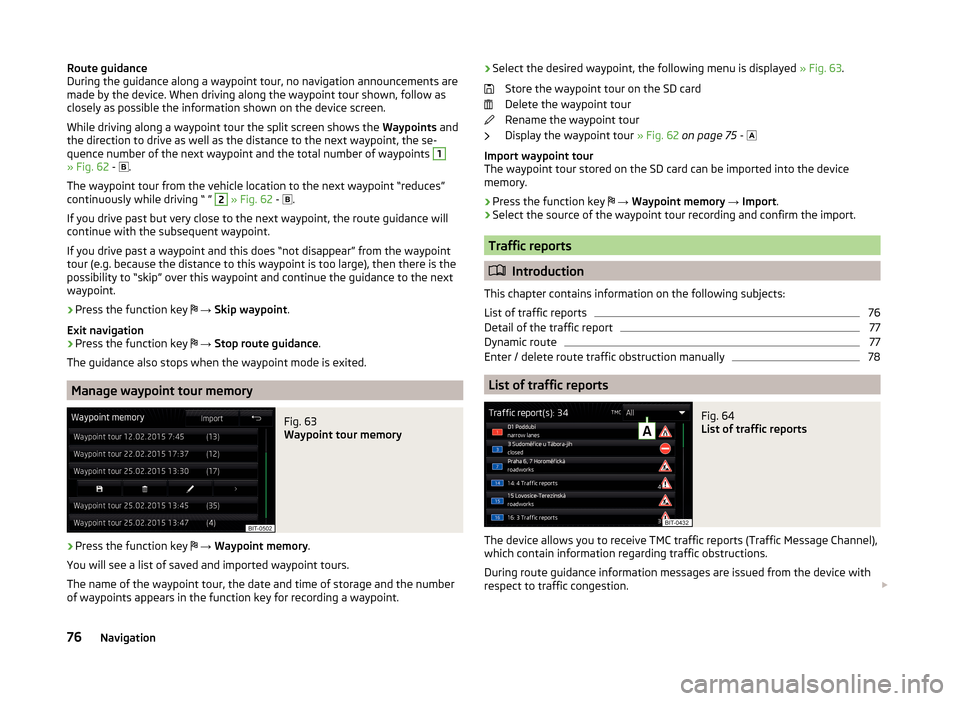
Fig. 63
Waypoint tour memory
›
Press the function key
→ Waypoint memory .
You will see a list of saved and imported waypoint tours.
The name of the waypoint tour, the date and time of storage and the number
of waypoints appears in the function key for recording a waypoint.
› Select the desired waypoint, the following menu is displayed
» Fig. 63.
Store the waypoint tour on the SD card
Delete the waypoint tour
Rename the waypoint tour
Display the waypoint tour » Fig. 62 on page 75 -
Import waypoint tour
The waypoint tour stored on the SD card can be imported into the device
memory.
› Press the function key
→ Waypoint memory → Import .
› Select the source of the waypoint tour recording and confirm the import.
Traffic reports
Introduction
This chapter contains information on the following subjects:
List of traffic reports
76
Detail of the traffic report
77
Dynamic route
77
Enter / delete route traffic obstruction manually
78
List of traffic reports
Fig. 64
List of traffic reports
The device allows you to receive TMC traffic reports (Traffic Message Channel),
which contain information regarding traffic obstructions.
During route guidance information messages are issued from the device with
respect to traffic congestion.
76Navigation
Page 90 of 100
Index
A
Abort route guidance
73
ACC82
Adaptive Cruise Control82
Additional keyboard languages15
Address61, 62
Adjust text messages38
Administering coupled devices43
Air conditioning85
Alphanumeric with keyboard10
Alternative routes78
Android Auto™54
Connection establishment55
Disconnection55
Function problems55
Home Page55
Anti-theft protection6
APN52
Apple CarPlay56
Connection establishment56
Disconnection56
Function problems57
Home menu56
Assistance systems82
Audio Media
22
Radio17
Audio source24
Automatic air conditioning85
Automatic air recirculation85
Automatic driving light when raining83
Automatic locking83
Automatic rear window wiper83
Automatic turning off of the device7
Automatic wiping when raining83
AUX28
Settings24
Auxiliary heating86
B
Blind spot monitoring
82
Bluetooth Settings
16
Switch on/off16
Update16
Visibility16
Bluetooth Player28
Bluetooth profile43
Breakdown service45
Broadcasting range see main menu
17
Broadcasting sector17
C
Call list Call list
47
Call settings38
CAR80
CD26
Central locking83
Clear calls38
Climatronic Display
85
Setting85
Closing83
Comfort turn signal83
COMING HOME83
Compatible sources DVD - video
33
Media29
Pictures31
Component protection6
Conditions for coupling40
Conference call48
Convenience consumer80
Cooling system85
Coupled device SIM card is inserted, a connected telephone
42
Couple device no telephone connected
41
Custom destination66
Custom destinations65
Custom POI category66
D
DAB Radio DAB text and image presentation
20
Settings20
Data connection52
Data roaming52
Date15
Daytime running light83
Daytime running light when raining83
Delete destination70
Demo mode79
Description of the device7
Destination Address
61, 62
Custom destination66
Favourite70
GPS coordinates62
Home address63
Image with GPS31
List of stored destinations63
Map point62
Memory70
POI64
Destination details70
Destination management Destination details
70
Favourite70
Storage70
87Index