CD player SKODA OCTAVIA 2015 3.G / (5E) Columbus Infotainment System Manual
[x] Cancel search | Manufacturer: SKODA, Model Year: 2015, Model line: OCTAVIA, Model: SKODA OCTAVIA 2015 3.G / (5E)Pages: 100, PDF Size: 11.13 MB
Page 5 of 100
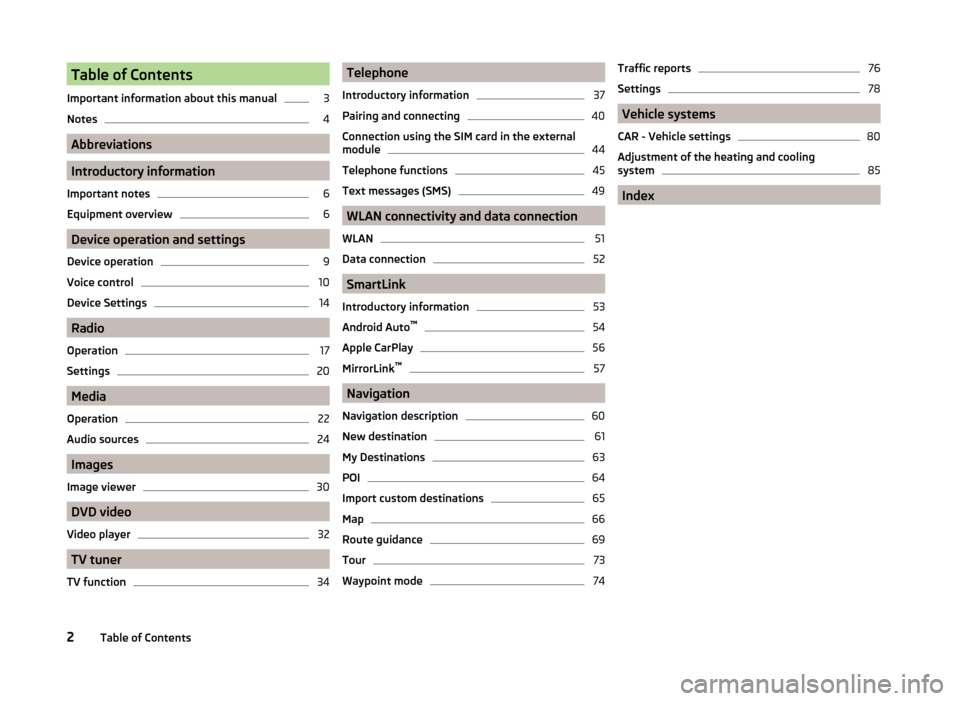
Table of Contents
Important information about this manual3
Notes
4
Abbreviations
Introductory information
Important notes
6
Equipment overview
6
Device operation and settings
Device operation
9
Voice control
10
Device Settings
14
Radio
Operation
17
Settings
20
Media
Operation
22
Audio sources
24
Images
Image viewer
30
DVD video
Video player
32
TV tuner
TV function
34Telephone
Introductory information37
Pairing and connecting
40
Connection using the SIM card in the external
module
44
Telephone functions
45
Text messages (SMS)
49
WLAN connectivity and data connection
WLAN
51
Data connection
52
SmartLink
Introductory information
53
Android Auto ™
54
Apple CarPlay
56
MirrorLink™
57
Navigation
Navigation description
60
New destination
61
My Destinations
63
POI
64
Import custom destinations
65
Map
66
Route guidance
69
Tour
73
Waypoint mode
74Traffic reports76
Settings
78
Vehicle systems
CAR - Vehicle settings
80
Adjustment of the heating and cooling system
85
Index
2Table of Contents
Page 6 of 100
Important information about this manual
This Owner's Manual is valid for the different versions of the Infotainment Co-
lumbus (hereinafter referred to only as device). The device may differ depend-
ing on the vehicle model, in which it is installed in both its appearance and in
the arrangement of the controls.
This Owner's Manual describes all possible device functions without identify-
ing them as special equipment, model variants or market-dependent equip-
ment. Consequently, the device on this vehicle does not need to contain all of
the functions described in this Owner's Manual.
For example, if the vehicle is not factory equipped with the CANTON sound
system, the menu points CANTON Optimisation, CANTON Surround and CAN-
TON Equaliser are not shown.
The availability of some features described in this manual depends on the
type of external devices (for example, telephone, music player, etc.).
Information on the compatibility of external devices can be found on ŠKODAIn- ternet pages http://infotainment.skoda-auto.com .
The Images in these Operating Instructions are for illustrative purposes only.
The illustrations can differ in minor details from your vehicle; they are only in-
tended to provide general information.
ŠKODA AUTO a.s. pursues a policy of ongoing product and model development
with all vehicles. Changes in terms of supply scope are possible at any time
with regard to design, equipment and technology. The information listed in
these Operating Instructions corresponds to the information available at the
time of going to press.
It is therefore not possible for legal claims to be made based on the technical
data, illustrations and information contained in these Operating Instructions.
Declaration of conformity
ŠKODA AUTO a.s. hereby declares that the ŠKODA Infotainment systems meet
the basic requirements and additional provisions of Directive 1999/5/EC with
reference to radio equipment and telecommunications devices.
Applies to Nigeria: ŠKODA AUTO a.s. hereby declares that the “connection and
the use of this communication device is granted by the Nigerian Communica-
tions Commission.”3Important information about this manual
Page 19 of 100
■Voice control session end tone - Switch on/off the audible signal when voice
control ends
■ Input tone in voice dialogue - Switch on/off the audible signal for the voice
input
Safe removal of the data source
›
Press the key
→
→ Remove safely: Press and select the data source
to be removed.
Restore factory settings
›
Press the key
→
→ Factory settings .
In this menu, some or all settings can be restored.
Bluetooth ®
settings
›
Press the key
→
→ Bluetooth .
■ Bluetooth - Switch on/off Bluetooth ®
function
■ Visibility: - Switch on/off the visibility of the Bluetooth ®
device for other de-
vices
■ Name: - Change the device name
■ Paired devices - Display the list of coupled Bluetooth ®
Devices
■ Find devices - Searches for available devices
■ Bluetooth audio (A2DP/AVRCP) - Turn on/off the ability to connect an audio
device (e.g. MP3 player, tablet etc...)
WLAN Settings
›
Press the key
→
→ WLAN → Mobile hotspot .
The transfer all the settings is made only after pressing the function key
Store .
■ Mobile hotspot - WLAN hotspot switch on/off (if an external device is con-
nected to the device via a WLAN hotspot, then the symbol will appear in the
function key with the associated number of connected external devices)
■ Security level: - Setting the connection security with the WLAN hotspot
■ WPA2 - WPA2 security
■ WPA - WPA security
■ No security level - Without security (without access password for WLAN
hotspot)
■ Network key - Enter the access code to the WLAN hotspot
■ SSID: ... - Name of the WLAN hotspot device
■ Do not send network name (SSID) - WLAN hotspot security switch on/off
System information
›
Press the key
→
→ System information .
■ Device part number: ... - Part number of the unit
■ Hardware: ... - Version of the hardware used
■ Software: ... - Version of the software used
■ “Gracenote” database: ... - Multimedia database version Gracenote
■ Navigation database: ... - Version of the navigation data
■ Media Codec: ... - Media codec version
■ Update software - Software update (e.g. Bluetooth ®
or station logos)
The information on available software updates is to be obtained from a ŠKODA
partner or on the following ŠKODA Internet pages.
http://infotainment.skoda-auto.com
16Device operation and settings
Page 26 of 100
Audio sourcesJukebox - Internal device memory
CD/DVD - Inserted CD / DVD
SD card - inserted SD card
USB - connected to the USB input audio source
BT audio - coupled Bluetooth ®
player
WLAN - Connected to the WLAN audio source
AUX - Connected to the AUX input audio source
Playback
The unit will play the contents of the connected audio source according to the
alphabetically sequenced directory and file name.
Operating modes
OperationActionPlay / PausePress from
Plays the current track from the start
Press from (after about 3 seconds
after the start of the track playback)Finger movement to the right of the screen area A
» Fig. 9 on page 22
(After 3 seconds from the start of the track playback)Fast-reverse within the titlePress and hold Fast-forward within the trackPress and hold
Play the previous track
Press from (within 3 seconds after
the start of the track playback)Finger movement to the right of the screen area A
» Fig. 9 on page 22
(Within 3 seconds after the start of the track playback)Play the next track
Press from Finger movement to the left of the
screen area A
» Fig. 9 on page 22Switch on/off the random playback
from the current album or folderPress from Switch on/off the repeat playback
from the current album or folderPress from OperationActionSwitch on/off repeat playback of spe-
cific trackPress from Search (applies to sources with a dis-
played multimedia database)Press from Turn on / off the preferred playback
(most played / best rated) trackPress from
The movement within the track is possible by finger touching the timeline
B
» Fig. 9 on page 22 .
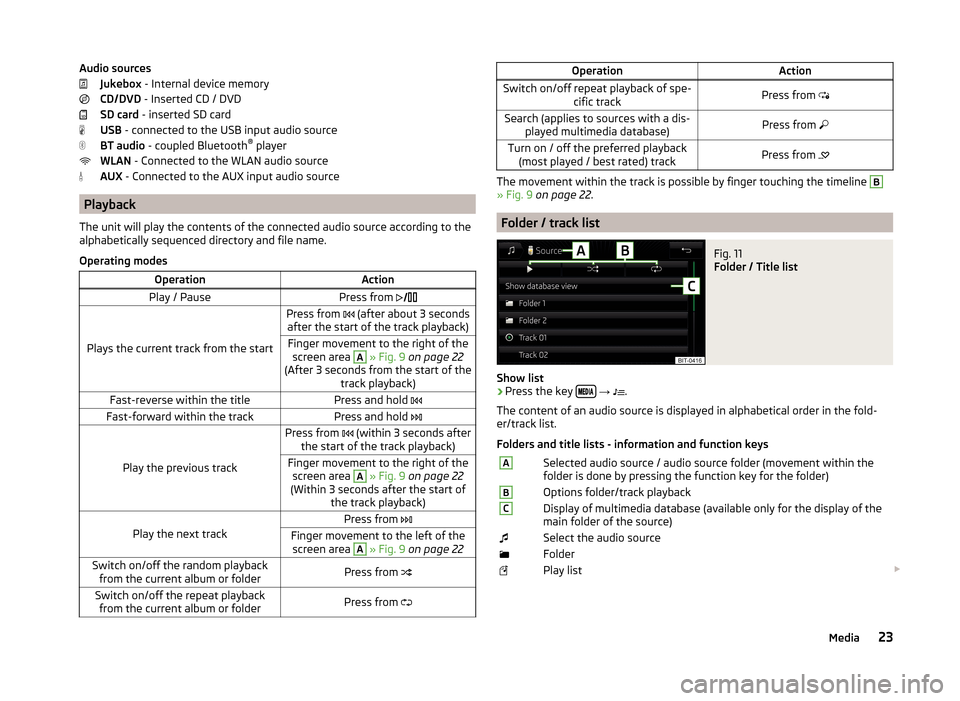
Folder / track list
Fig. 11
Folder / Title list
Show list
›
Press the key
→
.
The content of an audio source is displayed in alphabetical order in the fold-
er/track list.
Folders and title lists - information and function keys
ASelected audio source / audio source folder (movement within the
folder is done by pressing the function key for the folder)BOptions folder/track playbackCDisplay of multimedia database (available only for the display of the
main folder of the source)Select the audio sourceFolderPlay list 23Media
Page 27 of 100
/ Currently playing title / track playback stoppedThe title cannot be played (pressing the function key shows the
cause).
Note
■ With more than 1,000 tracks in the folder only the first 1,000 tracks with the
oldest creation date are displayed.■
The scanning speed of the folder / track list depends on the connection
speed and volume of data.
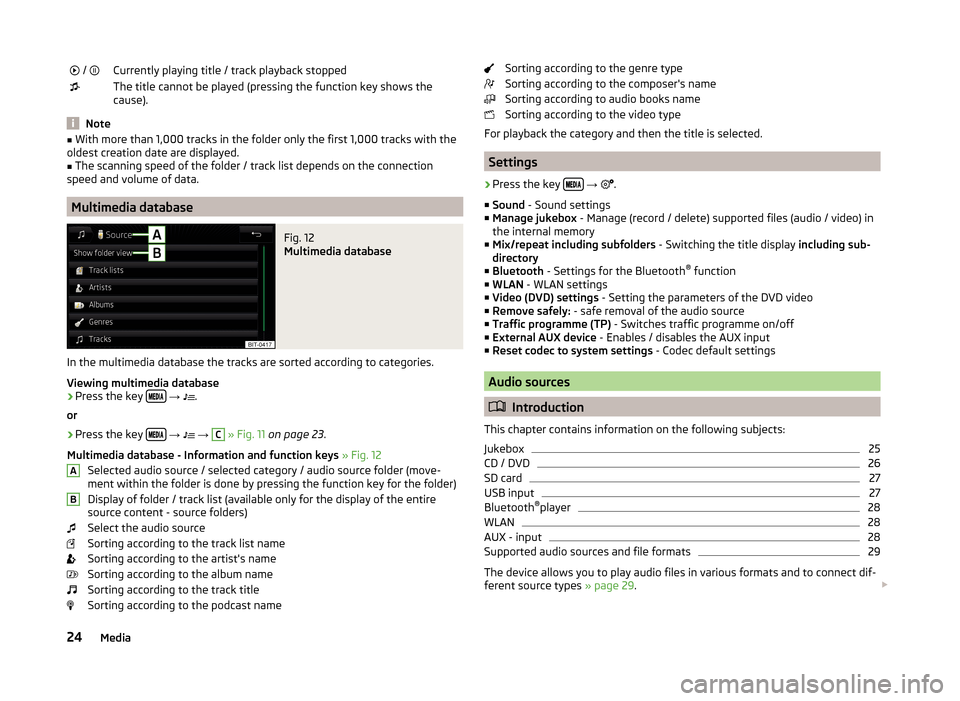
Multimedia database
Fig. 12
Multimedia database
In the multimedia database the tracks are sorted according to categories.
Viewing multimedia database
›
Press the key
→
.
or
›
Press the key
→
→
C
» Fig. 11 on page 23 .
Multimedia database - Information and function keys » Fig. 12
Selected audio source / selected category / audio source folder (move- ment within the folder is done by pressing the function key for the folder)
Display of folder / track list (available only for the display of the entire
source content - source folders)
Select the audio source
Sorting according to the track list name
Sorting according to the artist's name
Sorting according to the album name
Sorting according to the track title
Sorting according to the podcast name
ABSorting according to the genre type
Sorting according to the composer's name
Sorting according to audio books name
Sorting according to the video type
For playback the category and then the title is selected.
Settings
›
Press the key
→
.
■ Sound - Sound settings
■ Manage jukebox - Manage (record / delete) supported files (audio / video) in
the internal memory
■ Mix/repeat including subfolders - Switching the title display including sub-
directory
■ Bluetooth - Settings for the Bluetooth ®
function
■ WLAN - WLAN settings
■ Video (DVD) settings - Setting the parameters of the DVD video
■ Remove safely: - safe removal of the audio source
■ Traffic programme (TP) - Switches traffic programme on/off
■ External AUX device - Enables / disables the AUX input
■ Reset codec to system settings - Codec default settings
Audio sources
Introduction
This chapter contains information on the following subjects:
Jukebox
25
CD / DVD
26
SD card
27
USB input
27
Bluetooth ®
player
28
WLAN
28
AUX - input
28
Supported audio sources and file formats
29
The device allows you to play audio files in various formats and to connect dif-
ferent source types » page 29.
24Media
Page 29 of 100
Note■It is not possible to copy the contents of copyright protected CDs or DVDs to
the Jukebox.■
Files that have already been copied are recognized and cannot be copied
again (shown in grey).
■
It is not possible to copy files while simultaneously playing back audio or vid-
eo files in the CD/DVD drive.
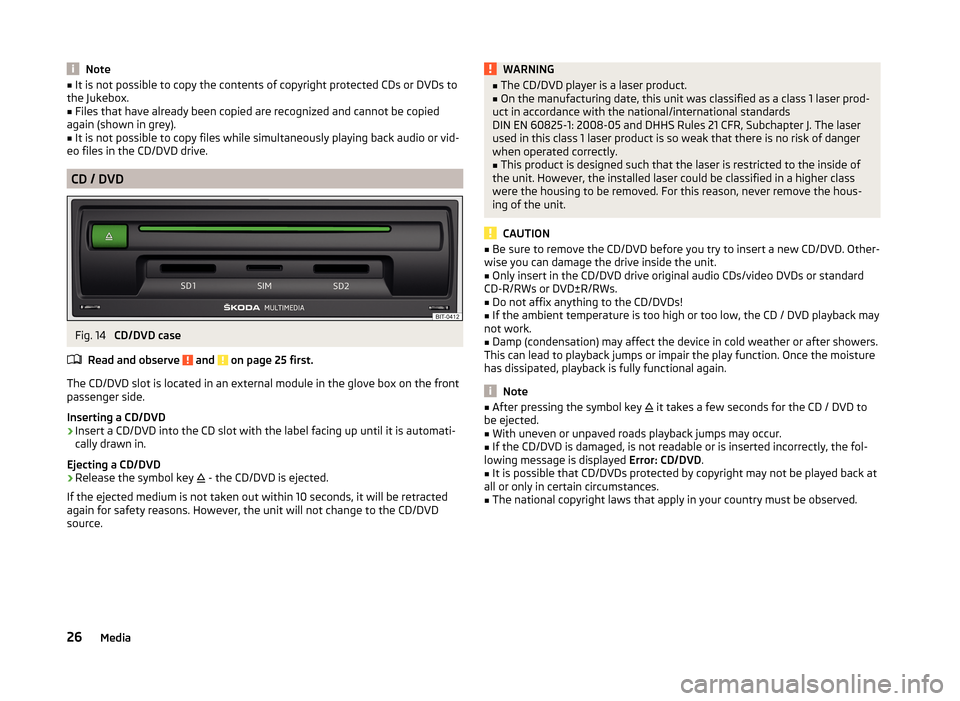
CD / DVD
Fig. 14
CD/DVD case
Read and observe
and on page 25 first.
The CD/DVD slot is located in an external module in the glove box on the front
passenger side.
Inserting a CD/DVD
›
Insert a CD/DVD into the CD slot with the label facing up until it is automati-
cally drawn in.
Ejecting a CD/DVD
›
Release the symbol key
- the CD/DVD is ejected.
If the ejected medium is not taken out within 10 seconds, it will be retracted
again for safety reasons. However, the unit will not change to the CD/DVD
source.
WARNING■ The CD/DVD player is a laser product.■On the manufacturing date, this unit was classified as a class 1 laser prod-
uct in accordance with the national/international standards
DIN EN 60825-1: 2008-05 and DHHS Rules 21 CFR, Subchapter J. The laser
used in this class 1 laser product is so weak that there is no risk of danger
when operated correctly.■
This product is designed such that the laser is restricted to the inside of
the unit. However, the installed laser could be classified in a higher class
were the housing to be removed. For this reason, never remove the hous-
ing of the unit.
CAUTION
■ Be sure to remove the CD/DVD before you try to insert a new CD/DVD. Other-
wise you can damage the drive inside the unit.■
Only insert in the CD/DVD drive original audio CDs/video DVDs or standard
CD-R/RWs or DVD±R/RWs.
■
Do not affix anything to the CD/DVDs!
■
If the ambient temperature is too high or too low, the CD / DVD playback may
not work.
■
Damp (condensation) may affect the device in cold weather or after showers.
This can lead to playback jumps or impair the play function. Once the moisture
has dissipated, playback is fully functional again.
Note
■ After pressing the symbol key it takes a few seconds for the CD / DVD to
be ejected.■
With uneven or unpaved roads playback jumps may occur.
■
If the CD/DVD is damaged, is not readable or is inserted incorrectly, the fol-
lowing message is displayed Error: CD/DVD.
■
It is possible that CD/DVDs protected by copyright may not be played back at
all or only in certain circumstances.
■
The national copyright laws that apply in your country must be observed.
26Media
Page 31 of 100
Bluetooth®
player
Read and observe
and on page 25 first.
The unit allows audio files of a connected Bluetooth ®
player to play using the
A2DP and AVRCP audio profile.
Connect the Bluetooth ®
player
›
Connect the player to the device - follow the same instructions as for pairing
the device with a telephone » page 41.
›
Select the audio source
BT audio » page 22 , Select audio source and then
the desired player.
Separate the Bluetooth ®
player
›
Terminate the connection in the list of paired devices » page 43.
Automatic playback stop and disconnection
If an Apple device is connected as a Bluetooth ®
player and is it connected to
the USB input (for example, for the purpose of charging the connected device),
then playback via Bluetooth ®
stops and playback is then only possible via USB.
If the audio source is switched from Bluetooth ®
Players to USB, then there is
an automatic interruption of the Bluetooth ®
connection. The following warning
message appears in the screen Bluetooth audio (A2DP) … Connection cancel-
led.
If the Bluetooth ®
player audio source is connected to the AUX input, then the
audio output is switched from the AUX input of the connected device. For fur-
ther playback the audio source is to be switched to AUX.
Note
If a device is connected to the device using Apple CarPlay, then a connection
using Bluetooth ®
is possible.
WLAN
Read and observe
and on page 25 first.
The device allows you to play audio files connected from a WLAN device to the
device.
Play over WLAN
›
Connect the player to the device's WLAN » page 51, WLAN Hotspot - Con-
nection to the external device with the device WLAN .
›Start the UPnP application in the connected device or connect a device that
allows you to set up a DLNA server.›
Select the audio source
WLAN » page 22 , Select audio source .
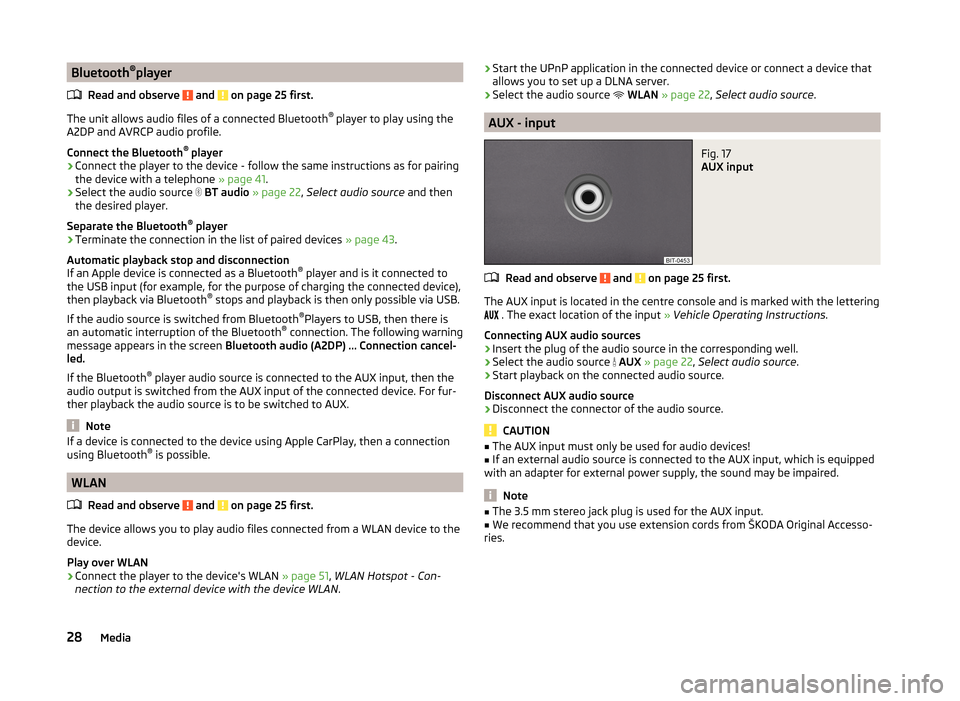
AUX - input
Fig. 17
AUX input
Read and observe and on page 25 first.
The AUX input is located in the centre console and is marked with the lettering
. The exact location of the input
» Vehicle Operating Instructions .
Connecting AUX audio sources
›
Insert the plug of the audio source in the corresponding well.
›
Select the audio source
AUX » page 22 , Select audio source .
›
Start playback on the connected audio source.
Disconnect AUX audio source
›
Disconnect the connector of the audio source.
CAUTION
■ The AUX input must only be used for audio devices!■If an external audio source is connected to the AUX input, which is equipped
with an adapter for external power supply, the sound may be impaired.
Note
■ The 3.5 mm stereo jack plug is used for the AUX input.■We recommend that you use extension cords from ŠKODA Original Accesso-
ries.28Media
Page 35 of 100
DVD video
Video player
Introduction
This chapter contains information on the following subjects:
Main menu
32
Select a video source
32
Video playback
32
DVD menu
33
Supported video sources and file formats
33
Settings
33
First and foremost, pay attention to the safety instructions » page 6 , Impor-
tant notes .
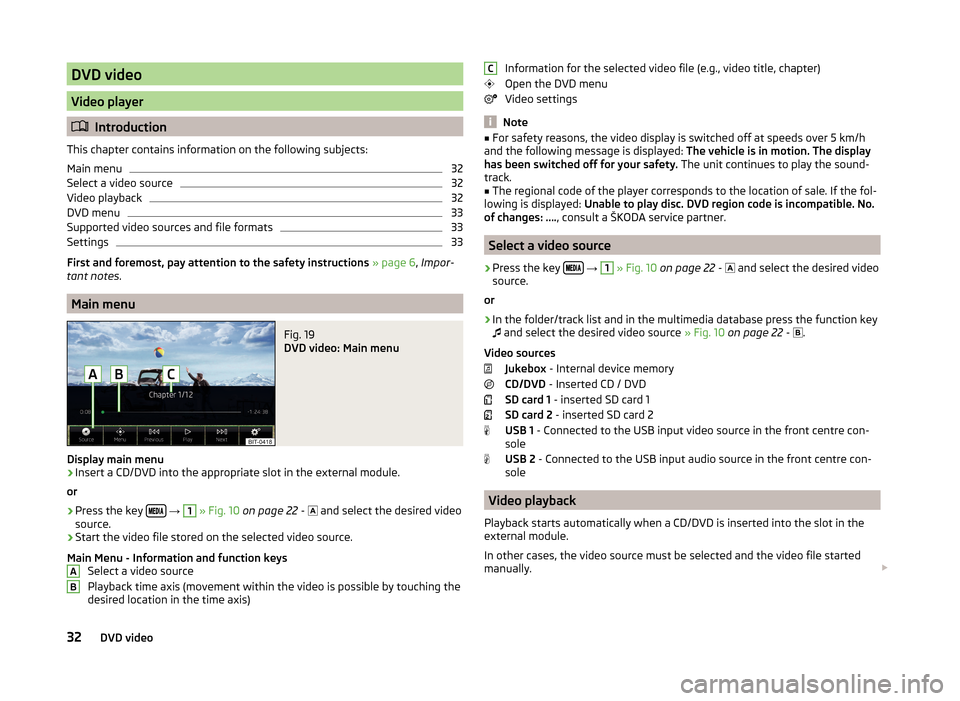
Main menu
Fig. 19
DVD video: Main menu
Display main menu
›
Insert a CD/DVD into the appropriate slot in the external module.
or
›
Press the key
→
1
» Fig. 10 on page 22 -
and select the desired video
source.
›
Start the video file stored on the selected video source.
Main Menu - Information and function keys Select a video source
Playback time axis (movement within the video is possible by touching the
desired location in the time axis)
ABInformation for the selected video file (e.g., video title, chapter)
Open the DVD menu
Video settings
Note
■ For safety reasons, the video display is switched off at speeds over 5 km/h
and the following message is displayed: The vehicle is in motion. The display
has been switched off for your safety. The unit continues to play the sound-
track.■
The regional code of the player corresponds to the location of sale. If the fol-
lowing is displayed: Unable to play disc. DVD region code is incompatible. No.
of changes: …. , consult a ŠKODA service partner.
Select a video source
›
Press the key
→
1
» Fig. 10 on page 22 -
and select the desired video
source.
or
›
In the folder/track list and in the multimedia database press the function key
and select the desired video source
» Fig. 10 on page 22 -
.
Video sources Jukebox - Internal device memory
CD/DVD - Inserted CD / DVD
SD card 1 - inserted SD card 1
SD card 2 - inserted SD card 2
USB 1 - Connected to the USB input video source in the front centre con-
sole
USB 2 - Connected to the USB input audio source in the front centre con-
sole
Video playback
Playback starts automatically when a CD/DVD is inserted into the slot in the
external module.
In other cases, the video source must be selected and the video file started
manually.
C32DVD video
Page 43 of 100
Pairing and connecting
Introduction
This chapter contains information on the following subjects:
conditions for coupling
40
Telephone search
40
Pairing - no telephone connected
41
Pairing - a telephone is connected
41
Pairing - two telephones connected
41
Connected SIM card in an external module, no telephone connected
42
Connected SIM card in an external module, a telephone - coupling
42
Pairing from the telephone
42
Pairing confirmation
42
Administering coupled devices
43
To connect a telephone with the device, the two devices must be paired via
Bluetooth ®
.
The pairing procedure is dependent on the number of telephones already con-
nected, whether using the inserted SIM card in the external module or via the
telephone using the profile rSAP » page 37, Possible connection types .
A connection with a telephone that is already paired does not require coupling. It is enough to find the telephone that has been coupled in the list of coupled
telephones and make the connection.
If a SIM card is located in the external module with activated telephone serv-
ices, then only one telephone can be connected with the device. Depending on
the telephone used only those telephone contact lists and text messages
(SMS) are available.
If a device is connected to the device using Apple CarPlay, then a connection
using Bluetooth ®
is possible.
Note
■ The range of the connection to the hands-free system is limited to the pas-
senger compartment.■
The maximum number of paired telephones is 20. Pairing a new telephone
after reaching the maximum number causes the telephone that has not been
paired for the longest time to be automatically replaced.
conditions for coupling
The telephone can be coupled with the device under the following conditions. The ignition is switched on.
The Bluetooth ®
function of the device » page 16 and the telephone is
switched on.
The visibility of the device » page 16 and the telephone is switched on.
The telephone is within range of the Bluetooth ®
signal of the device.
The telephone is compatible with the device.
There is no device connected to the device using Apple CarPlay.
The pairing can be initiated from the device or from the telephone.
During the pairing and connecting process the device can demand the confir-
mation by the Bluetooth ®
profile (e.g., enable contact import, enable the test
messaging or the connection of an audio player or similar). The telephone dis-
play should be monitored to acknowledge any possible request.
Please refer to the compatibility of telephones as well as updates which are
available for the Bluetooth ®
device, and are available on the following ŠKODA
Internet pages.
http://infotainment.skoda-auto.com
Telephone search
The telephone is not in the list of paired devices
The telephone can be searched for in one of the following ways.
›
If there is no connected telephone to the device, then press the key
→
Find telephone .
›
If there is
no telephone connected to the device, then press the key
→
→ Find telephone .
›
If a SIM card is inserted in the external module of the device, then press →
D
» Fig. 24 on page 37 → Find telephone .
A search for available devices starts. After about 30 seconds a list of found de-
vices appears, which is updated up to 1 minute after the start of the search ap-
pears.
›
If you do not want to wait for the display of the list press the function key
Results .
›
Select the desired select telephone.
40Telephone
Page 44 of 100
The telephone is in the list of coupled devices
If a telephone is connected with the device then proceed in one of the follow- ing ways.›
Press the key
→
or
D
» Fig. 24 on page 37 and select the desired
phone.
or
›
Press the key
→
Select telephone and select the desired telephone.
or
›
Press the key
→
→ Bluetooth → Paired devices and select the tele-
phone and a Bluetooth ®
- connection profile » page 43.
Pairing - no telephone connected
›
Press the key
→ Find telephone .
A search for available Bluetooth ®
devices takes place.
›
Select the desired select telephone.
›
Confirm the coupling.
After pairing confirmation the telephone is connected to the device as the
main telephone.
Pairing - a telephone is connected
›
Press the key
→
→ Find telephone .
A search for available Bluetooth ®
devices takes place.
›
Select the desired select telephone.
The following menu appears in the screen.
■ Cancel - Cancel the coupling
■ Replace - Pairing and replacement of the main telephone
■ Add - Pairing as additional telephone (the menu is not visible when the tele-
phone is connected via the rSAP profile)
› Select the desired connection type.
› Confirm the coupling.
After pairing confirmation the telephone connects to the device.
Pair the telephone when the main telephone is connected via the rSAP
profile
To connect another telephone to the device, it is necessary to first quit the
connection using the rSAP profile.
› Press the key
→
→ Find telephone .
› Select the desired select telephone.
› Press the function key
Add → Hands-free telephone (HFP) .
The main telephone ends the connection via the rSAP profile and connects to
the device via the HFP profile.
› Confirm the coupling.
The telephone to be connected connects with the device as the additional tel-
ephone.
Pairing - two telephones connected
›
Press the key
→
→ Find telephone .
A search for available Bluetooth ®
devices takes place.
›
Select the desired select telephone.
The following menu appears in the screen.
■ Cancel - Cancel the coupling
■ Main tel. - Changing the main telephone
■ Addition. tel. - Changing the auxiliary telephone
› Select the desired connection type.
› Confirm the coupling.
After pairing confirmation the telephone connects to the device.
If you want to replace a telephone that is also connected to the device as an audio player, then the following message appears on the screen.
Two devices are already connected. Please disconnect at least one of these
devices first in order to connect ….
Disconnect from the telephone to be replaced and repeat the coupling proce-
dure.
Pair the telephone via the rSAP profile › Press the key
→
→ Find telephone .
› Select the telephone you want with the rSAP profile.
41Telephone