window SKODA OCTAVIA 2015 3.G / (5E) Columbus Infotainment System Manual
[x] Cancel search | Manufacturer: SKODA, Model Year: 2015, Model line: OCTAVIA, Model: SKODA OCTAVIA 2015 3.G / (5E)Pages: 100, PDF Size: 11.13 MB
Page 12 of 100
Device operation and settings
Device operation
Introduction
This chapter contains information on the following subjects:
Operation principles
9
Alphanumeric with keyboard
10
Operation by means of an application in the external device
10
This chapter covers the device operation and settings.
Note
Depending on the equipment, the device can be operated with the operating
lever or via the buttons on the multifunction steering wheel. Additional infor-
mation » Vehicle Operating Instructions .
Operation principles
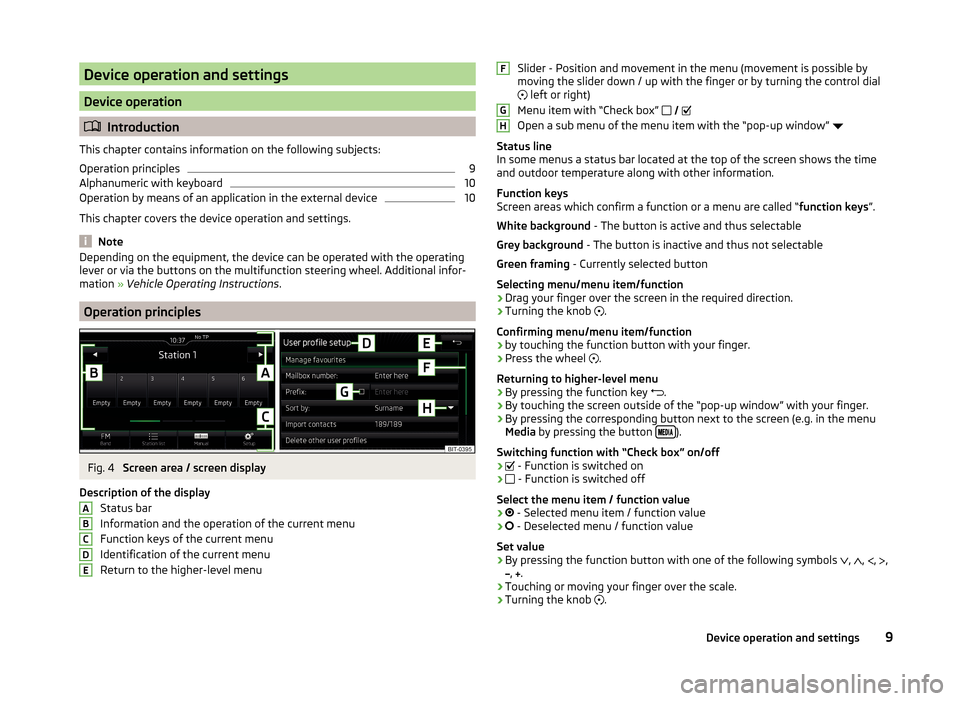
Fig. 4
Screen area / screen display
Description of the display Status bar
Information and the operation of the current menu Function keys of the current menu
Identification of the current menu
Return to the higher-level menu
ABCDESlider - Position and movement in the menu (movement is possible by
moving the slider down / up with the finger or by turning the control dial left or right)
Menu item with “Check box”
Open a sub menu of the menu item with the “pop-up window”
Status line
In some menus a status bar located at the top of the screen shows the time
and outdoor temperature along with other information.
Function keys
Screen areas which confirm a function or a menu are called “ function keys”.
White background - The button is active and thus selectable
Grey background - The button is inactive and thus not selectable
Green framing - Currently selected button
Selecting menu/menu item/function › Drag your finger over the screen in the required direction.
› Turning the knob
.
Confirming menu/menu item/function
› by touching the function button with your finger.
› Press the wheel
.
Returning to higher-level menu › By pressing the function key
.
› By touching the screen outside of the “pop-up window” with your finger.
› By pressing the corresponding button next to the screen (e.g. in the menu
Media by pressing the button
).
Switching function with “Check box” on/off
›
- Function is switched on
›
- Function is switched off
Select the menu item / function value
›
- Selected menu item / function value
›
- Deselected menu / function value
Set value › By pressing the function button with one of the following symbols
,
,
,
,
,
.
› Touching or moving your finger over the scale.
› Turning the knob
.
FGH9Device operation and settings
Page 14 of 100
›Telephone
› NavigationWARNINGDo not use the function of the telephone voice control in an emergency.
Your voice commands may not be recognized in such situations. The tele-
phone connection may not be established or the connection may take too
much time to complete. The emergency number should be dialled manually!
CAUTION
The messages are generated by the device. The flawless clarity (e.g. road or
city name) cannot always be guaranteed.
Function requirements
Read and observe
and on page 11 first.
Function requirements for voice control The unit is switched on.
No telephone call is in progress.
The parking aid is not active.
Requirements for optimum voice command recognition
› The voice commands are only then to be spoken when the symbol is dis-
played in the device screen or in the display of the combined instrument
.
› Speak with a normal tone of voice without intonation and excessive pauses.
› Avoid bad pronunciation.
› Close the doors, windows and sliding roof, in order to avoid disturbing envi-
ronmental influences on the function of the voice commands.
› You are recommended to speak louder at higher speeds, so that the sound of
your voice is not drowned out by the increased ambient noise.
› During voice control, limit additional noise in the vehicle, e.g. passengers
talking at the same time.
CAUTION
■ For some languages, there is no voice control available. This device indicates
this fact through a text message that is displayed after setting the device lan-
guage screen .
Note
During voice control, no navigation announcements and traffic announce-
ments are played.Switching on/off
Read and observe
and on page 11 first.
Switching on voice control
Voice control can be switched on in one of the following ways.
›
Press the key on the device.
or
›
Release the symbol key
on the multifunction steering wheel.
Activation of voice control is indicated by an acoustic signal and the device
screen will display a collection of basic voice commands for the current menu.
Switching off voice control
Voice control can be switched off in one of the following ways.
›
Hold the button on the device or press twice.
›
Release the symbol key
on the multifunction steering wheel or press
twice.
›
Issue the voice command End voice control.
The voice control switches off when certain device buttons (e.g.
, etc.)
are operated.
Guidance and help for voice control
Read and observe
and on page 11 first.
The unit will play a tutorial for voice mode, which makes using the familiar
voice control operate the appliance you, or help with the information which
voice commands are expected for the currently selected menu.
Instructions for voice control
When you give the voice command Start tutorial, the unit plays one of the sev-
en parts of the voice control tutorial. After saying the command again the next
part is played , etc.
Individual parts of the introduction can be called up separately by saying the
voice command Introduction part ... and the number 1 through 7.
Help for voice control
When you give the voice command Help, the unit displays voice commands for
the current selected menu. In some cases, after pronouncing Help again, the
next part of the help is shown.
11Device operation and settings
Page 20 of 100
Radio
Operation
Introduction
This chapter contains information on the following subjects:
Main menu
17
Select broadcasting sector
17
List of available stations
18
Search and select available stations
18
Store preferred station
19
Station logos
19
TP Traffic programme
19
Radio DAB text and image presentation
20
The device allows analogue radio reception of FM and AM frequency ranges as
well as DAB digital radio reception.
CAUTION
■ For vehicles with window antennas do not stick foil or metal coated stickers
to the window as this can lead to interference.■
Car parks, tunnels, tall buildings or mountains can interfere with the radio
signal even causing it to fail completely.
Main menu
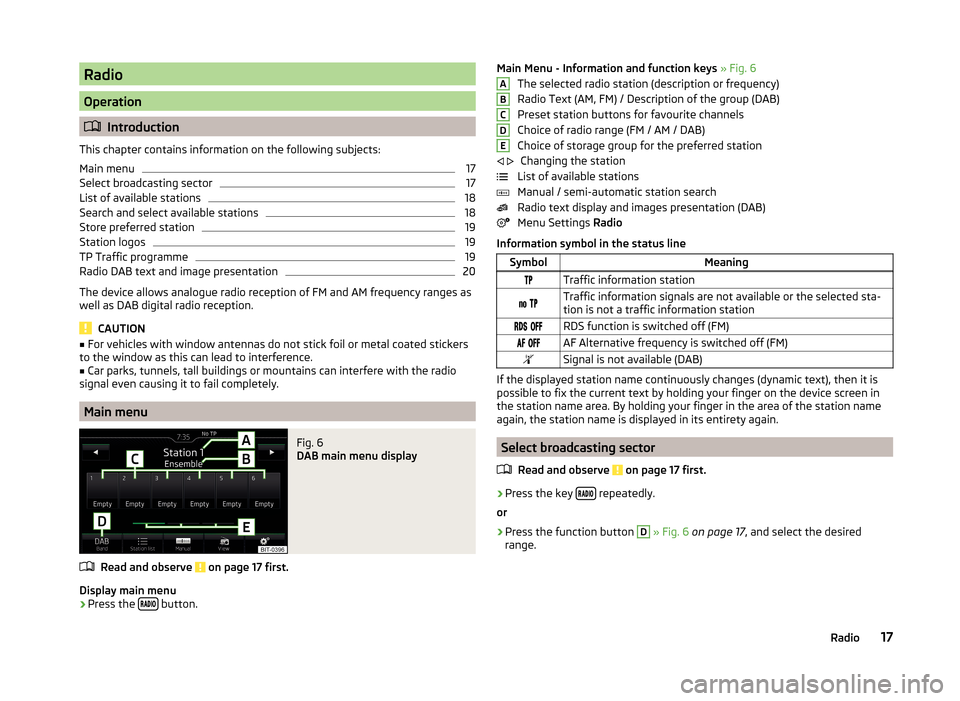
Fig. 6
DAB main menu display
Read and observe on page 17 first.
Display main menu
›
Press the button.
Main Menu - Information and function keys
» Fig. 6
The selected radio station (description or frequency)
Radio Text (AM, FM) / Description of the group (DAB)
Preset station buttons for favourite channels
Choice of radio range (FM / AM / DAB)
Choice of storage group for the preferred station Changing the station
List of available stations
Manual / semi-automatic station search
Radio text display and images presentation (DAB)
Menu Settings Radio
Information symbol in the status lineSymbolMeaningTraffic information station Traffic information signals are not available or the selected sta-
tion is not a traffic information station RDS function is switched off (FM) AF Alternative frequency is switched off (FM)Signal is not available (DAB)
If the displayed station name continuously changes (dynamic text), then it is
possible to fix the current text by holding your finger on the device screen in
the station name area. By holding your finger in the area of the station name
again, the station name is displayed in its entirety again.
Select broadcasting sector
Read and observe
on page 17 first.
›
Press the key repeatedly.
or
›
Press the function button
D
» Fig. 6 on page 17 , and select the desired
range.
ABCDE 17Radio
Page 32 of 100
Supported audio sources and file formatsRead and observe
and on page 25 first.
Supported audio sources
SourceInterfaceTypeSpecificationFile sys-temSD cardSD readerStandard sizeSD, SDHC, SDXC
FAT16VFAT
FAT32
exFAT NTFSUSB-
devices
USB 1.x; 2.x and 3.x or
higher with support of USB 2.x
MSC
USB stick;
HDD (without any special software); The MSC mode
supports USB de- vices
MTP
Devices with theAndroid operat- ing system or
Windows mobile (mobile phone, tablet)
Apple
Devices with the
operating system
iOS (iPhone, iPod, iPad)
CD/DVDCD/DVD-Drive
Audio CD (Up to 80 min);
CD-R / RW (Up to 700 MB);
DVD±R/RW; DVD audioISO9660;
Joliet (Level 1,2,3); UDF 1.x;UDF 2.x
-
Supported audio file formatsCodec type
(File formats)File suffixMax bit rateMaximumsampling rateMulti
channels a)Play listsWindows Media
Audio
9 and 10 (Lay- er-3)
wma384 kbit /s96 kHz
no
m3upls
wpl
m3u8 asx
WAVwav
Defined bythe format (approx.
1.5 Mbit/s)
48 kHz
MPEG-1; 2 and 2.5mp3320 kbit /sMPEG-2 and 4aac; mp4;m4a
yes
FLAC;
OGG Vorbisflac; ogg
Defined by the format (approx.
5.5 Mbit/s)a)
Applies to the CANTON sound system.
The GPT standards (GUID partition table) method structured audio sources are
not supported by the device.
Files that are protected by Digital Rights Management (DRM) technology can-
not be played back by the device.
29Media
Page 63 of 100
Navigation
Navigation description
Introduction
This chapter contains information on the following subjects:
GPS satellite signal
60
Navigation data
60
Main menu
60
Pop-up windows
61
GPS satellite signal
The unit uses the GPS (Global Positioning System) satellite signal for route
guidance.
Outside the range of the GPS satellite signal (e.g. in dense vegetation, in tun-
nels, parking garages, etc.), the unit navigates only with restrictions using
some on-vehicle sensors (such as speed sensor or steering angle sensor).
The unit offers the possibility to show in the split screen display the following
Position » Fig. 44 on page 61 information about the current geographical po-
sition of the vehicle and the satellite signal.
Geographical longitude
Geographical latitude
Elevation
Number of received/available satellites
To view the information on the longitude and latitude of the current vehicle
position display requires the reception of GPS signals from at least three satel-
lites.
To view the elevation information of the current vehicle position display re-
quires the reception of GPS signals from at least five satellites.
Navigation data
Navigation data source
The navigation data is stored in the internal memory.
Finding out the version of the navigation data › Press in the
Navigation menu the function key
→ Version information .
Update navigation data
We recommend that you update the navigation data on a regular basis (e.g.
Due to newly developed roads and changed traffic signs etc.).
For information on how to update the navigation data ask a ŠKODA partner or
go to the following ŠKODA website.
http://infotainment.skoda-auto.com
Main menu
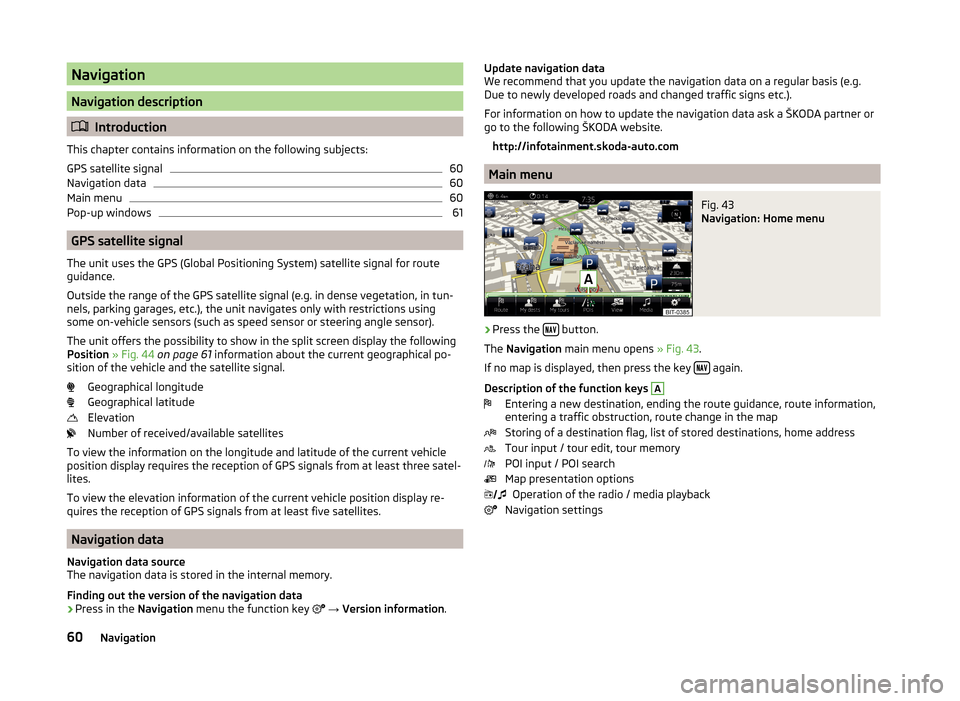
Fig. 43
Navigation: Home menu
›
Press the button.
The Navigation main menu opens » Fig. 43.
If no map is displayed, then press the key
again.
Description of the function keys
A
Entering a new destination, ending the route guidance, route information,
entering a traffic obstruction, route change in the map
Storing of a destination flag, list of stored destinations, home address
Tour input / tour edit, tour memory
POI input / POI search
Map presentation options Operation of the radio / media playback
Navigation settings
60Navigation
Page 64 of 100
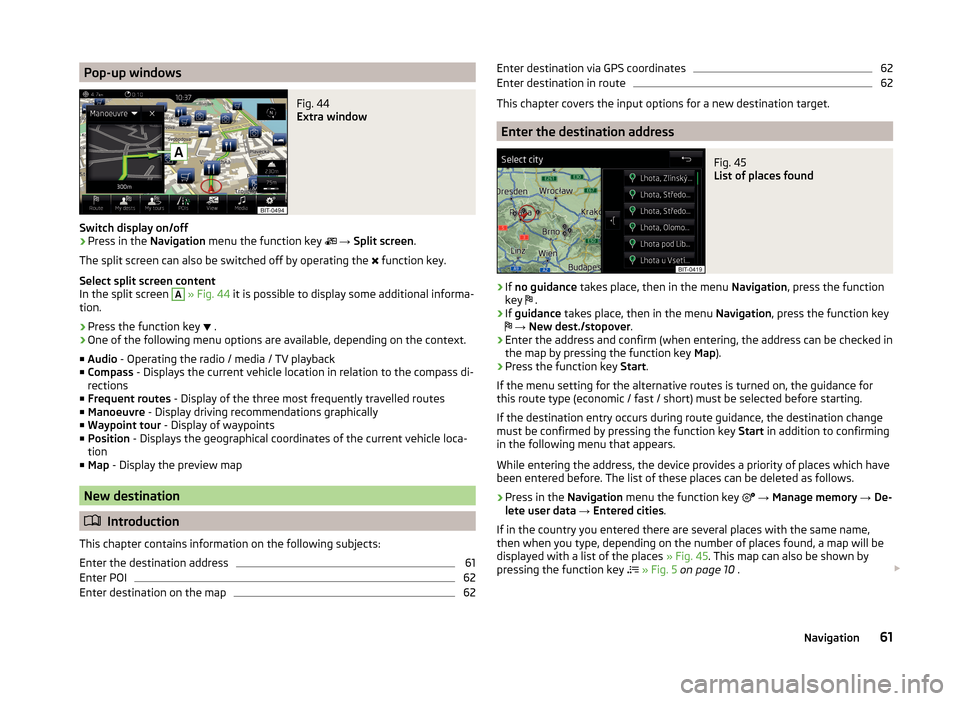
Pop-up windowsFig. 44
Extra window
Switch display on/off
›
Press in the Navigation menu the function key
→ Split screen .
The split screen can also be switched off by operating the function key.
Select split screen content
In the split screen
A
» Fig. 44 it is possible to display some additional informa-
tion.
› Press the function key
.
› One of the following menu options are available, depending on the context.
■ Audio - Operating the radio / media / TV playback
■ Compass - Displays the current vehicle location in relation to the compass di-
rections
■ Frequent routes - Display of the three most frequently travelled routes
■ Manoeuvre - Display driving recommendations graphically
■ Waypoint tour - Display of waypoints
■ Position - Displays the geographical coordinates of the current vehicle loca-
tion
■ Map - Display the preview map
New destination
Introduction
This chapter contains information on the following subjects:
Enter the destination address
61
Enter POI
62
Enter destination on the map
62Enter destination via GPS coordinates62Enter destination in route62
This chapter covers the input options for a new destination target.
Enter the destination address
Fig. 45
List of places found
›
If no guidance takes place, then in the menu Navigation, press the function
key .
›
If
guidance takes place, then in the menu Navigation, press the function key
→ New dest./stopover .
›
Enter the address and confirm (when entering, the address can be checked in
the map by pressing the function key Map).
›
Press the function key Start.
If the menu setting for the alternative routes is turned on, the guidance for
this route type (economic / fast / short) must be selected before starting.
If the destination entry occurs during route guidance, the destination change
must be confirmed by pressing the function key Start in addition to confirming
in the following menu that appears.
While entering the address, the device provides a priority of places which have
been entered before. The list of these places can be deleted as follows.
› Press in the
Navigation menu the function key
→ Manage memory → De-
lete user data → Entered cities .
If in the country you entered there are several places with the same name,
then when you type, depending on the number of places found, a map will be
displayed with a list of the places » Fig. 45. This map can also be shown by
pressing the function key
» Fig. 5 on page 10 .
61Navigation
Page 73 of 100
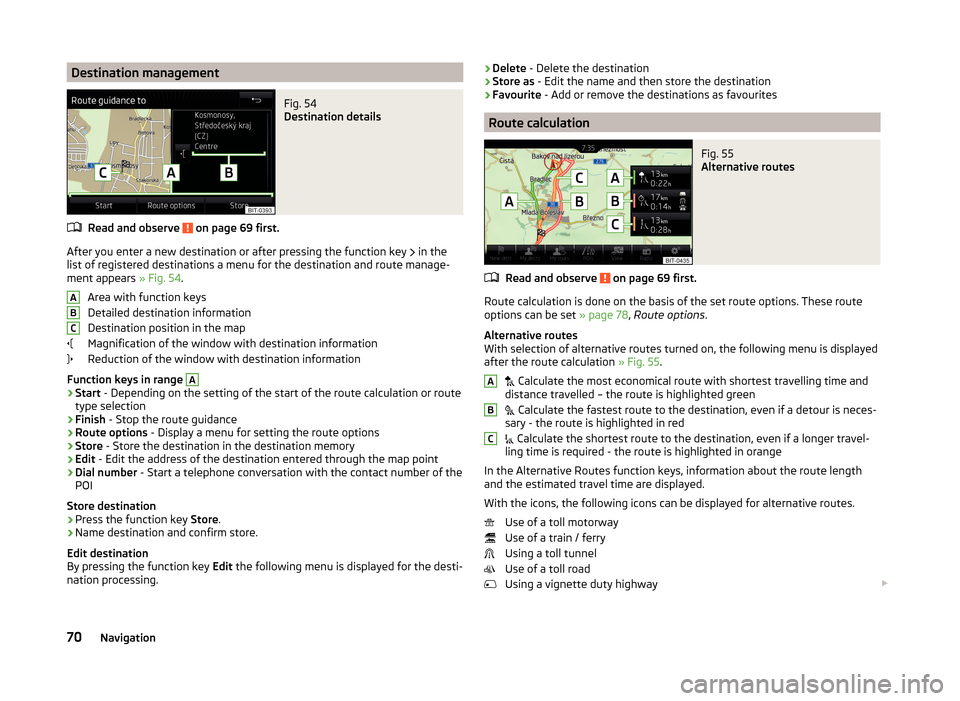
Destination managementFig. 54
Destination details
Read and observe on page 69 first.
After you enter a new destination or after pressing the function key in the
list of registered destinations a menu for the destination and route manage-
ment appears » Fig. 54.
Area with function keys
Detailed destination information
Destination position in the map
Magnification of the window with destination information
Reduction of the window with destination information
Function keys in range
A
› Start
- Depending on the setting of the start of the route calculation or route
type selection
› Finish
- Stop the route guidance
› Route options
- Display a menu for setting the route options
› Store
- Store the destination in the destination memory
› Edit
- Edit the address of the destination entered through the map point
› Dial number
- Start a telephone conversation with the contact number of the
POI
Store destination
› Press the function key
Store.
› Name destination and confirm store.
Edit destination
By pressing the function key Edit the following menu is displayed for the desti-
nation processing.
ABC› Delete
- Delete the destination
› Store as
- Edit the name and then store the destination
› Favourite
- Add or remove the destinations as favourites
Route calculation
Fig. 55
Alternative routes
Read and observe on page 69 first.
Route calculation is done on the basis of the set route options. These route
options can be set » page 78, Route options .
Alternative routes
With selection of alternative routes turned on, the following menu is displayed
after the route calculation » Fig. 55.
Calculate the most economical route with shortest travelling time and
distance travelled – the route is highlighted green
Calculate the fastest route to the destination, even if a detour is neces-
sary - the route is highlighted in red
Calculate the shortest route to the destination, even if a longer travel-
ling time is required - the route is highlighted in orange
In the Alternative Routes function keys, information about the route length
and the estimated travel time are displayed.
With the icons, the following icons can be displayed for alternative routes. Use of a toll motorway
Use of a train / ferry
Using a toll tunnel
Use of a toll road
Using a vignette duty highway
ABC70Navigation
Page 80 of 100
Show list›Press the button.
A list of traffic reports is shown » Fig. 64.
The list of traffic reports is arranged according to the type of road and the road
number (motorway, express way, country road, etc.).
A traffic report may contain some of the following information.›
Number of road affected
›
Name of the location in question
›
Description of the traffic obstruction
›
Symbol of the traffic obstruction
A traffic report with a number contains multiple reports.
If the icon in the list of traffic reports is crossed out, then the device is out-
side the range of the traffic report provider.
Display options
With ongoing guidance and after pressing the function key
A
» Fig. 64 the
following menu items can be selected.
›
All - View all traffic reports
›
Route - Display the traffic reports on the route
Note
The traffic reports are updated by the device constantly in the background.
The reception of traffic reports is always switched on and cannot be turned
off.
Detail of the traffic report
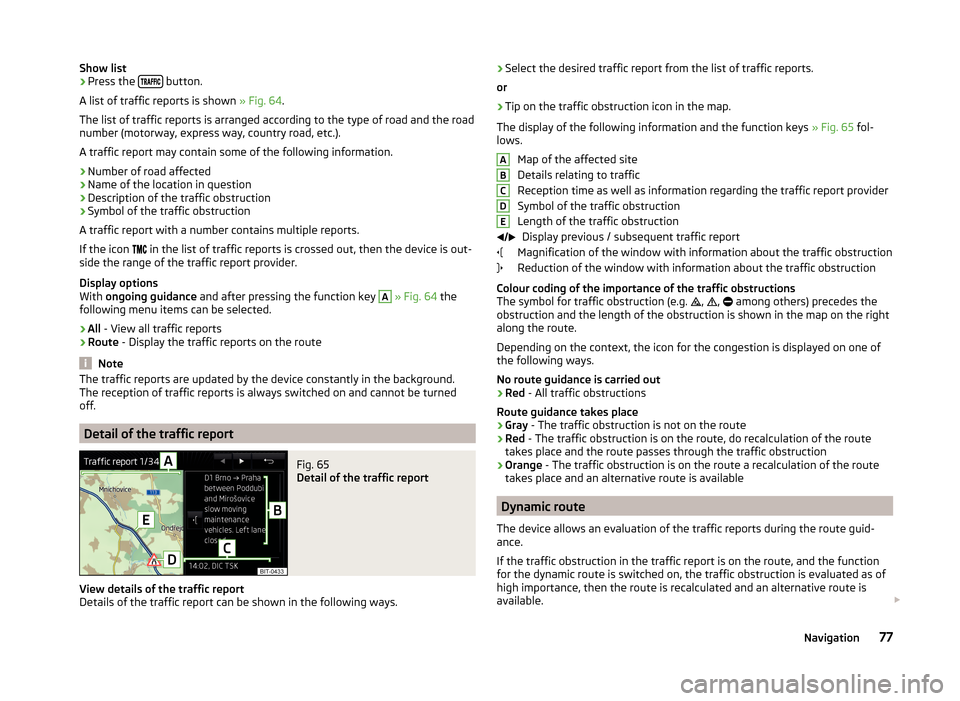
Fig. 65
Detail of the traffic report
View details of the traffic report
Details of the traffic report can be shown in the following ways.
› Select the desired traffic report from the list of traffic reports.
or›
Tip on the traffic obstruction icon in the map.
The display of the following information and the function keys » Fig. 65 fol-
lows.
Map of the affected site
Details relating to traffic
Reception time as well as information regarding the traffic report provider
Symbol of the traffic obstruction
Length of the traffic obstruction Display previous / subsequent traffic report
Magnification of the window with information about the traffic obstruction
Reduction of the window with information about the traffic obstruction
Colour coding of the importance of the traffic obstructions
The symbol for traffic obstruction (e.g. ,
,
among others) precedes the
obstruction and the length of the obstruction is shown in the map on the right
along the route.
Depending on the context, the icon for the congestion is displayed on one of
the following ways.
No route guidance is carried out › Red
- All traffic obstructions
Route guidance takes place
› Gray
- The traffic obstruction is not on the route
› Red
- The traffic obstruction is on the route, do recalculation of the route
takes place and the route passes through the traffic obstruction
› Orange
- The traffic obstruction is on the route a recalculation of the route
takes place and an alternative route is available
Dynamic route
The device allows an evaluation of the traffic reports during the route guid- ance.
If the traffic obstruction in the traffic report is on the route, and the function
for the dynamic route is switched on, the traffic obstruction is evaluated as of
high importance, then the route is recalculated and an alternative route is
available.
ABCDE77Navigation
Page 82 of 100
Fuel options›
Press in the Navigation menu the function key
→ Fuel options .
■ Select preferred fuel station - Select your preferred fuel station brand (the
selected station brand will be displayed in the first three positions of the list)
■ Fuel warning - Switch on / off the display of the following warning (when the
fuel gauge reaches the reserve area)
Warning: fuel tank almost empty. Would you like to find a fuel station near-
by? with the following menu items.
› Cancel
- Close the window with the warning
› Search
- Find the nearest petrol station; by selecting the petrol station the
route guidance is started
Navigation announcements
›
Press in the Navigation menu the function key
→ Nav. announcements .
■ Volume - Volume control of the navigation announcements
■ Entertainment fading (nav. announcements) - Setting the fading of the au-
dio volume (e.g. radio volume.) with navigation announcements
■ Nav. announcements: - Sets the type of the navigation announcements
■ Comprehensive - All navigation announcements
■ Brief - Short navigation announcements
■ Congestion only - Only navigation announcements regarding the guidance
change
■ No navigation sound during call - Enable / disable the playback of navigation
prompts during a telephone conversation
■ Note: “My POIs” - Turn on/off an audible indication when approaching a cus-
tom POI (if supported by the imported custom POI)
Advanced settings
›
Press in the Navigation menu the function key
→ Advanced settings .
■ Time display: - Select the time display in the status line
■ Time of arrival - Estimated time of arrival at the destination
■ Travelling time - Estimated travelling time to the destination
■
Status line: - Selection of the target type for which the status line the route
and travel time are displayed according to the setting Time display: (the se-
lection also affects the target type displayed in the map » page 67)
■ Destination - Final destination
■ Next stopover - Next stopover
■ Note: national border crossed - Switching on/off the display for information
on national speed limits when crossing the national border
■ Demo mode - Switch on/off guidance in demo mode
■ Define demo mode starting point - Enter the start point of the route guid-
ance in the demo mode
■ Cancel - Cancel the entry
■ Position - Enter the current vehicle position as the starting point
■ Address - Enter an address as the starting point
Manage memory
›
Press in the
Navigation menu the function key
→ Manage memory .
■ Sort by: - Setting the configuration of the phone book
■ Surname - Sort by contact name
■ Forename - Sort by contact's first name
■ Define home address - Enter the home address
■ Delete my POIs - Delete the custom POIs
■ Update my POIs - Update the custom POIs
■ Delete user data - Delete user data (by pressing the function key Delete and
confirming the deletion, the selected menu item is deleted) ■ Last destinations - Delete the last destinations
■ Dest. memory - Delete the stored destinations
■ Tour memory - Deletes the stored tours
■ My points of interest (Personal POI) - Delete the custom POIs
■ Entered cities - Delete the history of places already entered via the address
■ Home address - Delete the stored home address
■ Flagged destination - Delete the flagged destination
■ Waypoints - Delete the points in the waypoint mode
■ Most frequent routes - Deletion of the most travelled routes
79Navigation
Page 86 of 100
Light›
Press the key
→
→ Light .
■ Light assistance - Setting of outdoor lighting
■ Dynamic Light Assist - Activation/deactivation of the function Dynamic
Light Assist
■ Light Assist - Activation / deactivation of the Light Assist function
■ Switch-on time: - Sensitivity adjustment of the sensor for the automatic
headlight control
■ Early - High sensibility
■ Medium - Medium sensibility
■ Late - Low sensibility
■ Automatic headlight control (rain) - Activate/deactivate automatic head-
light control in rain
■ Daytime running lights - Activate/deactivate daytime running lights
■ Convenience turn signal - Activate/deactivate lane change flashing
■ Travel mode: - Light setting for the right/left-hand traffic
■ Right-hand traffic - For right-hand traffic
■ Left-hand traffic - For left-hand traffic
■ Background lighting - Sets the interior lighting
■ Instrument/switch lighting - Sets the brightness of the instrument/switch
lighting
■ Footwell lighting - Sets the brightness of the footwell light
■ “Coming/Leaving Home” function - setting the COMING HOME / LEAVING
HOME function ■ Coming Home function - Sets the period that the lights remain on after you
leave the vehicle (0 - 30 seconds; 0 - function deactivated)
■ Leaving Home function - Sets the period that the lights remain on after
you unlock the vehicle (0 - 30 seconds; 0 - function deactivated)
Interior lighting
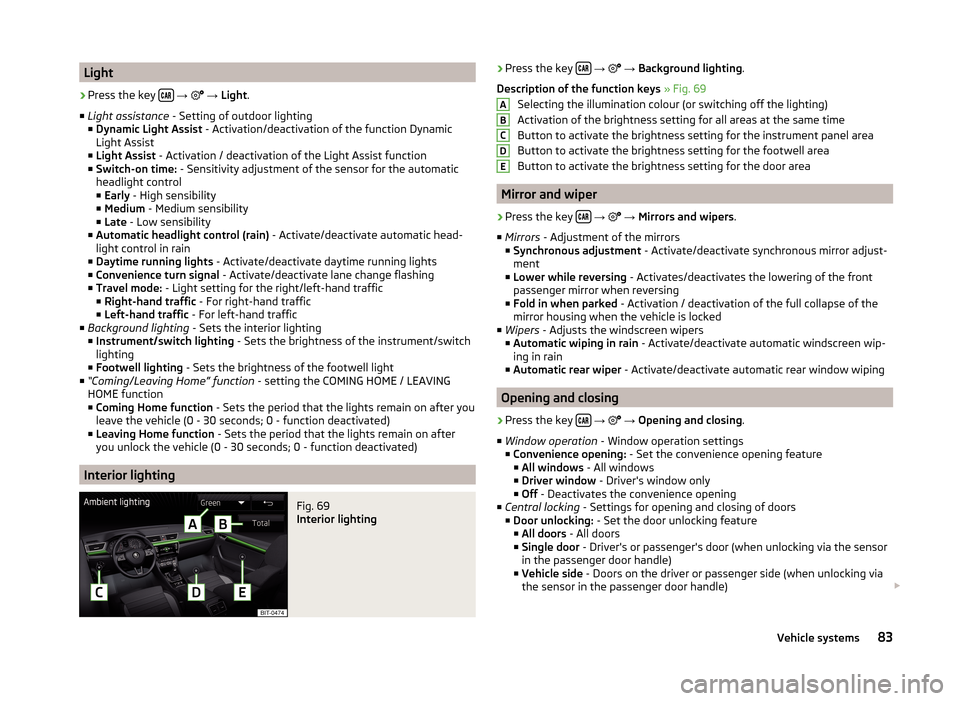
Fig. 69
Interior lighting
› Press the key
→ → Background lighting .
Description of the function keys » Fig. 69
Selecting the illumination colour (or switching off the lighting)
Activation of the brightness setting for all areas at the same time
Button to activate the brightness setting for the instrument panel area
Button to activate the brightness setting for the footwell area
Button to activate the brightness setting for the door area
Mirror and wiper
›
Press the key
→
→ Mirrors and wipers .
■ Mirrors - Adjustment of the mirrors
■ Synchronous adjustment - Activate/deactivate synchronous mirror adjust-
ment
■ Lower while reversing - Activates/deactivates the lowering of the front
passenger mirror when reversing
■ Fold in when parked - Activation / deactivation of the full collapse of the
mirror housing when the vehicle is locked
■ Wipers - Adjusts the windscreen wipers
■ Automatic wiping in rain - Activate/deactivate automatic windscreen wip-
ing in rain
■ Automatic rear wiper - Activate/deactivate automatic rear window wiping
Opening and closing
›
Press the key
→
→ Opening and closing .
■ Window operation - Window operation settings
■ Convenience opening: - Set the convenience opening feature
■ All windows - All windows
■ Driver window - Driver's window only
■ Off - Deactivates the convenience opening
■ Central locking - Settings for opening and closing of doors
■ Door unlocking: - Set the door unlocking feature
■ All doors - All doors
■ Single door - Driver's or passenger's door (when unlocking via the sensor
in the passenger door handle)
■ Vehicle side - Doors on the driver or passenger side (when unlocking via
the sensor in the passenger door handle)
ABCDE83Vehicle systems