ABS SKODA OCTAVIA 2015 3.G / (5E) Owner's Manual
[x] Cancel search | Manufacturer: SKODA, Model Year: 2015, Model line: OCTAVIA, Model: SKODA OCTAVIA 2015 3.G / (5E)Pages: 268, PDF Size: 37.54 MB
Page 9 of 268
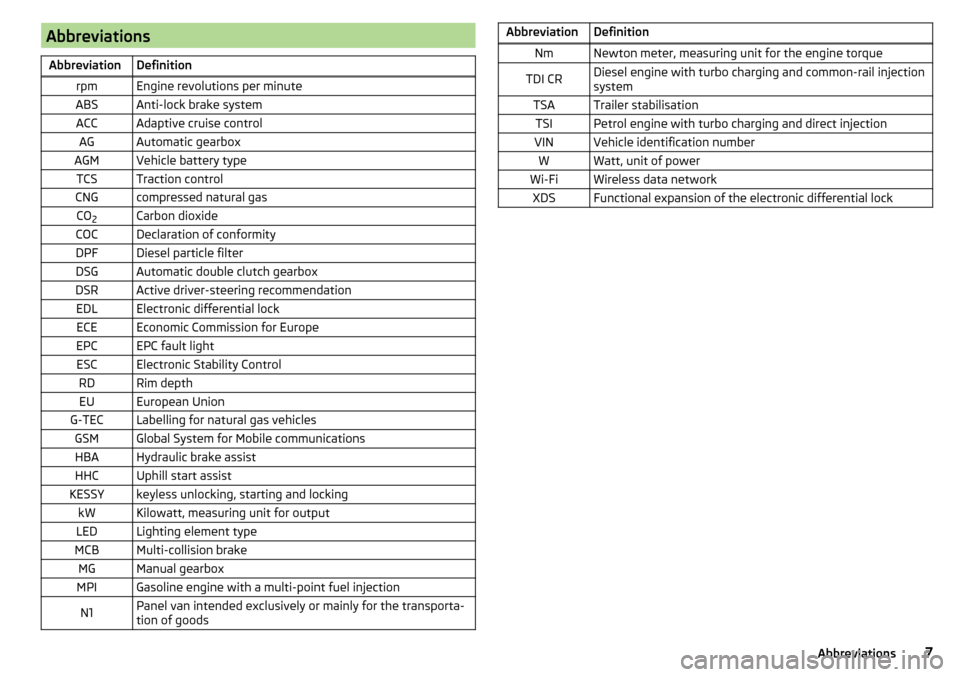
AbbreviationsAbbreviationDefinitionrpmEngine revolutions per minuteABSAnti-lock brake systemACCAdaptive cruise controlAGAutomatic gearboxAGMVehicle battery typeTCSTraction controlCNGcompressed natural gasCO2Carbon dioxideCOCDeclaration of conformityDPFDiesel particle filterDSGAutomatic double clutch gearboxDSRActive driver-steering recommendationEDLElectronic differential lockECEEconomic Commission for EuropeEPCEPC fault lightESCElectronic Stability ControlRDRim depthEUEuropean UnionG-TECLabelling for natural gas vehiclesGSMGlobal System for Mobile communicationsHBAHydraulic brake assistHHCUphill start assistKESSYkeyless unlocking, starting and lockingkWKilowatt, measuring unit for outputLEDLighting element typeMCBMulti-collision brakeMGManual gearboxMPIGasoline engine with a multi-point fuel injectionN1Panel van intended exclusively or mainly for the transporta-
tion of goodsAbbreviationDefinitionNmNewton meter, measuring unit for the engine torqueTDI CRDiesel engine with turbo charging and common-rail injection
systemTSATrailer stabilisationTSIPetrol engine with turbo charging and direct injectionVINVehicle identification numberWWatt, unit of powerWi-FiWireless data networkXDSFunctional expansion of the electronic differential lock7Abbreviations
Page 33 of 268
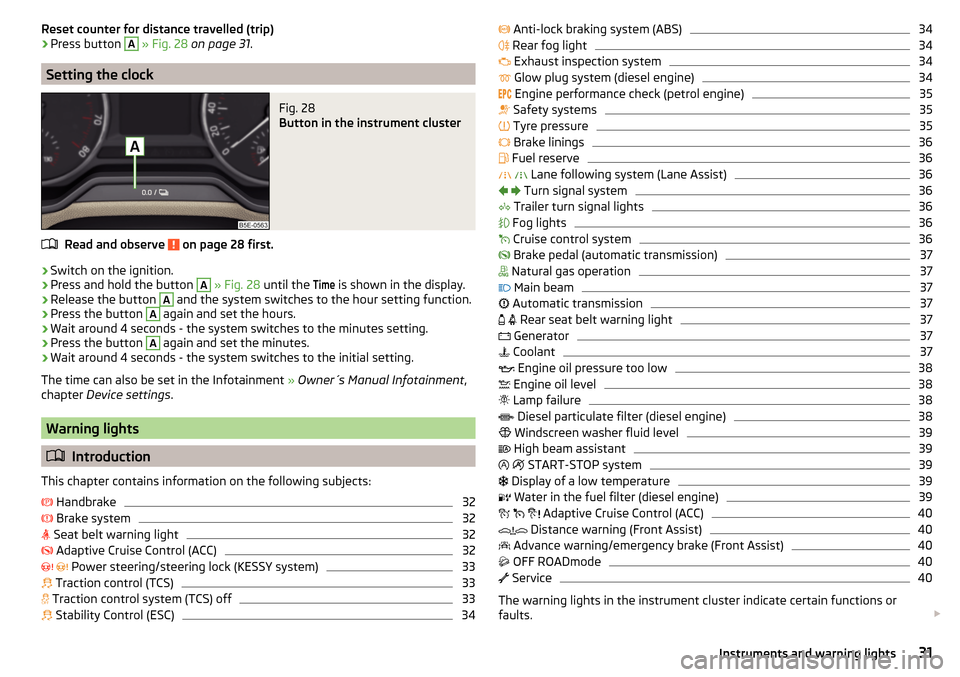
Reset counter for distance travelled (trip)›Press button A » Fig. 28 on page 31 .
Setting the clock
Fig. 28
Button in the instrument cluster
Read and observe on page 28 first.
›
Switch on the ignition.
›
Press and hold the button
A
» Fig. 28 until the
Time
is shown in the display.
›
Release the button
A
and the system switches to the hour setting function.
›
Press the button
A
again and set the hours.
›
Wait around 4 seconds - the system switches to the minutes setting.
›
Press the button
A
again and set the minutes.
›
Wait around 4 seconds - the system switches to the initial setting.
The time can also be set in the Infotainment » Owner´s Manual Infotainment ,
chapter Device settings .
Warning lights
Introduction
This chapter contains information on the following subjects:
Handbrake
32
Brake system
32
Seat belt warning light
32
Adaptive Cruise Control (ACC)
32
Power steering/steering lock (KESSY system)
33
Traction control (TCS)
33
Traction control system (TCS) off
33
Stability Control (ESC)
34
Anti-lock braking system (ABS)34 Rear fog light34
Exhaust inspection system
34
Glow plug system (diesel engine)
34
Engine performance check (petrol engine)
35
Safety systems
35
Tyre pressure
35
Brake linings
36
Fuel reserve
36
Lane following system (Lane Assist)
36
Turn signal system
36
Trailer turn signal lights
36
Fog lights
36
Cruise control system
36
Brake pedal (automatic transmission)
37
Natural gas operation
37
Main beam
37
Automatic transmission
37
Rear seat belt warning light
37
Generator
37
Coolant
37
Engine oil pressure too low
38
Engine oil level
38
Lamp failure
38
Diesel particulate filter (diesel engine)
38
Windscreen washer fluid level
39
High beam assistant
39
START-STOP system
39
Display of a low temperature
39
Water in the fuel filter (diesel engine)
39
Adaptive Cruise Control (ACC)
40
Distance warning (Front Assist)
40
Advance warning/emergency brake (Front Assist)
40
OFF ROADmode
40
Service
40
The warning lights in the instrument cluster indicate certain functions or
faults.
31Instruments and warning lights
Page 34 of 268
Some warning lights can be accompanied by acoustic signals and messages in
the display of the instrument cluster.
After switching on the ignition, some warning lights light up briefly as a func-
tion test.
If the tested systems are OK, the corresponding warning lights go out a few
seconds after switching on the ignition or after starting the engine.
Warning lights in the display
Depending on the importance the warning light
(danger) or
(warning) illu-
minate along with some of the warning lights in the list with the warning
lights.
Depending on vehicle equipment, some warning lights may be displayed in col-
our on the display. For example, the coolant warning light may be displayed as
follows.
▶ - Segment display/monochromatic (“black and white”) MAXI DOT display
▶ - Coloured MAXI DOT displayWARNING■
Ignoring illuminated warning lights and related messages or instructions
in the display of the instrument cluster may lead to serious personal injury
or damage to the vehicle.■
If you have to stop for technical reasons, then park the vehicle at a safe
distance from the traffic, switch off the engine and activate the hazard
warning light system » page 73. Place the warning triangle at the prescri-
bed distance.
■
The engine compartment of your car is a hazardous area. The following
warning instructions must be followed at all times when working in the en-
gine compartment » page 194, Engine compartment .
Handbrake
Read and observe
on page 32 first.
illuminates – the hand brake is applied.
An acoustic signal will sound if you drive the vehicle above 5 km/h while the
handbrake is still on.
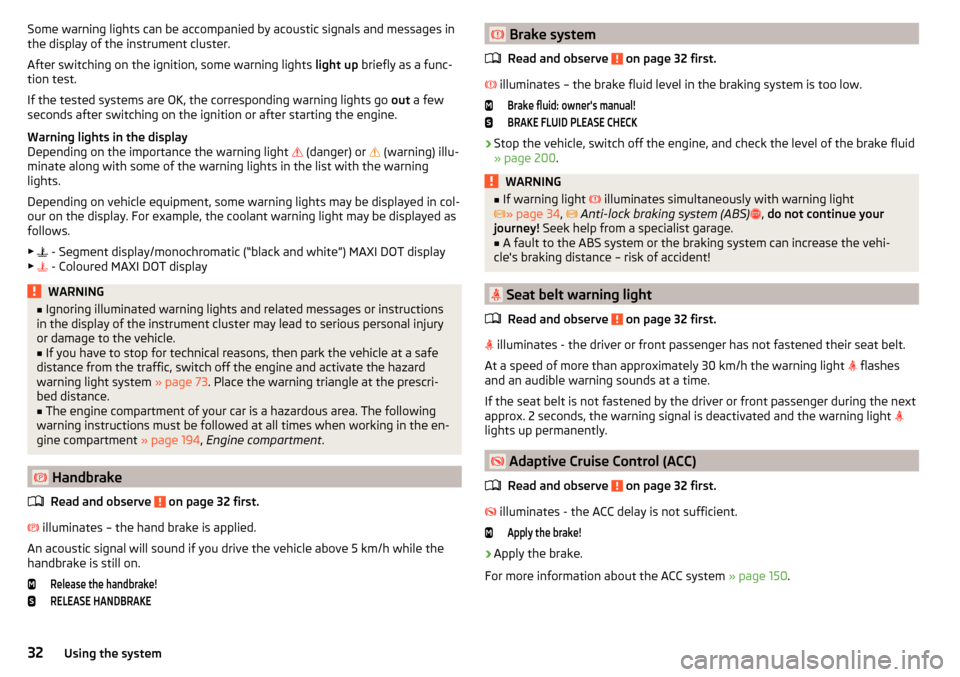
Release the handbrake!RELEASE HANDBRAKE Brake system
Read and observe
on page 32 first.
illuminates – the brake fluid level in the braking system is too low.
Brake fluid: owner's manual!BRAKE FLUID PLEASE CHECK›
Stop the vehicle, switch off the engine, and check the level of the brake fluid
» page 200 .
WARNING■
If warning light illuminates simultaneously with warning light
» page 34 , Anti-lock braking system (ABS) , do not continue your
journey! Seek help from a specialist garage.■
A fault to the ABS system or the braking system can increase the vehi-
cle's braking distance – risk of accident!
Seat belt warning light
Read and observe
on page 32 first.
illuminates - the driver or front passenger has not fastened their seat belt.
At a speed of more than approximately 30 km/h the warning light flashes
and an audible warning sounds at a time.
If the seat belt is not fastened by the driver or front passenger during the next
approx. 2 seconds, the warning signal is deactivated and the warning light
lights up permanently.
Adaptive Cruise Control (ACC)
Read and observe
on page 32 first.
illuminates - the ACC delay is not sufficient.
Apply the brake!›
Apply the brake.
For more information about the ACC system » page 150.
32Using the system
Page 36 of 268
NoteOn vehicles without the ESC system, the warning light does not illuminate
upon deactivation of the TCS system, but a message is only displayed on the
display of the instrument cluster.
Stability Control (ESC)
Read and observe
on page 32 first.
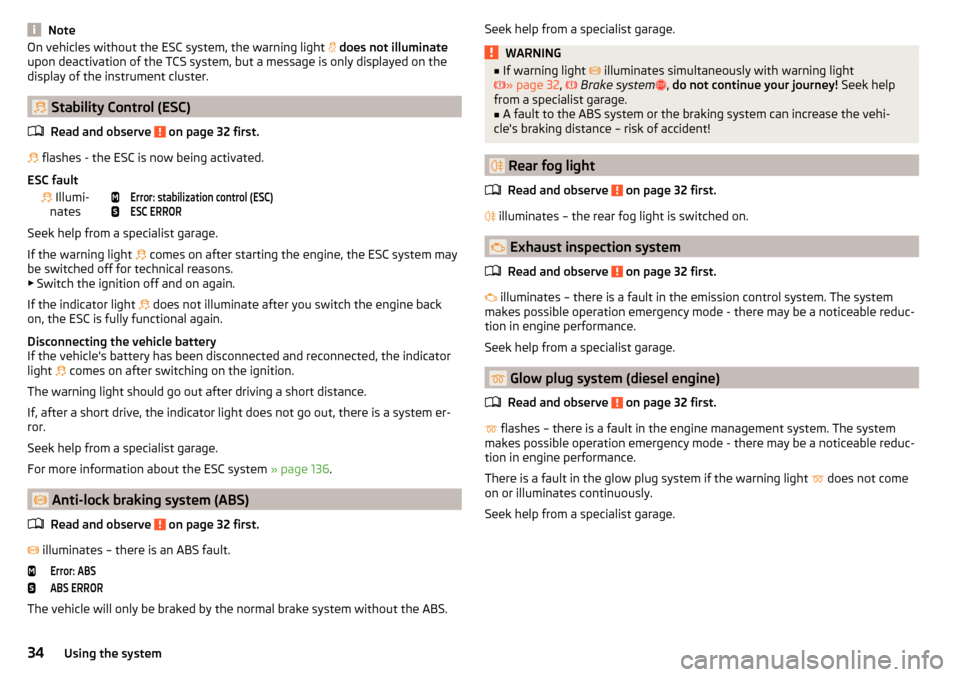
flashes - the ESC is now being activated.
ESC fault
Illumi-
nates
Error: stabilization control (ESC)ESC ERROR
Seek help from a specialist garage.
If the warning light comes on after starting the engine, the ESC system may
be switched off for technical reasons. ▶ Switch the ignition off and on again.
If the indicator light does not illuminate after you switch the engine back
on, the ESC is fully functional again.
Disconnecting the vehicle battery
If the vehicle's battery has been disconnected and reconnected, the indicator
light comes on after switching on the ignition.
The warning light should go out after driving a short distance.
If, after a short drive, the indicator light does not go out, there is a system er-
ror.
Seek help from a specialist garage.
For more information about the ESC system » page 136.
Anti-lock braking system (ABS)
Read and observe
on page 32 first.
illuminates – there is an ABS fault.
Error: ABSABS ERROR
The vehicle will only be braked by the normal brake system without the ABS.
Seek help from a specialist garage.WARNING■
If warning light illuminates simultaneously with warning light
» page 32 , Brake system , do not continue your journey! Seek help
from a specialist garage.■
A fault to the ABS system or the braking system can increase the vehi-
cle's braking distance – risk of accident!
Rear fog light
Read and observe
on page 32 first.
illuminates – the rear fog light is switched on.
Exhaust inspection system
Read and observe
on page 32 first.
illuminates – there is a fault in the emission control system. The system
makes possible operation emergency mode - there may be a noticeable reduc-
tion in engine performance.
Seek help from a specialist garage.
Glow plug system (diesel engine)
Read and observe
on page 32 first.
flashes – there is a fault in the engine management system. The system
makes possible operation emergency mode - there may be a noticeable reduc-
tion in engine performance.
There is a fault in the glow plug system if the warning light does not come
on or illuminates continuously.
Seek help from a specialist garage.
34Using the system
Page 55 of 268
Unlocking and opening
Unlocking and locking
Introduction
This chapter contains information on the following subjects:
Locking/unlocking using the key via the lock cylinder
54
Unlocking/locking with the remote control key
54
Unlocking / locking - KESSY
55
Locking and unlocking the vehicle with the central locking button
55
Safe securing system
56
Individual settings
56
Opening/closing a door
57
Child safety lock
57
Malfunctions
57
Your car is equipped with a central locking system.
The central locking system allows you to lock and unlock all doors, the fuel fill-
er flap and the boot lid at the same time. The functions of the central locking
system can be individually adjusted » page 56.
After unlocking, depending on vehicle equipment and setting the following is
valid for the central locking. ▶ The turn signal lights flash twice as confirmation that the vehicle has been
unlocked.
▶ An double audible signal sounds additionally on vehicles which are fitted
with the anti-theft alarm system.
▶ The doors, the boot lid and the fuel filler flap are unlocked.
▶ The interior lamp illuminates.
▶ The SafeLock system is switched off.
▶ The indicator light in the driver door stops flashing.
▶ The exterior mirrors are set into the driving position.
▶ The anti-theft alarm system is deactivated.
After locking, depending on vehicle equipment and setting the following is
valid for the central locking. ▶ The turn signal lights flash once as confirmation that the vehicle has been
locked.
▶ An audible signal sounds additionally on vehicles which are fitted with the
anti-theft alarm system.
▶ The doors, the boot lid and the fuel filler flap are locked.
▶ The interior lamp goes out.
▶ The SafeLock system is switched on.
▶ The warning light in the driver door begins flashing.
▶ The exterior mirrors are folded back into the park position.
▶ The anti-theft alarm system is activated.
If the doors or the luggage compartment lid remain open after the vehicle has
been locked, the turn signal lights do not flash until they have been closed.
Protection against unwanted vehicle unlocking
If the vehicle is unlocked and a door or the boot lid not opened within the next
45 seconds, the vehicle will lock again automatically and the safe securing sys-
tem or anti-theft alarm system will be switched back on.WARNING■ Never leave the key in the vehicle when you exit the vehicle. Unauthor-
ized persons, such as children, for example, could lock the car, turn on the
ignition or start the engine - there is a danger of injury and accidents!■
When leaving the vehicle, never leave persons who are not completely in-
dependent, such as children, unattended in the vehicle. These individuals
might not be able to leave the vehicle on their own or to help themselves.
Can be fatal at very high or very low temperatures!
CAUTION
■ Each key contains electronic components; therefore it must be protected
against moisture and severe shocks.■
Keep the groove of the keys absolutely clean. Impurities (textile fibres, dust,
etc.) have a negative effect on the functionality of the locking cylinder and ig-
nition lock.
■
If the driver's door has been opened, the vehicle cannot be locked.
53Unlocking and opening
Page 113 of 268
■The height of the vehicle changes after mounting a roof luggage rack system
including the load that is being transported. Compare the vehicle height with
available clearances, such as underpasses and garage doors.■
Ensure the roof aerial is not impaired by the load being transported.
Note
We recommend that you use a roof rack from ŠKODA Original Accessories.
fixing points for base support
Fig. 133
Attachment points
Read and observe
and on page 110 first.
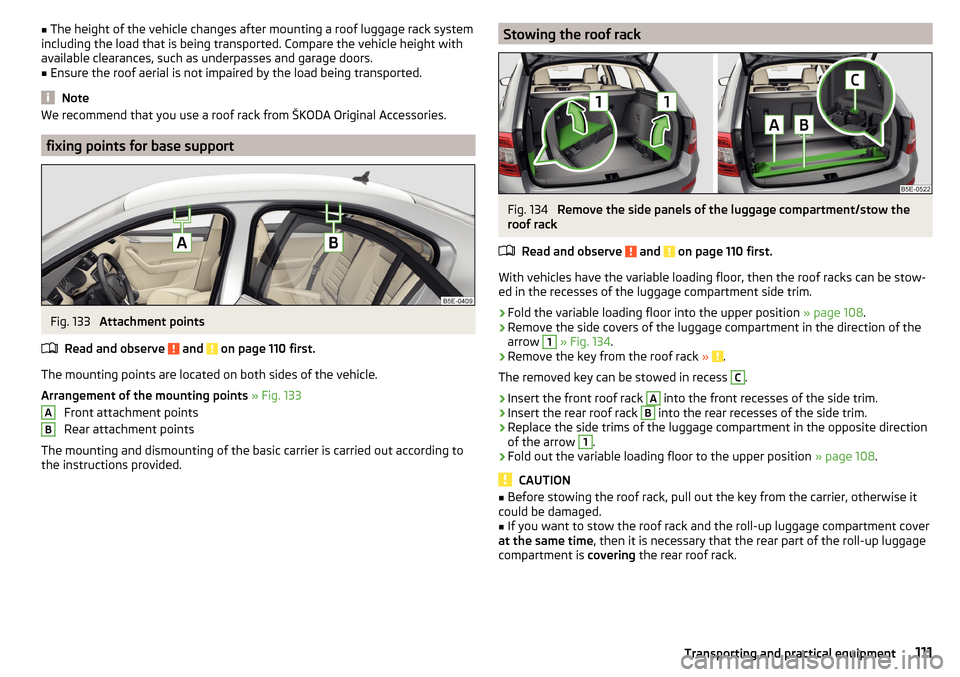
The mounting points are located on both sides of the vehicle.
Arrangement of the mounting points » Fig. 133
Front attachment points
Rear attachment points
The mounting and dismounting of the basic carrier is carried out according to
the instructions provided.
ABStowing the roof rackFig. 134
Remove the side panels of the luggage compartment/stow the
roof rack
Read and observe
and on page 110 first.
With vehicles have the variable loading floor, then the roof racks can be stow-ed in the recesses of the luggage compartment side trim.
›
Fold the variable loading floor into the upper position » page 108.
›
Remove the side covers of the luggage compartment in the direction of the
arrow
1
» Fig. 134 .
›
Remove the key from the roof rack » .
The removed key can be stowed in recess
C
.
›
Insert the front roof rack
A
into the front recesses of the side trim.
›
Insert the rear roof rack
B
into the rear recesses of the side trim.
›
Replace the side trims of the luggage compartment in the opposite direction
of the arrow
1
.
›
Fold out the variable loading floor to the upper position » page 108.
CAUTION
■
Before stowing the roof rack, pull out the key from the carrier, otherwise it
could be damaged.■
If you want to stow the roof rack and the roll-up luggage compartment cover
at the same time , then it is necessary that the rear part of the roll-up luggage
compartment is covering the rear roof rack.
111Transporting and practical equipment
Page 137 of 268
Assist systems
General information
Introduction
This chapter contains information on the following subjects:
Radar sensor
135WARNINGThe following general information regarding the use of assistance systems
must be observed.■
The assistance systems only serve to support and do not relieve the driv-
er of the responsibility for driving the vehicle.
■
The increased safety provision, as well as the increased occupant protec-
tion provided by the assistance systems must not tempt you to take risks -
risk of accident!
■
Adjust the speed and driving style to the current visibility, weather, road
and traffic conditions.
■
The assistance systems have physical and system-related limitations. For
this reason, the driver may experience some undesired or delayed system
responses in certain situations. You should therefore always be alert and
ready to intervene!
■
Only activate, deactivate or set the assistance systems so that you have
the vehicle fully under control in every traffic situation - risk of accident!
Radar sensor
Fig. 154
Mounting location of the radar
sensor
Read and observe on page 135 first.
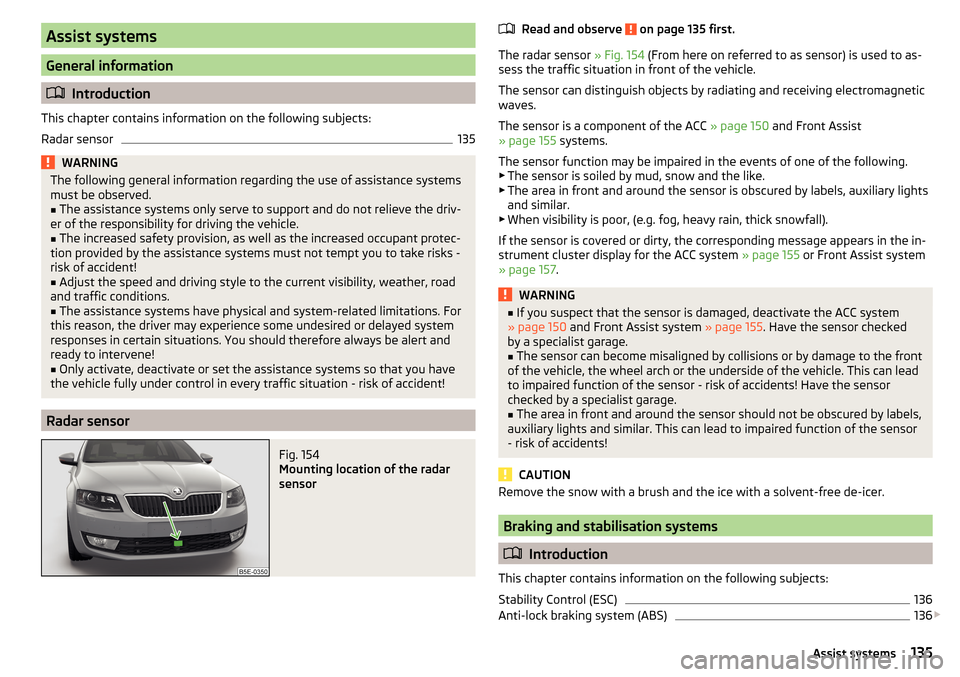
The radar sensor » Fig. 154 (From here on referred to as sensor) is used to as-
sess the traffic situation in front of the vehicle.
The sensor can distinguish objects by radiating and receiving electromagnetic waves.
The sensor is a component of the ACC » page 150 and Front Assist
» page 155 systems.
The sensor function may be impaired in the events of one of the following. ▶ The sensor is soiled by mud, snow and the like.
▶ The area in front and around the sensor is obscured by labels, auxiliary lights
and similar.
▶ When visibility is poor, (e.g. fog, heavy rain, thick snowfall).
If the sensor is covered or dirty, the corresponding message appears in the in-
strument cluster display for the ACC system » page 155 or Front Assist system
» page 157 .
WARNING■
If you suspect that the sensor is damaged, deactivate the ACC system
» page 150 and Front Assist system » page 155. Have the sensor checked
by a specialist garage.■
The sensor can become misaligned by collisions or by damage to the front
of the vehicle, the wheel arch or the underside of the vehicle. This can lead
to impaired function of the sensor - risk of accidents! Have the sensor
checked by a specialist garage.
■
The area in front and around the sensor should not be obscured by labels,
auxiliary lights and similar. This can lead to impaired function of the sensor
- risk of accidents!
CAUTION
Remove the snow with a brush and the ice with a solvent-free de-icer.
Braking and stabilisation systems
Introduction
This chapter contains information on the following subjects:
Stability Control (ESC)
136
Anti-lock braking system (ABS)
136
135Assist systems
Page 138 of 268
Traction control (TCS)136Electronic differential lock (EDL and XDS)137
Driver Steering Recommendation (DSR)
137
Brake Assist (HBA)
137
Hill Start Assist (HHC)
137
Multi collision brake (MCB)
138
Trailer stabilization system (TSA)
138
This chapter describes the functions of the brake and stabilization systems.
The error display is in Chapter » page 31, Warning lights .
The brake and stabilization systems are automatically activated each time the
ignition is switched on, unless otherwise indicated.
WARNINGThe general information relating to the use of assistance systems must be
observed » page 135, in section Introduction .
Stability Control (ESC)
Read and observe
on page 136 first.
The ESC improves vehicle stability in dynamic driving situations, such as when
the vehicle starts to skid.
The ESC monitors whether the desired direction of the current vehicle motion
is occurring. In case of any deviation (e.g. oversteer), the ESC automatically
brakes individual wheels to maintain the desired direction.
During an intervention of the system, the warning light flashes in the instru-
ment cluster.
Enable/disable ESC Sport
The activation of the ESC sports allows a sportier driving style. With a slight
over or under steering of the vehicle take no ESC interventions take place and
the TCS is restricted so that the spinning of the wheels of the driven axle can
occur.
The activation or deactivation of the ESC sports can be done in one of two
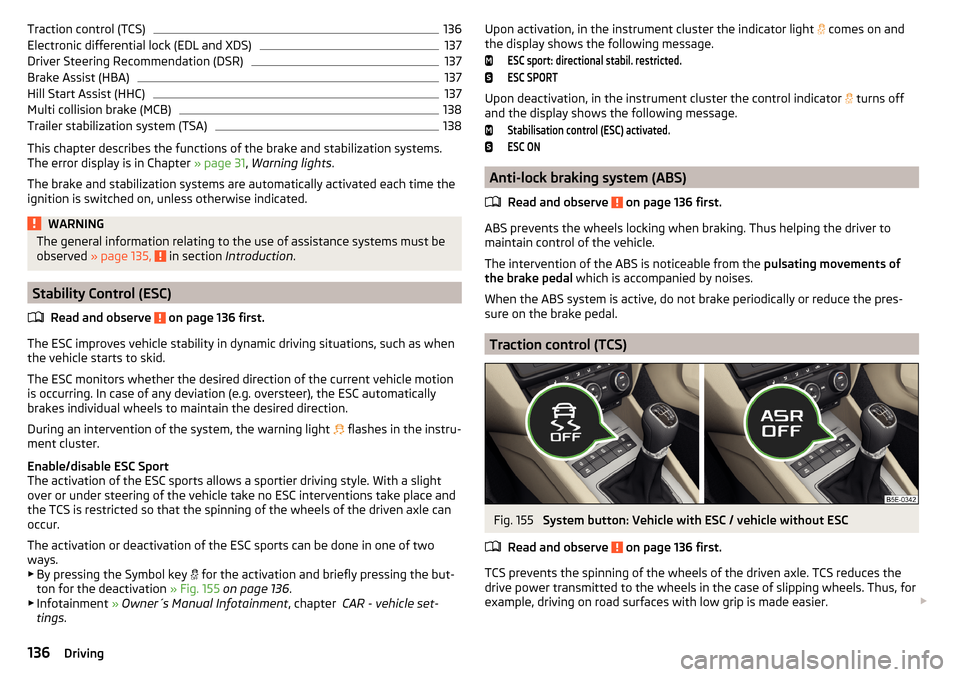
ways. ▶ By pressing the Symbol key for the activation and briefly pressing the but-
ton for the deactivation » Fig. 155 on page 136 .
▶ Infotainment » Owner´s Manual Infotainment , chapter CAR - vehicle set-
tings .
Upon activation, in the instrument cluster the indicator light comes on and
the display shows the following message.ESC sport: directional stabil. restricted.ESC SPORT
Upon deactivation, in the instrument cluster the control indicator
turns off
and the display shows the following message.
Stabilisation control (ESC) activated.ESC ON
Anti-lock braking system (ABS)
Read and observe
on page 136 first.
ABS prevents the wheels locking when braking. Thus helping the driver to
maintain control of the vehicle.
The intervention of the ABS is noticeable from the pulsating movements of
the brake pedal which is accompanied by noises.
When the ABS system is active, do not brake periodically or reduce the pres- sure on the brake pedal.
Traction control (TCS)
Fig. 155
System button: Vehicle with ESC / vehicle without ESC
Read and observe
on page 136 first.
TCS prevents the spinning of the wheels of the driven axle. TCS reduces the
drive power transmitted to the wheels in the case of slipping wheels. Thus, for
example, driving on road surfaces with low grip is made easier.
136Driving
Page 140 of 268
Multi collision brake (MCB)Read and observe
on page 136 first.
The MCB helps to decrease speed after a collision through automatic braking
interventions and to stabilize the vehicle. This reduces the risk of a subse-
quent crash due to uncontrolled vehicle movement.
The automatic brake interventions can take place only if the following condi-
tions are met.
A head-on or side collision occurred.
The impact speed was higher than approx. 10 km/h.
The brakes, the ESC and other required electrical systems remain function-
al after impact.
The accelerator pedal is not actuated.
Trailer stabilization system (TSA)
Read and observe
on page 136 first.
The TSA helps the combination stable in situations where the trailer sways
and then the whole trailer combination.
TSA brakes the individual wheels of the towing vehicle in order to damp the
rocking motion of the entire vehicle combination.
The following conditions are required for the correct TSA function. The trailer was shipped from the factory or purchased from the ŠKODA
genuine accessories.
The trailer is electrically connected to the towing vehicle by means of the
trailer socket.
The parking aid is activated.
The speed is higher than approx. 60 km/h.
Further information » page 167, Hitch and trailer .
OFF ROAD-mode
Introduction
This chapter contains information on the following subjects:
Operation
139
Hill Descent Assistant
139
ESC OFF ROAD
140
TCSOFF ROAD
140
EDS OFF ROAD
140
ABS OFF ROAD
140
The OFF ROAD mode includes several features that help to overcome difficult
navigable routes when travelling on non-paved roads.
But even with OFF ROAD mode activated, your vehicle is never a true SUV.
WARNING■ The general information relating to the use of assistance systems must
be observed » page 135, in section Introduction .■
A lack of fuel can cause irregular engine running or cause the engine to
shut down. This would lead the OFF ROAD mode to lose its effectiveness -
risk of accident!
CAUTION
■ The OFF ROAD mode is not designed for the use on common roads.■All four wheels must be fitted with the same tyres approved by the manufac-
turer to ensure theOFF ROAD mode operates correctly.138Driving
Page 141 of 268
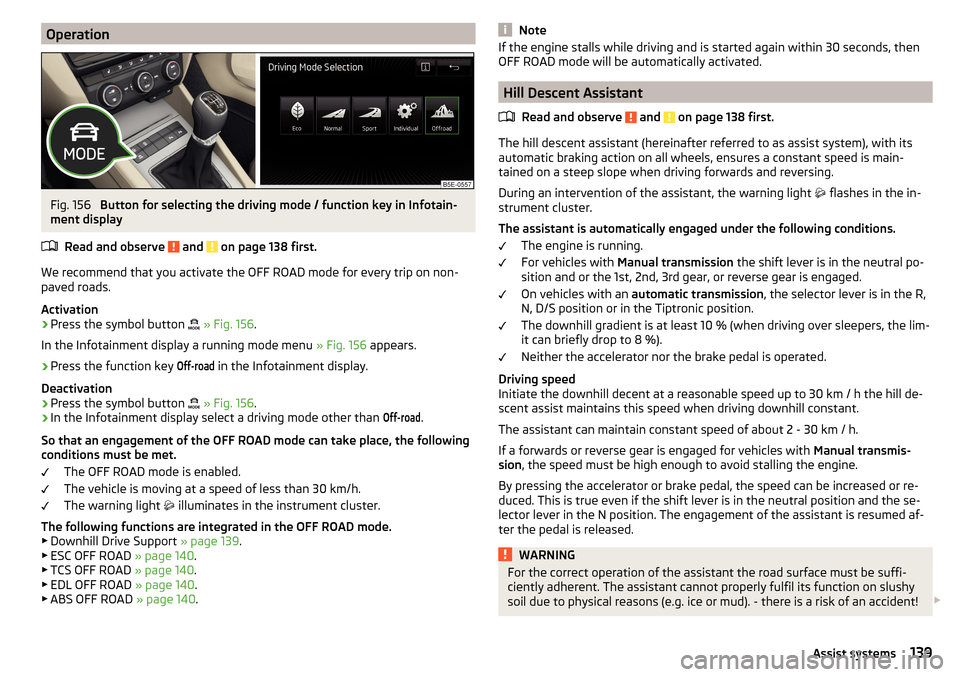
OperationFig. 156
Button for selecting the driving mode / function key in Infotain-
ment display
Read and observe
and on page 138 first.
We recommend that you activate the OFF ROAD mode for every trip on non-paved roads.
Activation
›
Press the symbol button
» Fig. 156 .
In the Infotainment display a running mode menu » Fig. 156 appears.
›
Press the function key
Off-road
in the Infotainment display.
Deactivation
›
Press the symbol button
» Fig. 156 .
›
In the Infotainment display select a driving mode other than
Off-road
.
So that an engagement of the OFF ROAD mode can take place, the following
conditions must be met.
The OFF ROAD mode is enabled.
The vehicle is moving at a speed of less than 30 km/h. The warning light illuminates in the instrument cluster.
The following functions are integrated in the OFF ROAD mode.
▶ Downhill Drive Support » page 139.
▶ ESC OFF ROAD » page 140.
▶ TCS OFF ROAD » page 140.
▶ EDL OFF ROAD » page 140.
▶ ABS OFF ROAD » page 140.
NoteIf the engine stalls while driving and is started again within 30 seconds, then
OFF ROAD mode will be automatically activated.
Hill Descent Assistant
Read and observe
and on page 138 first.
The hill descent assistant (hereinafter referred to as assist system), with its
automatic braking action on all wheels, ensures a constant speed is main-
tained on a steep slope when driving forwards and reversing.
During an intervention of the assistant, the warning light flashes in the in-
strument cluster.
The assistant is automatically engaged under the following conditions. The engine is running.
For vehicles with Manual transmission the shift lever is in the neutral po-
sition and or the 1st, 2nd, 3rd gear, or reverse gear is engaged.
On vehicles with an automatic transmission , the selector lever is in the R,
N, D/S position or in the Tiptronic position.
The downhill gradient is at least 10 % (when driving over sleepers, the lim-
it can briefly drop to 8 %).
Neither the accelerator nor the brake pedal is operated.
Driving speed
Initiate the downhill decent at a reasonable speed up to 30 km / h the hill de-
scent assist maintains this speed when driving downhill constant.
The assistant can maintain constant speed of about 2 - 30 km / h.
If a forwards or reverse gear is engaged for vehicles with Manual transmis-
sion , the speed must be high enough to avoid stalling the engine.
By pressing the accelerator or brake pedal, the speed can be increased or re-
duced. This is true even if the shift lever is in the neutral position and the se-
lector lever in the N position. The engagement of the assistant is resumed af-
ter the pedal is released.
WARNINGFor the correct operation of the assistant the road surface must be suffi-
ciently adherent. The assistant cannot properly fulfil its function on slushy
soil due to physical reasons (e.g. ice or mud). - there is a risk of an accident! 139Assist systems