jump start SKODA OCTAVIA 2015 3.G / (5E) Owner's Manual
[x] Cancel search | Manufacturer: SKODA, Model Year: 2015, Model line: OCTAVIA, Model: SKODA OCTAVIA 2015 3.G / (5E)Pages: 268, PDF Size: 37.54 MB
Page 5 of 268
General Maintenance
Care and maintenance178
Service work, adjustments and technical
alterations
178
Washing vehicle
181
Cleaning vehicle exterior
182
Interior care
186
Inspecting and replenishing
189
Fuel
189
Engine compartment
194
Engine oil
197
Coolant
198
Brake fluid
200
Vehicle battery
201
Wheels
205
Tyres and wheel rims
205
Winter operation
209
Do-it-yourself
Emergency equipment, and self-help
211
Emergency equipment
211
Changing a wheel
213
Puncture repair kit
217
Jump-starting
219
Towing the vehicle
220
Remote control
223
Emergency unlocking/locking
224
Replacing windscreen wiper blades
225
Fuses and light bulbs
226
Fuses
226
Bulbs
230Technical data
Technical data236
Basic vehicle data
236
Vehicle-specific information depending on
engine type
244
Index
3Table of Contents
Page 122 of 268
Driving
Starting-off and Driving
Starting and stopping the engine using the key
Introduction
This chapter contains information on the following subjects:
Electronic immobilizer
120
Steering lock locking / unlocking
120
Turning ignition on/off and starting the engine
121
Stopping the engine
121
With the key in the ignition, the ignition can be switched on and off and the
engine can be started / stopped.
WARNING■ While driving with the engine stopped, the ignition must always be
switched on » page 121, Turning ignition on/off and starting the engine .
■ With the ignition off, the steering may lock » page 120 - danger of an
accident!■
Do not withdraw the ignition key from the ignition lock until the vehicle
has come to a stop » page 128, Parking . Otherwise, the steering may lock -
danger of an accident!
■
Never leave the key in the vehicle when you exit the vehicle. Unauthor-
ized persons such as children could lock the car, turn on the ignition or start
the engine -risk of injury, accidents and damage!
■
Never leave the vehicle unattended with the engine running - there is
risk of accident, damage or theft!
■
Never switch off the engine before the vehicle is stationary – risk of acci-
dent!
WARNING■ Never (e.g. in garages) run the engine in a closed place - there is the dan-
ger of poisoning and death!■
Do not leave any items (e.g. cloths or tools) in the engine compartment.
This presents a fire hazard and the risk of engine damage.
■
Never cover the engine with additional insulation material (e.g. with a
blanket) – risk of fire!
CAUTION■ Only start the engine when the engine and the vehicle are stationary - there
is a danger of starter and engine damage!■
Do not push-start the engine – there is a risk of damaging the engine and
the catalytic converter. The battery from another vehicle can be used as a
jump-start aid » page 219.
Note
Do not warm up the engine while the vehicle is stationary. If possible, start
your journey as soon as the engine has started. Through this, the engine rea-
ches its operating temperature faster.
Electronic immobilizer
Read and observe
and on page 120 first.
The electronic immobiliser (hereinafter referred to as immobiliser) makes theattempted theft or unauthorised use of your vehicle more difficult.
An electronic chip is integrated in the head of the key. The immobiliser is deac-
tivated with the aid of this chip when the key is inserted in the ignition lock.
As soon as the ignition key is removed from the ignition lock, the immobiliser is
automatically activated.
Operational problems
If a component in the immobiliser key fails, it is not possible to start the en-
gine. A corresponding message appears in the display of the instrument clus-
ter to explain the immobiliser is active.
To start, use the other vehicle key or seek help from a specialist garage.
Steering lock locking / unlocking
Read and observe
and on page 120 first.
The steering lock (steering lock) deters any attempted theft of your vehicle.
Locking
›
Withdraw the ignition key.
›
Turn the steering wheel to the left or right until the steering lock clicks into
place.
Unlocking
›
Insert the key into the ignition lock.
120Driving
Page 124 of 268

Starting and stopping the engine at the push of the button
Introduction
Fig. 143
Starter button (
)
This chapter contains information on the following subjects:
Steering column lock locking / unlocking
122
Switching ignition on / off
123
Starting the engine
123
Switching off the engine
123
Problems starting the engine
124
The ignition can be switched on and off and the engine can be started/stop-
ped with the starter button » Fig. 143.
The key must be in the vehicle in order to unlock the steering wheel, switch on the ignition, start the engine and drive.
WARNING■ Never leave the key in the vehicle when you exit the vehicle. Unauthor-
ized persons such as children could lock the car, turn on the ignition or start
the engine -risk of injury, accidents and damage!■
Never leave the vehicle unattended with the engine running - there is a
risk of theft etc!
■
Never switch off the engine before the vehicle is stationary – risk of acci-
dent!
WARNINGNever (e.g. in garages) run the engine in a closed place - there is the danger
of poisoning and death!CAUTION■ The system can recognize the valid key, even if it has been accidentally left
on the vehicle roof - there is danger of loss or damage to the key!■
Only start the engine when the engine and the vehicle are stationary - there
is a danger of starter and engine damage!
■
Do not push-start the engine – there is a risk of damaging the engine and
the catalytic converter. The battery from another vehicle can be used as a
jump-start aid » page 219.
Note
■
Do not warm up the engine while the vehicle is stationary. If possible, start
your journey as soon as the engine has started. Through this, the engine rea-
ches its operating temperature faster.■
The system is protected against inadvertently switching off the engine while
driving, this means that the engine can only be switched off in an emergency
» page 123 .
Steering column lock locking / unlocking
Read and observe
and on page 122 first.
The steering lock (steering lock) deters any attempted theft of your vehicle.
Locking
›
Switch off the engine.
›
Open the driver door.
The steering lock is locked automatically.
If the driver's door is opened and the ignition is switched off afterwards, the
steering is only locked after the vehicle has been locked.
Unlocking
›
Open the driver's door and get into the vehicle.
›
Close the driver's door.
The steering is locked automatically.
Under certain circumstances (e.g. after switching off the ignition and opening
the driver's door), the steering is enabled only when the ignition is switched on
or the engine is started.
122Driving
Page 204 of 268
WARNING■The use of open flames and light should be avoided.■Smoking and radio triggering activities should be avoided.■
Never use a damaged vehicle battery – risk of explosion!
■
Never charge a frozen or thawed vehicle battery – risk of explosion and
caustic burns!
■
Replace a frozen vehicle battery.
■
Never jump-start vehicle batteries with an electrolyte level that is too low
– risk of explosion and caustic burns.
CAUTION
■ Improper handling of the vehicle battery may cause damage.■Ensure that battery acid does not come into contact with the bodywork – risk
of damage to the paintwork.■
If the vehicle has not been driven for more than 3 to 4 weeks, the battery will
discharge. Prevent the battery from discharging by disconnecting the battery's
negative terminal
or continuously charging the battery with a very low
charging current.
■
Do not place the battery in direct daylight in order to protect the vehicle bat-
tery housing from the effects of ultra-violet light.
■
If the vehicle is frequently used for making short trips, the vehicle battery
will not have time to charge up sufficiently and may discharge.
Note
■ We recommend having all work on the vehicle battery carried out by a spe-
cialist garage.■
You should replace batteries older than 5 years.
Opening the cover
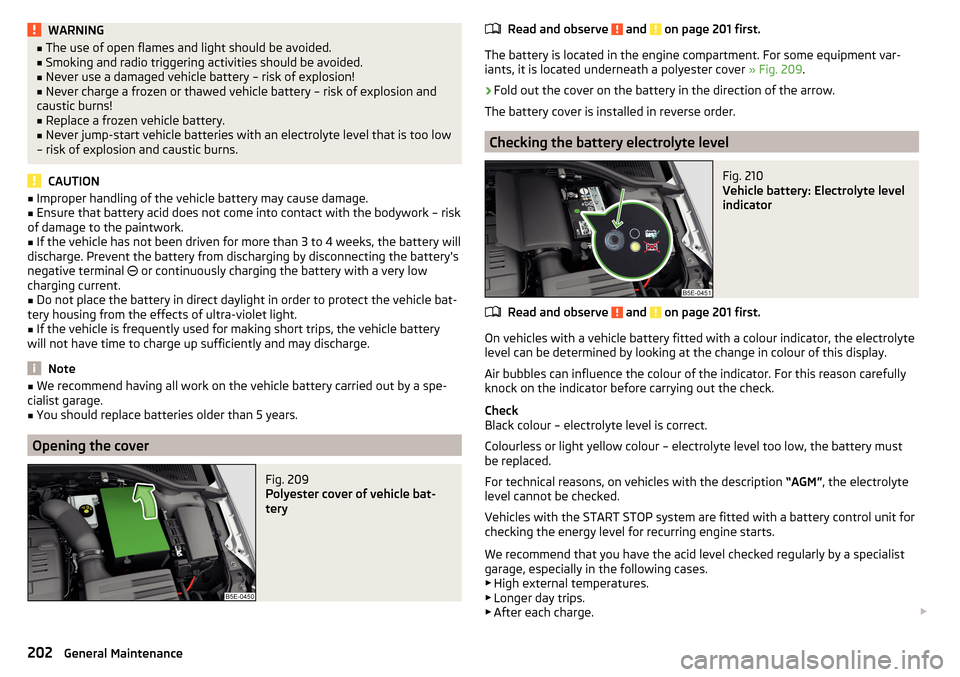
Fig. 209
Polyester cover of vehicle bat-
tery
Read and observe and on page 201 first.
The battery is located in the engine compartment. For some equipment var- iants, it is located underneath a polyester cover » Fig. 209.
›
Fold out the cover on the battery in the direction of the arrow.
The battery cover is installed in reverse order.
Checking the battery electrolyte level
Fig. 210
Vehicle battery: Electrolyte level
indicator
Read and observe and on page 201 first.
On vehicles with a vehicle battery fitted with a colour indicator, the electrolyte
level can be determined by looking at the change in colour of this display.
Air bubbles can influence the colour of the indicator. For this reason carefully
knock on the indicator before carrying out the check.
Check
Black colour – electrolyte level is correct.
Colourless or light yellow colour – electrolyte level too low, the battery must
be replaced.
For technical reasons, on vehicles with the description “AGM”, the electrolyte
level cannot be checked.
Vehicles with the START STOP system are fitted with a battery control unit for
checking the energy level for recurring engine starts.
We recommend that you have the acid level checked regularly by a specialist
garage, especially in the following cases. ▶ High external temperatures.
▶ Longer day trips.
▶ After each charge.
202General Maintenance
Page 205 of 268
Winter time
The vehicle battery only has a proportion of the starting power in lower tem-
peratures. A discharged vehicle battery may already freeze at temperatures
just below 0 °C .
We therefore recommend that you have the battery checked and, if necessary,
recharged by a specialist garage before the start of the winter.
Note
The battery acid level is also checked regularly by a specialist garage as part of
the inspection service.
Charging
Read and observe
and on page 201 first.
A properly charged vehicle battery is essential for reliably starting the engine.A charging operation can be performed if the following conditions are satis-
fied.
The engine is turned off.
The ignition is switched off.
All consumers are turned off.
The bonnet is open.
“Fast charging” with high currents
›
Disconnect both battery cables (first of all “negative”, then “positive”).
›
Attach the terminal clamps of the charger to the battery terminals (red =
“positive”, black = “negative”).
›
Plug the mains cable of the charger into the power socket and switch on the
device.
›
After charging has been successful: Switch off the charger and remove the
mains cable from the power socket.
›
Only then disconnect the charger's terminal clamps.
›
Reconnect the cables to the battery (first of all “positive”, then “negative”).
Charging with low voltages
It is not necessary to disconnect the cables from the battery if you recharge
the vehicle battery, for example from a mini-charger.
Refer to the instructions of the charger manufacturer .
A charging current of 0.1 multiple of the total vehicle battery capacity (or low-
er) must be used until full charging is achieved.
The vent plugs of the vehicle battery should not be opened for charging.WARNING■ When you charge a battery, hydrogen is released, and a highly explosive
gas mixture is also produced. An explosion can be caused through sparkling
over during unclamping or loosening of the cable plug while the ignition is
on.■
Creating a bridge between the poles on the battery (e.g. with metal ob-
jects - cables) creates a short circuit - risk of damage to the battery, explo-
sion and burning of the battery, jets of acid spurting out.
■
Avoid creating sparks when working with cables and electrical devices.
Strong sparking represents a risk of injury.
■
Before carrying out any work on the electrical system, switch off the en-
gine, the ignition and all electrical components and disconnect the negative
terminal
.
■
“Quick-charging” the vehicle battery is dangerous and requires a special
charger and specialist knowledge.
■
We therefore recommend that vehicle batteries be “rapidly charged” by a
specialist garage.
CAUTION
On vehicles with the START/STOP system or additional heating (auxiliary heat-
ing), do not connect the pole terminal of the charger directly to the negative
terminal of the vehicle battery, but rather only to the engine earth » page 219,
Jump-starting using the battery from another vehicle .
Replacing
Read and observe
and on page 201 first.
The new vehicle battery must have the same capacity, voltage, current and
size as the original battery. Suitable vehicle battery types can be purchased
from a specialist garage.
We recommend you have the battery replaced by a specialist garage.
Disconnecting and reconnecting
Read and observe
and on page 201 first.
Disconnecting
›
Switch off the ignition.
203Inspecting and replenishing
Page 221 of 268

WARNING■If the tyre cannot be inflated to at least. 2.0 bar, the damage is too great.
The sealing agent cannot be used to seal the tyre. Do not drive the vehi-
cle. Seek help from a specialist garage.■
The tyre inflation hose and air compressor may get hot as the tyre is be-
ing inflated – risk of burning.
CAUTION
Switch off the air compressor after running 8 minutes at the latest – risk of
overheating! Allow the air compressor to cool a few minutes before switching
it on again.
Notes for driving with a repaired tyre
Read and observe
on page 217 first.
The inflation pressure of the repaired tyre must be checked after driving for 10
minutes.
If the tyre inflation pressure is 1.3 bar or less
›
Do not drive the vehicle! You cannot properly seal with tyre with the
breakdown kit.
If the tyre inflation pressure is 1.3 bar or more
›
Set the tyre pressure back to the correct value.
›
Continue driving carefully to the nearest specialist garage at a maximum
speed of 80 km/h (50 mph).
WARNING■ A tyre filled with sealant has the same driving characteristics as a stand-
ard tyre.■
Do not drive faster than 80 km/h (50 mph).
■
Avoid accelerating at full throttle, sharp braking and fast cornering.
Jump-starting
Introduction
This chapter contains information on the following subjects:
Jump-starting using the battery from another vehicle
219The battery of another vehicle can be used to jump-start your vehicle if the en-
gine will not start because the battery is flat.WARNING■ Pay attention to the warning instructions relating to working in the en-
gine compartment » page 194.■
A discharged vehicle battery may already freeze at temperatures just be-
low 0 °C. If the battery is frozen, do not carry out a jump start with the bat-
tery of another vehicle – risk of explosion!
■
Keep any sources of ignition (naked flame, smouldering cigarettes, etc.)
away from the battery – risk of explosion!
■
Never jump-start vehicle batteries with an electrolyte level that is too low
– risk of explosion and caustic burns.
■
The vent screws of the battery cells must be tightened firmly.
Note
We recommend you buy jump-start cables from a car battery specialist.
Jump-starting using the battery from another vehicle
Fig. 224
Jump-starting: A – flat battery, B
– battery providing current
219Emergency equipment, and self-help
Page 222 of 268
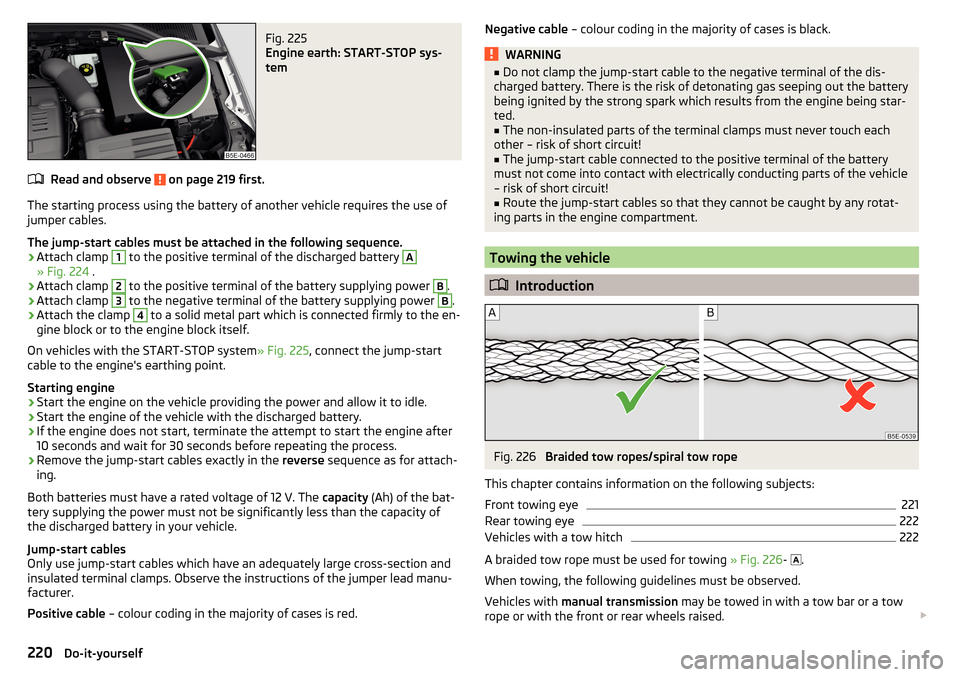
Fig. 225
Engine earth: START-STOP sys-
tem
Read and observe on page 219 first.
The starting process using the battery of another vehicle requires the use of
jumper cables.
The jump-start cables must be attached in the following sequence.
›
Attach clamp
1
to the positive terminal of the discharged battery
A
» Fig. 224 .
›
Attach clamp
2
to the positive terminal of the battery supplying power
B
.
›
Attach clamp
3
to the negative terminal of the battery supplying power
B
.
›
Attach the clamp
4
to a solid metal part which is connected firmly to the en-
gine block or to the engine block itself.
On vehicles with the START-STOP system » Fig. 225, connect the jump-start
cable to the engine's earthing point.
Starting engine
›
Start the engine on the vehicle providing the power and allow it to idle.
›
Start the engine of the vehicle with the discharged battery.
›
If the engine does not start, terminate the attempt to start the engine after
10 seconds and wait for 30 seconds before repeating the process.
›
Remove the jump-start cables exactly in the reverse sequence as for attach-
ing.
Both batteries must have a rated voltage of 12 V. The capacity (Ah) of the bat-
tery supplying the power must not be significantly less than the capacity of
the discharged battery in your vehicle.
Jump-start cables
Only use jump-start cables which have an adequately large cross-section and
insulated terminal clamps. Observe the instructions of the jumper lead manu-
facturer.
Positive cable – colour coding in the majority of cases is red.
Negative cable – colour coding in the majority of cases is black.WARNING■
Do not clamp the jump-start cable to the negative terminal of the dis-
charged battery. There is the risk of detonating gas seeping out the battery
being ignited by the strong spark which results from the engine being star-
ted.■
The non-insulated parts of the terminal clamps must never touch each
other – risk of short circuit!
■
The jump-start cable connected to the positive terminal of the battery
must not come into contact with electrically conducting parts of the vehicle
– risk of short circuit!
■
Route the jump-start cables so that they cannot be caught by any rotat-
ing parts in the engine compartment.
Towing the vehicle
Introduction
Fig. 226
Braided tow ropes/spiral tow rope
This chapter contains information on the following subjects:
Front towing eye
221
Rear towing eye
222
Vehicles with a tow hitch
222
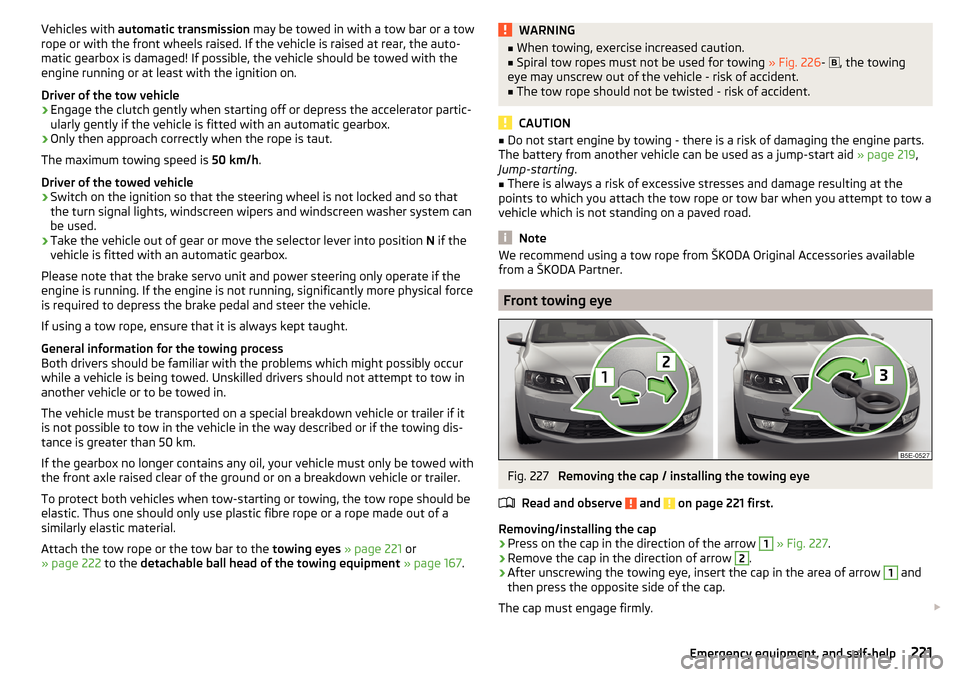
A braided tow rope must be used for towing » Fig. 226-
.
When towing, the following guidelines must be observed.
Vehicles with manual transmission may be towed in with a tow bar or a tow
rope or with the front or rear wheels raised.
220Do-it-yourself
Page 223 of 268
Vehicles with automatic transmission may be towed in with a tow bar or a tow
rope or with the front wheels raised. If the vehicle is raised at rear, the auto-
matic gearbox is damaged! If possible, the vehicle should be towed with the
engine running or at least with the ignition on.
Driver of the tow vehicle›
Engage the clutch gently when starting off or depress the accelerator partic-
ularly gently if the vehicle is fitted with an automatic gearbox.
›
Only then approach correctly when the rope is taut.
The maximum towing speed is 50 km/h.
Driver of the towed vehicle
›
Switch on the ignition so that the steering wheel is not locked and so that
the turn signal lights, windscreen wipers and windscreen washer system can
be used.
›
Take the vehicle out of gear or move the selector lever into position N if the
vehicle is fitted with an automatic gearbox.
Please note that the brake servo unit and power steering only operate if the
engine is running. If the engine is not running, significantly more physical force
is required to depress the brake pedal and steer the vehicle.
If using a tow rope, ensure that it is always kept taught.
General information for the towing process
Both drivers should be familiar with the problems which might possibly occur while a vehicle is being towed. Unskilled drivers should not attempt to tow in
another vehicle or to be towed in.
The vehicle must be transported on a special breakdown vehicle or trailer if it
is not possible to tow in the vehicle in the way described or if the towing dis-
tance is greater than 50 km.
If the gearbox no longer contains any oil, your vehicle must only be towed with
the front axle raised clear of the ground or on a breakdown vehicle or trailer.
To protect both vehicles when tow-starting or towing, the tow rope should be
elastic. Thus one should only use plastic fibre rope or a rope made out of a
similarly elastic material.
Attach the tow rope or the tow bar to the towing eyes » page 221 or
» page 222 to the detachable ball head of the towing equipment » page 167 .
WARNING■
When towing, exercise increased caution.■Spiral tow ropes must not be used for towing » Fig. 226- , the towing
eye may unscrew out of the vehicle - risk of accident.■
The tow rope should not be twisted - risk of accident.
CAUTION
■ Do not start engine by towing - there is a risk of damaging the engine parts.
The battery from another vehicle can be used as a jump-start aid » page 219,
Jump-starting .■
There is always a risk of excessive stresses and damage resulting at the
points to which you attach the tow rope or tow bar when you attempt to tow a
vehicle which is not standing on a paved road.
Note
We recommend using a tow rope from ŠKODA Original Accessories available
from a ŠKODA Partner.
Front towing eye
Fig. 227
Removing the cap / installing the towing eye
Read and observe
and on page 221 first.
Removing/installing the cap
›
Press on the cap in the direction of the arrow
1
» Fig. 227 .
›
Remove the cap in the direction of arrow
2
.
›
After unscrewing the towing eye, insert the cap in the area of arrow
1
and
then press the opposite side of the cap.
The cap must engage firmly.
221Emergency equipment, and self-help
Page 254 of 268
Disconnecting and reconnectingvehicle battery203
Display29
Compass points49
Coolant temperature29
Gear changes41
Natural gas reserve30
Petrol / Diesel reserve30
Service interval49
Disposal Acceptance and recycling of used vehicles
181
Distance driven30
Distance warning Warning light
40
Door Child safety lock
57
Closing57
Emergency locking224
Emergency locking the driver's door224
Opening57
Door warning40
double hooks103
Drive Driving through water
134
DriveGreen133
Driver Steering Recommendation (DSR)137
Driving Emissions
239
Fuel consumption239
through water134
Driving mode157
driving mode select Normal mode
157
Driving Mode Selection157
DSR137
E
ECO-TIP
49
Eco-tips49
Economical driving Tips132
EDL137
Electrical boot lid set the top position of the lid
61
Electric boot lid Force limit
60
Manual operation60
Electric luggage compartment lid Malfunctions
61
Operating60
Electric window lifter64
Window operation malfunctions64
Electric window lifters62
Buttons in the driver's door62
Electronic differential lock (EDL, XDS)137
Electronic immobilizer120
emergency replace battery in the remote control
223
Emergency Changing a wheel
213
Hazard warning light system73
Jump-starting219
Locking the door without a locking cylinder224
Locking the driver's door224
Selector lever-unlocking225
Switch off the engine by pressing a button123
Towing the using the tow hitch222
Towing the vehicle220
Tyre repair217
Unlocking the driver's door224
emergency equipment reflective vest
211
Emergency equipment Fire extinguisher
212
First aid kit211
Jack212
Vehicle tool kit212
Warning triangle211
Emissions239
Engine Running-in132
Warning messages37
Engine compartment194
Brake fluid200
Overview196
Vehicle battery201
Engine number236
engine oil specification
197
Engine oil197
Changing197
Checking198
Replenishing198
Warning light38
EPC Warning light
35
ESC Operation
136
Warning light34
ESC Sport136
Estate instrument Natural gas reserve display
30
Estate Instrument panel Petrol / Diesel reserve display
30
Exhaust inspection system Warning light
34
F
Fastening elements
101
Fatigue detection164
Function164
Information messages165
Films183
Fire extinguisher212
First aid kit211
Floor covering Fixing
103
in the luggage compartment103
252Index
Page 256 of 268
Temperature gauge29
Warning lights31
Interior care186
Natural leather187
Interior light Front
74
Interior lights Rear
75
Interior monitor58
iPad holder Behind the headrests
99
Handling99
ISOFIX23
J
Jack
212
Maintenance185
Jump-starting219
K
KESSY Locking
55
Unlocking55
Key Locking
54
Starting the engine121
Stopping the engine121
Switching off the ignition121
Switching on the ignition121
Unlocking54
Key CAR see Infotainment
4
Knee airbag17
L
Lamp failure Warning light
38
Lamps Warning light
38
Lane Assistsee Lane Departure Warning160
Warning light36
Lane Departure Warning160
Activation / deactivation162
Information messages162
Operation161
Lap timer48
Leather Natural leather care
187
LEAVING HOME73
Lever Main beam
69
Turn signal69
Levers Windscreen wipers
78
Light Cockpit
74
COMING HOME / LEAVING HOME73
Fog lights72
Headlights with CORNER function73
High-beam assistant71
Rear fog light72
Replacing bulbs230
travel mode71
Xenon headlight70
Light Assist High-beam assistant
71
lighting entry space
75
Lighting Luggage compartment
100
Lights67
Automatic driving lamp control70
Daylight running68
Hazard warning light system73
Headlight beam range regulation68
Headlight flasher69
Low beam68
Main beam69
Parking lights68, 74
Switching on and off68
Turn signal69
Warning lights31
Load238
Locking Individual settings
56
KESSY55
Key54
Remote control54
Locking and unlocking the vehicle from the in- side
55
Locking the door without a locking cylinder Emergency
224
Long cargo channel88
Low beam68
Low tyre pressure warning See tyre pressure monitoring
165
Luggage compartment100
Compartment with cargo element106
Cover104
Fastening elements101
Fix floor covering103
Fixing nets102
floor covering on both sides103
foldable hook103
Folding double hooks103
Lighting100
Luggage net104
Net partition109
Roll-up cover105
Storage compartments under the floor cover- ing
106
Stowing the roof rack111
unlock manually224
Unlock the boot lid224
Variable loading floor107
Luggage compartment cover104
Roll-up cover105
254Index