Front Assist SKODA OCTAVIA 2016 3.G / (5E) Owner's Guide
[x] Cancel search | Manufacturer: SKODA, Model Year: 2016, Model line: OCTAVIA, Model: SKODA OCTAVIA 2016 3.G / (5E)Pages: 324, PDF Size: 48.85 MB
Page 220 of 324
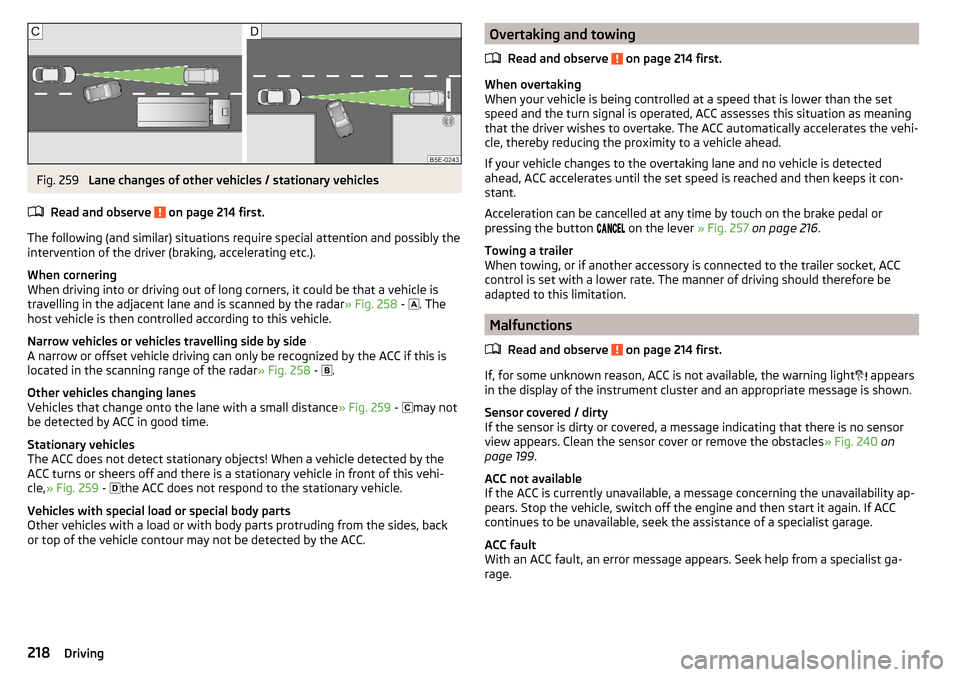
Fig. 259
Lane changes of other vehicles / stationary vehicles
Read and observe
on page 214 first.
The following (and similar) situations require special attention and possibly the
intervention of the driver (braking, accelerating etc.).
When cornering
When driving into or driving out of long corners, it could be that a vehicle is
travelling in the adjacent lane and is scanned by the radar » Fig. 258 -
. The
host vehicle is then controlled according to this vehicle.
Narrow vehicles or vehicles travelling side by side
A narrow or offset vehicle driving can only be recognized by the ACC if this is
located in the scanning range of the radar » Fig. 258 -
.
Other vehicles changing lanes
Vehicles that change onto the lane with a small distance » Fig. 259 -
may not
be detected by ACC in good time.
Stationary vehicles
The ACC does not detect stationary objects! When a vehicle detected by the
ACC turns or sheers off and there is a stationary vehicle in front of this vehi-
cle, » Fig. 259 -
the ACC does not respond to the stationary vehicle.
Vehicles with special load or special body parts
Other vehicles with a load or with body parts protruding from the sides, back
or top of the vehicle contour may not be detected by the ACC.
Overtaking and towing
Read and observe
on page 214 first.
When overtaking
When your vehicle is being controlled at a speed that is lower than the set
speed and the turn signal is operated, ACC assesses this situation as meaning
that the driver wishes to overtake. The ACC automatically accelerates the vehi-
cle, thereby reducing the proximity to a vehicle ahead.
If your vehicle changes to the overtaking lane and no vehicle is detected
ahead, ACC accelerates until the set speed is reached and then keeps it con-
stant.
Acceleration can be cancelled at any time by touch on the brake pedal or
pressing the button on the lever
» Fig. 257 on page 216 .
Towing a trailer
When towing, or if another accessory is connected to the trailer socket, ACC
control is set with a lower rate. The manner of driving should therefore be
adapted to this limitation.
Malfunctions
Read and observe
on page 214 first.
If, for some unknown reason, ACC is not available, the warning light appears
in the display of the instrument cluster and an appropriate message is shown.
Sensor covered / dirty
If the sensor is dirty or covered, a message indicating that there is no sensor
view appears. Clean the sensor cover or remove the obstacles » Fig. 240 on
page 199 .
ACC not available
If the ACC is currently unavailable, a message concerning the unavailability ap-
pears. Stop the vehicle, switch off the engine and then start it again. If ACC
continues to be unavailable, seek the assistance of a specialist garage.
ACC fault
With an ACC fault, an error message appears. Seek help from a specialist ga-
rage.
218Driving
Page 221 of 324
Front Assist
Introduction
This chapter contains information on the following subjects:
Settings in Infotainment
219
Operation
219
Distance warning
219
Warning and automatic braking
220
Deactivation/activation
220
Malfunctions
221
The Front Assist (hereinafter referred to as system) warns you of the danger of
a collision with a vehicle or another obstacle in front of the vehicle, and tries to
avoid a collision or mitigate its consequences by automatically applying the
brakes where necessary.
The area in front of the vehicle is monitored by a radar sensor » page 199.
WARNING■
The general information relating to the use of assistance systems must
be observed » page 199, in section Introduction .■
The system does not respond to crossing or oncoming objects.
CAUTION
In case of failure of more than one brake light on the vehicle or on the electri-
cally connected trailer, the system becomes unavailable.
Settings in Infotainment
Read and observe
and on page 219 first.
›
Press the button, then tap on the function surface
→
Driver assistance
.
■ Front Assist (ambient traffic monitor. sys.) - Set the assistant for distance
monitoring to the vehicles ahead ■
Active
- Activate/deactivate the assistant
■
Advance warning
(Version 1) - Activate/deactivate advance warning
■
Advance warning
(Version 2) - Activating/deactivating and setting the distance
level at which a warning occurs
■
Display distance warning
- Activate/deactivate distance warnings
Operation
Read and observe
and on page 219 first.
The system support is provided in the following manner.▶ Alerts you about a dangerous proximity to the vehicle ahead.
▶ Warns you of an impending collision.
▶ Assists with a brake action triggered by the driver.
▶ If the driver fails to respond to a detected danger, automatic braking is per-
formed.
The system can work only if the following basic conditions are met. The system is activated.
TCS is activated » page 201.
The vehicle is travelling forwards at a speed of more than approx. 5 km/h.
Note
The system can be impaired or may not be available, for example when driving
in “sharp ”curves or with an ESC engagement » page 200.
Distance warning
Fig. 260
Display in the instrument cluster: Proximity warning
Read and observe and on page 219 first.
If a safe distance from the vehicle ahead is fallen short of, the warning light
appears in the display
» Fig. 260 .
Immediately increase the proximity if the current traffic situation allows you
to do so!
The proximity at which the warning is displayed depends on the current speed.
The warning may occur when driving between about 60 km/h and 210 km/h.
219Assist systems
Page 222 of 324
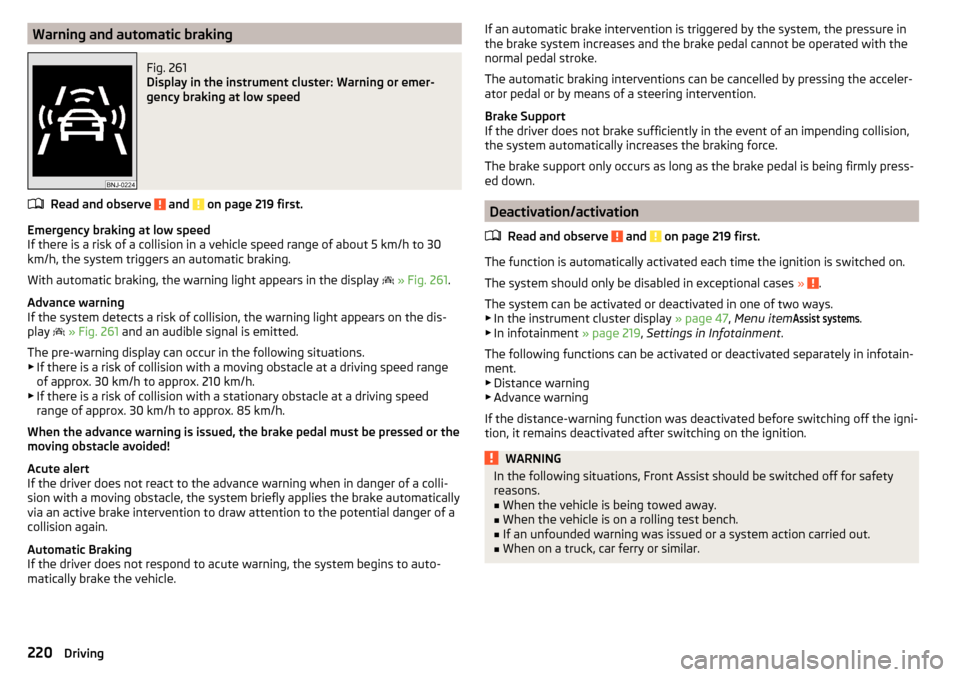
Warning and automatic brakingFig. 261
Display in the instrument cluster: Warning or emer-
gency braking at low speed
Read and observe and on page 219 first.
Emergency braking at low speed
If there is a risk of a collision in a vehicle speed range of about 5 km/h to 30
km/h, the system triggers an automatic braking.
With automatic braking, the warning light appears in the display
» Fig. 261 .
Advance warning
If the system detects a risk of collision, the warning light appears on the dis-
play
» Fig. 261 and an audible signal is emitted.
The pre-warning display can occur in the following situations. ▶ If there is a risk of collision with a moving obstacle at a driving speed range
of approx. 30 km/h to approx. 210 km/h.
▶ If there is a risk of collision with a stationary obstacle at a driving speed
range of approx. 30 km/h to approx. 85 km/h.
When the advance warning is issued, the brake pedal must be pressed or the
moving obstacle avoided!
Acute alert
If the driver does not react to the advance warning when in danger of a colli-
sion with a moving obstacle, the system briefly applies the brake automatically
via an active brake intervention to draw attention to the potential danger of a
collision again.
Automatic Braking
If the driver does not respond to acute warning, the system begins to auto-
matically brake the vehicle.
If an automatic brake intervention is triggered by the system, the pressure in
the brake system increases and the brake pedal cannot be operated with the
normal pedal stroke.
The automatic braking interventions can be cancelled by pressing the acceler-
ator pedal or by means of a steering intervention.
Brake Support
If the driver does not brake sufficiently in the event of an impending collision,
the system automatically increases the braking force.
The brake support only occurs as long as the brake pedal is being firmly press-
ed down.
Deactivation/activation
Read and observe
and on page 219 first.
The function is automatically activated each time the ignition is switched on.
The system should only be disabled in exceptional cases »
.
The system can be activated or deactivated in one of two ways. ▶ In the instrument cluster display » page 47, Menu item
Assist systems
.
▶ In infotainment » page 219, Settings in Infotainment .
The following functions can be activated or deactivated separately in infotain-
ment. ▶ Distance warning
▶ Advance warning
If the distance-warning function was deactivated before switching off the igni-
tion, it remains deactivated after switching on the ignition.
WARNINGIn the following situations, Front Assist should be switched off for safety
reasons.■
When the vehicle is being towed away.
■
When the vehicle is on a rolling test bench.
■
If an unfounded warning was issued or a system action carried out.
■
When on a truck, car ferry or similar.
220Driving
Page 225 of 324
Mode selection and infotainment displayFig. 262
Button for selecting the driving mode: Version 1 / version 2
Fig. 263
Display in Infotainment screen
Read and observe on page 221 first.
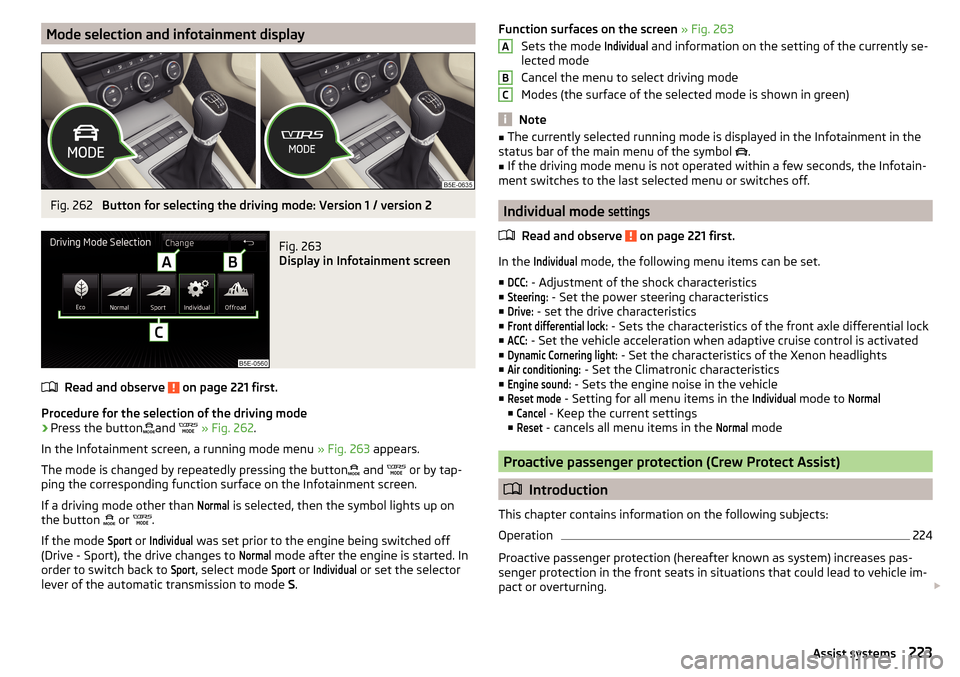
Procedure for the selection of the driving mode
›
Press the buttonand
» Fig. 262 .
In the Infotainment screen, a running mode menu » Fig. 263 appears.
The mode is changed by repeatedly pressing the button and
or by tap-
ping the corresponding function surface on the Infotainment screen.
If a driving mode other than
Normal
is selected, then the symbol lights up on
the button or
.
If the mode
Sport
or
Individual
was set prior to the engine being switched off
(Drive - Sport), the drive changes to
Normal
mode after the engine is started. In
order to switch back to
Sport
, select mode
Sport
or
Individual
or set the selector
lever of the automatic transmission to mode S.
Function surfaces on the screen » Fig. 263
Sets the mode Individual
and information on the setting of the currently se-
lected mode
Cancel the menu to select driving mode
Modes (the surface of the selected mode is shown in green)
Note
■ The currently selected running mode is displayed in the Infotainment in the
status bar of the main menu of the symbol .■
If the driving mode menu is not operated within a few seconds, the Infotain-
ment switches to the last selected menu or switches off.
Individual mode
settings
Read and observe on page 221 first.
In the
Individual
mode, the following menu items can be set.
■
DCC:
- Adjustment of the shock characteristics
■
Steering:
- Set the power steering characteristics
■
Drive:
- set the drive characteristics
■
Front differential lock:
- Sets the characteristics of the front axle differential lock
■
ACC:
- Set the vehicle acceleration when adaptive cruise control is activated
■
Dynamic Cornering light:
- Set the characteristics of the Xenon headlights
■
Air conditioning:
- Set the Climatronic characteristics
■
Engine sound:
- Sets the engine noise in the vehicle
■
Reset mode
- Setting for all menu items in the
Individual
mode to
Normal
■
Cancel
- Keep the current settings
■
Reset
- cancels all menu items in the
Normal
mode
Proactive passenger protection (Crew Protect Assist)
Introduction
This chapter contains information on the following subjects:
Operation
224
Proactive passenger protection (hereafter known as system) increases pas-
senger protection in the front seats in situations that could lead to vehicle im-
pact or overturning.
ABC223Assist systems
Page 226 of 324
WARNINGThe general information relating to the use of assistance systems must be
observed » page 199, in section Introduction .
Note
■
The system component service life is monitored electronically. Further infor-
mation » page 35 , Safety systems .■
If the front passenger front airbag is deactivated, the belt tensioning func-
tion for the front passenger seat is switched off.
Operation
Read and observe
on page 224 first.
In critical driving situations (e.g. during emergency braking or a sudden changein direction), the following steps can be taken separately or combined in order
to reduce the risk of serious injury.
▶ The front passenger's and driver's seatbelts, if worn, are automatically ten-
sioned closely over the body.
▶ Opened door windows in the front doors are closed automatically up to a gap
of about 5 cm from the edge.
▶ The sliding/tilting roof is closed.
Once the critical driving situation has passed, the tension on the seatbelts will
be released again.
The system operates at two levels of protection.
The first level of protection
The system already intervenes in situations that may occur during dynamic
driving. As a result, this primarily helps to keep the driver and the passenger in
the correct seated position.
The first protection level can be deactivated in one of the following ways. ▶ in the menu
Infotainment
→
→
Driver assistance
.
▶ Deactivation of TCS » page 201.
▶ By selecting the driving mode
Sport
» page 223 .
Provided that the driving mode
Sport
is not selected, the system is activated
over the two levels of protection after switching the ignition off and on again.
The second level of protection
The system intervenes only if the situation is evaluated as critical, such as
when panic braking at high speeds.
This level of protection cannot be deactivated.
Lane Departure Warning (Lane Assist)
Introduction
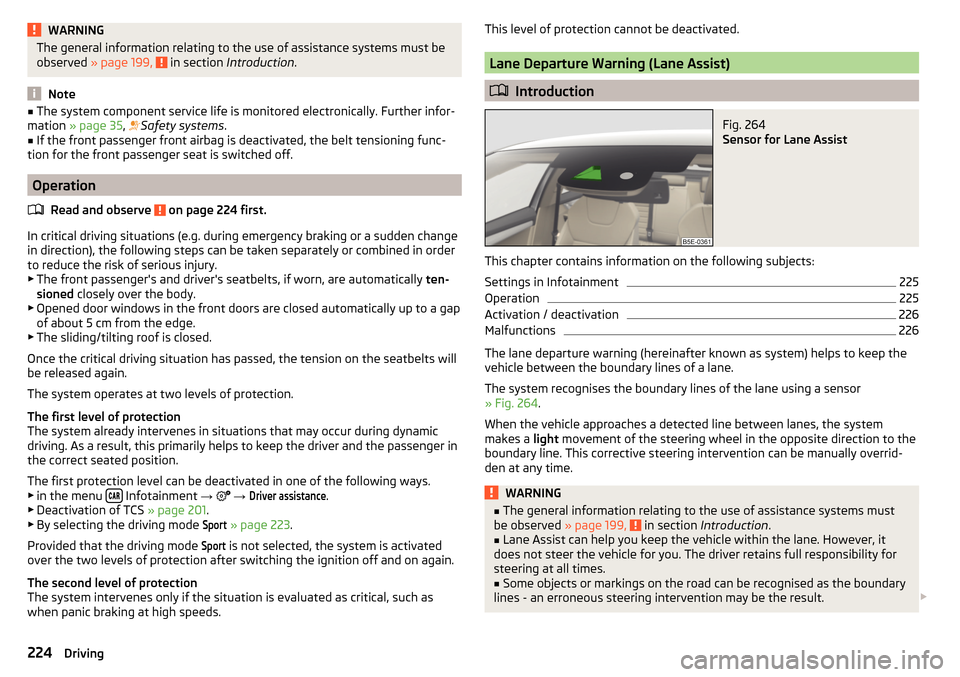
Fig. 264
Sensor for Lane Assist
This chapter contains information on the following subjects:
Settings in Infotainment
225
Operation
225
Activation / deactivation
226
Malfunctions
226
The lane departure warning (hereinafter known as system) helps to keep the
vehicle between the boundary lines of a lane.
The system recognises the boundary lines of the lane using a sensor
» Fig. 264 .
When the vehicle approaches a detected line between lanes, the system
makes a light movement of the steering wheel in the opposite direction to the
boundary line. This corrective steering intervention can be manually overrid-
den at any time.
WARNING■ The general information relating to the use of assistance systems must
be observed » page 199, in section Introduction .■
Lane Assist can help you keep the vehicle within the lane. However, it
does not steer the vehicle for you. The driver retains full responsibility for
steering at all times.
■
Some objects or markings on the road can be recognised as the boundary
lines - an erroneous steering intervention may be the result.
224Driving
Page 227 of 324
WARNINGThe system may not be able to recognise the boundary line, or recognise it
incorrectly, for example, in the following situations.■
When visibility is poor, (e.g. fog, heavy rain, thick snowfall).
■
When driving in “sharp” bends.
■
The sensor is blinded by the sun or oncoming traffic.
■
The field of view of the sensor is limited by an obstacle or a preceding ve-
hicle.
CAUTION
Do not attach any stickers or similar objects in front of the sensor on the wind-
screen to avoid impairing the functions of the system.
Note
■ The system is designed for driving on motorways and roads with adequate
longitudinal markings.■
The system can detect both continuous and broken lines.
Settings in Infotainment
Read and observe
and on page 224 first.
›
Press the button, then tap on the function surface
→
Driver assistance
.
■ Lane Assist (lane departure warning sys.) - Settings for Lane Assist
■
Active
- Activate/deactivate the assistant
■
Adaptive lane guidance
- Activate/deactivate adaptive lane guidance
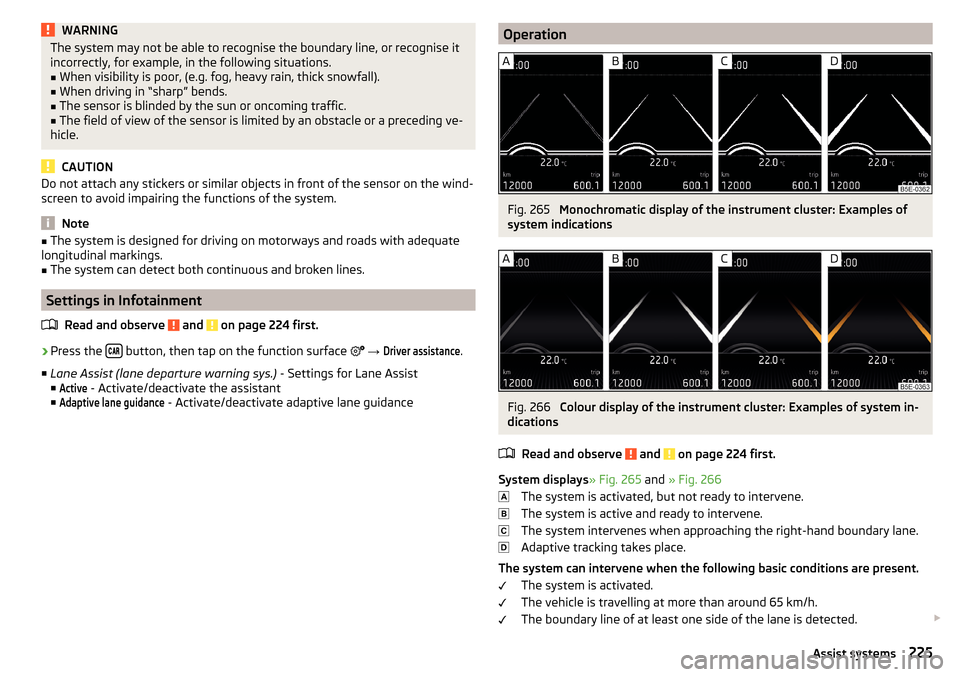
OperationFig. 265
Monochromatic display of the instrument cluster: Examples of
system indications
Fig. 266
Colour display of the instrument cluster: Examples of system in-
dications
Read and observe
and on page 224 first.
System displays » Fig. 265 and » Fig. 266
The system is activated, but not ready to intervene.
The system is active and ready to intervene.
The system intervenes when approaching the right-hand boundary lane.
Adaptive tracking takes place.
The system can intervene when the following basic conditions are present. The system is activated.
The vehicle is travelling at more than around 65 km/h.
The boundary line of at least one side of the lane is detected.
225Assist systems
Page 231 of 324
WARNING■The general information relating to the use of assistance systems must
be observed » page 199, in section Introduction .■
For the driving ability is always the driver's responsibility. Never drive if
you feel tired.
■
The system may not detect all cases where a break is needed.
■
Therefore, take regular, sufficient breaks during long trips.
■
There will be no system warning during the so-called micro-sleep.
Note
■ In some situations, the system may evaluate the driving incorrectly and thus
mistakenly recommend a break (e.g. sporty driving, adverse weather condi-
tions or poor road conditions).■
The system is designed primarily for use on motorways.
Tyre pressure monitoring
Introduction
This chapter contains information on the following subjects:
Storing the tyre pressure values and Infotainment display
229
The tyre pressure monitoring function (hereinafter referred to as the system)
monitors the tyre pressure while driving.
If the tyre inflation pressure changes, the warning light
lights up in the in-
strument cluster and an audible signal sounds » page 35.
The system can only function properly if the tyres have the prescribed inflation
pressure and these pressure values are stored in the system.
The tyre pressure values are always stored in the system if one of the fol-
lowing events occurs.
▶ Change of tyre inflation pressure.
▶ Change one or more wheels.
▶ Change in position of a wheel on the vehicle.
▶ The warning light
lights up in the instrument cluster.
WARNING■
The general information relating to the use of assistance systems must
be observed » page 199, in section Introduction .■
Having the correct tyre inflation pressure is always the driver's responsi-
bility. Tyre inflation pressure must be checked regularly » page 261.
■
The system cannot warn in case of very rapid tyre inflation pressure loss,
e.g. in case of sudden tyre damage.
■
Before storing the pressure values, the tyres must be inflated to the
specified inflation pressure » page 261. If incorrect pressure values are
saved, the system may also not issue a warning even if the tyre inflation
pressure is too low.
CAUTION
To ensure proper system function, the tire pressure values must be stored ev-
ery 10 000 km or 1x a year.
Storing the tyre pressure values and Infotainment display
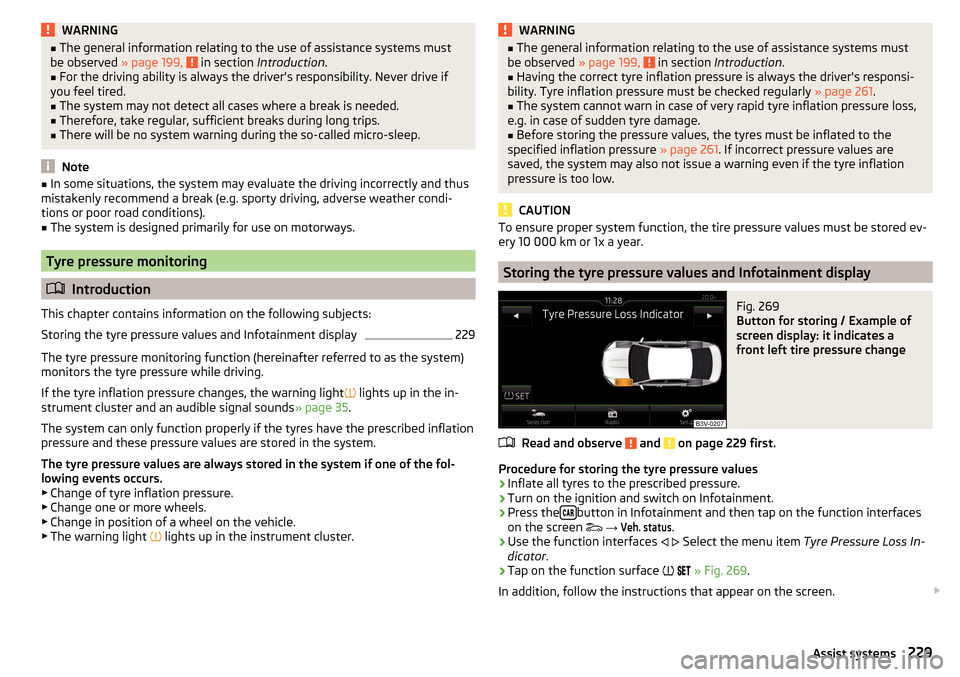
Fig. 269
Button for storing / Example of
screen display: it indicates a
front left tire pressure change
Read and observe and on page 229 first.
Procedure for storing the tyre pressure values
›
Inflate all tyres to the prescribed pressure.
›
Turn on the ignition and switch on Infotainment.
›
Press the button in Infotainment and then tap on the function interfaces
on the screen
→
Veh. status
.
›
Use the function interfaces
Select the menu item
Tyre Pressure Loss In-
dicator .
›
Tap on the function surface
» Fig. 269 .
In addition, follow the instructions that appear on the screen.
229Assist systems
Page 258 of 324
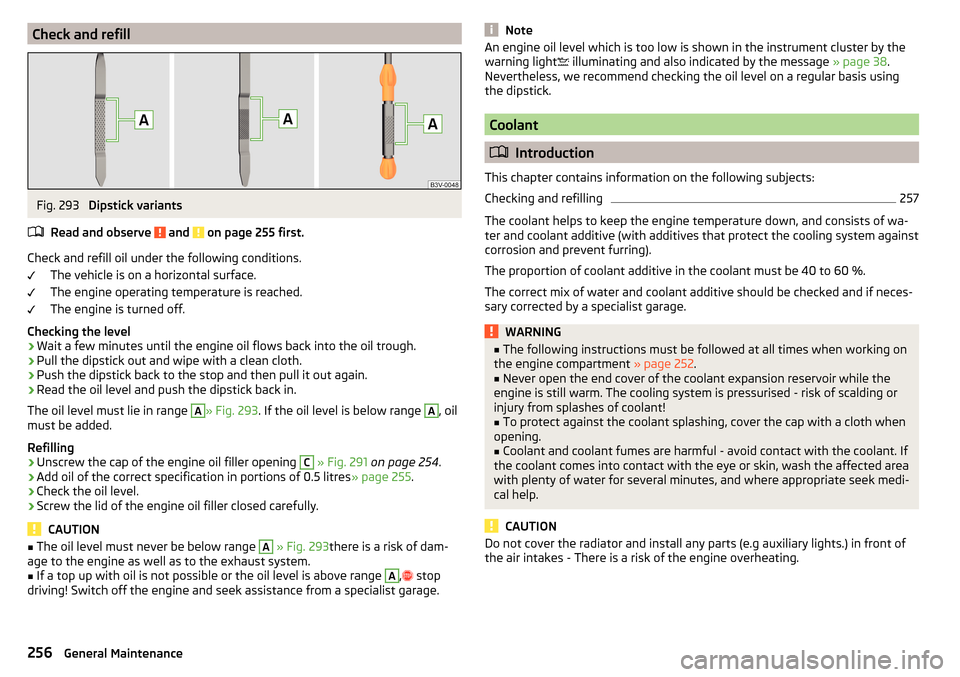
Check and refillFig. 293
Dipstick variants
Read and observe
and on page 255 first.
Check and refill oil under the following conditions. The vehicle is on a horizontal surface.
The engine operating temperature is reached.
The engine is turned off.
Checking the level
›
Wait a few minutes until the engine oil flows back into the oil trough.
›
Pull the dipstick out and wipe with a clean cloth.
›
Push the dipstick back to the stop and then pull it out again.
›
Read the oil level and push the dipstick back in.
The oil level must lie in range
A
» Fig. 293 . If the oil level is below range
A
, oil
must be added.
Refilling
›
Unscrew the cap of the engine oil filler opening
C
» Fig. 291 on page 254 .
›
Add oil of the correct specification in portions of 0.5 litres » page 255.
›
Check the oil level.
›
Screw the lid of the engine oil filler closed carefully.
CAUTION
■
The oil level must never be below range A » Fig. 293 there is a risk of dam-
age to the engine as well as to the exhaust system.■
If a top up with oil is not possible or the oil level is above range
A
,
stop
driving! Switch off the engine and seek assistance from a specialist garage.
NoteAn engine oil level which is too low is shown in the instrument cluster by the
warning light illuminating and also indicated by the message » page 38.
Nevertheless, we recommend checking the oil level on a regular basis using
the dipstick.
Coolant
Introduction
This chapter contains information on the following subjects:
Checking and refilling
257
The coolant helps to keep the engine temperature down, and consists of wa-
ter and coolant additive (with additives that protect the cooling system against
corrosion and prevent furring).
The proportion of coolant additive in the coolant must be 40 to 60 %.
The correct mix of water and coolant additive should be checked and if neces-
sary corrected by a specialist garage.
WARNING■ The following instructions must be followed at all times when working on
the engine compartment » page 252.■
Never open the end cover of the coolant expansion reservoir while the
engine is still warm. The cooling system is pressurised - risk of scalding or
injury from splashes of coolant!
■
To protect against the coolant splashing, cover the cap with a cloth when
opening.
■
Coolant and coolant fumes are harmful - avoid contact with the coolant. If
the coolant comes into contact with the eye or skin, wash the affected area
with plenty of water for several minutes, and where appropriate seek medi-
cal help.
CAUTION
Do not cover the radiator and install any parts (e.g auxiliary lights.) in front of
the air intakes - There is a risk of the engine overheating.256General Maintenance
Page 282 of 324
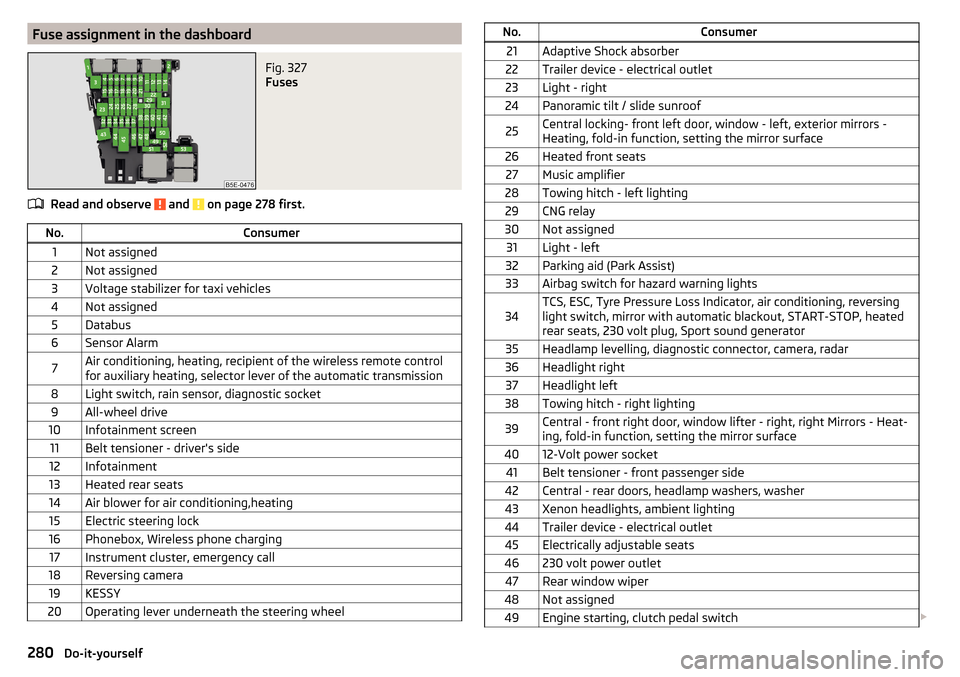
Fuse assignment in the dashboardFig. 327
Fuses
Read and observe and on page 278 first.
No.Consumer1Not assigned2Not assigned3Voltage stabilizer for taxi vehicles4Not assigned5Databus6Sensor Alarm7Air conditioning, heating, recipient of the wireless remote control
for auxiliary heating, selector lever of the automatic transmission8Light switch, rain sensor, diagnostic socket9All-wheel drive10Infotainment screen11Belt tensioner - driver's side12Infotainment13Heated rear seats14Air blower for air conditioning,heating15Electric steering lock16Phonebox, Wireless phone charging17Instrument cluster, emergency call18Reversing camera19KESSY20Operating lever underneath the steering wheelNo.Consumer21Adaptive Shock absorber22Trailer device - electrical outlet23Light - right24Panoramic tilt / slide sunroof25Central locking- front left door, window - left, exterior mirrors -
Heating, fold-in function, setting the mirror surface26Heated front seats27Music amplifier28Towing hitch - left lighting29CNG relay30Not assigned31Light - left32Parking aid (Park Assist)33Airbag switch for hazard warning lights34TCS, ESC, Tyre Pressure Loss Indicator, air conditioning, reversing
light switch, mirror with automatic blackout, START-STOP, heated
rear seats, 230 volt plug, Sport sound generator35Headlamp levelling, diagnostic connector, camera, radar36Headlight right37Headlight left38Towing hitch - right lighting39Central - front right door, window lifter - right, right Mirrors - Heat-
ing, fold-in function, setting the mirror surface4012-Volt power socket41Belt tensioner - front passenger side42Central - rear doors, headlamp washers, washer43Xenon headlights, ambient lighting44Trailer device - electrical outlet45Electrically adjustable seats46230 volt power outlet47Rear window wiper48Not assigned49Engine starting, clutch pedal switch 280Do-it-yourself
Page 303 of 324
Index
A
A2DP/AVRCP
153
Abort route guidance181
ABS Operation
201
Warning light34
ACC214
Settings in Infotainment214
Acceptance and recycling of used vehicles242
Accessories240
Active steering assist (DSR)202
Adaptive Chassis Control Warning light
40
Adaptive Chassis Control (DCC)221
Adaptive cruise control Set/change desired speed
217
Warning light33, 40
Adaptive Cruise Control214
automatic stopping and starting215
Malfunctions218
Operation215
Operation overview216
Overtaking218
Radar sensor199
Set the clearance level217
Settings in Infotainment214
Special driving conditions217
Start control216
Stop/resume control216
Trailer towing218
Adaptive headlight see xenon headlight
66
Additional keyboard languages123, 130
Additional windows Manoeuvre
180
Adjusting Steering wheel
13
Adjusting seats manually76
Adjusting the seats12
Advice on tyre/wheel usage260
AHL see xenon headlight
66
Air-conditioning system Air outlet vents
108
air bag18
Airbag Adjustments and impairments to the airbagsystem
241
Deactivation21
Deployment19
Warning light35
Airbag system18
Air conditioning104
Air distribution control107
Climatronic105
Manual air conditioning105
Air distribution control107
Air outlet vents108
Alarm55
Trailer239
All-year tyres263
Alphanumeric keyboard117
Alternative routes128
Android Auto166
Connection establishment166
Disconnection166
Home Page166
Anti-lock braking system (ABS)201
Anti-theft alarm system55
Trailer239
Anti-theft wheel bolts268
APN124
Apple CarPlay167
Connection establishment167
Disconnection167
Main menu167
Armrest Front79
Rear80
Ashtray91
Assembling the bar ball, Step 1
232
bar ball, Step 2233
Assist systems199
AT THE133
Audio source139
Auto check control42
Automatic consumer shutdown258
Automatic drive Selector lever
194
Automatic driving light control66
Automatic gearbox Disengage selector lever
195
Kickdown196
Launch control196
Malfunction37
Manual shifting on the multifunction steering wheel
195
Selector lever-emergency unlocking277
Selector lever lock195
Start and drive196
Tiptronic195
Warning light37
Automatic transmission194
AUX85, 141
Settings126
Auxiliary heating (auxiliary heating and ventila- tion)
108
Avoiding damage to your vehicle198
B
ball bar ready position
232
301Index