deactivate airbag SKODA OCTAVIA 2016 3.G / (5E) Owner's Manual
[x] Cancel search | Manufacturer: SKODA, Model Year: 2016, Model line: OCTAVIA, Model: SKODA OCTAVIA 2016 3.G / (5E)Pages: 324, PDF Size: 48.85 MB
Page 22 of 324
WARNING (Continued)■If the airbag has been deployed, the airbag system must then be replaced.■In the area of the front airbag and the knee airbag, the surface of the
steering wheel and the dashboard should be cleaned using only a dry cloth
or one that has been dampened with water.WARNINGInformation about the front airbags■For the driver and front passenger, it is important to maintain a distance
of at least 25 cm to the steering wheel or the panel » Fig. 9 - A
, If you do
not keep this distance, it means that the airbag system cannot protect you
- There is a risk to life! The front seats and the head restraints must always
also be correctly adjusted to match the body size of the occupant.
■
The front passenger airbag must be deactivated if using a rear-facing
child seat on the front passenger seat » page 21, Airbag deactivation . If
this is not done, there is a risk of the child suffering severe or even fatal
injuries if the front passenger airbag is deployed.
■
No other persons, animals or objects should be placed in front of the oc-
cupants in the front seats in the deployment area of the front airbags.
■
The steering wheel and the surface of the dash panel on the passenger
side must not be plastered, covered or modified in any way. No parts (e.g.
cup holders, mobile phone mounts etc.) may be mounted near the airbag
installation points and in the airbag deployment area.
■
Never place objects on the surface of the dash panel on the passenger
side.
WARNINGInformation about knee airbags■Adjust the driver's seat in a forward/back direction so that there is a gap
of at least 10 cm between the legs and the dashboard in the vicinity of the
knee airbag » Fig. 9 - B
. If it is not possible to meet this requirement due to
your body size, visit a specialist garage.
■
The surface of the airbag module in the lower part of the dash panel be-
low the steering column not have stickers attached, be covered or modified
in any other way. Nothing may be attached to the cover of the airbag mod-
ule or located within the immediate vicinity.
■
Do not attach any bulky and heavy objects (bunch of keys etc.) to the igni-
tion key. These can be ejected by the knee airbag when it is deployed and
can cause injuries.
WARNINGInformation on side and head airbags■No objects (e.g. sun visors turned towards the windows) should be loca-
ted in the deployment area of the side and head airbags. No accessories
(e.g. cup holders etc.) should be fitted to the doors - risk of injury!■
Hang only light clothing on the hooks in the vehicle, do not leave any
heavy or sharp objects in the pockets. Do not use hangers to hang up
clothes.
■
The airbag system operates using pressure sensors located in the front
doors. For this reason, no adjustments may be carried out to the doors or
door panels (e.g. installation of additional loudspeakers). Further informa-
tion » page 241 .
■
No excessive force, e.g. through blows, kicks etc. should be applied to the
seat backrests - there is a risk of damage to the side airbags. The side air-
bags would not be deployed in such a case!
■
Any seat or protective covers which you fit to the driver or front passen-
ger seats must only be of a type expressly authorised by ŠKODA AUTO. In
view of the fact that the airbag inflates out of the backrest of the seat, use
of non-approved seat or protective covers would considerably impair the
protective function of the side airbag.
■
Any damage to the original seat covers or stitching at the installation
points for the side airbags should be immediately repaired by a specialist
company.
WARNINGInformation on the use of the airbag system■Any work on the airbag system, including the installation and removal of
system components due to other repair work (e.g. removal of the steering
wheel), must only be carried out by a specialist garage. Further information
» page 241 .■
No changes of any sort should be made to parts of the airbag system, the
front bumper or the bodywork.
■
Do not manipulate individual parts of the airbag system, as this might re-
sult in the airbag being deployed.
20Safety
Page 23 of 324
Airbag deactivation
Introduction
This chapter contains information on the following subjects:
Deactivating airbags
21
Deactivating the front passenger airbag
21
Deactivating airbags
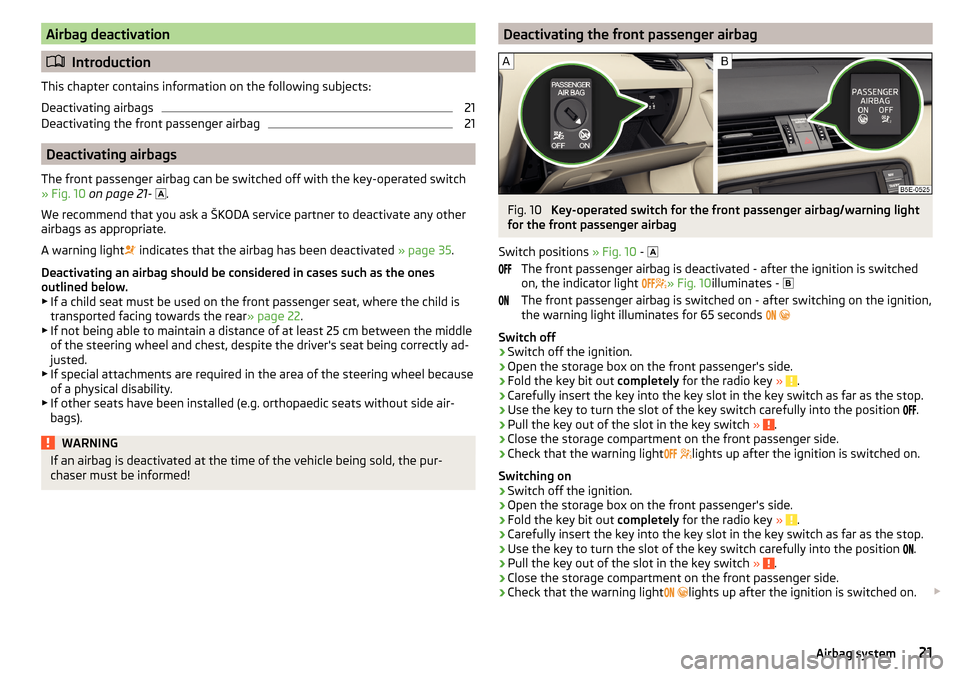
The front passenger airbag can be switched off with the key-operated switch
» Fig. 10 on page 21 -
.
We recommend that you ask a ŠKODA service partner to deactivate any other
airbags as appropriate.
A warning light indicates that the airbag has been deactivated
» page 35.
Deactivating an airbag should be considered in cases such as the ones
outlined below. ▶ If a child seat must be used on the front passenger seat, where the child is
transported facing towards the rear » page 22.
▶ If not being able to maintain a distance of at least 25 cm between the middle
of the steering wheel and chest, despite the driver's seat being correctly ad-
justed.
▶ If special attachments are required in the area of the steering wheel because
of a physical disability.
▶ If other seats have been installed (e.g. orthopaedic seats without side air-
bags).
WARNINGIf an airbag is deactivated at the time of the vehicle being sold, the pur-
chaser must be informed!Deactivating the front passenger airbagFig. 10
Key-operated switch for the front passenger airbag/warning light
for the front passenger airbag
Switch positions » Fig. 10 -
The front passenger airbag is deactivated - after the ignition is switched
on, the indicator light » Fig. 10
illuminates -
The front passenger airbag is switched on - after switching on the ignition,
the warning light illuminates for 65 seconds
Switch off
›
Switch off the ignition.
›
Open the storage box on the front passenger's side.
›
Fold the key bit out completely for the radio key » .
›
Carefully insert the key into the key slot in the key switch as far as the stop.
›
Use the key to turn the slot of the key switch carefully into the position
.
›
Pull the key out of the slot in the key switch
» .
›
Close the storage compartment on the front passenger side.
›
Check that the warning light
lights up after the ignition is switched on.
Switching on
›
Switch off the ignition.
›
Open the storage box on the front passenger's side.
›
Fold the key bit out completely for the radio key » .
›
Carefully insert the key into the key slot in the key switch as far as the stop.
›
Use the key to turn the slot of the key switch carefully into the position
.
›
Pull the key out of the slot in the key switch
» .
›
Close the storage compartment on the front passenger side.
›
Check that the warning light
lights up after the ignition is switched on.
21Airbag system
Page 37 of 324
Emission control systemRead and observe
on page 33 first.
lights up – there is a fault in the emission control system. The system
makes it possible to drive on in emergency mode - there may be a noticeable
reduction in engine performance.
▶ You can drive on, exercising appropriate caution. Seek assistance from a spe-
cialist garage immediately.
Preheating unit (diesel)
Read and observe
on page 33 first.
flashes – there is a fault in the engine management system. The system
makes possible operation emergency mode - there may be a noticeable reduc-
tion in engine performance.
There is a fault in the glow plug system if the warning light does not come
on or illuminates continuously.
▶ You can drive on, exercising appropriate caution. Seek assistance from a spe-
cialist garage immediately.
EPC warning light (petrol)
Read and observe
on page 33 first.
lights up – there is a fault in the engine management system. The system
makes it possible to drive on in emergency mode - there may be a noticeable
reduction in engine performance.
▶ You can drive on, exercising appropriate caution. Seek assistance from a spe-
cialist garage immediately.
Safety systems
Read and observe
on page 33 first.
System fault
lights up - there is a fault in the airbag system.
Error: AirbagAIRBAG ERROR▶
Seek help from a specialist garage.
The front passenger airbag has been disabled with the key switch
illuminates for around 4 seconds after the ignition has been switched on.
One of the airbags or a belt tensioner has been disabled by the diagnostic
tool
illuminates for around 4 seconds after the ignition is switched on and then
flashes for approximately 12 seconds.Airbag/ belt tensioner deactivated.AIRBAG/ BELT TENSIONER OFF
ProActive passenger protection
illuminates and the following message is shown in the information cluster
display.
Proactive passenger protection not available.PROACTIVE PASSENGER PROTECT NOT AVAIL
or
Proactive passenger protection: function restricted.LIMITED PROACTIVE PASSENGER PROTECT
The seat belt for the driver and front passenger needs to be replaced.
▶ Seek help from a specialist garage.
WARNINGWhen a fault in the airbag system occurs, there is a risk of the system not
being triggered in the event of an accident. Therefore, this must be
checked immediately by a specialized garage.
Tyre pressure
Read and observe
on page 33 first.
Change of tyre pressure values
lights up - there was a pressure change in one of the tyres.
An audible signal sounds as a warning. ▶ Immediately reduce speed and avoid sudden steering and braking manoeu-
vres.
▶ Stop the vehicle, turn the ignition off and check the tyres and their inflation
pressure » page 261 .
35Instruments and warning lights
Page 70 of 324
NoteWhile driving with an accessory connected to the trailer socket (e.g. trailer,
bike carrier) only the equipment is illuminated by the fog light. The towing de-
vice must be installed at the factory or from the ŠKODA original accessories.
Fog lights with CORNER function
Read and observe
on page 64 first.
The CORNER function automatically switches on the fog lights on the respec-tive side of the vehicle (e.g. when cornering), if the following conditions are
met.
The turn signal is switched on or the front wheels are turned sharply 1)
.
The vehicle speed is below 40 km/h.
The low beam is switched on.
The fog lights are not switched on.
The two fog lights are switched on when you shift into the reverse gear.
COMING HOME / LEAVING HOME
Read and observe
on page 64 first.
The function COMING HOME ensures that the vehicle's environment is illumi-
nated after switching off the ignition and opening the driver's door.
The function LEAVING HOME ensures that the vehicle's environment is illumi-
nated after unlocking the vehicle with the radio remote control unit.
The function switches the light on only if there is poorer visibility and the light
switch is in the position .
The two functions can be activated/deactivated and set in the Infotainment
menu
→
→
Light
.
CAUTION
■
Poorer visibility is evaluated by a sensor mounted below the windscreen in
the holder of the rear-view mirror. Do not cover the sensor - the system can be
affected.■
If this option is always enabled, then the battery is heavily loaded.
Hazard warning light systemFig. 51
Button for hazard warning light
system
Read and observe on page 64 first.
›
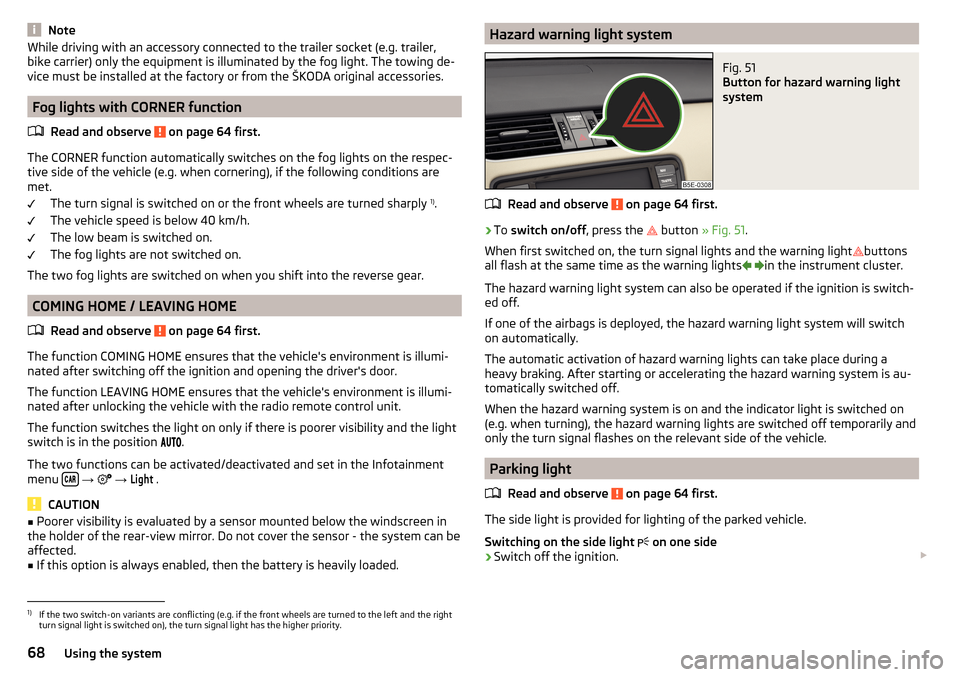
To switch on/off , press the
button
» Fig. 51 .
When first switched on, the turn signal lights and the warning light buttons
all flash at the same time as the warning lights
in the instrument cluster.
The hazard warning light system can also be operated if the ignition is switch-
ed off.
If one of the airbags is deployed, the hazard warning light system will switch
on automatically.
The automatic activation of hazard warning lights can take place during a
heavy braking. After starting or accelerating the hazard warning system is au-
tomatically switched off.
When the hazard warning system is on and the indicator light is switched on
(e.g. when turning), the hazard warning lights are switched off temporarily and
only the turn signal flashes on the relevant side of the vehicle.
Parking light
Read and observe
on page 64 first.
The side light is provided for lighting of the parked vehicle.
Switching on the side light on one side
›
Switch off the ignition.
1)
If the two switch-on variants are conflicting (e.g. if the front wheels are turned to the left and the right
turn signal light is switched on), the turn signal light has the higher priority.
68Using the system
Page 80 of 324
NoteEvery time you save new seat and exterior mirror settings for driving forwards,
you must also save the front passenger mirror setting for reversing again.
Memory function of the remote control key
Read and observe
on page 76 first.
Every time the vehicle is locked, the driver´s seat and exterior mirror settings
are saved and assigned to the key with which the vehicle was locked.
After the following unlocking of the vehicle with the same key and opening
the driver’s door, the driver´s seat and exterior mirrors that are saved to this
key will be adopted.
This function can be activated / deactivated in the Infotainment menu
→
→
Seats
.
Storing front passenger´s exterior mirror settings for reversing
The function for lowering the passenger-side mirror surface when reversing
can be activated in the Infotainment menu
→
→
Mirrors and wipers
.
›
Unlock the vehicle with the remote control key and switch on the ignition.
›
Turn the rotary knob for the exterior mirror control to the position for the
front passenger mirror area » page 74.
›
Engage reverse gear.
›
Adjust the front passenger's mirror to the desired position.
›
Disengage reverse gear. The adjusted position of the exterior mirror is stored
in the remote control key memory.
Stopping the ongoing adjustment
›
Press any button on the driver's seat or the button on the remote control
key.
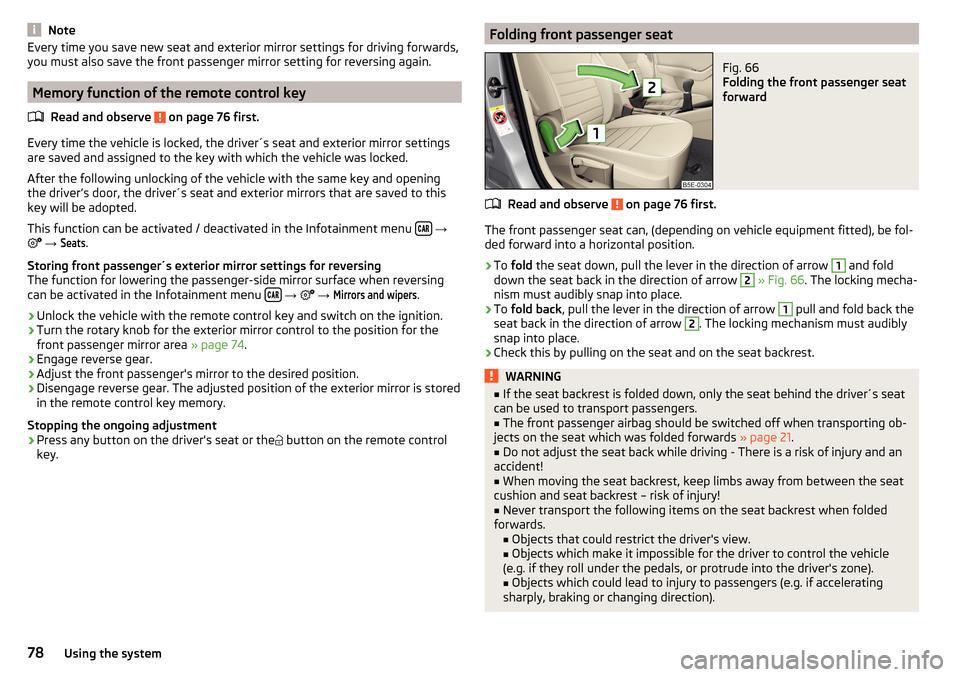
Folding front passenger seatFig. 66
Folding the front passenger seat
forward
Read and observe on page 76 first.
The front passenger seat can, (depending on vehicle equipment fitted), be fol-
ded forward into a horizontal position.
›
To fold the seat down, pull the lever in the direction of arrow
1
and fold
down the seat back in the direction of arrow
2
» Fig. 66 . The locking mecha-
nism must audibly snap into place.
›
To fold back , pull the lever in the direction of arrow
1
pull and fold back the
seat back in the direction of arrow
2
. The locking mechanism must audibly
snap into place.
›
Check this by pulling on the seat and on the seat backrest.
WARNING■ If the seat backrest is folded down, only the seat behind the driver´s seat
can be used to transport passengers.■
The front passenger airbag should be switched off when transporting ob-
jects on the seat which was folded forwards » page 21.
■
Do not adjust the seat back while driving - There is a risk of injury and an
accident!
■
When moving the seat backrest, keep limbs away from between the seat
cushion and seat backrest – risk of injury!
■
Never transport the following items on the seat backrest when folded
forwards. ■ Objects that could restrict the driver's view.
■ Objects which make it impossible for the driver to control the vehicle
(e.g. if they roll under the pedals, or protrude into the driver's zone). ■ Objects which could lead to injury to passengers (e.g. if accelerating
sharply, braking or changing direction).
78Using the system
Page 215 of 324
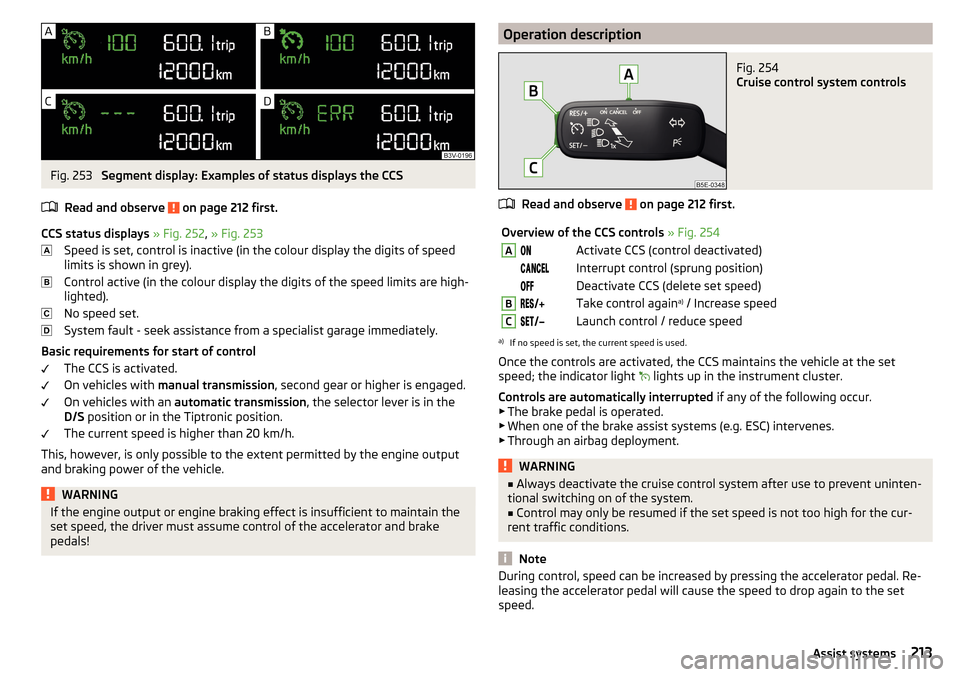
Fig. 253
Segment display: Examples of status displays the CCS
Read and observe
on page 212 first.
CCS status displays » Fig. 252 , » Fig. 253
Speed is set, control is inactive (in the colour display the digits of speed
limits is shown in grey).
Control active (in the colour display the digits of the speed limits are high-
lighted).
No speed set.
System fault - seek assistance from a specialist garage immediately.
Basic requirements for start of control The CCS is activated.
On vehicles with manual transmission , second gear or higher is engaged.
On vehicles with an automatic transmission , the selector lever is in the
D/S position or in the Tiptronic position.
The current speed is higher than 20 km/h.
This, however, is only possible to the extent permitted by the engine output
and braking power of the vehicle.
WARNINGIf the engine output or engine braking effect is insufficient to maintain the
set speed, the driver must assume control of the accelerator and brake
pedals!Operation descriptionFig. 254
Cruise control system controls
Read and observe on page 212 first.
Overview of the CCS controls » Fig. 254AActivate CCS (control deactivated) Interrupt control (sprung position) Deactivate CCS (delete set speed)BTake control again a)
/ Increase speedCLaunch control / reduce speeda)
If no speed is set, the current speed is used.
Once the controls are activated, the CCS maintains the vehicle at the set
speed; the indicator light lights up in the instrument cluster.
Controls are automatically interrupted if any of the following occur.
▶ The brake pedal is operated.
▶ When one of the brake assist systems (e.g. ESC) intervenes.
▶ Through an airbag deployment.
WARNING■ Always deactivate the cruise control system after use to prevent uninten-
tional switching on of the system.■
Control may only be resumed if the set speed is not too high for the cur-
rent traffic conditions.
Note
During control, speed can be increased by pressing the accelerator pedal. Re-
leasing the accelerator pedal will cause the speed to drop again to the set
speed.213Assist systems
Page 226 of 324
WARNINGThe general information relating to the use of assistance systems must be
observed » page 199, in section Introduction .
Note
■
The system component service life is monitored electronically. Further infor-
mation » page 35 , Safety systems .■
If the front passenger front airbag is deactivated, the belt tensioning func-
tion for the front passenger seat is switched off.
Operation
Read and observe
on page 224 first.
In critical driving situations (e.g. during emergency braking or a sudden changein direction), the following steps can be taken separately or combined in order
to reduce the risk of serious injury.
▶ The front passenger's and driver's seatbelts, if worn, are automatically ten-
sioned closely over the body.
▶ Opened door windows in the front doors are closed automatically up to a gap
of about 5 cm from the edge.
▶ The sliding/tilting roof is closed.
Once the critical driving situation has passed, the tension on the seatbelts will
be released again.
The system operates at two levels of protection.
The first level of protection
The system already intervenes in situations that may occur during dynamic
driving. As a result, this primarily helps to keep the driver and the passenger in
the correct seated position.
The first protection level can be deactivated in one of the following ways. ▶ in the menu
Infotainment
→
→
Driver assistance
.
▶ Deactivation of TCS » page 201.
▶ By selecting the driving mode
Sport
» page 223 .
Provided that the driving mode
Sport
is not selected, the system is activated
over the two levels of protection after switching the ignition off and on again.
The second level of protection
The system intervenes only if the situation is evaluated as critical, such as
when panic braking at high speeds.
This level of protection cannot be deactivated.
Lane Departure Warning (Lane Assist)
Introduction
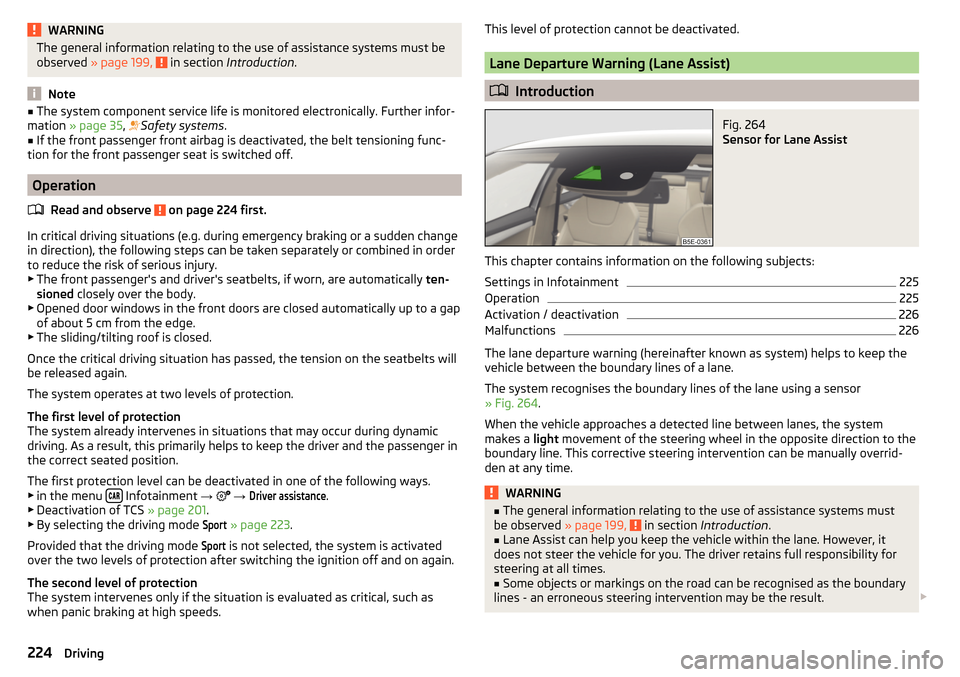
Fig. 264
Sensor for Lane Assist
This chapter contains information on the following subjects:
Settings in Infotainment
225
Operation
225
Activation / deactivation
226
Malfunctions
226
The lane departure warning (hereinafter known as system) helps to keep the
vehicle between the boundary lines of a lane.
The system recognises the boundary lines of the lane using a sensor
» Fig. 264 .
When the vehicle approaches a detected line between lanes, the system
makes a light movement of the steering wheel in the opposite direction to the
boundary line. This corrective steering intervention can be manually overrid-
den at any time.
WARNING■ The general information relating to the use of assistance systems must
be observed » page 199, in section Introduction .■
Lane Assist can help you keep the vehicle within the lane. However, it
does not steer the vehicle for you. The driver retains full responsibility for
steering at all times.
■
Some objects or markings on the road can be recognised as the boundary
lines - an erroneous steering intervention may be the result.
224Driving