high beam SKODA OCTAVIA 2016 3.G / (5E) Owner's Manual
[x] Cancel search | Manufacturer: SKODA, Model Year: 2016, Model line: OCTAVIA, Model: SKODA OCTAVIA 2016 3.G / (5E)Pages: 324, PDF Size: 48.85 MB
Page 31 of 324
Using the system
cockpit
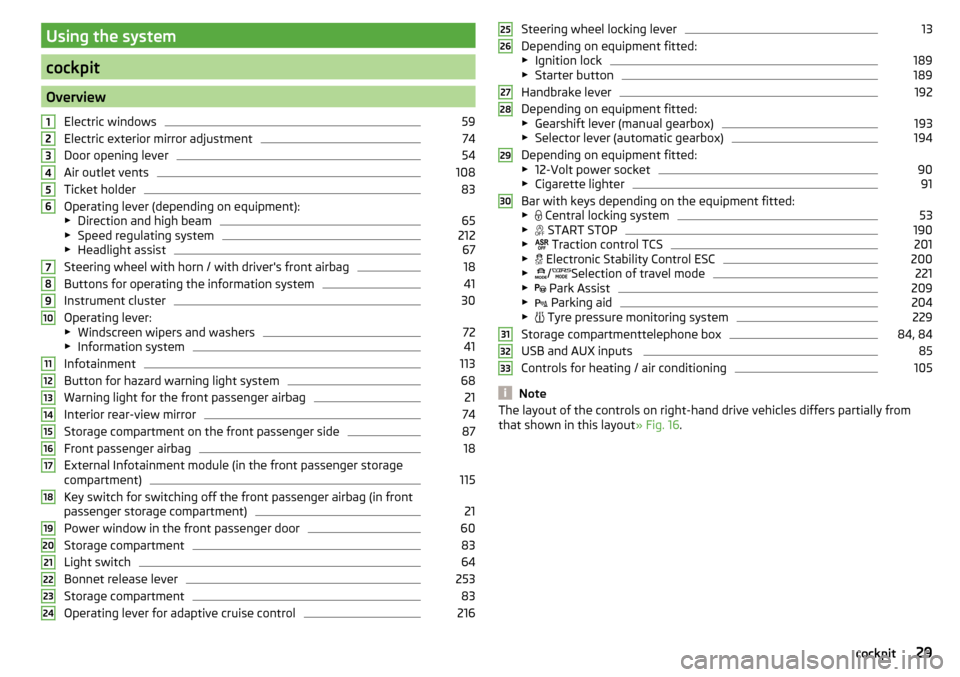
OverviewElectric windows
59
Electric exterior mirror adjustment
74
Door opening lever
54
Air outlet vents
108
Ticket holder
83
Operating lever (depending on equipment):
▶ Direction and high beam
65
▶Speed regulating system
212
▶Headlight assist
67
Steering wheel with horn / with driver's front airbag
18
Buttons for operating the information system
41
Instrument cluster
30
Operating lever:
▶ Windscreen wipers and washers
72
▶Information system
41
Infotainment
113
Button for hazard warning light system
68
Warning light for the front passenger airbag
21
Interior rear-view mirror
74
Storage compartment on the front passenger side
87
Front passenger airbag
18
External Infotainment module (in the front passenger storage
compartment)
115
Key switch for switching off the front passenger airbag (in front
passenger storage compartment)
21
Power window in the front passenger door
60
Storage compartment
83
Light switch
64
Bonnet release lever
253
Storage compartment
83
Operating lever for adaptive cruise control
216123456789101112131415161718192021222324Steering wheel locking lever13
Depending on equipment fitted:
▶ Ignition lock
189
▶Starter button
189
Handbrake lever
192
Depending on equipment fitted:
▶ Gearshift lever (manual gearbox)
193
▶Selector lever (automatic gearbox)
194
Depending on equipment fitted:
▶ 12-Volt power socket
90
▶Cigarette lighter
91
Bar with keys depending on the equipment fitted:
▶ Central locking system
53
▶
START STOP
190
▶
Traction control TCS
201
▶
Electronic Stability Control ESC
200
▶
/
Selection of travel mode
221
▶
Park Assist
209
▶
Parking aid
204
▶
Tyre pressure monitoring system
229
Storage compartmenttelephone box
84, 84
USB and AUX inputs
85
Controls for heating / air conditioning
105
Note
The layout of the controls on right-hand drive vehicles differs partially from
that shown in this layout » Fig. 16.25262728293031323329cockpit
Page 34 of 324
Warning lights
Introduction
This chapter contains information on the following subjects:
Handbrake
33
Braking system
33
Front seat belt warning light
33
Adaptive cruise control (ACC)
33
Power steering / steering lock (KESSY system)
33
Stability control (ESC) / Traction control (TCS)
34
Traction control (TCS) disabled
34
Anti-lock braking system (ABS)
34
Rear fog light
34
Emission control system
35
Preheating unit (diesel)
35
EPC warning light (petrol)
35
Safety systems
35
Tyre pressure
35
Brake linings
36
Low fuel - petrol / diesel
36
Lane assist (Lane Assist)
36
Turn signal system
36
Trailer turn signal lights
36
Fog lights
37
Cruise control
37
Brake pedal (automatic gearbox)
37
Natural gas operation
37
Main beam
37
Automatic gearbox
37
Rear seat belt warning light
37
Generator
37
Coolant
38
Engine oil pressure
38
Engine oil level
38
Lamp failure
39
Diesel particle filter (diesel)
39
Windscreen washer fluid level39High beam assistant39
START-STOPsystem
39
Display a low temperature
39
Water in the fuel filter (diesel)
40
Adaptive cruise control (ACC)
40
Distance warning (Front Assist)
40
Front assist
40
OFF ROAD mode
40
Adaptive Chassis Control (DCC)
40
Service
40
The warning lights in the instrument cluster indicate certain functions or
faults.
Some warning lights can be accompanied by acoustic signals and messages in
the display of the instrument cluster.
After switching on the ignition, some warning lights light up briefly as a func-
tion test. If the tested systems are OK, the corresponding warning lights go
out a few seconds after switching on the ignition or after starting the engine.
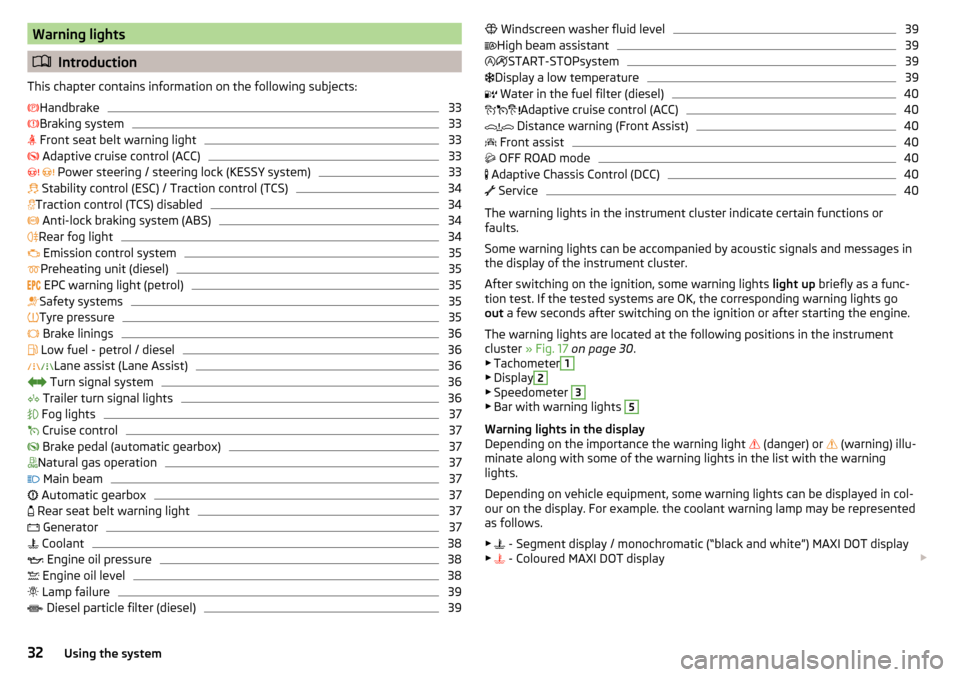
The warning lights are located at the following positions in the instrument
cluster » Fig. 17 on page 30 .
▶ Tachometer
1
▶Display
2
▶Speedometer
3
▶Bar with warning lights
5
Warning lights in the display
Depending on the importance the warning light (danger) or
(warning) illu-
minate along with some of the warning lights in the list with the warning
lights.
Depending on vehicle equipment, some warning lights can be displayed in col-
our on the display. For example. the coolant warning lamp may be represented
as follows.
▶ - Segment display / monochromatic (“black and white”) MAXI DOT display
▶ - Coloured MAXI DOT display
32Using the system
Page 41 of 324
Lamp failureRead and observe
on page 33 first.
illuminates – one of the lamps is faulty.
A message will appear in the display about the affected lamp.
Diesel particle filter (diesel)
Read and observe
on page 33 first.
The diesel particulate filter separates the soot particles from the exhaust. The
soot particles collect in the diesel particulate filter where they are burnt on a
regular basis.
illuminates – the filter is clogged with soot.
To clean the filter, and where traffic conditions permit »
, drive as follows for
at least 15 minutes or until the indicator light goes out.
4. or gear 5 engaged (automatic gearbox: Position D / S).
Vehicle speed at least 70 km/h.
Engine speed between 1800-2500 rpm.
If the filter is properly cleaned, the warning light extinguishes.
If the filter is not properly cleaned, the warning light does not go out and
the warning light begins to flash.
▶ You can drive on, exercising appropriate caution. Seek assistance from a spe-
cialist garage immediately.
WARNING■ Always adjust the speed and driving style to the actual weather, road, ter-
rain and traffic conditions.■
The diesel particulate filter reaches very high temperatures - there is a
fire hazard and serious injury could be caused. Therefore, never stop the
vehicle at places where the underside of your vehicle can come into contact
with flammable materials, such as dry grass, undergrowth, leaves, spilled
fuel etc.
CAUTION■ As long as the warning light illuminates, one must take into account an
increased fuel consumption and a power reduction of the engine.■
Using diesel fuel with an increased sulphur content can considerably reduce
the life of the diesel particle filter. A ŠKODA partner will be able to tell you
which countries use diesel fuel with a high sulphur content.
Note
We encourage you to avoid constant short journeys. This will improve the com-
bustion process of the soot particles in the diesel particulate filter.
Windscreen washer fluid level
Read and observe
on page 33 first.
illuminates – the windscreen washer fluid level is too low.
▶ Top up the windscreen washer fluid » page 254.
High beam assistant
Read and observe
on page 33 first.
illuminates – the high beam assistant is activated » page 67, High-beam
assistant (Light Assist) .
START-STOPsystem
Read and observe
on page 33 first.
The warning lights
indicates the state of the START STOP system
» page 190 .
Display a low temperature
Read and observe
on page 33 first.
illuminates – the outside temperature is below +4 °C.
WARNINGEven at temperatures of around +4 °C, black ice may still be on the road
surface! You should therefore not only rely on the outside temperature dis-
play for accurate information as to whether there is ice on the road.39Instruments and warning lights
Page 66 of 324
Lights and visibility
Light
Introduction
This chapter contains information on the following subjects:
Operating the lights
64
Daytime running lights(DAY LIGHT)
65
Turn signal and main beam
65
Automatic driving light control
66
Xenon headlight
66
High-beam assistant (Light Assist)
67
Fog lights/rear fog light
67
Fog lights with CORNER function
68
COMING HOME / LEAVING HOME
68
Hazard warning light system
68
Parking light
68
Entry space lighting
69
Driving abroad
69
The lights work only with the ignition on, unless otherwise stated.
The layout of the controls on right-hand drive vehicles differs partially from
that shown in this layout » Fig. 46 on page 64 .
WARNINGThe automatic driving lamp control only operates as a support and
does not release the driver from his responsibility to check the light and, if
necessary, to switch on the light depending on the light conditions.
Note
The headlights may mist up temporarily. When the light is on, the light-emit-
ting surface demists after a short time.Operating the lightsFig. 46
Light switch and control dial for
the headlight beam range regu-
lation
Read and observe on page 64 first.
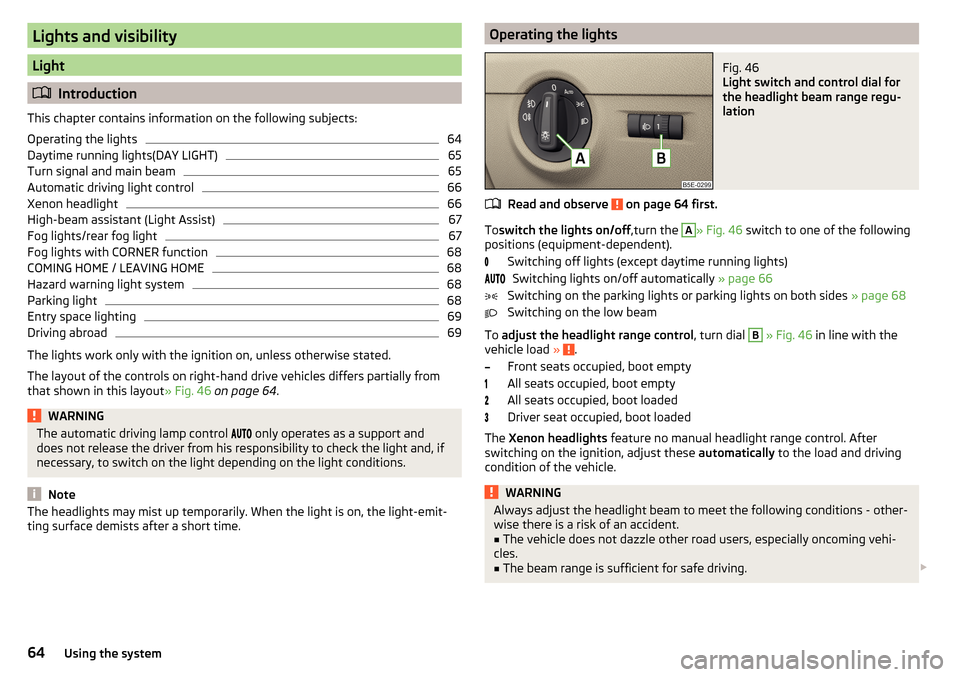
To switch the lights on/off ,turn the
A
» Fig. 46 switch to one of the following
positions (equipment-dependent).
Switching off lights (except daytime running lights)Switching lights on/off automatically » page 66
Switching on the parking lights or parking lights on both sides » page 68
Switching on the low beam
To adjust the headlight range control , turn dial
B
» Fig. 46 in line with the
vehicle load » .
Front seats occupied, boot empty
All seats occupied, boot empty
All seats occupied, boot loaded
Driver seat occupied, boot loaded
The Xenon headlights feature no manual headlight range control. After
switching on the ignition, adjust these automatically to the load and driving
condition of the vehicle.
WARNINGAlways adjust the headlight beam to meet the following conditions - other-
wise there is a risk of an accident.■
The vehicle does not dazzle other road users, especially oncoming vehi-
cles.
■
The beam range is sufficient for safe driving.
64Using the system
Page 69 of 324

High-beam assistant (Light Assist)Fig. 49
Sensor window for the high-beam assistant / system on / off
Read and observe
on page 64 first.
The system automatically switches the high beam on/off in accordance with
the existing traffic (other vehicles) and environmental conditions (e.g. driving
through a lit village).
The high beam on/off is controlled by a sensor or a camera » Fig. 49.
Activating / Deactivating the system takes place in the Infotainment menu
→
→
Light
→
Light Assist
.
Conditions for the system function The system is activated.
The light switch is in the position .
The vehicle speed is over 60 km/h or for some countries more than 40
km/h.
The windscreen is clean in the sensor area.
Switching on and off
›
To turn on the system, push the control stalk into the sprung position
A
» Fig. 49 , the warning light
illuminates in the display of the instrument
cluster.
›
To turn off the automatically switched on main beam, push the control stalk
into the sprung position
B
, the » Fig. 49 warning light
expires.
›
To
manually switch on the main beam, push the control stalk into the sprung
position
A
» Fig. 49 , the warning light
expires.
The headlight switches off automatically when the speed falls below 30 km/h.
If there is a fault, the error message will appear in the instrument cluster dis-
play. Seek help from a specialist garage.WARNINGThe system is used only for support, thus the driver is not released from his
obligation to manually adjust the main or low beam according to the given
ambient conditions (e.g. in unfavourable lighting and weather conditions,
as when passing poorly lit road users, if necessary, when the visual range
of the sensor is limited by an obstacle).
CAUTION
Do not cover the sensor - the system can be affected.
Fog lights/rear fog light
Fig. 50
Light switch – switch on front
and rear fog light
Read and observe on page 64 first.
Switching on the fog lights / rear fog lights is possible if the following condi-
tions apply.
The lights switch is in position
,
or
» Fig. 50 .
›
Toswitch on thefog lights ,turn the light switch to position
1
; the warning
light
illuminates in the instrument cluster.
›
To turn on therear fog light , pull the light switch to position
2
, the indicator
light
will light up in the instrument cluster.
If the vehicle is not fitted with fog lights,therear fog light is switched on by
pulling out the light switch to the only possible setting.
The fog lights/rear fog light are switched offin the reverse order.
67Lights and visibility
Page 70 of 324
NoteWhile driving with an accessory connected to the trailer socket (e.g. trailer,
bike carrier) only the equipment is illuminated by the fog light. The towing de-
vice must be installed at the factory or from the ŠKODA original accessories.
Fog lights with CORNER function
Read and observe
on page 64 first.
The CORNER function automatically switches on the fog lights on the respec-tive side of the vehicle (e.g. when cornering), if the following conditions are
met.
The turn signal is switched on or the front wheels are turned sharply 1)
.
The vehicle speed is below 40 km/h.
The low beam is switched on.
The fog lights are not switched on.
The two fog lights are switched on when you shift into the reverse gear.
COMING HOME / LEAVING HOME
Read and observe
on page 64 first.
The function COMING HOME ensures that the vehicle's environment is illumi-
nated after switching off the ignition and opening the driver's door.
The function LEAVING HOME ensures that the vehicle's environment is illumi-
nated after unlocking the vehicle with the radio remote control unit.
The function switches the light on only if there is poorer visibility and the light
switch is in the position .
The two functions can be activated/deactivated and set in the Infotainment
menu
→
→
Light
.
CAUTION
■
Poorer visibility is evaluated by a sensor mounted below the windscreen in
the holder of the rear-view mirror. Do not cover the sensor - the system can be
affected.■
If this option is always enabled, then the battery is heavily loaded.
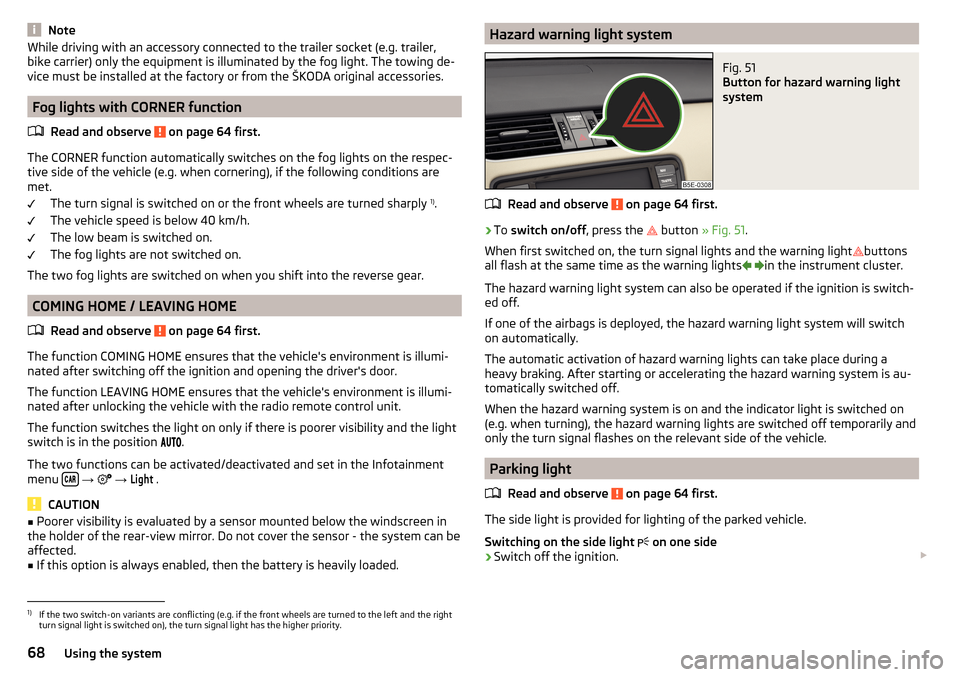
Hazard warning light systemFig. 51
Button for hazard warning light
system
Read and observe on page 64 first.
›
To switch on/off , press the
button
» Fig. 51 .
When first switched on, the turn signal lights and the warning light buttons
all flash at the same time as the warning lights
in the instrument cluster.
The hazard warning light system can also be operated if the ignition is switch-
ed off.
If one of the airbags is deployed, the hazard warning light system will switch
on automatically.
The automatic activation of hazard warning lights can take place during a
heavy braking. After starting or accelerating the hazard warning system is au-
tomatically switched off.
When the hazard warning system is on and the indicator light is switched on
(e.g. when turning), the hazard warning lights are switched off temporarily and
only the turn signal flashes on the relevant side of the vehicle.
Parking light
Read and observe
on page 64 first.
The side light is provided for lighting of the parked vehicle.
Switching on the side light on one side
›
Switch off the ignition.
1)
If the two switch-on variants are conflicting (e.g. if the front wheels are turned to the left and the right
turn signal light is switched on), the turn signal light has the higher priority.
68Using the system
Page 89 of 324

Glasses compartmentFig. 86
Opening the glasses storage box
Read and observe and on page 82 first.
›
To open , press on the outer edge of the glasses compartment in area
A
.
The compartment folds in the direction of the arrow » Fig. 86.
›
To close , swivel the compartment against the direction of the arrow until it
audibly clicks into place.
CAUTION
■ Do not put any heat-sensitive objects in the glasses storage box - with high
temperatures there is risk of damage.■
The box must be closed before leaving and locking the vehicle – risk of im-
pairment to the functions of the anti-theft alarm system.
Storage compartment on the front passenger side
Fig. 87
Open storage compartment / close storage compartment and
open air supply
Read and observe and on page 82 first.
The storage compartment is equipped with an interior light (this is illuminated
when the parking lights / low beam are switched on), a pen/card holder and an air outlet.
Storage compartment
›
To open , pull the handle
A
in the direction of arrow
1
and fold the cover in
the direction of arrow
2
» Fig. 87 .
›
To close , swivel the cover in the direction of arrow
3
until it audibly clicks
into place.
Air supply
›
To open , turn the rotary switch until it stops in the position
» Fig. 87
.
›
To close , turn the rotary switch until it stops in the position
.
The temperature of the storage compartment supplied with air is dependent
on the setting in the air conditioning.
Storage compartment for umbrella
Fig. 88
Opening the storage compart-
ment
Read and observe and on page 82 first.
The storage compartment under the passenger seat is used for storing an um-
brella.
›
To open , pull the handle in direction of arrow
1
pull and open the compart-
ment in the direction of arrow
2
» Fig. 88 .
›
To close , screw in the lid in the opposite direction of arrow
2
until it audibly
clicks into place.
CAUTION
Never store a wet umbrella in the storage compartment - there is a risk of
damage to the umbrella. 87Useful features
Page 200 of 324
NoteResetting the single-trip memory “since start” also resets the average con-
sumption E, the driving assessment D, and the diagram C.
Radiator shutters
The radiator shutters located in front of the radiator (hereinafter: shutter) help
to reduce CO 2 emissions as well as harmful emissions and to save fuel.
If the system detects that it is possible to reduce the amount of air flowing to
the radiator, it closes the blinds. As a result, the air resistance of the vehicle is
reduced.
If, due to a function impairment of the shutters, a driving speed of 150 km/h is
reached, an appropriate message is shown in the display of the instrument
cluster.
After the display of the above message, the top speed of the vehicle is auto-
matically limited to around 160 km/h.
If this message appears in the winter, the cause may be ice or snow caught up
in the blinds. After the ice or snow has thawed, the blinds are functional again.
If the impairment not due to ice or snow, then assistance from a specialist
should be sought.
Avoiding damage to your vehicle
Introduction
This chapter contains information on the following subjects:
Driving Tips
198
Driving through water
198
Driving Tips
Only drive on roads and terrain that correspond to the vehicle parame-
ters » page 288 , Technical data .
The driver is always responsible for deciding whether the vehicle can cope
with the conditions and the terrain.
WARNING■ Adjust the speed and driving style to the current visibility, weather, road
and traffic conditions. Too high a speed or an erroneous manoeuvre may
cause serious injury and damage to the vehicle.■
Combustible objects such as dry leaves or twigs caught under the base of
the vehicle could ignite on hot vehicle parts - risk of fire!
CAUTION
■ Pay attention to the ground clearance of the vehicle! When driving over ob-
jects which are larger than the ground clearance, the vehicle can get damaged.■
Any objects that get trapped under the vehicle floor must be removed as
soon as possible. These items can cause damage to the vehicle (e.g. to parts of
the fuel or brake system).
Driving through water
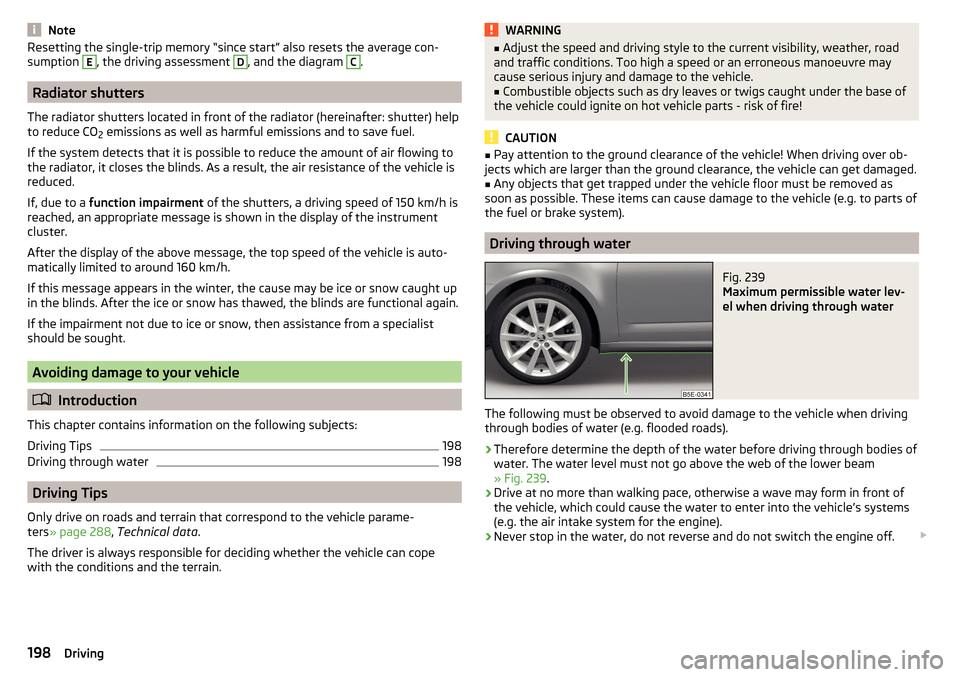
Fig. 239
Maximum permissible water lev-
el when driving through water
The following must be observed to avoid damage to the vehicle when driving
through bodies of water (e.g. flooded roads).
›
Therefore determine the depth of the water before driving through bodies of
water. The water level must not go above the web of the lower beam
» Fig. 239 .
›
Drive at no more than walking pace, otherwise a wave may form in front of
the vehicle, which could cause the water to enter into the vehicle’s systems
(e.g. the air intake system for the engine).
›
Never stop in the water, do not reverse and do not switch the engine off.
198Driving
Page 284 of 324
No.Consumer19Windscreen wipers20Anti-theft alarm21Windscreen heater22Engine control system, voltage stabilizer for taxi vehicles23Starter24Electrical auxiliary heating system31Vacuum pump32Not assigned33Not assigned34All-wheel drive35Not assigned36Not assigned37Aux. heating38Not assigned
Bulbs
Introduction
This chapter contains information on the following subjects:
Bulb arrangement in the front headlights
283
Replacing the bulb for the side light (Halogen headlights)
283
Changing the bulb for main beam, separate daytime running lights, and
parking light
283
Replacing the bulb for the side light (Xenon headlights)
284
Change bulb for fog lights switch - Variant 1
284
Change bulb for fog lights switch - Variant 2
285
Changing the bulb for the licence plate light
285
Removing/installing tail light
286
Replacing the bulbs in the tail lamp assembly - Variant 1
286
Replacing the bulbs in the tail lamp assembly - Variant 2
287
We recommend having bulbs replaced by a specialist garage or seeking other
expert help in the event of any uncertainties.
▶ Switch off the ignition and all of the lights before replacing a bulb.
▶ Faulty bulbs must only be replaced with the same type of bulbs. The designa-
tion is located on the light socket or the glass bulb.
We recommend having the headlight settings checked by a specialist garage after replacing a bulb in the low, high or fog beam.
In the case of failure of a Xenon gas discharge bulb or an LED diode, visit a
specialist garage.WARNING■ Always read and observe the warnings before completing any work in the
engine compartment » page 252.■
Accidents can be caused if the road in front of the vehicle is not suffi-
ciently illuminated and the vehicle cannot or can only be seen with difficul-
ty by other road users.
■
Bulbs H7 H8 and H15 are pressurised and may burst when changing the
bulb - risk of injury! We therefore recommended wearing gloves and safety
glasses when changing a bulb.
■
Do not carry out any work on the Xenon gas discharge lamps - risk of
death!
CAUTION
Do not take hold of the glass bulb with naked fingers (even the smallest
amount of dirt reduces the working life of the light bulb). Use a clean cloth,
napkin, or similar.
Note
■ This Owner's Manual only describes the replacement of bulbs where it is pos-
sible to replace the bulbs on your own without any complications arising. Other
bulbs must be replaced by a specialist garage.■
We recommend that a box of replacement bulbs always be carried in the ve-
hicle.
282Do-it-yourself
Page 307 of 324
Engine oil255
Check256
Oil changing255
Refilling256
Specification255
Warning light38
Enter destination Address
172
Destination on the map173
Environment monitoring system Settings in Infotainment
219
EPC35
Equalizer122
ESC ESC Sport
200
Operation200
Warning light34
External device data transfer123
External module CD / DVD
139
SD card140
SIM card154
Video DVD145
F
Factory settings
124 , 131
Fastening elements94
Fatigue detection228
Favourite174, 179
file formats media
142, 143
Requirements and Restrictions142, 143
File formats DVD video
146
Pictures145
Films245
Finish route guidance181
Fire extinguisher265
First aid kit265
Flagged destination174
Flashing65
Floor covering in the luggage compartment96
Flooring in the luggage compartment96
Floor mats194
See Floor mats194
FM133
Set125, 131
Fog lights Warning light
37
Fog lights/rear fog light67
Fog lights with CORNER function68
Force limiter Electric boot lid
57
Sliding/tilting roof62
Window60
Front assist Warning light
40
Front Assist219
Deactivation/activation220
Distance warning219
Malfunctions221
Operation219
Radar sensor199
Settings in Infotainment219
Warning and automatic braking220
Warning light40
Front seats76
fuel Gas gauge
31
Gasoline / Diesel gauge31
Fuel248
Diesel250
refer to Fuel248
Refuel CNG251
Refuelling249
Unleaded petrol249
Warning light36
Fuel consumption291
Fuel filter Information messages40
Fuel options129
Fuel reserve Petrol diesel
36
Function surfaces116
Fuses278
in the engine compartment281
in the switchboard279, 280
Plastic clip281
G
Gas station
173
Gearbox Information messages
37
Gear change Gear recommendation
42
Information on the selected gear42
Gear changing lever
193
Genuine parts241
Glasses compartment87
GPS169
Graphical driving recommendations180
Guarantee5
H
Handbrake
192
Warning light33
Hazard warning light system68
HBA202
Headrests80
Heating104, 105
Air distribution control107
Mirrors74
Seats81
Windscreen and rear window71
HHC202
High-beam assistant67
305Index