key SKODA OCTAVIA TOUR 2009 1.G / (1U) Owner's Guide
[x] Cancel search | Manufacturer: SKODA, Model Year: 2009, Model line: OCTAVIA TOUR, Model: SKODA OCTAVIA TOUR 2009 1.G / (1U)Pages: 224, PDF Size: 13.53 MB
Page 157 of 224
Fuel
156
Operation in winterWinter-grade diesel fuel A different grade of diesel fuel is available at
filling stations in winter than during the
summer. Using “summer-grade diesel fuel” at
temperatures below 0°C can result in
operational problems because the diesel be
comes viscous as a result of paraffin
separation. It is therefore the case that EN 590 prescribes diesel fuel class for certain periods of the year which can also be purchased at
the corresponding time during the year.
“Winter-grade diesel fuel” will still operate properly even at a temperature of -20°C. It is often the case in countries with diff
erent climatic conditions that diesel fuels
available have a different temperature characteristic. The specialist garages and the filling stations in the country concerned wi
ll be able to provide you with informa-
tion regarding the diesel fuels available. Prewarming fuel The vehicle is fitted with a fuel filter prewarming system. This secures operation of a vehicle using diesel fuel down to an environmental temperature of -25°C.
Caution
It is not permitted to add the various fuel
additives on the market, including petrol,
to diesel fuel in order to
improve its flow properties.
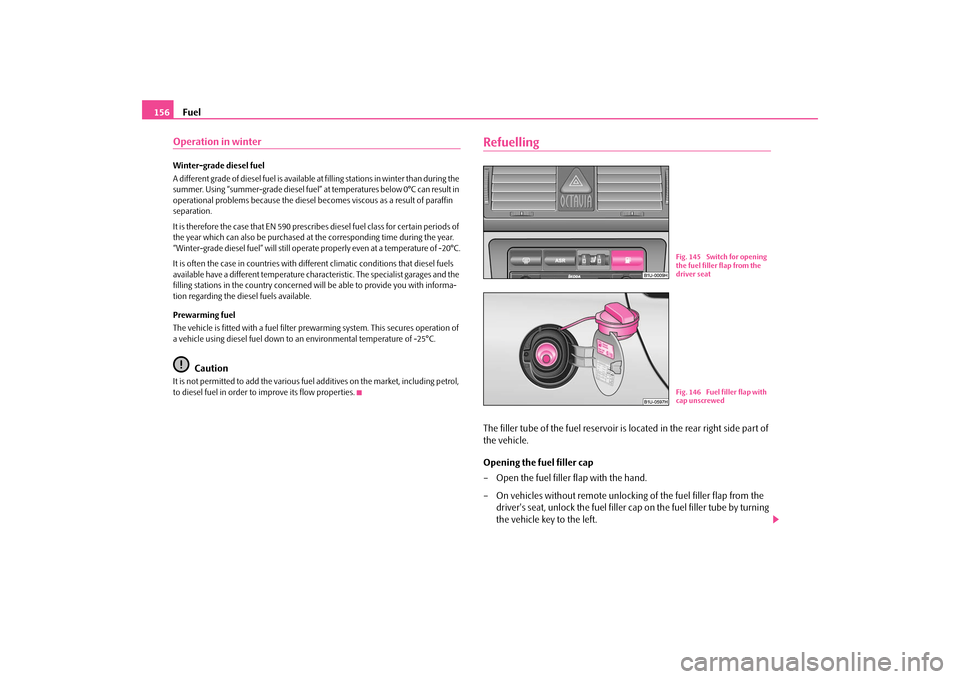
RefuellingThe filler tube of the fuel reservoir is
located in the rear right side part of
the vehicle. Opening the fuel filler cap – Open the fuel filler flap with the hand. – On vehicles without remote unlocking
of the fuel filler flap from the
driver's seat, unlock the fuel filler cap on the fuel filler tube by turning the vehicle key to the left.
Fig. 145 Switch for opening the fuel filler flap from the driver seatFig. 146 Fuel filler flap with cap unscrewed
s2g8.b.book Page 156 Tuesday, April 7, 2009 8:53 AM
Page 158 of 224
Fuel
157
Using the system
Safety
Driving Tips
General Maintenance
Breakdown assistance
Technical Data
– Unscrew the fuel filler cap anti-cl
ockwise and place the fuel filler cap
from above on the fuel filler flap
⇒
page 156, fig. 146
.
Closing fuel filler cap – Screw on the cap by turning it to the right until it is heard to lock. – On vehicles without remote unlocking of the fuel filler flap from the
driver's seat, lock the fuel filler cap on the fuel filler tube by turning the vehicle key to the right and withdraw the key.
– Close the fuel filler flap until it locks. Open the fuel filler flap from the driver's seat* – Press the switch to open the fuel filler flap
⇒
page 156, fig. 145
.
– Unscrew the fuel filler cap anti-cl
ockwise and place the fuel filler cap
from above on the fuel filler flap
⇒
page 156, fig. 146
.
Closing fuel filler cap – Screw on the cap by turning it to the right until it is heard to lock. – Close the fuel filler flap until it locks.The correct grade of fuel for your vehicle as
well as the tyre size and inflation pres-
sures are stated on a sticker affixed to the
inside of the fuel filler flap. Further infor-
mation on fuel
⇒page 155, “Fuel”.
The fuel tank has a capacity of about 55 litres.
WARNING
Pay attention to any legal requirements if
you do carry a spare canister in the
vehicle. We do not recommend carrying any fuel canisters in your vehicle for safety reasons. The canister can be da
maged in the event of an accident and
fuel may leak out.
Caution
•
Before refuelling it is necessary to switch off the auxiliary heating system (auxil-
iary heating and ventilation) *.•
Remove any fuel which has spilled onto
the paintwork of your vehicle immedi-
ately - risk of paint damage!•
On vehicles fitted with a
catalytic converter, never let the fuel tank run
completely empty. An irregular supply of fu
el to the engine can result in misfiring
and unburnt fuel may get into the exhaust system, which may result in overheating and damage to the catalytic converter.•
Make sure that the valve is not pressed
into the filler tube when inserting the
pump nozzle into the filler tube. Otherwis
e you are unintentionally filling up the
volume, which in case of heat can cause an
expansion of the fuel. This can lead to
an overflow of fuel or damage
to parts of the fuel reservoir.
•
The fuel tank is full just as soon as the pump nozzle switches off for the first time,
provided the nozzle has been operated pr
operly. Do not continue refuelling -
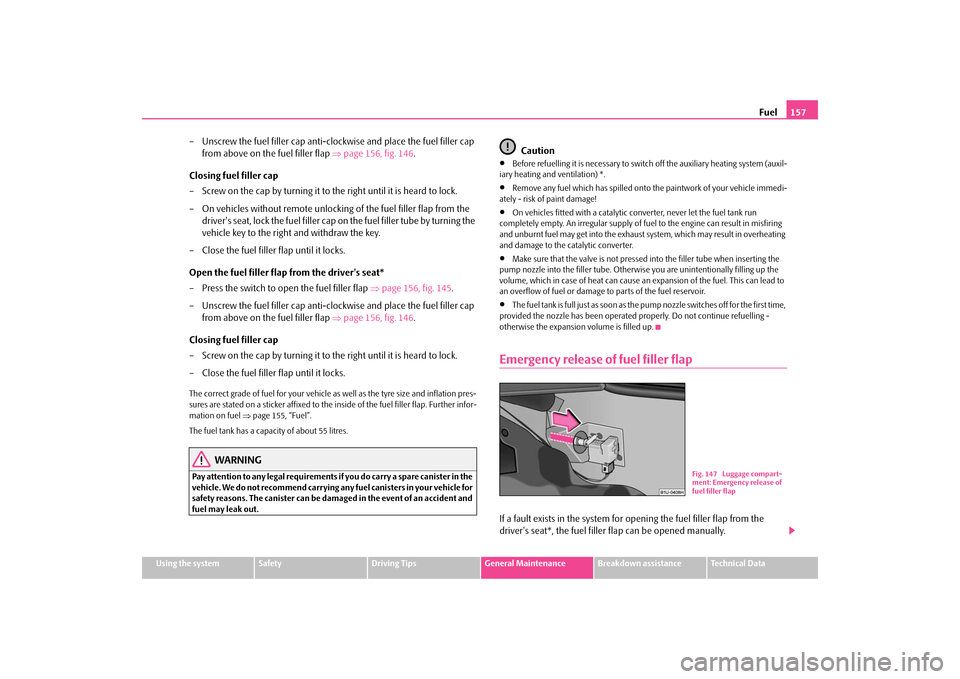
otherwise the expansion volume is filled up.Emergency release of fuel filler flapIf a fault exists in the system for opening the fuel filler flap from the driver's seat*, the fuel filler flap can be opened manually.
Fig. 147 Luggage compart- ment: Emergency release of fuel filler flap
s2g8.b.book Page 157 Tuesday, April 7, 2009 8:53 AM
Page 161 of 224
Inspecting and replenishing
160
– Take the bonnet support out of its holder and set it in the opening
designed for it
⇒
page 159, fig. 150
.
Closing the bonnet – Lift the bonnet slightly and unhook the bonnet support. Press the
bonnet support into the hold
er designed to hold it.
– Allow the bonnet to drop from a height of about 30 cm into the lock -
bonnet
do not press down on it
!
WARNING
•
Never open the bonnet if you see that steam or coolant is flowing out of
the engine compartment - risk of scaldi
ng! Wait long enough until the steam
or coolant has stopped escaping.•
For safety reasons, the bonnet must always be properly closed when
driving. One should therefore check that
the lock has in fact engaged prop-
erly after closing the bonnet.•
Stop your vehicle i
mmediately while driving if yo
u notice that the lock is
not properly engaged and close the bonn
et properly - risk of an accident!
Working in the engine compartment Particular care is required when ca
rrying out any work in the engine
compartment!There is a risk of injuries, scalding,
accidents and fire wh
en working in the
engine compartment, e.g. inspecting an
d replenishing oil and other fluids. For
this reason, it is essential to comply with the warning instructions stated below and with the general applicable
rules of safety. The engine compart-
ment of your car is a hazardous area
⇒
.
WARNING
•
Never open the bonnet if you see that steam or coolant is flowing out of
the engine compartment - risk of scaldi
ng! Wait long enough until the steam
or coolant has stopped escaping.•
Switch off the engine and pull out the ignition key.
•
Apply the handbrake firmly.
•
On vehicles fitted with a manual gearbox, move the gearshift lever into
Neutral.•
Allow the engine to cool down.
•
Keep children clear of the engine compartment.
•
Never spill oil and other fluids over the hot engine. Such fluids (e.g. the
antifreeze contained in the coolant) may ignite!•
Avoid short circuits in the electrical system - particularly on the battery.
•
Never place your hand into the radiator
fan as long as the engine is still
warm. The fan might suddenly start running!•
Never open the cap of the coolant expa
nsion bottle as long as the engine
is still warm. The cooling system is pressurized!•
Cover over the cap of the coolant expansion reservoir with a large cloth
when opening it as protection for your face, hands and arms from hot steam or hot coolant.•
Do not let objects, such as e.g cleaning cloth or tools lie in the engine
compartment.•
If you wish to work under the vehicl
e, you must secure the vehicle from
rolling away and support it
with suitable supporting blocks; the lifting jack*
is not sufficient for this - risk of injury!•
In cases where it be necessary to carry out inspection work when the
engine is running there is an additional risk from rotating parts (e.g. the V- ribbed belt, alternator, radiator fan) and from the high-voltage ignition system. Please observe in addition the following:
− Never touch the electrical cabl
es of the ignition system.
− Absolutely avoid any jewellery, loose items of clothing or long hair from getting into the rotating part
s of the engine - Hazard! Therefore
s2g8.b.book Page 160 Tuesday, April 7, 2009 8:53 AM
Page 196 of 224
Fuses and light bulbs
195
Using the system
Safety
Driving Tips
General Maintenance
Breakdown assistance
Technical Data
Electrically adjustable
seats are protected by
automatic circuit breakers
, which
switch on again automatically after a fe
w seconds after the overload has been
eliminated.BulbsChanging bulbsThe relevant lamp must always be switch
ed off before a light bulb is replaced.
12
Power supply of the self-diagnosis
7,5
13
Brake lights
10
14
Interior lighting, central lockin
g system, interior lighting
(without central locking system)
10
15
Instrument cluster,
steering angle sender, rear mirror
5
16
Air conditioning system
10
17
Heated windscreen washer nozzles daylight driving lights
530
18
Right main beam
10
19
Left main beam
10
20
Right low beam, headlight range adjustment
15
21
Low beam on the left
15
22
Right parking light
5
23
Left parking light
5
24
Front window wiper, motor for wash pump
20
25
Air blower, air conditioning system, Climatronic
25
26
Rear window heater
25
27
Rear window wiper
15
28
Fuel pump
15
29
Control unit: Petrol engine control unit: Diesel engine
1510
30
Electric sliding/tilting roof
20
31
Not assigned
32
Petrol engine - injection valvesdiesel engine - injection pump, control unit
1030
33
Headlight cleaning system
20
No.
Power consumer
Amperes
34
Petrol engine: Control unitdiesel engine: Control unit
1010
35
Trailer socket, power socket in the luggage compart- ment
30
36
Fog lights
15
37
Petrol engine: Control unit diesel engine: Control unit
205
38
Lighting of the luggage compartment, central locking system, opening of the fuel filler flap, interior lighting
15
39
Hazard warning light system
15
40
Horn
20
41
Cigarette lighter
15
42
Radio, mobile phone
15
43
Petrol engine: Control unit diesel engine: Control unit
1010
44
Seat heaters
15
a)For power consumers, e.g. the radio, which can be
operated with the ignition switched off as
long as the ignition key is not withdrawn.No.
Power consumer
Amperes
s2g8.b.book Page 195 Tuesday, April 7, 2009 8:53 AM
Page 218 of 224
Index
217
Using the system
Safety
Driving Tips
General Maintenance
Breakdown assistance
Technical Data
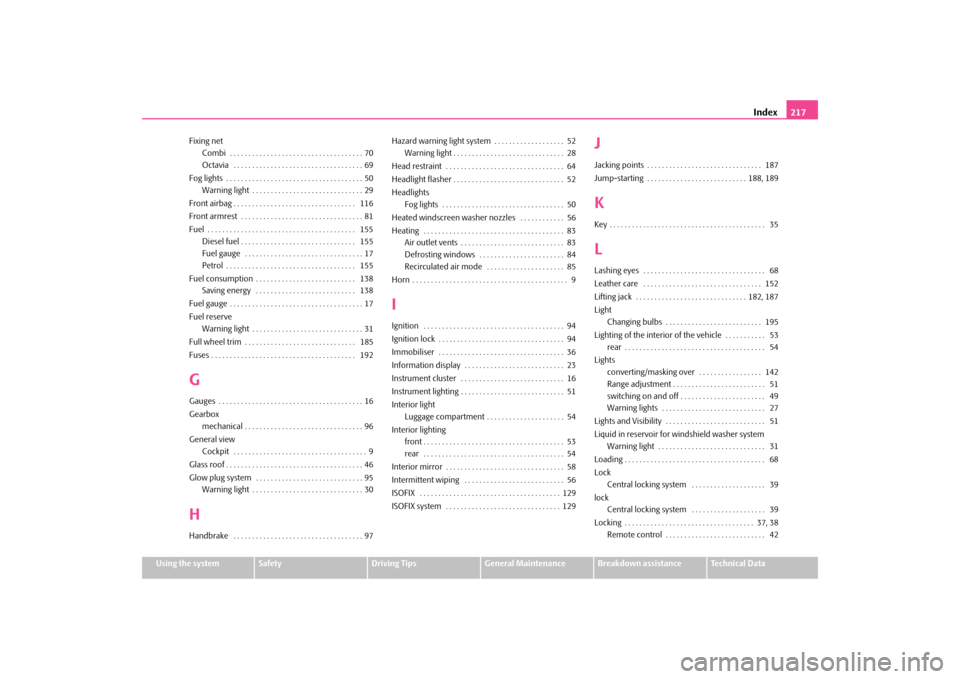
Fixing net
Combi . . . . . . . . . . . . . . . . . . . . . . . . . . . . . . . . . . . . 70Octavia . . . . . . . . . . . . . . . . . . . . . . . . . . . . . . . . . . . 69
Fog lights . . . . . . . . . . . . . . . . . . . . . . . . . . . . . . . . . . . . . 50
Warning light . . . . . . . . . . . . . . . . . . . . . . . . . . . . . . 29
Front airbag . . . . . . . . . . . . . . . . . . . . . . . . . . . . . . . . . 116 Front armrest . . . . . . . . . . . . . . . . . . . . . . . . . . . . . . . . . 81 Fuel . . . . . . . . . . . . . . . . . . . . . . . . . . . . . . . . . . . . . . . . 155
Diesel fuel . . . . . . . . . . . . . . . . . . . . . . . . . . . . . . . 155Fuel gauge . . . . . . . . . . . . . . . . . . . . . . . . . . . . . . . . 17Petrol . . . . . . . . . . . . . . . . . . . . . . . . . . . . . . . . . . . 155
Fuel consumption . . . . . . . . . . . . . . . . . . . . . . . . . . . 138
Saving energy . . . . . . . . . . . . . . . . . . . . . . . . . . . 138
Fuel gauge . . . . . . . . . . . . . . . . . . . . . . . . . . . . . . . . . . . . 17 Fuel reserve
Warning light . . . . . . . . . . . . . . . . . . . . . . . . . . . . . . 31
Full wheel trim . . . . . . . . . . . . . . . . . . . . . . . . . . . . . . 185 Fuses . . . . . . . . . . . . . . . . . . . . . . . . . . . . . . . . . . . . . . . 192GGauges . . . . . . . . . . . . . . . . . . . . . . . . . . . . . . . . . . . . . . . 16 Gearbox
mechanical . . . . . . . . . . . . . . . . . . . . . . . . . . . . . . . . 96
General view
Cockpit . . . . . . . . . . . . . . . . . . . . . . . . . . . . . . . . . . . . 9
Glass roof . . . . . . . . . . . . . . . . . . . . . . . . . . . . . . . . . . . . . 46 Glow plug system . . . . . . . . . . . . . . . . . . . . . . . . . . . . . 95
Warning light . . . . . . . . . . . . . . . . . . . . . . . . . . . . . . 30
HHandbrake . . . . . . . . . . . . . . . . . . . . . . . . . . . . . . . . . . . 97
Hazard warning light system . . . . . . . . . . . . . . . . . . . 52
Warning light . . . . . . . . . . . . . . . . . . . . . . . . . . . . . . 28
Head restraint . . . . . . . . . . . . . . . . . . . . . . . . . . . . . . . . 64Headlight flasher . . . . . . . . . . . . . . . . . . . . . . . . . . . . . . 52 Headlights
Fog lights . . . . . . . . . . . . . . . . . . . . . . . . . . . . . . . . . 50
Heated windscreen washer nozzles . . . . . . . . . . . . 56Heating . . . . . . . . . . . . . . . . . . . . . . . . . . . . . . . . . . . . . . 83
Air outlet vents . . . . . . . . . . . . . . . . . . . . . . . . . . . . 83Defrosting windows . . . . . . . . . . . . . . . . . . . . . . . 84Recirculated air mode . . . . . . . . . . . . . . . . . . . . . 85
Horn . . . . . . . . . . . . . . . . . . . . . . . . . . . . . . . . . . . . . . . . . . 9IIgnition . . . . . . . . . . . . . . . . . . . . . . . . . . . . . . . . . . . . . . 94 Ignition lock . . . . . . . . . . . . . . . . . . . . . . . . . . . . . . . . . . 94Immobiliser . . . . . . . . . . . . . . . . . . . . . . . . . . . . . . . . . . 36 Information display . . . . . . . . . . . . . . . . . . . . . . . . . . . 23 Instrument cluster . . . . . . . . . . . . . . . . . . . . . . . . . . . . 16Instrument lighting . . . . . . . . . . . . . . . . . . . . . . . . . . . . 51 Interior light
Luggage compartment . . . . . . . . . . . . . . . . . . . . . 54
Interior lighting
front . . . . . . . . . . . . . . . . . . . . . . . . . . . . . . . . . . . . . . 53rear . . . . . . . . . . . . . . . . . . . . . . . . . . . . . . . . . . . . . . 54
Interior mirror . . . . . . . . . . . . . . . . . . . . . . . . . . . . . . . . 58 Intermittent wiping . . . . . . . . . . . . . . . . . . . . . . . . . . . 56 ISOFIX . . . . . . . . . . . . . . . . . . . . . . . . . . . . . . . . . . . . . . 129ISOFIX system . . . . . . . . . . . . . . . . . . . . . . . . . . . . . . . 129
JJacking points . . . . . . . . . . . . . . . . . . . . . . . . . . . . . . . 187Jump-starting . . . . . . . . . . . . . . . . . . . . . . . . . . . 188, 189KKey . . . . . . . . . . . . . . . . . . . . . . . . . . . . . . . . . . . . . . . . . . 35LLashing eyes . . . . . . . . . . . . . . . . . . . . . . . . . . . . . . . . . 68Leather care . . . . . . . . . . . . . . . . . . . . . . . . . . . . . . . . 152 Lifting jack . . . . . . . . . . . . . . . . . . . . . . . . . . . . . . 182, 187 Light
Changing bulbs . . . . . . . . . . . . . . . . . . . . . . . . . . 195
Lighting of the interior of the vehicle . . . . . . . . . . . 53
rear . . . . . . . . . . . . . . . . . . . . . . . . . . . . . . . . . . . . . . 54
Lights
converting/masking over . . . . . . . . . . . . . . . . . 142Range adjustment . . . . . . . . . . . . . . . . . . . . . . . . . 51switching on and off . . . . . . . . . . . . . . . . . . . . . . . 49Warning lights . . . . . . . . . . . . . . . . . . . . . . . . . . . . 27
Lights and Visibility . . . . . . . . . . . . . . . . . . . . . . . . . . . 51Liquid in reservoir for windshield washer system
Warning light . . . . . . . . . . . . . . . . . . . . . . . . . . . . . 31
Loading . . . . . . . . . . . . . . . . . . . . . . . . . . . . . . . . . . . . . . 68 Lock
Central locking system . . . . . . . . . . . . . . . . . . . . 39
lock
Central locking system . . . . . . . . . . . . . . . . . . . . 39
Locking . . . . . . . . . . . . . . . . . . . . . . . . . . . . . . . . . . . 37, 38
Remote control . . . . . . . . . . . . . . . . . . . . . . . . . . . 42
s2g8.b.book Page 217 Tuesday, April 7, 2009 8:53 AM