lock SKODA OCTAVIA TOUR 2009 1.G / (1U) Service Manual
[x] Cancel search | Manufacturer: SKODA, Model Year: 2009, Model line: OCTAVIA TOUR, Model: SKODA OCTAVIA TOUR 2009 1.G / (1U)Pages: 224, PDF Size: 13.53 MB
Page 98 of 224
Starting-off and Driving
97
Using the system
Safety
Driving Tips
General Maintenance
Breakdown assistance
Technical Data
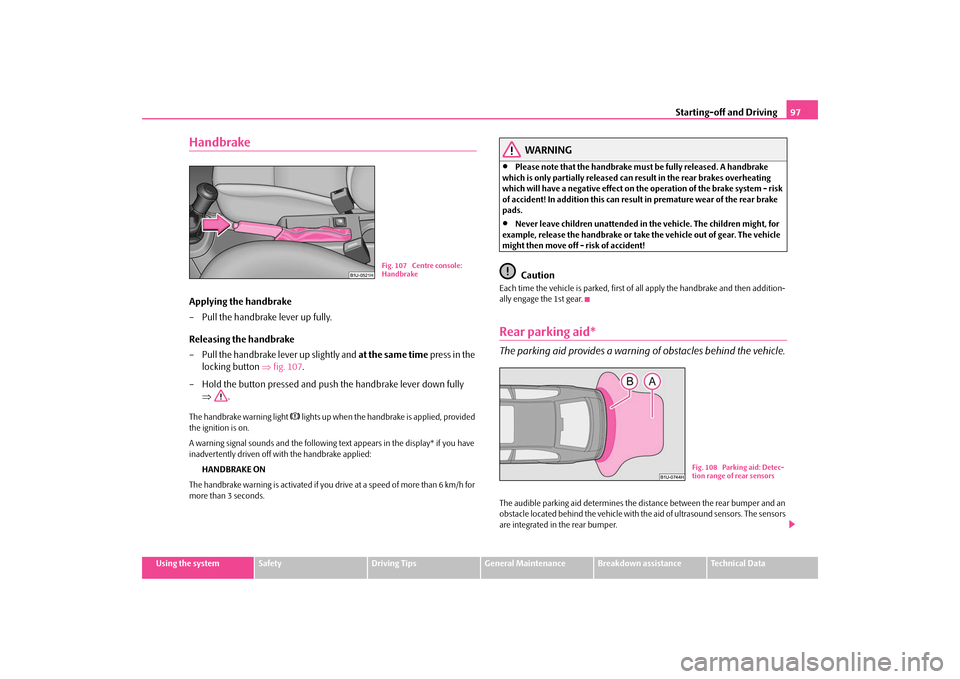
HandbrakeApplying the handbrake – Pull the handbrake lever up fully. Releasing the handbrake – Pull the handbrake lever up slightly and
at the same time
press in the
locking button
⇒
fig. 107
.
– Hold the button pressed and push the handbrake lever down fully
⇒
.
The handbrake warning light
lights up when the handbrake is applied, provided
the ignition is on. A warning signal sounds and the following text appears in the display* if you have inadvertently driven off with the handbrake applied:
HANDBRAKE ON
The handbrake warning is activated if you drive at a speed of more than 6 km/h for more than 3 seconds.
WARNING
•
Please note that the handbrake must be fully released. A handbrake
which is only partially released can re
sult in the rear brakes overheating
which will have a negative effect on th
e operation of the brake system - risk
of accident! In addition this can result in premature wear of the rear brake pads.•
Never leave children unattended in the vehicle. The children might, for
example, release the handbrake or take
the vehicle out of gear. The vehicle
might then move off - risk of accident!
Caution
Each time the vehicle is parked, first of
all apply the handbrake and then addition-
ally engage the 1st gear.Rear parking aid*The parking aid provides a warning of obstacles behind the vehicle.The audible parking aid determines the distance between the rear bumper and an obstacle located behind the vehicle with th
e aid of ultrasound sensors. The sensors
are integrated in the rear bumper.
Fig. 107 Centre console: Handbrake
Fig. 108 Parking aid: Detec-tion range of rear sensors
s2g8.b.book Page 97 Tuesday, April 7, 2009 8:53 AM
Page 102 of 224
Communication
101
Using the system
Safety
Driving Tips
General Maintenance
Breakdown assistance
Technical Data
CommunicationMobile phone, handsfree-system*Universal preparation for the phoneOnly one telephone mount is factory-
fitted. An adapter for the phone can
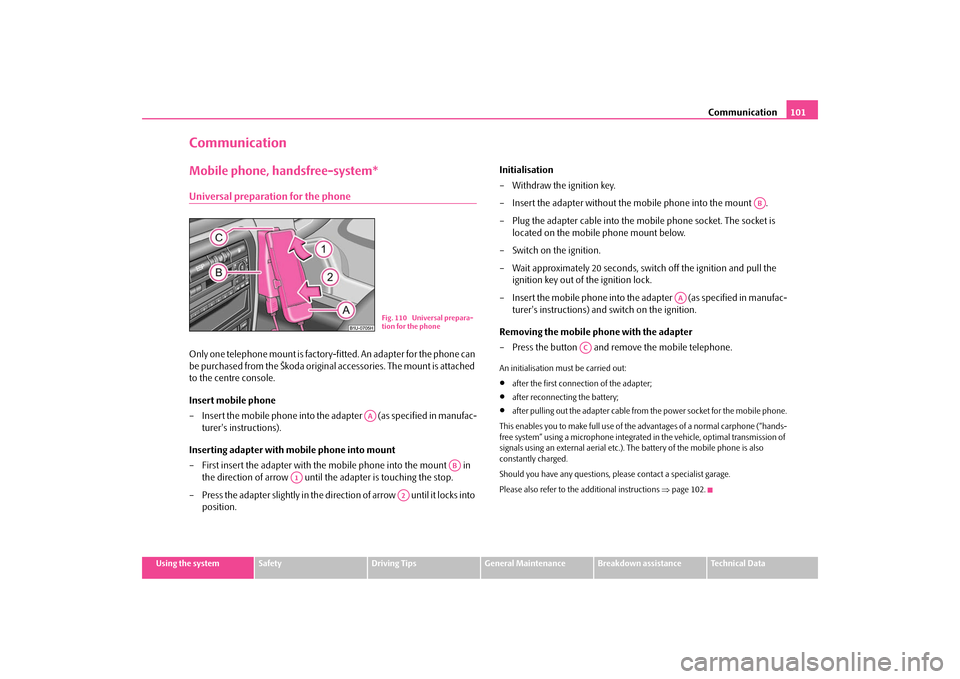
be purchased from the Škoda original accessories. The mount is attached to the centre console. Insert mobile phone – Insert the mobile phone into the adapter (as specified in manufac-
turer's instructions).
Inserting adapter with mobile phone into mount – First insert the adapter with the mobile phone into the mount in
the direction of arrow until the adapter is touching the stop.
– Press the adapter slightly in the direction of arrow until it locks into
position.
Initialisation – Withdraw the ignition key. – Insert the adapter without the mobile phone into the mount . – Plug the adapter cable into the mobile phone socket. The socket is
located on the mobile phone mount below.
– Switch on the ignition.– Wait approximately 20 seconds, swit
ch off the ignition and pull the
ignition key out of the ignition lock.
– Insert the mobile phone into the adapter (as specified in manufac-
turer's instructions) and switch on the ignition.
Removing the mobile phone with the adapter – Press the button and remove the mobile telephone.An initialisation must be carried out:•
after the first connection of the adapter;
•
after reconnecting the battery;
•
after pulling out the adapter cable from
the power socket for the mobile phone.
This enables you to make full use of the advantages of a normal carphone (“hands- free system” using a microphone integrated in the vehicle, optimal transmission of signals using an external aerial etc.).
The battery of the mobile phone is also
constantly charged. Should you have any questions, pl
ease contact a specialist garage.
Please also refer to the additional instructions
⇒page 102.
Fig. 110 Universal prepara- tion for the phone
AA
AB
A1
A2
AB
AA
AC
s2g8.b.book Page 101 Tuesday, April 7, 2009 8:53 AM
Page 106 of 224
Passive Safety
105
Using the system
Safety
Driving Tips
General Maintenance
Breakdown assistance
Technical Data
•
Adjust the seat backrest so that you are able to reach the highest point of the
steering wheel with your arms at a slight angle.•
Adjust the head restraint so that the top edge of the head restraint is at the same
level as the upper part of your head
⇒page 104, fig. 112
.
•
Fasten the seat belt correctly
⇒page 110, “How are seat belts correctly
fastened?”. Manual driver seat adjustment
⇒page 60, “Adjusting the front seats”.
Electrical driver seat adjustment
⇒page 61, “Adjusting front seats electrically*”.
WARNING
•
The front seats and the head restraints must always be adjusted to match
the body size of the seat occupant as well as the seat belts must always be correctly fastened in order to provide an optimal protection for you and your occupants.•
The driver must maintain a distance of at least 25 cm to the steering
wheel
⇒page 104, fig. 111
. Not maintaining this minimum distance will
mean that the airbag system will not be able to properly protect you - hazard!•
When driving, hold the steering whee
l with both hands firmly on the
outer edge in the 9 o'clock and 3 o'clock position. Never hold the steering wheel firmly in the 12 o'clock position or in another way (e.g. in the middle of the steering wheel or at the inner
steering wheel edge). In such cases,
injuries to the arms, the hands and the head can occur when the driver airbag is deployed.•
The seat backrests must not be angled too far back when driving other-
wise this will affect proper operation of the seat belts and of the airbag system - risk of injury!•
Ensure that there are no objects in the footwell as any objects may get
behind the pedals during a driving or
braking manoeuvre.
You would then
no longer be able to operate the
clutch, to brake or accelerate.
Correct seated position for the front passenger The front passenger must maintain a distance of at least 25°cm from the dash panel so that the combination of the airbag and the seat belt offers the greatest possible sa
fety when an airbag is deployed.
For the safety of the front passenger and to
reduce the risk of injury in the event of
an accident, we recommend the following setting:•
Adjust the front passenger seat as far as possible to the rear.
•
Adjust the head restraint so that the top edge of the head restraint is at the same
level as the upper part of your head
⇒page 104, fig. 112
.
•
Fasten the seat belt correctly
⇒page 110, “How are seat belts correctly
fastened?”. In exceptional cases the front pass
enger airbag can be deactivated
⇒page 120,
“Deactivating an airbag”. Manual front passenger adjustment
⇒page 60, “Adjusting the front seats”.
Electrical front passenger seat adjustment
⇒page 61, “Adjusting front seats electri-
cally*”.
WARNING
•
The front seats and the head restraints must always be adjusted to match
the body size of the seat occupant as well as the seat belts must always be correctly fastened in order to provide an optimal protection for you and your occupants.•
The front passenger must maintain a distance of at least 25 cm to the
dash panel. Not maintaining this mi
nimum distance will mean that the
airbag system will not be able to properly protect you - hazard!•
Always keep your feet in
the footwell when the vehicle is being driven -
never place your feet on the instrument panel, out of the window or on the surfaces of the seats. You will be exposed to increased risk of injury if it becomes necessary to apply the brake or in the event of an accident. If an airbag is deployed, you may suffer fata
l injuries when adopting an incorrect
seated position!
s2g8.b.book Page 105 Tuesday, April 7, 2009 8:53 AM
Page 111 of 224
Seat belts
110
•
No two persons (also not children) should ever use a single seat belt
together.•
The maximum protection which seat belts can offer is only achieved if
you are correctly seated
⇒page 104, “Correct seated position”.
•
The belt webbing must no
t run across solid or fragile objects (e.g. spec-
tacles, ball-point pens, keys etc.) as this may be a cause of injuries.•
Bulky, loose clothing (e.g. a winter coat over a jacket) does not allow you
to be correctly seated and impairs proper operation of the seat belts.•
It is prohibited to use clamps or other objects to adjust seat belts (e.g. for
shortening the belts for smaller persons).•
The lock tongue should only be insert
ed into the lock which is the correct
one for your seat. Wrong use of the safety belt will reduce its capacity to protect and the risk of injury increases.•
The seat backrests of the front seats must not be tilted too far to the rear
otherwise the seatbelts can
lose their effectiveness.
•
The belt webbing must always be ke
pt clean. Soiled belt webbing may
impair proper operation of the inertia reel
⇒page 153, “Seat belts”.
•
The slot of the belt tongue must not be blocked by paper or similar
objects otherwise the belt tongue will not lock in place properly.•
Inspect the seat belts regu
larly to ensure they are
in good condition. If
you find seat belts which have damage to the seat belt webbing, seat belt connections, to the inertia reels or to the lock, the relevant safety belt must be replaced by a specialist garage.•
The seat belts must not be removed or changed in any way. Do not make
an attempt to repair the seat belts yourself.•
Damaged seat belts which have been subjected to stress in an accident
and were therefore stretched, must be replaced - this is best done by a specialist garage. The anchorage points
of the belts must also be inspected.
The anchorage points for the be
lts should also be checked.
•
In certain countries it is possible to use seat belts which differ in terms of
their operation from the seat belts wh
ich are described on the pages which
follow.
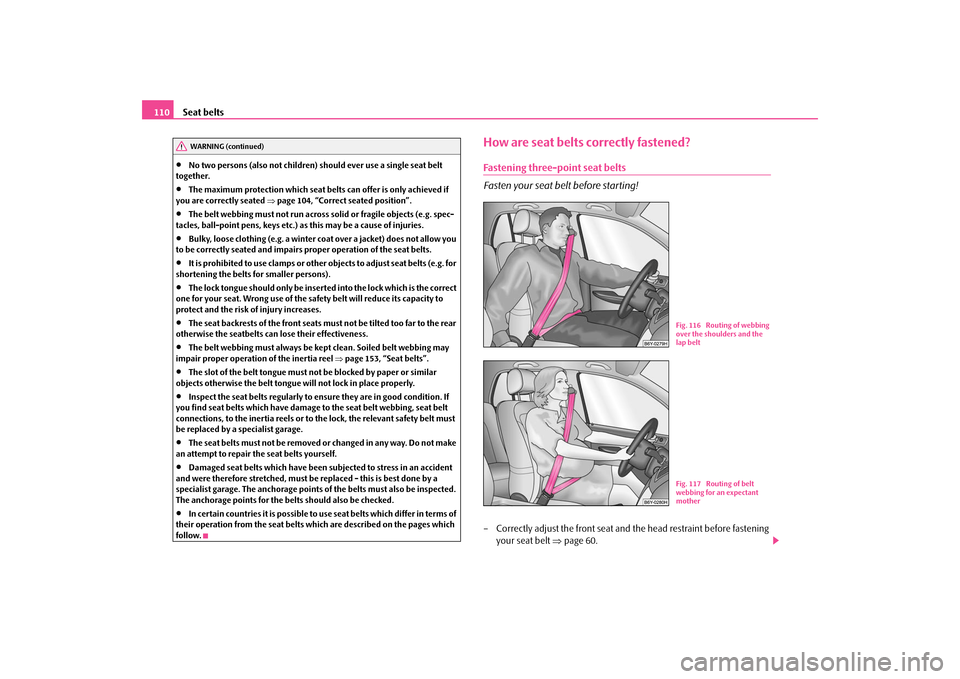
How are seat belts correctly fastened?Fastening three-point seat belts Fasten your seat belt before starting!– Correctly adjust the front seat and
the head restraint before fastening
your seat belt
⇒
page 60.
WARNING (continued)
Fig. 116 Routing of webbing over the shoulders and the lap beltFig. 117 Routing of belt webbing for an expectant mother
s2g8.b.book Page 110 Tuesday, April 7, 2009 8:53 AM
Page 112 of 224
Seat belts
111
Using the system
Safety
Driving Tips
General Maintenance
Breakdown assistance
Technical Data
– Slowly pull the belt webbing at the to
ngue of the lock over your chest
and pelvis
⇒
.
– Insert the tongue of the lock into th
e seat belt buckle belonging to the
seat until it is heard to lock in place.
– Pull on the belt to check that it has also reliably engaged in the lock.Each three-point seat belt is equipped with an inertia reel. This inertia reel offers you complete freedom of movement if the
belt is unreeled slowly. If the brakes are
applied suddenly, the inertia reel will block. It also blocks the belts when the car accelerates, when driving uphill and when cornering. Expectant mothers must also wear the seat belt
⇒
.
WARNING
•
The shoulder part of the seat belt must never run across your neck but
must run approximately over the middl
e of the shoulder and fit snugly
against the chest. The lap part of the
belt must run across the hip and must
never be routed across the stomach. It must always fit snugly
⇒page 110,
fig. 116
. Adjust the belt webbing as required.
•
The lap part of the belt should be positioned as low as possible at the
pelvis of an expectant mother in order to avoid exerting any pressure on the lower abdomen.•
Always ensure that the webbing of the
seat belts is properly routed. Seat
belts which are not correctly adjusted ca
n themselves cause injuries even in
minor accidents.•
A seat belt which is hanging too loose can result in injuries as your body
is moved forward by the kinetic energy produced in an accident and is then suddenly held firm by the belt.•
Only insert the lock tongue into the lo
ck which is the correct one for your
seat. This will affect the protection whic
h the belt offers and increase the risk
of an injury.
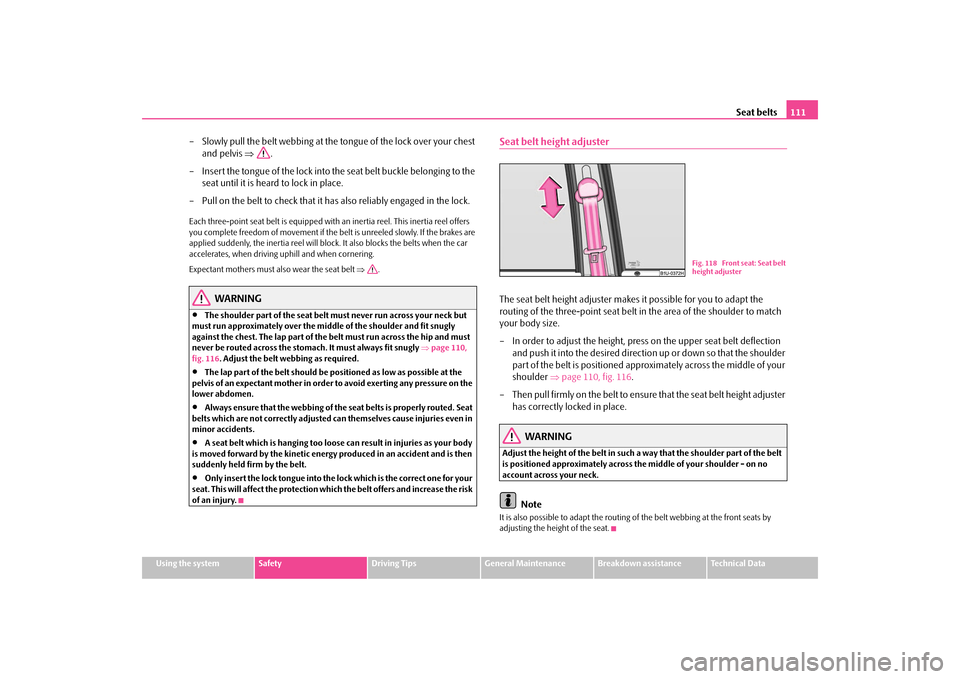
Seat belt height adjusterThe seat belt height adjuster makes it possible for you to adapt the routing of the three-point seat belt in
the area of the shoulder to match
your body size. – In order to adjust the height, press
on the upper seat belt deflection
and push it into the desired direction up or down so that the shoulder part of the belt is positioned appr
oximately across the middle of your
shoulder
⇒
page 110, fig. 116
.
– Then pull firmly on the belt to ensure
that the seat belt height adjuster
has correctly locked in place.
WARNING
Adjust the height of the belt in such a way that the shoulder part of the belt is positioned approximately across the middle of your shoulder - on no account across your neck.
Note
It is also possible to adapt the routing
of the belt webbing at the front seats by
adjusting the height of the seat.
Fig. 118 Front seat: Seat belt height adjuster
s2g8.b.book Page 111 Tuesday, April 7, 2009 8:53 AM
Page 113 of 224
Seat belts
112
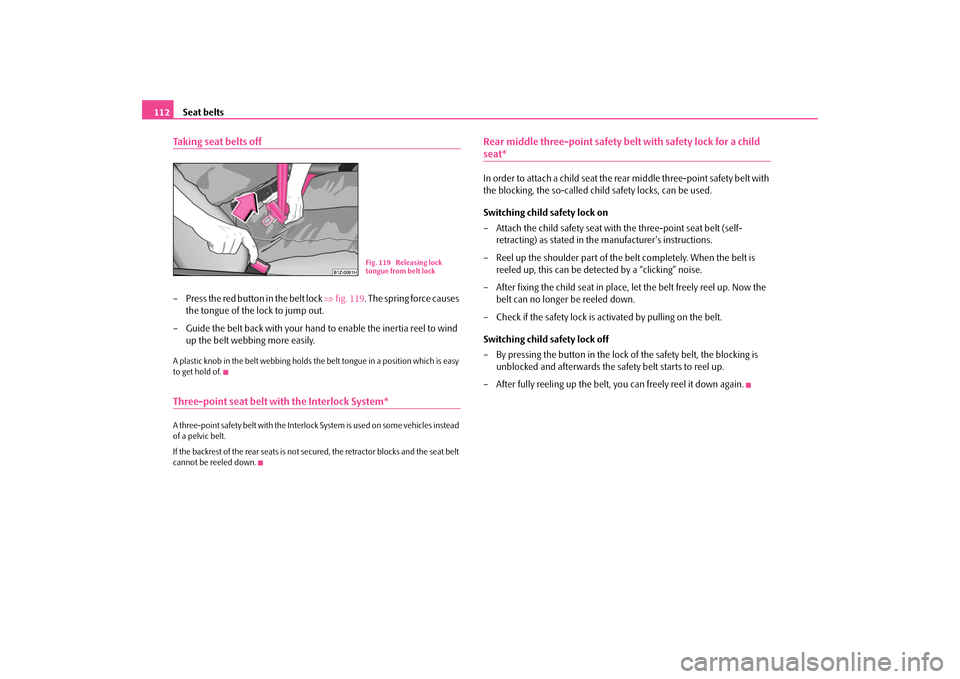
Taking seat belts off– Press the red button in the belt lock
⇒
fig. 119
. The spring force causes
the tongue of the lock to jump out.
– Guide the belt back with your hand
to enable the inertia reel to wind
up the belt webbing more easily.
A plastic knob in the belt webbing holds the belt tongue in a position which is easy to get hold of.Three-point seat belt with the Interlock System*A three-point safety belt with the Interlock System is used on some vehicles instead of a pelvic belt. If the backrest of the rear seats is not secured, the retractor blocks and the seat belt cannot be reeled down.
Rear middle three-point safety belt with safety lock for a child seat*In order to attach a child seat the rear
middle three-point safety belt with
the blocking, the so-called chil
d safety locks, can be used.
Switching child safety lock on – Attach the child safety seat with the three-point seat belt (self-
retracting) as stated in the manufacturer's instructions.
– Reel up the shoulder part of the
belt completely. When the belt is
reeled up, this can be detected by a “clicking” noise.
– After fixing the child seat in place, let the belt freely reel up. Now the
belt can no longer be reeled down.
– Check if the safety lock is activated by pulling on the belt. Switching child safety lock off – By pressing the button in the lock of
the safety belt, the blocking is
unblocked and afterwards the safety belt starts to reel up.
– After fully reeling up the belt, you can freely reel it down again.
Fig. 119 Releasing lock tongue from belt lock
s2g8.b.book Page 112 Tuesday, April 7, 2009 8:53 AM
Page 114 of 224
Seat belts
113
Using the system
Safety
Driving Tips
General Maintenance
Breakdown assistance
Technical Data
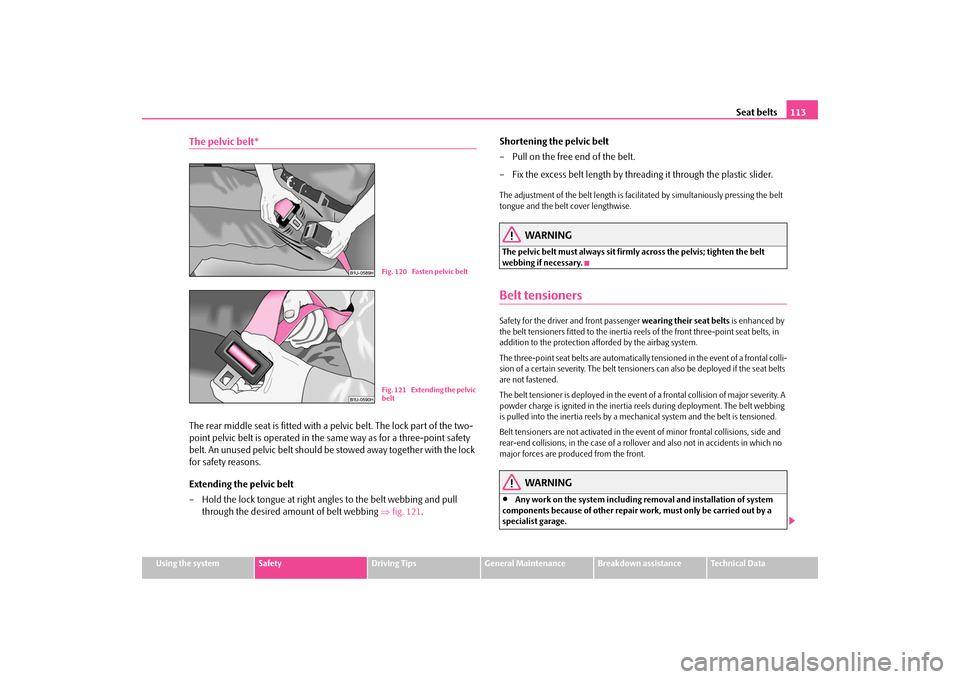
The pelvic belt*The rear middle seat is fitted with a pelvic belt. The lock part of the two- point pelvic belt is operated in the same way as for a three-point safety belt. An unused pelvic belt should be stowed away together with the lock for safety reasons. Extending the pelvic belt – Hold the lock tongue at right an
gles to the belt webbing and pull
through the desired amo
unt of belt webbing
⇒
fig. 121
.
Shortening the pelvic belt – Pull on the free end of the belt. – Fix the excess belt length by threading it through the plastic slider.The adjustment of the belt length is facili
tated by simultaniously pressing the belt
tongue and the belt
cover lengthwise.
WARNING
The pelvic belt must always sit firmly across the pelvis; tighten the belt webbing if necessary.Belt tensionersSafety for the driver and front passenger
wearing their seat belts
is enhanced by
the belt tensioners fitted to the inertia reels of the front three-point seat belts, in addition to the protection afforded by the airbag system. The three-point seat belts are automatically tensioned in the event of a frontal colli- sion of a certain severity. The belt tensioners can also be deployed if the seat belts are not fastened. The belt tensioner is deployed in the event of a frontal collision of major severity. A powder charge is ignited in the inertia
reels during deployment. The belt webbing
is pulled into the inertia reels by a mech
anical system and the belt is tensioned.
Belt tensioners are not activated in the ev
ent of minor frontal collisions, side and
rear-end collisions, in the case of a rollover and also not in accidents in which no major forces are produced from the front.
WARNING
•
Any work on the system including removal and installation of system
components because of other repair work, must only be carried out by a specialist garage.
Fig. 120 Fasten pelvic beltFig. 121 Extending the pelvic belt
s2g8.b.book Page 113 Tuesday, April 7, 2009 8:53 AM
Page 117 of 224
Airbag system
116
When are the airbags deployed?The airbag system is designed in such a
way that the driver and the front passenger
airbag* are deployed in the event of a
frontal collision of major severity
.
In the case of a
violent side crash
, the side airbag* is depl
oyed on the side of the
vehicle on which the collision occurs. In certain accident situations, the front as well as the side airbags are deployed at the same time. The airbags
are not deployed
in the case of
minor
frontal and side collisions, in the
case of rear-end collisi
ons and vehicle rollover.
Deployment factors It is not possible to state globally which deployment conditions apply to the airbag system in every situation as the circumstances which exist in the case of accidents vary greatly. An important role in this case
, for example, is played by factors such as
the type of object against wh
ich the vehicle impacts (hard,
soft), the angle of impact,
the vehicle speed etc. A decisive factor for the deployment of the airbags is the deceleration which occurs during a collision. The control unit analyses
the nature of the collision and activates
the relevant restraint system. If the vehicle deceleration which occurs and is meas- ured during the collision remains below the prescribed reference values specified in the control unit, the airbags are not
deployed although the vehicle may well
suffer severe damage to the bodywork as a consequence of the accident. The airbags are not deployed if:•
ignition is switched off;
•
a minor frontal collision;
•
a minor side collision;
•
a rear-end collision;
•
Rollover of the vehicle.Note
•
A grey white, non harmful gas is released when airbag is inflated. This is
perfectly normal and is not an indi
cation of a fire in the vehicle.
•
The dash panel must be replaced afte
r the front passenger airbag has been
deployed.•
In the event of an accident in which the airbags are deployed: − the interior lighting comes on (if the swit
ch for the interior light is in the door
contact position), − the hazard warning light is switched on; − All the doors are unlocked.
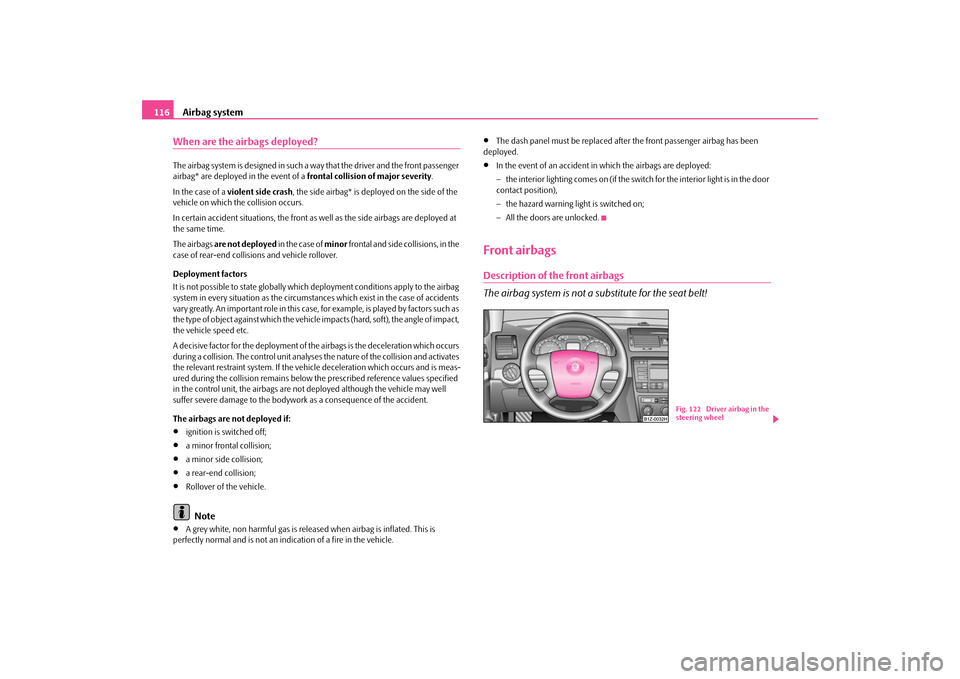
Front airbagsDescription of the front airbags The airbag system is not a substitute for the seat belt!
Fig. 122 Driver airbag in the steering wheel
s2g8.b.book Page 116 Tuesday, April 7, 2009 8:53 AM
Page 130 of 224
Transporting children safely
129
Using the system
Safety
Driving Tips
General Maintenance
Breakdown assistance
Technical Data
WARNING
•
When transporting a child on the front passenger seat, please comply
with the appropriate national regulations regarding the use of child safety seats. If required, the airb
ag has to be deactivated,
− in a specialist garage − or by using the switch for the front passenger airbag*
⇒page 121.
•
The shoulder part of the seat belt must run approximately across the
middle of the shoulder and fit snugly against the chest. It must on no account run across the neck. The lap part of the seat belt must run across the pelvis and fits snugly; it must not run over th
e belly. Tighten the belt webbing over
your hip if necessary.•
Please comply with any differing nati
onal legal regulations regarding the
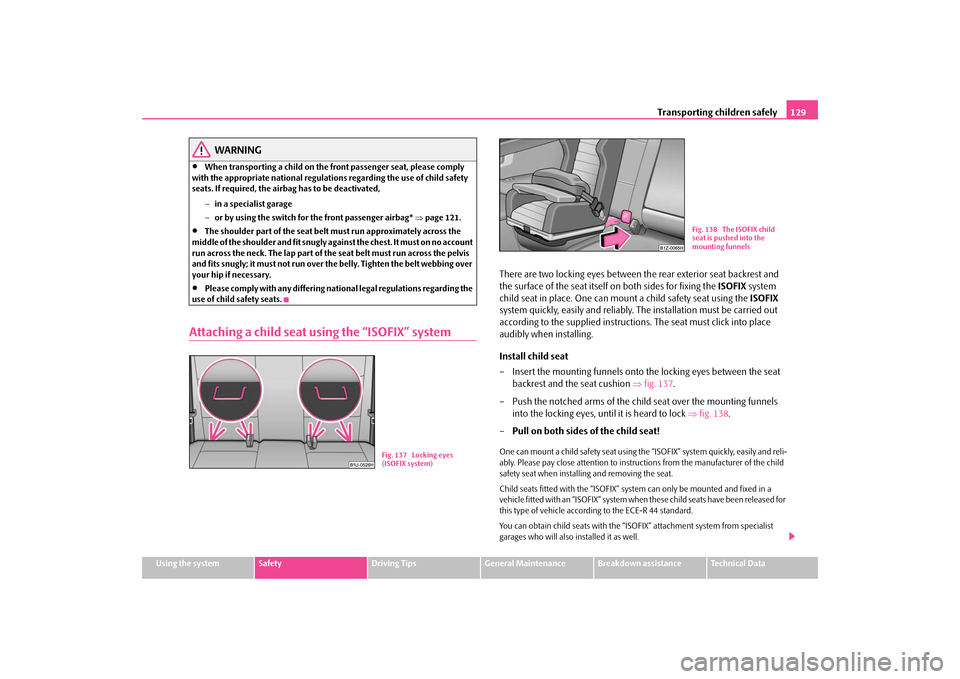
use of child safety seats.Attaching a child seat us
ing the “ISOFIX” system
There are two locking eyes between th
e rear exterior seat backrest and
the surface of the seat itself
on both sides for fixing the
ISOFIX
system
child seat in place. One can mount
a child safety seat using the
ISOFIX
system quickly, easily and reliably.
The installation must be carried out
according to the supplied instructions. The seat must click into place audibly when installing. Install child seat – Insert the mounting funnels onto the locking eyes between the seat
backrest and the seat cushion
⇒
fig. 137
.
– Push the notched arms of the chil
d seat over the mounting funnels
into the locking eyes, until it is heard to lock
⇒
fig. 138
.
–
Pull on both sides of the child seat!
One can mount a child safety seat using the “ISOFIX” system quickly, easily and reli- ably. Please pay close attention to instruct
ions from the manufacturer of the child
safety seat when installing and removing the seat. Child seats fitted with the “ISOFIX” syst
em can only be mounted and fixed in a
vehicle fitted with an “ISOFIX” system when
these child seats have been released for
this type of vehicle according to the ECE-R 44 standard. You can obtain child seats with the “ISOFIX” attachment system from specialist garages who will also installed it as well.
Fig. 137 Locking eyes (ISOFIX system)
Fig. 138 The ISOFIX child seat is pushed into the mounting funnels
s2g8.b.book Page 129 Tuesday, April 7, 2009 8:53 AM
Page 131 of 224

Transporting children safely
130
Complete installation instructions are
enclosed with the child safety seat.
WARNING
•
The locking eyes have just been de
veloped for child safety seats which
use the “ISOFIX” system. You should
therefore never attach other child
safety seats, seat belts or obje
cts to the locking eyes - hazard!
•
Ask a specialist garage whether a
child seat which you bought for
another vehicle is recommended for use in your vehicle before using a child seat with “ISOFIX” system.•
Certain child seats which use the “ISOFIX” system can be attached with
standard three-point seat belts. Please pay close attention to instructions from the manufacturer of the child safety seat when installing and removing the seat.
Note
•
Child seats which use the “ISOFIX” system are currently available for children
weighing from 9 up to 18 kg. This correspo
nds to an age range of from 9 months to
4 years.s2g8.b.book Page 130 Tuesday, April 7, 2009 8:53 AM