power steering SKODA OCTAVIA TOUR 2009 1.G / (1U) Owner's Manual
[x] Cancel search | Manufacturer: SKODA, Model Year: 2009, Model line: OCTAVIA TOUR, Model: SKODA OCTAVIA TOUR 2009 1.G / (1U)Pages: 224, PDF Size: 13.53 MB
Page 4 of 224
Contents
3
Using the system
Safety
Driving Tips
General Maintenance
Breakdown assistance
Technical Data
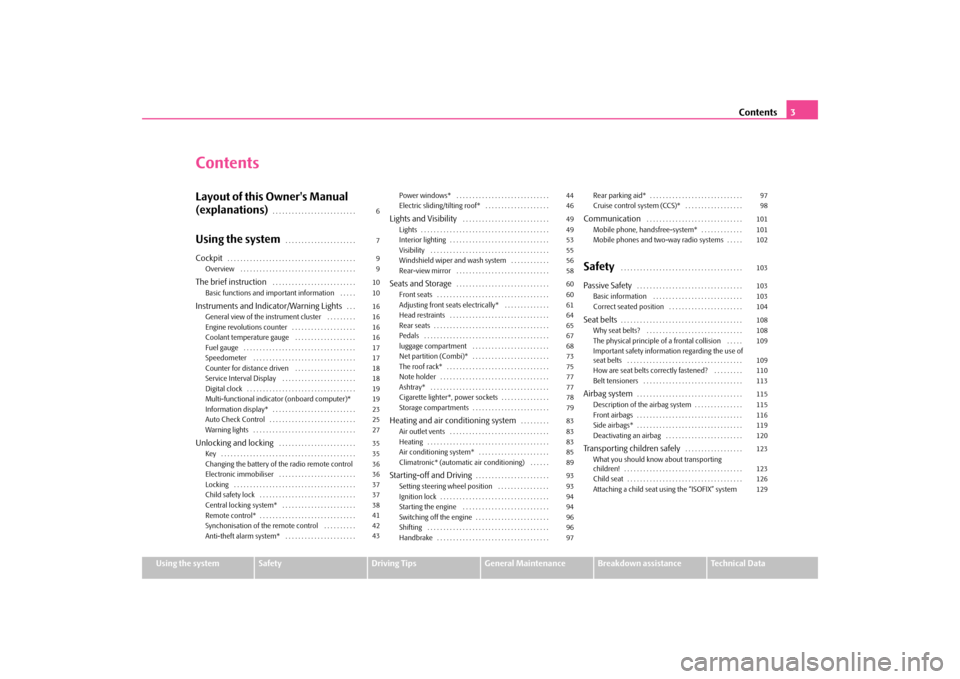
ContentsLayout of this Owner's Manual (explanations)
. . . . . . . . . . . . . . . . . . . . . . . . . .
Using the system
. . . . . . . . . . . . . . . . . . . . . .
Cockpit
. . . . . . . . . . . . . . . . . . . . . . . . . . . . . . . . . . . . . . . .
Overview . . . . . . . . . . . . . . . . . . . . . . . . . . . . . . . . . . . . The brief instruction
. . . . . . . . . . . . . . . . . . . . . . . . . .
Basic functions and important information . . . . . Instruments and Indicator/Warning Lights
. . .
General view of the instrument cluster . . . . . . . . . Engine revolutions counter . . . . . . . . . . . . . . . . . . . . Coolant temperature gauge . . . . . . . . . . . . . . . . . . . Fuel gauge . . . . . . . . . . . . . . . . . . . . . . . . . . . . . . . . . . . Speedometer . . . . . . . . . . . . . . . . . . . . . . . . . . . . . . . . Counter for distance driven . . . . . . . . . . . . . . . . . . . Service Interval Display . . . . . . . . . . . . . . . . . . . . . . . Digital clock . . . . . . . . . . . . . . . . . . . . . . . . . . . . . . . . . . Multi-functional indicator
(onboard computer)*
Information display* . . . . . . . . . . . . . . . . . . . . . . . . . . Auto Check Control . . . . . . . . . . . . . . . . . . . . . . . . . . . Warning lights . . . . . . . . . . . . . . . . . . . . . . . . . . . . . . . . Unlocking and locking
. . . . . . . . . . . . . . . . . . . . . . . .
Key . . . . . . . . . . . . . . . . . . . . . . . . . . . . . . . . . . . . . . . . . . Changing the battery of the radio remote controlElectronic immobiliser . . . . . . . . . . . . . . . . . . . . . . . . Locking . . . . . . . . . . . . . . . . . . . . . . . . . . . . . . . . . . . . . . Child safety lock . . . . . . . . . . . . . . . . . . . . . . . . . . . . . . Central locking system* . . . . . . . . . . . . . . . . . . . . . . . Remote control* . . . . . . . . . . . . . . . . . . . . . . . . . . . . . . Synchonisation of the remote control . . . . . . . . . . Anti-theft alarm system* . . . . . . . . . . . . . . . . . . . . . .
Power windows* . . . . . . . . . . . . . . . . . . . . . . . . . . . . . Electric sliding/tilting roof* . . . . . . . . . . . . . . . . . . . . Lights and Visibility
. . . . . . . . . . . . . . . . . . . . . . . . . . .
Lights . . . . . . . . . . . . . . . . . . . . . . . . . . . . . . . . . . . . . . . . Interior lighting . . . . . . . . . . . . . . . . . . . . . . . . . . . . . . . Visibility . . . . . . . . . . . . . . . . . . . . . . . . . . . . . . . . . . . . . Windshield wiper and wash system . . . . . . . . . . . . Rear-view mirror . . . . . . . . . . . . . . . . . . . . . . . . . . . . . Seats and Storage
. . . . . . . . . . . . . . . . . . . . . . . . . . . . .
Front seats . . . . . . . . . . . . . . . . . . . . . . . . . . . . . . . . . . . Adjusting front seats electrically* . . . . . . . . . . . . . . Head restraints . . . . . . . . . . . . . . . . . . . . . . . . . . . . . . . Rear seats . . . . . . . . . . . . . . . . . . . . . . . . . . . . . . . . . . . . Pedals . . . . . . . . . . . . . . . . . . . . . . . . . . . . . . . . . . . . . . . luggage compartment . . . . . . . . . . . . . . . . . . . . . . . . Net partition (Combi)* . . . . . . . . . . . . . . . . . . . . . . . . The roof rack* . . . . . . . . . . . . . . . . . . . . . . . . . . . . . . . . Note holder . . . . . . . . . . . . . . . . . . . . . . . . . . . . . . . . . . Ashtray* . . . . . . . . . . . . . . . . . . . . . . . . . . . . . . . . . . . . . Cigarette lighter*, power sockets . . . . . . . . . . . . . . . Storage compartments . . . . . . . . . . . . . . . . . . . . . . . . Heating and air conditioning system
. . . . . . . . .
Air outlet vents . . . . . . . . . . . . . . . . . . . . . . . . . . . . . . . Heating . . . . . . . . . . . . . . . . . . . . . . . . . . . . . . . . . . . . . . Air conditioning system* . . . . . . . . . . . . . . . . . . . . . . Climatronic* (automatic air conditioning) . . . . . . Starting-off and Driving
. . . . . . . . . . . . . . . . . . . . . . .
Setting steering wheel position . . . . . . . . . . . . . . . . Ignition lock . . . . . . . . . . . . . . . . . . . . . . . . . . . . . . . . . . Starting the engine . . . . . . . . . . . . . . . . . . . . . . . . . . . Switching off the engine . . . . . . . . . . . . . . . . . . . . . . . Shifting . . . . . . . . . . . . . . . . . . . . . . . . . . . . . . . . . . . . . . Handbrake . . . . . . . . . . . . . . . . . . . . . . . . . . . . . . . . . . .
Rear parking aid* . . . . . . . . . . . . . . . . . . . . . . . . . . . . . Cruise control system (CCS)* . . . . . . . . . . . . . . . . . . Communication
. . . . . . . . . . . . . . . . . . . . . . . . . . . . . .
Mobile phone, handsfree-system* . . . . . . . . . . . . . Mobile phones and two-way radio systems . . . . . Safety
. . . . . . . . . . . . . . . . . . . . . . . . . . . . . . . . . . . . . .
Passive Safety
. . . . . . . . . . . . . . . . . . . . . . . . . . . . . . . . .
Basic information . . . . . . . . . . . . . . . . . . . . . . . . . . . . Correct seated position . . . . . . . . . . . . . . . . . . . . . . . Seat belts
. . . . . . . . . . . . . . . . . . . . . . . . . . . . . . . . . . . . . .
Why seat belts? . . . . . . . . . . . . . . . . . . . . . . . . . . . . . . The physical principle of a frontal collision . . . . . Important safety information regarding the use of seat belts . . . . . . . . . . . . . . . . . . . . . . . . . . . . . . . . . . . . How are seat belts correctly fastened? . . . . . . . . . Belt tensioners . . . . . . . . . . . . . . . . . . . . . . . . . . . . . . . Airbag system
. . . . . . . . . . . . . . . . . . . . . . . . . . . . . . . . .
Description of the airbag system . . . . . . . . . . . . . . . Front airbags . . . . . . . . . . . . . . . . . . . . . . . . . . . . . . . . . Side airbags* . . . . . . . . . . . . . . . . . . . . . . . . . . . . . . . . . Deactivating an airbag . . . . . . . . . . . . . . . . . . . . . . . . Transporting children safely
. . . . . . . . . . . . . . . . . .
What you should know about transporting children! . . . . . . . . . . . . . . . . . . . . . . . . . . . . . . . . . . . . . Child seat . . . . . . . . . . . . . . . . . . . . . . . . . . . . . . . . . . . . Attaching a child seat using the “ISOFIX” system
6 7 9 9 10 10 16 16 1616171718181919232527 35 35 3636373738414243
44 46 49 49 53555658 60 60 6164656768737577777879 83 83 838589 93 93 9494969697
97 98 101 101 102 103 103 103 104 108 108 109 109 110113 115 115 116 119 120 123 123 126129
s2g8.b.book Page 3 Tuesday, April 7, 2009 8:53 AM
Page 10 of 224
Cockpit
9
Using the system
Safety
Driving Tips
General Maintenance
Breakdown assistance
Technical Data
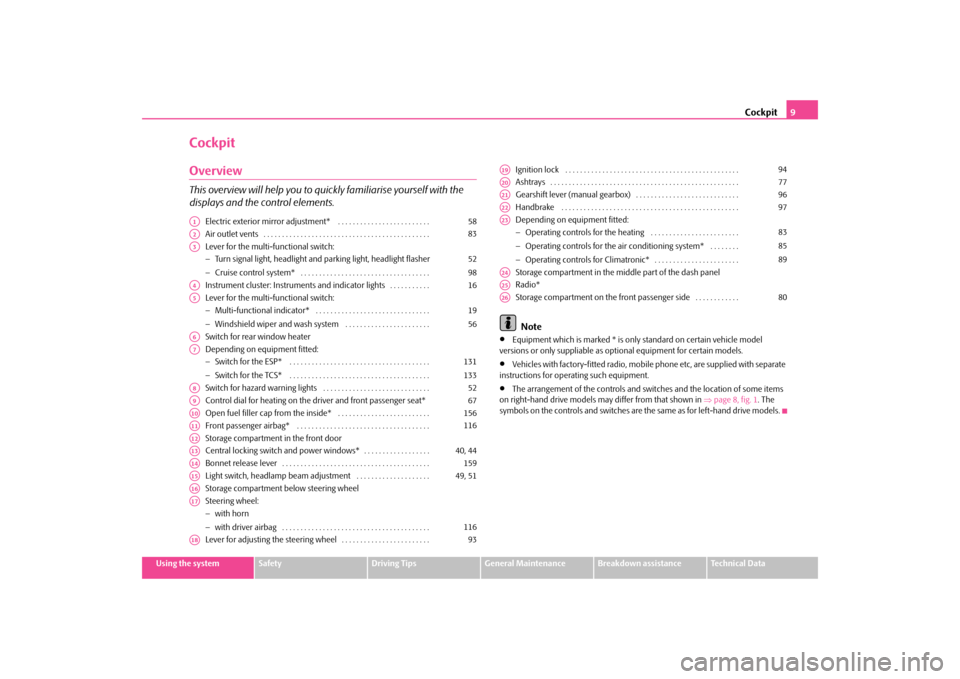
CockpitOverviewThis overview will help you to quickly familiarise yourself with the displays and the control elements.
Electric exterior mirror adjustment* . . . . . . . . . . . . . . . . . . . . . . . . . Air outlet vents . . . . . . . . . . . . . . . . . . . . . . . . . . . . . . . . . . . . . . . . . . . . . Lever for the multi-functional switch: − Turn signal light, headlight and parking light, headlight flasher − Cruise control system* . . . . . . . . . . . . . . . . . . . . . . . . . . . . . . . . . . . Instrument cluster: Instrum
ents and indicator lights . . . . . . . . . . .
Lever for the multi-functional switch: − Multi-functional indicator* . . . . . . . . . . . . . . . . . . . . . . . . . . . . . . . − Windshield wiper and wash system . . . . . . . . . . . . . . . . . . . . . . . Switch for rear window heater Depending on equipment fitted: − Switch for the ESP* . . . . . . . . . . . . . . . . . . . . . . . . . . . . . . . . . . . . . . − Switch for the TCS* . . . . . . . . . . . . . . . . . . . . . . . . . . . . . . . . . . . . . . Switch for hazard warning lights . . . . . . . . . . . . . . . . . . . . . . . . . . . . . Control dial for heating on the driver and front passenger seat* Open fuel filler cap from the inside* . . . . . . . . . . . . . . . . . . . . . . . . . Front passenger airbag* . . . . . . . . . . . . . . . . . . . . . . . . . . . . . . . . . . . . Storage compartment in the front door Central locking switch and power windows* . . . . . . . . . . . . . . . . . . Bonnet release lever . . . . . . . . . . . . . . . . . . . . . . . . . . . . . . . . . . . . . . . . Light switch, headlamp beam adjustment . . . . . . . . . . . . . . . . . . . . Storage compartment below steering wheelSteering wheel: − with horn − with driver airbag . . . . . . . . . . . . . . . . . . . . . . . . . . . . . . . . . . . . . . . . Lever for adjusting the steering wheel . . . . . . . . . . . . . . . . . . . . . . . .
Ignition lock . . . . . . . . . . . . . . . . . . . . . . . . . . . . . . . . . . . . . . . . . . . . . . . Ashtrays . . . . . . . . . . . . . . . . . . . . . . . . . . . . . . . . . . . . . . . . . . . . . . . . . . . Gearshift lever (manual gearbox) . . . . . . . . . . . . . . . . . . . . . . . . . . . . Handbrake . . . . . . . . . . . . . . . . . . . . . . . . . . . . . . . . . . . . . . . . . . . . . . . . Depending on equipment fitted: − Operating controls for the heating . . . . . . . . . . . . . . . . . . . . . . . . − Operating controls for the air conditioning system* . . . . . . . . − Operating controls for Climatronic* . . . . . . . . . . . . . . . . . . . . . . . Storage compartment in the midd
le part of the dash panel
Radio* Storage compartment on the front passenger side . . . . . . . . . . . . Note
•
Equipment which is marked * is only standard on certain vehicle model
versions or only suppliable as op
tional equipment for certain models.
•
Vehicles with factory-fitted radio, mobi
le phone etc, are supplied with separate
instructions for operating such equipment.•
The arrangement of the controls and swit
ches and the location of some items
on right-hand drive models may differ from that shown in
⇒page 8, fig. 1
. The
symbols on the controls and switches are the same as for left-hand drive models.
A1
58
A2
83
A3
52 98
A4
16
A5
1956
A6A7
131133
A8
52
A9
67
A10
156
A11
116
A12A13
40, 44
A14
159
A15
49, 51
A16A17
116
A18
93
A19
94
A20
77
A21
96
A22
97
A23
838589
A24A25A26
80
s2g8.b.book Page 9 Tuesday, April 7, 2009 8:53 AM
Page 36 of 224
Unlocking and locking
35
Using the system
Safety
Driving Tips
General Maintenance
Breakdown assistance
Technical Data
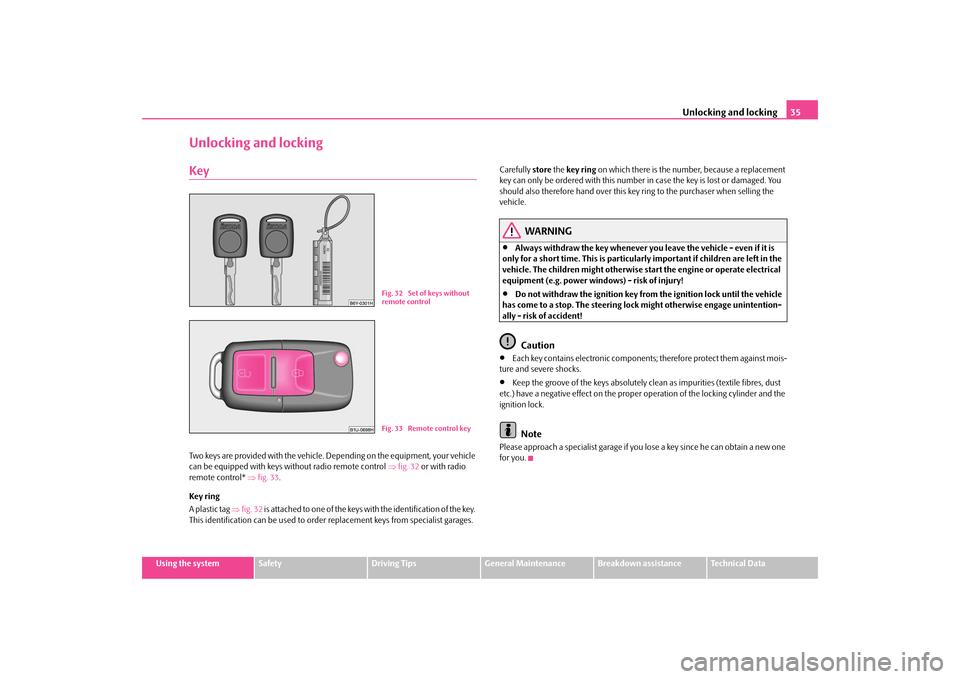
Unlocking and lockingKeyTwo keys are provided with the vehicle.
Depending on the equi
pment, your vehicle
can be equipped with keys
without radio remote control
⇒fig. 32
or with radio
remote control*
⇒fig. 33
.
Key ring A plastic tag
⇒fig. 32
is attached to one of the keys with the identification of the key.
This identification can be
used to order replacement keys from specialist garages.
Carefully
store
the
key ring
on which there is the number, because a replacement
key can only be ordered with this number
in case the key is lost or damaged. You
should also therefore hand over this ke
y ring to the purchaser when selling the
vehicle.
WARNING
•
Always withdraw the key
whenever you leave the ve
hicle - even if it is
only for a short time. This is particularly important if children are left in the vehicle. The children migh
t otherwise start the engine
or operate electrical
equipment (e.g. power windows) - risk of injury!•
Do not withdraw the ignition key from the ignition lock until the vehicle
has come to a stop. The steering lock
might otherwise engage unintention-
ally - risk of accident!
Caution
•
Each key contains electronic components
; therefore protect them against mois-
ture and severe shocks.•
Keep the groove of the keys absolutely clean as impurities (textile fibres, dust
etc.) have a negative effect on the proper operation of the locking cylinder and the ignition lock.
Note
Please approach a specialist garage if you lose a key since he can obtain a new one for you.
Fig. 32 Set of keys without remote controlFig. 33 Remote control key
s2g8.b.book Page 35 Tuesday, April 7, 2009 8:53 AM
Page 80 of 224
Seats and Storage
79
Using the system
Safety
Driving Tips
General Maintenance
Breakdown assistance
Technical Data
WARNING
•
Take care when using the cigarette li
ghter! Not paying proper attention
or incorrect use the cigarette lighter in
an uncontrolled manner may result in
burns.•
The cigarette lighter and the power so
cket also operates when the igni-
tion is switched off or the ignition key withdrawn. You should therefore never leave children unattended in the vehicle.
Caution
Always use matching plugs to av
oid damaging the power socket.
Note
•
Connecting electrical components when
the engine is not running will
drain the battery of the vehicl
e - risk of battery draining!
•
Further information
⇒page 179, “Accessories, chan
ges and replacement of
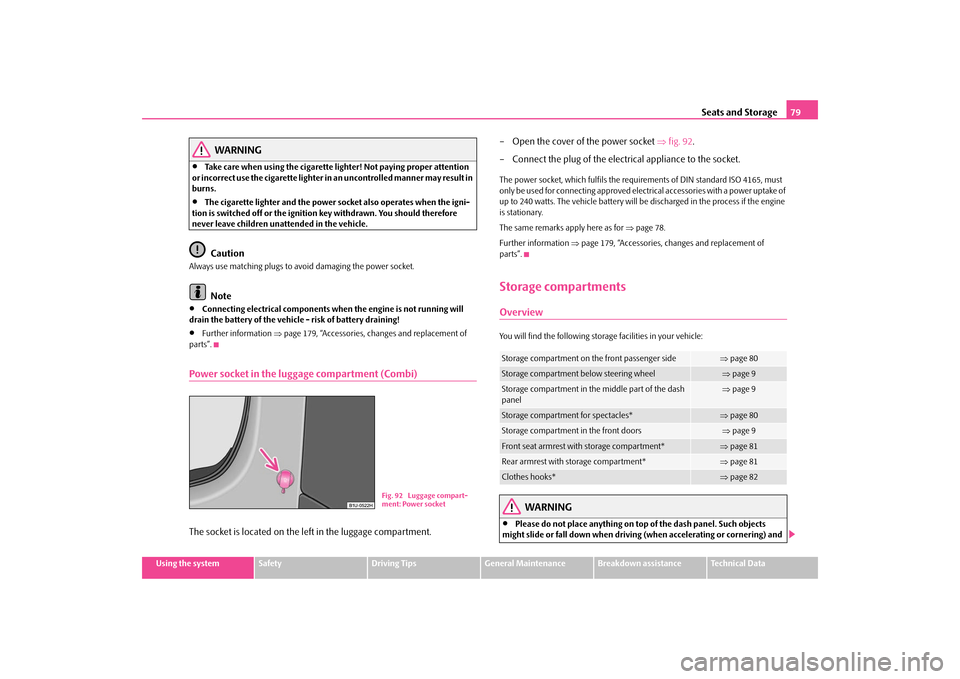
parts”.Power socket in the luggage compartment (Combi)The socket is located on the left in the luggage compartment.
– Open the cover of the power socket
⇒
fig. 92
.
– Connect the plug of the electr
ical appliance to the socket.
The power socket, which fulfils the requir
ements of DIN standard ISO 4165, must
only be used for connecting approved electr
ical accessories with a power uptake of
up to 240 watts. The vehicle ba
ttery will be discharged in the process if the engine
is stationary. The same remarks apply here as for
⇒page 78.
Further information
⇒page 179, “Accessories, changes and replacement of
parts”.Storage compartmentsOverviewYou will find the following storag
e facilities in
your vehicle:
WARNING
•
Please do not place anything on top of the dash panel. Such objects
might slide or fall down when driving
(when accelerating or cornering) and
Fig. 92 Luggage compart- ment: Power socket
Storage compartment on the front passenger side
⇒ page 80
Storage compartment below steering wheel
⇒page 9
Storage compartment in the middle part of the dash panel
⇒ page 9
Storage compartment for spectacles*
⇒page 80
Storage compartment in the front doors
⇒page 9
Front seat armrest with storage compartment*
⇒page 81
Rear armrest with storage compartment*
⇒page 81
Clothes hooks*
⇒page 82
s2g8.b.book Page 79 Tuesday, April 7, 2009 8:53 AM
Page 95 of 224
Starting-off and Driving
94
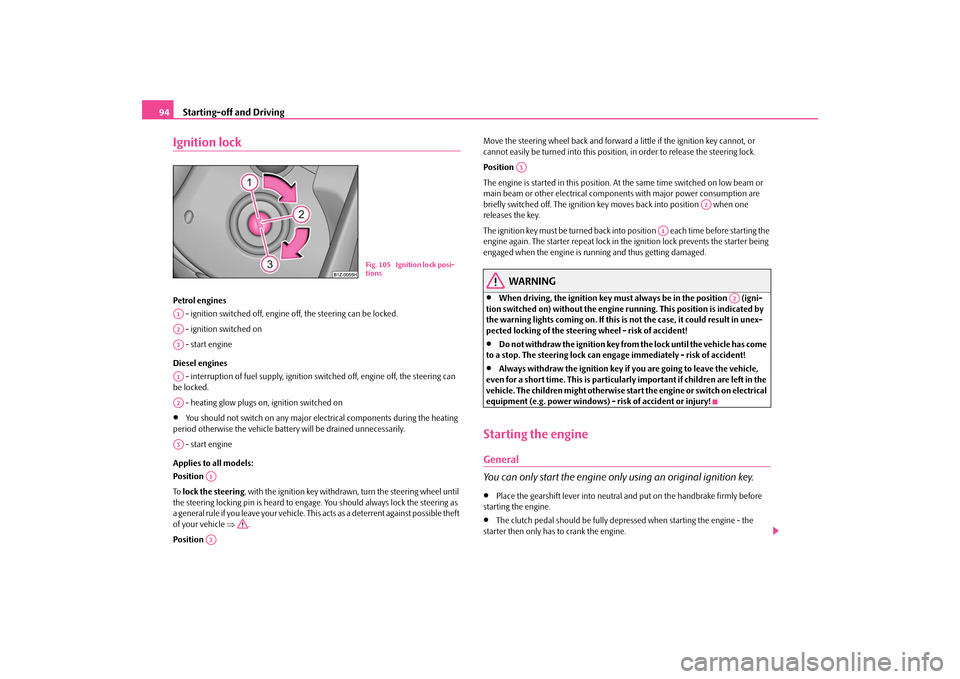
Ignition lockPetrol engines - ignition switched off, engine
off, the steering can be locked.
- ignition switched on - start engine Diesel engines - interruption of fuel supply, ignition sw
itched off, engine off, the steering can
be locked. - heating glow plugs on, ignition switched on•
You should not switch on any major elec
trical components during the heating
period otherwise the vehicle batt
ery will be drained unnecessarily.
- start engine Applies to all models: Position
To lock the steering
, with the ignition key withdrawn, turn the steering wheel until
the steering locking pin is heard to engage. You should always lock the steering as a general rule if you leave your
vehicle. This acts as a deterrent against possible theft
of your vehicle
⇒
.
Position
Move the steering wheel back and forward a little if the ignition key cannot, or cannot easily be turned into
this position, in order to
release the steering lock.
Position
The engine is started in this position. At
the same time switched on low beam or
main beam or other electrical compon
ents with major power consumption are
briefly switched off. The ignition key
moves back into position when one
releases the key. The ignition key must be turned back into position each time before starting the engine again. The starter repeat lock in th
e ignition lock prevents the starter being
engaged when the engine is r
unning and thus getting damaged.
WARNING
•
When driving, the ignition key must always be in the position (igni-
tion switched on) without the engine running. This position is indicated by the warning lights coming on. If this is not the case, it could result in unex- pected locking of the steerin
g wheel - risk of accident!
•
Do not withdraw the ignition key from the lock until the vehicle has come
to a stop. The steering lock can en
gage immediately - risk of accident!
•
Always withdraw the ignition key if
you are going to leave the vehicle,
even for a short time. This is particularly important if children are left in the vehicle. The children might
otherwise start the engine
or switch on electrical
equipment (e.g. power windows) - risk of accident or injury!Starting the engineGeneral You can only start the engine only using an original ignition key.•
Place the gearshift lever into neutral an
d put on the handbrake firmly before
starting the engine.•
The clutch pedal should be fully depr
essed when starting the engine - the
starter then only has to crank the engine.
Fig. 105 Ignition lock posi- tions
A1A2A3A1A2A3
A1A2
A3
A2
A1
A2
s2g8.b.book Page 94 Tuesday, April 7, 2009 8:53 AM
Page 162 of 224
Inspecting and replenishing
161
Using the system
Safety
Driving Tips
General Maintenance
Breakdown assistance
Technical Data
remove any jewellery beforehand, tie up your hair and wear tight fitting clothing.
•
Please also comply with the warnin
g instructions stated below when
carrying out any essential work on the
fuel system or on
the electrical
system:
− Always separate the car batter
y from the electrical system.
− Do not smoke. − Never carry out any work close to naked flames. − Always keep a working fire extinguisher at hand.Caution
When replenishing fluids in the engine, al
ways ensure that the fluids are on no
account mixed up. This may result in ma
jor operating problems and also vehicle
damage!
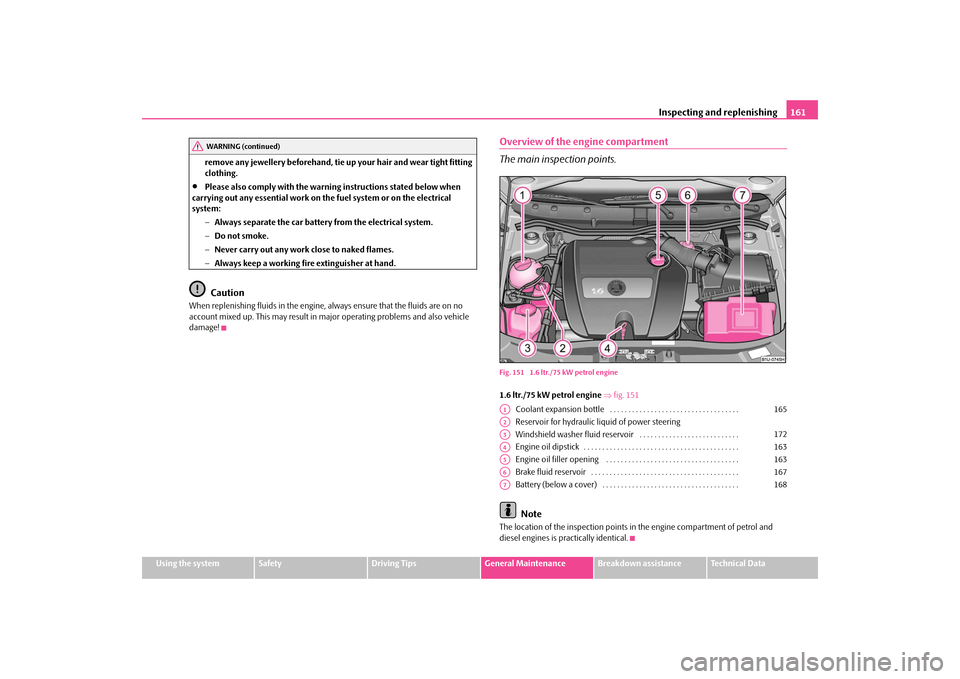
Overview of the engine compartment The main inspection points.Fig. 151 1.6 ltr./75 kW petrol engine1.6 ltr./75 kW petrol engine
⇒fig. 151
Coolant expansion bottle . . . . . . . . . . . . . . . . . . . . . . . . . . . . . . . . . . . Reservoir for hydraulic liquid of power steering Windshield washer fluid reservoir . . . . . . . . . . . . . . . . . . . . . . . . . . . Engine oil dipstick . . . . . . . . . . . . . . . . . . . . . . . . . . . . . . . . . . . . . . . . . . Engine oil filler opening . . . . . . . . . . . . . . . . . . . . . . . . . . . . . . . . . . . . Brake fluid reservoir . . . . . . . . . . . . . . . . . . . . . . . . . . . . . . . . . . . . . . . . Battery (below a cover) . . . . . . . . . . . . . . . . . . . . . . . . . . . . . . . . . . . . . Note
The location of the inspection points in
the engine compartment of petrol and
diesel engines is practically identical.
WARNING (continued)
A1
165
A2A3
172
A4
163
A5
163
A6
167
A7
168
s2g8.b.book Page 161 Tuesday, April 7, 2009 8:53 AM
Page 165 of 224
Inspecting and replenishing
164
– Inspect the oil level
⇒
page 163.
– Carefully screw on the cap of the
filler opening and push the dipstick
in fully.
WARNING
•
Avoid dripping oil onto hot parts of the engine when topping up will oil -
a risk of fire!•
Read and observe the warning notes
⇒page 160, “Working in the engine
compartment” before working in the engine compartment.
For the sake of the environment
The oil level must on no account be above the range
⇒page 163. Oil will other-
wise be drawn in through the crankcas
e ventilation and may pass through the
exhaust system to atmosphere. The oil ma
y combust in the cata
lytic converter and
damage it.Changing engine oilThe engine oil must be changed at the intervals stated in the Service schedule or according to the service interval indicator
⇒page 18.
WARNING
•
Only carry out the engine oil change, if you have the required profes-
sional knowledge!•
Read and observe the warning notes
⇒page 160, “Working in the engine
compartment” before working in the engine compartment.•
Let the engine cool down - risk of burning from hot oil.
•
Wear an eye protection - risk of
caustic burns due to oil splashes.
•
Oil is toxic! Store old oil in a safe place out of the reach of children and
unauthorized persons until you dispose of it properly.
Caution
You must not pour any additives into th
e engine oil - risk of engine damage!
Damage, which results from such produc
t, are excluded from the warranty.
For the sake of the environment
•
You must on no account pour oil into
the ground or into the sewage system.
•
In view of the problems involved in prop
erly disposing of old oil, the material,
equipment and the knowledge required fo
r such work, we recommend that you
have the oil and oil filter change carried out by a specialist garage.
Note
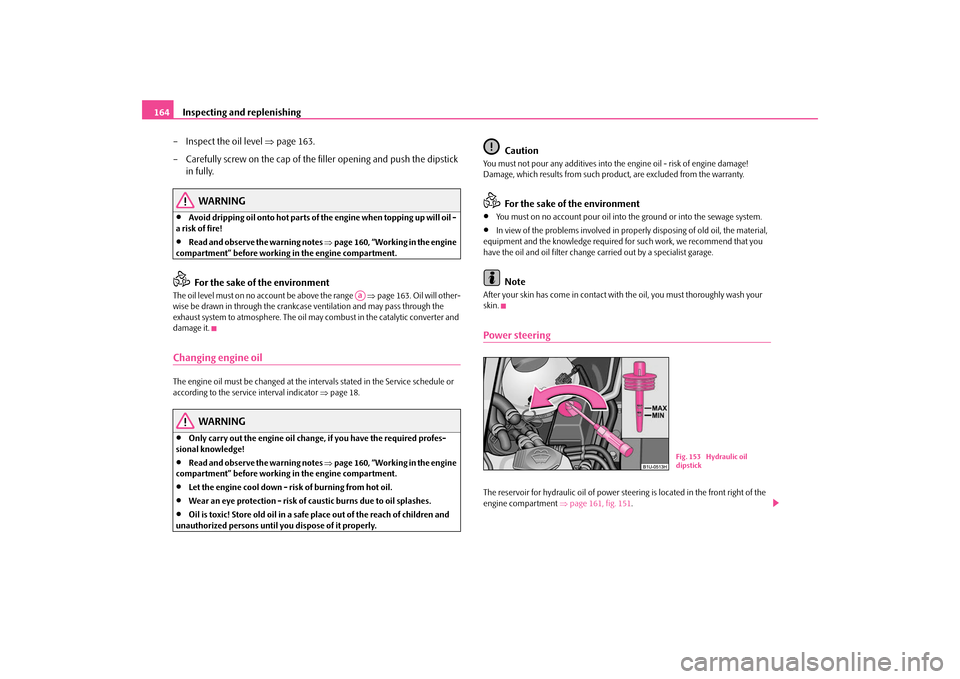
After your skin has come in contact with the oil, you must thoroughly wash your skin.Power steeringThe reservoir for hydraulic oil of power stee
ring is located in the front right of the
engine compartment
⇒page 161, fig. 151
.
Aa
Fig. 153 Hydraulic oil dipstick
s2g8.b.book Page 164 Tuesday, April 7, 2009 8:53 AM
Page 166 of 224
Inspecting and replenishing
165
Using the system
Safety
Driving Tips
General Maintenance
Breakdown assistance
Technical Data
Check hydraulic oil The hydraulic system of the power steering is filled with the hydraulic oil designated in the catalogue as G 002 000. Perform the inspection of the hydraulic oil level when the engine is cold and not running. The hydraulic oil level must be between the “MIN” and “MAX” markings ⇒ page 164, fig. 153
. If the level drops below the mark
ing “MIN”, it is necessary that
the power steering is checked by a specialist
garage. It is not sufficient to solely refill
with hydraulic oil.
Note
If the engine is not running (when towing) or
if the V-ribbed belt is torn, the power
steering does not operate. The vehicle is fully steerable however. There is however increased force required to turn the steering wheel.Cooling systemCoolant The job of the coolant is to cool the engine.The cooling system does not require an
y maintenance under normal operating
conditions. The coolant consists of water
with a concentration of coolant additive
of 40 %. This mixture not only provides
antifreeze protection down to -25°C but
also protects the cooling and heating system from corrosion. It also prevents the formation of scale and significantly increases the boiling point of the coolant. You must therefore not reduce the concentr
ation of antifreeze agent in the coolant
by adding water, also not during the summ
er months or in countries with a warm
climate.
The concentration of coolant additive in the coolant must be at least
40%. You can increase the amount of antifreeze
in the coolant if a higher concentration
of antifreeze is necessary for climatic
reasons but only up to 60% (antifreeze
protection down to approx. -40°C). The an
tifreeze protection tails off above that
concentration.
Vehicles exported to countries with a co
ld climate (e.g. Sweden, Norway, Finland)
are already factory-filled with a coolant which offers antifreeze protection down to about -35°C. In these countries the concentr
ation of coolant additive should be at
least 50 %. Coolant The cooling system is factory-filled with
coolant (purple in colour), which complies
with the specification TL-VW 774 G. We recommend that you use the same c
oolant additive - G12 PLUS-PLUS (purple
in colour) for topping up the system. Please contact a specialist garage if you have any questions regarding the coolant or if you wish to fill up with a different coolant. A specialist garage can also supply
you with the correct coolant additives.
Caution
•
Other coolant additives may cause operational problems which, in partic-
ular, involves significantly reducing the anticorrosion effect.•
Any faults or problems resulting from corrosion may cause a loss of
coolant and, as a consequence of th
is, result in major engine damage.
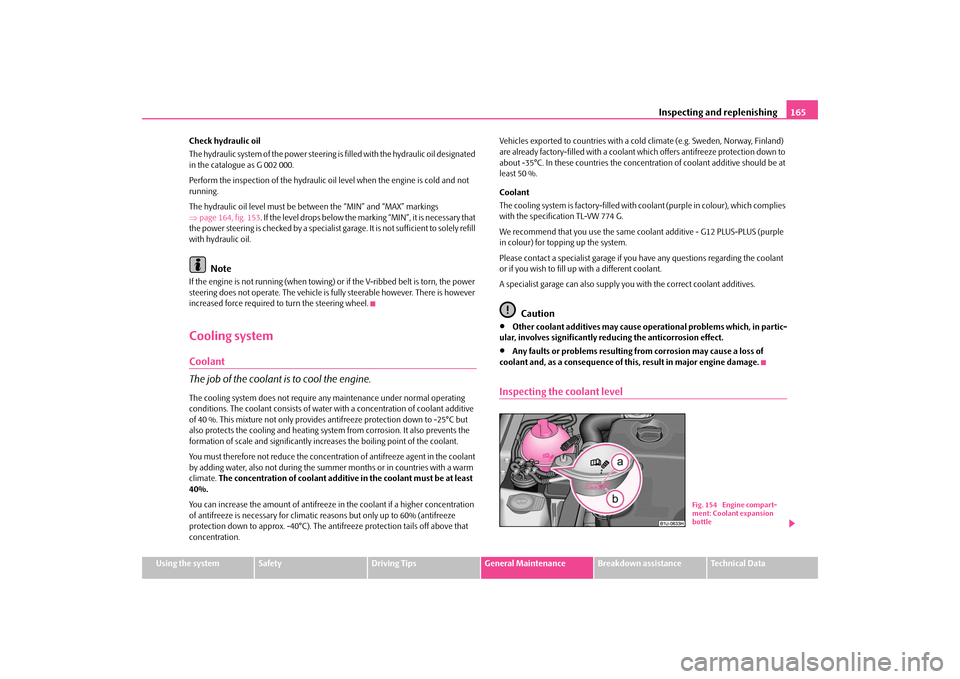
Inspecting the coolant level
Fig. 154 Engine compart- ment: Coolant expansion bottle
s2g8.b.book Page 165 Tuesday, April 7, 2009 8:53 AM
Page 191 of 224
Breakdown assistance
190
– Release the clutch particular
ly gently when starting off.
Driver of the towed vehicle – Switch the ignition on so that the steering wheel is not blocked and
you can also operate the turn signal
lights, the headlight flasher, the
windscreen wipers and wi
ndscreen washer system.
– Take the vehicle out of gear. – Note that the brake servo unit and power steering only operate if the
engine is running. You will require si
gnificantly greater physical force
to depress the brake pedal and to steer the vehicle if the engine is not running.
– Ensure that the tow rope is always kept taught.Tow rope or tow bar A tow
bar
is safest way of towing a vehicle and also minimizes any shocks. You can
use a tow
rope
only if a suitable tow bar is not available.
The tow rope must be elastic to protect
the vehicle. Thus one should only use
plastic fibre rope or a rope made
out of a similarly elastic material.
Only attach the tow rope to the
towing eyes
provided for this purpose
⇒page 190,
“Front towing eye”. Driving style Towing another vehicle requires a certain
amount of practice. Both drivers should
be familiar with the particular points
about towing a vehicle. Unskilled drivers
should not attempt to tow in another vehicle or to be towed in. One should be constantly vigilant not to allow impermissibly high towing forces or jerky loadings. There is always a risk of excessive stresses and damage resulting at the points to which you attach the tow ro
pe or tow bar when you attempt to tow a
vehicle which is not standing on a paved road.
Caution
If the gearbox of your vehicle no longer
contains any oil because of a defect, your
vehicle must only be towed in with the driven wheels raised clear of the ground, or on a special vehicle transporter or trailer.
Note
•
Please comply with any legal requirements particularly regarding the switched
on signal systems, when towing in
or tow-starting another vehicle.
•
The tow rope must not be twisted as it may in certain circumstances result in the
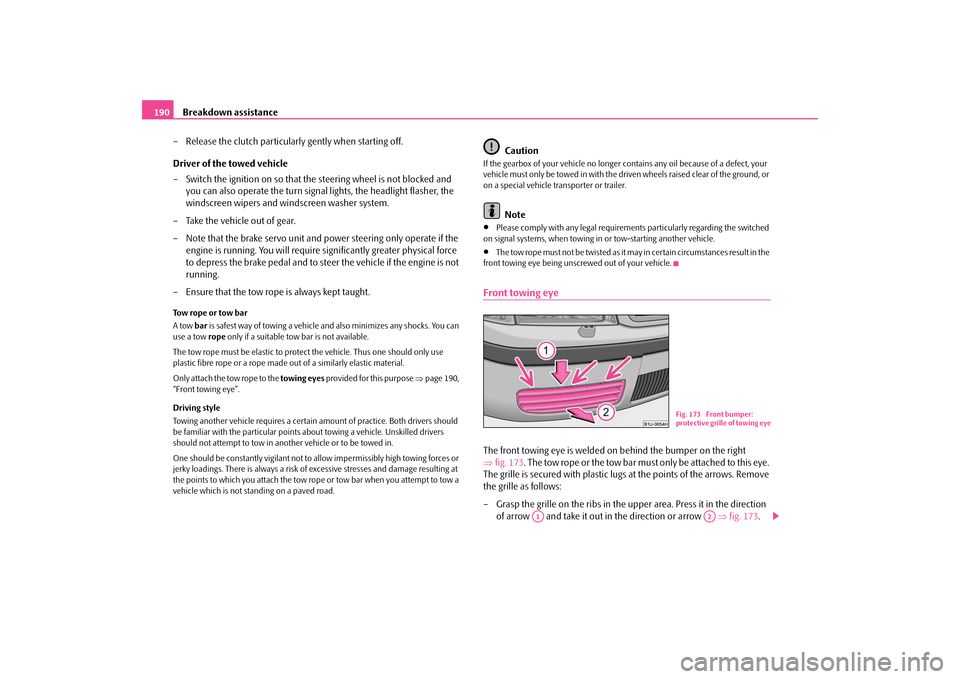
front towing eye being unscrewed out of your vehicle.Front towing eyeThe front towing eye is welded on behind the bumper on the right ⇒
fig. 173
. The tow rope or the tow bar must only be attached to this eye.
The grille is secured with plastic lugs at the points of the arrows. Remove the grille as follows: – Grasp the grille on the ribs in the upper area. Press it in the direction
of arrow and take it out in the direction or arrow
⇒
fig. 173
.
Fig. 173 Front bumper: protective grille of towing eye
A1
A2
s2g8.b.book Page 190 Tuesday, April 7, 2009 8:53 AM
Page 196 of 224
Fuses and light bulbs
195
Using the system
Safety
Driving Tips
General Maintenance
Breakdown assistance
Technical Data
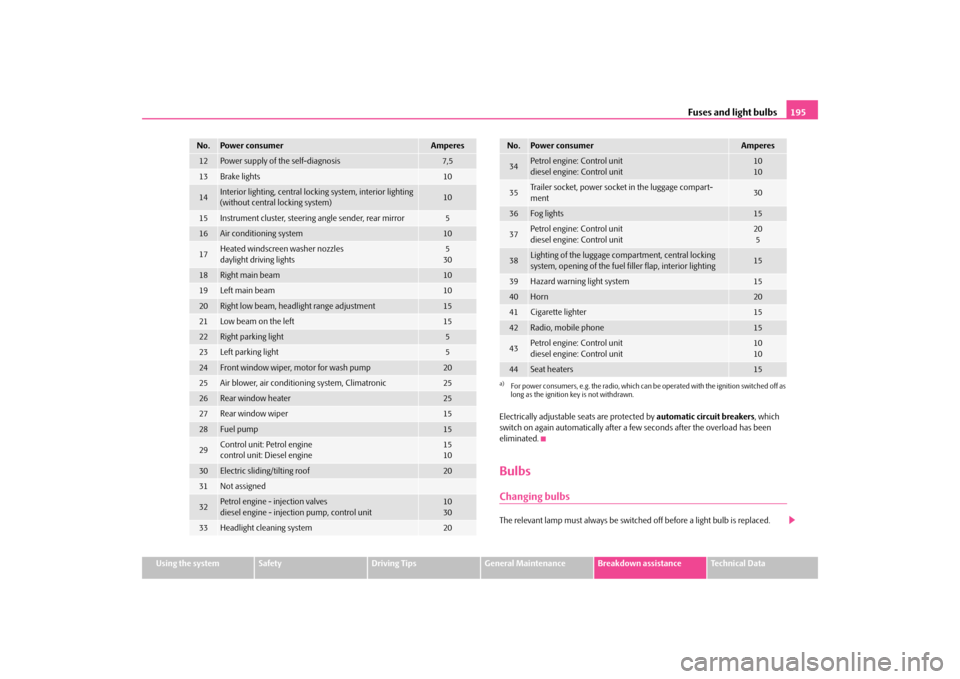
Electrically adjustable
seats are protected by
automatic circuit breakers
, which
switch on again automatically after a fe
w seconds after the overload has been
eliminated.BulbsChanging bulbsThe relevant lamp must always be switch
ed off before a light bulb is replaced.
12
Power supply of the self-diagnosis
7,5
13
Brake lights
10
14
Interior lighting, central lockin
g system, interior lighting
(without central locking system)
10
15
Instrument cluster,
steering angle sender, rear mirror
5
16
Air conditioning system
10
17
Heated windscreen washer nozzles daylight driving lights
530
18
Right main beam
10
19
Left main beam
10
20
Right low beam, headlight range adjustment
15
21
Low beam on the left
15
22
Right parking light
5
23
Left parking light
5
24
Front window wiper, motor for wash pump
20
25
Air blower, air conditioning system, Climatronic
25
26
Rear window heater
25
27
Rear window wiper
15
28
Fuel pump
15
29
Control unit: Petrol engine control unit: Diesel engine
1510
30
Electric sliding/tilting roof
20
31
Not assigned
32
Petrol engine - injection valvesdiesel engine - injection pump, control unit
1030
33
Headlight cleaning system
20
No.
Power consumer
Amperes
34
Petrol engine: Control unitdiesel engine: Control unit
1010
35
Trailer socket, power socket in the luggage compart- ment
30
36
Fog lights
15
37
Petrol engine: Control unit diesel engine: Control unit
205
38
Lighting of the luggage compartment, central locking system, opening of the fuel filler flap, interior lighting
15
39
Hazard warning light system
15
40
Horn
20
41
Cigarette lighter
15
42
Radio, mobile phone
15
43
Petrol engine: Control unit diesel engine: Control unit
1010
44
Seat heaters
15
a)For power consumers, e.g. the radio, which can be
operated with the ignition switched off as
long as the ignition key is not withdrawn.No.
Power consumer
Amperes
s2g8.b.book Page 195 Tuesday, April 7, 2009 8:53 AM