brakes SKODA OCTAVIA TOUR 2011 2.G / (1Z) Owner's Manual
[x] Cancel search | Manufacturer: SKODA, Model Year: 2011, Model line: OCTAVIA TOUR, Model: SKODA OCTAVIA TOUR 2011 2.G / (1Z)Pages: 183, PDF Size: 11.13 MB
Page 5 of 183
Contents
4
Driving Tips
. . . . . . . . . . . . . . . . . . . . . . . . . . . . . .
Intelligent Technology
. . . . . . . . . . . . . . . . . . . . . . .
Electronic stability programme (ESP)* . . . . . . . . . .
Brakes . . . . . . . . . . . . . . . . . . . . . . . . . . . . . . . . . . . . . . .
Brake booster . . . . . . . . . . . . . . . . . . . . . . . . . . . . . . . .
Antilock brake system (ABS) . . . . . . . . . . . . . . . . . . .
Brake Assist* . . . . . . . . . . . . . . . . . . . . . . . . . . . . . . . . .
Electromechanical power steering . . . . . . . . . . . . .
Tyre inflation pressure-control system* . . . . . . . .
Driving and the Environment
. . . . . . . . . . . . . . . .
The first 1 500 kilometres and then afterwards .
Catalytic converter . . . . . . . . . . . . . . . . . . . . . . . . . . .
Driving in an economical and environmentally
conscious manner . . . . . . . . . . . . . . . . . . . . . . . . . . . .
Environmental compatibility . . . . . . . . . . . . . . . . . . .
Motoring abroad . . . . . . . . . . . . . . . . . . . . . . . . . . . . . .
Avoiding damage to your vehicle . . . . . . . . . . . . . .
Driving through bodies of water on roads . . . . . .
Towing a trailer
. . . . . . . . . . . . . . . . . . . . . . . . . . . . . . .
Towing a trailer . . . . . . . . . . . . . . . . . . . . . . . . . . . . . .
General Maintenance
. . . . . . . . . . . . . . . .
Taking care of your vehicle and cleaning the
vehicle
. . . . . . . . . . . . . . . . . . . . . . . . . . . . . . . . . . . . . . . . .
General . . . . . . . . . . . . . . . . . . . . . . . . . . . . . . . . . . . . . .
Care of the exterior of vehicle . . . . . . . . . . . . . . . . .
Care of the interior of vehicle . . . . . . . . . . . . . . . . . .
Fuel
. . . . . . . . . . . . . . . . . . . . . . . . . . . . . . . . . . . . . . . . . . . .
Petrol . . . . . . . . . . . . . . . . . . . . . . . . . . . . . . . . . . . . . . . .
Diesel . . . . . . . . . . . . . . . . . . . . . . . . . . . . . . . . . . . . . . . .
Refuelling . . . . . . . . . . . . . . . . . . . . . . . . . . . . . . . . . . . .
Inspecting and replenishing
. . . . . . . . . . . . . . . . . .
Engine compartment . . . . . . . . . . . . . . . . . . . . . . . . .
Engine oil . . . . . . . . . . . . . . . . . . . . . . . . . . . . . . . . . . . .
Cooling system . . . . . . . . . . . . . . . . . . . . . . . . . . . . . . .
Brake fluid . . . . . . . . . . . . . . . . . . . . . . . . . . . . . . . . . . . Battery . . . . . . . . . . . . . . . . . . . . . . . . . . . . . . . . . . . . . .
Windshield washer system . . . . . . . . . . . . . . . . . . . .
Wheels and Tyres
. . . . . . . . . . . . . . . . . . . . . . . . . . . . .
Wheels . . . . . . . . . . . . . . . . . . . . . . . . . . . . . . . . . . . . . .
Accessories, changing and replacing parts
. .
Accessories and replacement parts . . . . . . . . . . . .
Technical changes . . . . . . . . . . . . . . . . . . . . . . . . . . . .
Vehicles of category N1 . . . . . . . . . . . . . . . . . . . . . . .
Breakdown assistance
. . . . . . . . . . . . .
Breakdown assistance
. . . . . . . . . . . . . . . . . . . . . . .
First-aid box* and Warning triangle* (Octavia) . .
First-aid box* and warning triangle* (Estate car)
Fire extinguisher* . . . . . . . . . . . . . . . . . . . . . . . . . . . .
Vehicle tool kit . . . . . . . . . . . . . . . . . . . . . . . . . . . . . . .
Spare wheel* . . . . . . . . . . . . . . . . . . . . . . . . . . . . . . . .
Tyre repair kit* . . . . . . . . . . . . . . . . . . . . . . . . . . . . . . .
Changing a wheel . . . . . . . . . . . . . . . . . . . . . . . . . . . .
Jump-starting . . . . . . . . . . . . . . . . . . . . . . . . . . . . . . . .
Tow-starting and towing vehicle . . . . . . . . . . . . . .
Fuses and light bulbs
. . . . . . . . . . . . . . . . . . . . . . . . .
Electric fuses . . . . . . . . . . . . . . . . . . . . . . . . . . . . . . . . .
Bulbs . . . . . . . . . . . . . . . . . . . . . . . . . . . . . . . . . . . . . . . .
Technical Data
. . . . . . . . . . . . . . . . . . . . . . . . . .
Technical Data
. . . . . . . . . . . . . . . . . . . . . . . . . . . . . . . .
General information . . . . . . . . . . . . . . . . . . . . . . . . . .
Used abbreviations . . . . . . . . . . . . . . . . . . . . . . . . . . .
Performances . . . . . . . . . . . . . . . . . . . . . . . . . . . . . . . .
Weight . . . . . . . . . . . . . . . . . . . . . . . . . . . . . . . . . . . . . .
Identification details . . . . . . . . . . . . . . . . . . . . . . . . . .
Fuel consumption based on ECE regulations and EC
guidelines . . . . . . . . . . . . . . . . . . . . . . . . . . . . . . . . . . .
Dimensions . . . . . . . . . . . . . . . . . . . . . . . . . . . . . . . . . .
Engine oil specifications . . . . . . . . . . . . . . . . . . . . . .
1.4 ltr./59 kW - EU5 . . . . . . . . . . . . . . . . . . . . . . . . . . . 1.6 ltr./75 kW - EU4, EU2 . . . . . . . . . . . . . . . . . . . . . .
2.0 l/81 kW TDI CR EU4 . . . . . . . . . . . . . . . . . . . . . . .
Index
. . . . . . . . . . . . . . . . . . . . . . . . . . . . . . . . . . . . . . .
105105105107108108109109109111111111112115116116116118118121121121121125127127127128130130132133135
136140141141146146146146147147147147147147148148149153154156156159165165165165165165165166166166168
170172175
s2lk.2.book Page 4 Monday, April 18, 2011 7:41 AM
Page 28 of 183
Instruments and Indicator/Warning Lights27
Using the system
Safety
Driving Tips
General Maintenance
Breakdown assistance
Technical Data
The warning light comes on even when the ignition is switched off. The warning
light lights up for a
maximum of 5 minutes.
Seat belt warning light
The warning light
comes on after the ignition is switched on as a reminder to
fasten the seat belt. The warning light only goes out if the driver has fastened his
seat belt.
If the seat belt has not been fastened by the driver, a permanent warning signal
sounds at vehicle speeds greater than 20 km/h and simultaneously the warning
light flashes
.
If the seat belt is not fastened by the driver during the next 90 seconds, the warning
signal is deactivated and the warning light
lights up permanently.
Further information on the seat belts page 85, “Seat belts”.
Thickness of the brake pads*
The warning light
comes on for a few seconds when the ignition is switched on.
If the warning light comes on, contact a specialist garage immediately and have
the brake pads on all of the wheels inspected.
Boot lid
The warning light
comes on when the ignition is switched on if the luggage
compartment door is open. If th e boot lid opens while driving
, the warning light
lights up and an audible signal sounds.
The warning light comes on even when the ignition is switched off. The warning
light lights up for a maximum of 5 minutes.
Open door
The warning light
comes on if one or several door s are opened or if the boot lid
is opened. If one of the doors opens while driving, the warning light lights
up and
an audible signal sounds.
The warning light comes on even when the ignition is switched off. The warning
light lights up for a maximum of 5 minutes.
Brake system
The warning light
flashes or comes on if the brake fluid level is too low, if there
is a fault in the ABS or if the handbrake is applied.
If the warning light flashes and an audi ble signal sounds three times (handbrake
is not applied), stop and check the brake fluid level .
If there is a fault in the ABS which also influences the function of the brake system
(e.g. distribution of brake pressure), the ABS warning light
comes on and at the
same time the brake system warning light starts flashing
. Be aware that not only
the ABS but also another part of the brake system is defective .
An audible signal sounds three time s as an additional warning signal.
One should get used to high pedal forces, long braking distances and long free play
of the brake pedal when driving to the next specialist garage.
For further information on the brake system page 107, “Brakes”.
Handbrake applied
The warning light
also comes on if the handbrake is applied. An audible warning
is also given if you drive the vehicle for at least 3 seconds at a speed of more than
6 km/h.
WARNING
•
Pay attention to the following instruct ions before checking the brake fluid
level and opening the bonnet page 131, “Working in the engine compart-
ment”.
•
If the brake system warning light
does not go out a few seconds after
switching on the ignition or comes on when driving, stop immediately and check
the brake fluid in the reservoir page 135. If the fluid level has dropped below
the MIN marking, do not drive any further - risk of accident! Obtain professional
assistance.
Alternator
The warning light
comes on after the ignition has been switched on. It should go
out after the engine has started.
If the warning light does not go out after the engine has started, or comes on when
driving, drive to the nearest specialist garage. The vehicle battery will be discharged
in this case so switch off all no n-essential electrical components.
s2lk.2.book Page 27 Monday, April 18, 2011 7:41 AM
Page 54 of 183
Seats and Stowage53
Using the system
Safety
Driving Tips
General Maintenance
Breakdown assistance
Technical Data
WARNING
If you or the passenger have a subdued pa in and/or temperature sensitivity, e.g.
through medication, paralysis or because of chronic illness (e.g. diabetes), we
recommend not to use the seat heating at al l. This can lead to burns on the back,
the posterior and the legs which are difficult to heal. If the seat heating is used,
we recommend to make regular breaks in your journey when driving long
distances, so that in specific cases as mentioned above the body can recuperate
from the stress of the journey. Please consult your doctor, who can evaluate
your specific condition.
Caution
•
You should not kneel on the seats or otherwise apply pressure at specific points
in order to avoid damaging the heating elements of the seat heaters.
•
Do not use the seat heating if the seats are not occupied by persons or if objects
are fastened or stored on them, for example a child seat, a bag etc. A fault of the
heating elements in the seat heating can occur.
•
Do not clean the seats moist page 125.Note
•
The seat heating should only be switched on when the engine is running. This
has a significant effect of saving on the battery capacity.
•
If the on-board voltage drops, the seat heating is switched off automatically, in
order to provide sufficient electrical energy for the engine control.
PedalsConcerning a secure depressing of the peda l, you should use only footmats from the
Škoda genuine accessories.
Operation of the pedals must not be hindered!
WARNING
•
Greater pedal distances may be needed when there is a fault in the brake
system.
•
Do not place any footmats or other additional floor coverings in the area of
the pedals in order to ensure that all the pedals can be fully depressed and are
able to return unobstructed to their initial position - risk of accident!
•
There must be no objects on the floor which could roll under the pedals. You
would then no longer be able to apply the brakes, operate the clutch or acceler-
ator - risk of accident!
luggage compartmentLoading the luggage compartmentPlease observe the following in the interest of having good handling characteristics
of your vehicle:
– Distribute the items of luggage as evenly as possible.
– Place heavy objects as far forward as possible.
– Attach the items of luggage to the lashing eyes or the fixing net* page 54.
In the event of an accident, there is such a high kinetic energy which is produced by
small and light objects that they can cause severe injuries. The magnitude of the
kinetic energy depends on the speed at which the vehicle is travelling and on the
weight of the object. The speed at which the vehicle is travelling is in this case the
more significant factor.
Example: In the event of a frontal collis ion at a speed of 50 km/h, an unsecured
object with a weight of 4.5 kg produces an energy, which corresponds to 20 times
its own weight. This means that it results in a weight of approx. 90 kg. You can
imagine the injuries that can occur, if this “bullet” is flying through the interior
compartment and hits an occupant.
WARNING
•
Stow the objects in the luggage compartment and attach them to the lashing
eyes.
•
Loose objects in the passenger compar tment can be thrown forward during
a sudden manoeuvre or in case of an ac cident and can injure the occupants or
other oncoming traffic. This risk is still increased, if the objects which are flying
around are hit by a deployed airbag. In this case, the objects which are thrown
back can injure th e occupants - hazard.
•
Please note that the handling properti es of your vehicle may be affected
when transporting heavy objects as a result of the displacement of the centre of
gravity. The speed and style of driv ing must be adjusted accordingly.WARNING (continued)
s2lk.2.book Page 53 Monday, April 18, 2011 7:41 AM
Page 62 of 183
Seats and Stowage61
Using the system
Safety
Driving Tips
General Maintenance
Breakdown assistance
Technical Data
WARNING
•
Take care when using the cigarette lighter! Not paying proper attention or
incorrect use the cigarette lighter in an uncontrolled manner may result in burns.
•
The cigarette lighter and the power socket also operates when the ignition
is switched off or the ignition key withdrawn. You should therefore never leave
children unattended in the vehicle.Caution
Always use matching plugs to avoid damaging the power socket.
Note
•
Connecting electrical components when the engine is not running will drain
the battery of the vehicle - risk of battery draining!
•
Further information page 146, “Accessories, changing and replacing parts”.
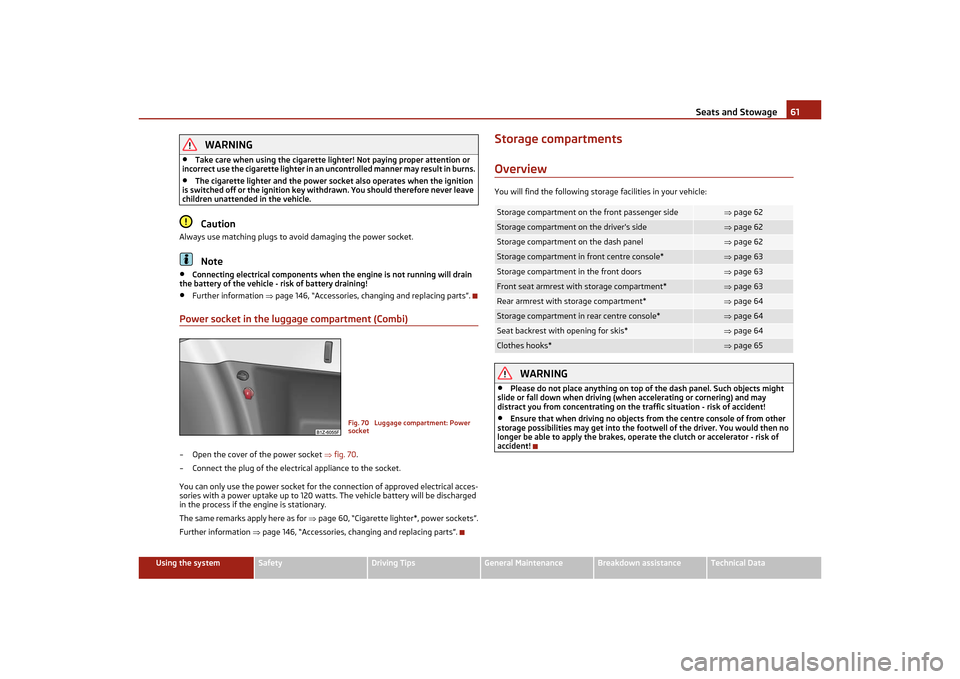
Power socket in the luggage compartment (Combi)– Open the cover of the power socket fig. 70.
– Connect the plug of the electrical appliance to the socket.
You can only use the power socket for the connection of approved electrical acces-
sories with a power uptake up to 120 watts. The vehicle battery will be discharged
in the process if the engine is stationary.
The same remarks apply here as for page 60, “Cigarette lighter*, power sockets”.
Further information page 146, “Accessories, changing and replacing parts”.
Storage compartmentsOverviewYou will find the following storage facilities in your vehicle:
WARNING
•
Please do not place anything on top of the dash panel. Such objects might
slide or fall down when driving (when accelerating or cornering) and may
distract you from concentrating on the traffic situation - risk of accident!
•
Ensure that when driving no objects from the centre console of from other
storage possibilities may get into the footwell of the driver. You would then no
longer be able to apply th e brakes, operate the clutch or accelerator - risk of
accident!
Fig. 70 Luggage compartment: Power
socket
Storage compartment on the front passenger side
page 62
Storage compartment on the driver's side
page 62
Storage compartment on the dash panel
page 62
Storage compartment in front centre console*
page 63
Storage compartment in the front doors
page 63
Front seat armrest with storage compartment*
page 63
Rear armrest with storage compartment*
page 64
Storage compartment in rear centre console*
page 64
Seat backrest with opening for skis*
page 64
Clothes hooks*
page 65
s2lk.2.book Page 61 Monday, April 18, 2011 7:41 AM
Page 77 of 183
Starting-off and Driving
76
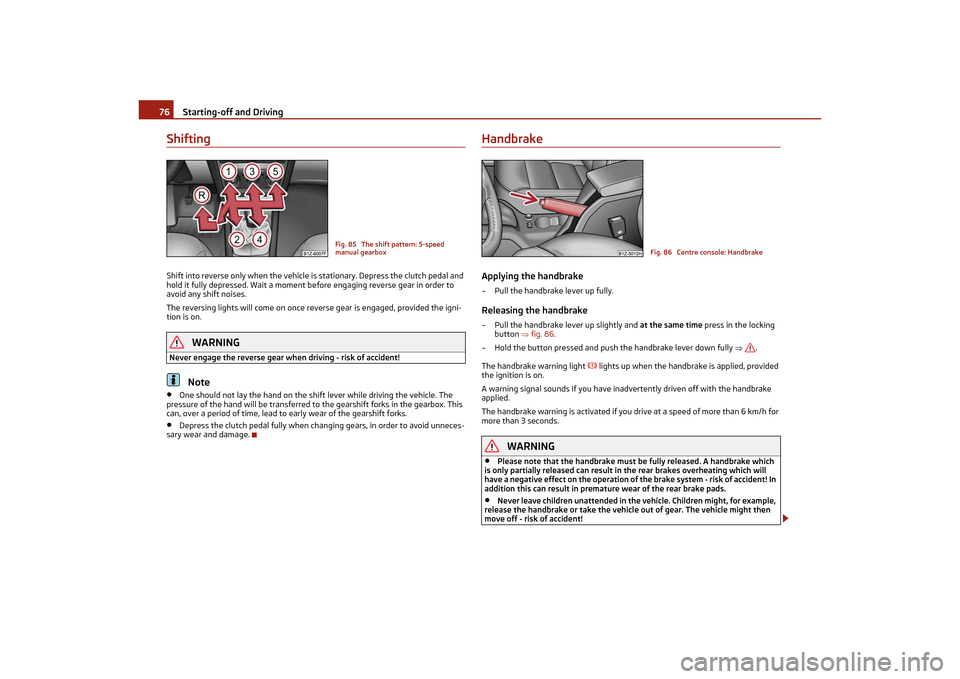
ShiftingShift into reverse only when the vehicle is stationary. Depress the clutch pedal and
hold it fully depressed. Wait a moment be fore engaging reverse gear in order to
avoid any shift noises.
The reversing lights will come on once reverse gear is engaged, provided the igni-
tion is on.
WARNING
Never engage the reverse gear when driving - risk of accident!
Note
•
One should not lay the hand on the shift lever while driving the vehicle. The
pressure of the hand will be transferred to the gearshift forks in the gearbox. This
can, over a period of time, lead to early wear of the gearshift forks.
•
Depress the clutch pedal fully when changing gears, in order to avoid unneces-
sary wear and damage.
HandbrakeApplying the handbrake– Pull the handbrake lever up fully.Releasing the handbrake– Pull the handbrake lever up slightly and at the same time press in the locking
button fig. 86.
– Hold the button pressed and push the handbrake lever down fully .
The handbrake warning light
lights up when the handbrake is applied, provided
the ignition is on.
A warning signal sounds if you have inadvertently driven off with the handbrake
applied.
The handbrake warning is activated if you drive at a speed of more than 6 km/h for
more than 3 seconds.
WARNING
•
Please note that the hand brake must be fully released. A handbrake which
is only partially released can result in the rear brakes overheating which will
have a negative effect on the operation of the brake system - risk of accident! In
addition this can result in premat ure wear of the rear brake pads.
•
Never leave children unattended in the vehicle. Children might, for example,
release the handbrake or take the vehicl e out of gear. The vehicle might then
move off - risk of accident!
Fig. 85 The shift pattern: 5-speed
manual gearbox
Fig. 86 Centre console: Handbrake
s2lk.2.book Page 76 Monday, April 18, 2011 7:41 AM
Page 88 of 183
Seat belts87
Using the system
Safety
Driving Tips
General Maintenance
Breakdown assistance
Technical Data
How are seat belts correctly fastened?Fastening three-point seat belts
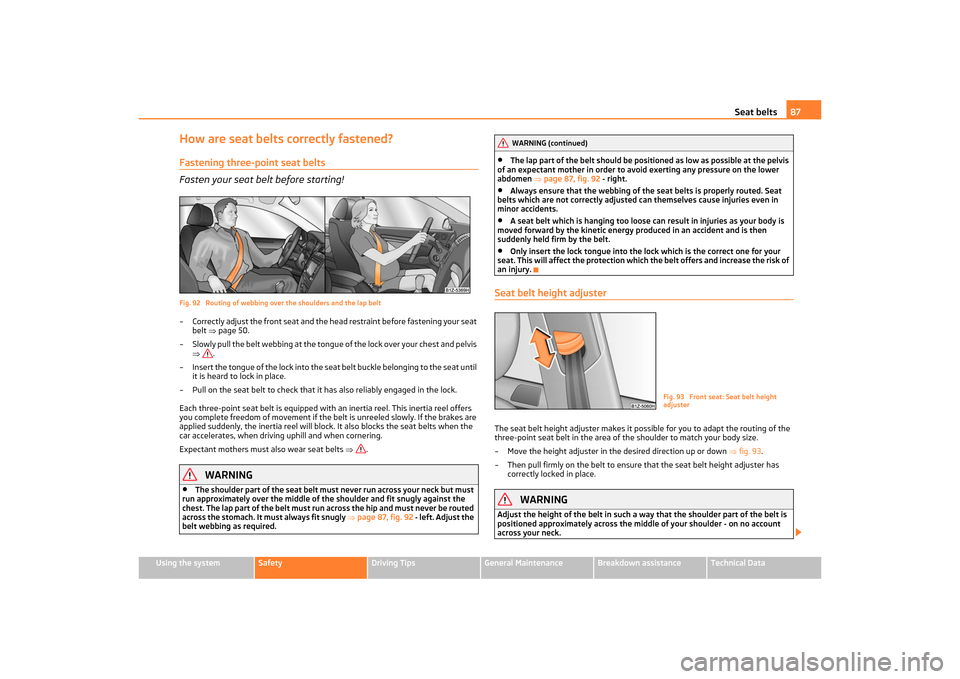
Fasten your seat belt before starting!Fig. 92 Routing of webbing over the shoulders and the lap belt– Correctly adjust the front seat and the he ad restraint before fastening your seat
belt page 50.
– Slowly pull the belt webbing at the tongue of the lock over your chest and pelvis .
– Insert the tongue of the lock into the seat belt buckle belonging to the seat until it is heard to lock in place.
– Pull on the seat belt to check that it has also reliably engaged in the lock.
Each three-point seat belt is equipped with an inertia reel. This inertia reel offers
you complete freedom of movement if the belt is unreeled slowly. If the brakes are
applied suddenly, the inertia reel will block. It also blocks the seat belts when the
car accelerates, when driving uphill and when cornering.
Expectant mothers must also wear seat belts .
WARNING
•
The shoulder part of the seat belt must never run across your neck but must
run approximately over the middle of th e shoulder and fit snugly against the
chest. The lap part of the belt must run across the hip and must never be routed
across the stomach. It must always fit snugly page 87, fig. 92 - left. Adjust the
belt webbing as required.
•
The lap part of the belt should be positi oned as low as possible at the pelvis
of an expectant mother in order to avoid exerting any pressure on the lower
abdomen page 87, fig. 92 - right.
•
Always ensure that the webbing of the seat belts is properly routed. Seat
belts which are not correctly adjusted c an themselves cause injuries even in
minor accidents.
•
A seat belt which is hanging too loose can result in injuries as your body is
moved forward by the kinetic energy pr oduced in an accident and is then
suddenly held firm by the belt.
•
Only insert the lock tongue into the lock which is the correct one for your
seat. This will affect the protection which th e b el t of f ers a n d i n c rea s e th e ri sk of
an injury.
Seat belt height adjusterThe seat belt height adjuster makes it po ssible for you to adapt the routing of the
three-point seat belt in the area of the shoulder to match your body size.
– Move the height adjuster in the desired direction up or down fig. 93 .
– Then pull firmly on the belt to ensure that the seat belt height adjuster has correctly locked in place.
WARNING
Adjust the height of the belt in such a wa y that the shoulder part of the belt is
positioned approximately ac ross the middle of your shoulder - on no account
across your neck.
WARNING (continued)
Fig. 93 Front seat: Seat belt height
adjuster
s2lk.2.book Page 87 Monday, April 18, 2011 7:41 AM
Page 107 of 183
Intelligent Technology
106
•
Changes to vehicle (e.g. on engine, on the brakes, on chassis or another combi-
nation of tyres and wheels) can influence the function of the ESP page 146,
“Accessories, changing and replacing parts”.
Electronic Differential Lock (EDL)*
The electronic differential lock prevents an individual wheel from
slipping.Models fitted with ESP are equipped with electronic differential lock (EDL).
General
The EDL makes it much easier, and sometimes at all possible, to start off, accelerate
and climb a steep hill when the conditions of the road surface are unfavourable.
Operating principle
The EDL is activated automatically, that is without any action on the part of the
driver. It monitors the speeds of the driven wheels with the aid of the ABS sensors.
Should only one drive wheel begin spinning on a slippery surface there will be an
appreciable difference in the speed of the driven wheels. The EDL function brakes
the slipping wheel and the differential transmits a greater driving force to the other
driven wheel. This control process is also accompanied by noises.
Overheating of the brakes
The EDL switches off automatically if unusually severe stresses exist in order to
avoid excessive heat genera tion in the disc brake on the wheel which is being
braked. The vehicle can continue to be driven and has the same characteristics as a
vehicle not fitted with EDL.
The EDL switches on again automatically as soon as the brake has cooled down.
WARNING
•
Carefully depress the accelerator when accelerating on uniformly slippery
road surfaces, such as ice and snow. The driven wheels might still spin despite
the EDL and affect the stability of the vehicle - risk of an accident!
•
You should always adapt your style of dr iving to the condition of road surface
and to the traffic situation even when your vehicle is fitted with EDL. The
increased safety offered must not temp t you to take greater risks than other-
wise - risk of an accident!
Note
•
If the ABS or ESP warning light comes on, this may also indicate a fault in the
EDL. Please have the vehicle inspected as soon as possible by a specialist garage.
•
Changes to vehicle (e.g. on engine, on the brakes, on chassis or another combi-
nation of tyres and wheels) can in fluence the function of the EDL page 146,
“Accessories, changing and replacing parts”.
Traction control system (TCS)
The traction control system prevents the driven wheels from spin-
ning when accelerating.General
The TCS makes it much easier, and sometimes at all possible, to start off, accelerate
and climb a steep hill when the conditions of the road surface are unfavourable.
Operating principle
The TCS switches on automatically when the engine is started and then conducts a
self-test. The system monitors the speeds of the driven wheels with the aid of the
ABS sensors. If the wheels are spinning, th e force transmitted to the road surface is
automatically adapted by reducing the engi ne speed. The system operates at all
speeds.
The TCS operates in combination with the ABS page 108, “Antilock brake system
(ABS)”. The TCS will not function if a fault exists in the ABS system.
The TCS warning light lights up in the instrument cluster when there is a fault on
the TCS
page 25.
During an intervention of th e system, the TCS warning light
flashes in the instru-
ment cluster page 25.
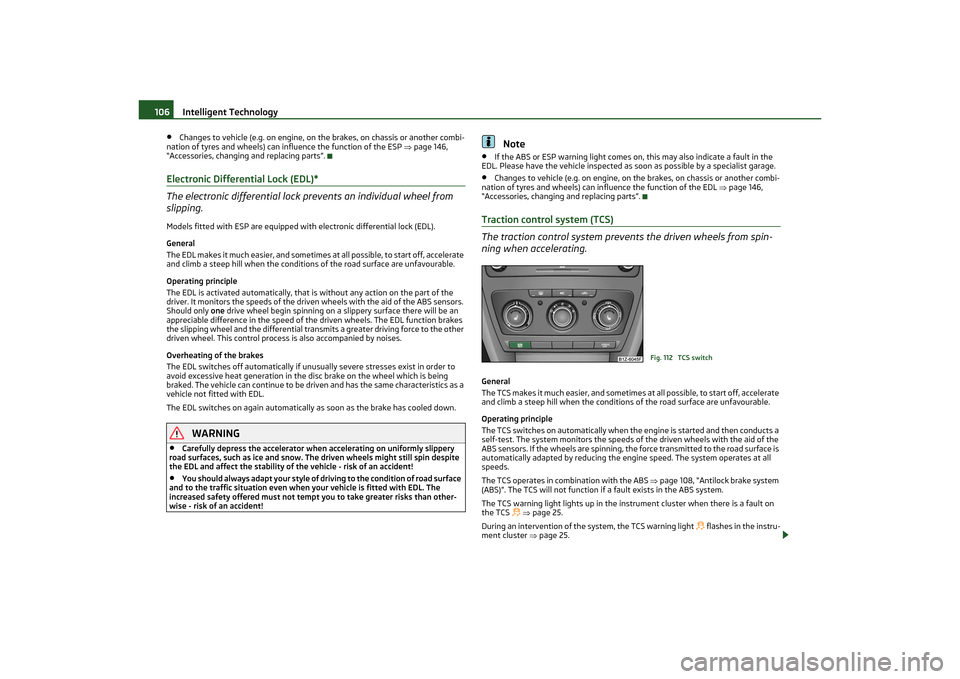
Fig. 112 TCS switch
s2lk.2.book Page 106 Monday, April 18, 2011 7:41 AM
Page 108 of 183
Intelligent Technology107
Using the system
Safety
Driving Tips
General Maintenance
Breakdown assistance
Technical Data
Switching off
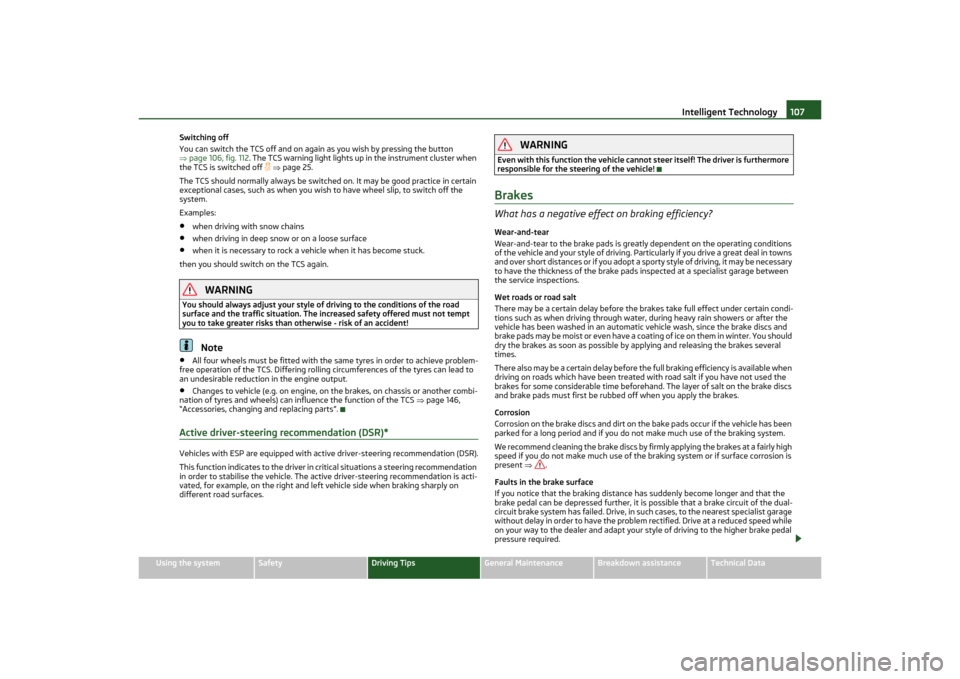
You can switch the TCS off and on again as you wish by pressing the button
page 106, fig. 112 . The TCS warning light lights up in the instrument cluster when
the TCS is switched off
page 25.
The TCS should normally always be switched on. It may be good practice in certain
exceptional cases, such as when you wish to have wheel slip, to switch off the
system.
Examples:
•
when driving with snow chains
•
when driving in deep snow or on a loose surface
•
when it is necessary to rock a vehicle when it has become stuck.
then you should switch on the TCS again.
WARNING
You should always adjust your style of driving to the conditions of the road
surface and the traffic situation. The in creased safety offered must not tempt
you to take greater risks than ot herwise - risk of an accident!
Note
•
All four wheels must be fitted with the same tyres in order to achieve problem-
free operation of the TCS. Differing rolling circumferences of the tyres can lead to
an undesirable reduction in the engine output.
•
Changes to vehicle (e.g. on engine, on the brakes, on chassis or another combi-
nation of tyres and wheels) can influence the function of the TCS page 146,
“Accessories, changing and replacing parts”.
Active driver-steerin g recommendation (DSR)*Vehicles with ESP are equipped with active driver-steering recommendation (DSR).
This function indicates to the driver in critical situations a steering recommendation
in order to stabilise the vehicle. The active driver-steering recommendation is acti-
vated, for example, on the right and left vehicle side when braking sharply on
different road surfaces.
WARNING
Even with this function the vehicle cannot steer itself! The driver is furthermore
responsible for the steering of the vehicle!BrakesWhat has a negative effect on braking efficiency?Wear-and-tear
Wear-and-tear to the brake pads is greatly dependent on the operating conditions
of the vehicle and your style of driving. Particularly if you drive a great deal in towns
and over short distances or if you adopt a sp orty style of driving, it may be necessary
to have the thickness of the brake pads inspected at a specialist garage between
the service inspections.
Wet roads or road salt
There may be a certain delay before the brakes take full effect under certain condi-
tions such as when driving through water, during heavy rain showers or after the
vehicle has been washed in an automatic vehicle wash, since the brake discs and
brake pads may be moist or even have a coating of ice on them in winter. You should
dry the brakes as soon as possible by applying and releasing the brakes several
times.
There also may be a certain delay before the full braking efficiency is available when
driving on roads which have been treated wi th road salt if you have not used the
brakes for some considerable time beforehand. The layer of salt on the brake discs
and brake pads must first be rubbed off when you apply the brakes.
Corrosion
Corrosion on the brake discs and dirt on the bake pads occur if the vehicle has been
parked for a long period and if you do not make much use of the braking system.
We recommend cleaning the brake discs by firmly applying the brakes at a fairly high
speed if you do not make much use of the braking system or if surface corrosion is
present .
Faults in the brake surface
If you notice that the braking distance has suddenly become longer and that the
brake pedal can be depressed further, it is possible that a brake circuit of the dual-
circuit brake system has failed. Drive, in such cases, to the nearest specialist garage
without delay in order to have the problem rectified. Drive at a reduced speed while
on your way to the dealer and adapt your style of driving to the higher brake pedal
pressure required.
s2lk.2.book Page 107 Monday, April 18, 2011 7:41 AM
Page 109 of 183
Intelligent Technology
108
Low brake fluid level
An insufficient level of brake fluid may result in problems in the brake system. The
level of the brake fluid is monitored electronically page 27, “Brake system ”.
WARNING
•
Only apply the brakes for the purpose of drying and cleaning the brake discs
if the traffic conditions permit this. Do not place any other road users in jeop-
ardy.
•
When retrospectively mounting a front spoiler, solid wheel hubs etc. one
must ensure that the air supply to the front wheel brakes is not reduced other-
wise the braking system could run too hot.
•
Allow for the fact that new brake pads do not achieve their full braking effi-
ciency until after the first 200 kilometres. New brake pads must be first “run in”
before they develop their optimal friction force. You can, however, compensate
for this slightly reduced braking force by increasing the pressure on the brake
pedal. This guideline also applies to an y new brake pads installed at a future
date.Caution
•
Never allow the brakes to rub by applying slight pressure if you do not wish to
brake the vehicle. This causes the brakes to overheat and can also result in a longer
braking distance and excessive wear.
•
Before negotiating a steep downhill section, reduce your speed, shift down into
the next lower gear. This enables you to ma ke full use of the braking power of the
vehicle and reduces the strain on the brakes. Any additional braking should be done
intermittently, no t continuously.Note
The brake light flashes automatically in ca se of an emergency braking at speeds
greater than 60 km/h or with the interven tion of the ABS, which lasts longer than
1.5 seconds. After the speed was reduced below 10 km/h or the vehicle was stopped,
the brake light stops flashing and the hazard warning light system switches on. The
hazard warning light system is switched off automatically after accelerating or
driving off again.Brake boosterThe brake booster boosts the pressure wh ich you generate with the brake pedal.
The necessary pressure is only generated when the engine is running.
WARNING
•
Never switch off the engine be fore the vehicle is stationary.
•
The brake booster only operates when the engine is running. Greater phys-
ical effort for braking is required when en gine is switched off. Because if you do
not stop as normal, this can caus e an accident and severe injuries.
Antilock brake system (ABS)ABS prevents the wheels locking when braking.General
The ABS contributes significantly to enhancing the active safety of your vehicle.
Compared to a vehicle not fitted with ABS, you are able to retain optimal steering
ability even during a full brake application on a slippe ry road surface because the
wheels do not lock up.
You must not expect, however, that the braking distance will be shorter under all
circumstances as a result of the ABS. The braking distance for example on gravel
and fresh snow, when you should anyway be driving slowly and cautiously, will be
longer.
Operating principle
The brake pressure will be reduced on a wheel which is rotating at a speed which is
too low for the speed of the vehicle and tending to lock. This control cycle is notice-
able from a pulsating movement of the brake pedal which is accompanied by
noises. This is consciously intended to pr ovide the driver with the information that
the wheels are tending to lock (ABS control range). You must always keep the brake
pedal depressed to enable the ABS to optimally control the brake application in this
braking range. Never interrupt the application of the brakes!
WARNING
•
The ABS can also not overcome the physical limits of your vehicle. Please do
not forget this, particularly when driving on icy or wet road surfaces. If the ABS
is operating within the control range, adapt your speed immediately to the
conditions of the road surface and the traffic situation. The increased safety
offered by the ABS must not tempt you to take greater risks than otherwise -
risk of an accident!
•
The normal braking system is still fully functional if there is an ABS fault.
Visit a specialist garage as quickly as poss ible and adjust your style of driving to
s2lk.2.book Page 108 Monday, April 18, 2011 7:41 AM
Page 110 of 183
Intelligent Technology109
Using the system
Safety
Driving Tips
General Maintenance
Breakdown assistance
Technical Data
take account of the ABS fault in the meantime since you will not know the
extent of the fault and in how far
the braking efficiency is affected.
Note
•
A warning light comes on if a fault occurs in the ABS system
page 26.
•
Changes to vehicle (e.g. on engine, on the brakes, on chassis or another combi-
nation of tyres and wheels) can influence the function of the ABS page 146,
“Accessories, changing and replacing parts”.
Brake Assist*During a severe brake application (e.g. if a hazard exists), the Brake Assist increases
the braking force and thus makes it possible to rapidly produce the pressure
required in the brake system.
The majority of drivers do apply the brakes in good time in dangerous situations, but
do not depress the brake pedal with sufficient pressure. Consequently, it is not
possible for the vehicle to achieve its maximum deceleration and the vehicle covers
a greater distance than necessary.
The Brake Assist is activated by the very quick operation of the brake pedal. In such
cases, a much greater braking pressure exists than during a normal brake applica-
tion. This makes it possible, even with a relatively low resistance of the brake pedal,
to produce an adequate pressure in the brake system in the shortest possible time,
which is required for maximum deceleration of the car. You must apply the brake
pedal firmly and hold it in this position in order to achieve the shortest possible
braking distance.
The Brake Assist is able to help you achi eve a shorter braking distance in emergency
situations by rapidly producing the pressure required in the brake system. It fully
exploits the attributes of the ABS. After you release the brake pedal, the function
of the Brake Assist is automatically swit ched off and the brakes operate in the
normal way.
The Brake Assist is part of the ESP system. If a fault occurs in the ESP, the Brake
Assist function is also not availa ble. Further information on the ESP page 105.
WARNING
•
The Brake Assist is also not able to overcome the physical limits of your
vehicle in terms of the braking distance required.
•
Adapt your speed to the conditions of th e road surface and to the traffic situ-
ation.
•
The increased safety offered by the Brake Assist must not tempt you to take
a greater safety risk than otherwise.
Electromechanical power steeringThe power steering enables you to steer the vehicle with less physical force.
With the electromechanical power steering, the steering assist is automatically
adapted to the speed and to the steering angle.
It is still possible to fully steer the vehicle if the power steering fails or if the engine
is not running (vehicle being towed in). The only difference is that greater physical
effort is required.
If there is a fault in the power steering, the warning light
or lights up in the
instrument cluster page 24.
WARNING
Contact your specialist garage if the power steering is defective.Tyre inflation pressure-control system*The tyre inflation pressure-control system compares with the aid of the ABS
sensors the speed and also the rolling circumference of the individual wheels. If the
rolling circumference of a wheel is changed, the warning light
lights up in the
WARNING (continued)
WARNING (continued)
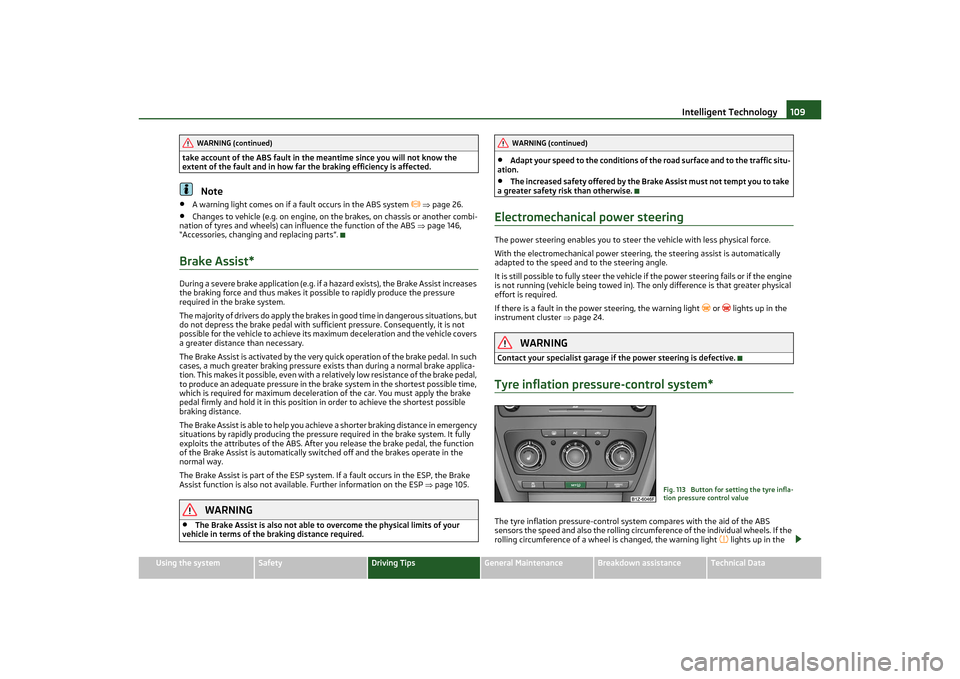
Fig. 113 Button for setting the tyre infla-
tion pressure control value
s2lk.2.book Page 109 Monday, April 18, 2011 7:41 AM