charging SKODA RAPID 2012 1.G Owner's Manual
[x] Cancel search | Manufacturer: SKODA, Model Year: 2012, Model line: RAPID, Model: SKODA RAPID 2012 1.GPages: 180, PDF Size: 4.36 MB
Page 7 of 180

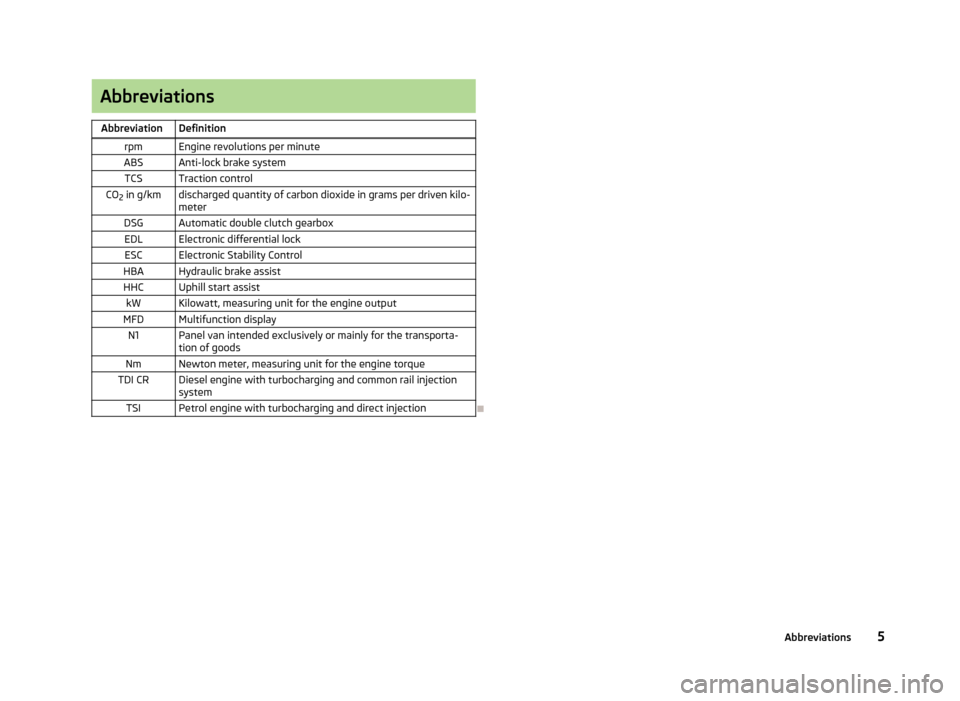
Abbreviations
Abbreviation Definition rpm Engine revolutions per minute
ABS Anti-lock brake system TCS Traction control
CO 2 in g/km discharged quantity of carbon dioxide in grams per driven kilo-
meter
DSG Automatic double clutch gearbox EDL Electronic differential lockESC Electronic Stability Control
HBA Hydraulic brake assist HHC Uphill start assist kW Kilowatt, measuring unit for the engine output
MFD Multifunction display N1 Panel van intended exclusively or mainly for the transporta- tion of goods
Nm Newton meter, measuring unit for the engine torque
TDI CR Diesel engine with turbocharging and common rail injection system
TSI Petrol engine with turbocharging and direct injection Ð 5
Abbreviations
Page 40 of 180

Interior light
Interior lighting – version 1
Fig. 23
Interior lighting – version 1
Switching on
› Press switch A
» Fig. 23 towards the edge of the light, the symbol
appears.
Switching off
› Press the switch A
» Fig. 23 in the middle position
O.
Operating with the door contact switch
› Press switch A
» Fig. 23 towards the middle of the light, the symbol
ap-
pears.
Reading lights
› Press switch B
» Fig. 23 to switch the reading lights on or off.
If operating lights with the door contact switch is enabled (switch A
» Fig. 23 is
in position ), the light will come on when:
› the vehicle is unlocked;
› one of the doors is opened;
› or the ignition key is removed.
If operating lights with the door contact switch is enabled (switch A
is in position
), the light will turn off when:
› the vehicle is locked;
› the ignition is switched on;
› about 30 seconds after all the doors have been closed.
If a door remains open, or if the switch A
is in the position
, the interior light
goes out after 10
minutes to prevent the battery from discharging. Ð Interior lighting – version 2
Fig. 24
Interior lighting – version 2
Switching on
› Press the switch
» Fig. 24 into position .
Switching off
› Press the switch
» Fig. 24 into position 0.
Operating with the door contact switch
› Press the switch
» Fig. 24 into position .
The same principles apply for interior lighting version 2 as for » page 38, Interior
lighting – version 1 . Ð Interior lights at the rear
Fig. 25
Interior lights at the rear
Press switch » Fig. 25 to turn the light light on or off. Ð
38 Using the system
Page 135 of 180

Clear water is not sufficient to intensively clean the windscreen and headlights.
We therefore recommend using clean water with a screen cleaner
(including anti-
freeze in the winter) that is able to remove stubborn dirt.
Antifreeze should always be added to the cleaning water in the winter even if the
vehicle is fitted with heated windscreen washer nozzles.
Under exceptional circumstances, methylated spirits can also be used if no screen
cleaner with antifreeze is available. The concentration of methylated spirits must
not be more than 15
%. The freeze protection at this concentration is sufficient
only to -5 °C. CAUTION
■ Under no circumstances must radiator antifreeze or other additives be added to
the windscreen washer fluid.
■ If the vehicle is fitted with a headlight cleaning system, only cleaning products
which do not attack the polycarbonate coating of the headlights must be added
to the windscreen washer fluid. Note
Do not remove the filter from the windscreen washer fluid reservoir when replen-
ishing it with liquid otherwise the liquid transportation system can be contamina-
ted, which can cause the windscreen washer system to malfunction. ÐVehicle battery
ä
Introduction
This chapter contains information on the following subjects:
Battery cover 134
Checking the battery electrolyte level 135
Operation in winter 135
Charging a vehicle battery 135
Disconnecting and reconnecting the vehicle battery 136
Replacing the vehicle battery 136
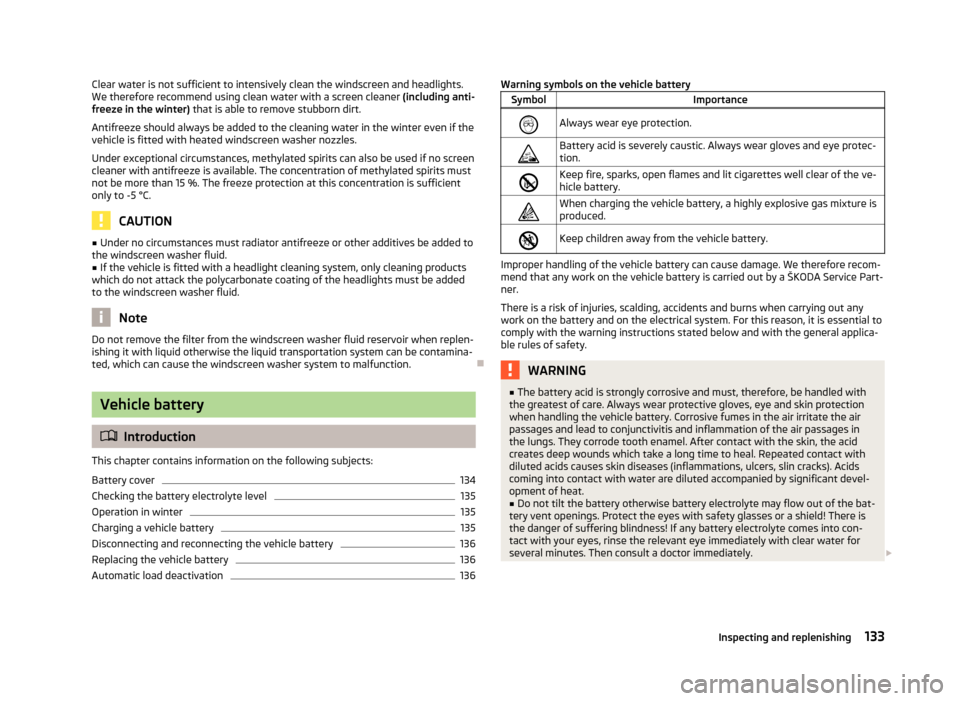
Automatic load deactivation 136Warning symbols on the vehicle battery
Symbol Importance
Always wear eye protection.
Battery acid is severely caustic. Always wear gloves and eye protec-
tion.
Keep fire, sparks, open flames and lit cigarettes well clear of the ve-
hicle battery.
When charging the vehicle battery, a highly explosive gas mixture is
produced.
Keep children away from the vehicle battery. Improper handling of the vehicle battery can cause damage. We therefore recom-
mend that any work on the vehicle battery is carried out by a
ŠKODA Service Part-
ner.
There is a risk of injuries, scalding, accidents and burns when carrying out any
work on the battery and on the electrical system. For this reason, it is essential to
comply with the warning instructions stated below and with the general applica-
ble rules of safety. WARNING
■ The battery acid is strongly corrosive and must, therefore, be handled with
the greatest of care. Always wear protective gloves, eye and skin protection
when handling the vehicle battery. Corrosive fumes in the air irritate the air
passages and lead to conjunctivitis and inflammation of the air passages in
the lungs. They corrode tooth enamel. After contact with the skin, the acid
creates deep wounds which take a long time to heal. Repeated contact with
diluted acids causes skin diseases (inflammations, ulcers, slin cracks). Acids
coming into contact with water are diluted accompanied by significant devel-
opment of heat.
■ Do not tilt the battery otherwise battery electrolyte may flow out of the bat-
tery vent openings. Protect the eyes with safety glasses or a shield! There is
the danger of suffering blindness! If any battery electrolyte comes into con-
tact with your eyes, rinse the relevant eye immediately with clear water for
several minutes. Then consult a doctor immediately. £
133
Inspecting and replenishing
Page 136 of 180

WARNING (Continued)
■ Splashes of acid on your skin or clothes should be neutralised as soon as
possible using soap suds and then rinsed with plenty of water. If acid was
swallowed, seek immediate medical attention.
■ Keep children away from the vehicle battery.
■ When you charge a battery, hydrogen is released, and a highly explosive gas
mixture is also produced. An explosion can be caused through sparkling over
during unclamping or loosening of the cable plug while the ignition is on. ■ Bridging of the poles will create a short circuit (e.g. through metal objects,
cables). Possible consequences of a short circuit: Melting of lead struts, explo-
sion and burning of the battery, jets of acid spurting out.
■ It is prohibited to work with a naked flame and light, to smoke or to carry
out any activities which produce sparks. Avoid creating sparks when working
with cables and electrical devices. Strong sparking represents a risk of injury. ■ Before carrying out any work on the electrical system, switch off the engine,
the ignition and all of the electrical components and disconnect the negative
terminal
(-) on the battery. If you wish to replace a bulb it suffices to switch off
the relevant light.
■ Never charge a frozen or thawed vehicle battery – risk of explosion and
caustic burns! Replace a frozen vehicle battery.
■ Never jump-start vehicle batteries with an electrolyte level that is too low –
risk of explosion and caustic burns.
■ Never use a damaged vehicle battery – risk of explosion! Replace a damaged
vehicle battery immediately. CAUTION
■ The vehicle battery must only be disconnected if the ignition is switched off,
otherwise the vehicle's electrical system (electronic components) can be dam-
aged. When disconnecting the battery from the electrical system, first of all dis-
connect the negative terminal
(-) of the battery. Then disconnect the positive ter-
minal (+).
■ When connecting the battery to the electrical system, first connect the positive
terminal (+) of the battery. Then connect the negative terminal
(-). Under no cir-
cumstances must the battery cables be connected incorrectly – risk of a cable fire.
■ Ensure that battery acid does not come into contact with the bodywork – risk of
damage to the paintwork.
■ Do not place the battery in direct daylight in order to protect the vehicle battery
housing from the effects of ultra-violet light. ■
If the vehicle has not been driven for more than 3 to 4 weeks, the battery will
discharge. This is because certain electrical components consume electricity (e.
g.
control units) also in idle state. Prevent the battery from discharging by discon-
necting the battery's negative terminal or continuously charging the battery with
a very low charging current.
■ If the vehicle is frequently used for making short trips, the vehicle battery will
not have time to charge up sufficiently and may discharge. For the sake of the environment
A vehicle battery that has been removed is a special type of hazardous waste.
These must be disposed of in accordance with national legal regulations. Note
You should replace batteries older than 5 years. Ð Battery cover
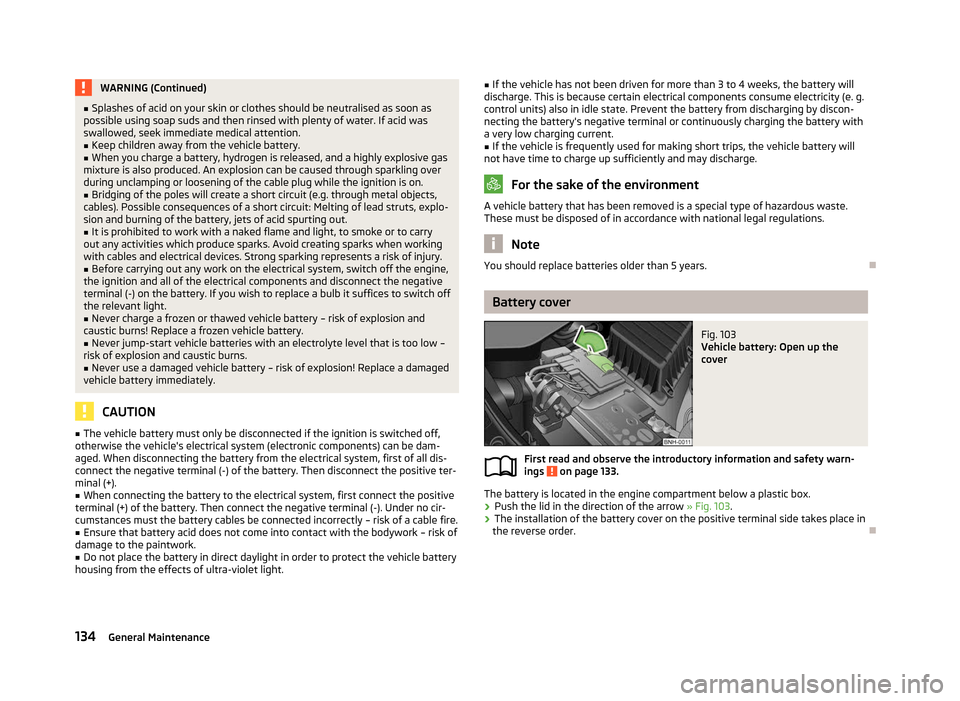
Fig. 103
Vehicle battery: Open up the
cover
First read and observe the introductory information and safety warn-
ings on page 133.
The battery is located in the engine compartment below a plastic box.
› Push the lid in the direction of the arrow
» Fig. 103.
› The installation of the battery cover on the positive terminal side takes place in
the reverse order. Ð
ä
134 General Maintenance
Page 137 of 180

Checking the battery electrolyte level
Fig. 104
Vehicle battery: Electrolyte level
indicator
First read and observe the introductory information and safety warn-
ings on page 133.
We recommend you have the electrolyte level checked by a ŠKODA specialist ga-
rage from time to time, especially in the following cases.
› High outside temperatures.
› Long daily drives
› After each charge
» page 135.
On vehicles with a vehicle battery fitted with a colour indicator, the so-called
magic eye » Fig. 104 , the electrolyte level can be determined by looking at the
change in colour.
Air bubbles can influence the colour of the indicator. For this reason carefully
knock on the indicator before carrying out the check.
› Black colour – electrolyte level is correct.
› Colourless or light yellow colour – electrolyte level too low, the battery must be
replaced. Note
■ The battery electrolyte level is periodically checked by a ŠKODA Service Partner
as part of the Inspection Service. ■ For technical reasons, on vehicles with the description “AGM”, the electrolyte
level cannot be checked. ■ Vehicles with a START-STOP system are fitted with a battery control unit for
checking the energy level for the recurring engine start. Ð
ä Operation in winter
First read and observe the introductory information and safety warn-
ings on page 133.
At low temperatures, the vehicle battery only has part of the initial power output
that it has at normal temperatures.
A discharged vehicle battery may already freeze at temperatures just below 0
°C.
We therefore recommend that you have the battery checked and, if necessary, re-
charged by a ŠKODA Service Partner before the start of the winter. Ð Charging a vehicle battery
First read and observe the introductory information and safety warn-
ings on page 133.
A properly charged vehicle battery is essential for reliably starting the engine.
› Switch off the ignition and all of the electrical components.
› Only for “quick-charging”: Disconnect both battery cables (first of all “negative”,
then
“positive”).
› Attach the terminal clamps of the charger to the battery terminals (red =
“posi-
tive
”, black = “negative”).
› Only now plug the mains cable of the charger into the power socket and switch
on the device.
› When charging is completed: Switch off the charger and remove the mains ca-
ble from the power socket.
› Only then disconnect the charger's terminal clamps.
› Reconnect the cables to the battery, if necessary (first of all
“positive”, then
“negative
”).
It is not normally necessary to disconnect the cables of the battery if you re-
charge the vehicle battery using low amperages (as for example from a mini-
charger). Refer to the instructions of the charger manufacturer.
A charging current of 0.1 multiple of the total vehicle battery capacity (or lower)
must be used until full charging is achieved.
It is, however, necessary to disconnect both cables before charging the battery
with high amperages, so-called “ quick-charging”. £
ä
ä
135
Inspecting and replenishing
Page 138 of 180

“Quick-charging” the vehicle battery is
dangerous and requires a special charger
and specialist knowledge. We therefore recommend having the quick charging of
vehicle batteries undertaken by a
ŠKODA specialist garage.
The vent plugs of the vehicle battery should not be opened for charging. CAUTION
On vehicles with the START/STOP system, the pole terminal of the charger must
not be connected directly to the negative terminal of the vehicle battery, but only
to the engine earth » page 153, Jump-starting in vehicles with the
START-STOP
system . ÐDisconnecting and reconnecting the vehicle battery
First read and observe the introductory information and safety warn-
ings on page 133.
On disconnecting and reconnecting the vehicle battery the following functions
are initially deactivated or are no longer able to operate fault-free:
Operation Operating measure
Enter the radio/navigation system code num-
ber » User manual of the radio
or » user manual of the naviga-
tion system
Setting the clock » page 11
Data in the multifunction display are deleted. » page 11Note
We recommend having the vehicle checked by a ŠKODA Service Partner to ensure
the full functionality of all electrical systems. ÐReplacing the vehicle battery
First read and observe the introductory information and safety warn-
ings on page 133.
When replacing a battery, the new vehicle battery must have the same capacity,
voltage, amperage and be the same size. Suitable types of vehicle batteries can
be purchased from a
ŠKODA Service Partner.
ä
ä We recommend that the battery is replaced by a ŠKODA Service Partner, where
the new vehicle battery will be installed properly and the original battery will be
disposed of in accordance with national regulations.
Ð Automatic load deactivation
First read and observe the introductory information and safety warn-
ings on page 133.
An intelligent vehicle power management system automatically takes various
measures at high loads on the vehicle battery to prevent discharging of the bat-
tery: This manifests itself by the following:
› The idling speed is raised to allow the generator to deliver more electricity to
the electrical system.
› Where appropriate large consumers of power, e.g. seat heaters, rear window
heaters, voltage supply to the 12V power socket, have their power limited or in
case of emergency shut off completely. Note
Despite such intervention by the vehicle electric system management, the vehicle
battery may be drained. For example, when the ignition is switched on a long time
with the engine turned off or the side or parking lights are turned on during lon-
ger parking. Driving comfort is not put at risk by any shutting off of consumers.
Often the driver is not aware of it having taken place. Ð ä
136 General Maintenance
Page 172 of 180

Index
A
ABS 73
Warning light 20
Accessories 144
Adjusting Exterior mirror 42
Adjusting seats 92
Adjustment Seat 45
Aerial 118
see Radio reception 120
Airbag 99
Deployment 99
Front airbag 100
Head airbag 102
Side airbag 101
Airbag system 99
Air conditioning system Air outlet vents 60
Climatronic 65
Manual air conditioning system 62
Alarm 29
Anti-theft alarm system 29
Antilock brake system 73
Armrest 45
rear 48
Ashtray 53
ASR 73
Assist systems ABS 20, 73
ASR 73
Cruise control systems (CCS) 75
EDL 73
ESC 19, 72
Parking aid 74START/STOP 77
TCS 20
Auto Check Control 16
Automatic gearbox 79
Dynamic shift programme 82
Emergency programme 82
Information for driving 79
Kickdown 82
Manual shifting of gears 81
Parking 80
Selector lever-emergency unlocking 83
Selector lever lock 81
Selector lever positions 80
Starting off 80
Stopping 80
Tiptronic 81
Automatic load deactivation 136
AUX-IN 90
Avoiding damage to your vehicle 113
B
Before setting off 91
Belts 95
Belt tensioners 98
Bonnet Closing 128
Opening 128
Boot Class
N1 vehicles 49
Cover 50
Emergency unlocking 31
Fastening elements 49
Fixing nets 50
Hooks 50
Light 49
see Boot lid 31
Unlocking the boot lid 31
Boot lid 31
Automatic locking 31
Brake assist 72Brake booster 72
Brake fluid Checking 132
Brakes Brake booster 72
Handbrake 72
Running in 109
Warning light 17
Braking Brake fluid 132
Breakdown kit 149
Bulbs Replacing 159
Button in the driver's door Electrical power windows 31
C
Car computer see Multifunction display 11
Car jack 145
Carrier 51
Catalytic converter 109
Central locking button 27
Central locking system 25
lock 27
unlock 26
Changes 144
Changing Engine oil 130
Wheel 146
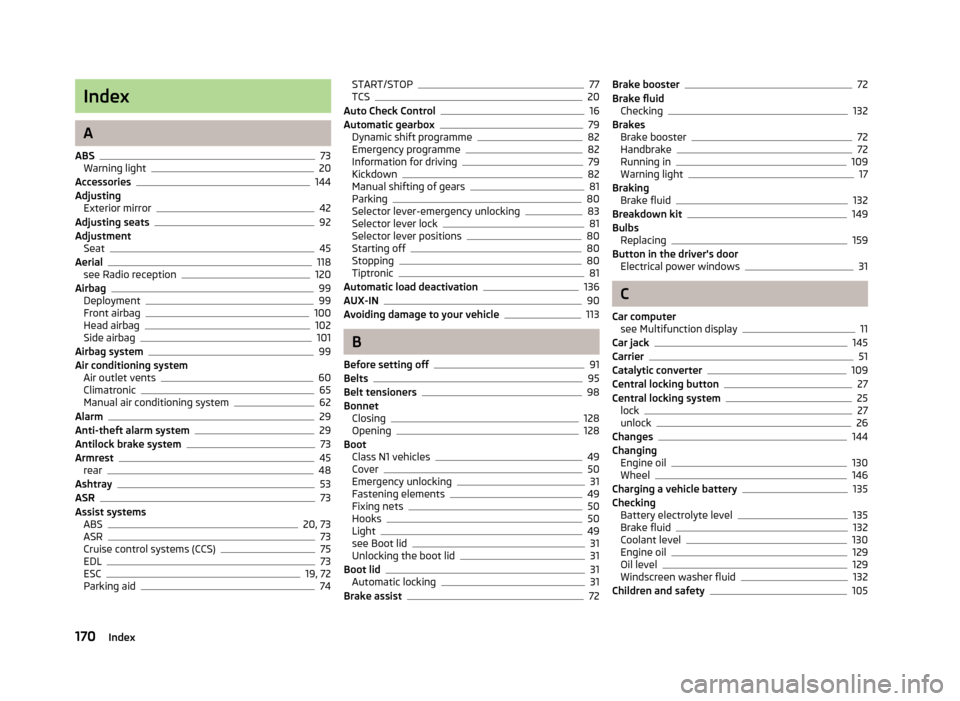
Charging a vehicle battery 135
Checking Battery electrolyte level 135
Brake fluid 132
Coolant level 130
Engine oil 129
Oil level 129
Windscreen washer fluid 132
Children and safety 105
170 Index
Page 176 of 180

START STOP
Jump-starting 153
Steering force assistance 69
Steering wheel 69
Storage 54
Storage compartments 54
Sun visors 39
Switching off the engine 70
T
Taking care of the vehicle Artificial leather 122
Material coverings 122
Materials 122
Natural leather 122
Seat belts 123
Taking care of your vehicle 117
Automatic car wash system 118
Chrome parts 119
Cleaning the wheels 121
Door lock cylinders 120
Headlight lenses 120
High-pressure cleaner 118
Plastic parts 119
Polishing the paintwork 119
Preservation 119
Rubber seals 120
Washing 118
Washing by hand 118
Wash system 118
TCS Warning light 20
Technical data 164
Telephone 84
Tiptronic 79
see automatic gearbox 81
Tool 145
TOP TETHER 108
Towing 153
Towing a trailer 115Towing eye 154
Towing protection 29
Traction control 73
Trailer 115
Towing a trailer 115
Transport Boot 48
Roof rack system 51
Transporting children safely 105
Two-way radio systems 84
Type plate 164
Tyre repair 149
Tyres see Wheels and tyres 139
U
Underbody protection 121
unlock Central locking system 26
Unlocking Remote control 28
Uphill start assist 72
USB 90
V
Vehicle battery Automatic load deactivation 136
Charging 135
Checking the electrolyte level 135
Operation in winter 135
Replacing 136
Safety instructions 133
Vehicle Condition see Auto Check Control 16
Vehicle data sticker 164
Vehicle dimensions 165
Vehicle key 24
Vehicle tool kit 145Visors
see Sun visors 39
W
Warning lights 16
Warning symbols see Warning lights 16
Warning triangle 145
Washing 117
Automatic car wash system 118
by hand 118
Chrome parts 119
High-pressure cleaner 118
Weights 164
Wheel bolts Anti-theft wheel bolt 149
Caps 141
Loosening and tightening 148
Wheels 137
Wheels and tyres Changing a wheel 146
Full wheel trim 141
General information 137
Handling wheels and tyres 139
new tyres 139
Service life of tyres 138
Snow chains 143
Spare wheel 140
Wheel bolts 142
Winter tyres 142
Windows De-icing 120
See Electrical power windows 31
Windscreen washer fluid Checking 132
Replenishing 132
Warning light 22
Winter 132
Windscreen washer system 132
Windscreen wipers 40
174 Index