display SKODA RAPID 2016 1.G Owner's Guide
[x] Cancel search | Manufacturer: SKODA, Model Year: 2016, Model line: RAPID, Model: SKODA RAPID 2016 1.GPages: 184, PDF Size: 27.06 MB
Page 50 of 184
SafeLockRead and observe
and on page 46 first.
SafeLock prevents the doors from being opened from inside as well as window
operation. This makes an attempted break-in to the vehicle more difficult.
Activating
SafeLock is activated when the vehicle is locked from the outside.
This function is pointed out by the following message on the display of the in-
strument cluster after the ignition is switched off.
Check SAFELOCK! Owner's Manual!CHECK SAFELOCK
Activation display
When SafeLock is activated, the warning light in the driver's door flashes for 2
seconds in rapid succession, then starts to flash at longer intervals.
Deactivating
▶ By locking twice within 2 seconds.
▶ or: by deactivating the interior monitor and the towing protection
» page 50 .
The warning light in the driver door flashes rapidly for about 2 seconds, then
goes out and starts to flash at longer intervals after about 30 seconds.
If the vehicle is locked and the safe securing system is switched off, the door
can be opened separately from the inside by a single pull on opening lever.
The SafeLock switches on the next time the vehicle is locked.
WARNINGIf the vehicle is locked and the safe securing system activated, no people
must remain in the car as it will then not be possible to either unlock a door
or open a window from the inside. The locked doors make it more difficult
for rescuers to get into the vehicle in an emergency – risk to life!
Individual settings
Read and observe
and on page 46 first.
The following functions of the central locking system can be set individually in
the Infotainment » Owner´s Manual - Infotainment .
All doors
The function allows you to unlock all doors, the boot lid and the fuel filler flap.
Single door
The function allows you to unlock only the driver's door and the fuel filler flap
with the radio remote control. KESSY allows the unlocking of a single door
which is in the vicinity of the key, as well as the fuel filler flap. The other doors
and the boot lid are only unlocked once the door handle is unlocked or
touched.
Doors on a vehicle side
This function enables you to unlock both doors on the driver's side and the
fuel filler flap with the radio remote control unit. KESSY allows the unlocking of
both doors which are in the vicinity of the key, as well as the fuel filler flap. The
other doors and the boot lid are only unlocked once the door handle is un-
locked or touched.
Automatic locking/unlocking
This function enables the locking of all doors and the boot lid from a speed of
15 km / h. Opening the doors and the boot lid from the outside is not possible.
The renewed unlocking of the doors and the boot lid is carried out when the
ignition key is removed or when the door is opened from inside (depending on
the individual setting for the central locking system).
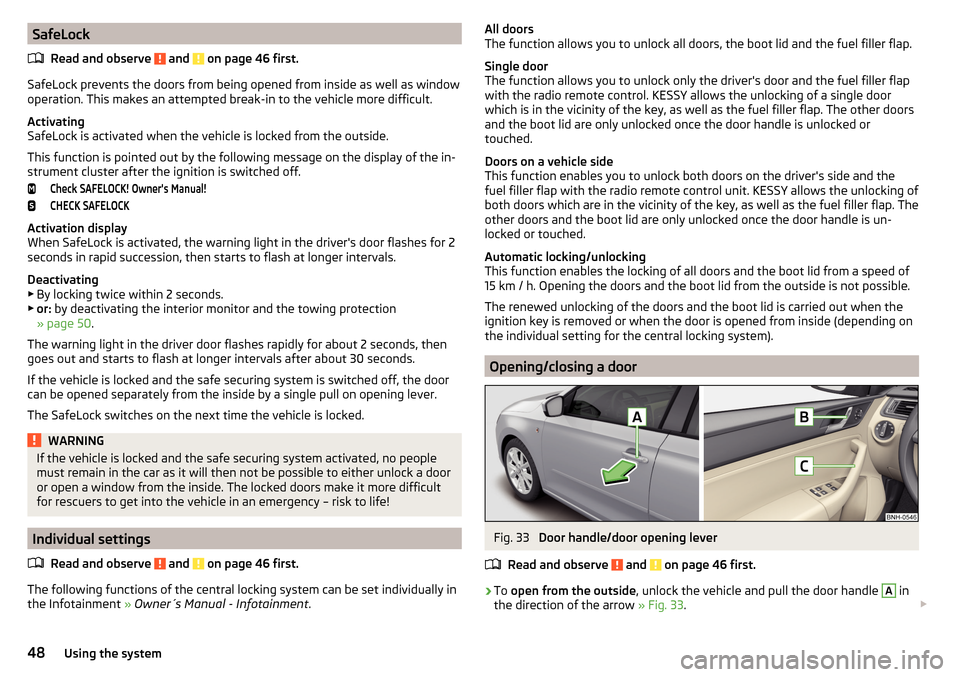
Opening/closing a door
Fig. 33
Door handle/door opening lever
Read and observe
and on page 46 first.
›
To open from the outside , unlock the vehicle and pull the door handle
A
in
the direction of the arrow » Fig. 33.
48Using the system
Page 51 of 184
›To
open from the inside , pull the door opening lever B and push the door
away from you.›
To lock from the inside , grab handle
C
and close the door.
WARNING■
The door must be closed properly, otherwise it could open whilst the ve-
hicle is in motion - can be fatal!■
Only open and close the door when there is no one in the opening/closing
range – risk of injury!
■
Never drive with the doors open - there is a risk of death!
■
An opened door can close automatically if there is a strong wind or the
vehicle is on an incline – risk of injury!
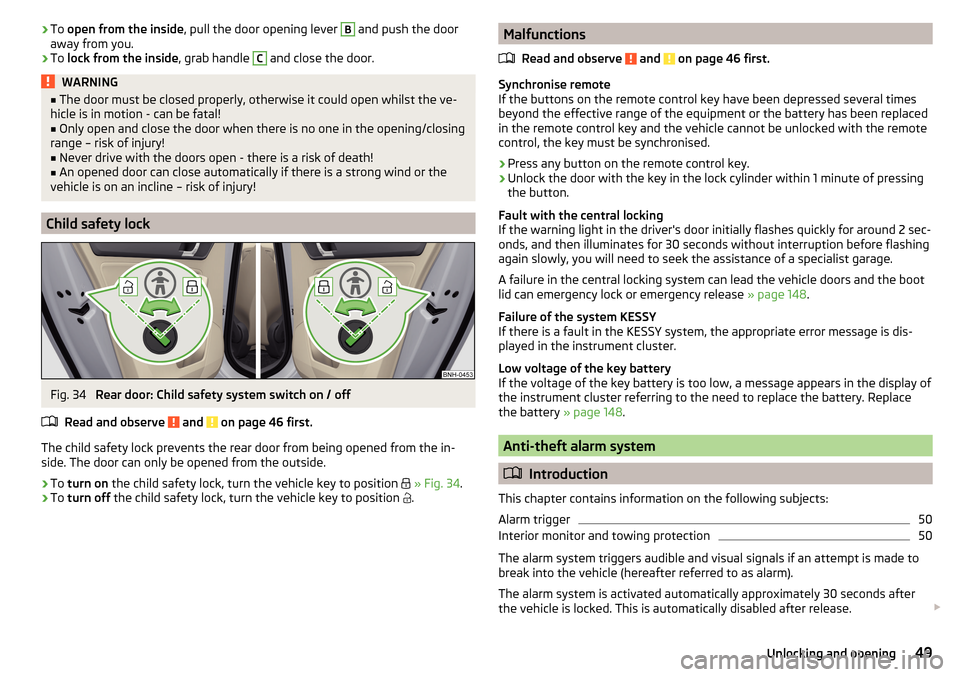
Child safety lock
Fig. 34
Rear door: Child safety system switch on / off
Read and observe
and on page 46 first.
The child safety lock prevents the rear door from being opened from the in-
side. The door can only be opened from the outside.
›
To turn on the child safety lock, turn the vehicle key to position
» Fig. 34 .
›
To turn off the child safety lock, turn the vehicle key to position
.
Malfunctions
Read and observe
and on page 46 first.
Synchronise remote
If the buttons on the remote control key have been depressed several times
beyond the effective range of the equipment or the battery has been replaced
in the remote control key and the vehicle cannot be unlocked with the remote
control, the key must be synchronised.
›
Press any button on the remote control key.
›
Unlock the door with the key in the lock cylinder within 1 minute of pressing the button.
Fault with the central locking
If the warning light in the driver's door initially flashes quickly for around 2 sec-
onds, and then illuminates for 30 seconds without interruption before flashing
again slowly, you will need to seek the assistance of a specialist garage.
A failure in the central locking system can lead the vehicle doors and the boot
lid can emergency lock or emergency release » page 148.
Failure of the system KESSY
If there is a fault in the KESSY system, the appropriate error message is dis-
played in the instrument cluster.
Low voltage of the key battery
If the voltage of the key battery is too low, a message appears in the display of the instrument cluster referring to the need to replace the battery. Replace
the battery » page 148.
Anti-theft alarm system
Introduction
This chapter contains information on the following subjects:
Alarm trigger
50
Interior monitor and towing protection
50
The alarm system triggers audible and visual signals if an attempt is made to
break into the vehicle (hereafter referred to as alarm).
The alarm system is activated automatically approximately 30 seconds after the vehicle is locked. This is automatically disabled after release.
49Unlocking and opening
Page 63 of 184
Headlight cleaning systemRead and observe
and on page 59 first.
The headlights are cleaned with every first and after every tenth spraying of
the windscreen under the following conditions.
The ignition is switched on.
The low beam is switched on.
The outside temperature is between -11° C to +36° C.
To ensure the correct functioning of the system, even in winter, this needs to be regularly cleared of snow and ice (e.g. using the de-icing spray).
Rear view mirror
Introduction
This chapter contains information on the following subjects:
Interior mirror dimming
61
Exterior mirrors
62WARNINGExterior mirrors increase the field of view, however, they make objects ap-
pear smaller and further away. Therefore, use the interior mirror whenever
possible, for assessing the distances to the vehicles following behind.
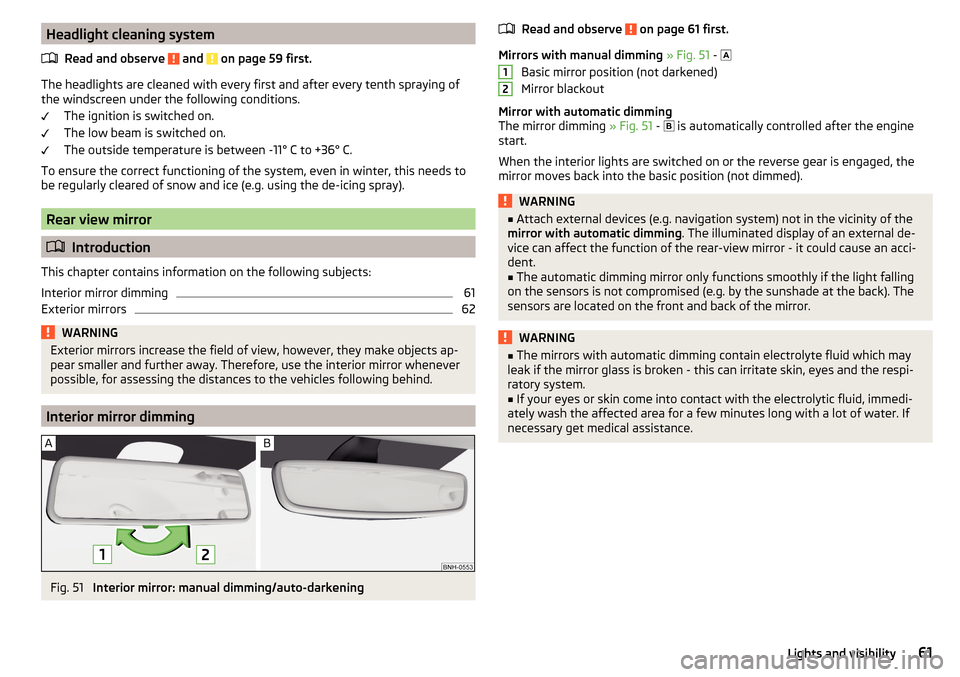
Interior mirror dimming
Fig. 51
Interior mirror: manual dimming/auto-darkening
Read and observe on page 61 first.
Mirrors with manual dimming » Fig. 51 -
Basic mirror position (not darkened)
Mirror blackout
Mirror with automatic dimming
The mirror dimming » Fig. 51 -
is automatically controlled after the engine
start.
When the interior lights are switched on or the reverse gear is engaged, the
mirror moves back into the basic position (not dimmed).
WARNING■ Attach external devices (e.g. navigation system) not in the vicinity of the
mirror with automatic dimming . The illuminated display of an external de-
vice can affect the function of the rear-view mirror - it could cause an acci-
dent.■
The automatic dimming mirror only functions smoothly if the light falling
on the sensors is not compromised (e.g. by the sunshade at the back). The
sensors are located on the front and back of the mirror.
WARNING■ The mirrors with automatic dimming contain electrolyte fluid which may
leak if the mirror glass is broken - this can irritate skin, eyes and the respi-
ratory system.■
If your eyes or skin come into contact with the electrolytic fluid, immedi-
ately wash the affected area for a few minutes long with a lot of water. If
necessary get medical assistance.
1261Lights and visibility
Page 68 of 184

Useful features
Interior fittings
Introduction
This chapter contains information on the following subjects:
Ticket holder
66
stowage compartments in the doors
67
Storage compartment in the centre console
67
USB and AUX input
67
Storage compartment on the dashboard
67
Cup holders
68
Waste container
68
Cigarette lighter
69
Ashtray
69
12-volt socket
70
Multimedia holder
70
Storage compartment in the front arm rest
71
Glasses compartment
71
Storage compartment on the front passenger side
71
Storage compartment for umbrella
72
Clothes hook
72
Storage pockets on the backs of the front seats
72
Storage pockets on the inner sides of the front seats
72WARNING■ Do not place anything on the dashboard. These objects might slide or fall
down when driving and may distract you from concentrating on the traffic –
risk of accident!■
Make sure that while driving no objects can enter the driver's footwell -
they could cause an accident!
■
Do not carry any objects on the front passenger seat, except objects de-
signed for this purpose (e.g. child seats) – risk of accident!
■
No objects should be placed in the storage compartments nor in the
drinks holders; the vehicle occupants could be endangered if there is sud-
den braking or the vehicle collides with something.
WARNING (Continued)■ For safety reasons, lockable storage compartments should be closed
while driving - there is a risk of injury from the opened lid or through the
loose objects in the compartment.■
Make sure no objects protrude from the storage compartments - danger
of injury!
■
Do not exceed the permissible loads for the storage compartments and
pockets - risk of injury and risk of damage to the compartments and pock-
ets!
■
Ash, cigarettes, cigars and the like should only be stored in the ashtray -
danger of fire/burns!
■
The storage compartments, multimedia holder and waste container are
not a substitute for the ashtray and must not be used for such purposes –
risk of fire!
CAUTION
Do not place any large or sharp objects in the storage compartments and pock-
ets - there is a risk of damage to the compartments and pockets.
Ticket holder
Fig. 61
Ticket holder
Read and observe and on page 66 first.
The ticket holder » Fig. 61 is provided for the holding and displaying e.g. car
park tickets.
66Using the system
Page 83 of 184

Recirculated air mode activated
Cooling system activated
Set blower speed
Set the blower speed (the set blower speed is indicated by the corre-
sponding number of segments in the display)
▶ Turn to the left: Decrease speed / switch off Climatronic
▶ Turn to the right: Increase speed
Interior temperature sensor Switching on/off the intensive windscreen air flow - when this function
is switched on, the warning light illuminates in the button
Switching automatic mode on » page 81
Switching the airflow to the windows on and off
Switching the airflow to the upper body on and off
Switching the airflow to the footwell on and off
Switch recirculation on/off » page 81
Switch the cooling system on/off
When this function is switched on, the corresponding icon appears in the dis-
play.
After the cooling system is switched off, only the ventilation function remains
active, whereby the lowest temperature that can be reached is the outside
temperature.
Setting temperature
In the range between 16 ° C and 29 ° C, an automatic temperature control
takes place.
At a temperature setting below 16 ° C, lights up in the display, the Climatron-
ic functions with maximum cooling performance .
At a temperature setting above 29 ° C, lights up in the temperature display,
the Climatronic functions with maximum heating output.
Switching between Celsius and Fahrenheit
Press the button and
simultaneously and hold for about 2 s, the dis-
play shows the desired unit (position 3
» Fig. 96 ).
CAUTION
Do not cover the interior temperature sensor 11 » Fig. 96 - the function of the
Climatronic could be affected.7891011NoteIn order to ensure adequate thermal comfort, there may be an increase in en-
gine idle speed during operation of the Climatronic in some circumstances.
Climatronic - automatic operation
Read and observe
on page 80 first.
The automatic mode is used in order to maintain a constant temperature andto demist the windows in the interior of the car.
›
To switch on press the
button. The display shows
(pos.
4
» Fig. 96
on page 80 ).
›
To turn off , press any button for the air distribution or change the blower
speed. The temperature regulation is continued.
Air distribution control
Read and observe
on page 80 first.
The recirculation mode prevents contaminated outside air getting into the In-terior of the vehicle. In recirculated air mode air is sucked out of the interior of
the vehicle and then fed back into the interior.
›
To switch on/off , press the
button.
Heating and manual air conditioning system
If the air distribution control is set to position when the recirculation modes
is switched on, the recirculated-air mode is switched off. By pressing the
button, the air recirculation also in this position can be switched on again.
Climatronic
With the recirculated-air mode switched on the symbol appears in the dis-
play.
The symbol disappears from the display after turning off the air recircula-
tion.
If the humidity increases in the vehicle, an automatic shutdown of the recircu-
lation can occur.
81Heating and ventilation
Page 84 of 184

WARNINGThe recirculation system cannot be switched on for a longer period of time,
because no fresh air is fed through from the outside. “Stale air” may result
in fatigue in the driver and occupants, reduce attention levels and also
cause the windows to mist up. As soon as windows mist up, turn on the re-
circulation system immediately - risk of accident!
CAUTION
We recommend not smoking in the vehicle when the recirculating air operation
is switched on. The smoke sucked from the interior is deposited on the evapo-
rator of the air conditioner. This produces a permanent odour when the air
conditioning system is operating which can only be eliminated through consid-
erable effort and expense (replacement of compressor).
Note
If recirculated air mode is switched on for around 15 minutes, the symbol
will begin to flash in the Climatronic display as a sign that the recirculated air
mode is switched on long-term. If the recirculated air mode is not switched off,
the
symbol flashes for around 5 minutes.
Air outlet vents
Fig. 97
Air outlet vents
Read and observe
on page 80 first.
The direction of airflow can be adjusted using the air outlet vents 3, 4 » Fig. 97 ,
the outlets can be opened and closed individually.
The setting of the airflow direction is carried out by moving the adjustment el- ement A » Fig. 97 in the desired direction.
Open/close›
Turn the regulator
B
up/down » Fig. 97.
Depending on the setting for air distribution, the air will flow from the follow-
ing air vents.
Set the direction of the air outletAir outlet nozzles » Fig. 971. 2 . 41. 2 . 4 . 53 . 44 . 5
CAUTION
Do not cover the air vents - the air distribution could be compromised.82Using the system
Page 85 of 184

Driving
Starting-off and Driving
Starting and stopping the engine
Introduction
This chapter contains information on the following subjects:
Electronic immobiliser and steering lock
83
Switch on/off ignition
84
Starting / stopping the engine
84
Problems with the engine start - vehicles with starter button
85
Depending on equipment fitted, it is possible to switch the ignition on/off and
start/stop the engine with the key in the ignition or using the starter button .
WARNING■
Never switch off the engine before the vehicle is stationary – risk of acci-
dent!■
While driving with the engine stopped the ignition must always be
switched on. Otherwise, the steering may lock - danger of an accident!
■
Do not withdraw the ignition key from the ignition lock until the vehicle
has come to a stop » page 88, Parking . Otherwise, the steering may lock -
danger of an accident!
■
Never leave the vehicle unattended with the engine running - there is a
risk of theft etc!
■
Never (e.g. in garages) run the engine in an enclosed place - there is the
danger of poisoning and death!
CAUTION
■ Only start the engine when the engine and the vehicle are stationary - there
is a danger of starter and engine damage!■
Do not push-start the engine – risk of damaging the engine and the catalytic
converter. The battery from another vehicle can be used as a jump-start aid.
■
On vehicles with the starter button, pay attention to where the key is loca-
ted. The system can recognize the valid key, even if it has been accidentally
left on the vehicle roof - there is danger of loss or damage to the key!
NoteDo not warm up the engine while the vehicle is stationary. If possible, start
your journey as soon as the engine has started. This helps the engine to reach
its operating temperature faster.
Electronic immobiliser and steering lock
Read and observe
and on page 83 first.
The electronic immobiliser (hereinafter referred to as immobiliser) makes the
theft or unauthorised use of your vehicle more difficult.
Immobiliser
The immobiliser allows the engine to start provided an original vehicle key only
is used.
Malfunction of the immobiliser
If a component in the immobiliser key fails, it is not possible to start the en-
gine. A corresponding message appears in the display of the instrument clus-
ter to explain the immobiliser is active.
To start, use the other vehicle key or seek help from a specialist garage.
Steering lock - lock
›
On vehicles with ignition lock, remove the key and turn the steering wheel
until the steering lock engages.
›
On vehicles with a starter button, switch off the ignition and open the driv-
er's door. If the driver's door is opened and the ignition is switched off after-
wards, the steering is only locked automatically after the vehicle has been
locked.
Steering lock - unlock
›
On vehicles with ignition lock, insert the key into the ignition and turn on the
ignition. If this is not possible, then move the steering wheel slightly back
and forth, as a result of which the steering lock should unlock.
›
On vehicles with starter button, get into the vehicle and close the driver's
door. Under certain circumstances, the steering lock can be unlocked only
when the ignition is switched on or the engine is started.
WARNINGNever let the vehicle roll with locked steering lock - risk of accident!83Starting-off and Driving
Page 87 of 184
Note■The engine running noises may be louder at first for a short time after start-
ing the cold engine.■
You should not switch on any major electrical components during the heat-
ing period, otherwise the vehicle battery will be drained unnecessarily.
■
After switching off the ignition, the radiator fan may (also intermittently)
continue to operate for approx. 10 minutes.
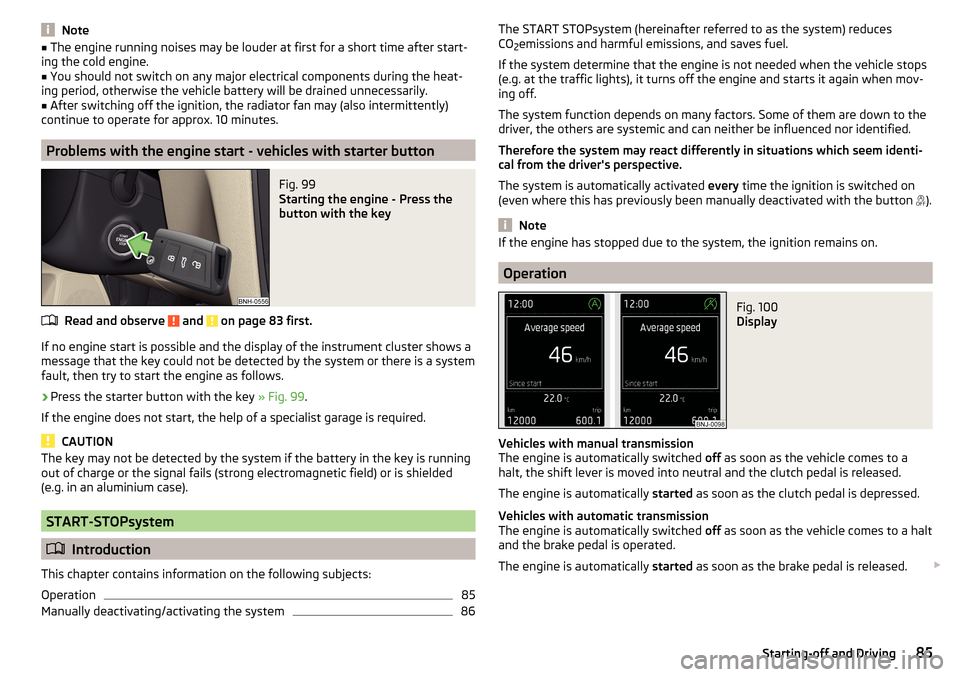
Problems with the engine start - vehicles with starter button
Fig. 99
Starting the engine - Press the
button with the key
Read and observe and on page 83 first.
If no engine start is possible and the display of the instrument cluster shows a
message that the key could not be detected by the system or there is a system
fault, then try to start the engine as follows.
›
Press the starter button with the key » Fig. 99.
If the engine does not start, the help of a specialist garage is required.
CAUTION
The key may not be detected by the system if the battery in the key is running
out of charge or the signal fails (strong electromagnetic field) or is shielded
(e.g. in an aluminium case).
START-STOPsystem
Introduction
This chapter contains information on the following subjects:
Operation
85
Manually deactivating/activating the system
86The START STOPsystem (hereinafter referred to as the system) reduces
CO 2emissions and harmful emissions, and saves fuel.
If the system determine that the engine is not needed when the vehicle stops
(e.g. at the traffic lights), it turns off the engine and starts it again when mov-
ing off.
The system function depends on many factors. Some of them are down to the
driver, the others are systemic and can neither be influenced nor identified.
Therefore the system may react differently in situations which seem identi-
cal from the driver's perspective.
The system is automatically activated every time the ignition is switched on
(even where this has previously been manually deactivated with the button ).
Note
If the engine has stopped due to the system, the ignition remains on.
Operation
Fig. 100
Display
Vehicles with manual transmission
The engine is automatically switched off as soon as the vehicle comes to a
halt, the shift lever is moved into neutral and the clutch pedal is released.
The engine is automatically started as soon as the clutch pedal is depressed.
Vehicles with automatic transmission
The engine is automatically switched off as soon as the vehicle comes to a halt
and the brake pedal is operated.
The engine is automatically started as soon as the brake pedal is released.
85Starting-off and Driving
Page 88 of 184
Requirements for the system to function correctly
The following conditions must be met for the system to function correctly.
The driver's door is closed.
The driver has fastened the seat belt.
The driving speed was higher than 4 km/h after the last stop.
No trailer or other accessory is connected to the trailer socket.
System status
The system status is shown in the display when the vehicle comes to a halt
» Fig. 100 .
The engine is automatically switched off; when the vehicle moves off the
ignition process will be automatically initiated.
The engine is not automatically switched off.
The engine does not shut down when the vehicle stops, if e.g. the following
applies.
▶ The engine temperature for the proper function of the system has not yet
been reached.
▶ The charge state of the vehicle battery is too low.
▶ The current consumption is too high.
▶ High air conditioning or heating output (high fan speed, big difference be-
tween the desired and actual interior temperature).
If the engine has shut down automatically but the system detects that the en- gine is required to run (e.g. if the brake pedal is pressed repeatedly) then the
system automatically starts up the engine.
More information about the current system status can be displayed on the In-
fotainment screen » Owner´s Manual - Infotainment .
If there is a system fault , the following message will appear in the display of
the instrument cluster. Seek help from a specialist garage.Note■ If the driver's seat belt is removed for more than 30 seconds or the driver's
door is opened after the engine has switched off automatically, the engine will
have to be restarted manually.■
No automatic engine shut-down takes place when a vehicle with automatic
transmission is moving at low speed (e.g. during a traffic jam) and remains sta-
tionary after pressing the brake pedal lightly. Automatic engine shut-down
takes place if you press the brake pedal down with more force.
■
For vehicles with automatic transmission there is no automatic engine shut-
down when the system detects a manoeuvring action due to a large steering
angle.
Manually deactivating/activating the system
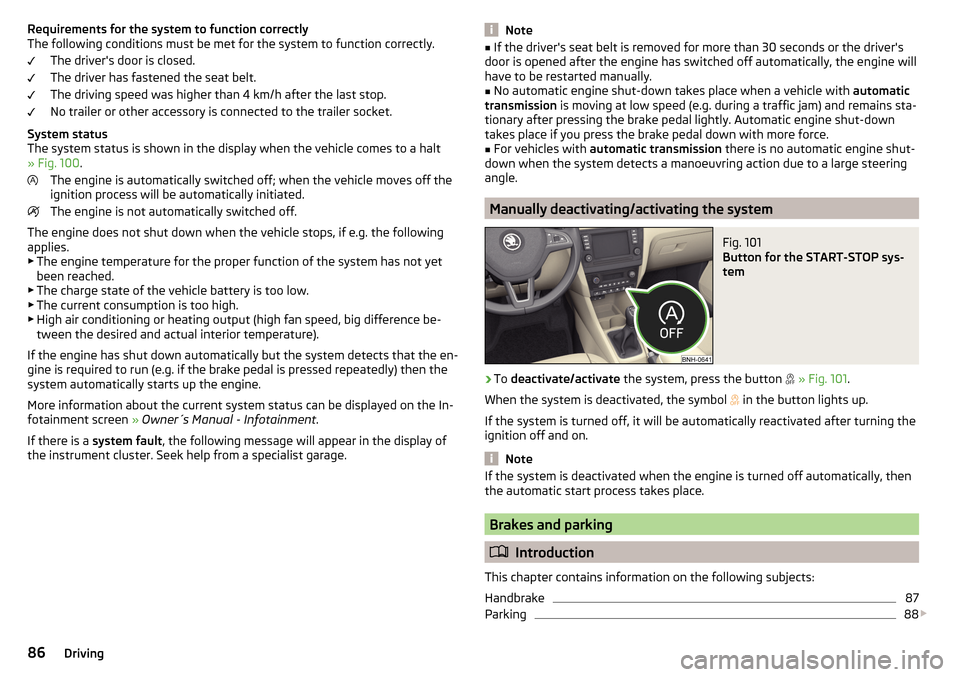
Fig. 101
Button for the START-STOP sys-
tem
›
To deactivate/activate the system, press the button
» Fig. 101 .
When the system is deactivated, the symbol
in the button lights up.
If the system is turned off, it will be automatically reactivated after turning the ignition off and on.
Note
If the system is deactivated when the engine is turned off automatically, then
the automatic start process takes place.
Brakes and parking
Introduction
This chapter contains information on the following subjects:
Handbrake
87
Parking
88
86Driving
Page 91 of 184
Only a floor mat (ex-factory or from the ŠKODA Original Accessories range)
which can be secured to the attachment points should be used in the driver's
footwell.WARNINGThere should be no objects in the driver's footwell, otherwise the pedal op-
eration can be impeded - risk of accident!
Automatic gearbox
Introduction
This chapter contains information on the following subjects:
Select selector lever position
89
Selector lever lock
90
Manual shifting (Tiptronic)
90
Starting-off and driving
91
The automatic transmission performs an automatic gear change irrespective of
the engine load, the operation of the accelerator, the vehicle speed and the
selected driving mode.
The modes of the automatic transmission can be adjusted by the driver by
means of the selector lever.
WARNING■ Do not accelerate when selecting drive mode prior to moving off - risk of
accident!■
Never move the selector lever to mode R or P when driving – risk of acci-
dent!
■
If the vehicle stalls, with engine running, in the D, S , R or Tiptronic mode,
then the vehicle must be prevented from rolling away by means of the
brake pedal, parking brake or using the Auto Hold function. Even when the
engine is idling, the power transmission is never completely interrupted –
the vehicle crawls forward.
■
When leaving the vehicle, the selector lever must always be set to P. Oth-
erwise, the vehicle could be set in motion - risk of accident!
CAUTION
If you want to move the selector lever from position N to position D / S whilst
driving, the engine must be running at idling speed.Select selector lever positionFig. 104
Selector lever/display
Read and observe and on page 89 first.
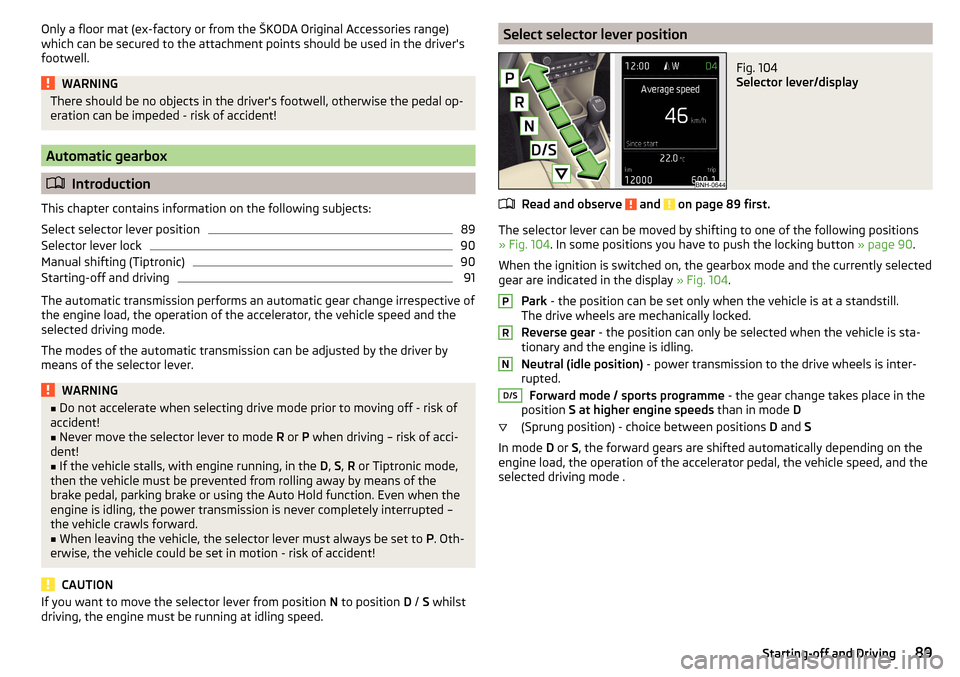
The selector lever can be moved by shifting to one of the following positions
» Fig. 104 . In some positions you have to push the locking button » page 90.
When the ignition is switched on, the gearbox mode and the currently selected
gear are indicated in the display » Fig. 104.
Park - the position can be set only when the vehicle is at a standstill.
The drive wheels are mechanically locked.
Reverse gear - the position can only be selected when the vehicle is sta-
tionary and the engine is idling.
Neutral (idle position) - power transmission to the drive wheels is inter-
rupted.
Forward mode / sports programme - the gear change takes place in the
position S at higher engine speeds than in mode D
(Sprung position) - choice between positions D and S
In mode D or S, the forward gears are shifted automatically depending on the
engine load, the operation of the accelerator pedal, the vehicle speed, and the
selected driving mode .
PRND/S89Starting-off and Driving