door lock SKODA RAPID 2016 1.G Owner's Manual
[x] Cancel search | Manufacturer: SKODA, Model Year: 2016, Model line: RAPID, Model: SKODA RAPID 2016 1.GPages: 184, PDF Size: 27.06 MB
Page 5 of 184
Do-it-yourself
Emergency equipment and self-help138
Emergency equipment
138
Changing a wheel
139
Breakdown kit
143
Jump-starting
145
Towing the vehicle
146
Remote - change battery
148
Emergency unlocking / unlocking of doors
148
Replacing windscreen wiper blades
149
Fuses and light bulbs
151
Fuses
151
Bulbs
154
Technical data
Technical data
160
Basic vehicle data
160
Vehicle-specific details per engine type
165
Index
3Table of Contents
Page 14 of 184
WARNING■Never adjust the steering wheel when the vehicle is moving only when
the vehicle is stationary!■
The safety lever must always be locked so that the steering wheel cannot
accidentally change position – risk of accident!
Correct seating position for the front passenger
Read and observe
on page 11 first.
For passenger safety and to reduce the risk of injury in an accident, the follow-ing instructions must be observed.
Position the front passenger seat back as far as possible. The front pas-
senger must maintain a distance of at least 25 cm to the dash panel so
that the airbag offers the greatest possible safety if it is deployed.
Adjust the headrest so that the top edge of the headrest is at the same
level as the upper part of your head » Fig. 2 on page 11
B
(not for seats
with integrated headrests).
Correctly fasten the seat belt » page 12.
WARNING■
A distance of least 25 cm to the dashboard should be maintained, other-
wise the airbag system will not be able to protect you - hazard!■
Always keep your feet in the footwell when the car is being driven – nev-
er place your feet on the instrument panel, out of the window or on the
surface of the seats! You will be exposed to increased risk of injury if it be-
comes necessary to apply the brake or in the event of an accident. If an air-
bag is deployed, you could suffer fatal injuries by adopting an incorrect
seated position!
Correct seating position for the passengers in the rear seats
Read and observe
on page 11 first.
For the safety of the passengers in the rear seats, and to reduce the risk of
injury in an accident, the following instructions must be observed.
Adjust the headrest such that the top edge of the headrest is at the same
level as the upper part of the head » Fig. 2 on page 11
B
.
Correctly fasten the seat belt » page 12, Using seat belts .
Seat belts
Using seat belts
Introduction
This chapter contains information on the following subjects:
Correct routing of seat belt
13
Fastening and unfastening seat belts
14
Seat belts that are fastened correctly offer good protection in the event of an
accident. They reduce the risk of an injury and increase the chance of survival
in the event of a major accident.
The seat belts reduce the kinetic energy (energy of motion) to a considerable
extent. They also prevent uncontrolled movements which, in turn, may well re-
sult in severe injuries.
When transporting a child the following instructions must be observed
» page 19 , Transporting children safely .
WARNING■
Fasten seat belts before every ride! This also applies to other passengers
- there is a danger of injury!■
Maximum seat belt protection is only achieved if you are correctly seated
» page 10 , Correct and safe seated position .
■
The seat backrests of the front seats must not be tilted too far to the rear
otherwise the seatbelts can lose their effectiveness.
WARNINGInformation on dealing with the safety belts■The belt webbing must not be jammed in-between at any point or twis-
ted, or chafe against any sharp edges.■
Make sure you do not catch the seat belt in the door when closing it.
WARNINGInformation on the proper use of the safety belts■Adjust the height of the belt in such a way that the shoulder part of the
belt is roughly positioned across the middle of your shoulder – on no ac-
count across your neck. 12Safety
Page 19 of 184
The following airbags will be deployed in the event of a severe side collision.
▶ Front side airbag.
▶ Head airbag.
When an airbag is deployed, the following events occur. ▶ The hazard warning lights are switched on.
▶ All the doors are unlocked.
▶ The fuel supply to the engine is interrupted.
▶ The interior light comes on (if the automatic operation of the interior light is
switched on - position
).
When there is no air bag deployment?
With minor frontal and side collisions, rear collision, overturning of the vehicle
or vehicle roll-over there is no airbag deployment.
Safety instructions
Fig. 9
Safe distance from the steering
wheel and dashboard
WARNINGGeneral information■The seat belts and the airbag system can only offer optimum protection
if the driver and passengers are seated properly » page 10 .■
The airbag unleashes enormous force when triggered, which can lead to
serious injuries or fatalities if the driver and passengers are not seated
properly. This applies in particular to children who are transported without
using a suitable child safety seat » page 21.
■
If there is a fault, have the airbag system checked immediately by a spe-
cialist garage. Otherwise, there is a risk of the airbag not being activated in
the event of an accident.
■
If the airbag has been deployed, the airbag system must then be replaced.
■
The surface of the steering wheel and the dashboard should only be
cleaned with a dry or slightly dampened cloth in the area of the front air-
bags.
WARNINGInformation about the front airbags■For the driver and front passenger, it is important to maintain a distance
of at least 25 cm to the steering wheel or to the dashboard » Fig. 9 - A
, If
you do not keep this distance, the airbag system cannot protect you -
There is a risk to life! The front seats and the head restraints must always
also be correctly adjusted to match the body size of the occupant.
■
The front passenger airbag must be deactivated if using a rear-facing
child seat on the front passenger seat » page 18, Airbag deactivation . If
this is not done, there is a risk of the child suffering severe or even fatal
injuries if the front passenger airbag is deployed.
■
No other persons, animals or objects should be placed in front of the oc-
cupants in the front seats in the deployment area of the front airbags.
■
The steering wheel and the surface of the dashboard on the passenger
side must not be stickered, covered or modified in any way. No parts (e.g.
cup holders, mobile phone mounts and the like) may be mounted near the
airbag installation points and in the airbag deployment area.
■
Never place objects on the surface of the dashboard on the passenger
side.
WARNINGInformation about for side and head airbags■No objects (e.g. sun visors turned towards the windows) should be loca-
ted in the deployment area of the side and head airbags. No accessories
(e.g. cup holders etc.) should be fitted to the doors - risk of injury!■
Hang only light clothing on the hooks in the vehicle, do not leave any
heavy or sharp objects in the pockets. Do not use hangers to hang up the
clothes.
■
No excessive force, e.g. through blows, kicks etc. should be applied to the
seat backrests - there is a risk of damage to the side airbags. The side air-
bags would not be deployed in such a case!
■
Any seat or protective covers which you fit to the driver or front passen-
ger seats must only be of a type expressly authorised by ŠKODA AUTO. In
view of the fact that the airbag inflates out of the backrest of the seat, use
of non-approved seat or protective covers would considerably impair the
protective function of the side airbag.
■
Any damage to the original seat covers or stitching at the installation
points for the side airbags should be immediately repaired by a specialist
company.
17Airbag system
Page 29 of 184
Using the system
Cockpit
OverviewElectric windows
52
Door opening lever
48
Electric exterior mirror adjustment
62
Air outlet nozzles
82
Ticket holder
66
Operating lever (depending on equipment):
▶ Direction and high beam
55
▶Speed regulating system
100
▶Speed limiter
101
Steering wheel with horn / with driver's front airbag
15
Buttons for operating the information system
37
Instrument cluster
28
Operating lever:
▶ Windscreen wipers and washers
60
▶Information system
37
Depending on equipment fitted:
▶ Storage compartment
67
▶Infotainment » Owner's Manual for Infotainment
Button for hazard warning light system
57
Warning light for the front passenger airbag
18
Interior rear-view mirror
61
Key switch for switching off the front passenger airbag (in front
passenger storage compartment)
18
Front passenger airbag
15
External Infotainment module (in the front passenger storage
compartment) » Owner's Manual - Infotainment
Storage compartment on the front passenger side
71
Electric window in the front passenger door
52
Storage compartments
67
Light switch
54
Headlight range control (in the dashboard)
5412345678910111213141516171819202122Bonnet release lever126
Steering wheel locking lever
11
Depending on equipment fitted:
▶ Ignition lock
84
▶Starter button
84
Storage compartment
67
Handbrake lever
87
Depending on equipment fitted:
▶ Gearshift lever (manual gearbox)
88
▶Selector lever (automatic gearbox)
89
Cup holder
68
AUX / USB input
67
Bar with keys depending on the equipment fitted:
▶ Left seat heating
65
▶
Traction control (TCS)
94
▶
Parking aid
96
▶
Central locking system
47
▶
Rear window heater
59
▶
START STOP
85
▶
Windscreen heater
59
▶
Right seat heating
65
Controls for heating / air conditioning
79
Note
The layout of the controls on right-hand drive vehicles differs partially from
that shown in this layout » Fig. 16.2324252627282930313227Cockpit
Page 40 of 184
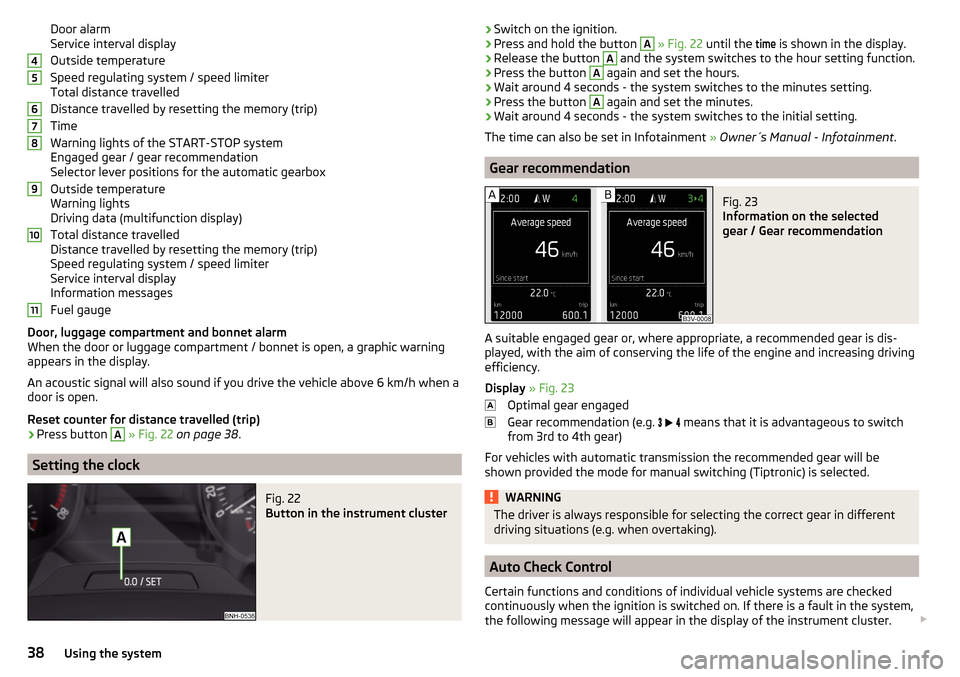
Door alarm
Service interval display
Outside temperature
Speed regulating system / speed limiter
Total distance travelled
Distance travelled by resetting the memory (trip)
Time
Warning lights of the START-STOP system
Engaged gear / gear recommendation
Selector lever positions for the automatic gearbox
Outside temperature
Warning lights
Driving data (multifunction display)
Total distance travelled
Distance travelled by resetting the memory (trip)
Speed regulating system / speed limiter
Service interval display
Information messages
Fuel gauge
Door, luggage compartment and bonnet alarm
When the door or luggage compartment / bonnet is open, a graphic warning
appears in the display.
An acoustic signal will also sound if you drive the vehicle above 6 km/h when a
door is open.
Reset counter for distance travelled (trip)›
Press button
A
» Fig. 22 on page 38 .
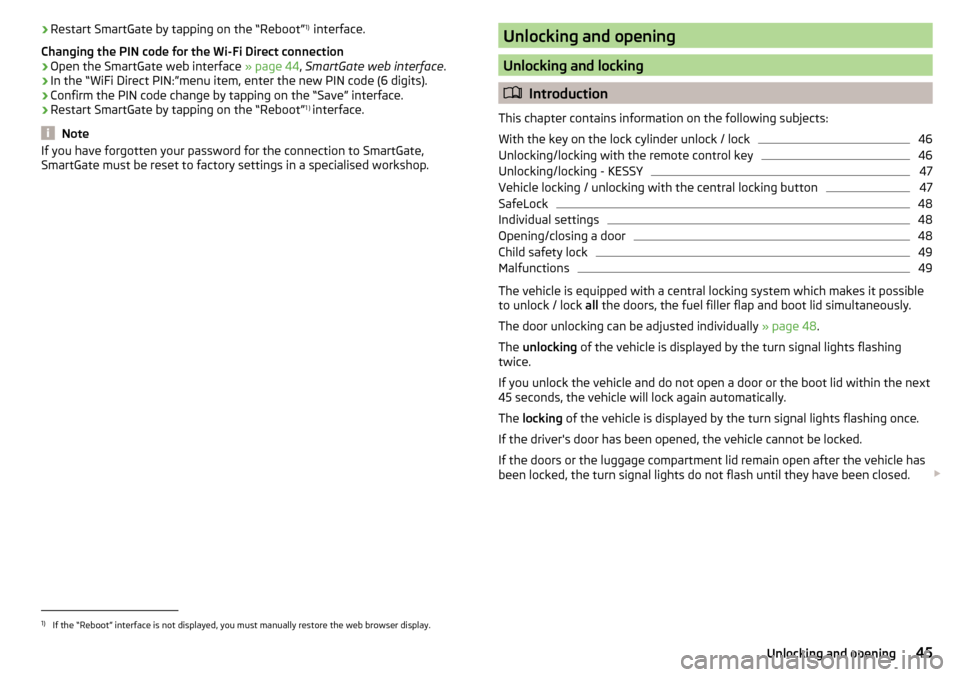
Setting the clock
Fig. 22
Button in the instrument cluster
4567891011›Switch on the ignition.›Press and hold the button A
» Fig. 22 until the
time
is shown in the display.›
Release the button
A
and the system switches to the hour setting function.
›
Press the button
A
again and set the hours.
›
Wait around 4 seconds - the system switches to the minutes setting.
›
Press the button
A
again and set the minutes.
›
Wait around 4 seconds - the system switches to the initial setting.
The time can also be set in Infotainment » Owner´s Manual - Infotainment .
Gear recommendation
Fig. 23
Information on the selected
gear / Gear recommendation
A suitable engaged gear or, where appropriate, a recommended gear is dis-
played, with the aim of conserving the life of the engine and increasing driving
efficiency.
Display » Fig. 23
Optimal gear engaged
Gear recommendation (e.g.
means that it is advantageous to switch
from 3rd to 4th gear)
For vehicles with automatic transmission the recommended gear will be
shown provided the mode for manual switching (Tiptronic) is selected.
WARNINGThe driver is always responsible for selecting the correct gear in different
driving situations (e.g. when overtaking).
Auto Check Control
Certain functions and conditions of individual vehicle systems are checked
continuously when the ignition is switched on. If there is a fault in the system,
the following message will appear in the display of the instrument cluster.
38Using the system
Page 47 of 184
›Restart SmartGate by tapping on the “Reboot” 1)
interface.
Changing the PIN code for the Wi-Fi Direct connection›
Open the SmartGate web interface » page 44, SmartGate web interface .
›
In the “WiFi Direct PIN:”menu item, enter the new PIN code (6 digits).
›
Confirm the PIN code change by tapping on the “Save” interface.
›
Restart SmartGate by tapping on the “Reboot” 1 )
interface.
Note
If you have forgotten your password for the connection to SmartGate,
SmartGate must be reset to factory settings in a specialised workshop.Unlocking and opening
Unlocking and locking
Introduction
This chapter contains information on the following subjects:
With the key on the lock cylinder unlock / lock
46
Unlocking/locking with the remote control key
46
Unlocking/locking - KESSY
47
Vehicle locking / unlocking with the central locking button
47
SafeLock
48
Individual settings
48
Opening/closing a door
48
Child safety lock
49
Malfunctions
49
The vehicle is equipped with a central locking system which makes it possible
to unlock / lock all the doors, the fuel filler flap and boot lid simultaneously.
The door unlocking can be adjusted individually » page 48.
The unlocking of the vehicle is displayed by the turn signal lights flashing
twice.
If you unlock the vehicle and do not open a door or the boot lid within the next
45 seconds, the vehicle will lock again automatically.
The locking of the vehicle is displayed by the turn signal lights flashing once.
If the driver's door has been opened, the vehicle cannot be locked.
If the doors or the luggage compartment lid remain open after the vehicle has
been locked, the turn signal lights do not flash until they have been closed.
1)
If the “Reboot” interface is not displayed, you must manually restore the web browser display.
45Unlocking and opening
Page 49 of 184
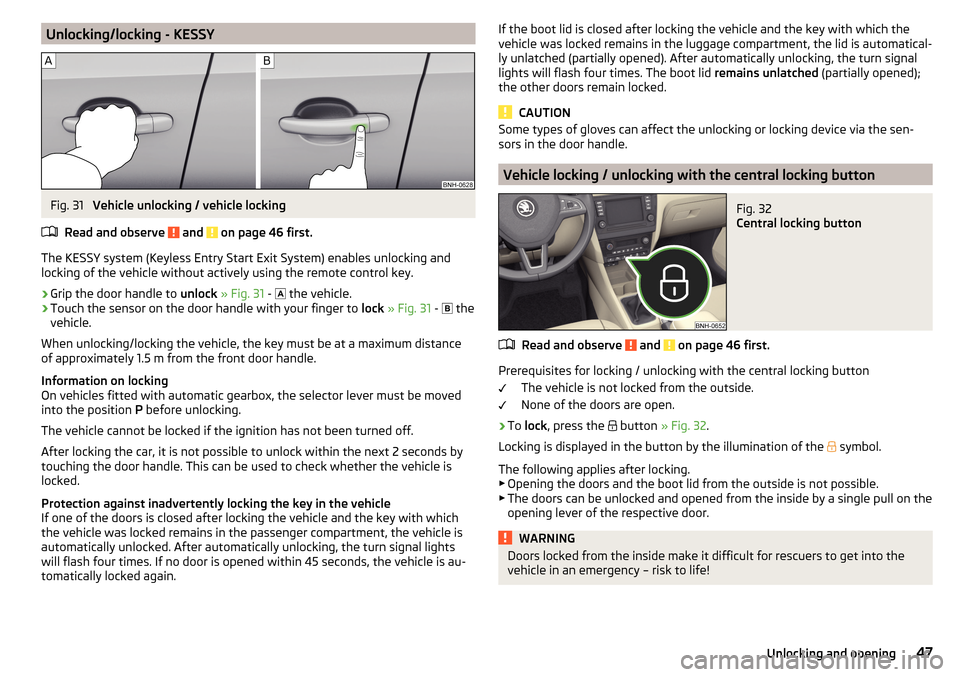
Unlocking/locking - KESSYFig. 31
Vehicle unlocking / vehicle locking
Read and observe
and on page 46 first.
The KESSY system (Keyless Entry Start Exit System) enables unlocking and
locking of the vehicle without actively using the remote control key.
›
Grip the door handle to unlock » Fig. 31 -
the vehicle.
›
Touch the sensor on the door handle with your finger to
lock » Fig. 31 -
the
vehicle.
When unlocking/locking the vehicle, the key must be at a maximum distance
of approximately 1.5 m from the front door handle.
Information on locking
On vehicles fitted with automatic gearbox, the selector lever must be moved
into the position P before unlocking.
The vehicle cannot be locked if the ignition has not been turned off.
After locking the car, it is not possible to unlock within the next 2 seconds by touching the door handle. This can be used to check whether the vehicle is
locked.
Protection against inadvertently locking the key in the vehicle
If one of the doors is closed after locking the vehicle and the key with which
the vehicle was locked remains in the passenger compartment, the vehicle is
automatically unlocked. After automatically unlocking, the turn signal lights
will flash four times. If no door is opened within 45 seconds, the vehicle is au-
tomatically locked again.
If the boot lid is closed after locking the vehicle and the key with which the vehicle was locked remains in the luggage compartment, the lid is automatical-
ly unlatched (partially opened). After automatically unlocking, the turn signal
lights will flash four times. The boot lid remains unlatched (partially opened);
the other doors remain locked.
CAUTION
Some types of gloves can affect the unlocking or locking device via the sen-
sors in the door handle.
Vehicle locking / unlocking with the central locking button
Fig. 32
Central locking button
Read and observe and on page 46 first.
Prerequisites for locking / unlocking with the central locking button
The vehicle is not locked from the outside.
None of the doors are open.
›
To lock , press the
button » Fig. 32 .
Locking is displayed in the button by the illumination of the
symbol.
The following applies after locking. ▶ Opening the doors and the boot lid from the outside is not possible.
▶ The doors can be unlocked and opened from the inside by a single pull on the
opening lever of the respective door.
WARNINGDoors locked from the inside make it difficult for rescuers to get into the
vehicle in an emergency – risk to life!47Unlocking and opening
Page 50 of 184
SafeLockRead and observe
and on page 46 first.
SafeLock prevents the doors from being opened from inside as well as window
operation. This makes an attempted break-in to the vehicle more difficult.
Activating
SafeLock is activated when the vehicle is locked from the outside.
This function is pointed out by the following message on the display of the in-
strument cluster after the ignition is switched off.
Check SAFELOCK! Owner's Manual!CHECK SAFELOCK
Activation display
When SafeLock is activated, the warning light in the driver's door flashes for 2
seconds in rapid succession, then starts to flash at longer intervals.
Deactivating
▶ By locking twice within 2 seconds.
▶ or: by deactivating the interior monitor and the towing protection
» page 50 .
The warning light in the driver door flashes rapidly for about 2 seconds, then
goes out and starts to flash at longer intervals after about 30 seconds.
If the vehicle is locked and the safe securing system is switched off, the door
can be opened separately from the inside by a single pull on opening lever.
The SafeLock switches on the next time the vehicle is locked.
WARNINGIf the vehicle is locked and the safe securing system activated, no people
must remain in the car as it will then not be possible to either unlock a door
or open a window from the inside. The locked doors make it more difficult
for rescuers to get into the vehicle in an emergency – risk to life!
Individual settings
Read and observe
and on page 46 first.
The following functions of the central locking system can be set individually in
the Infotainment » Owner´s Manual - Infotainment .
All doors
The function allows you to unlock all doors, the boot lid and the fuel filler flap.
Single door
The function allows you to unlock only the driver's door and the fuel filler flap
with the radio remote control. KESSY allows the unlocking of a single door
which is in the vicinity of the key, as well as the fuel filler flap. The other doors
and the boot lid are only unlocked once the door handle is unlocked or
touched.
Doors on a vehicle side
This function enables you to unlock both doors on the driver's side and the
fuel filler flap with the radio remote control unit. KESSY allows the unlocking of
both doors which are in the vicinity of the key, as well as the fuel filler flap. The
other doors and the boot lid are only unlocked once the door handle is un-
locked or touched.
Automatic locking/unlocking
This function enables the locking of all doors and the boot lid from a speed of
15 km / h. Opening the doors and the boot lid from the outside is not possible.
The renewed unlocking of the doors and the boot lid is carried out when the
ignition key is removed or when the door is opened from inside (depending on
the individual setting for the central locking system).
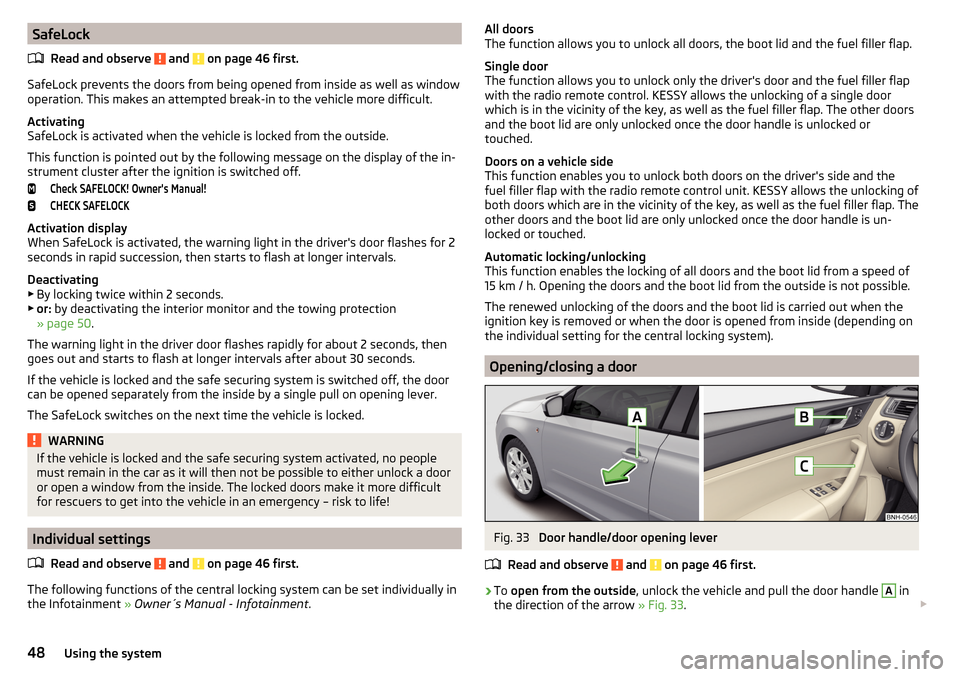
Opening/closing a door
Fig. 33
Door handle/door opening lever
Read and observe
and on page 46 first.
›
To open from the outside , unlock the vehicle and pull the door handle
A
in
the direction of the arrow » Fig. 33.
48Using the system
Page 51 of 184
›To
open from the inside , pull the door opening lever B and push the door
away from you.›
To lock from the inside , grab handle
C
and close the door.
WARNING■
The door must be closed properly, otherwise it could open whilst the ve-
hicle is in motion - can be fatal!■
Only open and close the door when there is no one in the opening/closing
range – risk of injury!
■
Never drive with the doors open - there is a risk of death!
■
An opened door can close automatically if there is a strong wind or the
vehicle is on an incline – risk of injury!
Child safety lock
Fig. 34
Rear door: Child safety system switch on / off
Read and observe
and on page 46 first.
The child safety lock prevents the rear door from being opened from the in-
side. The door can only be opened from the outside.
›
To turn on the child safety lock, turn the vehicle key to position
» Fig. 34 .
›
To turn off the child safety lock, turn the vehicle key to position
.
Malfunctions
Read and observe
and on page 46 first.
Synchronise remote
If the buttons on the remote control key have been depressed several times
beyond the effective range of the equipment or the battery has been replaced
in the remote control key and the vehicle cannot be unlocked with the remote
control, the key must be synchronised.
›
Press any button on the remote control key.
›
Unlock the door with the key in the lock cylinder within 1 minute of pressing the button.
Fault with the central locking
If the warning light in the driver's door initially flashes quickly for around 2 sec-
onds, and then illuminates for 30 seconds without interruption before flashing
again slowly, you will need to seek the assistance of a specialist garage.
A failure in the central locking system can lead the vehicle doors and the boot
lid can emergency lock or emergency release » page 148.
Failure of the system KESSY
If there is a fault in the KESSY system, the appropriate error message is dis-
played in the instrument cluster.
Low voltage of the key battery
If the voltage of the key battery is too low, a message appears in the display of the instrument cluster referring to the need to replace the battery. Replace
the battery » page 148.
Anti-theft alarm system
Introduction
This chapter contains information on the following subjects:
Alarm trigger
50
Interior monitor and towing protection
50
The alarm system triggers audible and visual signals if an attempt is made to
break into the vehicle (hereafter referred to as alarm).
The alarm system is activated automatically approximately 30 seconds after the vehicle is locked. This is automatically disabled after release.
49Unlocking and opening
Page 52 of 184
CAUTIONBefore leaving the vehicle, check that all doors and windows are closed in or-
der to ensure that the alarm system is fully operational.
Note
The alarm system has its own power source, whose service life is 5 years.
Alarm trigger
Read and observe
on page 50 first.
The alarm is triggered when one of the following unauthorised actions is acti-
vated on the vehicle with an activated warning system. ▶ Opening the bonnet.
▶ Opening the boot lid.
▶ Opening the doors.
▶ Manipulation of the ignition lock.
▶ Towing the vehicle.
▶ Movement in the vehicle.
▶ Sudden and significant voltage drop of the electrical system.
▶ Uncoupling the trailer.
An alarm is triggered also when the driver's door is unlocked and opened by
the lock cylinder.
The alarm is switched off by pressing the
button on the key or switching on
the ignition.
Interior monitor and towing protection
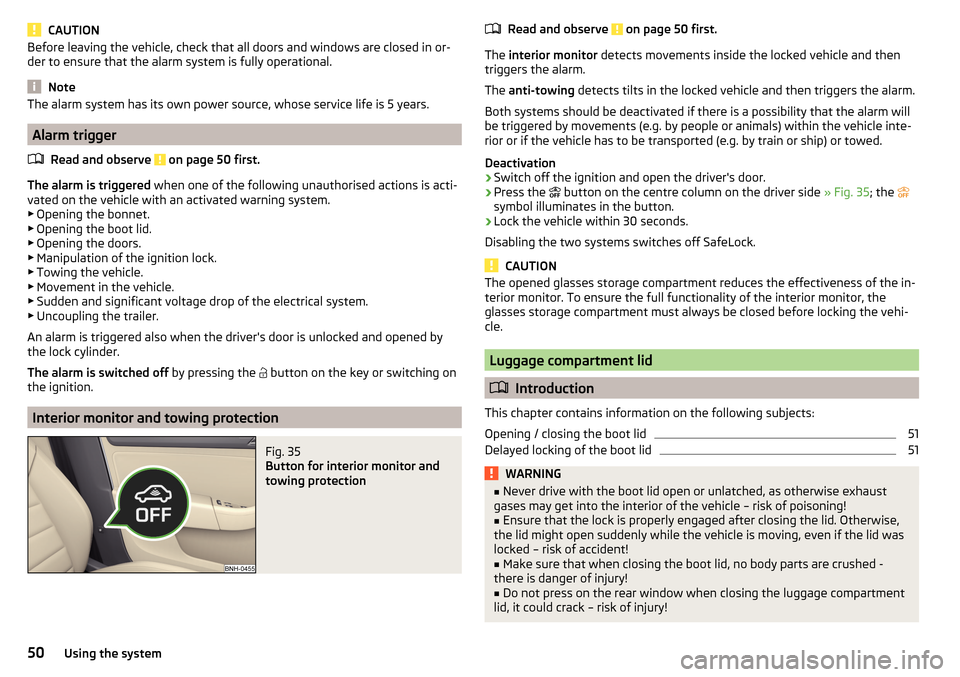
Fig. 35
Button for interior monitor and
towing protection
Read and observe on page 50 first.
The interior monitor detects movements inside the locked vehicle and then
triggers the alarm.
The anti-towing detects tilts in the locked vehicle and then triggers the alarm.
Both systems should be deactivated if there is a possibility that the alarm will
be triggered by movements (e.g. by people or animals) within the vehicle inte-
rior or if the vehicle has to be transported (e.g. by train or ship) or towed.
Deactivation
›
Switch off the ignition and open the driver's door.
›
Press the button on the centre column on the driver side
» Fig. 35; the
symbol illuminates in the button.
›
Lock the vehicle within 30 seconds.
Disabling the two systems switches off SafeLock.
CAUTION
The opened glasses storage compartment reduces the effectiveness of the in-
terior monitor. To ensure the full functionality of the interior monitor, the
glasses storage compartment must always be closed before locking the vehi-
cle.
Luggage compartment lid
Introduction
This chapter contains information on the following subjects:
Opening / closing the boot lid
51
Delayed locking of the boot lid
51WARNING■ Never drive with the boot lid open or unlatched, as otherwise exhaust
gases may get into the interior of the vehicle – risk of poisoning!■
Ensure that the lock is properly engaged after closing the lid. Otherwise,
the lid might open suddenly while the vehicle is moving, even if the lid was
locked – risk of accident!
■
Make sure that when closing the boot lid, no body parts are crushed -
there is danger of injury!
■
Do not press on the rear window when closing the luggage compartment
lid, it could crack – risk of injury!
50Using the system