fog light bulb SKODA RAPID 2016 1.G Owner's Manual
[x] Cancel search | Manufacturer: SKODA, Model Year: 2016, Model line: RAPID, Model: SKODA RAPID 2016 1.GPages: 184, PDF Size: 27.06 MB
Page 36 of 184
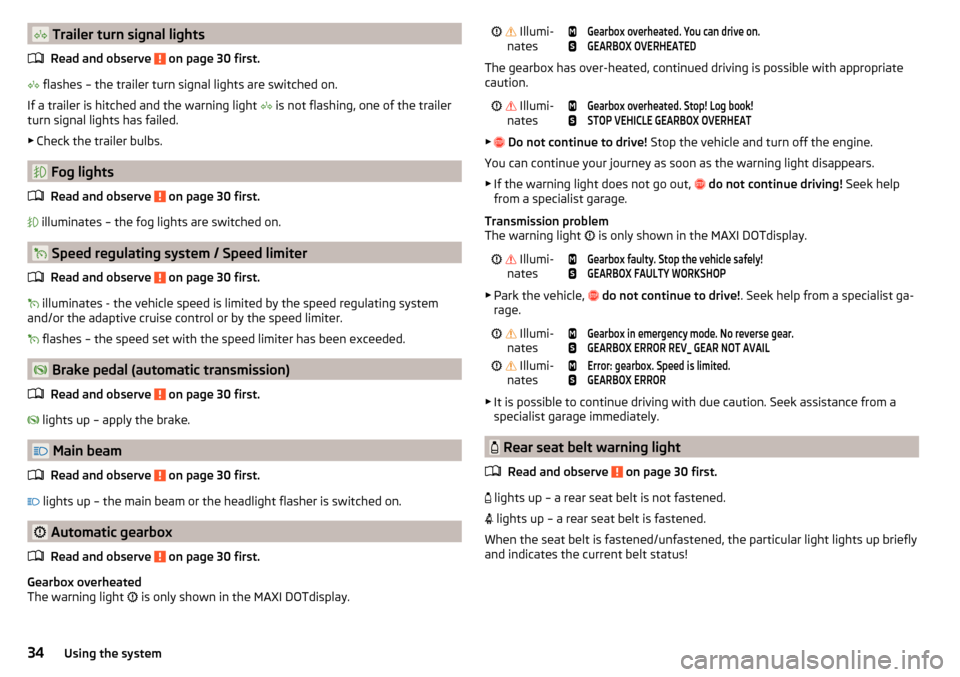
Trailer turn signal lightsRead and observe
on page 30 first.
flashes – the trailer turn signal lights are switched on.
If a trailer is hitched and the warning light
is not flashing, one of the trailer
turn signal lights has failed.
▶ Check the trailer bulbs.
Fog lights
Read and observe
on page 30 first.
illuminates – the fog lights are switched on.
Speed regulating system / Speed limiter
Read and observe
on page 30 first.
illuminates - the vehicle speed is limited by the speed regulating system
and/or the adaptive cruise control or by the speed limiter.
flashes – the speed set with the speed limiter has been exceeded.
Brake pedal (automatic transmission)
Read and observe
on page 30 first.
lights up – apply the brake.
Main beam
Read and observe
on page 30 first.
lights up – the main beam or the headlight flasher is switched on.
Automatic gearbox
Read and observe
on page 30 first.
Gearbox overheated
The warning light is only shown in the MAXI DOTdisplay.
Illumi-
nates
Gearbox overheated. You can drive on.GEARBOX OVERHEATED
The gearbox has over-heated, continued driving is possible with appropriate
caution.
Illumi-
nates
Gearbox overheated. Stop! Log book!STOP VEHICLE GEARBOX OVERHEAT
▶ Do not continue to drive! Stop the vehicle and turn off the engine.
You can continue your journey as soon as the warning light disappears.
▶ If the warning light does not go out,
do not continue driving! Seek help
from a specialist garage.
Transmission problem
The warning light is only shown in the MAXI DOTdisplay.
Illumi-
nates
Gearbox faulty. Stop the vehicle safely!GEARBOX FAULTY WORKSHOP
▶ Park the vehicle,
do not continue to drive! . Seek help from a specialist ga-
rage.
Illumi-
nates
Gearbox in emergency mode. No reverse gear.GEARBOX ERROR REV_ GEAR NOT AVAIL Illumi-
nates
Error: gearbox. Speed is limited.GEARBOX ERROR
▶ It is possible to continue driving with due caution. Seek assistance from a
specialist garage immediately.
Rear seat belt warning light
Read and observe
on page 30 first.
lights up – a rear seat belt is not fastened.
lights up – a rear seat belt is fastened.
When the seat belt is fastened/unfastened, the particular light lights up briefly
and indicates the current belt status!
34Using the system
Page 156 of 184
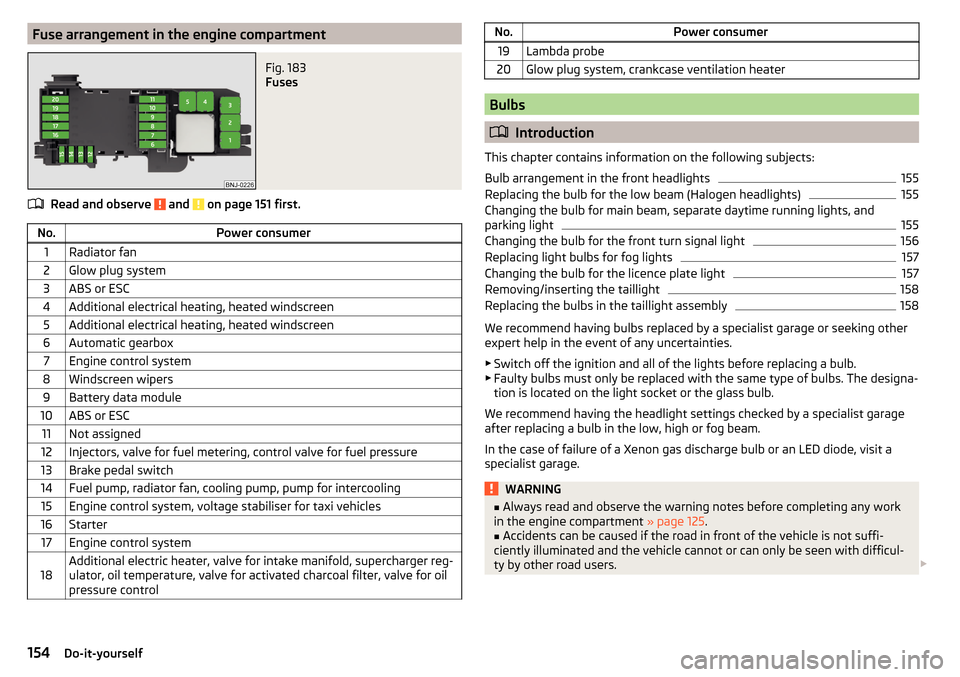
Fuse arrangement in the engine compartmentFig. 183
Fuses
Read and observe and on page 151 first.
No.Power consumer1Radiator fan2Glow plug system3ABS or ESC4Additional electrical heating, heated windscreen5Additional electrical heating, heated windscreen6Automatic gearbox7Engine control system8Windscreen wipers9Battery data module10ABS or ESC11Not assigned12Injectors, valve for fuel metering, control valve for fuel pressure13Brake pedal switch14Fuel pump, radiator fan, cooling pump, pump for intercooling15Engine control system, voltage stabiliser for taxi vehicles16Starter17Engine control system18Additional electric heater, valve for intake manifold, supercharger reg-
ulator, oil temperature, valve for activated charcoal filter, valve for oil
pressure controlNo.Power consumer19Lambda probe20Glow plug system, crankcase ventilation heater
Bulbs
Introduction
This chapter contains information on the following subjects:
Bulb arrangement in the front headlights
155
Replacing the bulb for the low beam (Halogen headlights)
155
Changing the bulb for main beam, separate daytime running lights, and
parking light
155
Changing the bulb for the front turn signal light
156
Replacing light bulbs for fog lights
157
Changing the bulb for the licence plate light
157
Removing/inserting the taillight
158
Replacing the bulbs in the taillight assembly
158
We recommend having bulbs replaced by a specialist garage or seeking other
expert help in the event of any uncertainties.
▶ Switch off the ignition and all of the lights before replacing a bulb.
▶ Faulty bulbs must only be replaced with the same type of bulbs. The designa-
tion is located on the light socket or the glass bulb.
We recommend having the headlight settings checked by a specialist garage after replacing a bulb in the low, high or fog beam.
In the case of failure of a Xenon gas discharge bulb or an LED diode, visit a
specialist garage.
WARNING■ Always read and observe the warning notes before completing any work
in the engine compartment » page 125.■
Accidents can be caused if the road in front of the vehicle is not suffi-
ciently illuminated and the vehicle cannot or can only be seen with difficul-
ty by other road users.
154Do-it-yourself
Page 159 of 184
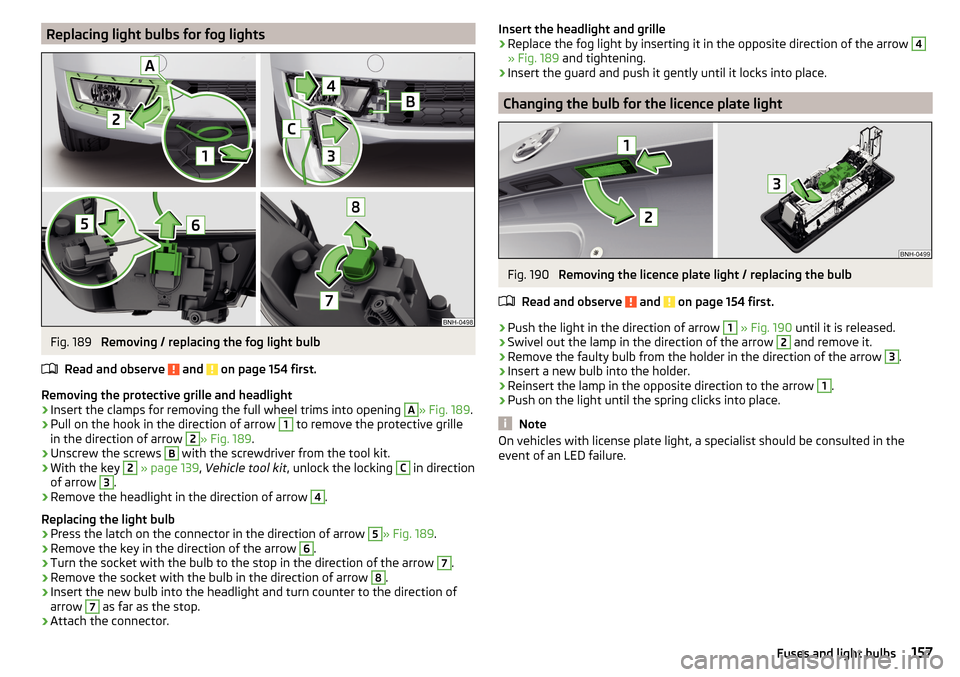
Replacing light bulbs for fog lightsFig. 189
Removing / replacing the fog light bulb
Read and observe
and on page 154 first.
Removing the protective grille and headlight
›
Insert the clamps for removing the full wheel trims into opening
A
» Fig. 189 .
›
Pull on the hook in the direction of arrow
1
to remove the protective grille
in the direction of arrow
2
» Fig. 189 .
›
Unscrew the screws
B
with the screwdriver from the tool kit.
›
With the key
2
» page 139 , Vehicle tool kit , unlock the locking
C
in direction
of arrow
3
.
›
Remove the headlight in the direction of arrow
4
.
Replacing the light bulb
›
Press the latch on the connector in the direction of arrow
5
» Fig. 189 .
›
Remove the key in the direction of the arrow
6
.
›
Turn the socket with the bulb to the stop in the direction of the arrow
7
.
›
Remove the socket with the bulb in the direction of arrow
8
.
›
Insert the new bulb into the headlight and turn counter to the direction of
arrow
7
as far as the stop.
›
Attach the connector.
Insert the headlight and grille›Replace the fog light by inserting it in the opposite direction of the arrow 4
» Fig. 189 and tightening.
›
Insert the guard and push it gently until it locks into place.
Changing the bulb for the licence plate light
Fig. 190
Removing the licence plate light / replacing the bulb
Read and observe
and on page 154 first.
›
Push the light in the direction of arrow
1
» Fig. 190 until it is released.
›
Swivel out the lamp in the direction of the arrow
2
and remove it.
›
Remove the faulty bulb from the holder in the direction of the arrow
3
.
›
Insert a new bulb into the holder.
›
Reinsert the lamp in the opposite direction to the arrow
1
.
›
Push on the light until the spring clicks into place.
Note
On vehicles with license plate light, a specialist should be consulted in the
event of an LED failure.157Fuses and light bulbs
Page 173 of 184
Gear changeGear recommendation38
Information on the selected gear38
Gear changing Gear stick
88
Genuine parts116
Glasses compartment71
GPS See Owner´s Manual -Infotainment
6
H
Handbrake
87
Warning light30
Hazard warning light system57
HBA95
Headrests64
Heating79, 80
Air distribution control81
Exterior mirrors62
Seats65
Windscreen and rear window59
Help in an emergency8
HHC95
Hill Start Assist (HHC)95
Hitch108
Hooks76
Horn27
I
I-PAD holder
73
Ignition lock84
Images See Owner´s Manual -Infotainment
6
Immobiliser83
Inertia reels14
Information about the towing process146
Information system37
Auto Check Control37
Door alarm37
Gear recommendation38
MAXI DOT display41
Multifunction display39
Service interval display42
Infotainment6
Instrument cluster28
See instrument cluster28
Warning lights29
Interior light58
Interior lighting58
Interior monitor50
ISOFIX22, 23
J
Jack
139
Jacking points Raise vehicle
142
Jump-starting145
K
KESSY Unlocking/locking
47
Key Change battery
148
Lock46
Starting / stopping the engine84
Switch on/off ignition84
Unlock46
L
Lamp failure Warning light
36
Lamps Warning light
36
LEAVING HOME56
Lever Cruise control101
Front Assist105
Operation of the information system39
Speed regulating system102
Turn signal/main beam55
Windscreen wipers60
Light Cockpit
57
COMING HOME / LEAVING HOME56
Daytime running lights54
Flash55
Parking light57
Replacing bulbs154
Turn signal/main beam55
Light bulbs Replacing
154
Lighting Interior lighting
57
Luggage compartment74
Lights53
Automatic driving light control55
Beam range adjustment54
Driving abroad57
Fog lights/rear fog light56
Fog lights with the CORNER function56
Hazard warning light system57
Headlight cleaning system61
Low beam54
Parking light54
Switching on/off54
Warning lights29
Load161
Lock Individual settings
48
Key46
Locking Central locking button
47
in case of emergency149
KESSY47
Remote control46
171Index
Page 175 of 184
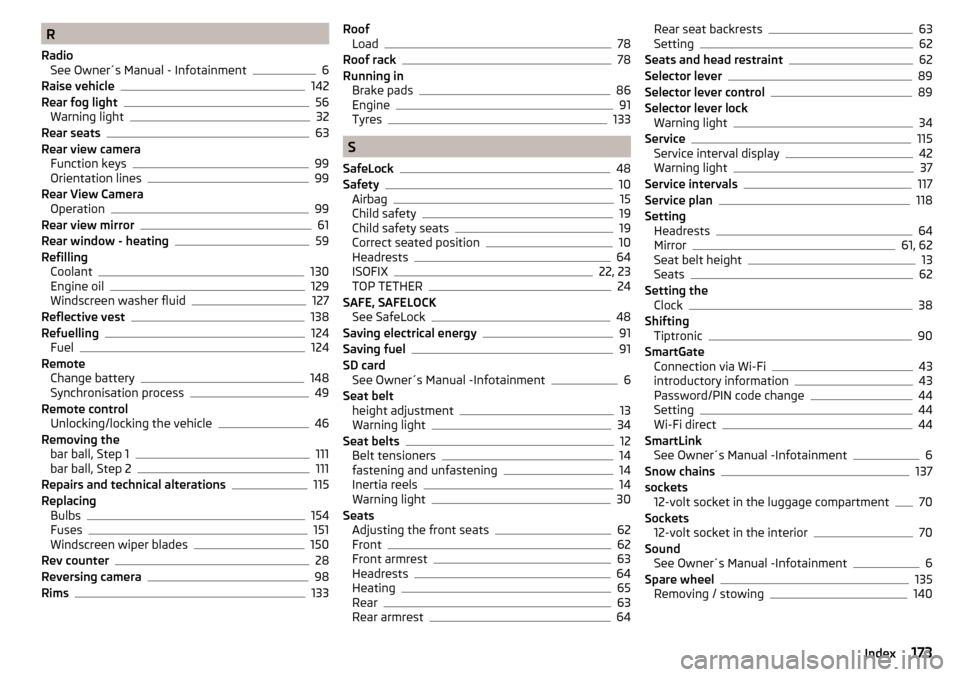
R
Radio See Owner´s Manual - Infotainment
6
Raise vehicle142
Rear fog light56
Warning light32
Rear seats63
Rear view camera Function keys
99
Orientation lines99
Rear View Camera Operation
99
Rear view mirror61
Rear window - heating59
Refilling Coolant
130
Engine oil129
Windscreen washer fluid127
Reflective vest138
Refuelling124
Fuel124
Remote Change battery
148
Synchronisation process49
Remote control Unlocking/locking the vehicle
46
Removing the bar ball, Step 1
111
bar ball, Step 2111
Repairs and technical alterations115
Replacing Bulbs
154
Fuses151
Windscreen wiper blades150
Rev counter28
Reversing camera98
Rims133
Roof Load78
Roof rack78
Running in Brake pads
86
Engine91
Tyres133
S
SafeLock
48
Safety10
Airbag15
Child safety19
Child safety seats19
Correct seated position10
Headrests64
ISOFIX22, 23
TOP TETHER24
SAFE, SAFELOCK See SafeLock
48
Saving electrical energy91
Saving fuel91
SD card See Owner´s Manual -Infotainment
6
Seat belt height adjustment
13
Warning light34
Seat belts12
Belt tensioners14
fastening and unfastening14
Inertia reels14
Warning light30
Seats Adjusting the front seats
62
Front62
Front armrest63
Headrests64
Heating65
Rear63
Rear armrest64
Rear seat backrests63
Setting62
Seats and head restraint62
Selector lever89
Selector lever control89
Selector lever lock Warning light
34
Service115
Service interval display42
Warning light37
Service intervals117
Service plan118
Setting Headrests
64
Mirror61, 62
Seat belt height13
Seats62
Setting the Clock
38
Shifting Tiptronic
90
SmartGate Connection via Wi-Fi
43
introductory information43
Password/PIN code change44
Setting44
Wi-Fi direct44
SmartLink See Owner´s Manual -Infotainment
6
Snow chains137
sockets 12-volt socket in the luggage compartment
70
Sockets 12-volt socket in the interior
70
Sound See Owner´s Manual -Infotainment
6
Spare wheel135
Removing / stowing140
173Index