display SKODA RAPID SPACEBACK 2013 1.G Workshop Manual
[x] Cancel search | Manufacturer: SKODA, Model Year: 2013, Model line: RAPID SPACEBACK, Model: SKODA RAPID SPACEBACK 2013 1.GPages: 193, PDF Size: 14.8 MB
Page 147 of 193

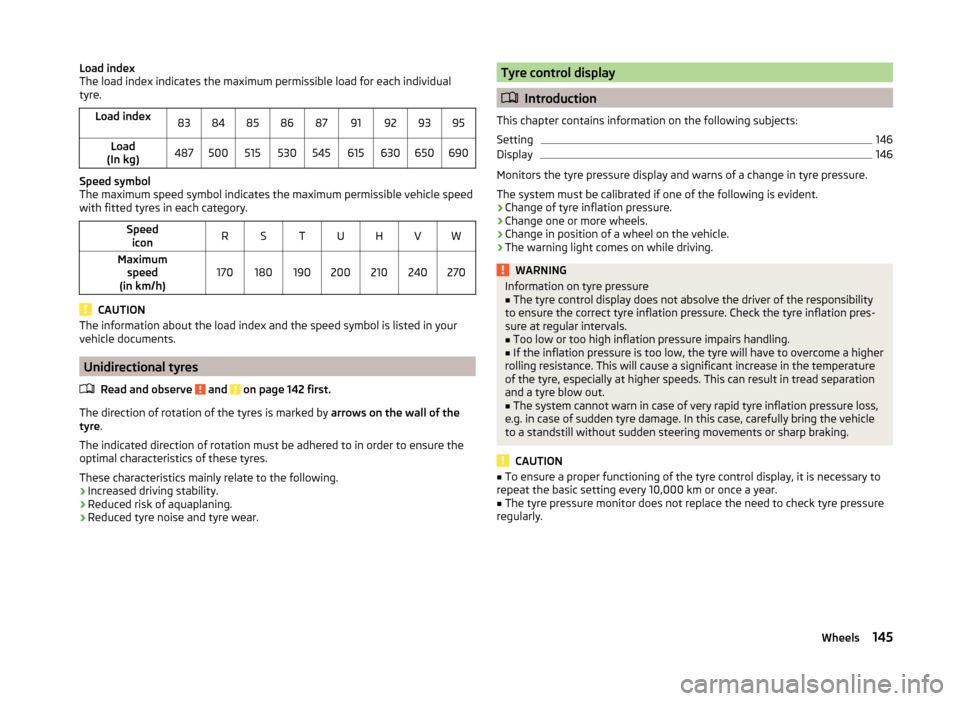
Load index
The load index indicates the maximum permissible load for each individual
tyre.Load index838485868791929395Load
(In kg)487500515530545615630650690
Speed symbol
The maximum speed symbol indicates the maximum permissible vehicle speed
with fitted tyres in each category.
Speed iconRSTUHVWMaximum speed
(in km/h)170180190200210240270
CAUTION
The information about the load index and the speed symbol is listed in your
vehicle documents.
Unidirectional tyres
Read and observe
and on page 142 first.
The direction of rotation of the tyres is marked by arrows on the wall of the
tyre .
The indicated direction of rotation must be adhered to in order to ensure the
optimal characteristics of these tyres.
These characteristics mainly relate to the following.
› Increased driving stability.
› Reduced risk of aquaplaning.
› Reduced tyre noise and tyre wear.
Tyre control display
Introduction
This chapter contains information on the following subjects:
Setting
146
Display
146
Monitors the tyre pressure display and warns of a change in tyre pressure.
The system must be calibrated if one of the following is evident. › Change of tyre inflation pressure.
› Change one or more wheels.
› Change in position of a wheel on the vehicle.
› The warning light comes on while driving.
WARNINGInformation on tyre pressure■The tyre control display does not absolve the driver of the responsibility
to ensure the correct tyre inflation pressure. Check the tyre inflation pres-
sure at regular intervals.■
Too low or too high inflation pressure impairs handling.
■
If the inflation pressure is too low, the tyre will have to overcome a higher
rolling resistance. This will cause a significant increase in the temperature
of the tyre, especially at higher speeds. This can result in tread separation
and a tyre blow out.
■
The system cannot warn in case of very rapid tyre inflation pressure loss,
e.g. in case of sudden tyre damage. In this case, carefully bring the vehicle
to a standstill without sudden steering movements or sharp braking.
CAUTION
■ To ensure a proper functioning of the tyre control display, it is necessary to
repeat the basic setting every 10,000 km or once a year.■
The tyre pressure monitor does not replace the need to check tyre pressure
regularly.
145Wheels
Page 148 of 193

SettingFig. 132
Button for setting the tyre infla-
tion pressure control value
Read and observe and on page 145 first.
›
Inflate all of the tyres to the specified inflation pressure » page 143.
›
Switch on the ignition.
›
Press the symbol button
» Fig. 132 for longer than 2 seconds.
If the warning light in the instrument cluster lights up and does not go out
after the system configuration, this indicates a system fault.
If there is a blinking light in the instrument cluster, then there is a system
fault.
Display
Read and observe
and on page 145 first.
The control light in the instrument cluster lights up when any of the follow-
ing conditions are met.
› The tyre inflation pressure is low.
› The structure of the tyre is damaged.
› The vehicle is loaded on one side.
› The wheels of one axle are loaded more heavily (e.g. when towing a trailer or
when driving uphill or downhill).
› Snow chains are mounted.
› The spare wheel is mounted.
› One wheel per axle was changed.
WARNING■
When illuminated control lights light up in the instrument cluster lights,
immediately reduce speed and avoid violent steering and brake manoeu-
vres. Stop the vehicle as soon as possible and inspect the tyres and their
inflation pressure.■
Under certain circumstances (e.g. sporty style of driving, wintry or un-
paved roads) the warning light
in the instrument cluster may be delayed
or not light up at all.
Reserve and temporary spare wheel
Introduction
This chapter contains information on the following subjects:
Change
147
Spare wheel
147
Fit a wheel in the appropriate dimensions and design as soon as possible.
WARNING■ If, in the event of a puncture, it is necessary to fit a spare wheel with a
tyre without a dedicated running direction or with the opposite direction of
rotation, drive carefully as the optimal characteristics of the tyre are no lon-
ger applicable in this situation.■
If the dimensions or design of the spare wheel differ from the tyres fitted
to the vehicle (e.g. winter tyres or low-profile tyres), it must only be used
briefly in the event of a puncture and if an appropriately cautious style of
driving is adopted.
146General Maintenance
Page 149 of 193

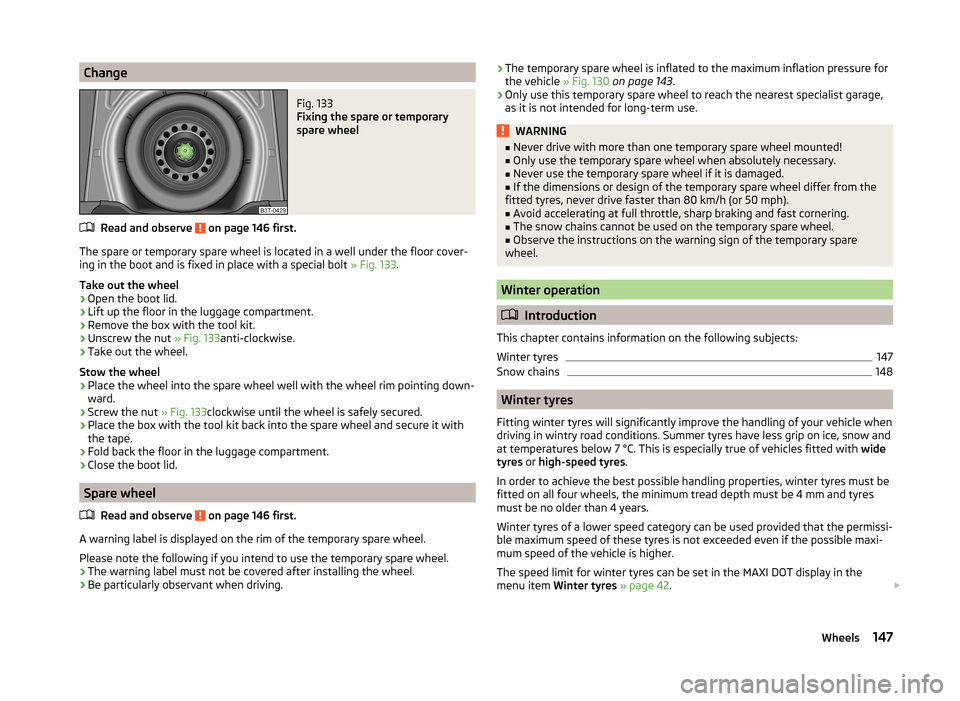
ChangeFig. 133
Fixing the spare or temporary
spare wheel
Read and observe on page 146 first.
The spare or temporary spare wheel is located in a well under the floor cover-
ing in the boot and is fixed in place with a special bolt » Fig. 133.
Take out the wheel
›
Open the boot lid.
›
Lift up the floor in the luggage compartment.
›
Remove the box with the tool kit.
›
Unscrew the nut » Fig. 133anti-clockwise.
›
Take out the wheel.
Stow the wheel
›
Place the wheel into the spare wheel well with the wheel rim pointing down-
ward.
›
Screw the nut » Fig. 133clockwise until the wheel is safely secured.
›
Place the box with the tool kit back into the spare wheel and secure it with
the tape.
›
Fold back the floor in the luggage compartment.
›
Close the boot lid.
Spare wheel
Read and observe
on page 146 first.
A warning label is displayed on the rim of the temporary spare wheel.
Please note the following if you intend to use the temporary spare wheel. › The warning label must not be covered after installing the wheel.
› Be particularly observant when driving.
› The temporary spare wheel is inflated to the maximum inflation pressure for
the vehicle » Fig. 130 on page 143 .
› Only use this temporary spare wheel to reach the nearest specialist garage,
as it is not intended for long-term use.WARNING■ Never drive with more than one temporary spare wheel mounted!■Only use the temporary spare wheel when absolutely necessary.■
Never use the temporary spare wheel if it is damaged.
■
If the dimensions or design of the temporary spare wheel differ from the
fitted tyres, never drive faster than 80 km/h (or 50 mph).
■
Avoid accelerating at full throttle, sharp braking and fast cornering.
■
The snow chains cannot be used on the temporary spare wheel.
■
Observe the instructions on the warning sign of the temporary spare
wheel.
Winter operation
Introduction
This chapter contains information on the following subjects:
Winter tyres
147
Snow chains
148
Winter tyres
Fitting winter tyres will significantly improve the handling of your vehicle when
driving in wintry road conditions. Summer tyres have less grip on ice, snow and
at temperatures below 7 °C. This is especially true of vehicles fitted with wide
tyres or high-speed tyres .
In order to achieve the best possible handling properties, winter tyres must be
fitted on all four wheels, the minimum tread depth must be 4 mm and tyres
must be no older than 4 years.
Winter tyres of a lower speed category can be used provided that the permissi-
ble maximum speed of these tyres is not exceeded even if the possible maxi-
mum speed of the vehicle is higher.
The speed limit for winter tyres can be set in the MAXI DOT display in the
menu item Winter tyres » page 42 .
147Wheels
Page 183 of 193

Brake fluid137
Checking138
Information messages31
brake pedal (automatic gearbox) indicator light
36
brakes Driving in
104
Brakes Brake booster
99
Brake fluid138
Braking and stabilisation systems106
Handbrake100
Information messages31
Brakes and parking99
Braking Information on braking
99
Breakdown kit155
bulb rear lamp
170
Bulbs Replacing
166
Buttons in the driver's door Electric power windows
51
C
Car computer See multifunction display
39
Care and maintenance119
Car park ticket holder69
Carrier83
Cavity protection125
Central locking45
Central locking button48
Change Engine oil
134
Changing Front turn signal bulb
168
Wheels151
Changing a wheel Follow-up work153
Preliminary work151
Removing and attaching a wheel152
Charging a vehicle battery140
Check Fit ball head properly
114
Checking Battery electrolyte level
140
Brake fluid138
Coolant137
Engine oil135
Oil level135
Windscreen washer fluid134
Checks Statutory checks
119
Children and safety20
Child safety Side airbag
21
Child safety lock48
Child seat Classification
22
ISOFIX22
on the front passenger seat20
TOP TETHER23
Use of child seats22
Use of ISOFIX child seats23
Chrome parts see vehicle care
124
Cigarette lighter70
cleaning chrome parts
124
Cleaning Alcantara
128
and maintaining belts128
artificial leather128
headlight glasses125
materials128
natural leather127
plastic parts124
seats covers of the electrically heated seats128
wheels126
Cleaning safety belt
128
Cleaning seat covers
128
Cleaning the interior artificial leather
128
Seat covers128
Cleaning the outside of the vehicle Decorative films
124
Cleaning the vehicle exterior Cavity protection
125
Door locking cylinder125
Headlight glasses125
Under-body protection126
wheels126
Windows and external mirrors125
Cleaning vehicle122
Cleaning vehicle exterior123
Plastic parts124
Rubber seals124
Vehicle paint work123
Wiper blades126
Clean interior Safety belt
128
clean outside of vehicle chrome parts
124
Climatronic air distribution control
85
Operating elements87
Clothes hook74
Cockpit 12-Volt power outlet
71
Ashtray71
Cigarette lighter70
General view25
Lights58
storage compartments68
useful equipment68
181Index
Page 184 of 193

COMING HOME57
compartments68
Computer See multifunction display
39
convenience turn signal55
Coolant136
Checking137
Information messages32
Replenishing137
Temperature gauge27
Warning light32
Cooling system cost-effective use
88
malfunctions88
CORNER See Fog lights with CORNER function
56
Correct seated position7
Driver7
Front passenger8
Instructions9
Rear seats9
Counter for distance driven28
cruise control operation
108
operation description109
Cruise control system Warning light
36
Cruise Control System108
Cup holders70
D
DAY LIGHT See Daytime running lights
54
Daytime running lights54
Dazzle see sun screen of the panoramic roof
60
De-icing windows
125
Deactivating an airbag18
Decorative films124
Defrosting rear window59
Delayed locking of the boot lid see boot lid
51
Departure angle175
Diesel refer to Fuel
131
Diesel fuel Operation in winter
131
Diesel particle filter Information notices
34
Warning light34
Digital Clock Time
29
Dipstick135
Disconnecting and reconnecting vehicle battery
141
Display27
Compass points43
Coolant temperature27
Fuel supply28
Gear changes38
Service intervals43
Display a low temperature38
Display of the second speed29
Disposal Acceptance and recycling of used vehicles
121
Distance driven28
Door Child safety lock
48
Closing49
Emergency locking161
Opening49
Warning light for open door31
Door open Warning light
31
Double-sided floor covering79
Driving Driving through water105
Emissions173
Fuel consumption173
Maximum speed176
off made-up roads105
Driving economically Tips
104
Driving in Brake linings
104
the engine104
Tyres104
Driving off made-up roads105
Driving through water105
Driving with a trailer116
E
Economical driving and environmental friendli- ness
104
EDL107
Electrical power windows Button in the driver's door
51
Button in the rear door52
Buttons in the driver's door52
Electronic Differential Lock (EDL)107
Electronic immobilizer97
Electronic Stability Control (ESC)106
Emergency Changing a wheel
151
Hazard warning light system57
jump-starting158
Jump-starting157
Locking the door without a locking cylinder161
Selector lever-unlocking162
Towing the vehicle158
Towing the vehicle using the tow hitch160
Tyre repair155
Unlocking the tailgate162
emergency equipment reflective vest
149
182Index
Page 186 of 193

Hydraulic Brake Assist (HBA)107
I
Ice scrapers
125
Ignition see ignition lock
98
Ignition lock98
Immobilizer97
Indicator lights30
Individual settings Locking
47
Unlocking47
Inertia reels13
Information system37
Compass point display43
Display a low temperature38
Door warning39
Gear recommendation38
MAXI DOT display42
Multifunction display39
Operation37
Service interval display43
instrument cluster Auto Check Control
29
Instrument cluster26
Counter for distance driven28
Display27
Display of the second speed29
Fuel gauge28
Indicator lights30
Overview26
Revolution counter27
see instrument cluster26
Speedometer27
Temperature gauge27
Interior care126
Natural leather127
Interior monitor50
ISOFIX22
J
Jack
150
Jump-starting157, 158
K
Key Locking
47
Start the engine98
Unlocking47
L
Lamp failure Indicator light
33
Lamps Warning lights
33
Leather Natural leather care
127
LEAVING HOME57
Lever Main beam
55
Turn signal55
Windscreen wipers61
lever lock selection (automatic gearbox) indicator light
36
Light COMING HOME / LEAVING HOME
57
Daytime running lights54
Fog lights with CORNER function56
Parking light58
Replacing bulbs166
Lighting Luggage compartment
75
Lights53
Automatic driving lamp control55
Beam range adjustment53
Cockpit58
Fog lights56
Hazard warning light system57
Headlight flasher55
Indicator lights30
Low beam53
Main beam55
Parking light53
Rear fog light56
switching on/off53
Turn signal55
Lock/unlock steering lock97
Locking Individual settings
47
Key47
Remote control46
Locking and unlocking the vehicle from the in- side
48
Locking the door without a locking cylinder Emergency
161
Low beam53
Luggage compartment75
Cover77
Emergency unlocking162
Fastening elements76
Fixing nets76
Flexible storage compartment79
Lighting75
Unlocking the tailgate162
Variable loading floor80
Luggage compartment cover77
Luggage compartment lid50
Luggage Storage Storage net bag
79
M
Main beam
55
Warning light36
Maintenance see vehicle care
123
Manual air conditioning Air distribution control
85
Operating elements86
184Index
Page 187 of 193

Manual gear changingrefer to gear changing101
MAXI DOT See MAXI DOT display
42
MAXI DOT display42
Main menu42
Operation37
Settings42
Maximum permissible weights
172
Maximum speed176
MDI96
MFD See multifunction display
39
Mirror Exterior mirror
63
Make-up60
Mobile phone89
Connecting to the hands-free system91
Modifications119
Modifications and technical alterations Airbags
121
Service120
Spoiler121
Multifunction display Functions
39
Information40
Memory39
Operation37
Multimedia94
Multimedia holder72
N
N1
79
Nameplate172
Nets76
O
Oil Information messages
31
See Engine oil135
Oil pressure Information messages
31
On-board computer See multifunction display
39
Operating weight172
Operation in winter Diesel fuel
131
Vehicle battery140
Original accessories120
Outside temperature40
Overview Engine compartment
133
Indicator lights30
P
Parking
100
Parking aid107
Parking aid107
Function108
Parking light53
Parking space100
Park the vehicle Parking
100
Passive safety Before setting off
6
Driving safety6
Safety equipment6
Passive Safety6
Payload172
Pedals101
Footmats101
Petrol see fuel
130
Plastic parts124
Pockets on the front seat rests74
Polishing vehicle paint work see vehicle care
123
Power outlet 12 V
71
Power steering Warning light
32
Practical equipment Net pockets on the front seat rests
74
Reflective vest149
Practical features 12-Volt power outlet
71
Storage pockets on the front seats74
Waste container72
R
Radiator fan
133
Raise vehicle153
Rear fog light56
Warning light33
Rear interior light59
Rear mirror62
Exterior mirror63
Interior mirror62
Refuelling129
Fuel129
Remote control Locking
46
Replacing the battery161
Synchronisation process161
Unlocking46
Remote control key Replacing the battery
161
Repairs and technical alterations119
Replacement parts119
Replacing Bulb for main beam, daytime running lights andparking light
168
Bulb for the fog light168
185Index
Page 188 of 193

Bulb for the licence plate light169
Bulb in rear light170
Bulbs166
Fuses163
Fuses in the dash panel164
Fuses in the engine compartment165
Low beam bulb167
Vehicle battery141
Windscreen wiper blades162
Wiper blades163
Replenishing Coolant
137
Engine oil136
Windscreen washer fluid134
Revolution counter27
Roof Load
83
Roof rack mounting points
83
Roof load83
Roof rack system83
Rubber seals124
S
SAFE See Safe securing system
47
SAFELOCK See Safe securing system
47
Safe securing system47
Safety6
Child safety20
Child safety seats20
Correct seated position7
Head restraints65
ISOFIX22
TOP TETHER23
Saving electrical energy104
Seals Vehicle care
124
SeatAdjusting64
Seat belt Warning light
31
Seat belts10
Belt tensioners13
fastening and unfastening12
Height adjustment13
Inertia reels13
The physical principle of a frontal collision11
Seat features66
Seats Front armrest
67
Head restraints65
Heating66
Rear armrest67
Seat backrests67
Seats and head restraint64
Selector lever Refer to Selector lever
102
Service120
Service interval display43
Setting29
Lower position of the variable loading floor81
seats and head restraints64
Upper position of the variable loading floor80
Setting the29
Side airbag16
Snow chains148
Spare change
147
spare wheel146
change147
instructions147
Speedometer27
See speedometer27
Speed symbol Refer to Wheels
145
Spoiler121
START-STOP109
Manually deactivating/activating the system111
Operating conditions of the system110
operation in vehicles with automatic gearbox110
operation in vehicles with manual gearbox110
system-related automatic start-up111
Starting engine Jump-starting
157
Starting the engine Jump-starting
158
START STOP Information messages
111
Jump-starting158
Start the engine98
Stating and turning off the engine97
Steering wheel8
Stopping100
Storage68
Storage compartment Glasses compartment
73
in the centre console69
in the front arm rest73
on the front passenger side73
Storage compartments68
Storage compartments in the boot78
Storage net bag79
Storage pockets on the front seats74
Stowage compartments in the doors
69
Sun visors60
Switching off the engine98
Switch light on/off53
T
Taking care of your vehicle Automatic car wash system
122
High-pressure cleaner123
Washing by hand122
Wash system122
186Index
Page 189 of 193

TCSOperation106
Technical data172
Telephone89
Tiptronic103
Tools150
TOP TETHER23
Towing158
Towing device Description
112
Use and care115
Towing eye Front
159
Rear160
Towing protection50
Traction Control System (TCS)106
Trailer116
13-pin power socket116
driving with a trailer116
Loading116
Safety eyelet116
Trailer operation112
Transport Luggage compartment
75
Roof rack system83
Transporting68
Transporting children safely20
Turn signal55
Turn signal system Warning light
36
two-way radio systems89
Tyre inflation pressure Warning light
35
Tyre load-bearing capacity Refer to Wheels
145
tyre pressure monitor display
146
setting146
Tyre repair Check pressure157
Preparations156
Sealing and inflating the tyre156
Tyres142
Inflation pressure143
new104
New144
Refer to Wheels144
Sizes143
Tyre wear indicator143
U
Under-body Vehicle care
126
Under-body protection126
Unlocking Individual settings
47
Key47
Remote control46
Unlocking and locking45
USB96
Used vehicles Acceptance and recycling
121
Useful equipment Ashtray
71
Car park ticket holder69
Cigarette lighter70
Clothes hook74
Cup holders70
Glasses compartment73
Multimedia holder72
Storage compartment68
Using the information system37
Using the selector lever102
V
Variable loading floor
80
Folding up82
Inserting81
Lower position81
Parking position82
Removing81
Upper position80
Vehicle battery Automatic load deactivation
141
charging140
Checking the battery electrolyte level140
Cover139
Operation in winter140
Replacing141
Safety instructions138
vehicle care chrome parts
124
Vehicle care Alcantara
128
Artificial leather128
Cavity protection125
Cleaning vehicle exterior123
Cleaning wheels126
Decorative films124
Door locking cylinder125
Headlight glasses125
Interior care126
Maintenance123
Materials128
Natural leather127
Plastic parts124
Polishing vehicle paint work123
Rubber seals124
Safety belt128
Seat covers128
Under-body protections126
washing122
Vehicle Condition see Auto Check Control
29
Vehicle data sticker172
Vehicle data sticker and nameplate Vehicle data sticker and nameplate
172
Vehicle dimensions174
Vehicle height174
187Index