ESP SKODA RAPID SPACEBACK 2013 1.G Owner's Manual
[x] Cancel search | Manufacturer: SKODA, Model Year: 2013, Model line: RAPID SPACEBACK, Model: SKODA RAPID SPACEBACK 2013 1.GPages: 193, PDF Size: 14.8 MB
Page 8 of 193
Safety
Passive Safety
General information
Introduction
This chapter contains information on the following subjects:
Before setting off
6
Driving safety
6
Safety equipment
6
In this section you will find important information, tips and notes on the sub-
ject of passive safety in your vehicle.
We have combined everything here which you should be familiar with, for ex-
ample, regarding seat belts, airbags, child seats and safety of children.
WARNING■ This chapter contains important information on how to use the vehicle for
the driver and his occupants.■
You can find further information on safety concerning you and those trav-
elling with you in the following chapters of this owner's manual.
■
The complete on-board literature should always be in the vehicle. This
applies in particular, if you rent out or sell the vehicle.
Before setting off
Read and observe
on page 6 first.
For your own safety and the safety of the people travelling with you, please
pay attention to the following points before setting off.
Ensure that the lighting and the turn signal system are functioning proper-
ly.
Ensure that the function of the wipers and the condition of the wiper
blades are free of any defects.
Ensure that all of the windows offer good visibility to the outside.
Adjust the rear-view mirror so that vision to the rear is guaranteed.
Ensure that the mirrors are not covered.
Check the tyre inflation pressure.
Check the engine oil, brake fluid and coolant level.
Secure all items of luggage.
Do not exceed the permissible axle loads and permissible gross weight of
the vehicle.
Close all doors as well as the bonnet and boot lid.
Ensure that no objects can obstruct the pedals.
Protect children in suitable child seats with correctly fastened seat
belts » page 20 , Transporting children safely .
Adopt the correct seated position » page 7, Correct and safe seated
position . Tell your passengers to assume the correct seated position.
Driving safety
Read and observe
on page 6 first.
The driver is fully responsible for himself and his occupants. If your driving
safety is effected, you place yourself and the oncoming traffic at risk.
The following guidelines must therefore be observed. Do not become distracted from concentrating on the traffic situation, e.g.
by your passengers or mobile phone calls.
Never drive when your driving ability is impaired, e.g. due to medication, al-
cohol or drugs.
Keep to the traffic regulations and the permissible speed limit.
Always adjust the driving speed to the road, traffic and weather condi-
tions.
Take regular breaks on long journeys – at least every two hours.
Safety equipment
Read and observe
on page 6 first.
The following list contains only part of the safety equipment in your vehicle.
› Three-point seat belts for all the seats.
› Belt force limiters for the front seats.
› Belt tensioners for the front seats.
› Seat belt height adjusters for the front seats.
› Front airbag for the driver and the front passenger.
› Side airbags.
6Safety
Page 11 of 193
Correct seated position for the passengers in the rear seatsRead and observe
on page 7 first.
To reduce the risk of injury in the event of a sudden braking manoeuvre or anaccident, the occupants on the rear seats must observe the following.
Adjust the head restraint such that the top edge of the head restraint is at
the same level as the upper part of the head
B
» Fig. 1 on page 7 .
Correctly fasten the seat belt » page 10, Using seat belts .
Use a suitable child restraint system if transporting children in the vehi-
cle » page 20 , Transporting children safely .
Adjust the seats and head restraints » page 64.
Examples of incorrect seated positions
Read and observe
on page 7 first.
Maximum seat belt protection is only achieved if seat belts are fastened cor-
rectly.
Incorrect seated positions considerably reduce the protective functions of the
seat belts and therefore increase the risk of injury due to an incorrect routing
of the seat belt.
The driver is fully responsible for himself and passengers, especially children.
Never allow a passenger to adopt an incorrect seated position when the car is
moving.
The following list contains instructions which, if not observed, may cause seri-
ous injuries or death. This list is not complete, however we would like you to
familiarise yourself with this subject.
Observe the following instructions while driving. Do not stand up.
Do not stand on the seats.
Do not kneel on the seats.
Do not tilt the seat backrest too far back.
Do not lean against the dash panel.
Do not lie on the rear seats.
Do not sit only on the front part of the seat.
Do not sit facing to the side.
Do not lean out of the window.
Do not put your feet out of the window.
Do not put your feet on the dash panel.
Do not put your feet on the seat cushion.
Do not allow anybody to travel in the footwell.
Do not drive without fastening your seat belt.
Do not delay in the luggage compartment.9Passive Safety
Page 20 of 193
WARNING (Continued)■The installation of impermissible accessories in the vicinity of the head
airbags can considerably impair the protection offered by the head airbag in
the event of it being deployed. When the deployed head airbag is inflated,
parts of the accessories fitted could be thrown into the interior of the car
and injure the occupants » page 119.■
The sun visors must not be swivelled towards the side windows in the
deployment area of the head airbags if any objects, such as ball-point pens,
etc. are attached to them. This might result in injuries to the occupants if
the head airbag is deployed.
■
There must not be any further persons, animals or objects positioned be-
tween the seated occupants and the deployment area of the airbag. In ad-
dition, none of the occupants should lean their head out of the window
when driving, or extend their arms and hands out of the window.
Note
In vehicles with head airbags, the lettering can be seen on the B column
cladding.
Deactivating airbags
Introduction
This chapter contains information on the following subjects:
Deactivating airbags
18
Deactivating the front passenger airbag
18
Deactivating airbags
Deactivating an airbag should be considered in cases such as the ones below. › If using a rear-facing child seat on the front passenger seat (due to different
legal regulations, the airbag must be deactivated if using a forwards-facing
child seat in some countries) » page 20, Transporting children safely .
› If it is not possible to maintain a distance of at least 25 cm between the mid-
dle of the steering wheel and chest, despite the driver's seat being correctly
adjusted.
› If special attachments are required in the area of the steering wheel because
of a physical disability.
› If different seats have been fitted (e.g. orthopaedic seats without side air-
bags).
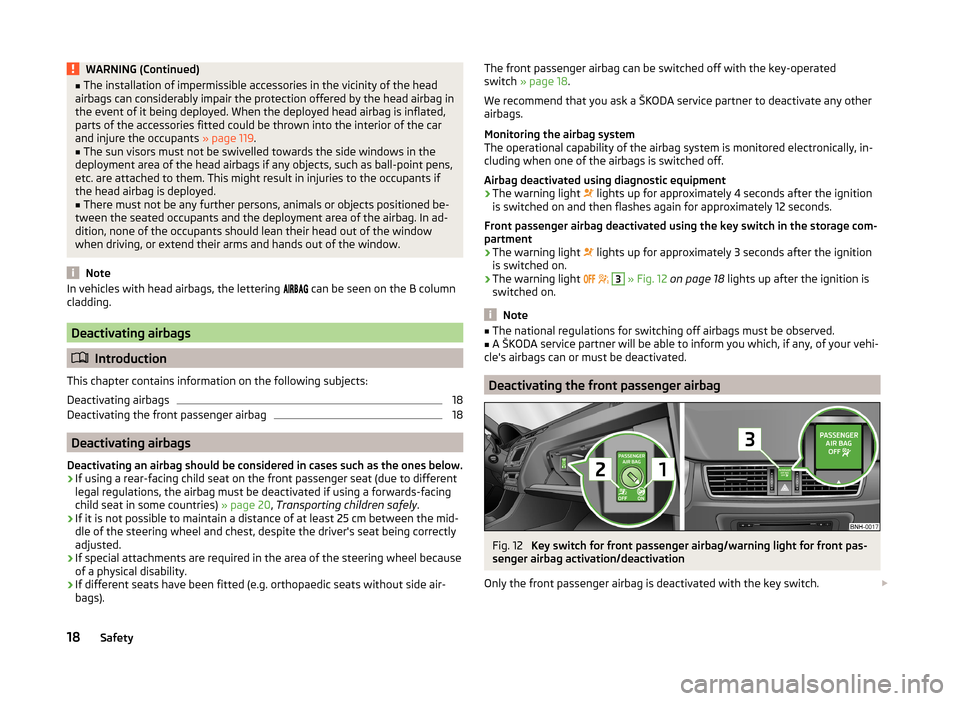
The front passenger airbag can be switched off with the key-operated
switch » page 18 .
We recommend that you ask a ŠKODA service partner to deactivate any other airbags.
Monitoring the airbag system
The operational capability of the airbag system is monitored electronically, in-
cluding when one of the airbags is switched off.
Airbag deactivated using diagnostic equipment › The warning light
lights up for approximately 4 seconds after the ignition
is switched on and then flashes again for approximately 12 seconds.
Front passenger airbag deactivated using the key switch in the storage com-
partment
› The warning light
lights up for approximately 3 seconds after the ignition
is switched on.
› The warning light
3
» Fig. 12 on page 18 lights up after the ignition is
switched on.
Note
■ The national regulations for switching off airbags must be observed.■A ŠKODA service partner will be able to inform you which, if any, of your vehi-
cle's airbags can or must be deactivated.
Deactivating the front passenger airbag
Fig. 12
Key switch for front passenger airbag/warning light for front pas-
senger airbag activation/deactivation
Only the front passenger airbag is deactivated with the key switch.
18Safety
Page 21 of 193
Switching off›Switch off the ignition.›
Open the storage box on the front passenger's side.
›
Fold the key bit out completely for the radio key » .
›
Carefully insert the key into the key slot in the key switch as far as the stop.
›
Use the key to turn the slot of the key switch carefully into position
2
» Fig. 12 OFF .
›
Pull the key out of the slot in the key switch » .
›
Close the storage box on the front passenger's side.
›
After switching on the ignition, check whether the warning light
3
1)
is
illuminated in writing
is illuminated in the centre panel.
Switching on
›
Switch off the ignition.
›
Open the storage box on the front passenger's side.
›
Fold the key bit out completely for the radio key » .
›
Carefully insert the key into the key slot in the key switch as far as the stop.
›
Use the key to turn the slot of the key switch carefully into position
1
» Fig. 12 ON .
›
Pull the key out of the slot in the key switch » .
›
Close the storage box on the front passenger's side.
›
After switching on the ignition, check whether the warning light
3
is
not illuminated in writing
is not illuminated in the centre
panel.
WARNING■ The driver is responsible for whether the airbag is switched on or switch-
ed off.■
Only switch off the airbag when the ignition is switched off! Otherwise a
fault can occur in the system for deactivating the airbag.
■
If the
warning light is flashing, the front passenger airbag will not
be deployed in an accident! Have the airbag system checked by a specialist
garage immediately.
■
The key cannot be inserted in the key switch while driving.
■ Shocks can cause the key to turn in the slot and trigger the airbag!
■ The airbag could be triggered unexpectedly in an accident - it may result
in injury or death!
CAUTIONAn insufficiently folded out key bit can damage the key switch!1)
The warning light comes on for a few seconds after the ignition is switched on, goes out for about
1 second and then comes on again.
19Airbag system
Page 32 of 193
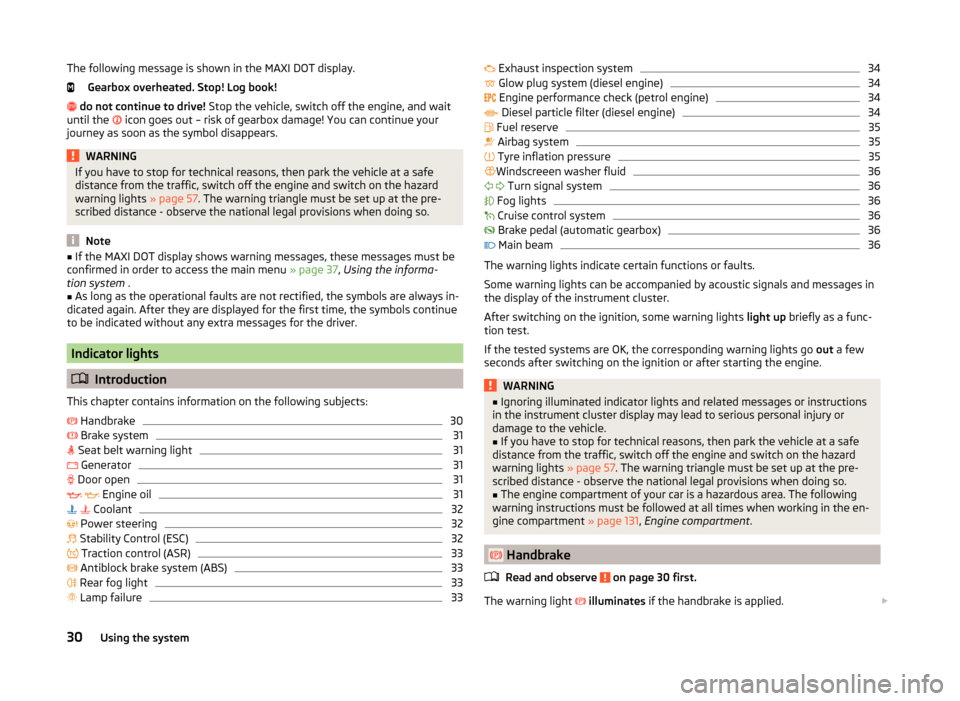
The following message is shown in the MAXI DOT display.Gearbox overheated. Stop! Log book!
do not continue to drive! Stop the vehicle, switch off the engine, and wait
until the
icon goes out – risk of gearbox damage! You can continue your
journey as soon as the symbol disappears.WARNINGIf you have to stop for technical reasons, then park the vehicle at a safe
distance from the traffic, switch off the engine and switch on the hazard
warning lights » page 57. The warning triangle must be set up at the pre-
scribed distance - observe the national legal provisions when doing so.
Note
■ If the MAXI DOT display shows warning messages, these messages must be
confirmed in order to access the main menu » page 37, Using the informa-
tion system .■
As long as the operational faults are not rectified, the symbols are always in-
dicated again. After they are displayed for the first time, the symbols continue
to be indicated without any extra messages for the driver.
Indicator lights
Introduction
This chapter contains information on the following subjects:
Handbrake
30
Brake system
31
Seat belt warning light
31
Generator
31
Door open
31
Engine oil
31
Coolant
32
Power steering
32
Stability Control (ESC)
32
Traction control (ASR)
33
Antiblock brake system (ABS)
33
Rear fog light
33
Lamp failure
33 Exhaust inspection system34 Glow plug system (diesel engine)34
Engine performance check (petrol engine)
34
Diesel particle filter (diesel engine)
34
Fuel reserve
35
Airbag system
35
Tyre inflation pressure
35
Windscreeen washer fluid
36
Turn signal system
36
Fog lights
36
Cruise control system
36
Brake pedal (automatic gearbox)
36
Main beam
36
The warning lights indicate certain functions or faults.
Some warning lights can be accompanied by acoustic signals and messages in
the display of the instrument cluster.
After switching on the ignition, some warning lights light up briefly as a func-
tion test.
If the tested systems are OK, the corresponding warning lights go out a few
seconds after switching on the ignition or after starting the engine.
WARNING■ Ignoring illuminated indicator lights and related messages or instructions
in the instrument cluster display may lead to serious personal injury or
damage to the vehicle.■
If you have to stop for technical reasons, then park the vehicle at a safe
distance from the traffic, switch off the engine and switch on the hazard
warning lights » page 57. The warning triangle must be set up at the pre-
scribed distance - observe the national legal provisions when doing so.
■
The engine compartment of your car is a hazardous area. The following
warning instructions must be followed at all times when working in the en-
gine compartment » page 131, Engine compartment .
Handbrake
Read and observe
on page 30 first.
The warning light
illuminates if the handbrake is applied.
30Using the system
Page 33 of 193
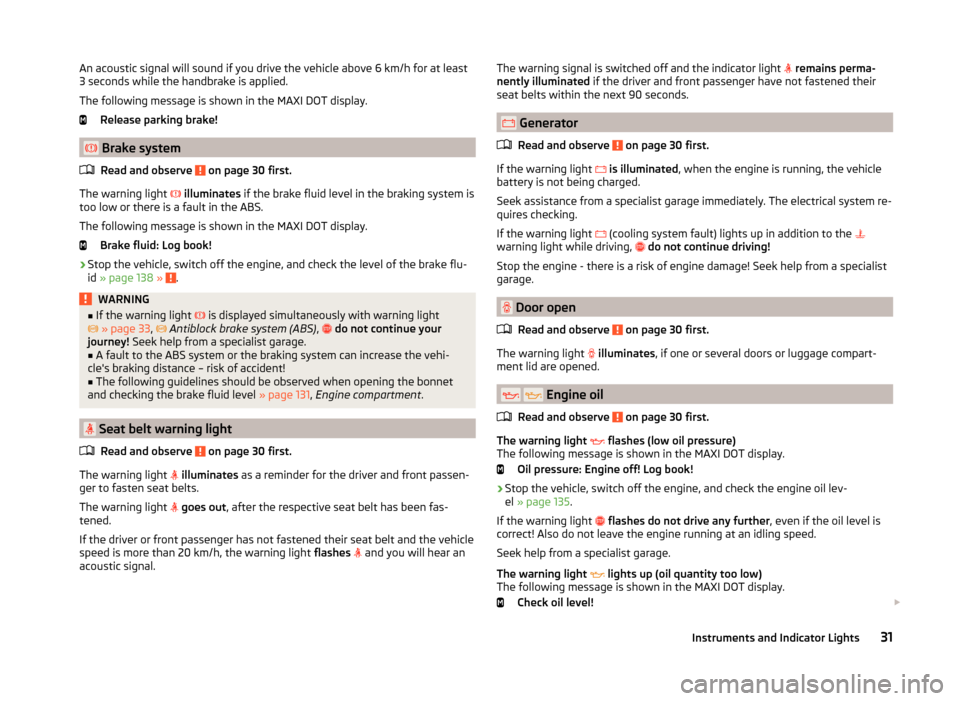
An acoustic signal will sound if you drive the vehicle above 6 km/h for at least
3 seconds while the handbrake is applied.
The following message is shown in the MAXI DOT display. Release parking brake!
Brake system
Read and observe
on page 30 first.
The warning light
illuminates if the brake fluid level in the braking system is
too low or there is a fault in the ABS.
The following message is shown in the MAXI DOT display. Brake fluid: Log book!
›
Stop the vehicle, switch off the engine, and check the level of the brake flu-
id » page 138 » .
WARNING■
If the warning light is displayed simultaneously with warning light
» page 33 , Antiblock brake system (ABS) , do not continue your
journey! Seek help from a specialist garage.■
A fault to the ABS system or the braking system can increase the vehi-
cle's braking distance – risk of accident!
■
The following guidelines should be observed when opening the bonnet
and checking the brake fluid level » page 131, Engine compartment .
Seat belt warning light
Read and observe
on page 30 first.
The warning light
illuminates as a reminder for the driver and front passen-
ger to fasten seat belts.
The warning light
goes out , after the respective seat belt has been fas-
tened.
If the driver or front passenger has not fastened their seat belt and the vehicle
speed is more than 20 km/h, the warning light flashes
and you will hear an
acoustic signal.
The warning signal is switched off and the indicator light remains perma-
nently illuminated if the driver and front passenger have not fastened their
seat belts within the next 90 seconds.
Generator
Read and observe
on page 30 first.
If the warning light
is illuminated , when the engine is running, the vehicle
battery is not being charged.
Seek assistance from a specialist garage immediately. The electrical system re-
quires checking.
If the warning light (cooling system fault) lights up in addition to the
warning light while driving,
do not continue driving!
Stop the engine - there is a risk of engine damage! Seek help from a specialist garage.
Door open
Read and observe
on page 30 first.
The warning light
illuminates , if one or several doors or luggage compart-
ment lid are opened.
Engine oil
Read and observe
on page 30 first.
The warning light flashes (low oil pressure)
The following message is shown in the MAXI DOT display.
Oil pressure: Engine off! Log book!
› Stop the vehicle, switch off the engine, and check the engine oil lev-
el » page 135 .
If the warning light
flashes do not drive any further , even if the oil level is
correct! Also do not leave the engine running at an idling speed.
Seek help from a specialist garage.
The warning light lights up (oil quantity too low)
The following message is shown in the MAXI DOT display.
Check oil level!
31Instruments and Indicator Lights
Page 39 of 193

Information system
Driver information system
Introduction
This chapter contains information on the following subjects:
Using the information system
37
Display a low temperature
38
Gear recommendation
38
Door, boot or engine compartment warning
39
The information system provides the driver with alerts and messages about in-
dividual vehicle systems.
This information and advice is shown in the instrument cluster display or indi-
cated by the illumination of the corresponding indicator light in the instrument
cluster.
The information system provides the following information and instructions
(depending on vehicle equipment).
› Data relating to the multi-function display (MFD)
» page 39.
› Data relating to the Maxi DOT display
» page 42.
› Service interval display
» page 43.
› Auto Check Control
» page 29.
› Selector lever positions for an automatic gearbox
» page 102.
WARNINGConcentrate fully at all times on your driving! As the driver, you are fully re-
sponsible for the operation of your vehicle.Using the information systemFig. 24
Buttons/dial: on the operating lever / on the multifunction steer-
ing wheel
Read and observe
on page 37 first.
Some functions of the information system can be operated using the buttons
on the multifunction steering wheel » Fig. 24.
Description of the operation
Button / wheel
» Fig. 2 4
ActionOperation
ABriefly press at the topor below for a longer timeSelect data / set data valuesPress top
or below for a longer timeDisplay main menu of the
MAXI DOT display » page 42BPress brieflyView information / confirm specificationCPress brieflyTo go up one level in the menu of the
MAXI DOT display » page 42Press and hold buttonDisplay main menu of the
MAXI DOT display » page 42DTurn upwards or down-
wardsSelect data / set data valuesPress brieflyView information / confirm specification37Information system
Page 41 of 193

WARNINGThe driver is always responsible for selecting the correct gear in different
driving situations, such as overtaking.
For the sake of the environment
A suitably selected gear has the following advantages.■It helps to reduce fuel consumption.■
It reduces the operating noise.
■
It protects the environment.
■
It benefits the durability and reliability of the engine.
Door, boot or engine compartment warning
Read and observe
on page 37 first.
Vehicles with a MAXI DOT display
If at least one door, the boot or bonnet is open, the display indicates the rele-
vant open door, boot or bonnet vehicle icon.
Vehicles with a segment display
If at least one door or the tailgate is open, the
warning light in the instru-
ment cluster lights up » page 31.
An acoustic signal will also sound if you drive the vehicle above 6 km/h when a door is open.
Multifunction display (MFD)
Introduction
This chapter contains information on the following subjects:
Memory
39
Information overview
40
Warning at excessive speeds
41
The driving data is displayed on the multifunction display.
The multifunction display only operates when the ignition is switched on. After the ignition is switched on, the function that was last selected before switch-
ing off the ignition is displayed.
For vehicles with a MAXI DOT display, the menu item MFD must be selected
and confirmed in the main menu » page 42, MAXI DOT display .
On vehicles with a MAXI DOT display, there is an option to fade out some of
the information » page 42, Settings .WARNING■
Concentrate fully at all times on your driving! As the driver, you are fully
responsible for the operation of your vehicle.■
Even at outside temperatures of around +4 °C, black ice may still be
present on the road surface! You should therefore not rely solely on the
outside temperature display for an indication of whether there is black ice
on the road.
CAUTION
Pull out the ignition key if coming in contact with the display (e.g. when clean-
ing) to prevent any possible damage.
Note
■ In certain national versions the displays appear in the Imperial system of
measures.■
If the display of the second speed is activated in mph, the current speed is
not indicated in km/h on the display.
■
The amount of fuel consumed will not be indicated.
Memory
Fig. 26
Multi-function display - memory display
Read and observe and on page 39 first.
In memory the values of elements of the multifunction display(e.g. average
fuel consumption) are recorded.
The multifunction display is equipped with two memories, 1 and 2.
39Information system
Page 42 of 193

Display of the selected memory in the display at the position A » Fig. 26
Single-trip memory
Total trip memory
Select memory›
Select the corresponding element of the multifunction display » page 40.
Confirm the element again to switch between the individual memories.
Resetting
›
Select the corresponding element of the multifunction display » page 40.
›
Select the desired memory.
›
Press and hold button
B
or adjustment wheel
D
» Fig. 24 on page 37 .
Single-trip memory (memory 1)
The single-trip memory collates the driving information from the moment the
ignition is switched on until it is switched off.
New data will also flow into the calculation of the current driving information if
the trip is continued within 2 hours after switching off the ignition.
If the trip is interrupted for more than 2 hours, the memory is automatically
erased.
Total-trip memory (memory 2)
The total-trip memory gathers data from any number of individual journeys up
to a total of 19 hours and 59 minutes or 1 999 kilometres driven ( ), and a total
of 99 hours and 59 minutes or 9 999 kilometres driven ( ).
The memory is deleted when either of these limits is reached and the calcula-
tion starts all over again.
Unlike the single-trip memory, the total-trip memory is not deleted after a pe-
riod of interruption of driving of 2 hours.
The following values of the selected memory are set to zero. › Average fuel consumption.
› Distance driven.
› Average speed.
› Driving time
Note
Disconnecting the vehicle battery will delete all memory data.Information overview
Read and observe
and on page 39 first.
The information overview of the Multifunction Display (the number of itemsdisplayed is different depending on equipment).
Outside temperature
The current outside temperature is displayed.
For vehicles with a MAXI DOT display this information is always shown.
Driving time
The time travelled since the memory was last erased is displayed.
If you want to measure the time travelled from a particular moment in time,
reset the memory to zero at that point in time » page 39, Memory .
The maximum time indicated in both memories is 19 hours and 59 minutes ( )
and 99 hours and 59 minutes ( ). The indicator is set back to zero if this period
is exceeded.
Current fuel consumption
The current fuel consumption level is displayed in litres/100 km 1)
. You can use
this information to adapt your driving style to the desired fuel consumption.
The display appears in litres/hour if the vehicle is stationary or driving at a low
speed 2)
.
Average fuel consumption
The average fuel consumption since the memory was last erased is displayed
in litres/100 km 1)
.
If you wish to determine the average fuel consumption over a certain period of time, you must set the memory at the start of the new measurement to
zero » page 39 , Memory . After erasing the memory, no value is displayed until
you have driven approx. 300 m.
The display is updated regularly while you are driving.
Range
The range indicates the distance you can still drive with your vehicle based on
the level of fuel in the tank and with the same style of driving as before.
1)
On some models in certain countries, the display appears in kilometres/litre.
2)
On some models in certain countries, – -.- km/ltr. is displayed when the vehicle is stationary.
40Using the system
Page 50 of 193

NoteIndividual settings can be carried out in a specialist workshop.
Locking/unlocking the vehicle from the inside
Fig. 30
Central locking button
Read and observe and on page 45 first.
If the vehicle has not been locked from outside, the » Fig. 30 button can be
used to unlock or lock the vehicle.
Unlocking/locking » Fig. 30
If the icon in the button
is lit, the vehicle is locked.
The central locking system also operates if the ignition is switched off.
The following applies if your vehicle has been locked using the central locking button.
› Opening the doors and the boot lid from the outside is not possible.
› The doors can be unlocked and opened from the inside by a single pull on the
opening lever of the respective door.
› In the event of an accident in which the airbags are deployed, the locked
doors are automatically unlocked in order to enable rescuers to gain access
to the vehicle.
WARNING■ Doors locked from the inside make it difficult for rescuers to get into the
vehicle in an emergency – risk to life!■
If the Safelock system is switched on » page 47, the door opening levers
and the central locking buttons do not operate.
CAUTION
If at least one door has been opened, the vehicle cannot be locked.Child safety lockFig. 31
Back door: left/right
Read and observe
and on page 45 first.
The child safety lock prevents the rear door from being opened from the in-
side. The door can only be opened from the outside.
Switching the cooling system on and off » Fig. 31
Switching on
Switching off
You can switch the child safety lock on and off using the vehicle key.
48Using the system