turn signal SKODA RAPID SPACEBACK 2014 1.G User Guide
[x] Cancel search | Manufacturer: SKODA, Model Year: 2014, Model line: RAPID SPACEBACK, Model: SKODA RAPID SPACEBACK 2014 1.GPages: 204, PDF Size: 27.11 MB
Page 62 of 204
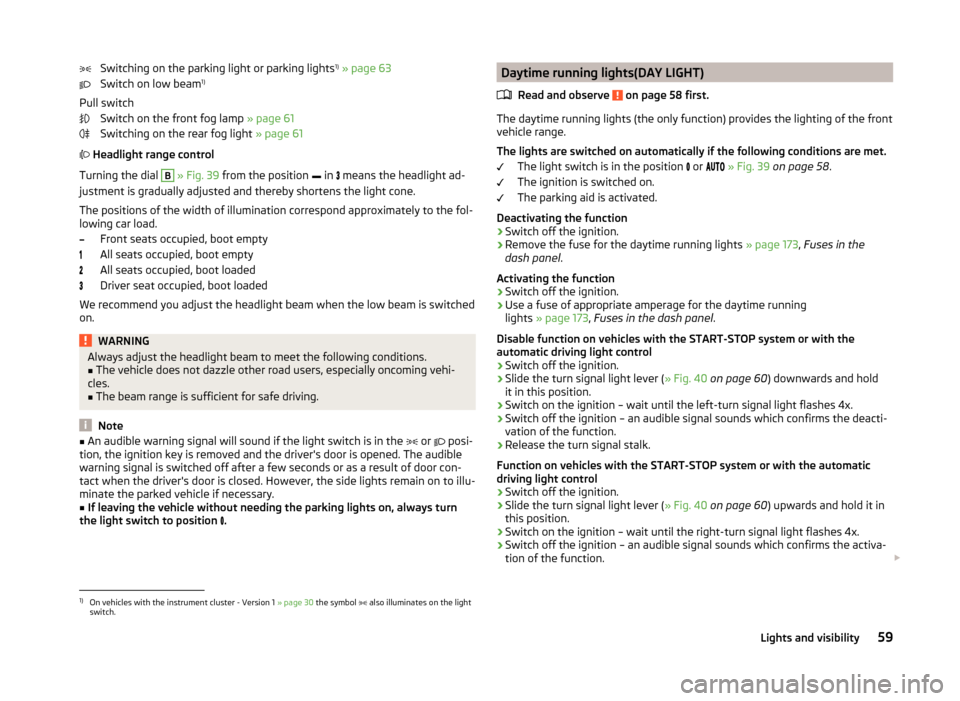
Switching on the parking light or parking lights1)
» page 63
Switch on low beam 1)
Pull switch Switch on the front fog lamp » page 61
Switching on the rear fog light » page 61
Headlight range control
Turning the dial B
» Fig. 39 from the position
in
means the headlight ad-
justment is gradually adjusted and thereby shortens the light cone.
The positions of the width of illumination correspond approximately to the fol- lowing car load.
Front seats occupied, boot empty
All seats occupied, boot empty
All seats occupied, boot loaded
Driver seat occupied, boot loaded
We recommend you adjust the headlight beam when the low beam is switched
on.
WARNINGAlways adjust the headlight beam to meet the following conditions.■The vehicle does not dazzle other road users, especially oncoming vehi-
cles.■
The beam range is sufficient for safe driving.
Note
■ An audible warning signal will sound if the light switch is in the or posi-
tion, the ignition key is removed and the driver's door is opened. The audible
warning signal is switched off after a few seconds or as a result of door con-
tact when the driver's door is closed. However, the side lights remain on to illu-
minate the parked vehicle if necessary.■
If leaving the vehicle without needing the parking lights on, always turn
the light switch to position
.
Daytime running lights(DAY LIGHT)
Read and observe
on page 58 first.
The daytime running lights (the only function) provides the lighting of the frontvehicle range.
The lights are switched on automatically if the following conditions are met. The light switch is in the position
or
» Fig. 39 on page 58 .
The ignition is switched on.
The parking aid is activated.
Deactivating the function
›
Switch off the ignition.
›
Remove the fuse for the daytime running lights » page 173, Fuses in the
dash panel .
Activating the function
›
Switch off the ignition.
›
Use a fuse of appropriate amperage for the daytime running
lights » page 173 , Fuses in the dash panel .
Disable function on vehicles with the START-STOP system or with the
automatic driving light control
›
Switch off the ignition.
›
Slide the turn signal light lever ( » Fig. 40 on page 60 ) downwards and hold
it in this position.
›
Switch on the ignition – wait until the left-turn signal light flashes 4x.
›
Switch off the ignition – an audible signal sounds which confirms the deacti-
vation of the function.
›
Release the turn signal stalk.
Function on vehicles with the START-STOP system or with the automatic
driving light control
›
Switch off the ignition.
›
Slide the turn signal light lever ( » Fig. 40 on page 60 ) upwards and hold it in
this position.
›
Switch on the ignition – wait until the right-turn signal light flashes 4x.
›
Switch off the ignition – an audible signal sounds which confirms the activa-
tion of the function.
1)
On vehicles with the instrument cluster - Version 1
» page 30 the symbol also illuminates on the light
switch.
59Lights and visibility
Page 63 of 204
›Release the turn signal stalk.WARNINGWhen the daytime running light is switched on, the side lights (neither at
the front nor the rear) and the number plate lights are not lit. Therefore al-
ways switch on the low beam when the visibility is poor.
Turn signal and main beam
Fig. 40
Operating lever: Turn signal and
main beam operation
Read and observe on page 58 first.
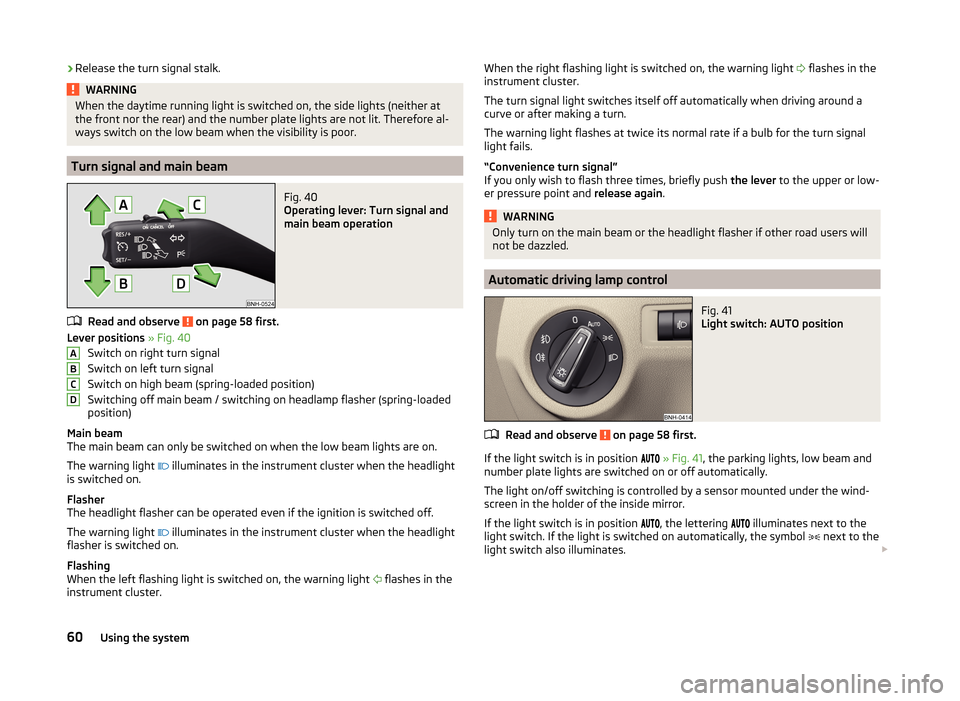
Lever positions » Fig. 40
Switch on right turn signal
Switch on left turn signal
Switch on high beam (spring-loaded position)
Switching off main beam / switching on headlamp flasher (spring-loaded
position)
Main beam
The main beam can only be switched on when the low beam lights are on.
The warning light
illuminates in the instrument cluster when the headlight
is switched on.
Flasher
The headlight flasher can be operated even if the ignition is switched off.
The warning light
illuminates in the instrument cluster when the headlight
flasher is switched on.
Flashing
When the left flashing light is switched on, the warning light
flashes in the
instrument cluster.
ABCDWhen the right flashing light is switched on, the warning light flashes in the
instrument cluster.
The turn signal light switches itself off automatically when driving around a
curve or after making a turn.
The warning light flashes at twice its normal rate if a bulb for the turn signal
light fails.
“Convenience turn signal”
If you only wish to flash three times, briefly push the lever to the upper or low-
er pressure point and release again.WARNINGOnly turn on the main beam or the headlight flasher if other road users will
not be dazzled.
Automatic driving lamp control
Fig. 41
Light switch: AUTO position
Read and observe on page 58 first.
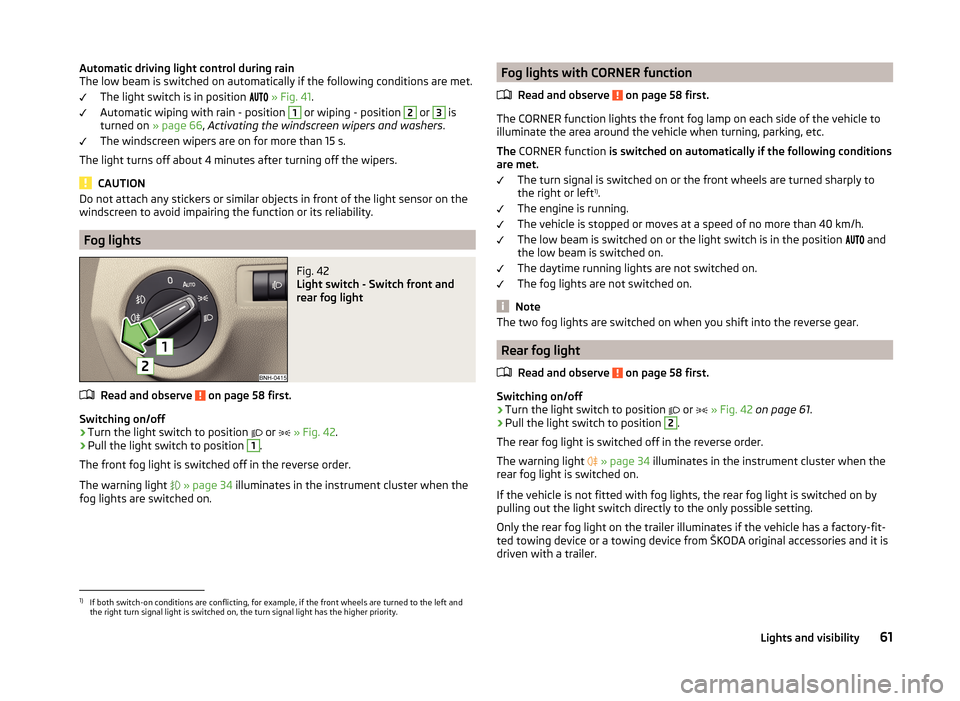
If the light switch is in position
» Fig. 41 , the parking lights, low beam and
number plate lights are switched on or off automatically.
The light on/off switching is controlled by a sensor mounted under the wind- screen in the holder of the inside mirror.
If the light switch is in position
, the lettering
illuminates next to the
light switch. If the light is switched on automatically, the symbol
next to the
light switch also illuminates.
60Using the system
Page 64 of 204
Automatic driving light control during rain
The low beam is switched on automatically if the following conditions are met.
The light switch is in position
» Fig. 41 .
Automatic wiping with rain - position 1
or wiping - position
2
or
3
is
turned on » page 66, Activating the windscreen wipers and washers .
The windscreen wipers are on for more than 15 s.
The light turns off about 4 minutes after turning off the wipers.
CAUTION
Do not attach any stickers or similar objects in front of the light sensor on the
windscreen to avoid impairing the function or its reliability.
Fog lights
Fig. 42
Light switch - Switch front and
rear fog light
Read and observe on page 58 first.
Switching on/off
›
Turn the light switch to position
or
» Fig. 42 .
›
Pull the light switch to position
1
.
The front fog light is switched off in the reverse order.
The warning light
» page 34 illuminates in the instrument cluster when the
fog lights are switched on.
Fog lights with CORNER function
Read and observe
on page 58 first.
The CORNER function lights the front fog lamp on each side of the vehicle to
illuminate the area around the vehicle when turning, parking, etc.
The CORNER function is switched on automatically if the following conditions
are met.
The turn signal is switched on or the front wheels are turned sharply to
the right or left 1)
.
The engine is running.
The vehicle is stopped or moves at a speed of no more than 40 km/h.
The low beam is switched on or the light switch is in the position and
the low beam is switched on.
The daytime running lights are not switched on.
The fog lights are not switched on.
Note
The two fog lights are switched on when you shift into the reverse gear.
Rear fog light
Read and observe
on page 58 first.
Switching on/off
›
Turn the light switch to position or
» Fig. 42 on page 61 .
›
Pull the light switch to position
2
.
The rear fog light is switched off in the reverse order.
The warning light
» page 34 illuminates in the instrument cluster when the
rear fog light is switched on.
If the vehicle is not fitted with fog lights, the rear fog light is switched on by
pulling out the light switch directly to the only possible setting.
Only the rear fog light on the trailer illuminates if the vehicle has a factory-fit-
ted towing device or a towing device from ŠKODA original accessories and it is
driven with a trailer.
1)
If both switch-on conditions are conflicting, for example, if the front wheels are turned to the left and
the right turn signal light is switched on, the turn signal light has the higher priority.
61Lights and visibility
Page 65 of 204

COMING HOME / LEAVING HOMERead and observe
on page 58 first.
COMING HOME (hereinafter referred to only as a function) switches the light
automatically for a short time after leaving the vehicle.
LEAVING HOME (hereinafter referred to only as a function) switches the light
automatically for a short time when approaching the vehicle.
The function switches on the following light, depending on the equipment
fitted.
› Parking lights
› Low beam
› Entry lighting in the exterior mirrors
› Licence plate light
Poorer visibility is evaluated by sensor mounted in the holder of the interior
mirror.
COMING HOME
The lights are switched on automatically if the following conditions are met.
The light switch is in position
» Fig. 41 on page 60 .
The visibility in the vehicle environment is reduced.
The ignition is switched off.
The function was activated before leaving the vehicle by briefly switching
on the headlight flasher » page 60, Turn signal and main beam .
The driver's door was open - within 60 seconds after turning off the igni-
tion.
The light goes out 10 seconds after closing all of the doors and the boot lid.
If a door or the boot lid remains open, the light goes out after 60 seconds.
LEAVING HOME
The lights are switched on automatically if the following conditions are met.
The light switch is in position
» Fig. 41 on page 60 .
The visibility in the vehicle environment is reduced.
The ignition is switched off.
The vehicle was unlocked with the radio remote control.
The light goes off after 10 seconds or when locking the vehicle.
CAUTION■
Do not attach any stickers or similar objects in front of the light sensor on
the windscreen to avoid impairing the function or its reliability.■
If this function is activated constantly, the battery will be heavily discharged
particularly in short-haul travel.
Hazard warning light system
Fig. 43
Button for hazard warning light
system
Read and observe on page 58 first.
Switching on/off
›
Press the button
» Fig. 43 .
All the turn signal lights on the vehicle flash at the same time when the hazard
warning light system is switched on. The warning light for the turn signals and
the warning light in the button also flash at the same time. The hazard warn-
ing light system can also be operated if the ignition is switched off.
If one of the airbags is deployed, the hazard warning light system will switch
on automatically.
If the turn signal light is switched on when the hazard warning light and the
ignition are both switched on, then only the turn signal light on the corre-
sponding vehicle side will flash.
WARNINGSwitch on the hazard warning light system if, for example, the following oc-
curs.■
You encounter a traffic congestion.
■
The vehicle must may have to be parked on the roadside due to a fault.
62Using the system
Page 66 of 204
Parking lightRead and observe
on page 58 first.
The parking light is provided for a temporary lighting of the parked vehicle.
Parking light
switching on
›
Switch off the ignition.
›
Place the control lever into position
A
or
B
as far as it can go » Fig. 40 on
page 60 - the parking light on the right/left-hand side of the vehicle is
switched on.
If the right or left turn signal light has been switched on and the ignition is
switched off, the parking light is not automatically switched on.
Switching on the side light on both sides
›
Turn the light switch
A
to position
» Fig. 39 on page 58 and lock the ve-
hicle.
After pulling out the ignition key and opening the driver's door, an audible
warning sounds. After a few seconds or after closing the driver's door, the au-
dible alarm is turned off, but the parking lights will remain switched on.
On vehicles with an instrument cluster -version 1 » page 30 the light switch
symbol also illuminates when the two-sided parking light is switched on.
CAUTION
Turning on the parking light means the battery is heavily loaded, especially
over short distances.
Driving abroad
Read and observe
on page 58 first.
The low beam is set asymmetrically. It illuminates the side of the road on
which the vehicle is being driven to a greater extent.
When driving in countries with opposing traffic system (traffic on the left/
right), asymmetric headlight adjustment can dazzle oncoming traffic. In order
to avoid this, the headlights must be adjusted at a specialist garage.
Note
You can find out more information on adjusting the headlights at a specialist
garage.Interior lighting
Introduction
This chapter contains information on the following subjects:
Front interior light
63
Rear interior light
64
Note
With the ignition off, the light turns off automatically after about 10 minutes.
Front interior light
Fig. 44
Operation of the front light: Version 1/version 2
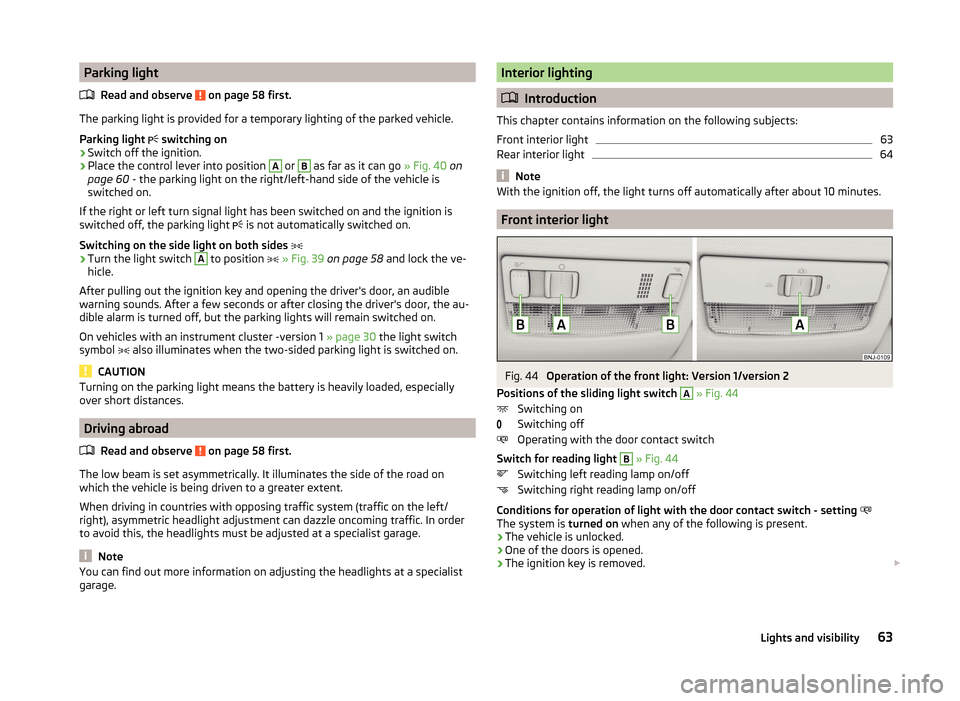
Positions of the sliding light switch
A
» Fig. 44
Switching on
Switching off
Operating with the door contact switch
Switch for reading light
B
» Fig. 44
Switching left reading lamp on/off
Switching right reading lamp on/off
Conditions for operation of light with the door contact switch - setting
The system is turned on when any of the following is present.
› The vehicle is unlocked.
› One of the doors is opened.
› The ignition key is removed.
63Lights and visibility
Page 95 of 204
Setting the direction of the air outlet » page 90
›
Air flow to the windows
›
Air flow to the upper body
›
Air flow in the footwell
›
Airflow over the windows and into the footwell
Switch recirculation on/off » page 90
Switch the cooling system on/off
Note
■ The warning light in the button illuminates after activation, even if not all
of the conditions for the function of the cooling system have been met. By
lighting up of the warning light in the button, the operational readiness of the
cooling system is signalled.■
During operation of the air conditioning, an increase in engine idle speed may
occur under certain circumstances in order to ensure sufficient heating com-
fort.
Climatronic (automatic air conditioning)
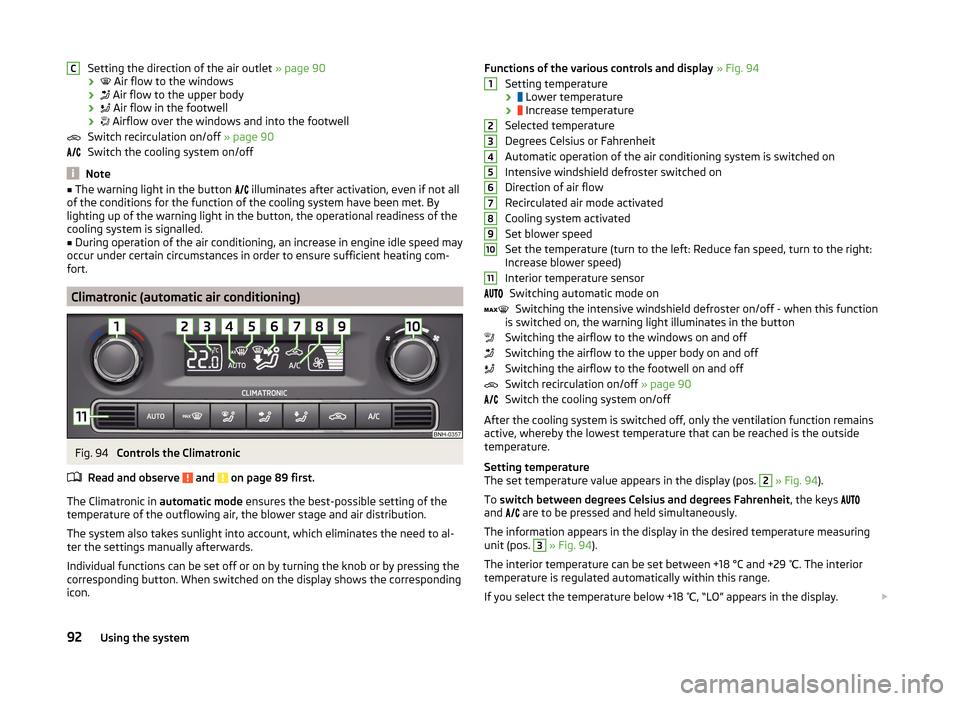
Fig. 94
Controls the Climatronic
Read and observe
and on page 89 first.
The Climatronic in automatic mode ensures the best-possible setting of the
temperature of the outflowing air, the blower stage and air distribution.
The system also takes sunlight into account, which eliminates the need to al-
ter the settings manually afterwards.
Individual functions can be set off or on by turning the knob or by pressing the
corresponding button. When switched on the display shows the corresponding
icon.
CFunctions of the various controls and display » Fig. 94
Setting temperature ›
Lower temperature
›
Increase temperature
Selected temperature
Degrees Celsius or Fahrenheit
Automatic operation of the air conditioning system is switched on
Intensive windshield defroster switched on
Direction of air flow
Recirculated air mode activated
Cooling system activated
Set blower speed
Set the temperature (turn to the left: Reduce fan speed, turn to the right:
Increase blower speed)
Interior temperature sensor Switching automatic mode on Switching the intensive windshield defroster on/off - when this function
is switched on, the warning light illuminates in the button
Switching the airflow to the windows on and off
Switching the airflow to the upper body on and off
Switching the airflow to the footwell on and off
Switch recirculation on/off » page 90
Switch the cooling system on/off
After the cooling system is switched off, only the ventilation function remains
active, whereby the lowest temperature that can be reached is the outside
temperature.
Setting temperature
The set temperature value appears in the display (pos. 2
» Fig. 94 ).
To switch between degrees Celsius and degrees Fahrenheit , the keys
and are to be pressed and held simultaneously.
The information appears in the display in the desired temperature measuring
unit (pos.
3
» Fig. 94 ).
The interior temperature can be set between +18 °C and +29 ℃. The interior
temperature is regulated automatically within this range.
If you select the temperature below +18 ℃, “LO” appears in the display.
123456789101192Using the system
Page 99 of 204
Button / adjust-ment
wheel » Fig. 95ActionOperation
1Turn downwardsDecrease volume2Press brieflyAccept a call/end a call
Display of the basic Phone menu → a)
Main Phone menu → List of dialled numbers → Call selected contact2Press and hold buttonReject the incoming call3Turn up/downPrevious / next menu item3Press brieflyConfirm selected menu item3Press and hold buttonContinuously display first letter of the phone book3Quickly turn upwardsTo the previous initial letter in the telephone book3Quickly turn downwardsTo the next initial letter in the telephone book4Press brieflyReturn to a previous level in the menu4Press and hold buttonExit telephone menua)
The symbol The → symbol means briefly press button again.
Symbols in the display
Read and observe
on page 94 first.
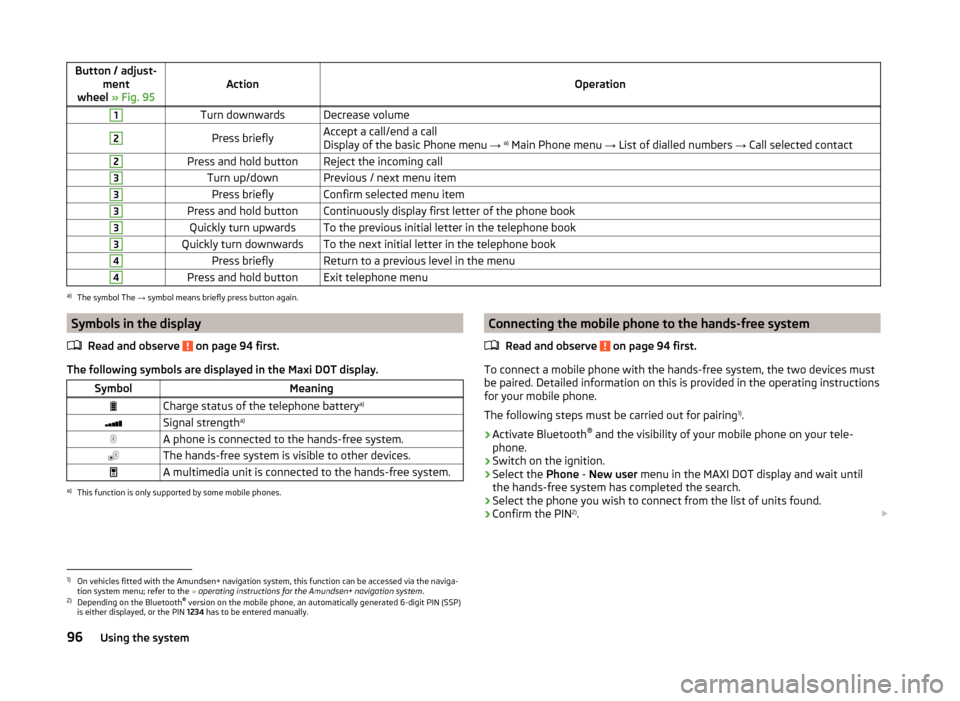
The following symbols are displayed in the Maxi DOT display.
SymbolMeaningCharge status of the telephone battery a)Signal strengtha)A phone is connected to the hands-free system.The hands-free system is visible to other devices.A multimedia unit is connected to the hands-free system.a)
This function is only supported by some mobile phones.
Connecting the mobile phone to the hands-free system
Read and observe
on page 94 first.
To connect a mobile phone with the hands-free system, the two devices must
be paired. Detailed information on this is provided in the operating instructions
for your mobile phone.
The following steps must be carried out for pairing 1)
.
›
Activate Bluetooth ®
and the visibility of your mobile phone on your tele-
phone.
›
Switch on the ignition.
›
Select the Phone - New user menu in the MAXI DOT display and wait until
the hands-free system has completed the search.
›
Select the phone you wish to connect from the list of units found.
›
Confirm the PIN 2)
.
1)
On vehicles fitted with the Amundsen+ navigation system, this function can be accessed via the naviga-
tion system menu; refer to the » operating instructions for the Amundsen+ navigation system .
2)
Depending on the Bluetooth®
version on the mobile phone, an automatically generated 6-digit PIN (SSP)
is either displayed, or the PIN 1234 has to be entered manually.
96Using the system
Page 117 of 204
NoteFor vehicles without stabilization control (ESC), during a TCS intervention the
control indicator blinks in the instrument cluster.
Electronic Differential Lock (EDL)
Read and observe
on page 113 first.
EDL prevents the turning of the respective wheel of the driven axle. EDL
brakes the spinning wheel, if necessary, and transmits the driving force to the
other driving wheel. Driving becomes easier on road surfaces with different
traction under each wheel of the driven axle.
The EDL switches off automatically in order to avoid excessive heat generation
on the brake of the wheel being braked. The vehicle can continue to be driven
and has the same characteristics as a vehicle not fitted with EDL. Once the
brakes have cooled down, there is an automatic re-activation of EDL.
Hydraulic Brake Assist (HBA)
Read and observe
on page 113 first.
The HBA increases the braking effect and helps to reduce the braking dis-
tance.
The HBA is activated by the very quick operation of the brake pedal. In order to
achieve the shortest possible braking distance, the brake pedal must be ap-
plied firmly until the vehicle has come to a standstill.
The HBA function is automatically deactivated when the brake pedal is re-
leased.
Hill Hold Control (HHC)
Read and observe
on page 113 first.
When driving on slopes, HHC allows you to move your foot from the brake ped-al to the accelerator pedal without having to use the handbrake.
The system holds the brake pressure produced by the activation of the brake pedal for approx. 2 seconds after the brake pedal is released.
The brake pressure drops gradually the more you operate the accelerator ped-
al. If the vehicle does not start off within 2 seconds, it starts to roll back.
The HHC is active from a 5% slope if the driver's door is closed. HHC is always
only active on slopes when in forward or reverse start off.
Parking aid
Introduction
This chapter contains information on the following subjects:
Function
115
Activation/deactivation
115
The parking aid (hereinafter referred to only as a system) draws attention via
acoustic signals and an indication in the radio or navigation display when ma-
noeuvring around obstacles in the vicinity of the vehicle.
The system uses ultrasound waves to calculate the distance between the
bumper and an obstacle. The ultrasonic sensors are integrated in the rear
bumper » Fig. 106 on page 115 .
WARNING■
The system only serves as an assistance and does not relieve the driver
of the responsibility for the vehicle operation.■
Moving persons or objects may not be recognised by the system sensors.
■
Under certain circumstances, surfaces of certain objects and types of
clothing cannot reflect the system signals. For this reason, such people or
objects may not be recognised by the system sensors.
■
External noise sources may affect the signals of the system sensors. Un-
der adverse conditions, this may cause objects or people to be not recog-
nised by the system.
■
Before reversing, you should make sure that there are no small obstacles,
such as rocks, thin posts, trailer draw-bars etc. behind your vehicle. Such
obstacles may not be recognised by the system sensors.
CAUTION
■ Keep the system sensors clean, snow-and ice-free and do not cover with any
objects of any kind, otherwise the system functioning may be impaired.■
Under adverse weather conditions (heavy rain, water vapour, very low or
high temperatures etc.), the system function may be limited - “incorrect recog-
nition of obstacle”.
■
Additionally installed accessories such as e.g. bicycle carriers can impair the
system function.
114Driving
Page 171 of 204
WARNING■Do not clamp the jump-start cable to the negative terminal of the dis-
charged battery. There is the risk of detonating gas seeping out of the bat-
tery being ignited by the strong spark resulting from the engine being star-
ted.■
The non-insulated parts of the terminal clamps must never touch each
other – there is a risk of short circuit!
■
The jump-start cable connected to the positive terminal of the battery
must not come into contact with electrically conducting parts of the vehicle
– there is a risk of short circuit!
■
Route the jump-start cables so that they cannot be caught by any rotat-
ing parts in the engine compartment.
■
There must not be any contact between the two vehicles, otherwise cur-
rent may flow as soon as the negative terminals are connected.
Towing the vehicle
Introduction
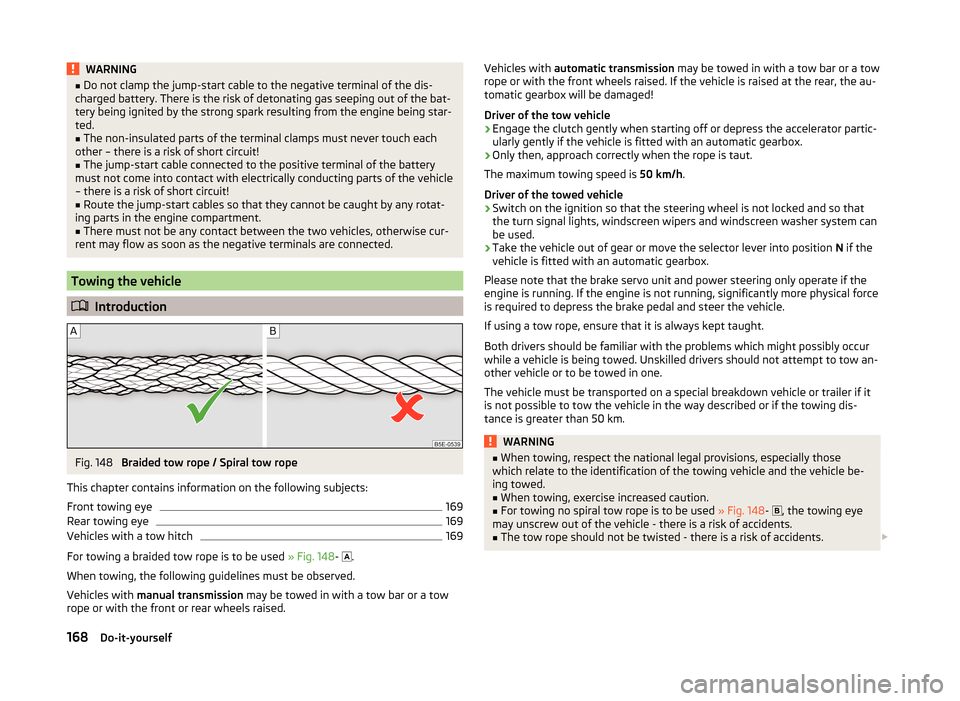
Fig. 148
Braided tow rope / Spiral tow rope
This chapter contains information on the following subjects:
Front towing eye
169
Rear towing eye
169
Vehicles with a tow hitch
169
For towing a braided tow rope is to be used » Fig. 148-
.
When towing, the following guidelines must be observed.
Vehicles with manual transmission may be towed in with a tow bar or a tow
rope or with the front or rear wheels raised.
Vehicles with automatic transmission may be towed in with a tow bar or a tow
rope or with the front wheels raised. If the vehicle is raised at the rear, the au-
tomatic gearbox will be damaged!
Driver of the tow vehicle›
Engage the clutch gently when starting off or depress the accelerator partic-
ularly gently if the vehicle is fitted with an automatic gearbox.
›
Only then, approach correctly when the rope is taut.
The maximum towing speed is 50 km/h.
Driver of the towed vehicle
›
Switch on the ignition so that the steering wheel is not locked and so that
the turn signal lights, windscreen wipers and windscreen washer system can
be used.
›
Take the vehicle out of gear or move the selector lever into position N if the
vehicle is fitted with an automatic gearbox.
Please note that the brake servo unit and power steering only operate if the
engine is running. If the engine is not running, significantly more physical force
is required to depress the brake pedal and steer the vehicle.
If using a tow rope, ensure that it is always kept taught.
Both drivers should be familiar with the problems which might possibly occur while a vehicle is being towed. Unskilled drivers should not attempt to tow an-
other vehicle or to be towed in one.
The vehicle must be transported on a special breakdown vehicle or trailer if it
is not possible to tow the vehicle in the way described or if the towing dis-
tance is greater than 50 km.
WARNING■ When towing, respect the national legal provisions, especially those
which relate to the identification of the towing vehicle and the vehicle be- ing towed.■
When towing, exercise increased caution.
■
For towing no spiral tow rope is to be used » Fig. 148-
, the towing eye
may unscrew out of the vehicle - there is a risk of accidents.
■
The tow rope should not be twisted - there is a risk of accidents.
168Do-it-yourself
Page 178 of 204
No.Power consumer43Horn44Windscreen wipers45Boot lid lock, central locking system46Alarm47Cigarette lighter48ABS49Turn signal lights, brake lights50DC-DC converter, radio51Electric windows (driver's window and rear left window)52Electric windows (front passenger's window and rear right)53Windscreen washer54START-STOP instrument cluster, operating lever under the steering
wheel, multifunction steering wheel55Control unit for automatic gearbox56Headlight cleaning system57Headlights front, rear58Headlights front, rear
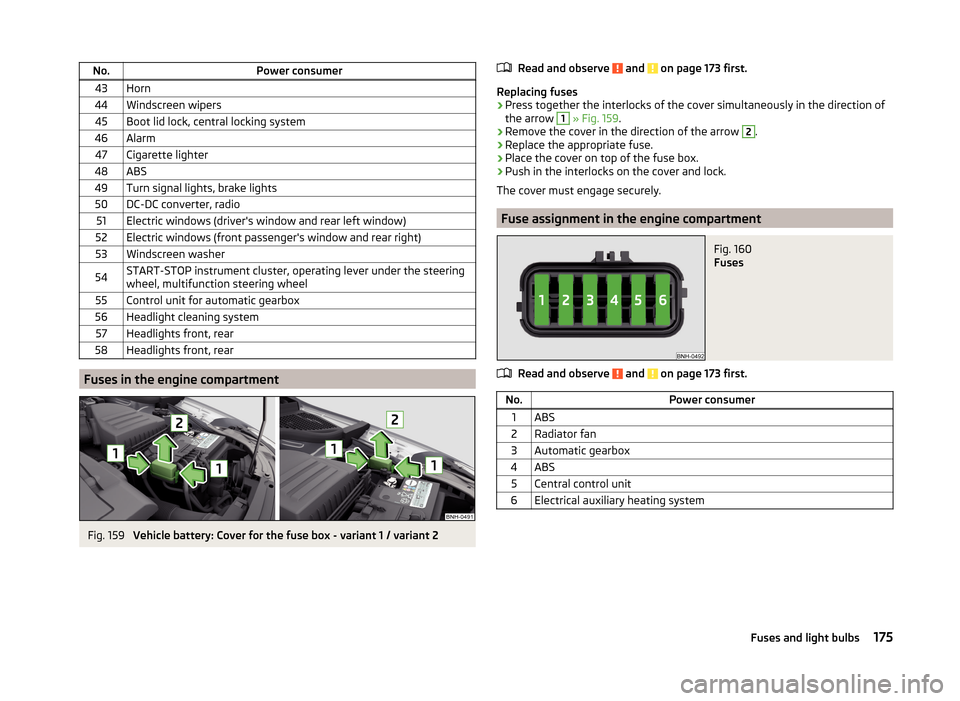
Fuses in the engine compartment
Fig. 159
Vehicle battery: Cover for the fuse box - variant 1 / variant 2
Read and observe and on page 173 first.
Replacing fuses
›
Press together the interlocks of the cover simultaneously in the direction of
the arrow
1
» Fig. 159 .
›
Remove the cover in the direction of the arrow
2
.
›
Replace the appropriate fuse.
›
Place the cover on top of the fuse box.
›
Push in the interlocks on the cover and lock.
The cover must engage securely.
Fuse assignment in the engine compartment
Fig. 160
Fuses
Read and observe and on page 173 first.
No.Power consumer1ABS2Radiator fan3Automatic gearbox4ABS5Central control unit6Electrical auxiliary heating system175Fuses and light bulbs