warning lights SKODA RAPID SPACEBACK 2014 1.G Owner's Guide
[x] Cancel search | Manufacturer: SKODA, Model Year: 2014, Model line: RAPID SPACEBACK, Model: SKODA RAPID SPACEBACK 2014 1.GPages: 204, PDF Size: 27.11 MB
Page 68 of 204
Note■If the on-board voltage drops, the heater switches off automatically, in order
to provide sufficient electrical energy for the engine control » page 151, Auto-
matic load deactivation .■
If the light is flashing inside the button the heater is off due to low battery.
Front sun visors
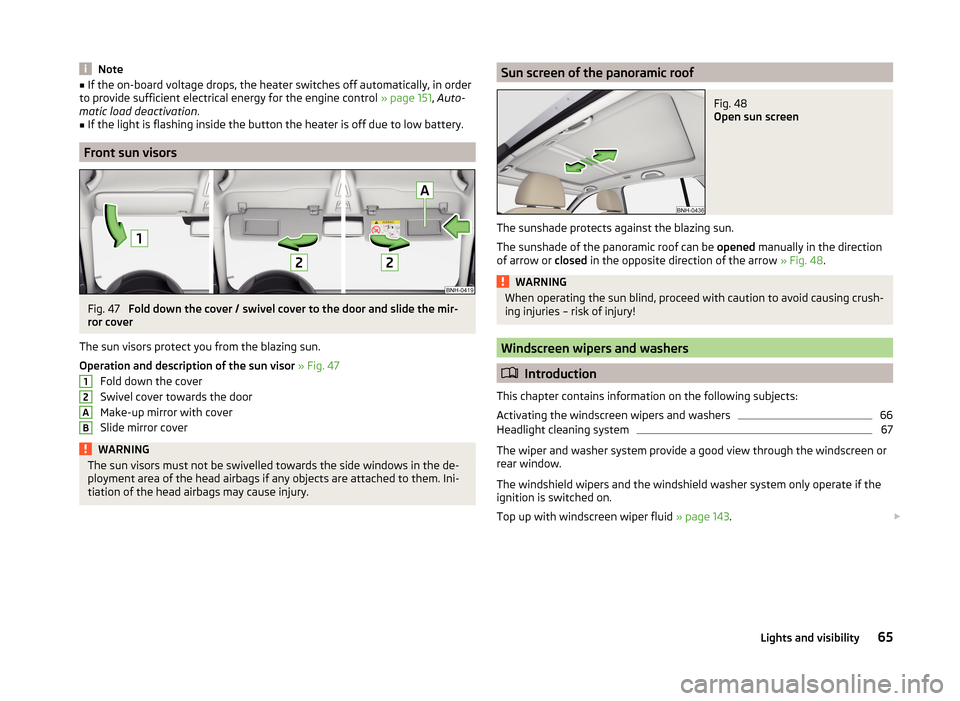
Fig. 47
Fold down the cover / swivel cover to the door and slide the mir-
ror cover
The sun visors protect you from the blazing sun.
Operation and description of the sun visor » Fig. 47
Fold down the cover
Swivel cover towards the door
Make-up mirror with cover
Slide mirror cover
WARNINGThe sun visors must not be swivelled towards the side windows in the de-
ployment area of the head airbags if any objects are attached to them. Ini-
tiation of the head airbags may cause injury.12ABSun screen of the panoramic roofFig. 48
Open sun screen
The sunshade protects against the blazing sun.
The sunshade of the panoramic roof can be opened manually in the direction
of arrow or closed in the opposite direction of the arrow » Fig. 48.
WARNINGWhen operating the sun blind, proceed with caution to avoid causing crush-
ing injuries – risk of injury!
Windscreen wipers and washers
Introduction
This chapter contains information on the following subjects:
Activating the windscreen wipers and washers
66
Headlight cleaning system
67
The wiper and washer system provide a good view through the windscreen or
rear window.
The windshield wipers and the windshield washer system only operate if the
ignition is switched on.
Top up with windscreen wiper fluid » page 143.
65Lights and visibility
Page 70 of 204

Letting go of the operating lever will cause the windscreen wash system to
stop and the wipers to continue for another 1 to 3 wiper strokes (depending on
the spraying duration).
Automatic wipe/wash for the rear window
The wash system operates immediately, the windscreen wiper wipes some-
what later.
Letting go of the operating lever will cause the windscreen wash system to
stop and the wiper to continue for another 1 to 3 wiper strokes (depending on
the spraying duration). The operating lever remains in position 6
.
Note
The rear window is wiped once automatically if the windscreen wipers are on
when reverse gear is selected.
Headlight cleaning system
Read and observe
and on page 66 first.
After the ignition is switched on, the headlights are always cleaned at the first
and after every tenth spray of the windscreen (setting
5
» Fig. 49 on
page 66 ), when the low beam or main beam is switched on.
You should remove stubborn dirt (such as insect residues) from the headlight
lenses at regular intervals, for example when refuelling. The following guide-
lines must be observed » page 134, Headlight glasses .
To ensure the proper operation of the cleaning system during the winter, any
snow should be removed from the washer nozzle fixtures and ice should be
cleared with a de-icing spray.
CAUTION
Never remove the nozzles from the headlight cleaning system by hand – risk of
damage!
Rear mirror
Introduction
This chapter contains information on the following subjects:
Interior mirror
67
Exterior mirror
68WARNING■ Make sure that the mirror is not covered by ice, snow, mist or other ob-
jects.■
Convex (curved outward) or aspheric exterior mirrors increase the field of
vision. They do, however, make objects appear smaller in the mirror. These
mirrors are therefore only of limited use for estimating distances to the fol-
lowing vehicles.
■
Whenever possible use the interior mirror for estimating the distances to
the following vehicles.
Interior mirror
Fig. 50
Interior mirror: manual dimming / auto-dimming / light sensor
Read and observe
on page 67 first.
Mirrors with manual dimming » Fig. 50
Basic position of the mirror
Mirror blackout
Mirror with automatic dimming » Fig. 50
Warning light - lights when dimming is activated
Switch for the activation of the automatic mirror dimming
Light sensor
Light sensor on the back of the mirror
Mirror with automatic dimming
If the automatic dimming is enabled, the mirror dims automatically depending
on the light falling on the sensors.
When the interior lights are switched on or the reverse gear is engaged, the
mirror always moves back into the basic position (not dimmed).
12ABCD67Lights and visibility
Page 74 of 204
›To re-insert the head restraint, push it far enough down in the direction of
arrow 7 into the seat backrest until the locking button clicks into place.WARNINGWith seats occupied, the respective head rests must be installed and adjus- ted correctly - there is a risk of fatal injury!
Note
For the sports seats, the head restraints are integrated into the front seat
backrests. These headrests cannot be removed.
Seat features
Introduction
This chapter contains information on the following subjects:
Front seat heating
71
Front armrest
72
Rear armrest
72
Seat backrests
72
Front seat heating
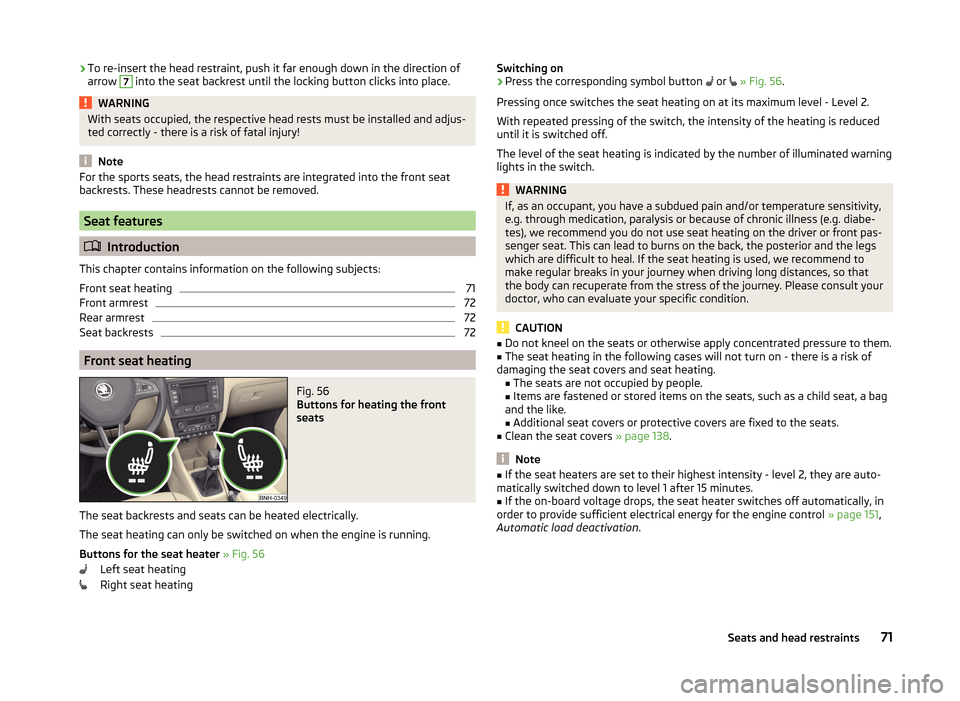
Fig. 56
Buttons for heating the front
seats
The seat backrests and seats can be heated electrically.
The seat heating can only be switched on when the engine is running.
Buttons for the seat heater » Fig. 56
Left seat heating
Right seat heating
Switching on›Press the corresponding symbol button or » Fig. 56 .
Pressing once switches the seat heating on at its maximum level - Level 2.
With repeated pressing of the switch, the intensity of the heating is reduced
until it is switched off.
The level of the seat heating is indicated by the number of illuminated warning
lights in the switch.WARNINGIf, as an occupant, you have a subdued pain and/or temperature sensitivity,
e.g. through medication, paralysis or because of chronic illness (e.g. diabe-
tes), we recommend you do not use seat heating on the driver or front pas-
senger seat. This can lead to burns on the back, the posterior and the legs
which are difficult to heal. If the seat heating is used, we recommend to
make regular breaks in your journey when driving long distances, so that
the body can recuperate from the stress of the journey. Please consult your
doctor, who can evaluate your specific condition.
CAUTION
■ Do not kneel on the seats or otherwise apply concentrated pressure to them.■The seat heating in the following cases will not turn on - there is a risk of
damaging the seat covers and seat heating. ■The seats are not occupied by people.
■ Items are fastened or stored items on the seats, such as a child seat, a bag
and the like.
■ Additional seat covers or protective covers are fixed to the seats.■
Clean the seat covers » page 138.
Note
■
If the seat heaters are set to their highest intensity - level 2, they are auto-
matically switched down to level 1 after 15 minutes.■
If the on-board voltage drops, the seat heater switches off automatically, in
order to provide sufficient electrical energy for the engine control » page 151,
Automatic load deactivation .
71Seats and head restraints
Page 111 of 204

Manual gear changingFig. 101
Gear shift pattern of 5 gear or
6 gear manual gearbox
The individual gear positions are shown on the gear shift » Fig. 101.
The gear shift indicator must be observed when changing gear » page 43.
Always depress the clutch pedal all the way down. This prevents uneven wear
on the clutch.
Engaging reverse gear
›
Stop the vehicle.
›
The clutch pedal must be fully depressed.
›
Move the shift lever to the idle position, switch and press down.
›
Move the shift lever fully to the left and then forward into the Rposi-
tion » Fig. 101 .
The reversing lights will come on once the reverse gear is engaged, provided
the ignition is on.
WARNINGNever engage reverse gear when driving – risk of accident!
CAUTION
■ If not in the process of changing gear, do not leave your hand on the gear
shift lever while driving. The pressure from the hand can cause the gear shift
mechanism to wear excessively.■
When stopping on a slope, never try to keep the vehicle in position by using
the clutch and accelerator pedals – this may lead to damage to the clutch
parts.
Pedals
The operation of the pedals must not be hindered under any circumstances!
In the driver's foot well, only a foot mat, which is attached to the two corre-
sponding attachment points, may be used.
Only use factory-supplied foot mats or foot mats from the range of
ŠKODAOriginal Accessories, which are fitted to two the two required attach-
ment points.WARNINGNo objects may be placed in the driver's foot well – risk due to obstruction
or limitation of pedal operation!
Automatic gearbox
Introduction
This chapter contains information on the following subjects:
Modes and use of selector lever
109
Selector lever lock
109
Manual shifting of gears (Tiptronic)
110
Starting-off and driving
110
The automatic transmission performs automatic gear changes.
The modes for the automatic transmission can be adjusted by the driver by
means of the selector lever.
WARNING■ Never accelerate when the mode for moving forward is set with the se-
lector lever - there is a risk of accident!■
Never move the selector lever to mode R or P when driving – risk of acci-
dent!
■
When the vehicle is stationary and the engine is running, the vehicle must
be held in mode D, S or R with the brake pedal. Even when the engine is
idling, the power transmission is never completely interrupted – the vehicle
crawls forward.
■
When leaving the vehicle, the selector lever is always to be put in the P
mode. Otherwise the vehicle could then start to move and potentially cause
an accident.
108Driving
Page 116 of 204
Assist systems
Braking and stabilisation systems
Introduction
This chapter contains information on the following subjects:
Electronic Stability Control (ESC)
113
Anti-lock Braking System (ABS)
113
Traction Control System (TCS)
113
Electronic Differential Lock (EDL)
114
Hydraulic Brake Assist (HBA)
114
Hill Hold Control (HHC)
114
This chapter deals with the functions of the braking and stabilisation systems,
with the error indicator referred to in chapter » page 34, Indicator lights .
The braking and stabilisation systems are automatically activated each time
the ignition is switched on.
WARNING■ A lack of fuel can cause irregular engine running or cause the engine to
shut down. The brake assist systems would then fail to function – risk of
accident!■
The increased safety provided by the brake assist systems must not
tempt you to take safety risks – risk of accident!
■
Adjust the speed and driving style to the current visibility, weather, road
and traffic conditions.
Electronic Stability Control (ESC)
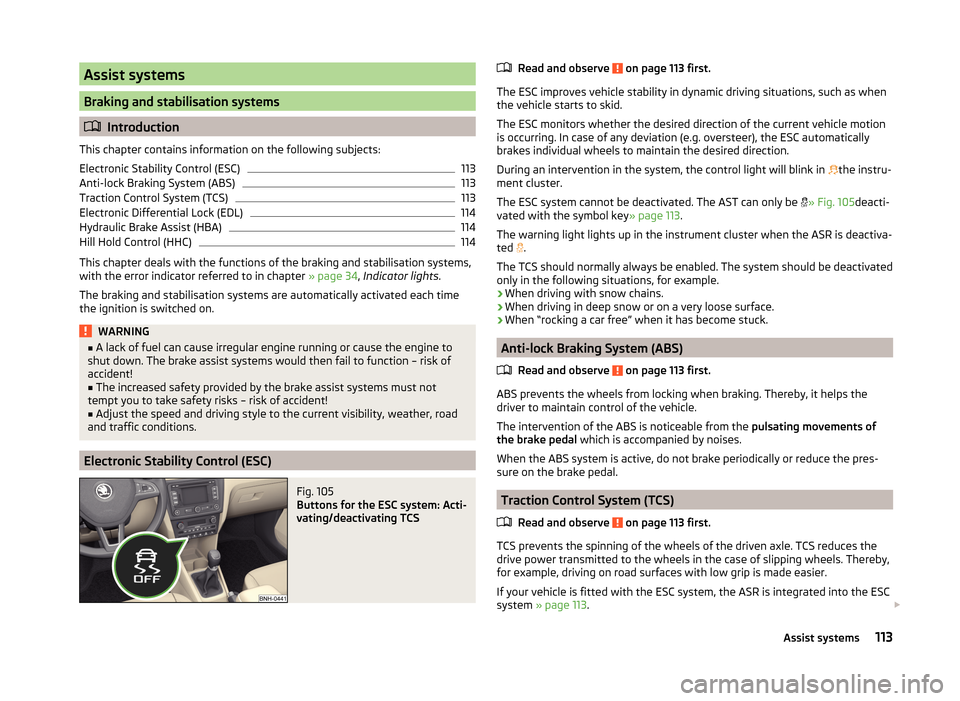
Fig. 105
Buttons for the ESC system: Acti-
vating/deactivating TCS
Read and observe on page 113 first.
The ESC improves vehicle stability in dynamic driving situations, such as when the vehicle starts to skid.
The ESC monitors whether the desired direction of the current vehicle motion
is occurring. In case of any deviation (e.g. oversteer), the ESC automatically
brakes individual wheels to maintain the desired direction.
During an intervention in the system, the control light will blink in
the instru-
ment cluster.
The ESC system cannot be deactivated. The AST can only be
» Fig. 105 deacti-
vated with the symbol key » page 113.
The warning light lights up in the instrument cluster when the ASR is deactiva- ted .
The TCS should normally always be enabled. The system should be deactivated
only in the following situations, for example.
› When driving with snow chains.
› When driving in deep snow or on a very loose surface.
› When “rocking a car free” when it has become stuck.
Anti-lock Braking System (ABS)
Read and observe
on page 113 first.
ABS prevents the wheels from locking when braking. Thereby, it helps the
driver to maintain control of the vehicle.
The intervention of the ABS is noticeable from the pulsating movements of
the brake pedal which is accompanied by noises.
When the ABS system is active, do not brake periodically or reduce the pres-
sure on the brake pedal.
Traction Control System (TCS)
Read and observe
on page 113 first.
TCS prevents the spinning of the wheels of the driven axle. TCS reduces thedrive power transmitted to the wheels in the case of slipping wheels. Thereby,
for example, driving on road surfaces with low grip is made easier.
If your vehicle is fitted with the ESC system, the ASR is integrated into the ESC
system » page 113 .
113Assist systems
Page 119 of 204
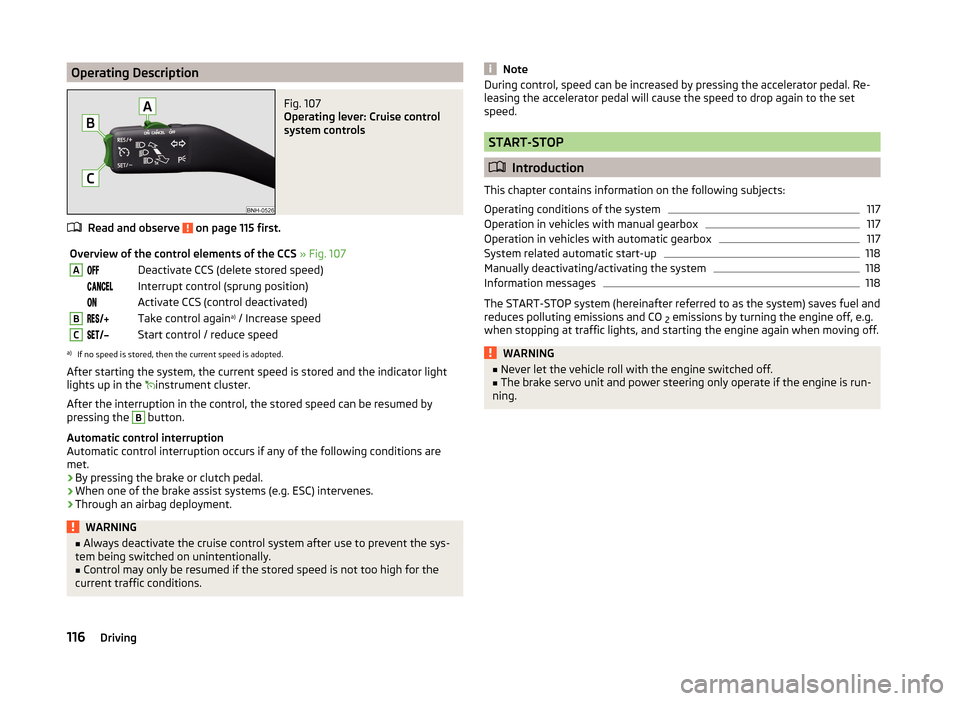
Operating DescriptionFig. 107
Operating lever: Cruise control
system controls
Read and observe on page 115 first.
Overview of the control elements of the CCS » Fig. 107ADeactivate CCS (delete stored speed) Interrupt control (sprung position) Activate CCS (control deactivated)BTake control again a)
/ Increase speedCStart control / reduce speeda)
If no speed is stored, then the current speed is adopted.
After starting the system, the current speed is stored and the indicator light
lights up in the instrument cluster.
After the interruption in the control, the stored speed can be resumed by
pressing the
B
button.
Automatic control interruption
Automatic control interruption occurs if any of the following conditions are
met.
› By pressing the brake or clutch pedal.
› When one of the brake assist systems (e.g. ESC) intervenes.
› Through an airbag deployment.
WARNING■
Always deactivate the cruise control system after use to prevent the sys-
tem being switched on unintentionally.■
Control may only be resumed if the stored speed is not too high for the
current traffic conditions.
NoteDuring control, speed can be increased by pressing the accelerator pedal. Re-
leasing the accelerator pedal will cause the speed to drop again to the set
speed.
START-STOP
Introduction
This chapter contains information on the following subjects:
Operating conditions of the system
117
Operation in vehicles with manual gearbox
117
Operation in vehicles with automatic gearbox
117
System related automatic start-up
118
Manually deactivating/activating the system
118
Information messages
118
The START-STOP system (hereinafter referred to as the system) saves fuel and
reduces polluting emissions and CO 2 emissions by turning the engine off, e.g.
when stopping at traffic lights, and starting the engine again when moving off.
WARNING■ Never let the vehicle roll with the engine switched off.■The brake servo unit and power steering only operate if the engine is run-
ning.116Driving
Page 121 of 204
Automatic engine shut-down takes place, segment display shows START-
STOP ACTIVE or the MAXI DOT display shows the warning sign » Fig. 108 on
page 117 .
Automatic engine start›
Release the brake pedal.
The automatic start procedure takes place again.
Further information on automatic transmission
The automatic engine shut down takes place when the selector lever is in po-
sitions P, D , S and N and in Tiptronic mode.
When the selector lever is in position P, the engine remains shut down even
after you release the brake pedal. The engine starts automatically by pressing
the gas pedal or by moving the selector lever into a different mode and releas-
ing the brake pedal.
If the engine is off due to the automatic and the selector lever is put to the R
position, then the automatic start up of the engine.
If the gear selector is moved from position R to the position D, S or N, the vehi-
cle must reach a speed of more than 10 km / h before the automatic engine
shutdown starts.
There is no automatic engine shutdown when the system detects a vehicle
moving due to a large steering angle.
No automatic engine shutdown takes place when the vehicle is moving at low
speed (e.g. during a traffic jam or when turning) and remains stationary after
pressing the brake pedal lightly. Automatic engine shutdown takes place if you
press the brake pedal down with more force.
System related automatic start-up
Read and observe
on page 116 first.
When the engine is off, the system can automatically start the engine beforethe desired journey continues. Some possible reasons for this are.
› The vehicle begins to roll, e.g. on a slope.
› The brake pedal has been actuated several times.
› The current consumption is too high.
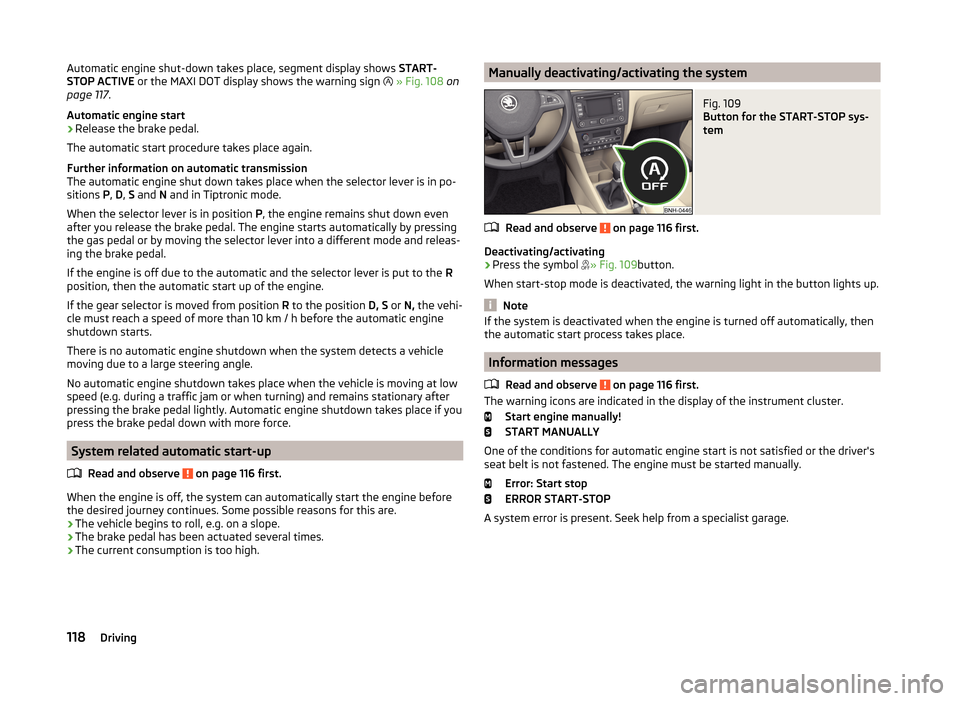
Manually deactivating/activating the systemFig. 109
Button for the START-STOP sys-
tem
Read and observe on page 116 first.
Deactivating/activating
›
Press the symbol » Fig. 109
button.
When start-stop mode is deactivated, the warning light in the button lights up.
Note
If the system is deactivated when the engine is turned off automatically, then
the automatic start process takes place.
Information messages
Read and observe
on page 116 first.
The warning icons are indicated in the display of the instrument cluster. Start engine manually!
START MANUALLY
One of the conditions for automatic engine start is not satisfied or the driver's
seat belt is not fastened. The engine must be started manually.
Error: Start stop
ERROR START-STOP
A system error is present. Seek help from a specialist garage.
118Driving
Page 128 of 204
NoteWe recommend that you use accessories from ŠKODA Original Accessories.
Trailer
Introduction
This chapter contains information on the following subjects:
Attaching and detaching trailers
125
Loading a trailer
126
Towing a trailer
126
Anti-theft alarm system
126
If your vehicle has already been factory-fitted with a towing device or is fitted
with a towing device from ŠKODA Original Accessories, then it meets all of the
technical requirements and national legal regulations for towing a trailer.
Note
If there is an error in the trailer lighting, check the fuses in the fuse box in the
dash panel » page 173.
Attaching and detaching trailers
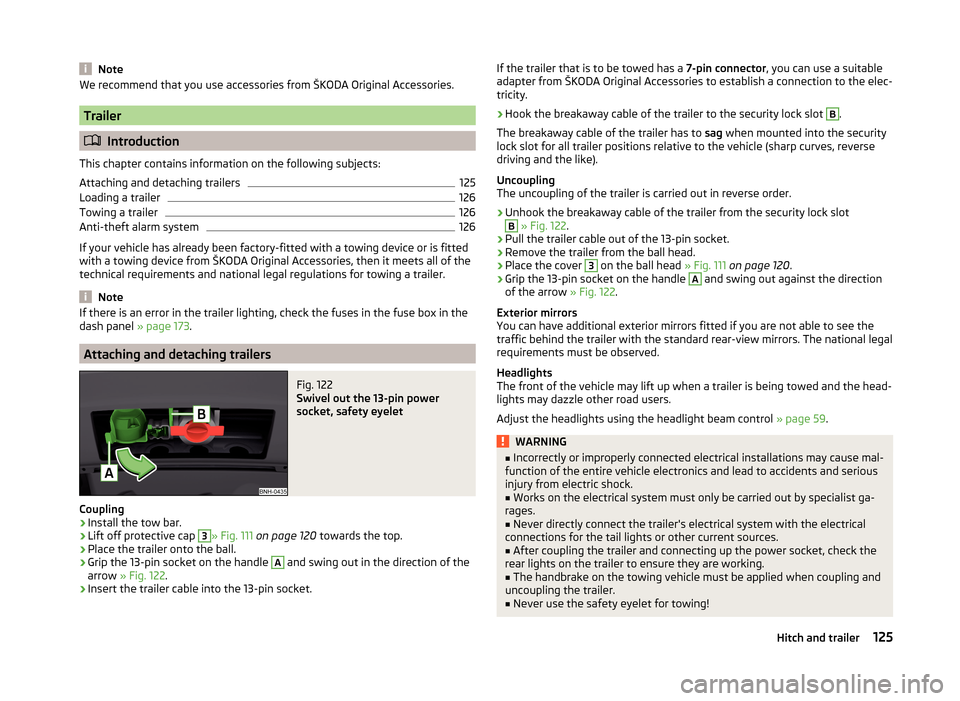
Fig. 122
Swivel out the 13-pin power
socket, safety eyelet
Coupling
›
Install the tow bar.
›
Lift off protective cap
3
» Fig. 111 on page 120 towards the top.
›
Place the trailer onto the ball.
›
Grip the 13-pin socket on the handle
A
and swing out in the direction of the
arrow » Fig. 122 .
›
Insert the trailer cable into the 13-pin socket.
If the trailer that is to be towed has a 7-pin connector, you can use a suitable
adapter from ŠKODA Original Accessories to establish a connection to the elec-
tricity.›
Hook the breakaway cable of the trailer to the security lock slot
B
.
The breakaway cable of the trailer has to sag when mounted into the security
lock slot for all trailer positions relative to the vehicle (sharp curves, reverse
driving and the like).
Uncoupling
The uncoupling of the trailer is carried out in reverse order.
›
Unhook the breakaway cable of the trailer from the security lock slot
B
» Fig. 122 .
›
Pull the trailer cable out of the 13-pin socket.
›
Remove the trailer from the ball head.
›
Place the cover
3
on the ball head » Fig. 111 on page 120 .
›
Grip the 13-pin socket on the handle
A
and swing out against the direction
of the arrow » Fig. 122.
Exterior mirrors
You can have additional exterior mirrors fitted if you are not able to see the
traffic behind the trailer with the standard rear-view mirrors. The national legal
requirements must be observed.
Headlights
The front of the vehicle may lift up when a trailer is being towed and the head- lights may dazzle other road users.
Adjust the headlights using the headlight beam control » page 59.
WARNING■
Incorrectly or improperly connected electrical installations may cause mal-
function of the entire vehicle electronics and lead to accidents and serious
injury from electric shock.■
Works on the electrical system must only be carried out by specialist ga-
rages.
■
Never directly connect the trailer's electrical system with the electrical
connections for the tail lights or other current sources.
■
After coupling the trailer and connecting up the power socket, check the
rear lights on the trailer to ensure they are working.
■
The handbrake on the towing vehicle must be applied when coupling and
uncoupling the trailer.
■
Never use the safety eyelet for towing!
125Hitch and trailer
Page 147 of 204
The cleaning fluid is provided for the cleaning of the front and rear window as
well as the headlight.
The capacity of the reservoir is about 3.5 litres or about 5.4 litres on vehicles
that have a headlight cleaning system 1)
.
Clear water is not sufficient to intensively clean the windscreen and head-
lights. We recommend using clean water together with a screen cleaner from
the range of ŠKODA Original Accessories (with anti-freeze in winter), which
will remove any stubborn dirt.
In Winter, the washing water should always be mixed with anti-freeze even if
the vehicle has heated windscreen washer nozzles.
Under exceptional circumstances, methylated spirits can also be used if no
screen cleaner with anti-freeze is available. The concentration of methylated
spirits must not be more than 15 %. The anti-freeze protection at this concen-
tration is sufficient only to -5 °C.
CAUTION
■ Under no circumstances must radiator anti-freeze or other additives be add-
ed to the windscreen washer fluid.■
If the vehicle is fitted with a headlight cleaning system, only cleaning prod-
ucts which do not attack the polycarbonate coating of the headlights must be
added to the windscreen washer fluid.
■
Do not remove the filter from the windscreen washer fluid reservoir when re-
filling, as this may cause contamination of the liquid transportation system,
leading in turn to a windscreen washer system malfunction.
Engine oil
Introduction
This chapter contains information on the following subjects:
Specification
144
Checking the oil level
145
Replenishing
146
The engine has been factory-filled with a high-grade oil that can be use
throughout the year - except in extreme climate zones.
The engine oils are undergoing continuous further development. Thus the in- formation stated in this Owner's Manual is only correct at the time of publica-
tion.
ŠKODA Service Partners are informed about the latest changes by the manu-
facturer. We therefore recommend that the oil change be completed by a
ŠKODA Service Partner.
The specifications (VW standards) stated in the following can be indicated sep-
arately or together with other specifications on the bottle.
The engine oil should be changed after specified service intervals » page 47.WARNINGThe engine compartment of your car is a hazardous area. The following
warning instructions must be followed at all times when working in the en-
gine compartment » page 141.
CAUTION
Do not pour any additives into the engine oil – risk of serious damage to the
engine parts!
Note
■ Before a long drive we recommend that you purchase and carry with you en-
gine oil which complies with the specification for your vehicle.■
We recommend that you use oils from ŠKODA Original Accessories.
■
If your skin has come into contact with oil, it must be washed thoroughly.
Specification
Read and observe
and on page 144 first.
Vehicles with variable service intervals
Petrol enginesSpecification1.2 litres/55 kWVW 503 00, VW 504 001.2 l/63 kW TSIVW 504 001.2 l/77 kW TSIVW 504 001.4 l/90 kW TSIVW 503 00, VW 504 00 1)
In some countries, 5.4 l. applies for both variants.
144General Maintenance
Page 149 of 204

ReplenishingRead and observe
and on page 144 first.
›
Unscrew the cap of the engine oil filler opening » Fig. 126 on page 143 .
›
Replenish the oil in portions of 0.5 litres in accordance with the correct speci-
fications » page 144 .
›
Check the oil level » page 145.
›
Screw the lid of the engine oil filler closed carefully.
›
Pull the dipstick out as far as the stop.
Coolant
Introduction
This chapter contains information on the following subjects:
Checking the coolant level
147
Replenishing
147
The coolant provides cooling for the motor.
It consists of water and coolant additive with additives that protect the cooling
system against corrosion and prevents furring.
The coolant additive level in the coolant must be at least 40%.
The coolant additive may be increased to a maximum of 60%.
The correct mixing ratio of water and coolant additive is to be checked if nec- essary by a specialist garage or is to be restored if necessary.
The description of the coolant is shown in the coolant expansion reser-
voir » Fig. 129 on page 147 .
WARNINGThe engine compartment of your car is a hazardous area. The following
warning instructions must be followed at all times when working in the en- gine compartment » page 141.■
The coolant is harmful to health.
■
Avoid contact with the coolant.
■
Coolant vapours are harmful to health.
■
Never open the end cover of the coolant expansion reservoir while the
engine is still warm. The cooling system is pressurised!
WARNING (Continued)■ When opening the end cover of the coolant expansion reservoir, cover it
with a cloth to protect your face, hands and arms from hot steam or hot
coolant.■
If any coolant splashes into your eyes, immediately rinse out your eyes
with clear water and contact a doctor as soon as possible.
■
Always keep the coolant in the original container, safe from people who
are not completely independent, especially children - there is a danger of
poisoning!
■
If coolant is swallowed, consult a doctor immediately.
■
Never spill operating fluids over the hot engine - risk of fire.
CAUTION
■ Do not continue if for some reason it is not possible to fill with coolant un-
der the current circumstances! Switch off the engine and seek assistance from
a specialist garage.■
If the expansion tank is empty, do not top up with coolant. The system could
ventilate - there is a risk of engine damage,
not continue! Switch off the en-
gine and seek assistance from a specialist garage.
■
The concentration of coolant additive in the coolant must never be under
40%.
■
Over 60% of coolant additive in the coolant reduces the antifreeze protec-
tion and cooling effect.
■
A coolant additive that does not comply with the correct specification can
significantly reduce the corrosion protection of the cooling system.
■
Any faults resulting from corrosion may cause a loss of coolant and can con-
sequently result in major engine damage!
■
Do not fill the coolant above the mark
A
. » Fig. 129 on page 147
■
If an error occurs, leading to the engine overheating, the help of a professio-
nal garage is to be sought - there is a risk of serious engine damage occurring.
■
Additional headlights and other attached components in front of the air inlet
impair the cooling efficiency of the coolant.
■
Never cover the radiator - there is a risk of the engine overheating.
146General Maintenance