key SKODA RAPID SPACEBACK 2015 1.G User Guide
[x] Cancel search | Manufacturer: SKODA, Model Year: 2015, Model line: RAPID SPACEBACK, Model: SKODA RAPID SPACEBACK 2015 1.GPages: 208, PDF Size: 29.2 MB
Page 53 of 208
CAUTION■Operation of the remote control may temporarily be affected by signal inter-
ference from transmitters close to the car and which operate in the same fre-
quency range (e.g. mobile phone, TV transmitter).■
The operating range of the remote control key is approx. 30 m. But this range
of the remote control can be reduced if the batteries are weak.
■
The battery must be replaced if the central locking does react to the remote
control at less than around 3 metres away » page 171.
Note
The remote control will operate only when visual contact with the vehicle.
Unlocking / locking - KESSY
Fig. 37
The front door handle
Read and observe
and on page 50 first.
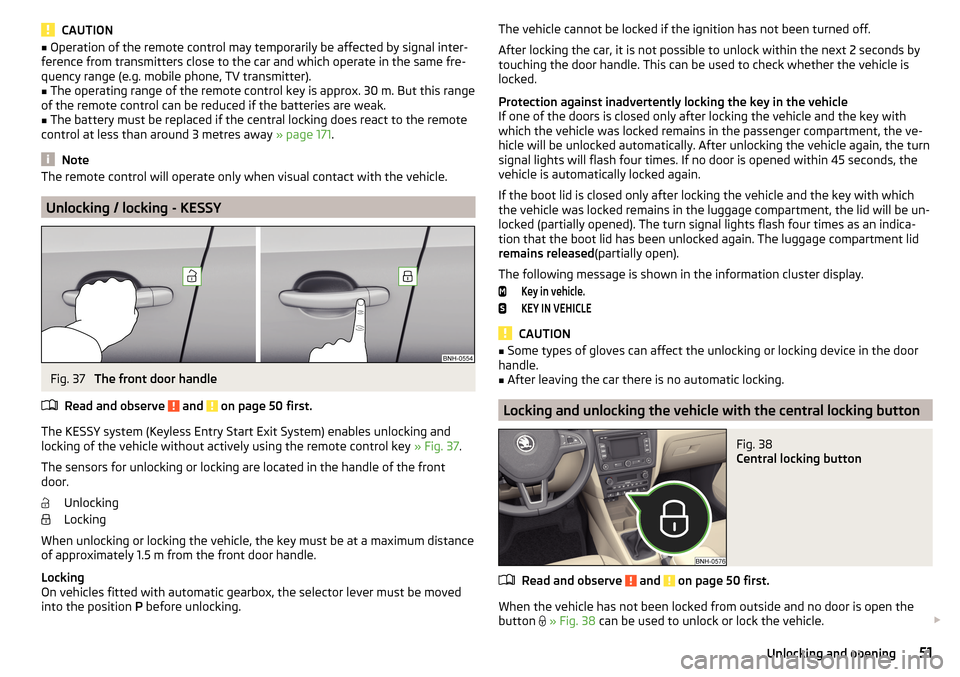
The KESSY system (Keyless Entry Start Exit System) enables unlocking and
locking of the vehicle without actively using the remote control key » Fig. 37.
The sensors for unlocking or locking are located in the handle of the front
door.
Unlocking
Locking
When unlocking or locking the vehicle, the key must be at a maximum distance
of approximately 1.5 m from the front door handle.
Locking
On vehicles fitted with automatic gearbox, the selector lever must be moved into the position P before unlocking.
The vehicle cannot be locked if the ignition has not been turned off.
After locking the car, it is not possible to unlock within the next 2 seconds by
touching the door handle. This can be used to check whether the vehicle is
locked.
Protection against inadvertently locking the key in the vehicle
If one of the doors is closed only after locking the vehicle and the key with
which the vehicle was locked remains in the passenger compartment, the ve-
hicle will be unlocked automatically. After unlocking the vehicle again, the turn
signal lights will flash four times. If no door is opened within 45 seconds, the
vehicle is automatically locked again.
If the boot lid is closed only after locking the vehicle and the key with which
the vehicle was locked remains in the luggage compartment, the lid will be un-
locked (partially opened). The turn signal lights flash four times as an indica-
tion that the boot lid has been unlocked again. The luggage compartment lid
remains released (partially open).
The following message is shown in the information cluster display.Key in vehicle.KEY IN VEHICLE
CAUTION
■ Some types of gloves can affect the unlocking or locking device in the door
handle.■
After leaving the car there is no automatic locking.
Locking and unlocking the vehicle with the central locking button
Fig. 38
Central locking button
Read and observe and on page 50 first.
When the vehicle has not been locked from outside and no door is open the button
» Fig. 38 can be used to unlock or lock the vehicle.
51Unlocking and opening
Page 54 of 208
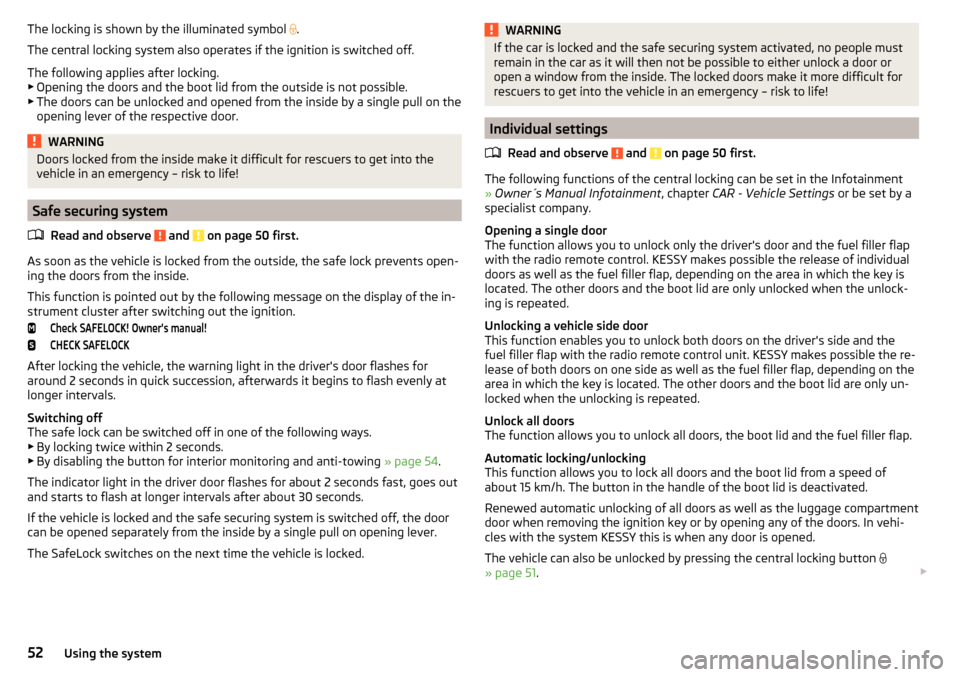
The locking is shown by the illuminated symbol .
The central locking system also operates if the ignition is switched off.
The following applies after locking. ▶ Opening the doors and the boot lid from the outside is not possible.
▶ The doors can be unlocked and opened from the inside by a single pull on the
opening lever of the respective door.WARNINGDoors locked from the inside make it difficult for rescuers to get into the
vehicle in an emergency – risk to life!
Safe securing system
Read and observe
and on page 50 first.
As soon as the vehicle is locked from the outside, the safe lock prevents open-
ing the doors from the inside.
This function is pointed out by the following message on the display of the in-
strument cluster after switching out the ignition.
Check SAFELOCK! Owner's manual!CHECK SAFELOCK
After locking the vehicle, the warning light in the driver's door flashes for
around 2 seconds in quick succession, afterwards it begins to flash evenly at
longer intervals.
Switching off
The safe lock can be switched off in one of the following ways.
▶ By locking twice within 2 seconds.
▶ By disabling the button for interior monitoring and anti-towing » page 54.
The indicator light in the driver door flashes for about 2 seconds fast, goes out
and starts to flash at longer intervals after about 30 seconds.
If the vehicle is locked and the safe securing system is switched off, the door
can be opened separately from the inside by a single pull on opening lever.
The SafeLock switches on the next time the vehicle is locked.
WARNINGIf the car is locked and the safe securing system activated, no people must
remain in the car as it will then not be possible to either unlock a door or
open a window from the inside. The locked doors make it more difficult for
rescuers to get into the vehicle in an emergency – risk to life!
Individual settings
Read and observe
and on page 50 first.
The following functions of the central locking can be set in the Infotainment
» Owner´s Manual Infotainment , chapter CAR - Vehicle Settings or be set by a
specialist company.
Opening a single door
The function allows you to unlock only the driver's door and the fuel filler flap
with the radio remote control. KESSY makes possible the release of individual
doors as well as the fuel filler flap, depending on the area in which the key is
located. The other doors and the boot lid are only unlocked when the unlock-
ing is repeated.
Unlocking a vehicle side door
This function enables you to unlock both doors on the driver's side and the
fuel filler flap with the radio remote control unit. KESSY makes possible the re-
lease of both doors on one side as well as the fuel filler flap, depending on the
area in which the key is located. The other doors and the boot lid are only un-
locked when the unlocking is repeated.
Unlock all doors
The function allows you to unlock all doors, the boot lid and the fuel filler flap.
Automatic locking/unlocking
This function allows you to lock all doors and the boot lid from a speed of
about 15 km/h. The button in the handle of the boot lid is deactivated.
Renewed automatic unlocking of all doors as well as the luggage compartment
door when removing the ignition key or by opening any of the doors. In vehi-
cles with the system KESSY this is when any door is opened.
The vehicle can also be unlocked by pressing the central locking button
» page 51 .
52Using the system
Page 55 of 208

Acoustic signals when locking / unlocking
For vehicles with an anti-theft alarm system, the acoustic signals can be ena- bled / disabled in the Infotainment » Owner´s Manual Infotainment , chap-
ter CAR - Vehicle Settings or be set by a specialist garage.
Opening/closing a door
Fig. 39
Door handle/door opening lever
Read and observe
and on page 50 first.
Opening from the outside
›
Unlock the vehicle.
›
Pull on the door handle
A
in the direction of the arrow » Fig. 39.
Opening from the inside
›
Pull on door opening lever
B
of the door and push the door away from you.
Closing from the inside
›
Grasp pull handle
C
and close the door.
WARNING■ Make sure that the door has closed correctly as it can open suddenly
while driving – risk of death!■
Only open and close the door when there is no one in the opening/closing
range – risk of injury!
■
An opened door can close automatically if there is a strong wind or the
vehicle is on an incline – risk of injury!
■
Never drive with the doors open - there is a risk of death!
Child safety lockFig. 40
Rear door: Child safety system switch on / off
Read and observe
and on page 50 first.
The child safety lock prevents the rear door from being opened from the in- side. The door can only be opened from the outside.
Switching the child safety system on/off » Fig. 40
Switching on
Switching off
You can switch the child safety lock on and off using the vehicle key.
Malfunctions
Read and observe
and on page 50 first.
Fault with the central locking
If the indicator light in the driver's door initially flashes quickly for around 2
seconds, and then lights up for 30 seconds without interruption before flash-
ing again slowly, you will need to seek the assistance of a specialist garage.
In the event of a fault in the central locking system, only the driver's door can
be locked or unlocked with the key. The other doors and the boot lid can be
locked or unlocked manually.
▶ Locking door » page 172.
▶ Unlocking the boot lid » page 172.
53Unlocking and opening
Page 56 of 208
Failure of the system KESSY
If the following message is displayed in the display of the instrument cluster,
then help is required from a specialist company.Keyless access system faulty.KEYLESS ACCESS SYSTEM FAULTY
Key battery discharged
If the voltage of the key battery is too low, the following message appears in
the display of the instrument cluster.
Change the key battery!KEY BATTERY PLEASE CHANGE
Replace the battery » page 171.
Anti-theft alarm system
Introduction
This chapter contains information on the following subjects:
Interior monitor and towing protection
54
The anti-theft alarm system (hereinafter referred to as the alarm system) in- creases protection against theft and break-in attempts into the vehicle.
The alarm system is activated automatically approximately 30 seconds after the vehicle is locked. This is automatically disabled after release.
The alarm system triggers audible and visual signals if an attempt is made to
break into the vehicle (hereafter referred to as alarm).
Triggering the alarm
The alarm is triggered when the following unauthorized actions are carried out
on the locked vehicle.
▶ Opening the bonnet.
▶ Opening the boot lid.
▶ Opening the doors.
▶ Manipulation of the ignition lock.
▶ Towing the vehicle.
▶ Movement in the vehicle.
▶ Sudden and significant voltage drop of the electrical system.
▶ Uncoupling the trailer.
If the driver's door of a vehicle is unlocked and opened by the lock cylinder,
then the alarm is triggered.
Switching off the alarm
The alarm is turned off by pressing the button on the key or switching on
the ignition.
CAUTION
Before leaving the vehicle, it must be checked that all of the windows, doors
and the sliding/tilting roof are locked in order to ensure the full functionality of
the anti-theft alarm system.
Note
The alarm system has its own power source. The working life of the power
supply source is 5 years.
Interior monitor and towing protection
Fig. 41
Button for interior monitor and
towing protection
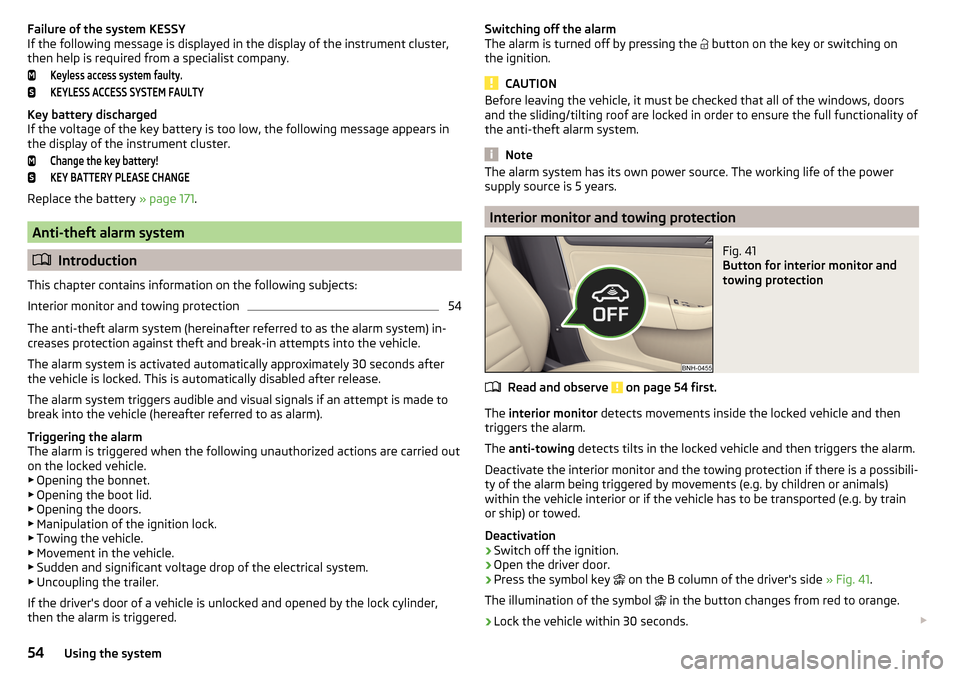
Read and observe on page 54 first.
The interior monitor detects movements inside the locked vehicle and then
triggers the alarm.
The anti-towing detects tilts in the locked vehicle and then triggers the alarm.
Deactivate the interior monitor and the towing protection if there is a possibili-
ty of the alarm being triggered by movements (e.g. by children or animals)
within the vehicle interior or if the vehicle has to be transported (e.g. by train
or ship) or towed.
Deactivation
›
Switch off the ignition.
›
Open the driver door.
›
Press the symbol key
on the B column of the driver's side » Fig. 41.
The illumination of the symbol
in the button changes from red to orange.
›
Lock the vehicle within 30 seconds.
54Using the system
Page 57 of 208

By disabling the interior monitoring and the anti-towing the safe lock is
switched off.
CAUTION
The opened glasses storage compartment reduces the effectiveness of the in-
terior monitor. To ensure the full functionality of the interior monitor, the
glasses storage compartment must always be closed before locking the vehi-
cle.
Luggage compartment lid
Introduction
This chapter contains information on the following subjects:
Boot lid opening/closing
55
Delayed locking of the boot lid
55
When closing the boot lid does do not press on the rear window.
Ensure that the lock is properly engaged after closing the boot lid.
The function of the button in the grip above the licence plate is deactivated when starting off or at a speed of 5 km/hour or more for vehicles with central
locking. The function is restored after the vehicle stops and the door is
opened.
WARNING■ Never drive with the boot lid open or unlatched, as otherwise exhaust
gases may get into the interior of the vehicle – risk of poisoning!■
Make sure that when closing the boot lid, no body parts are crushed -
there is danger of injury!
Boot lid opening/closingFig. 42
Opening / closing tailgate
Read and observe
on page 55 first.
After unlocking the vehicle, the boot lid can be opened with the button in the
handle above the number plate.
Opening
›
Press the button
A
in the direction of arrow
1
» Fig. 42 .
›
Raise the lid in the direction of the arrow
2
.
Closing
›
Grasp the mount
B
and lift in the direction of arrow
3
.
Delayed locking of the boot lid
Read and observe
on page 55 first.
If the boot lid is unlocked with the symbol key on the key, then the door is
automatically locked after closing.
The period after which the boot lid is locked automatically can be extended by
a specialist garage.
CAUTION
There is a risk of unwanted entry into the vehicle before the boot lid is locked
automatically. We therefore recommend locking the vehicle with the symbol
key
on the key.55Unlocking and opening
Page 62 of 208
Note■The light switch is in position or and the ignition is turned off, the low
beam is switched off automatically 1)
and the status light is lit. The side light is
switched off when the ignition key is removed, for vehicles with the start but-
ton after switching off the ignition and opening the driver's door.■
If there is a fault in the light switch, the low beam comes on automatically.
Daytime running lights(DAY LIGHT)
Read and observe
on page 59 first.
The daytime running light (hereinafter referred to as "function") lights the
front and rear vehicle area (only valid for some countries).
The lights are switched on automatically if the following conditions are met. The light switch is in the position or
.
The ignition is switched on.
The function is activated.
Activating/deactivating function on vehicles with Infotainment
The function can be disabled/enabled in the Infotainment » Owner´s Manual
Infotainment , chapter CAR - vehicle settings .
Deactivating on vehicles without Infotainment
›
Switch off the ignition.
›
Pull the indicator / main beam lever towards the steering wheel, push down
and hold in this position.
›
Switch on the ignition.
›
Wait until the left turn signal light flashes 4 times.
›
Switch off the ignition – an audible signal sounds which confirms the deacti-
vation of the function.
›
Release the turn signal stalk.
Activating on vehicles without Infotainment
›
Switch off the ignition.
›
Pull the indicator / main beam lever towards the steering wheel, push up and
hold in this position.
›
Switch on the ignition.
›
Wait until the right turn signal light flashes 4 times.
› Switch off the ignition – an audible signal sounds which confirms the activa-
tion of the function.›
Release the turn signal stalk.
WARNINGAlways switch on the low beam when visibility is poor.
Turn signal and main beam
Fig. 47
Operating lever: Turn signal and
main beam operation
Read and observe on page 59 first.
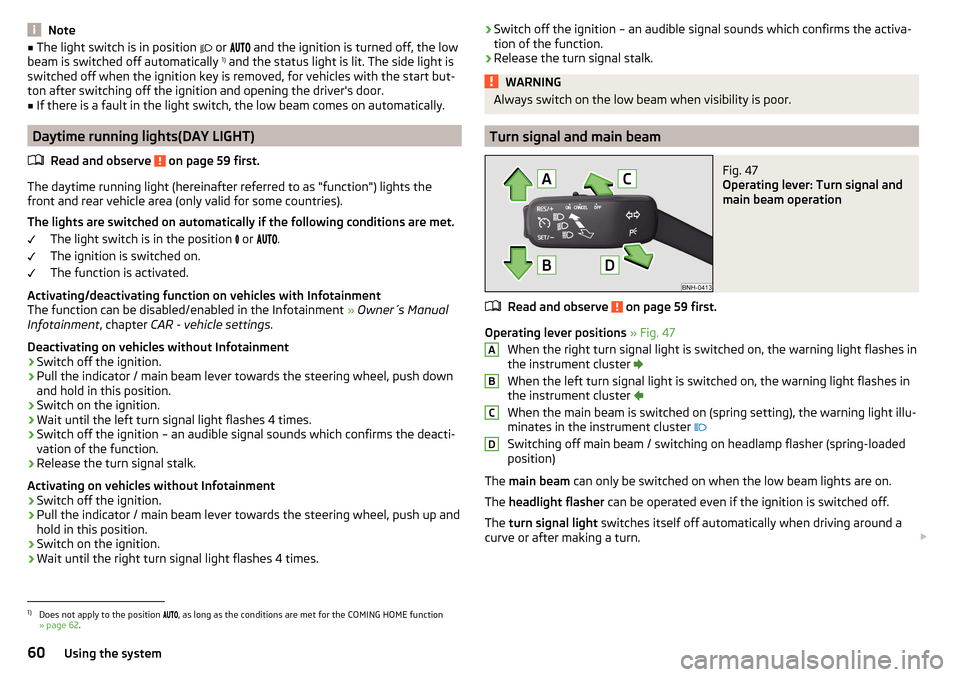
Operating lever positions » Fig. 47
When the right turn signal light is switched on, the warning light flashes in
the instrument cluster
When the left turn signal light is switched on, the warning light flashes in
the instrument cluster
When the main beam is switched on (spring setting), the warning light illu-
minates in the instrument cluster
Switching off main beam / switching on headlamp flasher (spring-loaded position)
The main beam can only be switched on when the low beam lights are on.
The headlight flasher can be operated even if the ignition is switched off.
The turn signal light switches itself off automatically when driving around a
curve or after making a turn.
ABCD1)
Does not apply to the position
, as long as the conditions are met for the COMING HOME function
» page 62 .
60Using the system
Page 65 of 208
When the hazard warning system is on and the indicator light is switched on
(e.g. when turning), the hazard warning lights are switched off temporarily and
only the turn signal flashes on the relevant side of the vehicle.
Parking light
Read and observe
on page 59 first.
The side light is provided for lighting of the parked vehicle.
Switching on the side light
on one side
›
Switch off the ignition.
›
Press the control lever to position
A
or
B
as far as the stop » Fig. 47 on
page 60 .
The parking lights on the right or left side of the vehicle are turned on.
Switching on the side light on both sides
›
With the ignition switched on turn the light switch to position .
›
Switch off the ignition.
›
Lock the vehicle.
After pulling out the ignition key and opening the driver's door, an audible
warning sounds.
After a few seconds or after closing the driver's door, the audible alarm is
turned off, but the parking lights will remain switched on.
CAUTION
■ Turning on the parking light means the battery is heavily loaded.■The parking light cannot be turned off automatic due to the low battery
charge level.■
If the two-sided parking lights are switched on when the ignition is off, then
there is no automatic switching off of the parking light.
Driving abroad
Read and observe
on page 59 first.
When driving in countries with opposing traffic system (traffic on the
left/right), your headlights may dazzle oncoming traffic. In order to avoid this,
the headlights must be adjusted at a specialist garage.
Interior lighting
Introduction
This chapter contains information on the following subjects:
Front interior light
63
Rear interior light
64
The inner lighting also works if the ignition is switched off.
The light turns off automatically 10 minutes after switching off the ignition or
opening a door unless otherwise specified.
Front interior light
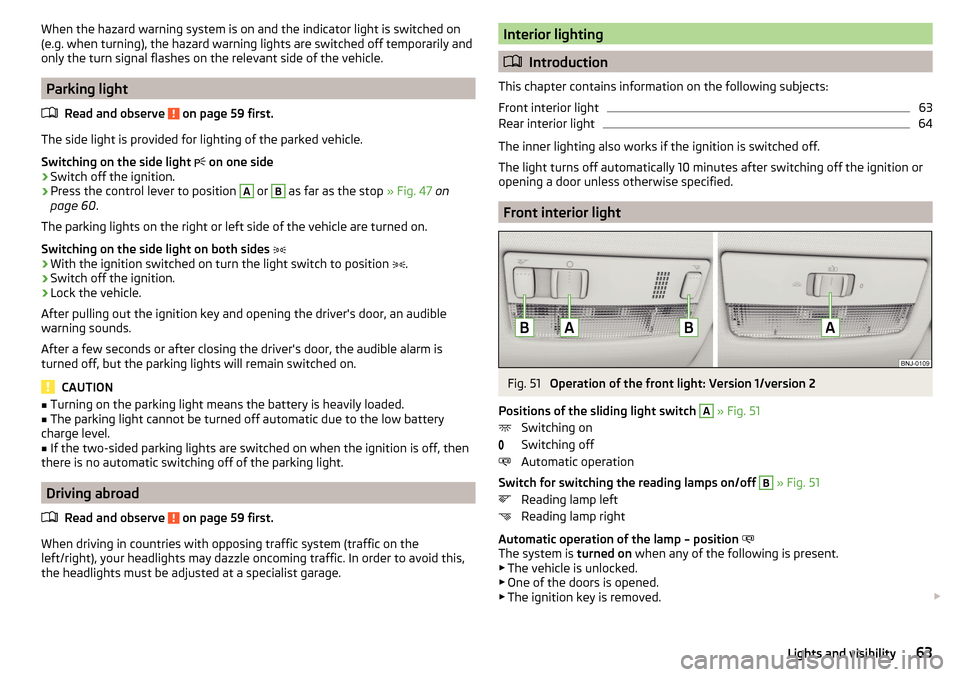
Fig. 51
Operation of the front light: Version 1/version 2
Positions of the sliding light switch
A
» Fig. 51
Switching on
Switching off
Automatic operation
Switch for switching the reading lamps on/off
B
» Fig. 51
Reading lamp left
Reading lamp right
Automatic operation of the lamp – position
The system is turned on when any of the following is present.
▶ The vehicle is unlocked.
▶ One of the doors is opened.
▶ The ignition key is removed.
63Lights and visibility
Page 79 of 208
Open/close waste container›Remove the cover in the direction of arrow 3 » Fig. 75 .
Closing takes place in reverse order.
Replace bags›
Remove the waste container from the slot.
›
Press the two locking lugs on the frame in the direction of arrow
4
» Fig. 76 .
›
Pull the bag together with the frame down in the direction of arrow
5
.
›
Remove the bag from the frame.
›
Pull the new bag through the frame and pull it over the frame in the direction
of arrow
6
.
›
Place the bag containing the frame in the direction of arrow
7
into the con-
tainer body, so that the two lugs engage audibly to the frame.
WARNINGNever use the waste container as an ashtray - risk of fire!
Note
We recommend that you use 20x30 cm bags.
Multimedia holder
Fig. 77
Multimedia holder
Read and observe on page 73 first.
Multimedia holder » Fig. 77
Storage compartment for storing two coins
Storage compartment for storing the vehicle key
Storage compartment for storing a mobile phone
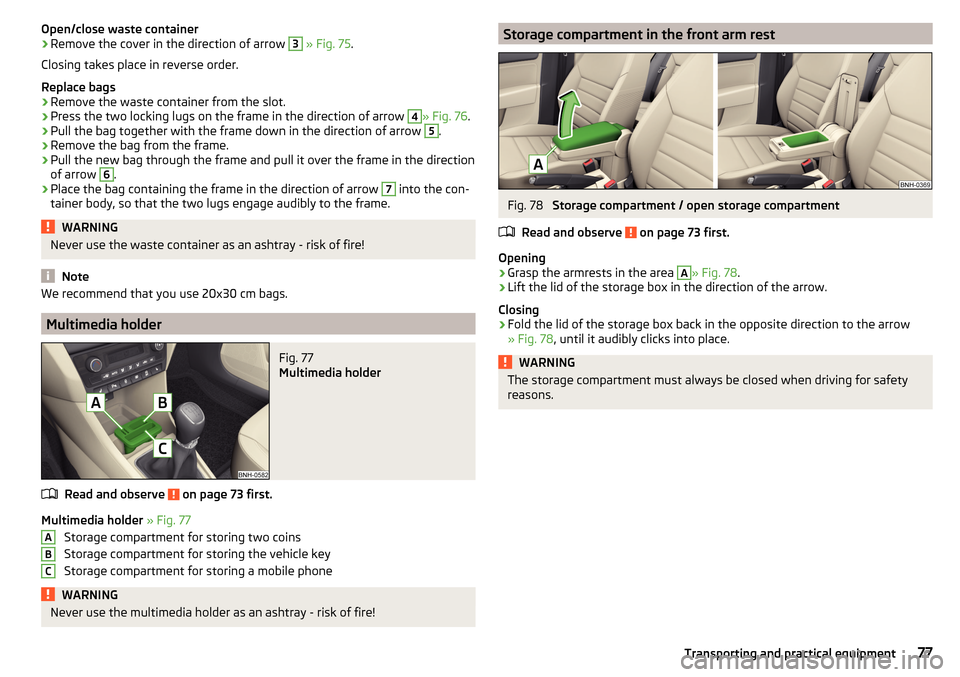
WARNINGNever use the multimedia holder as an ashtray - risk of fire!ABCStorage compartment in the front arm restFig. 78
Storage compartment / open storage compartment
Read and observe
on page 73 first.
Opening
›
Grasp the armrests in the area
A
» Fig. 78 .
›
Lift the lid of the storage box in the direction of the arrow.
Closing
›
Fold the lid of the storage box back in the opposite direction to the arrow
» Fig. 78 , until it audibly clicks into place.
WARNINGThe storage compartment must always be closed when driving for safety
reasons.77Transporting and practical equipment
Page 97 of 208
Driving
Starting-off and Driving
Starting and stopping the engine using the key
Introduction
This chapter contains information on the following subjects:
Electronic immobilizer
95
Steering lock locking / unlocking
96
Turn ignition on / off and start the engine
96
Stopping the engine
96
With the key in the ignition, the ignition can be switched on and off and the
engine can be started / stopped.
WARNING■ While driving with the engine stopped, the ignition must always be
switched on » page 96, Turn ignition on / off and start the engine .
■ With the ignition off, the steering may lock » page 96 - danger of an
accident!■
Do not withdraw the ignition key from the ignition lock until the vehicle
has come to a stop » page 103, Parking . Otherwise, the steering may lock -
danger of an accident!
■
Never leave the key in the vehicle when you exit the vehicle. Unauthor-
ized persons, such as children, for example, could lock the car, turn on the
ignition or start the engine - there is a danger of injury, accidents and dam-
age!
■
Never leave the vehicle unattended with the engine running - there is
risk of accident, damage or theft!
■
Never switch off the engine before the vehicle is stationary – risk of acci-
dent!
WARNING■ Never (e.g. in garages) run the engine in a closed place - there is the dan-
ger of poisoning and death!■
Do not leave any items (e.g. cloths or tools) in the engine compartment.
This presents a fire hazard and the risk of engine damage.
■
Never cover the engine with additional insulation material (e.g. with a
cover) – risk of fire!
CAUTION
■ Only start the engine when the engine and the vehicle are stationary - there
is a danger of starter and engine damage!■
Do not push-start the engine – risk of damaging the engine and the catalytic
converter. The battery from another vehicle can be used as a jump-start aid
» page 168 .
Note
Do not warm up the engine while the vehicle is stationary. If possible, start
your journey as soon as the engine has started. Through this, the engine rea-
ches its operating temperature faster.
Electronic immobilizer
Read and observe
and on page 95 first.
The electronic immobiliser (hereinafter referred to as the immobiliser) makesthe attempted theft or unauthorised use of your vehicle more difficult.
An electronic chip is integrated in the head of the key. The immobiliser is deac-
tivated with the aid of this chip when the key is inserted in the ignition lock.
As soon as the ignition key is removed from the ignition lock, the immobiliser is
automatically activated.
Operational problems
If the immobiliser components in the key fail, it is not possible to start the en-
gine. A corresponding message appears in the display of the instrument clus-
ter to explain that the immobiliser is active.
To start, use the other vehicle key or seek help from a specialist garage.
95Starting-off and Driving
Page 98 of 208

Steering lock locking / unlockingRead and observe
and on page 95 first.
The steering lock (steering lock) deters any attempted theft of your vehicle.
Locking
›
Withdraw the ignition key.
›
Turn the steering wheel to the left or right until the steering lock clicks into
place.
Unlocking
›
Insert the key into the ignition lock.
›
Switch on the ignition » page 96.
The steering lock is unlocked.
If the ignition switch cannot be turned on, then turn the steering wheel back and forth slightly and thereby unlock the steering lock.
Turn ignition on / off and start the engine
Fig. 110
Positions of the vehicle key in the ignition lock
Read and observe and on page 95 first.
Positions of the vehicle key in the ignition lock » Fig. 110
Ignition switched off, engine switched off
Ignition switched on
Starting engine
Switching ignition on/off
›
Turn key to position
2
.
The ignition is switched on.
›
Turn key to position
1
.
123The ignition is switched off.
Procedure for starting the engine›
Firmly apply the handbrake.
›
For vehicles with manual transmission , shift gear stick to neutral, depress
the clutch pedal and hold it there until the engine starts.
›
On vehicles with automatic transmission , place the selector lever in position
P or N and depress the brake pedal until the engine starts.
›
Turn the key into position
3
as far as it will go - the engine's starting proce-
dure will commence (do not touch the accelerator).
›
Release the key, the engine will start automatically.
After letting go, the vehicle key will return to position
2
.
If the engine does not start within 10 seconds, turn the key to position
1
. Re-
peat the start-up process after approx. half a minute.
For vehicles with diesel engines the glow plug warning light
goes on during
starting. The engine can be started after the indicator light goes out.
Note
■ The engine running noises may louder at first be louder for a short time after
starting the cold engine. This is quite normal and is not an operating problem.■
You should not switch on any major electrical components during the heat-
ing period otherwise the vehicle battery will be drained unnecessarily.
Stopping the engine
Read and observe
and on page 95 first.
›
Stop the vehicle » page 103, Parking .
›
Turn key to position
1
» Fig. 110 on page 96 .
The engine and the ignition are switched off simultaneously.
For vehicles with automatic transmission, the ignition key can only be removed
if the selector lever is in position P .
CAUTION
Do not switch the engine off immediately at the end of your journey after the
engine has been operated over a prolonged period at high loads but leave it to
run at an idling speed for about 1 minute. This prevents any possible accumula-
tion of heat when the engine is switched off. 96Driving