headlight SKODA RAPID SPACEBACK 2015 1.G Owner's Manual
[x] Cancel search | Manufacturer: SKODA, Model Year: 2015, Model line: RAPID SPACEBACK, Model: SKODA RAPID SPACEBACK 2015 1.GPages: 208, PDF Size: 29.2 MB
Page 29 of 208
Using the system
Cockpit
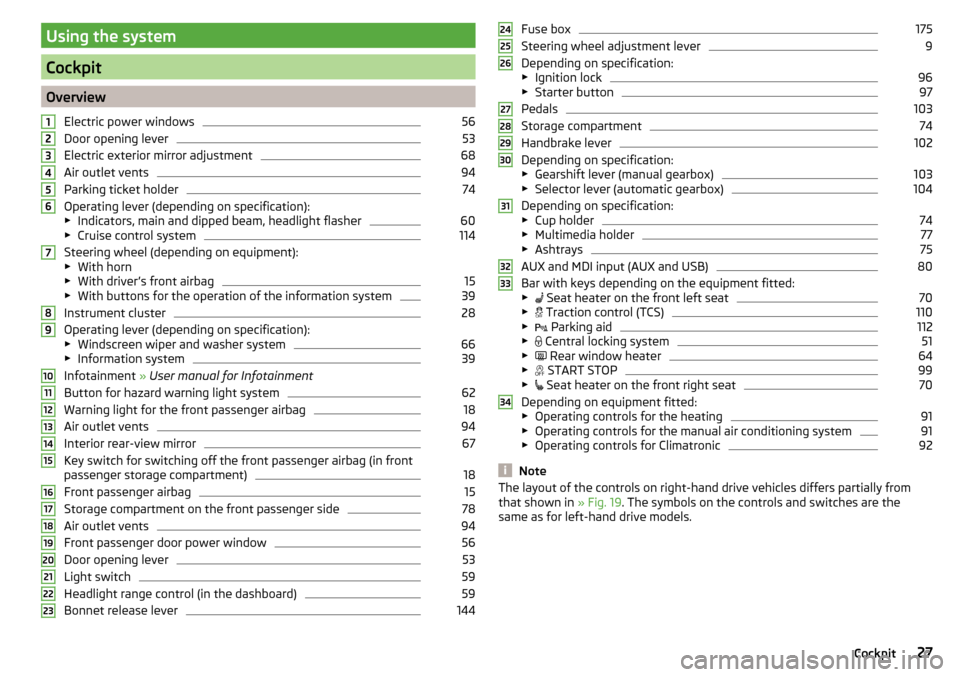
OverviewElectric power windows
56
Door opening lever
53
Electric exterior mirror adjustment
68
Air outlet vents
94
Parking ticket holder
74
Operating lever (depending on specification):
▶ Indicators, main and dipped beam, headlight flasher
60
▶Cruise control system
114
Steering wheel (depending on equipment):
▶ With horn
▶ With driver’s front airbag
15
▶With buttons for the operation of the information system
39
Instrument cluster
28
Operating lever (depending on specification):
▶ Windscreen wiper and washer system
66
▶Information system
39
Infotainment » User manual for Infotainment
Button for hazard warning light system
62
Warning light for the front passenger airbag
18
Air outlet vents
94
Interior rear-view mirror
67
Key switch for switching off the front passenger airbag (in front
passenger storage compartment)
18
Front passenger airbag
15
Storage compartment on the front passenger side
78
Air outlet vents
94
Front passenger door power window
56
Door opening lever
53
Light switch
59
Headlight range control (in the dashboard)
59
Bonnet release lever
1441234567891011121314151617181920212223Fuse box175
Steering wheel adjustment lever
9
Depending on specification:
▶ Ignition lock
96
▶Starter button
97
Pedals
103
Storage compartment
74
Handbrake lever
102
Depending on specification:
▶ Gearshift lever (manual gearbox)
103
▶Selector lever (automatic gearbox)
104
Depending on specification:
▶ Cup holder
74
▶Multimedia holder
77
▶Ashtrays
75
AUX and MDI input (AUX and USB)
80
Bar with keys depending on the equipment fitted:
▶ Seat heater on the front left seat
70
▶
Traction control (TCS)
110
▶
Parking aid
112
▶
Central locking system
51
▶
Rear window heater
64
▶
START STOP
99
▶
Seat heater on the front right seat
70
Depending on equipment fitted:
▶ Operating controls for the heating
91
▶Operating controls for the manual air conditioning system
91
▶Operating controls for Climatronic
92
Note
The layout of the controls on right-hand drive vehicles differs partially from
that shown in » Fig. 19. The symbols on the controls and switches are the
same as for left-hand drive models.242526272829303132333427Cockpit
Page 32 of 208
The operating range
The engine has reached its operating temperature as soon as the pointer
moves into the middle of the scale A
» Fig. 23 .
High temperature range
If the pointer reaches the red area of the scale, the coolant temperature is too
high.
CAUTION
■ Additional headlights and other attached components in front of the air inlet
impair the cooling efficiency of the coolant.■
Never cover the radiator - there is a risk of the engine overheating.
Note
On vehicles with the multifunction display, the coolant temperature can be
shown on the display by the corresponding driving data entry being selected
» page 40 , Information overview .
Fuel gauge
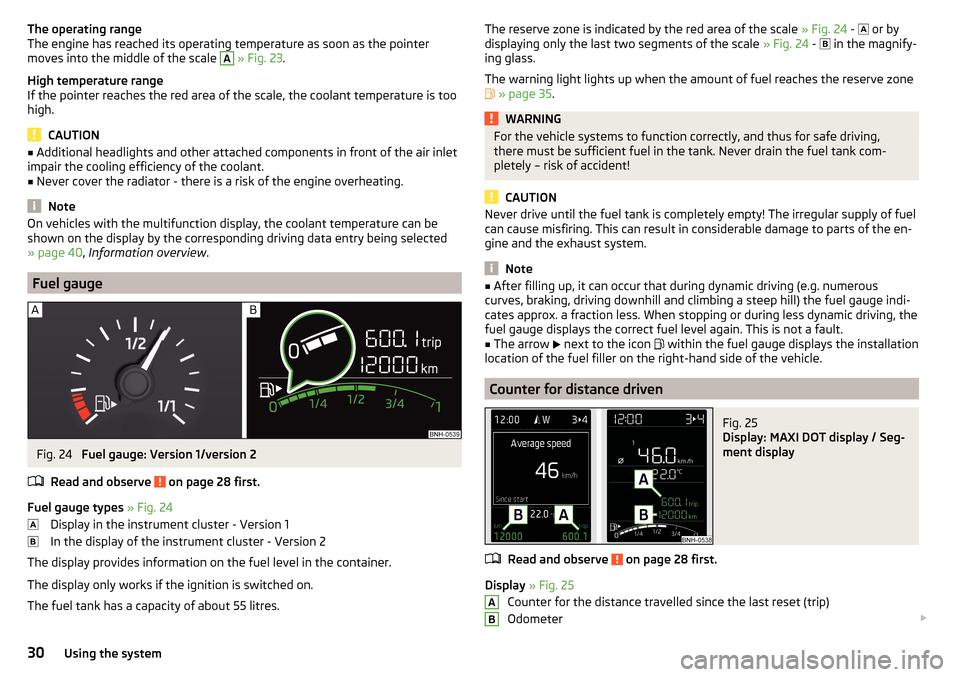
Fig. 24
Fuel gauge: Version 1/version 2
Read and observe
on page 28 first.
Fuel gauge types » Fig. 24
Display in the instrument cluster - Version 1
In the display of the instrument cluster - Version 2
The display provides information on the fuel level in the container.
The display only works if the ignition is switched on.
The fuel tank has a capacity of about 55 litres.
The reserve zone is indicated by the red area of the scale » Fig. 24 - or by
displaying only the last two segments of the scale » Fig. 24 - in the magnify-
ing glass.
The warning light lights up when the amount of fuel reaches the reserve zone
» page 35 .WARNINGFor the vehicle systems to function correctly, and thus for safe driving,
there must be sufficient fuel in the tank. Never drain the fuel tank com-
pletely – risk of accident!
CAUTION
Never drive until the fuel tank is completely empty! The irregular supply of fuel
can cause misfiring. This can result in considerable damage to parts of the en-
gine and the exhaust system.
Note
■ After filling up, it can occur that during dynamic driving (e.g. numerous
curves, braking, driving downhill and climbing a steep hill) the fuel gauge indi-
cates approx. a fraction less. When stopping or during less dynamic driving, the
fuel gauge displays the correct fuel level again. This is not a fault.■
The arrow
next to the icon
within the fuel gauge displays the installation
location of the fuel filler on the right-hand side of the vehicle.
Counter for distance driven
Fig. 25
Display: MAXI DOT display / Seg-
ment display
Read and observe on page 28 first.
Display » Fig. 25
Counter for the distance travelled since the last reset (trip)
Odometer
AB30Using the system
Page 38 of 208
Main beamRead and observe
on page 32 first.
illuminates – the main beam or the headlight flasher is switched on.
Automatic transmission
Read and observe
on page 32 first.
Gearbox overheated
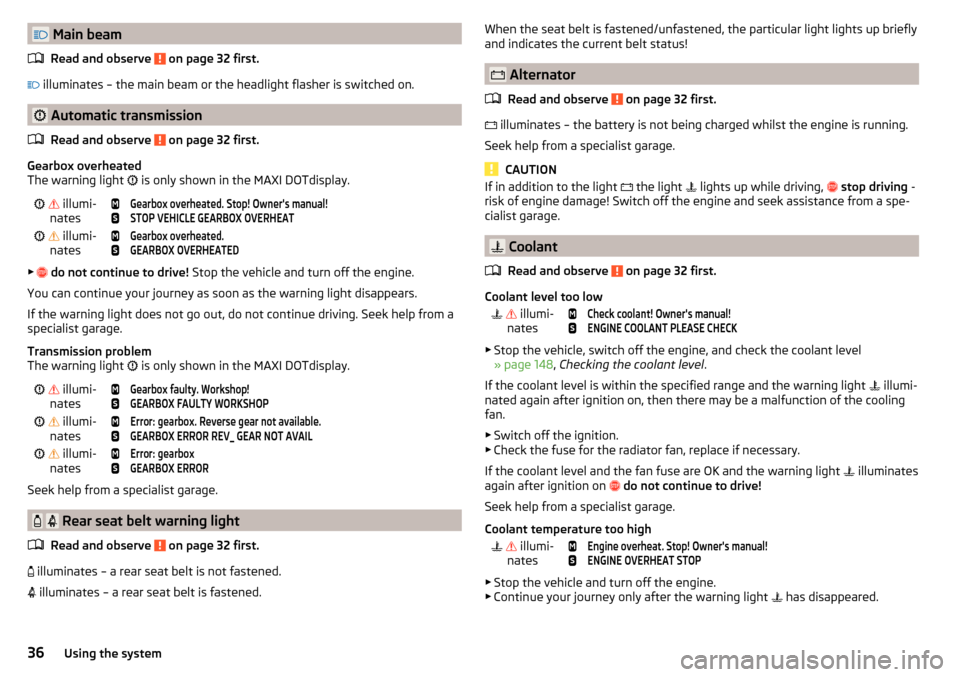
The warning light
is only shown in the MAXI DOTdisplay.
illumi-
nates
Gearbox overheated. Stop! Owner's manual!STOP VEHICLE GEARBOX OVERHEAT illumi-
nates
Gearbox overheated.GEARBOX OVERHEATED
▶
do not continue to drive! Stop the vehicle and turn off the engine.
You can continue your journey as soon as the warning light disappears.
If the warning light does not go out, do not continue driving. Seek help from a specialist garage.
Transmission problem
The warning light is only shown in the MAXI DOTdisplay.
illumi-
nates
Gearbox faulty. Workshop!GEARBOX FAULTY WORKSHOP illumi-
nates
Error: gearbox. Reverse gear not available.GEARBOX ERROR REV_ GEAR NOT AVAIL illumi-
nates
Error: gearboxGEARBOX ERROR
Seek help from a specialist garage.
Rear seat belt warning light
Read and observe
on page 32 first.
illuminates – a rear seat belt is not fastened.
illuminates – a rear seat belt is fastened.
When the seat belt is fastened/unfastened, the particular light lights up briefly
and indicates the current belt status!
Alternator
Read and observe
on page 32 first.
illuminates – the battery is not being charged whilst the engine is running.
Seek help from a specialist garage.
CAUTION
If in addition to the light the light lights up while driving, stop driving -
risk of engine damage! Switch off the engine and seek assistance from a spe-
cialist garage.
Coolant
Read and observe
on page 32 first.
Coolant level too low
illumi-
nates
Check coolant! Owner's manual!ENGINE COOLANT PLEASE CHECK
▶ Stop the vehicle, switch off the engine, and check the coolant level
» page 148 , Checking the coolant level .
If the coolant level is within the specified range and the warning light illumi-
nated again after ignition on, then there may be a malfunction of the cooling
fan.
▶ Switch off the ignition.
▶ Check the fuse for the radiator fan, replace if necessary.
If the coolant level and the fan fuse are OK and the warning light illuminates
again after ignition on
do not continue to drive!
Seek help from a specialist garage.
Coolant temperature too high
illumi-
nates
Engine overheat. Stop! Owner's manual!ENGINE OVERHEAT STOP
▶ Stop the vehicle and turn off the engine.
▶ Continue your journey only after the warning light has disappeared.
36Using the system
Page 39 of 208

Engine oil pressure too low
Read and observe
on page 32 first.
flashes – the engine oil pressure is too low.
Oil pressure: Stop vehicle! Owner's manual!STOP VEHICLE OIL PRESSURE›
Stop the vehicle, switch off the engine, and check the engine oil level.
Even if the oil level is correct,
do not drive any further if the warning light is
flashing. Also do not leave the engine running at an idling speed.
Seek help from a specialist garage.
CAUTION
If for some reason, it is not possible to top up the engine oil, do not contin-
ue driving! Switch off the engine and seek assistance from a specialist garage.
Engine oil level
Read and observe
on page 32 first.
Engine oil level too low
illumi-
nates
Oil level: add oil!ADD OIL
▶ Stop the vehicle, switch off the engine, and check the engine oil level, top up
if necessary.
The warning light will go out if the bonnet is left open for more than 30 sec-
onds. If no engine oil has been replenished, the warning light will come on
again after driving about 100 km.
Engine oil level too high
illumi-
nates
Reduce oil level!OIL LEVEL TOO HIGH
▶ Stop the vehicle, switch off the engine, and check the engine oil level.
In the event of a high oil level, seek assistance from a specialist garage.
Fault on the engine oil level sensor
illumi-
nates
Oil sensor: workshop!OIL SENSOR WORKSHOPSeek help from a specialist garage.
CAUTION
If for some reason, it is not possible to top up the engine oil, do not contin-
ue driving! Switch off the engine and seek assistance from a specialist garage.
Lamp failure
Read and observe
on page 32 first.
illuminates – one of the lamps is defective. A message will appear con-
cerning the affected lamp.
An example message in the display of the instrument cluster
Check right dipped headlight beam!DIPPED HEADLIGHT CHECK RIGHT
Diesel particulate filter (diesel engine)
Read and observe
on page 32 first.
The diesel particulate filter separates the soot particles from the exhaust. The soot particles collect in the diesel particulate filter where they are burnt on a
regular basis.
Illuminates – the filter is clogged with soot.
To clean the filter, and where traffic conditions permit »
, drive as follows for
at least 15 minutes or until the indicator light goes out.
Gear 4 or gear 5 engaged (automatic gearbox: Position D/S).
Vehicle speed at least 70 km/h.
Engine speed between 1,800-2,500 rpm.
If the filter is properly cleaned, the warning light extinguishes.
If the filter is not properly cleaned, the warning light does not go out and
the warning light begins to flash.
Particulate filter: owner's manual!PARTICLE FILTER OWNER MANUAL
Seek help from a specialist garage.
37Instruments and Indicator Lights
Page 61 of 208
Lights and visibility
Lights
Introduction
This chapter contains information on the following subjects:
Operating the light function
59
Daytime running lights(DAY LIGHT)
60
Turn signal and main beam
60
Automatic driving lamp control
61
Front and rear fog lights
61
Fog lights with the CORNER function
62
COMING HOME / LEAVING HOME
62
Hazard warning light system
62
Parking light
63
Driving abroad
63
Unless otherwise stated, the lights only work when the ignition is switched on.
The layout of the controls on right-hand drive vehicles differs partially from
that shown in » Fig. 46 on page 59 . The symbols which mark the individual
positions of the controls are identical.
WARNINGThe automatic driving lamp control only operates as a support and
does not release the driver from his responsibility to check the lights and, if
necessary, to switch on the light depending on the prevailing light condi-
tions.
Note
■ The headlights may mist up temporarily. When the driving lights are switched
on, the light outlet surfaces are free from mist after a short period, although
the headlight lenses may still be misted up in the peripheral areas. This mist
has no influence on the life of the lighting system.■
If the visibility is poor and the lights are not on (except daytime running light)
the brightness of the instrument lighting reduces to alert the driver to switch
on the lights in due time.
■
The brightness of the instrument lighting with the lights on (except daytime
running lights) can be set in the Infotainment » Owner´s Manual Infotainment ,
chapter CAR - Vehicle Settings .
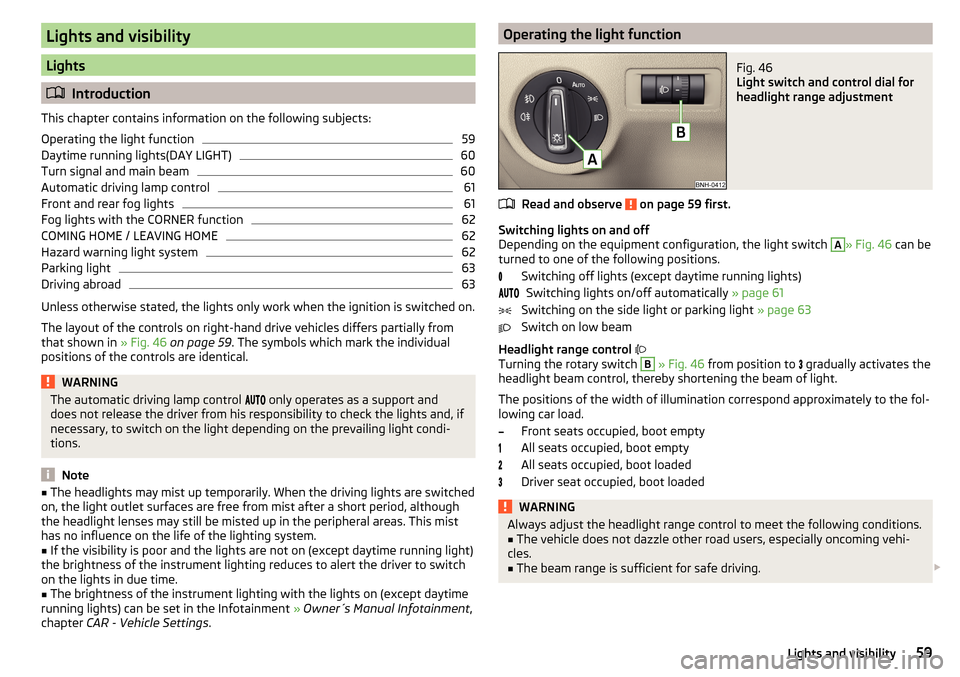
Operating the light functionFig. 46
Light switch and control dial for
headlight range adjustment
Read and observe on page 59 first.
Switching lights on and off
Depending on the equipment configuration, the light switch
A
» Fig. 46 can be
turned to one of the following positions.
Switching off lights (except daytime running lights)Switching lights on/off automatically » page 61
Switching on the side light or parking light » page 63
Switch on low beam
Headlight range control
Turning the rotary switch
B
» Fig. 46 from position to
gradually activates the
headlight beam control, thereby shortening the beam of light.
The positions of the width of illumination correspond approximately to the fol- lowing car load.
Front seats occupied, boot empty
All seats occupied, boot empty
All seats occupied, boot loaded
Driver seat occupied, boot loaded
WARNINGAlways adjust the headlight range control to meet the following conditions.■The vehicle does not dazzle other road users, especially oncoming vehi-
cles.■
The beam range is sufficient for safe driving.
59Lights and visibility
Page 62 of 208
Note■The light switch is in position or and the ignition is turned off, the low
beam is switched off automatically 1)
and the status light is lit. The side light is
switched off when the ignition key is removed, for vehicles with the start but-
ton after switching off the ignition and opening the driver's door.■
If there is a fault in the light switch, the low beam comes on automatically.
Daytime running lights(DAY LIGHT)
Read and observe
on page 59 first.
The daytime running light (hereinafter referred to as "function") lights the
front and rear vehicle area (only valid for some countries).
The lights are switched on automatically if the following conditions are met. The light switch is in the position or
.
The ignition is switched on.
The function is activated.
Activating/deactivating function on vehicles with Infotainment
The function can be disabled/enabled in the Infotainment » Owner´s Manual
Infotainment , chapter CAR - vehicle settings .
Deactivating on vehicles without Infotainment
›
Switch off the ignition.
›
Pull the indicator / main beam lever towards the steering wheel, push down
and hold in this position.
›
Switch on the ignition.
›
Wait until the left turn signal light flashes 4 times.
›
Switch off the ignition – an audible signal sounds which confirms the deacti-
vation of the function.
›
Release the turn signal stalk.
Activating on vehicles without Infotainment
›
Switch off the ignition.
›
Pull the indicator / main beam lever towards the steering wheel, push up and
hold in this position.
›
Switch on the ignition.
›
Wait until the right turn signal light flashes 4 times.
› Switch off the ignition – an audible signal sounds which confirms the activa-
tion of the function.›
Release the turn signal stalk.
WARNINGAlways switch on the low beam when visibility is poor.
Turn signal and main beam
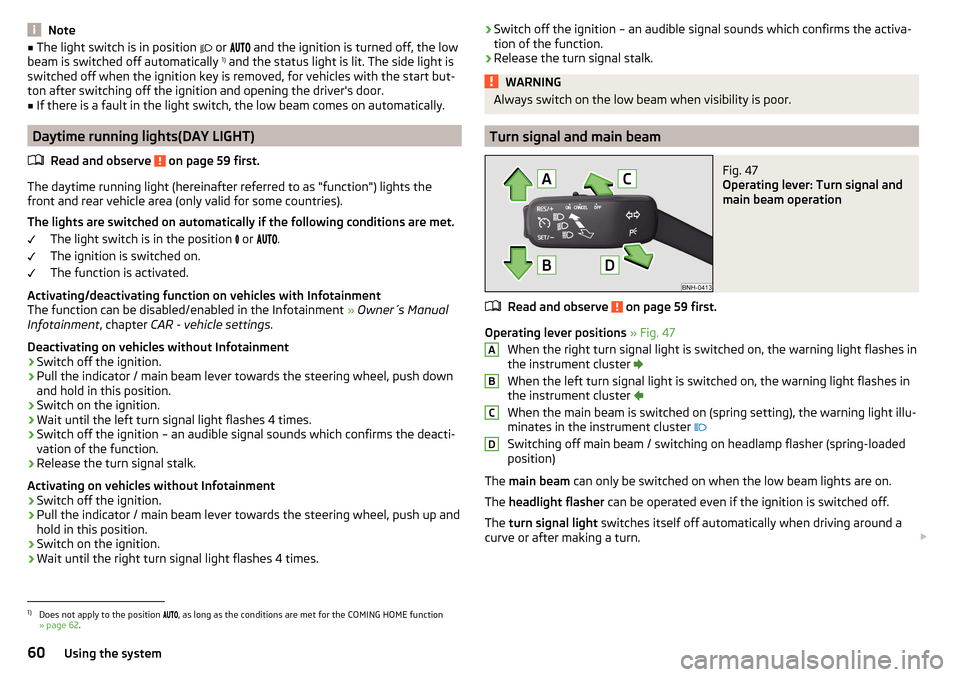
Fig. 47
Operating lever: Turn signal and
main beam operation
Read and observe on page 59 first.
Operating lever positions » Fig. 47
When the right turn signal light is switched on, the warning light flashes in
the instrument cluster
When the left turn signal light is switched on, the warning light flashes in
the instrument cluster
When the main beam is switched on (spring setting), the warning light illu-
minates in the instrument cluster
Switching off main beam / switching on headlamp flasher (spring-loaded position)
The main beam can only be switched on when the low beam lights are on.
The headlight flasher can be operated even if the ignition is switched off.
The turn signal light switches itself off automatically when driving around a
curve or after making a turn.
ABCD1)
Does not apply to the position
, as long as the conditions are met for the COMING HOME function
» page 62 .
60Using the system
Page 63 of 208
“Convenience turn signal”
When the control lever is lightly pressed to the pressure point A or B then
the respective turn-signal lamp flashes three times.
If during the “comfort flashing” the operating lever in the opposite side is
pressed, then the blinking stops.
The “Lane change flash” can be activated/deactivated in the Infotainment
» Owner´s Manual Infotainment , chapter CAR - vehicle settings .WARNINGOnly turn on the main beam or the headlight flasher if other road users will
not be dazzled.
Automatic driving lamp control
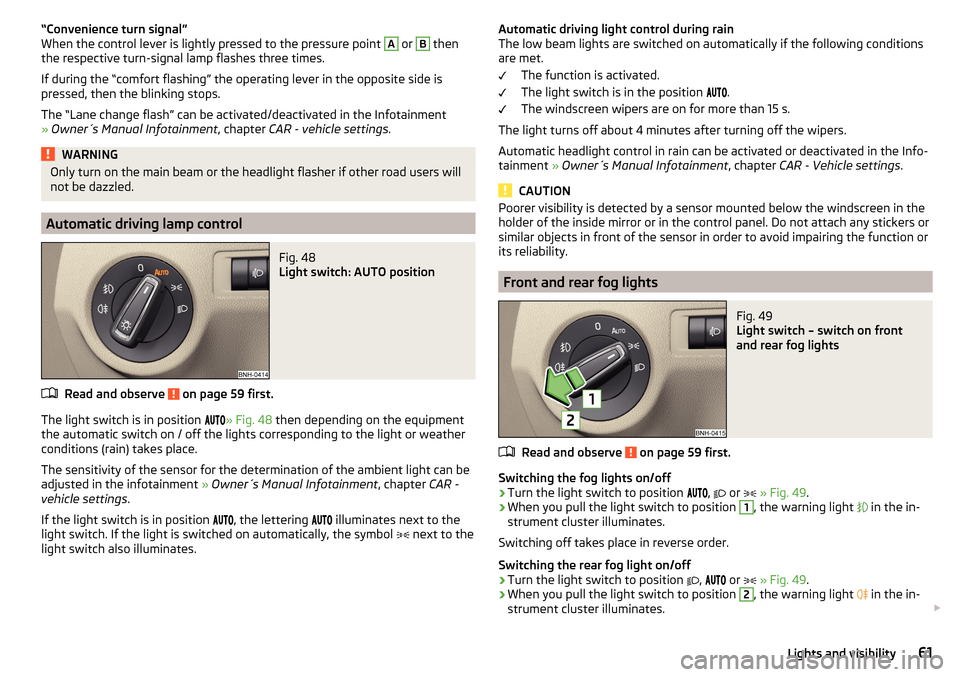
Fig. 48
Light switch: AUTO position
Read and observe on page 59 first.
The light switch is in position
» Fig. 48 then depending on the equipment
the automatic switch on / off the lights corresponding to the light or weather
conditions (rain) takes place.
The sensitivity of the sensor for the determination of the ambient light can be
adjusted in the infotainment » Owner´s Manual Infotainment , chapter CAR -
vehicle settings .
If the light switch is in position
, the lettering
illuminates next to the
light switch. If the light is switched on automatically, the symbol
next to the
light switch also illuminates.
Automatic driving light control during rain
The low beam lights are switched on automatically if the following conditions
are met.
The function is activated.
The light switch is in the position
.
The windscreen wipers are on for more than 15 s.
The light turns off about 4 minutes after turning off the wipers.
Automatic headlight control in rain can be activated or deactivated in the Info-
tainment » Owner´s Manual Infotainment , chapter CAR - Vehicle settings .
CAUTION
Poorer visibility is detected by a sensor mounted below the windscreen in the
holder of the inside mirror or in the control panel. Do not attach any stickers or
similar objects in front of the sensor in order to avoid impairing the function or
its reliability.
Front and rear fog lights
Fig. 49
Light switch – switch on front
and rear fog lights
Read and observe on page 59 first.
Switching the fog lights on/off
›
Turn the light switch to position
,
or
» Fig. 49 .
›
When you pull the light switch to position
1
, the warning light
in the in-
strument cluster illuminates.
Switching off takes place in reverse order.
Switching the rear fog light on/off
›
Turn the light switch to position
,
or
» Fig. 49 .
›
When you pull the light switch to position
2
, the warning light
in the in-
strument cluster illuminates.
61Lights and visibility
Page 65 of 208
When the hazard warning system is on and the indicator light is switched on
(e.g. when turning), the hazard warning lights are switched off temporarily and
only the turn signal flashes on the relevant side of the vehicle.
Parking light
Read and observe
on page 59 first.
The side light is provided for lighting of the parked vehicle.
Switching on the side light
on one side
›
Switch off the ignition.
›
Press the control lever to position
A
or
B
as far as the stop » Fig. 47 on
page 60 .
The parking lights on the right or left side of the vehicle are turned on.
Switching on the side light on both sides
›
With the ignition switched on turn the light switch to position .
›
Switch off the ignition.
›
Lock the vehicle.
After pulling out the ignition key and opening the driver's door, an audible
warning sounds.
After a few seconds or after closing the driver's door, the audible alarm is
turned off, but the parking lights will remain switched on.
CAUTION
■ Turning on the parking light means the battery is heavily loaded.■The parking light cannot be turned off automatic due to the low battery
charge level.■
If the two-sided parking lights are switched on when the ignition is off, then
there is no automatic switching off of the parking light.
Driving abroad
Read and observe
on page 59 first.
When driving in countries with opposing traffic system (traffic on the
left/right), your headlights may dazzle oncoming traffic. In order to avoid this,
the headlights must be adjusted at a specialist garage.
Interior lighting
Introduction
This chapter contains information on the following subjects:
Front interior light
63
Rear interior light
64
The inner lighting also works if the ignition is switched off.
The light turns off automatically 10 minutes after switching off the ignition or
opening a door unless otherwise specified.
Front interior light
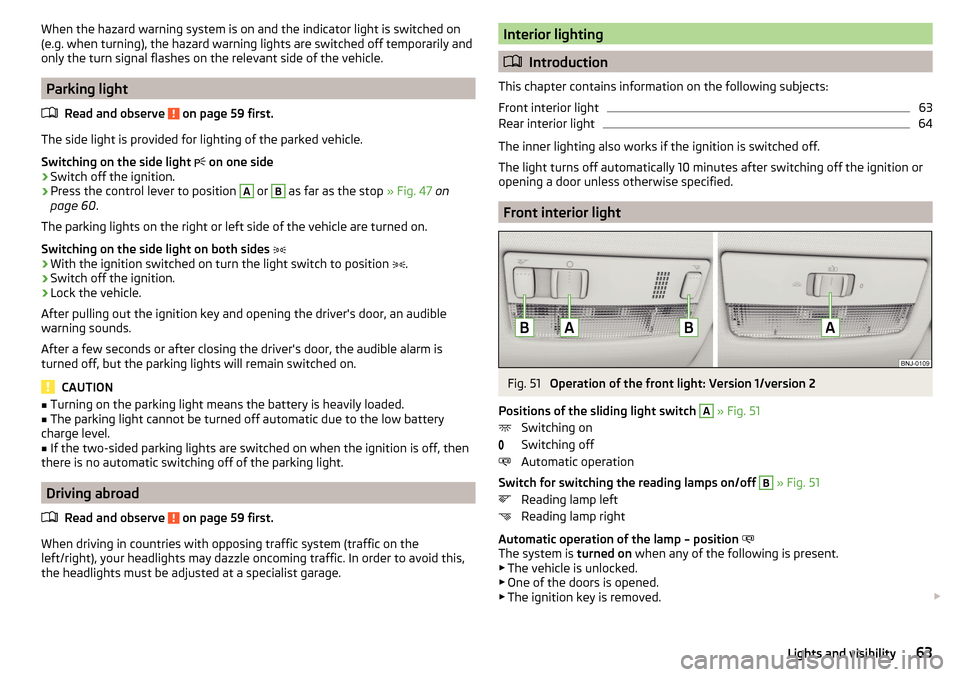
Fig. 51
Operation of the front light: Version 1/version 2
Positions of the sliding light switch
A
» Fig. 51
Switching on
Switching off
Automatic operation
Switch for switching the reading lamps on/off
B
» Fig. 51
Reading lamp left
Reading lamp right
Automatic operation of the lamp – position
The system is turned on when any of the following is present.
▶ The vehicle is unlocked.
▶ One of the doors is opened.
▶ The ignition key is removed.
63Lights and visibility
Page 67 of 208
If the engine is switched off when the heating is on and turned back on again
within 10 minutes, the heating is continued.
Note
■ If the on-board voltage decreases, the heating switches off automatically
» page 153 , Automatic load deactivation .■
If the light is flashing inside the button the heater is off due to low battery.
Front sun visors
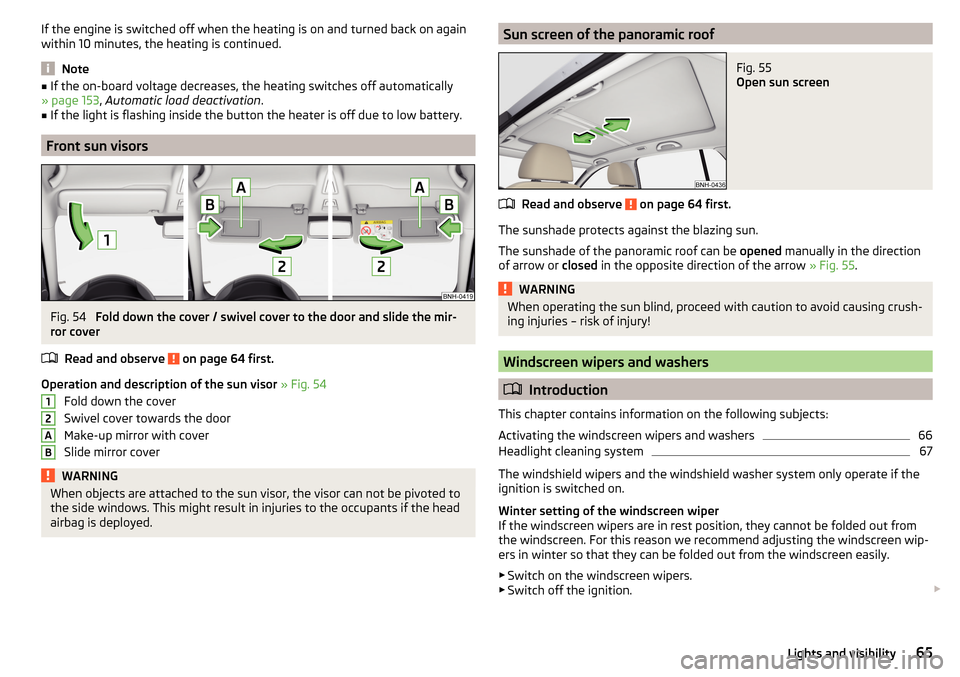
Fig. 54
Fold down the cover / swivel cover to the door and slide the mir-
ror cover
Read and observe
on page 64 first.
Operation and description of the sun visor » Fig. 54
Fold down the cover
Swivel cover towards the door
Make-up mirror with cover
Slide mirror cover
WARNINGWhen objects are attached to the sun visor, the visor can not be pivoted to
the side windows. This might result in injuries to the occupants if the head
airbag is deployed.12ABSun screen of the panoramic roofFig. 55
Open sun screen
Read and observe on page 64 first.
The sunshade protects against the blazing sun.
The sunshade of the panoramic roof can be opened manually in the direction
of arrow or closed in the opposite direction of the arrow » Fig. 55.
WARNINGWhen operating the sun blind, proceed with caution to avoid causing crush-
ing injuries – risk of injury!
Windscreen wipers and washers
Introduction
This chapter contains information on the following subjects:
Activating the windscreen wipers and washers
66
Headlight cleaning system
67
The windshield wipers and the windshield washer system only operate if the
ignition is switched on.
Winter setting of the windscreen wiper
If the windscreen wipers are in rest position, they cannot be folded out from
the windscreen. For this reason we recommend adjusting the windscreen wip-
ers in winter so that they can be folded out from the windscreen easily.
▶ Switch on the windscreen wipers.
▶ Switch off the ignition.
65Lights and visibility
Page 69 of 208

WARNINGAutomatic wiping during rain is only a support. The driver is not released
from the responsibility to set the function of the windscreen wipers man-
ually depending on the visibility conditions.
Headlight cleaning system
Read and observe
and on page 66 first.
To clean the headlights, the headlamp is also sprayed after every ten squirts.The headlight washer system works under the following conditions. The ignition is switched on.
The low beam is switched on.
The outside temperature is about -11° C to +36° C.
To ensure the correct functioning of the system, even in winter, this needs to
be regularly cleared of snow and ice, e.g. free with a de-icing spray.
CAUTION
Never remove the nozzles from the headlight cleaning system by hand – risk of
damage!
Rear mirror
Introduction
This chapter contains information on the following subjects:
Interior mirror dimming
67
Exterior mirror
68WARNING■ Convex (curved outward) or aspheric exterior mirrors increase the field of
vision. They do, however, make objects appear smaller in the mirror. These
mirrors are therefore only of limited use for estimating distances to the fol-
lowing vehicles.■
Whenever possible use the interior mirror for estimating the distances to
the following vehicles.
Interior mirror dimmingFig. 57
Interior mirror: manual dimming/auto-darkening
Read and observe
on page 67 first.
Mirrors with manual dimming » Fig. 57 -
Basic position of the mirror
Mirror blackout
Mirror with automatic dimming
After starting the engine, the mirror darkens » Fig. 57 -
automatically.
The mirror dimming is controlled by the light incident on the sensors on the
front and back of the mirror.
When the interior lights are switched on or the reverse gear is engaged, the
mirror always moves back into the basic position (not dimmed).
Do not attach external devices (e.g. navigation systems) on to the windscreen
or in the vicinity of the interior mirror »
.
WARNING■
The illuminated display of an external navigation device can lead to op-
erational faults to the automatic dimming interior mirror – risk of accident.■
Automatic mirror dimming operates only properly if the light striking the
sensors is not affected by other objects.
1267Lights and visibility