oil temperature SKODA RAPID SPACEBACK 2015 1.G Owner's Manual
[x] Cancel search | Manufacturer: SKODA, Model Year: 2015, Model line: RAPID SPACEBACK, Model: SKODA RAPID SPACEBACK 2015 1.GPages: 208, PDF Size: 29.2 MB
Page 33 of 208

Reset counter for distance travelled (trip)›Press button A » Fig. 26 on page 31 .
Setting the clock
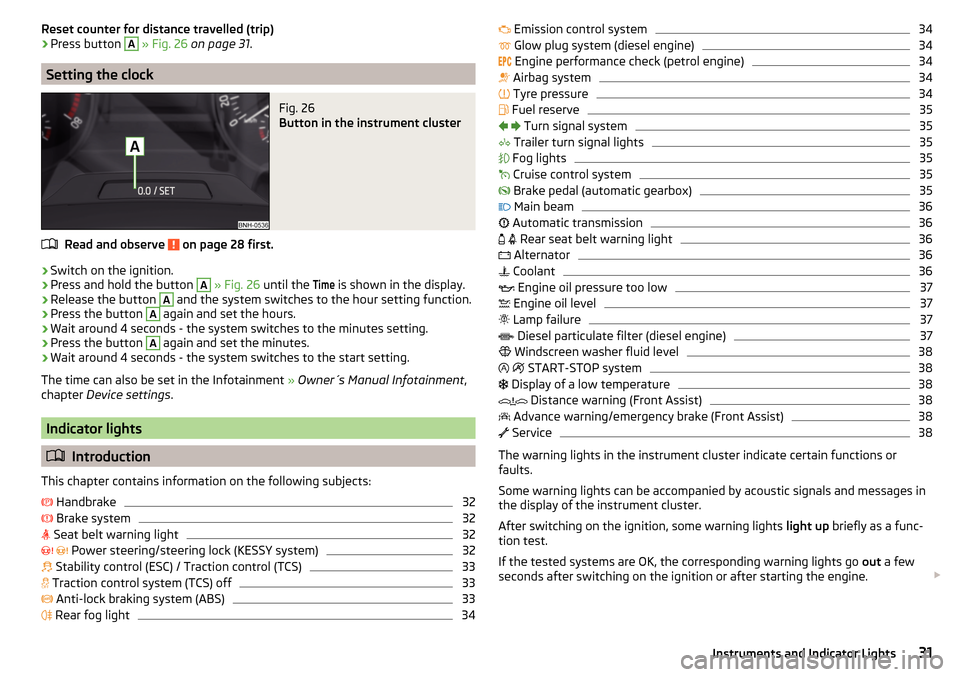
Fig. 26
Button in the instrument cluster
Read and observe on page 28 first.
›
Switch on the ignition.
›
Press and hold the button
A
» Fig. 26 until the
Time
is shown in the display.
›
Release the button
A
and the system switches to the hour setting function.
›
Press the button
A
again and set the hours.
›
Wait around 4 seconds - the system switches to the minutes setting.
›
Press the button
A
again and set the minutes.
›
Wait around 4 seconds - the system switches to the start setting.
The time can also be set in the Infotainment » Owner´s Manual Infotainment ,
chapter Device settings .
Indicator lights
Introduction
This chapter contains information on the following subjects:
Handbrake
32
Brake system
32
Seat belt warning light
32
Power steering/steering lock (KESSY system)
32
Stability control (ESC) / Traction control (TCS)
33
Traction control system (TCS) off
33
Anti-lock braking system (ABS)
33
Rear fog light
34
Emission control system34 Glow plug system (diesel engine)34
Engine performance check (petrol engine)
34
Airbag system
34
Tyre pressure
34
Fuel reserve
35
Turn signal system
35
Trailer turn signal lights
35
Fog lights
35
Cruise control system
35
Brake pedal (automatic gearbox)
35
Main beam
36
Automatic transmission
36
Rear seat belt warning light
36
Alternator
36
Coolant
36
Engine oil pressure too low
37
Engine oil level
37
Lamp failure
37
Diesel particulate filter (diesel engine)
37
Windscreen washer fluid level
38
START-STOP system
38
Display of a low temperature
38
Distance warning (Front Assist)
38
Advance warning/emergency brake (Front Assist)
38
Service
38
The warning lights in the instrument cluster indicate certain functions or
faults.
Some warning lights can be accompanied by acoustic signals and messages in
the display of the instrument cluster.
After switching on the ignition, some warning lights light up briefly as a func-
tion test.
If the tested systems are OK, the corresponding warning lights go out a few
seconds after switching on the ignition or after starting the engine.
31Instruments and Indicator Lights
Page 43 of 208

If you drive more efficiently this value can increase.
Average fuel consumption
The indication is calculated continuously since the last deletion of the memory.
After erasing the memory, no data will appear for the first 100 m driven.
Current fuel consumption
You can use this information to adapt your driving style to the desired fuel
consumption.
When the vehicle is stationary or slowly moving the fuel consumption is dis-
played in l/h (on models for some countries the following appears --,- km/l).
Oil temperature
If the engine oil temperature is in the range of 80-110 °C, the engine operating
temperature has been reached.
If the oil temperature is lower than 80 °C or above 110 °C, avoid high engine
revs, full throttle and high engine loads.
If the oil temperature is lower than 50 °C or if there is a fault in the system for
checking the oil temperature are displayed instead of the oil temperature.
Warning against excessive speeds
Set the speed limit, for example, for the maximum permissible speed in town
» page 41 .
Current driving speed
The display is identical to the display on the speedometer.
Average speed
The indication is calculated continuously since the last deletion of the memory.
After erasing the memory, no data will appear for the first 300 m driven.
Distance travelled
The distance travelled since the memory was last erased is displayed.
The maximum distance indicated is 9,999 km. The indicator is automatically
set back to zero if this period is exceeded.
Driving time
The time travelled since the memory was last erased is displayed.
The maximum distance indicated is 99 hours and 59 minutes. The indicator is
automatically set back to zero if this period is exceeded.Coolant temperature
If the engine oil temperature is in the range 80-110 °C, the engine operating
temperature is reached.
If the temperature lies below 80 °C or above 110 °C, avoid high engine revs, full
throttle and high engine loads.
Warning when exceeding the set speed
Read and observe
on page 40 first.
The system offers the possibility to set a speed limit beyond which an audiblealarm will sound and the following warning message appears.
Speed ... exceeded.SPEED TOO HIGH
Adjust the speed limit while the vehicle is stationary
›
Select the menu item
Warning at
at ( ) or
(
) and confirm.
›
Set the desired speed limit.
›
Confirm the set value, or wait several seconds; your settings will be saved
automatically.
The speed limit can be set in 5 km/h intervals.
Adjusting the speed limit while the vehicle is moving
›
Select the menu item
Warning at
at ( ) or
(
) and confirm.
›
Drive at the desired speed.
›
Confirm the current speed as the speed limit.
The set speed limit can be manually adjusted later if needed.
Deactivate speed limit
›
Select the menu item
Warning at
at ( ) or
(
) and confirm.
›
Confirm the stored value of the speed limits.
The speed limit will be disabled.
The set driving mode remains stored even after switching the ignition on and
off. After a gap between driving exceeding 2 hours, the pre-set speed limit is
deactivated.
41Information system
Page 140 of 208

Under-body protectionRead and observe
and on page 134 first.
The underside of your vehicle is already permanently protected by the factory
against chemical and mechanical influences.
It is not possible to guarantee that the protective coating will not suffer any
damage as the vehicle is driven.
We recommend having the protective coating underneath the vehicle and the
chassis checked — preferably before the beginning of winter and at the end of
winter.
WARNINGNever use additional under-body protection or anti-corrosion agents for ex-
haust pipes, catalytic converters, diesel particle filters or heat shields.
When the engine reaches its operating temperature, these substances may ignite - risk of fire!
Wiper blades
Read and observe
and on page 134 first.
Clean the wiper blades regularly with a glass cleaner. The wiper blades shouldbe cleaned with a sponge or cloth if they are heavily soiled by insect residues,
for example.
The wiper blades can become soiled with wax residues after washing in auto-
matic vehicle wash systems for example.
Interior care
Introduction
This chapter contains information on the following subjects:
Natural leather
138
Artificial leather, materials and Alcantara ®
139
Seat covers
140
Safety belts
140We recommend using vehicle care products from ŠKODA Original Accessories.
These are available from ŠKODA Partners. The usage instructions on the pack-
age must be observed.WARNING■ Vehicle care products may be harmful to your health if not used according
to the instructions.■
Always keep the vehicle care products safe from people who are not com-
pletely independent, e.g. children - there is a danger of poisoning!
■
Air fresheners and scents can be hazardous to heath when the tempera-
ture inside the vehicle is high.
CAUTION
■ Be sure to check clothing for colour fastness to avoid any damage or visible
stains on the material (leather), panels and textiles.■
Remove fresh stains such as those from ball-point pens, ink, lipstick, shoe
polish, etc., from the material (leather), panels and textiles as quickly as possi-
ble.
■
Do not attach scents or air fresheners to the dash panel – there is a risk of
damage to the dash panel.
■
Do not attach any stickers to the filaments or glass antenna - there is risk of
damage.
■
Do not clean the roof panelling with a brush – risk of damage to the surface
of the panelling.
■
Cleaners that contain solvents can damage the material being cleaned.
■
Apply only a small amount of the cleaning and care product.
Note
Due to the special tools and knowledge required, and to avoid any potential
problems with the cleaning and care of the interior of your vehicle, we recom-
mend that cleaning and care of the interior of your vehicle be carried out by a
ŠKODA service partner.
Natural leather
Read and observe
and on page 138 first.
The leather needs, depending on the strain placed on it, regular cleaning and
maintenance.
138General Maintenance
Page 147 of 208

Close the flap›Lift the bonnet.›
Decouple the bonnet support and press into the holder designed to hold it.
›
Let the bonnet drop into the lock carrier lock from a height of around 20 cm –
do not push it in !
Check that the bonnet is closed properly.
WARNING■ If you notice that the lock is not properly engaged while driving, stop the
vehicle immediately and close the bonnet – risk of accident!■
Make sure that when closing the bonnet, no body parts are crushed -
there is danger of injury!
CAUTION
Never open the bonnet by the locking lever » Fig. 151.
Engine compartment overview
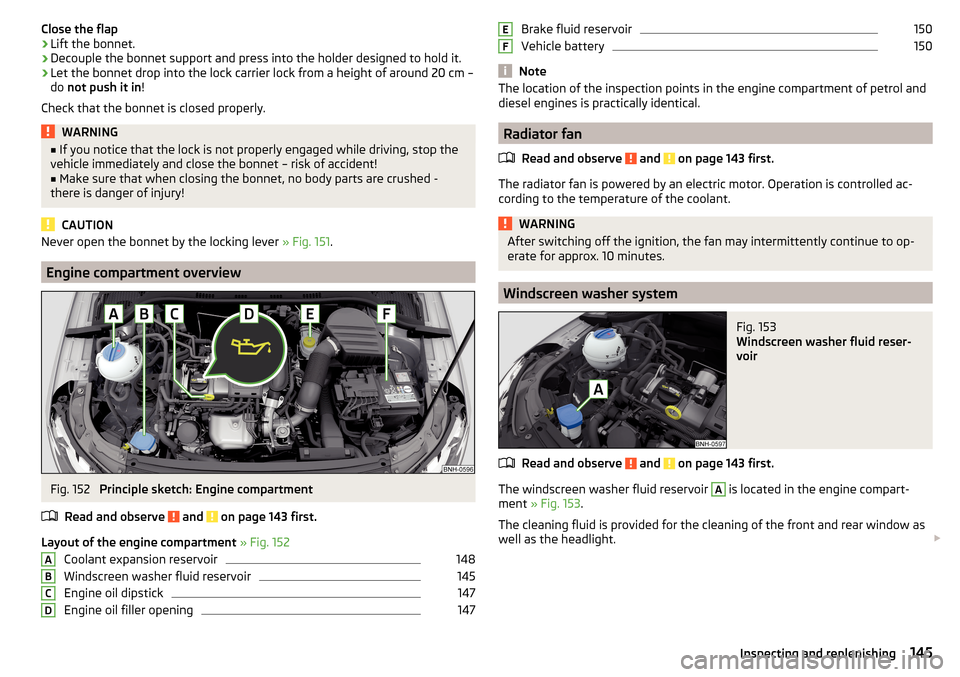
Fig. 152
Principle sketch: Engine compartment
Read and observe
and on page 143 first.
Layout of the engine compartment » Fig. 152
Coolant expansion reservoir
148
Windscreen washer fluid reservoir
145
Engine oil dipstick
147
Engine oil filler opening
147ABCDBrake fluid reservoir150
Vehicle battery
150
Note
The location of the inspection points in the engine compartment of petrol and
diesel engines is practically identical.
Radiator fan
Read and observe
and on page 143 first.
The radiator fan is powered by an electric motor. Operation is controlled ac-
cording to the temperature of the coolant.
WARNINGAfter switching off the ignition, the fan may intermittently continue to op-
erate for approx. 10 minutes.
Windscreen washer system
Fig. 153
Windscreen washer fluid reser-
voir
Read and observe and on page 143 first.
The windscreen washer fluid reservoir
A
is located in the engine compart-
ment » Fig. 153 .
The cleaning fluid is provided for the cleaning of the front and rear window as
well as the headlight.
EF145Inspecting and replenishing
Page 149 of 208

Vehicles with fixed service intervalsPetrol enginesSpecification1.2 l/66, 81 kW TSI
VW 502 00
1.4 l/92 kW TSI1.6 l./81 kW MPIDiesel enginesa)Specification1.4 l/66 kW TDI CRVW 507 001.6 l/85 kW TDI CRa)
Engine oil VW 505 01 can optionally be used in diesel engines
without a DPF.
CAUTION
■
In an emergency, another engine oil to be refilled. To prevent damage to the
engine, a maximum of 0.5 litres only of the following engine oils may be used:
■ For petrol engine models: ACEA A3/ACEA B4 or API SN, (API SM);
■ For diesel engine models: ACEA C3 or API CJ-4.
Checking the oil level
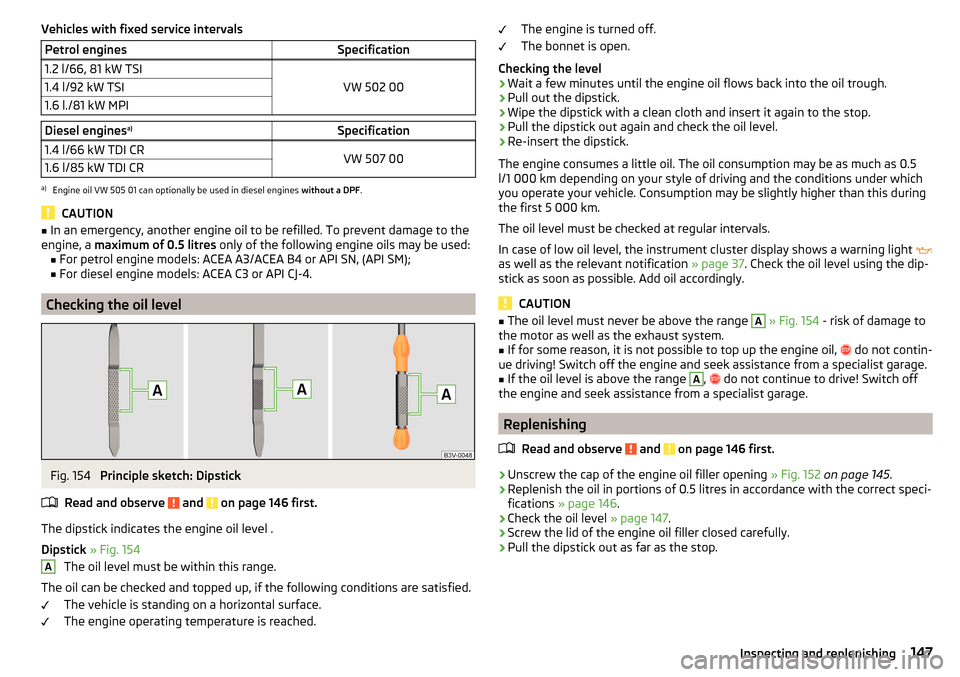
Fig. 154
Principle sketch: Dipstick
Read and observe
and on page 146 first.
The dipstick indicates the engine oil level .
Dipstick » Fig. 154
The oil level must be within this range.
The oil can be checked and topped up, if the following conditions are satisfied. The vehicle is standing on a horizontal surface.
The engine operating temperature is reached.
AThe engine is turned off.
The bonnet is open.
Checking the level›
Wait a few minutes until the engine oil flows back into the oil trough.
›
Pull out the dipstick.
›
Wipe the dipstick with a clean cloth and insert it again to the stop.
›
Pull the dipstick out again and check the oil level.
›
Re-insert the dipstick.
The engine consumes a little oil. The oil consumption may be as much as 0.5
l/1 000 km depending on your style of driving and the conditions under which
you operate your vehicle. Consumption may be slightly higher than this during
the first 5 000 km.
The oil level must be checked at regular intervals.
In case of low oil level, the instrument cluster display shows a warning light
as well as the relevant notification » page 37. Check the oil level using the dip-
stick as soon as possible. Add oil accordingly.
CAUTION
■ The oil level must never be above the range A » Fig. 154 - risk of damage to
the motor as well as the exhaust system.■
If for some reason, it is not possible to top up the engine oil,
do not contin-
ue driving! Switch off the engine and seek assistance from a specialist garage.
■
If the oil level is above the range
A
,
do not continue to drive! Switch off
the engine and seek assistance from a specialist garage.
Replenishing
Read and observe
and on page 146 first.
›
Unscrew the cap of the engine oil filler opening » Fig. 152 on page 145 .
›
Replenish the oil in portions of 0.5 litres in accordance with the correct speci-
fications » page 146 .
›
Check the oil level » page 147.
›
Screw the lid of the engine oil filler closed carefully.
›
Pull the dipstick out as far as the stop.
147Inspecting and replenishing