lock SKODA RAPID SPACEBACK 2016 1.G Columbus Amundsen Bolero Infotainment System Navigation Manual
[x] Cancel search | Manufacturer: SKODA, Model Year: 2016, Model line: RAPID SPACEBACK, Model: SKODA RAPID SPACEBACK 2016 1.GPages: 100, PDF Size: 12.8 MB
Page 13 of 100
Software updateFig. 12
QR code with reference to the
ŠKODA websites
Part of the device is the installed software.
The software update ensures optimum operation of the device (e.g.. Compati-
bility with new phones, updating the radio station logo).
Current information on the compatibility of external devices can be found on
the following ŠKODAInternet pages. This is done by reading the QR code
» Fig. 12 by the associated application in the external device (e.g. phone, tablet)
or after typing the following address into the web browser.
http://go.skoda.eu/updateportal
▶ To display the software information , press the
button, then tap on the
System information function surface Tap on
→
system information
.
▶ To start the software update , tap on the
Update software
function surface in
the displayed menu.
Device on / off
›
To power on/off the device, press .
Automatic Power On of the device
If the device was not turned off with the control switch
before the ignition
was turned off, it will automatically switch on after the ignition is switched on.
Automatic Power Off of the device
If the vehicle key is pulled out of the ignition lock while the unit is switched on,
the device will switch off automatically.
If the vehicle is fitted with the starter button, the device will switch off auto-
matically after the engine is switched off and the door is opened.
With the ignition off, the device will automatically turn off after about 30 mi-
nutes.
The device turns off automatically under certain circumstances. The device in-
forms of this via a text message on the device display.
Restart the device
If the device does not respond (if it “freezes”) This can be restarted by holing
for longer than 10 s.
Unit menus
Fig. 13
Overview of the device menu
›
To
display the device menu overview, press the button.
Overview of the device menu » Fig. 13
Menu Radio » page 21
Menu Media » page 24
Menu Images » page 31
sound settings
Unit set-up » page 16
- Adjusting the vehicle systems (not applicable to Yeti) » page 78
Navigation menu » page 59 (Applies to Columbus, Amundsen)
Menu Telephone » page 39
TV tuner (Applies to Columbus) » page 34
Target-oriented traffic information (TMC) (applies to Columbus, Amundsen)
» page 74
Media Command menu » page 36
Menu SmartLink » page 54
When connecting a supported external device instead of the symbol
the actual connection is shown instead of a symbol
▶ -
Android Auto
» page 55
▶ -
Apple CarPlay
» page 56
▶ -
MirrorLink®
» page 56
11Introductory information
Page 14 of 100
Adjusting the volume
Every change in volume is displayed on the screen.›
To increase the volume , turn the controller clockwise.
›
To
reduce volume , turn the controller anticlockwise.
›
To
mute , turn the controller to the left to 0.
›
or:
Press The button (applies to Bolero in the Yeti model).
The following symbol appears in the display when the sound is muted:
.
If, at the time of muting, sound is played from the source in the media menu,
then the playback is interrupted (pause) 1)
.
CAUTION
■ High volumes can cause sound resonance in the vehicle.■When changing or connecting an audio source, this may cause sudden
changes in volume. Reduce the volume before changing or connecting an au-
dio source.Device operation and settings
Device operation
Operating principles
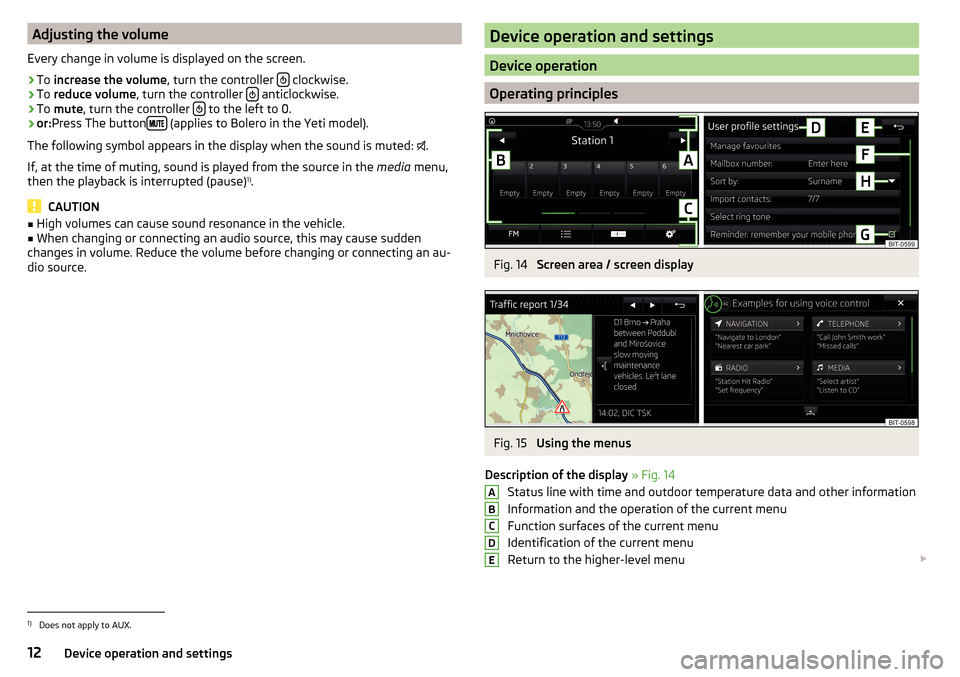
Fig. 14
Screen area / screen display
Fig. 15
Using the menus
Description of the display » Fig. 14
Status line with time and outdoor temperature data and other information
Information and the operation of the current menu
Function surfaces of the current menu
Identification of the current menu
Return to the higher-level menu
ABCDE1)
Does not apply to AUX.
12Device operation and settings
Page 19 of 100
The selected menu item is with the symbol provided.
Menu items which can be set by tapping on the respective function surface in
the A
» Fig. 19 area.
Sound settings
The scope of the following menu is dependent on the vehicle equipment with the sound system.
›
Press the button, then tap on the function surface
Tap.
■
Volume
- Volume settings
■
Announcements
- Adjustment of traffic announcements volume (TP)
■
Navigation announcements
- sets the volume for the navigation announce-
ments
■
Voice control
- volume setting for voice output
■
Maximum switch-on volume
- Sets the maximum volume after switching on the
device
■
Speed-dependent vol. adjustment
- increases the volume as speed increases
■
AUX volume:
- Sets the volume for the device connected through AUX exter-
nal devices
■
Quiet
- low volume
■
Medium
- Medium volume
■
Loud
- High volume
■
Bluetooth audio:
- Volume setting of the external device connected via Blue-
tooth ®
audio profile
■
Entertainment fading while parking
- Lowers the audio volume (e.g. radio volume)
with activated parking aid
■
Entertainment fading (nav. announcements)
- Lowers the audio volume (e.g. radio
volume) in the event of a nav. announcements
■
Bass - Mid - Treble
- setting the equalizer
■
Balance - Fader
- Sets the balance between left and right, front and rear
■
CANTON Equaliser
- Setting the equalizer
■
Individual
- Adjustment of treble, mid and bass
■
Profile
- Setting of the profile (e.g.
Rock
.
Classical
and so on).
■
CANTON optimisation
- Setting the optimum room sound perception
■
All
- Optimising the sound for the entire vehicle interior
■
Front
- Optimising the surround sound for the front seats
■
Driver
- Optimising the sound for the driver
■
CANTON surround
- Setting the surround sound levels in the area (“-9 ”Stereo /
“+9”full surround)
■
Subwoofer
- Subwoofer volume settings
■ŠKODA Surround - Turn surround sound on/off (Cannot be used in Radio mode)
■Virtual Subwoofer
-Turn virtual subwoofer on/off (Cannot be used in Radio
mode)
■
Sound Character
- Select the sound character (applies to Yeti)
■
Surround
- Optimising the sound for the room (applies to Yeti)
■
Sound focus
-Setting the optimum room sound perception
■
All
- Optimising the sound for the entire vehicle interior
■
Driver
- Optimising the sound for the driver
■
Touchscreen tone
- Switch on/off audible tone when touching the screen
■
No navigation announcements during call
- Switches on or off the navigation
prompts during a telephone conversation
Screen settings
›
Press the button, then tap on the function surface
→ Tap
screen
.
■
Switch off screen (in 10 seconds)
- Enable / disable the automatic power off func-
tion
■
Brightness:
- Adjusts the brightness of the screen
■
Touchscreen tone
- Switch on/off audible tone when touching the screen
■
Proximity sensor
- Turn the proximity sensors on/off (When the function is on,
e.g. Navigation will be shown in the main menu when moving a finger to-
wards the bottom bar with the functional surfaces on the screen)
■
Show clock in standby mode
- Time and date displayed on the screen when the
ignition is switched on and the unit is switched off
Time and date settings
›
Press the button, then tap on the function surface
Tap
→
Time and date
.
■
Clock time source:
- Setting the time source: manual,GPS (applies to Columbus,
Amundsen)
■
Time:
- Time settings
■
Summertime
- Activate / deactivate summer time (applies to Columbus,
Amundsen)
■
automatically adjust DST
- Turn on / off the automatic switch to daylight saving
time
■
Time zone:
- Select the time zone
■
Time format:
- Set the time format
■
Date:
- Date settings
■
Date format:
- Set the date format
17Device operation and settings
Page 30 of 100
■Do not affix anything to the CD/DVDs!■If the ambient temperature is too high or too low, the CD / DVD playback may
not work.■
Damp (condensation) may affect the device in cold weather or after showers.
This can cause the CD to jump or impair the play function. Once the moisture
has dissipated, playback is fully functional again.
Note
■ After pressing the symbol key it takes a few seconds for the CD / DVD to
be ejected.■
With uneven or unpaved roads playback jumps may occur.
■
If the CD/DVD is damaged, is not readable or is inserted incorrectly, the fol-
lowing message is displayed:
Error: CD/DVD
.
■
It is possible that CD/DVDs protected by copyright cannot be played back at
all or only in certain circumstances.
SD card
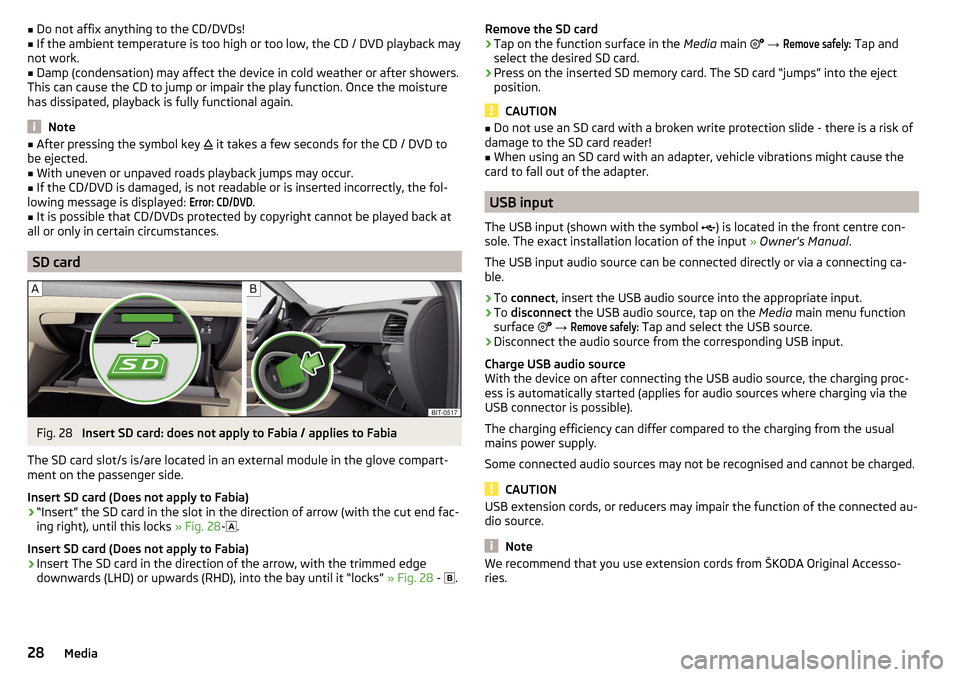
Fig. 28
Insert SD card: does not apply to Fabia / applies to Fabia
The SD card slot/s is/are located in an external module in the glove compart-
ment on the passenger side.
Insert SD card (Does not apply to Fabia)
›
“Insert” the SD card in the slot in the direction of arrow (with the cut end fac-
ing right), until this locks » Fig. 28-
.
Insert SD card (Does not apply to Fabia)
›
Insert The SD card in the direction of the arrow, with the trimmed edge
downwards (LHD) or upwards (RHD), into the bay until it “locks” » Fig. 28 -
.
Remove the SD card›Tap on the function surface in the Media main →
Remove safely:
Tap and
select the desired SD card.›
Press on the inserted SD memory card. The SD card “jumps” into the eject position.
CAUTION
■ Do not use an SD card with a broken write protection slide - there is a risk of
damage to the SD card reader!■
When using an SD card with an adapter, vehicle vibrations might cause the
card to fall out of the adapter.
USB input
The USB input (shown with the symbol ) is located in the front centre con-
sole. The exact installation location of the input » Owner's Manual .
The USB input audio source can be connected directly or via a connecting ca-
ble.
›
To connect , insert the USB audio source into the appropriate input.
›
To disconnect the USB audio source, tap on the Media main menu function
surface
→
Remove safely:
Tap and select the USB source.
›
Disconnect the audio source from the corresponding USB input.
Charge USB audio source
With the device on after connecting the USB audio source, the charging proc-
ess is automatically started (applies for audio sources where charging via the
USB connector is possible).
The charging efficiency can differ compared to the charging from the usual
mains power supply.
Some connected audio sources may not be recognised and cannot be charged.
CAUTION
USB extension cords, or reducers may impair the function of the connected au-
dio source.
Note
We recommend that you use extension cords from ŠKODA Original Accesso-
ries.28Media
Page 33 of 100
Pictures
Image viewer
main menu
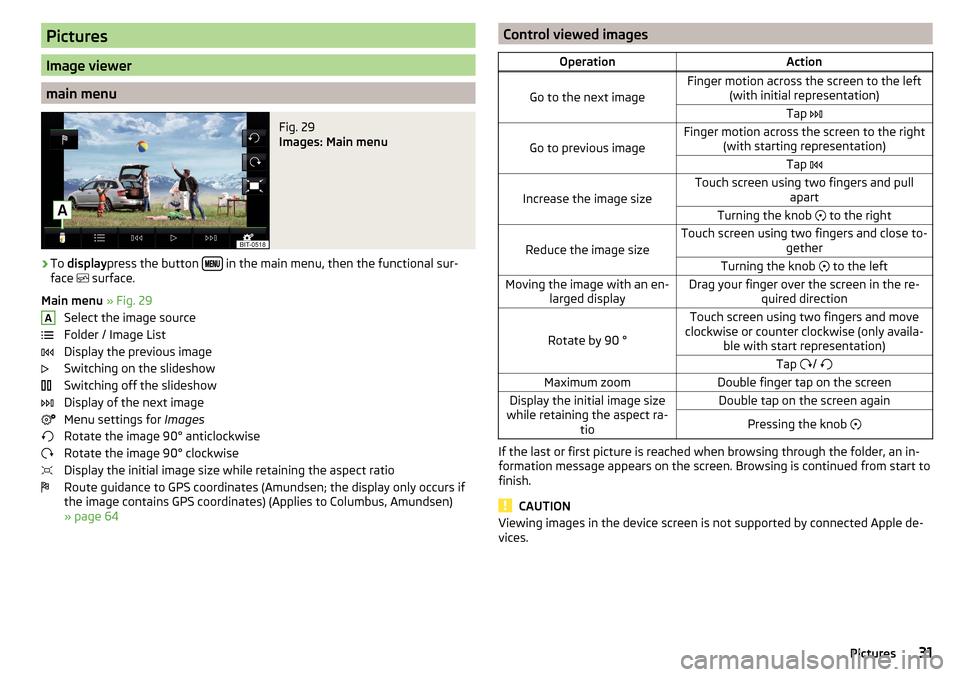
Fig. 29
Images: Main menu
›
To display press the button in the main menu, then the functional sur-
face surface.
Main menu » Fig. 29
Select the image source
Folder / Image List
Display the previous image
Switching on the slideshow
Switching off the slideshow
Display of the next image
Menu settings for Images
Rotate the image 90° anticlockwise
Rotate the image 90° clockwise
Display the initial image size while retaining the aspect ratio
Route guidance to GPS coordinates (Amundsen; the display only occurs if
the image contains GPS coordinates) (Applies to Columbus, Amundsen)
» page 64
AControl viewed imagesOperationAction
Go to the next image
Finger motion across the screen to the left (with initial representation)Tap
Go to previous image
Finger motion across the screen to the right
(with starting representation)Tap
Increase the image size
Touch screen using two fingers and pull
apartTurning the knob to the right
Reduce the image size
Touch screen using two fingers and close to-
getherTurning the knob to the leftMoving the image with an en-
larged displayDrag your finger over the screen in the re- quired direction
Rotate by 90 °
Touch screen using two fingers and move
clockwise or counter clockwise (only availa- ble with start representation)Tap / Maximum zoomDouble finger tap on the screenDisplay the initial image size
while retaining the aspect ra- tioDouble tap on the screen againPressing the knob
If the last or first picture is reached when browsing through the folder, an in-
formation message appears on the screen. Browsing is continued from start to
finish.
CAUTION
Viewing images in the device screen is not supported by connected Apple de-
vices.31Pictures
Page 47 of 100
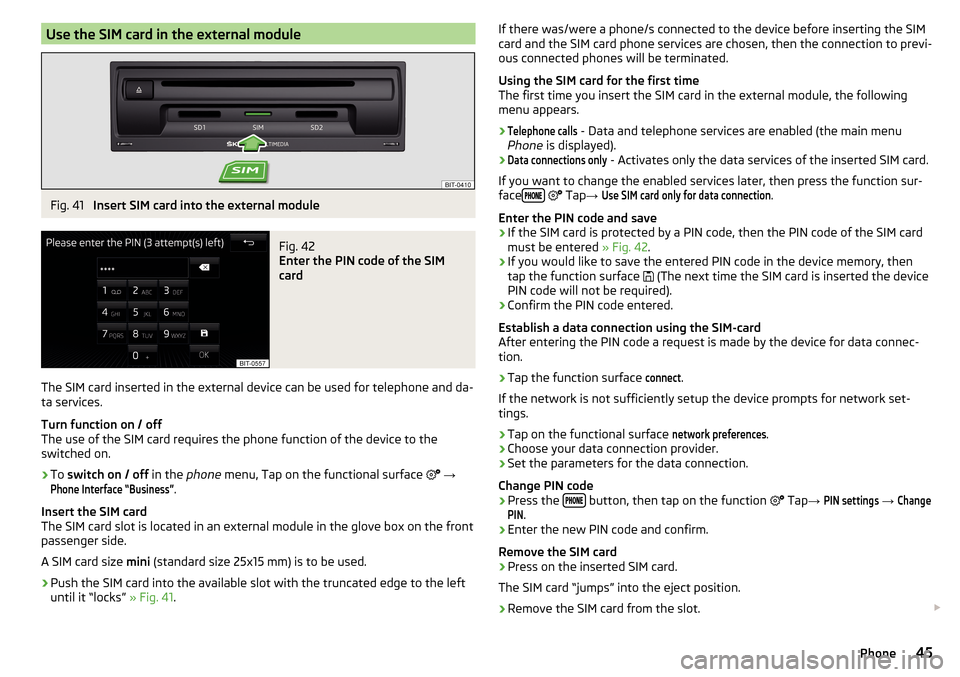
Use the SIM card in the external moduleFig. 41
Insert SIM card into the external module
Fig. 42
Enter the PIN code of the SIM
card
The SIM card inserted in the external device can be used for telephone and da-
ta services.
Turn function on / off
The use of the SIM card requires the phone function of the device to the
switched on.
›
To switch on / off in the phone menu, Tap on the functional surface
→
Phone Interface “Business”
.
Insert the SIM card
The SIM card slot is located in an external module in the glove box on the front
passenger side.
A SIM card size mini (standard size 25x15 mm) is to be used.
›
Push the SIM card into the available slot with the truncated edge to the left
until it “locks” » Fig. 41.
If there was/were a phone/s connected to the device before inserting the SIM
card and the SIM card phone services are chosen, then the connection to previ-
ous connected phones will be terminated.
Using the SIM card for the first time
The first time you insert the SIM card in the external module, the following
menu appears.›Telephone calls
- Data and telephone services are enabled (the main menu
Phone is displayed).
›Data connections only
- Activates only the data services of the inserted SIM card.
If you want to change the enabled services later, then press the function sur-
face
Tap
→
Use SIM card only for data connection
.
Enter the PIN code and save
›
If the SIM card is protected by a PIN code, then the PIN code of the SIM card
must be entered » Fig. 42.
›
If you would like to save the entered PIN code in the device memory, then
tap the function surface (The next time the SIM card is inserted the device
PIN code will not be required).
›
Confirm the PIN code entered.
Establish a data connection using the SIM-card
After entering the PIN code a request is made by the device for data connec-
tion.
›
Tap the function surface
connect
.
If the network is not sufficiently setup the device prompts for network set-
tings.
›
Tap on the functional surface
network preferences
.
›
Choose your data connection provider.
›
Set the parameters for the data connection.
Change PIN code
›
Press the button, then tap on the function
Tap
→
PIN settings
→
ChangePIN
.
›
Enter the new PIN code and confirm.
Remove the SIM card
›
Press on the inserted SIM card.
The SIM card “jumps” into the eject position.
›
Remove the SIM card from the slot.
45Phone
Page 56 of 100
SmartLink
Introductory information
Introduction to the subject
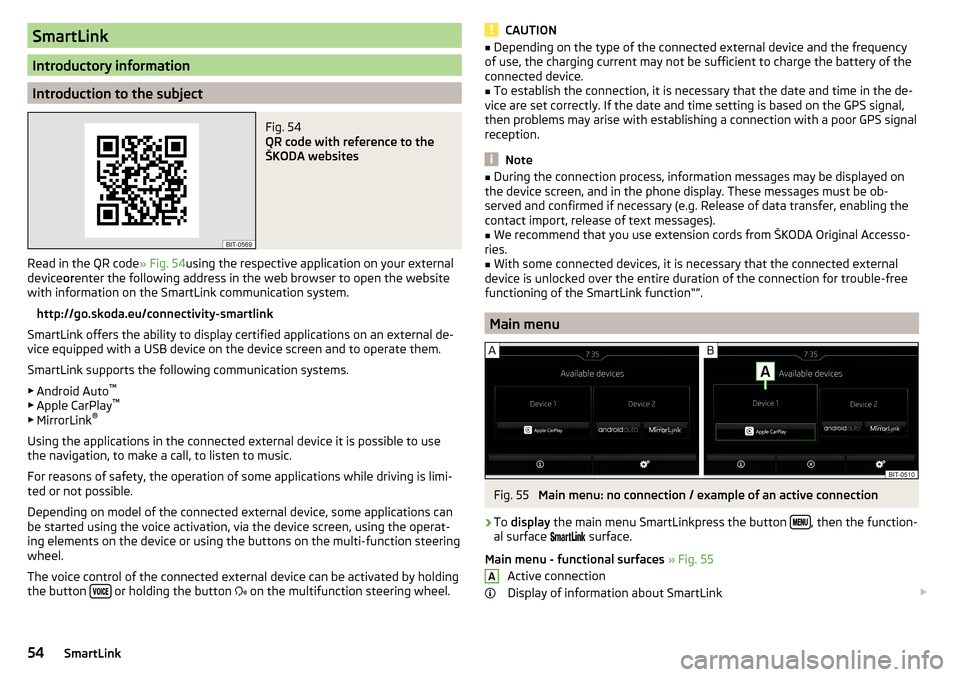
Fig. 54
QR code with reference to the
ŠKODA websites
Read in the QR code » Fig. 54using the respective application on your external
device orenter the following address in the web browser to open the website
with information on the SmartLink communication system.
http://go.skoda.eu/connectivity-smartlink
SmartLink offers the ability to display certified applications on an external de-
vice equipped with a USB device on the device screen and to operate them.
SmartLink supports the following communication systems. ▶ Android Auto ™
▶ Apple CarPlay ™
▶ MirrorLink ®
Using the applications in the connected external device it is possible to use
the navigation, to make a call, to listen to music.
For reasons of safety, the operation of some applications while driving is limi-
ted or not possible.
Depending on model of the connected external device, some applications can
be started using the voice activation, via the device screen, using the operat-
ing elements on the device or using the buttons on the multi-function steering
wheel.
The voice control of the connected external device can be activated by holding
the button
or holding the button
on the multifunction steering wheel.
CAUTION■
Depending on the type of the connected external device and the frequency
of use, the charging current may not be sufficient to charge the battery of the
connected device.■
To establish the connection, it is necessary that the date and time in the de-
vice are set correctly. If the date and time setting is based on the GPS signal,
then problems may arise with establishing a connection with a poor GPS signal
reception.
Note
■ During the connection process, information messages may be displayed on
the device screen, and in the phone display. These messages must be ob-
served and confirmed if necessary (e.g. Release of data transfer, enabling the
contact import, release of text messages).■
We recommend that you use extension cords from ŠKODA Original Accesso-
ries.
■
With some connected devices, it is necessary that the connected external
device is unlocked over the entire duration of the connection for trouble-free
functioning of the SmartLink function“”.
Main menu
Fig. 55
Main menu: no connection / example of an active connection
›
To display the main menu SmartLinkpress the button , then the function-
al surface
surface.
Main menu - functional surfaces » Fig. 55
Active connection
Display of information about SmartLink
A54SmartLink
Page 60 of 100
function issues
If problems occur with the MirrorLink ®
connection, then one of the following
messages may occur on the screen.
■Problem: Transfer
- Disconnect the external device and then reconnect
■
MirrorLink® audio is not available.
Disconnect the external device and reconnect
■
MirrorLink® availability on this mobile device is restricted.
- The use of the connected
device is not possible while driving
■
The mobile device is locked. Please unlock the mobile device to use MirrorLink®
- The con-
nected external device “Unlock”
■
Unable to start app or app not working.
Disconnect the external device and recon-
nect.
58SmartLink
Page 82 of 100
■Interior lighting - Sets the interior lighting
■Instrument/switch lighting
- Sets the brightness of the instrument/switch light-
ing
■
Footwell lighting
- Sets the brightness of the footwell light
■ “Coming/Leaving Home” function - setting the COMING HOME / LEAVING
HOME function
■
Coming Home function
- Sets the period that the lights remain on after you
leave the vehicle (0 - 30 seconds; 0 = function deactivated)
■
Leaving Home function
- Sets the period that the lights remain on after you un-
lock the vehicle (0 - 30 seconds; 0 = function deactivated)
Assistance systems
›
Press the button, then tap on the function surface
→
Driver assistance
.
■ ACC (adaptive cruise control) - Setting for the adaptive cruise control
■
Driving programme:
- Set the vehicle acceleration when adaptive cruise control
is activated 1)
■
Eco
- Economical
■
Normal
- Normal
■
Sport
- Sports
■
Last distance selected
- Last selected distance on/off
■
Distance:
- Set the distance monitoring to the vehicles ahead
■
Very close
- Very small distance
■
Close
- Small distance
■
Medium
- Medium distance
■
Far
- Large distance
■
Very far
- Very large distance
■ Front Assist (ambient traffic monitor. sys.) - Set the assistant for distance
monitoring to the vehicles ahead ■
Active
- Activate/deactivate the assistant
■
Advance warning
(Version 1) - Activate/deactivate advance warning
■
Advance warning
(Version 2) - Activating/deactivating and setting the distance
level at which a warning occurs ■
Early
- Longer distance
■
Medium
- Medium distance
■Late - Short distance
■Off
- Deactivation of the warning
■
Display distance warning
- Activate/deactivate distance warnings
■ Lane Assist - Settings for Lane Assist
■
Active
- Activate/deactivate the assistant
■
Adaptive lane guidance
- Activate/deactivate adaptive lane guidance
■ Blind Spot Monitor - Activation / deactivation of the assistant “Blind Spot
Monitor”
■ Dynamic Road Sign Display - Settings for the Dynamic Road Sign Display
■
Show in instrument cluster
- Activation/deactivation of the additional traffic
signs in the display of the instrument cluster
■
Speed warning:
2) - Setting a warning when exceeding the speed limit
■
Out
- Activation / deactivation of a warning when speed is excessive
■
Optical
- Activate a visual warning in the display of the instrument cluster
■
Optical / acoustic
- Activate a visual warning in the display of the instrument
cluster with an audible signal
■
Warning over
2) Setting the warning timing with the option to exceed the
speed limit in a range from 0 to 20 km/h -
■ Trailer detection
■
Show relevant trailer traffic Sign
- Activating / deactivating the display of rele-
vant trailer traffic signs
■
Use for route calculation
- Activation / deactivation of the option to take the
trailer into account for route calculation in navigation
■
Top speed for trailers
2) - Set the top speed for towing a trailer
■ Driver Alert System - Activate/deactivate the driver alert system
■ Proactive passenger protection - Activate/deactivate proactive passenger
protection
Parking and manoeuvring
›
Press the button, then tap on the function surface
Tap
→
Parking andmanoeuvring
.
■ ParkPilot - Settings for the parking aid
■
Activate automatically
- Activate/deactivate the compact parking aid display
(when driving forward)
■
Front volume
- Adjust the volume of the beeps for obstacle detection in front
1)
On vehicles with the choice of travel mode, this setting is carried out
» Owner's Manual , chapter Selec-
tion of travel mode .
2)
Applies for the Superb.
80Vehicle systems
Page 83 of 100
■Front tone setting - Setting the pitch of the beeps for obstacle detection in
front
■Rear volume
- Set the volume level of the beeps for the rear obstacle detec-
tion
■
Rear tone setting
- Setting the pitch of the beeps for the rear obstacle detec-
tion
■
Entertainment fading (parking)
- Lowers the audio volume (e.g. radio volume)
with activated parking aid
■ Rear Traffic Alert - Activate/deactivate the Rear Traffic Alert
Interior lighting (background lighting)
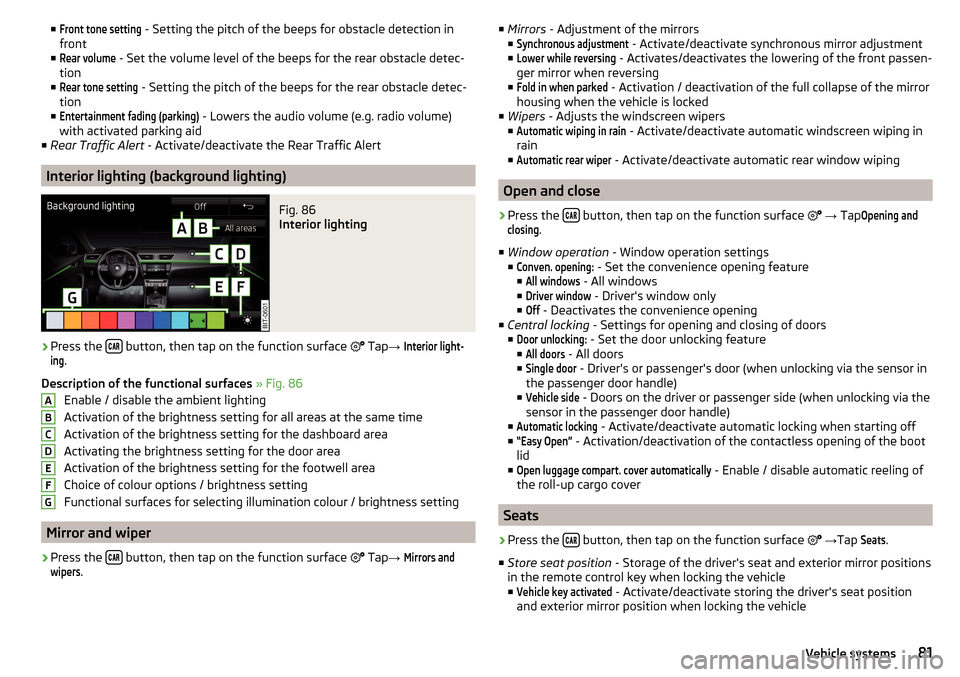
Fig. 86
Interior lighting
›
Press the button, then tap on the function surface
Tap
→
Interior light-ing
.
Description of the functional surfaces » Fig. 86
Enable / disable the ambient lighting
Activation of the brightness setting for all areas at the same time
Activation of the brightness setting for the dashboard area
Activating the brightness setting for the door area
Activation of the brightness setting for the footwell area
Choice of colour options / brightness setting
Functional surfaces for selecting illumination colour / brightness setting
Mirror and wiper
›
Press the button, then tap on the function surface
Tap
→
Mirrors andwipers
.
ABCDEFG■
Mirrors - Adjustment of the mirrors
■Synchronous adjustment
- Activate/deactivate synchronous mirror adjustment
■
Lower while reversing
- Activates/deactivates the lowering of the front passen-
ger mirror when reversing
■
Fold in when parked
- Activation / deactivation of the full collapse of the mirror
housing when the vehicle is locked
■ Wipers - Adjusts the windscreen wipers
■
Automatic wiping in rain
- Activate/deactivate automatic windscreen wiping in
rain
■
Automatic rear wiper
- Activate/deactivate automatic rear window wiping
Open and close
›
Press the button, then tap on the function surface
→ Tap
Opening andclosing
.
■ Window operation - Window operation settings
■
Conven. opening:
- Set the convenience opening feature
■
All windows
- All windows
■
Driver window
- Driver's window only
■
Off
- Deactivates the convenience opening
■ Central locking - Settings for opening and closing of doors
■
Door unlocking:
- Set the door unlocking feature
■
All doors
- All doors
■
Single door
- Driver's or passenger's door (when unlocking via the sensor in
the passenger door handle)
■
Vehicle side
- Doors on the driver or passenger side (when unlocking via the
sensor in the passenger door handle)
■
Automatic locking
- Activate/deactivate automatic locking when starting off
■
“Easy Open”
- Activation/deactivation of the contactless opening of the boot
lid
■
Open luggage compart. cover automatically
- Enable / disable automatic reeling of
the roll-up cargo cover
Seats
›
Press the button, then tap on the function surface
→ Tap
Seats
.
■ Store seat position - Storage of the driver's seat and exterior mirror positions
in the remote control key when locking the vehicle
■
Vehicle key activated
- Activate/deactivate storing the driver's seat position
and exterior mirror position when locking the vehicle
81Vehicle systems