set clock SKODA RAPID SPACEBACK 2016 1.G Columbus Amundsen Bolero Infotainment System Navigation Manual
[x] Cancel search | Manufacturer: SKODA, Model Year: 2016, Model line: RAPID SPACEBACK, Model: SKODA RAPID SPACEBACK 2016 1.GPages: 100, PDF Size: 12.8 MB
Page 14 of 100

Adjusting the volume
Every change in volume is displayed on the screen.›
To increase the volume , turn the controller clockwise.
›
To
reduce volume , turn the controller anticlockwise.
›
To
mute , turn the controller to the left to 0.
›
or:
Press The button (applies to Bolero in the Yeti model).
The following symbol appears in the display when the sound is muted:
.
If, at the time of muting, sound is played from the source in the media menu,
then the playback is interrupted (pause) 1)
.
CAUTION
■ High volumes can cause sound resonance in the vehicle.■When changing or connecting an audio source, this may cause sudden
changes in volume. Reduce the volume before changing or connecting an au-
dio source.Device operation and settings
Device operation
Operating principles
Fig. 14
Screen area / screen display
Fig. 15
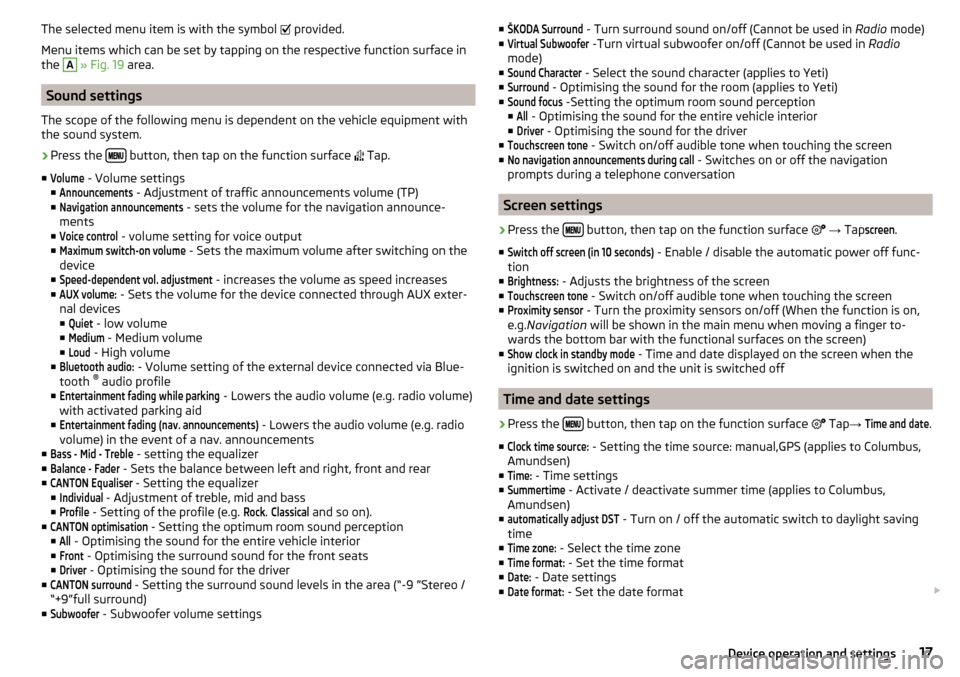
Using the menus
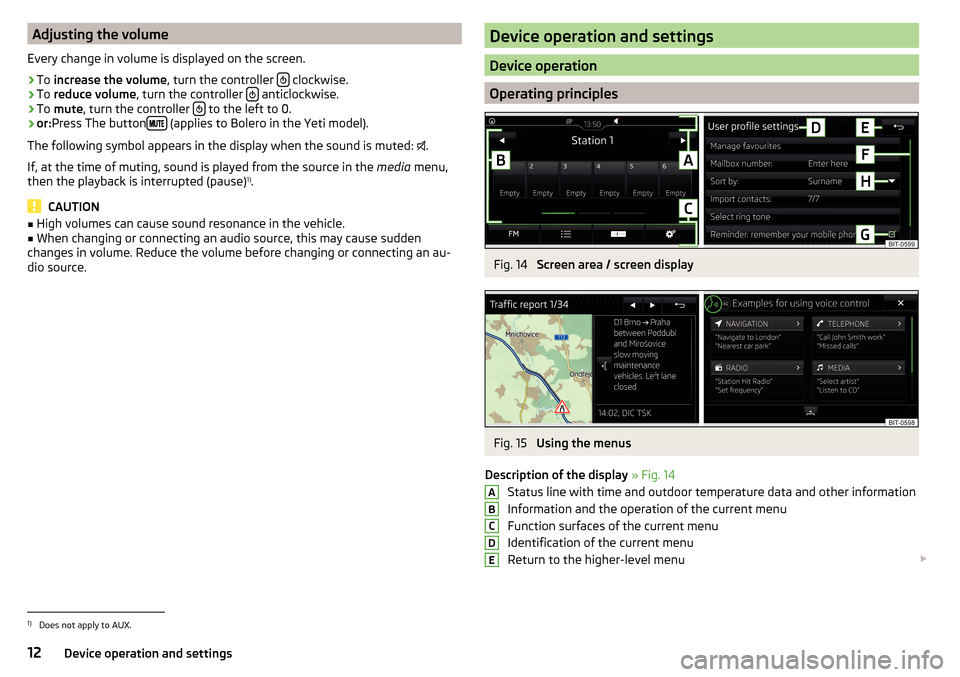
Description of the display » Fig. 14
Status line with time and outdoor temperature data and other information
Information and the operation of the current menu
Function surfaces of the current menu
Identification of the current menu
Return to the higher-level menu
ABCDE1)
Does not apply to AUX.
12Device operation and settings
Page 19 of 100

The selected menu item is with the symbol provided.
Menu items which can be set by tapping on the respective function surface in
the A
» Fig. 19 area.
Sound settings
The scope of the following menu is dependent on the vehicle equipment with the sound system.
›
Press the button, then tap on the function surface
Tap.
■
Volume
- Volume settings
■
Announcements
- Adjustment of traffic announcements volume (TP)
■
Navigation announcements
- sets the volume for the navigation announce-
ments
■
Voice control
- volume setting for voice output
■
Maximum switch-on volume
- Sets the maximum volume after switching on the
device
■
Speed-dependent vol. adjustment
- increases the volume as speed increases
■
AUX volume:
- Sets the volume for the device connected through AUX exter-
nal devices
■
Quiet
- low volume
■
Medium
- Medium volume
■
Loud
- High volume
■
Bluetooth audio:
- Volume setting of the external device connected via Blue-
tooth ®
audio profile
■
Entertainment fading while parking
- Lowers the audio volume (e.g. radio volume)
with activated parking aid
■
Entertainment fading (nav. announcements)
- Lowers the audio volume (e.g. radio
volume) in the event of a nav. announcements
■
Bass - Mid - Treble
- setting the equalizer
■
Balance - Fader
- Sets the balance between left and right, front and rear
■
CANTON Equaliser
- Setting the equalizer
■
Individual
- Adjustment of treble, mid and bass
■
Profile
- Setting of the profile (e.g.
Rock
.
Classical
and so on).
■
CANTON optimisation
- Setting the optimum room sound perception
■
All
- Optimising the sound for the entire vehicle interior
■
Front
- Optimising the surround sound for the front seats
■
Driver
- Optimising the sound for the driver
■
CANTON surround
- Setting the surround sound levels in the area (“-9 ”Stereo /
“+9”full surround)
■
Subwoofer
- Subwoofer volume settings
■ŠKODA Surround - Turn surround sound on/off (Cannot be used in Radio mode)
■Virtual Subwoofer
-Turn virtual subwoofer on/off (Cannot be used in Radio
mode)
■
Sound Character
- Select the sound character (applies to Yeti)
■
Surround
- Optimising the sound for the room (applies to Yeti)
■
Sound focus
-Setting the optimum room sound perception
■
All
- Optimising the sound for the entire vehicle interior
■
Driver
- Optimising the sound for the driver
■
Touchscreen tone
- Switch on/off audible tone when touching the screen
■
No navigation announcements during call
- Switches on or off the navigation
prompts during a telephone conversation
Screen settings
›
Press the button, then tap on the function surface
→ Tap
screen
.
■
Switch off screen (in 10 seconds)
- Enable / disable the automatic power off func-
tion
■
Brightness:
- Adjusts the brightness of the screen
■
Touchscreen tone
- Switch on/off audible tone when touching the screen
■
Proximity sensor
- Turn the proximity sensors on/off (When the function is on,
e.g. Navigation will be shown in the main menu when moving a finger to-
wards the bottom bar with the functional surfaces on the screen)
■
Show clock in standby mode
- Time and date displayed on the screen when the
ignition is switched on and the unit is switched off
Time and date settings
›
Press the button, then tap on the function surface
Tap
→
Time and date
.
■
Clock time source:
- Setting the time source: manual,GPS (applies to Columbus,
Amundsen)
■
Time:
- Time settings
■
Summertime
- Activate / deactivate summer time (applies to Columbus,
Amundsen)
■
automatically adjust DST
- Turn on / off the automatic switch to daylight saving
time
■
Time zone:
- Select the time zone
■
Time format:
- Set the time format
■
Date:
- Date settings
■
Date format:
- Set the date format
17Device operation and settings
Page 33 of 100

Pictures
Image viewer
main menu
Fig. 29
Images: Main menu
›
To display press the button in the main menu, then the functional sur-
face surface.
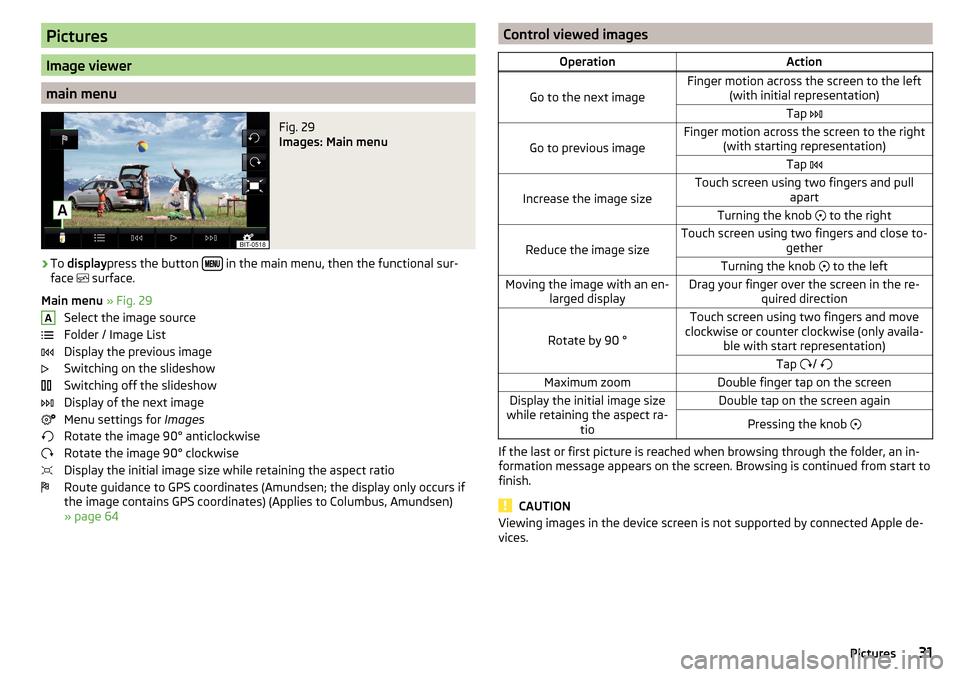
Main menu » Fig. 29
Select the image source
Folder / Image List
Display the previous image
Switching on the slideshow
Switching off the slideshow
Display of the next image
Menu settings for Images
Rotate the image 90° anticlockwise
Rotate the image 90° clockwise
Display the initial image size while retaining the aspect ratio
Route guidance to GPS coordinates (Amundsen; the display only occurs if
the image contains GPS coordinates) (Applies to Columbus, Amundsen)
» page 64
AControl viewed imagesOperationAction
Go to the next image
Finger motion across the screen to the left (with initial representation)Tap
Go to previous image
Finger motion across the screen to the right
(with starting representation)Tap
Increase the image size
Touch screen using two fingers and pull
apartTurning the knob to the right
Reduce the image size
Touch screen using two fingers and close to-
getherTurning the knob to the leftMoving the image with an en-
larged displayDrag your finger over the screen in the re- quired direction
Rotate by 90 °
Touch screen using two fingers and move
clockwise or counter clockwise (only availa- ble with start representation)Tap / Maximum zoomDouble finger tap on the screenDisplay the initial image size
while retaining the aspect ra- tioDouble tap on the screen againPressing the knob
If the last or first picture is reached when browsing through the folder, an in-
formation message appears on the screen. Browsing is continued from start to
finish.
CAUTION
Viewing images in the device screen is not supported by connected Apple de-
vices.31Pictures