light SKODA ROOMSTER 2006 1.G Manual PDF
[x] Cancel search | Manufacturer: SKODA, Model Year: 2006, Model line: ROOMSTER, Model: SKODA ROOMSTER 2006 1.GPages: 274, PDF Size: 48.64 MB
Page 121 of 274
Automatic gearbox
120
WARNING
•Do not depress the accelerator when changing the position of
the selector lever if the car is stationary and the engine is running
- risk of accident!
•Never move the selector lever into position R or P when driving
- risk of an accident!
•When the engine is running and the vehicle is stationary, it is
necessary to hold the car with the brake pedal in all the positions
of the selector lever (except P and N) since the power transmission
is never completely interrupted, also not when the engine is idling
- the vehicle "creeps".
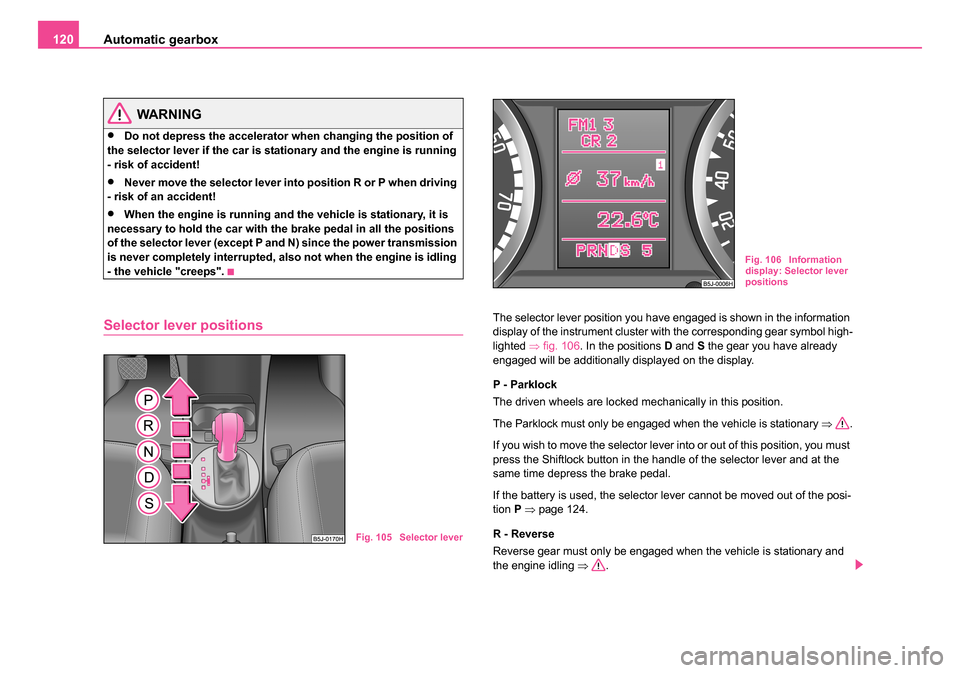
Selector lever positionsThe selector lever position you have engaged is shown in the information
display of the instrument cluster with the corresponding gear symbol high-
lighted ⇒fig. 106 . In the positions D and S the gear you have already
engaged will be additionally displayed on the display.
P - Parklock
The driven wheels are locked mechanically in this position.
The Parklock must only be engaged when the vehicle is stationary ⇒.
If you wish to move the selector lever into or out of this position, you must
press the Shiftlock button in the handle of the selector lever and at the
same time depress the brake pedal.
If the battery is used, the selector lever cannot be moved out of the posi-
tion P ⇒ page 124.
R - Reverse
Reverse gear must only be engaged when the vehicle is stationary and
the engine idling ⇒.
Fig. 105 Selector lever
Fig. 106 Information
display: Selector lever
positions
NKO 20 A05.book Page 120 Wednesday, June 21, 2006 1:42 PM
Page 122 of 274
Automatic gearbox121
Using the systemSafetyDriving TipsGeneral MaintenanceBreakdown assistanceTechnical Data
The brake pedal must be depressed and at the same time the Shiftlock
must be pressed, if you wish to obtain the selector lever positions
R, P or
N .
When the ignition is switched on and the selector lever is in position R, the
reverse lights will come on.
N - Neutral
The transmission is in Neutral in this position.
The brake pedal must be depressed (if the lever is in its position for longer
than 2 seconds) in order to move the selector lever out of the position N
into the position D, with the ignition switched on, on a vehicle travelling at
less than 5 km/hour or on a stationary vehicle.
The brake pedal must be depressed (if the lever is in its position for longer
than 2 seconds) in order to move the selector lever out of the position N
into the position R, with the ignition switched on, on a vehicle travelling at
less than 5 km/hour or on a stationary vehicle.
D - Drive, position for driving forward
When the selector lever is in this position, the forward gears are shifted up
and down automatically in line with engine load, vehicle speed and the
dynamic shift programme.
You must depress the brake pedal ⇒ if you wish to move the selector
lever into position D from N when the vehicle is travelling at less than
5 km/hour or is stationary.
In certain circumstances (e.g. when driving in mountainous regions or
when towing a trailer) it may be beneficial to select the manual shift
programme ⇒page 123 for a short time in order to adapt the gearbox
ratios manually to the driving situations.
S - Position for sporty style of driving
Shifting up later into a higher gear makes it possible to fully exploit the
power potential of the engine. The gearbox also then shifts down at higher
engine speeds as in the position D. The gearbox does not shift into the 6th gear in the position
S, because the
maximum speed is achieved with the 5th gear.
The Shiftlock on the selector lever grip must be pressed when moving the
selector lever out of the position D into the position S.
WARNING
•Never move the selector lever into position R or P when driving
- risk of an accident!
•When the engine is running and the vehicle is stationary, it is
necessary to hold the car with the brake pedal in all the positions
of the selector lever (except P and N) since the power transmission
is never completely interrupted, also not when the engine is idling
- the vehicle "creeps".
•You must on no account unintentionally operate the throttle
(e.g. by hand from the engine compartment) if a drive position is
engaged when the car is stationary. The vehicle would otherwise
immediately start off - also when the handbrake is firmly applied -
risk of an accident!
•You must move the selector lever into position P and firmly
apply the handbrake first before you or any other person opens the
bonnet and starts working on the engine when it is running - risk
of accident! It is also essential to observe all warnings ⇒page 210,
“Working in the engine compartment”.
Selector lever lock
Automatic selector lever lock
With the ignition on, the selector lever is locked when it is in the positions
P and N. You must first of all depress the brake pedal in order to move the
selector lever out of this position. The warning light
⇒ page 35 lights
NKO 20 A05.book Page 121 Wednesday, June 21, 2006 1:42 PM
Page 123 of 274
Automatic gearbox
122
up in the instrument cluster as a reminder for the driver when the selector
lever is in position P and N:
In addition, the symbol
for the automatic selector lever lock in the shift
gate lights up.
A time delay element ensures that the selector lever is not blocked when
rapidly switching over the position N (e.g. from R to D). This does, for
example, allow one to seesaw out a stuck vehicle. The selector lever lock
will click into place if the lever is in the N position for more than 2 seconds
without the brake pedal being pressed.
The selector lever lock is only active if the vehicle is stationary or moving
at speed of less than 5 km/hour. The lock is switched off automatically into
position N when the car is travelling at a higher speed.
Shiftlock button
The Shiftlock button in the handle of selector lever prevents certain
selector lever positions being engaged inadvertently. The selector lever
lock is cancelled when you press the Shiftlock button.
Keylock - Ignition key withdrawal lock
You can only withdraw the ignition key after switching off the ignition if the
selector lever is in position P. If the ignition key is withdrawn, the selector
lever is blocked in position P.
Kickdown function
The kickdown function provides you with maximum accel-
eration power.
Depressing the accelerator pedal allows the kickdown function to be acti-
vated in the desired driving program. This function has precedence over
the driving programme and serves for maximum acceleration of the
vehicle when exploiting the maximum power potential of the engine without taking into account the current selector lever position (
D, S or
Tiptronic ). The gearbox shifts down to one or several gears in line with
the driving state and the vehicle accelerates. The gearbox does not shift
up into the highest gear until the engine has reached its maximum revolu-
tions for this gear range.
WARNING
Please note that using the kickdown function can result in the
driven wheels spinning on a smooth or slippery road surface - risk
of skidding!
Dynamic shift programme
The automatic gearbox of your vehicle is controlled electronically. Shifting
up and down through the gears is performed automatically on the basis of
pre-defined driving programmes.
Adopting a moderate style of driving will cause the gearbox to select the
most economical driving programme. Shifting up into a higher gear as
soon as possible and shifting down as late as possible will have a favour-
able effect on your fuel consumption.
Adopting a sporty style of driving with rapid movements of the acceler-
ator pedal combined with sharp acceleration and frequent changes in
speed, exploiting the top speed of the car or depressing the accelerator
pedal (kickdown function), will cause the gearbox to switch over to this
style of driving and shift down earlier with frequent changes in gears in
comparison to the moderate style of driving.
Selecting the most appropriate driving programme for the particular style
of driving is a continuous process. Irrespective of this it is, however,
possible to switch or shift down into a dynamic shift programme by
depressing the accelerator rapidly. The gearbox shifts down into a lower
NKO 20 A05.book Page 122 Wednesday, June 21, 2006 1:42 PM
Page 124 of 274
Automatic gearbox123
Using the systemSafetyDriving TipsGeneral MaintenanceBreakdown assistanceTechnical Data
gear matching the speed of the car and this allows you to accelerate
rapidly (e.g. when overtaking) without having to depress the accelerator
pedal fully into the kickdown range. The original programme will be reac-
tivated to match your particular style of driving once the gearbox has
shifted up again.
When driving in hilly regions, the gears are selected to match uphill and
downhill sections. This avoids the gearbox frequently shifting up and down
when negotiating an uphill stretch. When driving downhill, it is possible to
shift down into the Tiptronic position, in order to exploit the engine brake
torque.
Tiptronic
The Tiptronic allows the driver to also shift gears manually.
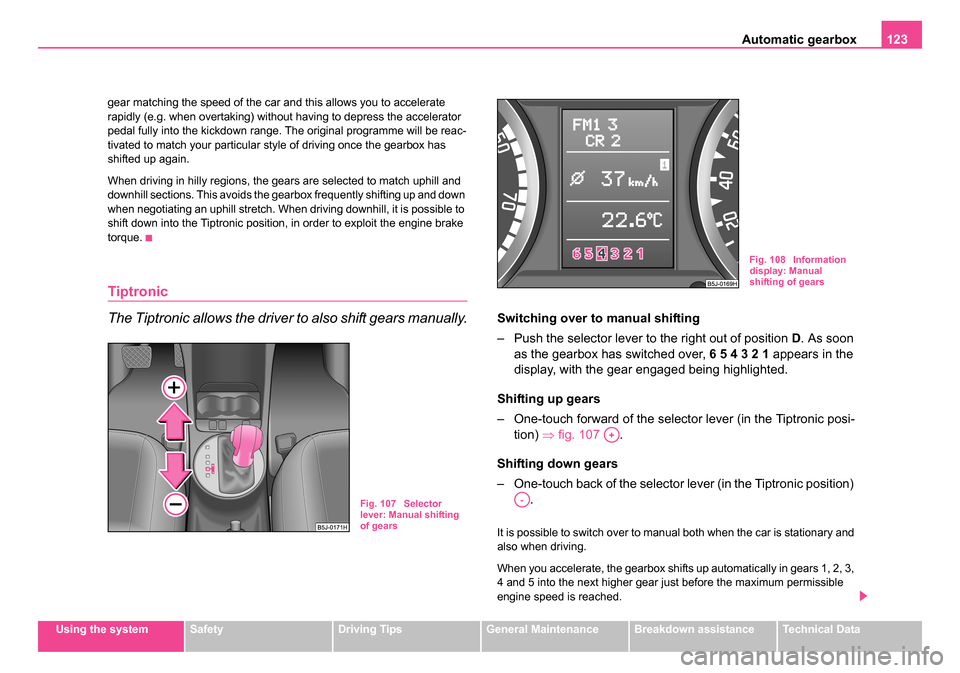
Switching over to
manual shifting
– Push the selector lever to the right out of position D. As soon
as the gearbox has switched over, 6 5 4 3 2 1 appears in the
display, with the gear engaged being highlighted.
Shifting up gears
– One-touch forward of the selector lever (in the Tiptronic posi- tion) ⇒fig. 107 .
Shifting down gears
– One-touch back of the selector lever (in the Tiptronic position) .
It is possible to switch over to manual both when the car is stationary and
also when driving.
When you accelerate, the gearbox shifts up automatically in gears 1, 2, 3,
4 and 5 into the next higher gear just before the maximum permissible
engine speed is reached.
Fig. 107 Selector
lever: Manual shifting
of gears
Fig. 108 Information
display: Manual
shifting of gears
A+
A-
NKO 20 A05.book Page 123 Wednesday, June 21, 2006 1:42 PM
Page 125 of 274
Automatic gearbox
124
If you select a lower gear, the automatic gearbox does not shift down until
there is no risk of the engine overrevving. (Does not apply for the shifting
from 2nd to 1st gear.)
If you operate the kickdown function, the gearbox shifts into a lower gear
in line with the vehicle speed and engine speed.
Emergency programme
An emergency programme exists in the event of a fault in
the system.
The gearbox operates in a corresponding emergency programme if there
are functional faults in the gearbox electronics. This is indicated by all of
the segments in the display lighting up or going out.
It is possible to continue to move the selector lever into all the positions.
In the positions D and S the gearbox remains engaged in the 3rd gear. It
is also possible to continue to engage reverse gear in the position R.
The manual shift programme (Tiptronic) is switched off in the emergency
mode.
If the gearbox has switched over to emergency mode, drive to the
nearest specialist garage in order to have the fault rectified.
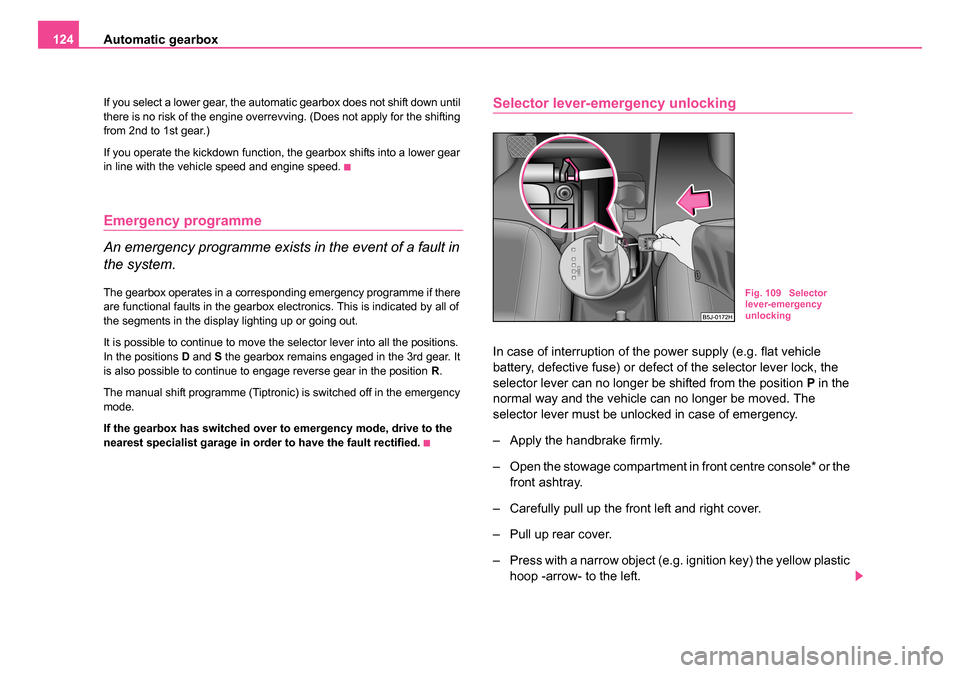
Selector lever-emergency unlocking
In case of interruption of the power supply (e.g. flat vehicle
battery, defective fuse) or defect of the selector lever lock, the
selector lever can no longer be shifted from the position P in the
normal way and the vehicle can no longer be moved. The
selector lever must be unlocked in case of emergency.
– Apply the handbrake firmly.
– Open the stowage compartment in front centre console* or the front ashtray.
– Carefully pull up the front left and right cover.
– Pull up rear cover.
– Press with a narrow object (e.g. ignition key) the yellow plastic hoop -arrow- to the left.
Fig. 109 Selector
lever-emergency
unlocking
NKO 20 A05.book Page 124 Wednesday, June 21, 2006 1:42 PM
Page 130 of 274
Communication129
Using the systemSafetyDriving TipsGeneral MaintenanceBreakdown assistanceTechnical Data
•It is recommended to speak louder at higher speeds, so that the tone
of your voice is louder than the increased surrounding noise.
•During the dialogue avoid additional noise in the vehicle, e.g. simulta-
neously talking occupants.
•Do not speak, if the system makes an announcement.
•The microphone for voice control is directed to the driver and front
passenger. Therefore the driver and the front passenger can operate the
equipment.
WARNING
Pay attention primarily to the traffic situation! As the driver you are
fully responsible for the traffic safety. Use the telephone system
only to such an extent, so that you are in full control of your vehicle
at any time.
Caution
Taking the mobile phone out of the adapter during the call can lead to
interruption of the connection. When taking out the mobile phone, the
connection to the factory-fitted antenna is interrupted, this reduces the
quality of the transmitting and receiving signal. This might result addition-
ally in harmful radiation from the mobile phone in the interior of the vehicle
and the charging of the telephone battery is interrupted.
Note
•Please also refer to the additional instructions ⇒page 138, “Mobile
phones and two-way radio systems”.
•Please contact your Škoda Service Partner if there are any points
which are not clear.
•The voice control of the telephone is only possible for adapters with
PTT button. Suitable adapters are available at a Škoda Service Partner.
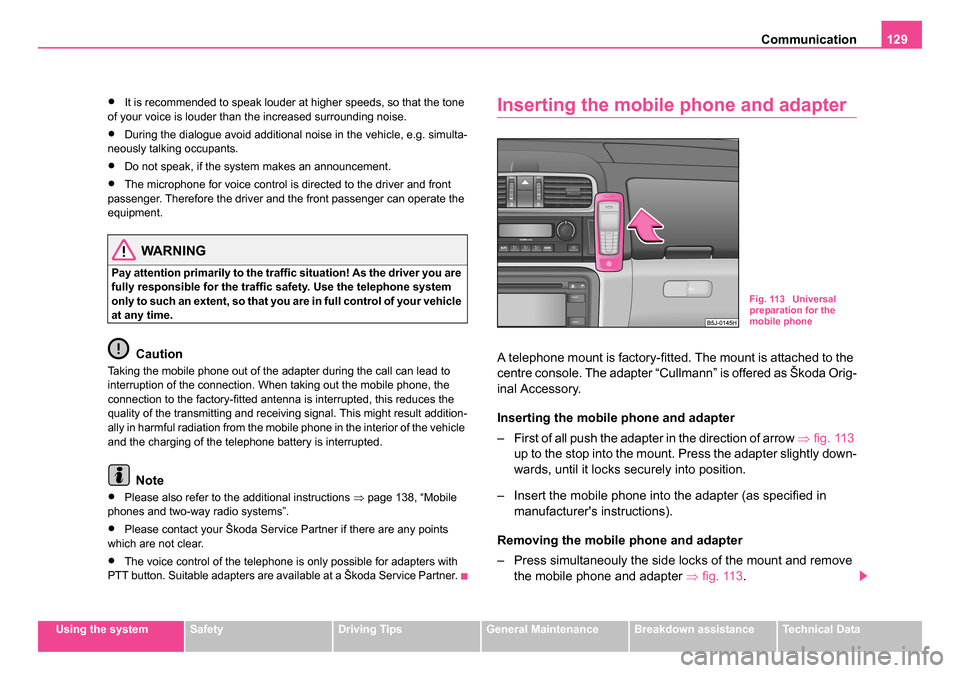
Inserting the mobile phone and adapter
A telephone mount is factory-fitted. The mount is attached to the
centre console. The adapter “Cullmann” is offered as Škoda Orig-
inal Accessory.
Inserting the mobile phone and adapter
– First of all push the adapter in the direction of arrow ⇒fig. 113
up to the stop into the mount. Press the adapter slightly down-
wards, until it locks securely into position.
– Insert the mobile phone into the adapter (as specified in manufacturer's instructions).
Removing the mobile phone and adapter
– Press simultaneouly the side locks of the mount and remove the mobile phone and adapter ⇒fig. 113 .
Fig. 113 Universal
preparation for the
mobile phone
NKO 20 A05.book Page 129 Wednesday, June 21, 2006 1:42 PM
Page 132 of 274
Communication131
Using the systemSafetyDriving TipsGeneral MaintenanceBreakdown assistanceTechnical Data
You can operate the mobile phone via the voice control
⇒page 128 or via
the buttons of the multi-functional module* ⇒page 127.
Note
It a yellow or red warning symbol lights up in the information display, the
menu phonebook cannot be selected.
Voice commands
Voice commands for mobile phone operation
Voice commands for operating the phone phone book
ActivityRead out in display
Call termi-
natedINCOMING CALL TERMINATED
Number
engagedLINE BUSY
No service foundNO SERVICE
Enter PIN
codeENTER PIN
Voice commandActivity
ENTER PIN/PIN CODEAfter this command the PIN code of the mobile
phone can be entered ⇒page 132.
DIAL NUMBERAfter this command a telephone number can
be entered which establishes a connection to
the requested partner ⇒page 133.
REDIALAfter this command the last selected telephone
number is selected again ⇒page 133.
Voice commandActivity
SAVE/STORE
NAMES/NAME/NUMB ERAfter this command a name with its telephone
number can be stored in the phone phone book
⇒page 134.
SELECT
NAMES/NAMEAfter this command a telephone number which
was stored under its given name in the phone
phone book can be selected ⇒page 134.
DELETE
NAMES/NAMEAfter this command a name in the phone phone
book can be erased ⇒page 135.
LISTEN TO/PLAY
PHONEBOOKAfter this command you can listen-in to the
phone phone book ⇒page 135.
DELETE PHONE-
BOOKAfter this command the complete phone book
or a name can be erased ⇒page 135.
NKO 20 A05.book Page 131 Wednesday, June 21, 2006 1:42 PM
Page 140 of 274
Communication139
Using the systemSafetyDriving TipsGeneral MaintenanceBreakdown assistanceTechnical Data
Note
If an external audio source is connected via AUX-IN*, which has a sepa-
rate power supply, this can lead to an interference of the audio signals. It
depends on the properties of the adapter.
CD changer*
Operating the CD changer*
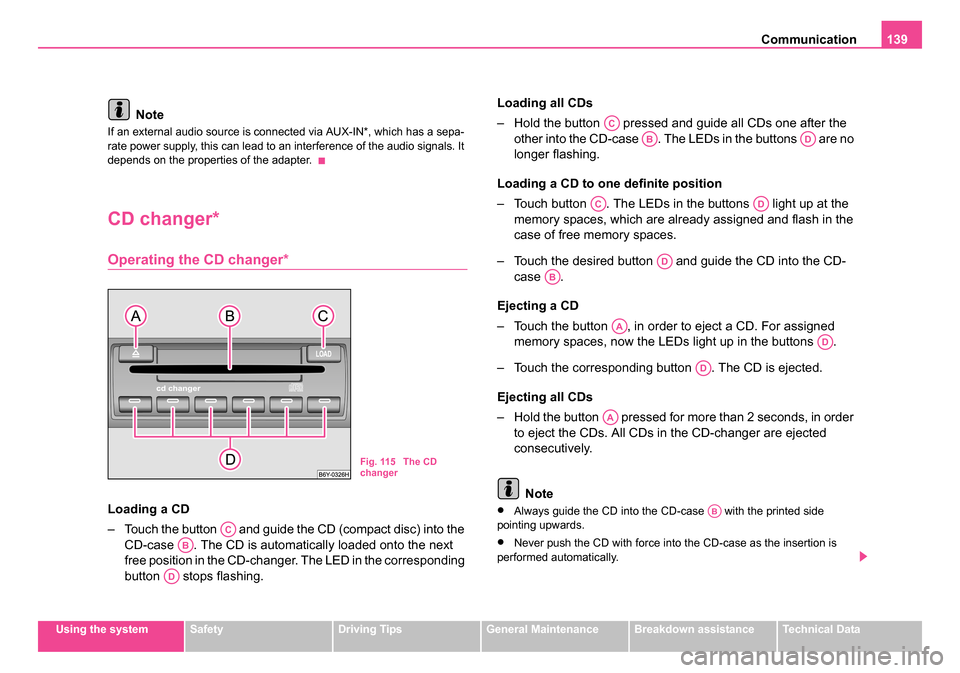
Loading a CD
– Touch the button and guide the CD (compact disc) into the
CD-case . The CD is automatically loaded onto the next
free position in the CD-changer. The LED in the corresponding
button stops flashing. Loading all CDs
– Hold the button pressed and guide all CDs one after the
other into the CD-case . The LEDs in the buttons are no
longer flashing.
Loading a CD to one definite position
– Touch button . The LEDs in the buttons light up at the memory spaces, which are already assigned and flash in the
case of free memory spaces.
– Touch the desired button and guide the CD into the CD- case .
Ejecting a CD
– Touch the button , in order to eject a CD. For assigned memory spaces, now the LEDs light up in the buttons .
– Touch the corresponding button . The CD is ejected.
Ejecting all CDs
– Hold the button pressed for more than 2 seconds, in order to eject the CDs. All CDs in the CD-changer are ejected
consecutively.
Note•Always guide the CD into the CD-case with the printed side
pointing upwards.
•Never push the CD with force into the CD-case as the insertion is
performed automatically.
Fig. 115 The CD
changer
AC
AB
AD
AC
ABAD
ACAD
AD
AB
AA
AD
AD
AA
AB
NKO 20 A05.book Page 139 Wednesday, June 21, 2006 1:42 PM
Page 141 of 274
Communication
140
•After loading a CD into the CD-changer, you must wait until the LED of
the corresponding button lights up. Then the CD-case is free to
load the next CD.
•If you have selected a position, on which a CD is already located, this
CD will be ejected. Take out the ejected CD and load the desired CD.
•The magazine can take up to six standard CDs (diameter 12 cm).
Please do not use 8 cm “single CDs”!
•In order to avoid malfunctions of the changer, please never use a CD
protective foil or stabilizer (obtainable on the market as CD-accessory).
•Described in this Owner's Manual are only the steps required for the
operation of the CD-changer.
•You will find further information for this setting menu in the Radio
Owner's Manual.
Tips for operating the CD-changer
Please pay attention to the following notes for operating the CD-
changer.
•Only clean CDs without scratches and damages should be used, in
order to guarantee a proper, high-quality CD-playback.
•Affix no labels to the CDs.
•Always store non-used CDs in the original folding box.
•Never expose CDs to direct sun rays.
•Use a soft, non-fluffy cloth to clean the CDs. Wipe the CD straight-lined
from the middle to the outside. Strong dirt must be eliminated with usual
CD-cleaner.
•Please never use liquids such as gasoline, paint thinner or disk
cleaner, otherwise the surface of the CD could get damaged.
Precaution measures for laser equipment
Laser equipment is classified according to DIN IEC 76 (CO) 6/VDE 0837
in the safety categories 1 - 4.
The Škoda CD-changer corresponds to the safety category 1.
The laser used for equipment of category 1 is to such an extent energy-
poor and/or shielded that there is no risk of danger when used in accord-
ance with the regulation.
WARNING
Please always pay full attention to the traffic situation around you!
Note
Do not remove the equipment cover. The equipment does not contain any
parts, which can be serviced by the user.
Warranty
The same guarantee conditions apply for our factory-fitted radio system
as for new vehicles.
Note
A damage in the sense of the warranty must not be the result from
improper handling of the system or from unprofessional repair attempts.
In addition, no external damage must be present.
ADAB
NKO 20 A05.book Page 140 Wednesday, June 21, 2006 1:42 PM
Page 143 of 274
Passive Safety
142
For this reason you will be provided with information on why this equip-
ment is very important, how it protects you and the occupants, what
should be observed when using the equipment and how you and the
people travelling with you can make full use of the existing safety equip-
ment. This Owner's Manual contains important warning notes, which you
and those travelling with you should pay attention to in order to reduce a
risk of injury.
Safety concerns everybody!
Before setting off
The driver is always fully responsible for his occupants
and for the operating safety of the vehicle.
For your own safety and the safety of the people travelling with you,
please pay attention to the following points before setting off.
•Ensure that the lighting and the turn signal system are functioning
properly.
•Inspect the tyre inflation pressure.
•Ensure that all the windows offer a good visibility to the outside.
•Safely attach the items of luggage ⇒page 77, “Loading the luggage
compartment”.
•Ensure that no objects can obstruct the pedal.
•Adjust the mirror, the front seat and the head restraint to match your
body size.
•Point out to your occupants that the head restraints must be adjusted
to match their body size.
•Protect the children in suitable child seats with correctly fastened seat
belts ⇒page 166, “Transporting children safely”.
•Adopt the correct seated position. Also inform your occupants to adopt
the correct seated position.
•Fasten the seat belt correctly. Also inform your occupants to properly
fasten the seat belts ⇒page 150, “How are seat belts correctly
fastened?”.
What influences the driving safety?
The driving safety is primarily determined by the style of
driving and the personal behaviour of all the occupants.
The driver is fully responsible for himself and his occupants. If your driving
safety is effected, you place yourself and the oncoming traffic at risk.
Please refer to the following guidelines.
•Do not get distracted from concentrating on the traffic situation, e.g. by
your occupants or mobile phone calls.
•Never drive when your driving ability is impaired, e.g. through medica-
tion, alcohol, drugs.
•Keep to the traffic regulations and the permissible speed limit.
•Adjust the driving speed at all times to the road condition as well as to
the traffic and weather conditions.
•Take regular breaks on long journeys - at the latest every two hours.
NKO 20 A05.book Page 142 Wednesday, June 21, 2006 1:42 PM