brake SKODA ROOMSTER 2006 1.G Owner's Manual
[x] Cancel search | Manufacturer: SKODA, Model Year: 2006, Model line: ROOMSTER, Model: SKODA ROOMSTER 2006 1.GPages: 274, PDF Size: 48.64 MB
Page 6 of 274
Contents5
Contents
Layout of this Owner's Manual
(explanations)
. . . . . . . . . . . . . . . . . . .
Using the system . . . . . . . . . . . . . . .
Cockpit . . . . . . . . . . . . . . . . . . . . . . . . . . . . . . .
General view . . . . . . . . . . . . . . . . . . . . . . . . .
Instruments and Indicator/Warning LightsGeneral view of the instrument cluster . . . . . .
Engine revolutions counter . . . . . . . . . . . . . . .
Coolant temperature gauge* . . . . . . . . . . . . .
Fuel gauge* . . . . . . . . . . . . . . . . . . . . . . . . . .
Counter for distance driven . . . . . . . . . . . . . .
Service Interval Display . . . . . . . . . . . . . . . . .
Digital clock . . . . . . . . . . . . . . . . . . . . . . . . . .
Multi-functional indicator (onboard computer)*
Information display* . . . . . . . . . . . . . . . . . . . .
Auto Check Control . . . . . . . . . . . . . . . . . . . .
Warning lights . . . . . . . . . . . . . . . . . . . . . . . . .
Unlocking and locking . . . . . . . . . . . . . . . . . .
Key . . . . . . . . . . . . . . . . . . . . . . . . . . . . . . . . .
Locking . . . . . . . . . . . . . . . . . . . . . . . . . . . . . .
Child safety lock . . . . . . . . . . . . . . . . . . . . . . .
Central locking system* . . . . . . . . . . . . . . . . .
Remote control* . . . . . . . . . . . . . . . . . . . . . . .
Anti-theft alarm system* . . . . . . . . . . . . . . . . .
Interior monitor* and Towing protection* . .
Power windows* . . . . . . . . . . . . . . . . . . . . . . .
Panorama roof* . . . . . . . . . . . . . . . . . . . . . . .
Lights and Visibility. . . . . . . . . . . . . . . . . . . . .
Lights . . . . . . . . . . . . . . . . . . . . . . . . . . . . . . .
Interior lighting . . . . . . . . . . . . . . . . . . . . . . . . Visibility . . . . . . . . . . . . . . . . . . . . . . . . . . . . .
Windshield wiper and wash system . . . . . . . .
Rear mirror . . . . . . . . . . . . . . . . . . . . . . . . . . .
Seats and Stowage . . . . . . . . . . . . . . . . . . . .
Front seats . . . . . . . . . . . . . . . . . . . . . . . . . . .
Head restraints . . . . . . . . . . . . . . . . . . . . . . . .
Heating the front seats* . . . . . . . . . . . . . . . . .
Rear seats . . . . . . . . . . . . . . . . . . . . . . . . . . .
Pedals . . . . . . . . . . . . . . . . . . . . . . . . . . . . . .
Luggage compartment . . . . . . . . . . . . . . . . . .
Bicycle carrier* . . . . . . . . . . . . . . . . . . . . . . . .
The roof luggage rack system* . . . . . . . . . . .
Front cup holder . . . . . . . . . . . . . . . . . . . . . . .
Rear cup holder* . . . . . . . . . . . . . . . . . . . . . .
Note holder . . . . . . . . . . . . . . . . . . . . . . . . . .
Ashtray* . . . . . . . . . . . . . . . . . . . . . . . . . . . . .
Cigarette lighter* and power sockets* . . . . . .
Storage compartments . . . . . . . . . . . . . . . . . .
Heating and air conditioning system . . . . .
Heating . . . . . . . . . . . . . . . . . . . . . . . . . . . . . .
Climatic (semi-automatic air conditioning
system)* . . . . . . . . . . . . . . . . . . . . . . . . . . . . .
Climatronic (automatic air conditioning)* . . . .
Starting-off and Driving. . . . . . . . . . . . . . . . .
Setting steering wheel position* . . . . . . . . . . .
Ignition lock . . . . . . . . . . . . . . . . . . . . . . . . . .
Starting the engine . . . . . . . . . . . . . . . . . . . . .
Switching off the engine . . . . . . . . . . . . . . . . .
Shifting (manual gearbox) . . . . . . . . . . . . . . .
Handbrake . . . . . . . . . . . . . . . . . . . . . . . . . . .
Parking aid* . . . . . . . . . . . . . . . . . . . . . . . . . .
Cruise control system (CCS)* . . . . . . . . . . . .
Automatic gearbox. . . . . . . . . . . . . . . . . . . . .
6-speed automatic gearbox* . . . . . . . . . . . . .
Communication . . . . . . . . . . . . . . . . . . . . . . .
Operating the radio . . . . . . . . . . . . . . . . . . . .
Radio and mobile phone operation . . . . . . . .
Universal telephone preinstallation with voice
control* . . . . . . . . . . . . . . . . . . . . . . . . . . . . .
Inserting the mobile phone and adapter . . . .
Mobile phone operation . . . . . . . . . . . . . . . . .
Voice commands . . . . . . . . . . . . . . . . . . . . . .
Enter PIN code . . . . . . . . . . . . . . . . . . . . . . .
Select number . . . . . . . . . . . . . . . . . . . . . . . .
Repeat last call . . . . . . . . . . . . . . . . . . . . . . .
Phone voice phonebook* . . . . . . . . . . . . . . . .
Bluetooth™* . . . . . . . . . . . . . . . . . . . . . . . . .
Mobile phones and two-way radio systems . .
Input AUX-IN* . . . . . . . . . . . . . . . . . . . . . . . .
CD changer* . . . . . . . . . . . . . . . . . . . . . . . . .
Safety. . . . . . . . . . . . . . . . . . . . . . . . . . . . . .
Passive Safety . . . . . . . . . . . . . . . . . . . . . . . .
Basic information . . . . . . . . . . . . . . . . . . . . . .
Correct seated position . . . . . . . . . . . . . . . . .
Seat belts. . . . . . . . . . . . . . . . . . . . . . . . . . . . .
Why seat belts? . . . . . . . . . . . . . . . . . . . . . . .
The physical principle of a frontal collision . .
Important safety information regarding the use
of seat belts . . . . . . . . . . . . . . . . . . . . . . . . . .
How are seat belts correctly fastened? . . . . .
Belt tensioner . . . . . . . . . . . . . . . . . . . . . . . . .
8
9
11
11
13
13
14
14
14
15
16
17
17
22
24
27
39
39
41
42
42
48
49
50
51
54
55
55
60 62
63
66
68
68
70
71
72
76
77
81
85
86
86
87
87
88
90
96
96
99
104
109
109 11 0111
11 2
11 3
11 4
11 5
11 6 11 9
11 9
126
126
127
128
129
130
131
132
133
133
134
136
138
138
139
141
141
141
143
147
147
148
149
150
152
NKO 20 A05.book Page 5 Wednesday, June 21, 2006 1:42 PM
Page 7 of 274
Contents
6
Airbag system. . . . . . . . . . . . . . . . . . . . . . . . .
Description of the airbag system . . . . . . . . . .
Front airbags . . . . . . . . . . . . . . . . . . . . . . . . .
Side airbags* . . . . . . . . . . . . . . . . . . . . . . . . .
Head airbags* . . . . . . . . . . . . . . . . . . . . . . . .
Deactivating an airbag . . . . . . . . . . . . . . . . . .
Transporting children safely. . . . . . . . . . . . .
What you should know about transporting
children! . . . . . . . . . . . . . . . . . . . . . . . . . . . . .
Child seat . . . . . . . . . . . . . . . . . . . . . . . . . . . .
Attaching a child seat using the “ISOFIX”
system* . . . . . . . . . . . . . . . . . . . . . . . . . . . . .
Attaching child seat using the “Top Tether”
system . . . . . . . . . . . . . . . . . . . . . . . . . . . . . .
Driving Tips . . . . . . . . . . . . . . . . . . . . . .
Intelligent Technology . . . . . . . . . . . . . . . . . .
Electronic stability programme (ESP)* . . . . . .
Brakes . . . . . . . . . . . . . . . . . . . . . . . . . . . . . .
Brake booster . . . . . . . . . . . . . . . . . . . . . . . .
Antilock brake system (ABS)* . . . . . . . . . . . .
Brake Assist* . . . . . . . . . . . . . . . . . . . . . . . . .
Power steering* . . . . . . . . . . . . . . . . . . . . . . .
Tyre inflation pressure-control system* . . . . .
Driving and the Environment. . . . . . . . . . . .
The first 1 500 kilometres and then afterwards
Catalytic converter . . . . . . . . . . . . . . . . . . . . .
Driving in an economical and environmentally
conscious manner . . . . . . . . . . . . . . . . . . . . .
Environmental compatibility . . . . . . . . . . . . . .
Motoring abroad . . . . . . . . . . . . . . . . . . . . . . .
Avoiding damage to your vehicle . . . . . . . . . .
Towing a trailer . . . . . . . . . . . . . . . . . . . . . . . .
Towing a trailer . . . . . . . . . . . . . . . . . . . . . . . .
General Maintenance. . . . . . . . . .
Taking care of your vehicle and cleaning the
vehicle . . . . . . . . . . . . . . . . . . . . . . . . . . . . . . .
General . . . . . . . . . . . . . . . . . . . . . . . . . . . . .
Care of the exterior of vehicle . . . . . . . . . . . .
Care of the interior of vehicle . . . . . . . . . . . . .
Fuel. . . . . . . . . . . . . . . . . . . . . . . . . . . . . . . . . .
Petrol . . . . . . . . . . . . . . . . . . . . . . . . . . . . . . .
Diesel . . . . . . . . . . . . . . . . . . . . . . . . . . . . . .
Refuelling . . . . . . . . . . . . . . . . . . . . . . . . . . .
Inspecting and Replenishing. . . . . . . . . . . .
Engine compartment . . . . . . . . . . . . . . . . . . . . . . . . . . . . . . . . . . . . . . . . . . . . . . . . . . . . . .
Cooling system . . . . . . . . . . . . . . . . . . . . . . .
Brake fluid . . . . . . . . . . . . . . . . . . . . . . . . . . .
Battery . . . . . . . . . . . . . . . . . . . . . . . . . . . . . .
Windshield washer system . . . . . . . . . . . . . .
Wheels and Tyres . . . . . . . . . . . . . . . . . . . . .
Wheels . . . . . . . . . . . . . . . . . . . . . . . . . . . . .
Accessories, changes and replacement of
parts . . . . . . . . . . . . . . . . . . . . . . . . . . . . . . . . .
Accessories and replacement parts . . . . . . .
Technical changes . . . . . . . . . . . . . . . . . . . . .
Breakdown assistance . . . . . . . .
Breakdown assistance . . . . . . . . . . . . . . . . .
First-aid box* and Warning triangle* . . . . . . .
Fire extinguisher* . . . . . . . . . . . . . . . . . . . . . .
Vehicle tool kit . . . . . . . . . . . . . . . . . . . . . . . .
Tyre repair kit* . . . . . . . . . . . . . . . . . . . . . . . .
Spare wheel* . . . . . . . . . . . . . . . . . . . . . . . . .
Changing a wheel . . . . . . . . . . . . . . . . . . . . .
Jump-starting . . . . . . . . . . . . . . . . . . . . . . . . .
Tow-starting and towing vehicle . . . . . . . . . . .
Fuses and light bulbs . . . . . . . . . . . . . . . . . .
Electric fuses . . . . . . . . . . . . . . . . . . . . . . . . .
Bulbs . . . . . . . . . . . . . . . . . . . . . . . . . . . . . . .
Te c h n i c a l D a ta . . . . . . . . . . . . . . . . . .
General . . . . . . . . . . . . . . . . . . . . . . . . . . . . . .
Identification data . . . . . . . . . . . . . . . . . . . . .
Index . . . . . . . . . . . . . . . . . . . . . . . . . . . . . .
154
154
156
159
161
163
166
166
170
174
175
177
177
177
180
181
181
182
183
183
185
185
186
187
191
192
192
193
193 197
197
197
197
203
205
205
205
207
209
209
212
215
218
220
224
225
225
232
232
232
235
235
235
235
236
236
237
237
243
245249
249
254
263
263
263
265
NKO 20 A05.book Page 6 Wednesday, June 21, 2006 1:42 PM
Page 27 of 274
Instruments and Indicator/Warning Lights
26
Three successive warning signals will sound if a red symbol appears.
If several operational faults of priority 1 exist, the symbols appear one after
the other and are each illuminated for about 5 seconds.
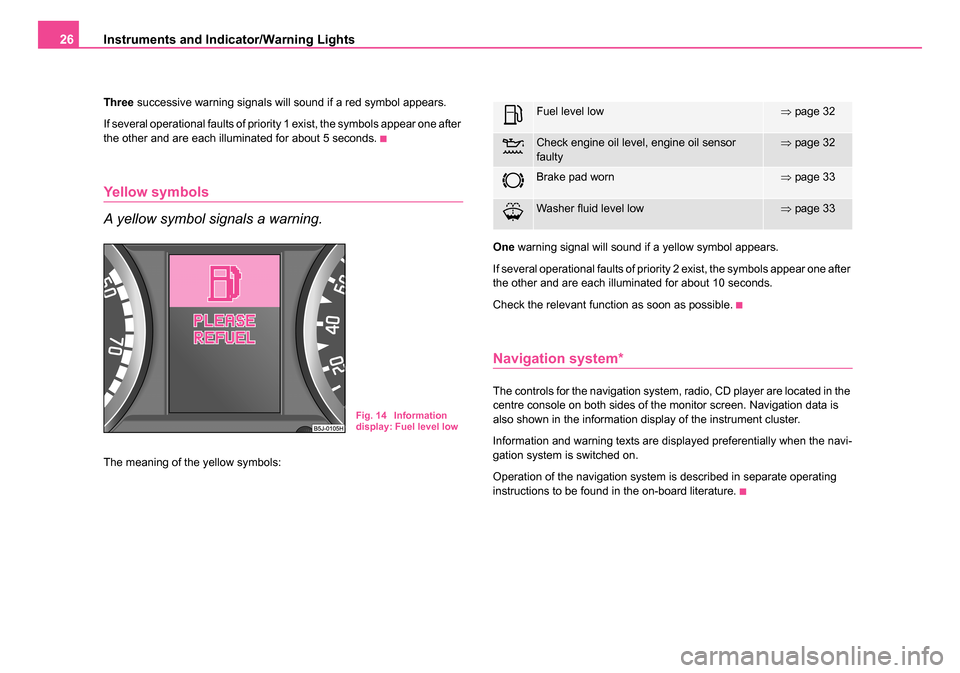
Yellow symbols
A yellow symbol signals a warning.
The meaning of the yellow symbols: One
warning signal will sound if a yellow symbol appears.
If several operational faults of priority 2 exist, the symbols appear one after
the other and are each illuminated for about 10 seconds.
Check the relevant function as soon as possible.
Navigation system*
The controls for the navigation system, radio, CD player are located in the
centre console on both sides of the monitor screen. Navigation data is
also shown in the information display of the instrument cluster.
Information and warning texts are displayed preferentially when the navi-
gation system is switched on.
Operation of the navigation system is described in separate operating
instructions to be found in the on-board literature.
Fig. 14 Information
display: Fuel level low
Fuel level low⇒ page 32
Check engine oil level, engine oil sensor
faulty⇒page 32
Brake pad worn⇒page 33
Washer fluid level low⇒page 33
NKO 20 A05.book Page 26 Wednesday, June 21, 2006 1:42 PM
Page 29 of 274
Instruments and Indicator/Warning Lights
28
WARNING
•If you do not pay attention to the warning lights coming on and
the corresponding descriptions and warning notes, this may result
in severe body injuries or major vehicle damage.
•The engine compartment of your car is a hazardous area. There
is a risk of injuries, scalding, accid ents and fire when working in the
engine compartment, e.g. inspecting and replenishing oil and other
fluids. It is also essential to observe all warnings ⇒page 210.
Note
•Arrangement of the indicator lights depends on the model and model
version. The symbols shown in the following functional description are to
be found as indicator lights in the instrument cluster.
•Operational faults are shown in the instrument cluster as red symbols
(priority 1 - danger) or yellow symbols (priority 2 - warning).
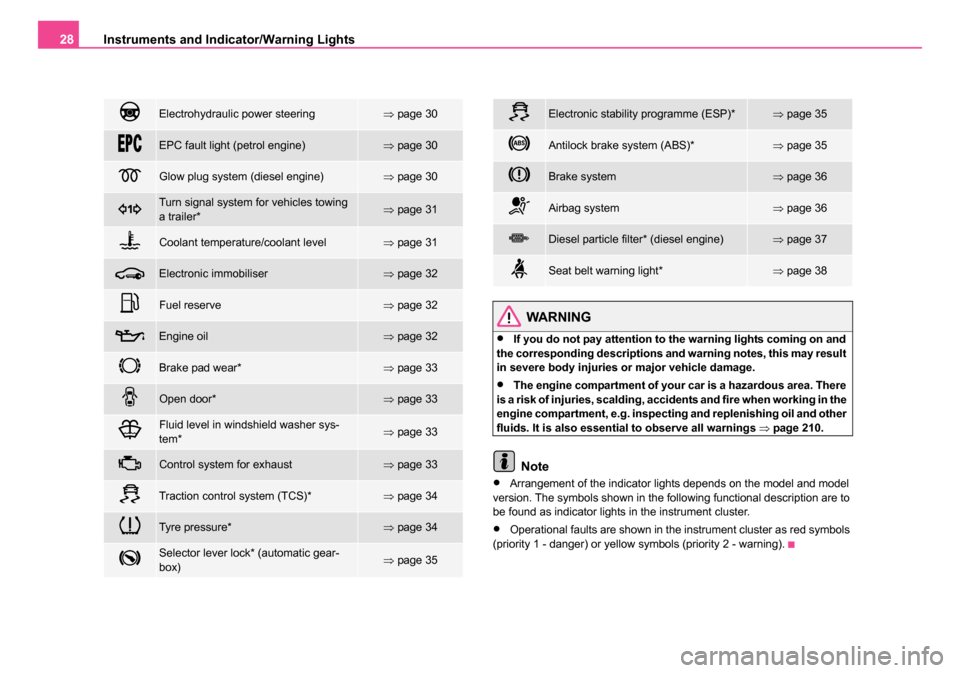
Electrohydraulic power steering⇒ page 30
EPC fault light (petrol engine)⇒page 30
Glow plug system (diesel engine)⇒page 30
Turn signal system for vehicles towing
a trailer*⇒page 31
Coolant temperature/coolant level⇒page 31
Electronic immobiliser⇒page 32
Fuel reserve⇒page 32
Engine oil⇒page 32
Brake pad wear*⇒page 33
Open door*⇒page 33
Fluid level in windshield washer sys-
tem*⇒page 33
Control system for exhaust⇒page 33
Traction control system (TCS)*⇒page 34
Tyre pressure*⇒page 34
Selector lever lock* (automatic gear-
box)⇒page 35
Electronic stability programme (ESP)*⇒page 35
Antilock brake system (ABS)*⇒page 35
Brake system⇒page 36
Airbag system⇒page 36
Diesel particle filter* (diesel engine)⇒page 37
Seat belt warning light*⇒page 38
NKO 20 A05.book Page 28 Wednesday, June 21, 2006 1:42 PM
Page 34 of 274
Instruments and Indicator/Warning Lights33
Using the systemSafetyDriving TipsGeneral MaintenanceBreakdown assistanceTechnical Data
In this case have the engine inspected without delay by a specialist
garage.
The following text will be displayed in the information display*:
OIL SENSOR WORKSHOP! (OIL SENSOR WORKSHOP!)
WARNING
•If you must stop for technical reasons, then park the vehicle at
a safe distance from the traffic and switch off the engine and switch
on the hazard warning light system ⇒page 59.
•The red oil pressure light is not an oil level indicator! One
should therefore check the oil level at regular intervals, preferably
after every refueling stop.
•Pay attention to the following instructions ⇒page 210,
“Working in the engine compartmen t” before checking the coolant
fluid level and opening the bonnet.
Thickness of the brake pads*
If the warning light comes on, contact a specialist garage immediately
and have the brake pads on all of the wheels inspected.
A peep sounds as an additional warning signal.
The following text will be displayed in the information display*: CHECK BRAKE PAD
Open door*
The warning light comes on if one or several doors, the bonnet or tail-
gate is opened.
The warning light comes on even when the ignition is switched off. The
warning light goes out 5 minutes after switching off the ignition if one or
several doors, the bonnet or tailgate is opened. The warning light goes out
after closing the doors.
Windshield washer fluid level*
The warning light comes on when the ignition is switched on if there is
insufficient fluid in the windshield washer system. Top up with liquid
⇒ page 224.
A peep sounds as an additional warning signal.
The following text will be displayed in the information display*: REFILL WASHER LIQUID
Control system for exhaust
The warning light comes on after the ignition has been switched on.
If the warning light does not go out after starting the engine or it lights up
or flashes when driving, a fault exists in an exhaust relevant component.
The engine management system selects an emergency programme
which enables you to drive to the nearest specialist garage by adopting a
gentle style of driving.
NKO 20 A05.book Page 33 Wednesday, June 21, 2006 1:42 PM
Page 35 of 274

Instruments and Indicator/Warning Lights
34
The following text will be displayed in the information display*:
EXHAUST WORKSHOP!
Traction control system (TCS)
The warning light comes on for a few seconds when the ignition is
switched on.
The warning light comes on when driving when a control cycle is acti-
vated.
The warning light will come on and remains on if the TCS is switched off
or if there is a fault in the system.
The fact that the TCS system operates together with the ABS means that
the TCS warning light will also come on if the ABS system is not operating
properly.
If the warning light
comes on immediately after starting the engine, the
TCS system can be switched off for technical reasons. In this case, the
TCS system can be switched on again by switching the ignition on and off.
If the warning light goes out, the TCS system is fully functional again.
Further information about the TCS ⇒page 178.
Note
If the battery has been disconnected and reconnected, the warning light comes on after switching on the ignition. The warning light must go out
after driving a short distance.
Tyre inflation pressure*
The warning light lights up, if there is a substantial drop in inflation
pressure in one of the tyres. Reduce the speed and check or correct as
soon as possible the inflation pressure in the tyres ⇒page 226.
A peep sounds as an additional warning signal.
If the warning light flashes, there is a system fault. Visit the nearest
specialist garage and have the fault rectified.
Further information about tyre pressure-control system ⇒page 183.
WARNING
•When the warning light lights up, immediately reduce the
speed and avoid sudden steering and brake manoeuvres. Please
stop the vehicle without delay at the nearest possible stop and
inspect the tyres and their inflation pressures.
•Under certain circumstances (e.g. sporty style of driving, wintry
or unpaved roads) the warning light can be delayed or does not
light up at all.
•The tyre inflation pressure-control system does not take away
the responsability from the driver for the correct tyre inflation pres-
sure.
Note
If the battery has been disconnected, the warning light comes on after
switching on the ignition. The warning light must go out after driving a
short distance.
NKO 20 A05.book Page 34 Wednesday, June 21, 2006 1:42 PM
Page 36 of 274
Instruments and Indicator/Warning Lights35
Using the systemSafetyDriving TipsGeneral MaintenanceBreakdown assistanceTechnical Data
Selector lever lock* (automatic gearbox)
If the warning light lights up, operate the brake pedal. This is neces-
sary, in order to be able to move the selector lever out of the position P or
N .
Electronic stability programme (ESP)*
The warning light comes on for a few seconds when the ignition is
switched on.
Components of the ESP system also include the Traction Control System
(TCS), Electronic Differential Lock (EDL), and the Antilock Brake System
ABS (ABS).
The warning light comes on when driving when a control cycle is acti-
vated.
The warning light will come on and remains on if the ESP is switched off
or if there is a fault in the system.
The fact that the ESP system operates together with the ABS means that
the ESP warning light will also come on if the ABS system is not operating
properly.
Further information on the ESP ⇒page 177, “Electronic stability
programme (ESP)*”.
Electronic Differential Lock (EDL)*
The EDL is a part of the ESP. A fault in the EDL is indicated by the ESP
warning light
in the instrument cluster. Have the vehicle inspected
immediately by your specialist garage. Further information on the EDL
⇒ page 179.
Antilock brake system (ABS)*
The warning light shows the functionality of the ABS.
The warning light comes on for a few seconds after the ignition has been
switched on or when starting the engine. The warning light goes out after
an automatic check sequence has been completed.
A fault in the ABS
The system is not functioning properly if the ABS warning light
does
not go out within a few seconds after switching on the ignition, does not
light up at all or lights up while driving. The vehicle will only be braked by
the normal brake system. Visit a specialist garage as quickly as possible
and adjust your style of driving in the meantime since you will not know
how great the damage is.
Three additional warning tones will sound if there is a major fault in the
ABS.
Further information about ABS ⇒page 181, “Antilock brake system
(ABS)*”.
A fault in the entire brake system
If the ABS warning light
comes on together with the brake system
warning light (handbrake must be released), there is a fault not only in
the ABS but also in another part of the brake system ⇒.
The following text will be displayed in the information display*: STOP BRAKE FAULT OWNER'S MANUAL!
WARNING
•If the brake system warning light comes on together with the
ABS warning light stop the vehicle immediately and check the
brake fluid level in the reservoir ⇒page 218, “Brake fluid”. If the
fluid level has dropped below the MIN marking, do not drive any
NKO 20 A05.book Page 35 Wednesday, June 21, 2006 1:42 PM
Page 37 of 274
Instruments and Indicator/Warning Lights
36
further - risk of accident! Contact a Škoda dealer to obtain profes-
sional assistance.
•Pay attention to the following instructions ⇒page 210,
“Working in the engine compartment” before checking the brake
fluid level and opening the bonnet.
•If the brake fluid is at the correct level, the ABS control function
has failed. The rear wheels may then block very rapidly when
braking. In certain circumstances, this can result in the rear end of
the car breaking away - risk of skidding! Drive carefully to the
nearest specialist garage and have the fault rectified.
Brake system
The warning light flashes or comes on if the brake fluid level is too low,
if there is a fault in the ABS or if the handbrake is applied.
If the warning light
flashes (handbrake is not applied), stop and check
the brake fluid level ⇒.
The following text will be displayed in the information display*: STOP BRAKE FLUID OWNER'S MANUAL
If there is a fault in the ABS which also influences the function of the
normal brake system (e.g. distribution of brake pressure), the ABS
warning light
comes on together with the brake system warning light . Be aware that not only the ABS but also another part of th brake
system is defective ⇒.
3 peeps sound as an additional warning signal.
One should get used to high pedal forces, long braking distances and long
free play of the brake pedal when driving to the next specialist garage. The following text will be displayed in the information display*:
STOP BRAKE FAULT OWNER'S MANUAL!
For further information on the brake system ⇒page 180, “Brakes”.
Handbrake applied
The warning light
also comes on if the handbrake is applied. An audible
warning is also given if you drive the vehicle for at least 3 seconds at a
speed of more than 6 km/h.
The following text will be displayed in the information display*:
HANDBRAKE ON
WARNING
•Pay attention to the following instructions ⇒page 210,
“Working in the engine compartment” before checking the brake
fluid level and opening the bonnet.
•If the brake system warning light does not go out a few
seconds after switching on the igni tion or comes on when driving,
stop immediately and check the brake fluid in the reservoir
⇒ page 218, “Brake fluid”. If the fluid level has dropped below the
MIN marking, do not drive any furthe r - risk of accident! Contact a
Škoda dealer to obtain professional assistance.
Airbag system
Monitoring the airbag system
The warning light
comes on for a few seconds when the ignition is
switched on.
WARNING (continued)
NKO 20 A05.book Page 36 Wednesday, June 21, 2006 1:42 PM
Page 69 of 274
Seats and Stowage
68
Seats and Stowage
Front seats
Basic information
The front seats have a wide range of different settings and can thus be
matched to the physical characteristics of the driver and front passenger.
Correct adjustment of the seats is particularly important for
•safely and quickly reaching the controls,
•a relaxed, fatigue-free body position,
•achieving the maximum protection offered by the seat belts and
the airbag system.
The chapters which follow describe the procedure which you should adopt
for adjusting the seats.
WARNING
•Never transport more occupants than the maximum seating in
the vehicle.
•Each occupant must correctly fasten the seat belt belonging to
the seat. Children must be fastened ⇒page 166, “Transporting
children safely” with a suitable restraint system.
•The front seats and the head restraints must always be adjusted
to match the body size of the seat occupant as well as the seat belts
must always be correctly fastened in order to provide an optimal
protection for you and your occupants.
•Always keep your feet in the footwell when the car is being
driven - never place your feet on the instrument panel, out of the
window or on the surfaces of the seats. This is particularly impor- tant for the front seat passenger. You will be exposed to increased
risk of injury if it becomes nece
ssary to apply the brake or in the
event of an accident. If an airbag is deployed, you may suffer fatal
injuries when adopting an incorrect seated position!
•It is important for the driver and front passenger to maintain a
distance of at least 25 cm from the steering wheel or dash panel.
Not maintaining this minimum distance will mean that the airbag
system will not be able to properly protect you - hazard! The front
seats and the head restraints must always also be correctly
adjusted to match the body size of the occupant.
•Ensure that there are no objects in the footwell as any objects
may get behind the pedals during a driving or braking manoeuvre.
You would then no longer be able to operate the clutch, to brake or
accelerate.
WARNING (continued)
NKO 20 A05.book Page 68 Wednesday, June 21, 2006 1:42 PM
Page 77 of 274
Seats and Stowage
76
WARNING
•The belt lock must be in their orig inal position after folding back
the seats - they must be ready to use.
•The seat backrests must be securely interlocked in position so
that no objects in the luggage compartment can slide into the
passenger compartment if there is sudden braking - risk of injury.
•When folding the seat backrest always make sure that it has
safely locked into position, this is confirmed by the position and a
visible marking on the cover of the lever.
Note
The seat belts of the outer seats must always be guided through the guide
loops next to the head restraints. Otherwise the seat belts can slip behind
the seat.
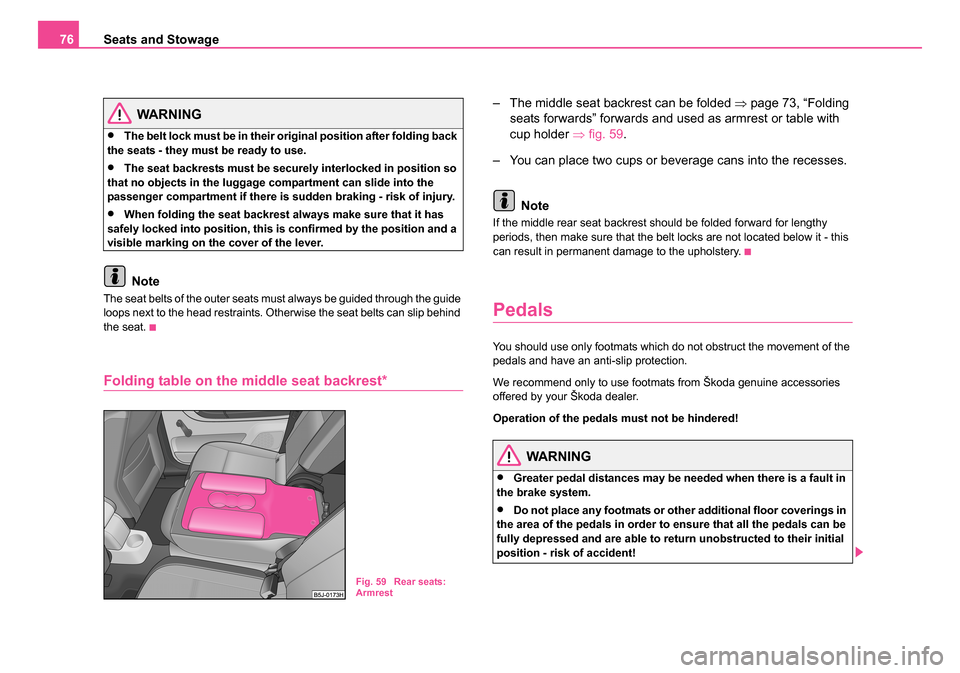
Folding table on the middle seat backrest*
– The middle seat backrest can be folded ⇒page 73, “Folding
seats forwards” forwards and used as armrest or table with
cup holder ⇒fig. 59 .
– You can place two cups or beverage cans into the recesses.
Note
If the middle rear seat backrest should be folded forward for lengthy
periods, then make sure that the belt locks are not located below it - this
can result in permanent damage to the upholstery.
Pedals
You should use only footmats which do not obstruct the movement of the
pedals and have an anti-slip protection.
We recommend only to use footmats from Škoda genuine accessories
offered by your Škoda dealer.
Operation of the pedals must not be hindered!
WARNING
•Greater pedal distances may be needed when there is a fault in
the brake system.
•Do not place any footmats or other additional floor coverings in
the area of the pedals in order to ensure that all the pedals can be
fully depressed and are able to return unobstructed to their initial
position - risk of accident!
Fig. 59 Rear seats:
Armrest
NKO 20 A05.book Page 76 Wednesday, June 21, 2006 1:42 PM