tow SKODA ROOMSTER 2007 1.G Service Manual
[x] Cancel search | Manufacturer: SKODA, Model Year: 2007, Model line: ROOMSTER, Model: SKODA ROOMSTER 2007 1.GPages: 248, PDF Size: 46.44 MB
Page 100 of 248
Automatic gearbox99
Using the systemSafetyDriving TipsGeneral MaintenanceBreakdown assistancePraktikTechnical Data
You must depress the brake pedal ⇒ if you wish to move the selector lever into position D from N when the vehicle is travelling at less than 5 km/hour or is stationary.
In certain circumstances (e.g. when driving in mountainous regions or when towing a trailer) it may be beneficial to select the manual shift programme ⇒page 100 for a short time in order to adapt the gearbox ratios manually to the driving situations.
S - Position for sporty style of driving
Shifting up later into a higher gear makes it possible to fully exploit the power potential of the engine. The gearbox also then shifts down at higher engine speeds as in the position D.
The gearbox does not shift into the 6th gear in the position S, because the maximum speed is achieved with the 5th gear.
The Shiftlock on the selector lever grip must be pressed when moving the selector lever out of the position D into the position S.
WARNING
•Never move the selector lever into position R or P when driving - risk of an accident!
•When the engine is running and the vehicle is stationary, it is necessary to hold the car with the brake pedal in all the positions of the selector lever (except P and N) since the power transmission is never completely inter-rupted, also not when the engine is idling - the vehicle "creeps".
•You must on no account unintentionally operate the throttle (e.g. by hand from the engine compartment) if a drive position is engaged when the car is stationary. The vehicle would ot herwise immediately start off - also when the handbrake is firmly applied - risk of an accident!
•You must move the selector lever into position P and firmly apply the handbrake first before you or any other person opens the bonnet and starts working on the engine when it is running - risk of accident! It is also essential to observe all warnings ⇒page 174, “Working in the engine compartment”.
Selector lever lock
Automatic selector lever lock
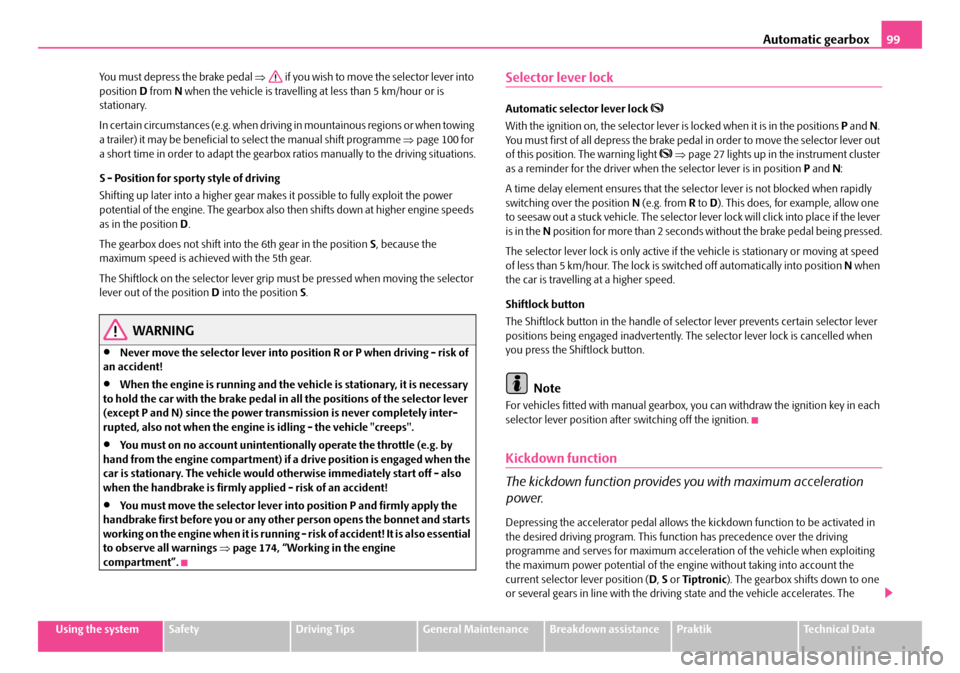
With the ignition on, the selector lever is locked when it is in the positions P and N. You must first of all depress the brake pedal in order to move the selector lever out of this position. The warning light ⇒page 27 lights up in the instrument cluster as a reminder for the driver when the selector lever is in position P and N:
A time delay element ensures that the sele ctor lever is not blocked when rapidly switching over the position N (e.g. from R to D). This does, for example, allow one to seesaw out a stuck vehicle. The selector lever lock will click into place if the lever is in the N position for more than 2 seconds without the brake pedal being pressed.
The selector lever lock is only active if th e vehicle is stationary or moving at speed of less than 5 km/hour. The lock is switched off automatically into position N when the car is travelling at a higher speed.
Shiftlock button
The Shiftlock button in the handle of sele ctor lever prevents certain selector lever positions being engaged inadvertently. The selector lever lock is cancelled when you press the Shiftlock button.
Note
For vehicles fitted with manual gearbox, yo u can withdraw the ignition key in each selector lever position after switching off the ignition.
Kickdown function
The kickdown function provides you with maximum acceleration
power.
Depressing the accelerator pedal allows th e kickdown function to be activated in the desired driving program. This function has precedence over the driving programme and serves for maximum accelera tion of the vehicle when exploiting the maximum power potential of the engine without taking into account the current selector lever position ( D, S or Tiptronic). The gearbox shifts down to one or several gears in line with the driving state and the vehicle accelerates. The
NKO A05R 20 MR08.book Page 99 Wednesday, March 28, 2007 9:42 AM
Page 102 of 248
Automatic gearbox101
Using the systemSafetyDriving TipsGeneral MaintenanceBreakdown assistancePraktikTechnical Data
Shifting down gears
– One-touch back of the selector lever (in the Tiptronic position) .
It is possible to switch over to manual both when the car is stationary and also when driving.
When you accelerate, the gearbox shifts up automatically in gears 1, 2, 3, 4 and 5 into the next higher gear just before the maximum permissible engine speed is reached.
If you select a lower gear, the automatic ge arbox does not shift down until there is no risk of the engine overrevving.
If you operate the kickdown function, the ge arbox shifts into a lower gear in line with the vehicle speed and engine speed.
Emergency programme
An emergency programme exists in th e event of a fault in the system.
The gearbox operates in a corresponding emergency programme if there are func- tional faults in the gearbox electronics. This is indicated by all of the segments in the display lighting up or going out.
It is possible to continue to move the se lector lever into all the positions. In the positions D and S the gearbox remains engaged in the 3rd gear. It is also possible to continue to engage reverse gear in the position R.
The manual shift programme (Tiptronic) is switched off in the emergency mode.
If the gearbox has switched over to emergency mode, drive to the nearest specialist garage in order to have the fault rectified.
Tow-starting and towing vehicle
Tow-starting a vehicle
It is not possible to tow-start or push-s tart vehicles fitted with automatic gearbox.
you can use jump-start cables connected to the battery of another vehicle for starting your car if the vehicle battery is flat ⇒page 202.
Towing a vehicle
Please pay attention to the following information if it comes necessary to tow-in your car ⇒page 203.A-
NKO A05R 20 MR08.book Page 101 Wednesday, March 28, 2007 9:42 AM
Page 123 of 248
Seat belts122
Seat belts
Why seat belts?
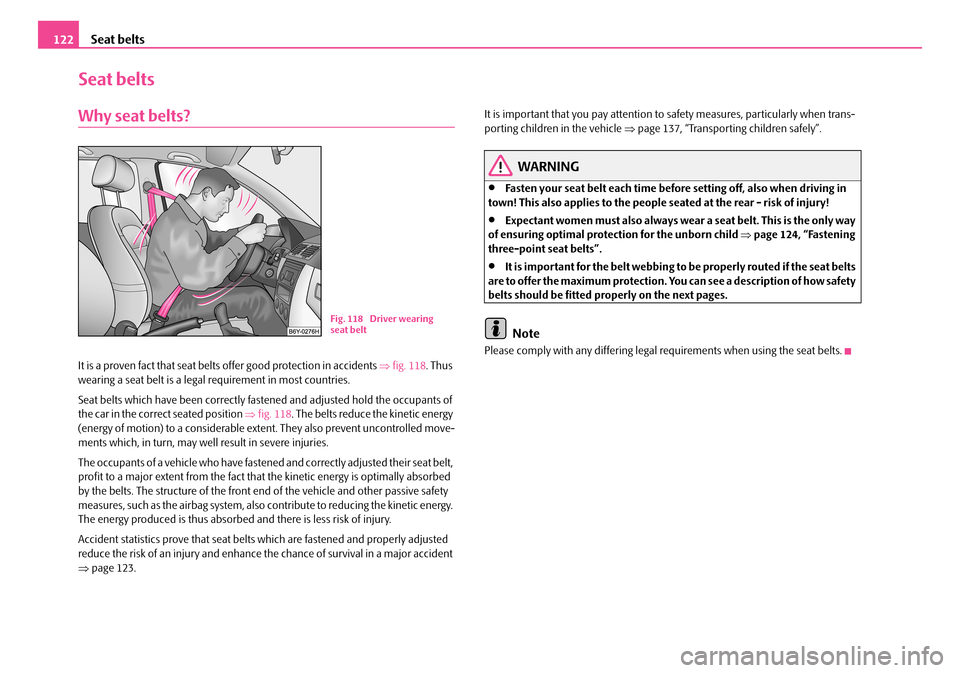
It is a proven fact that seat belts offer good protection in accidents ⇒fig. 118. Thus wearing a seat belt is a legal requirement in most countries.
Seat belts which have been correctly fastened and adjusted hold the occupants of the car in the correc t seated position ⇒fig. 118. The belts reduce the kinetic energy (energy of motion) to a considerable extent. They also prevent uncontrolled move- ments which, in turn, may well result in severe injuries.
The occupants of a vehicle who have fastened and correctly adjusted their seat belt, profit to a major extent from the fact that the kinetic energy is optimally absorbed by the belts. The structure of the front end of the vehicle and other passive safety measures, such as the airbag system, also contribute to reducing the kinetic energy. The energy produced is thus absorbed and there is less risk of injury.
Accident statistics prove that seat belts which are fastened and properly adjusted reduce the risk of an injury and enhance the chance of survival in a major accident ⇒ page 123.
It is important that you pay attention to safety measures, particularly when trans- porting children in the vehicle ⇒page 137, “Transporting children safely”.
WARNING
•Fasten your seat belt each time before setting off, also when driving in town! This also applies to the people seated at the rear - risk of injury!
•Expectant women must also always wear a seat belt. This is the only way of ensuring optimal protection for the unborn child ⇒page 124, “Fastening three-point seat belts”.
•It is important for the belt webbing to be properly routed if the seat belts are to offer the maximum protection. You can see a description of how safety belts should be fitted pr operly on the next pages.
Note
Please comply with any differing legal requirements when using the seat belts.
Fig. 118 Driver wearing seat belt
NKO A05R 20 MR08.book Page 122 Wednesday, March 28, 2007 9:42 AM
Page 142 of 248
Transporting children safely141
Using the systemSafetyDriving TipsGeneral MaintenanceBreakdown assistancePraktikTechnical Data
Universal category - seat is suitable for all approved types of child safety seats.
The seat can be fitted wi th fixing eyes for the “ISOFIX*”system.
The seat is equipped as standa rd with the fixing system “To p Te t h e r”.
Child seats of group 0/0+
The optimal solution for babies of up to about 9 months old weighing up to 10 kg or babies up to about 18 mont hs old weighing up to 13 kg is a child safety seat which is fastened in the opposite direction of travel ⇒fig. 138.
Child seats in which the child is facing with its back towards the direction of travel should not be used on the front pa ssenger seat when the vehicle is fitted with a front passenger airbag ⇒page 138, “Use of child safety seats on the front passenger seat”.
WARNING
•It is essential to always switch off the front passenger airbag (airbags) at a specialist garage or with the switch for front passenger airbag(s)* when attaching in exceptional circumstances a child safety seat on the front passenger seat where the child is seated with its back facing in direction of travel (in some countries also when the child is facing the direction of travel) ⇒ page 136.
•In certain countries national legal provisions require that besides the front passenger airbag also the side or head passenger airbags are deacti- vated. Please comply with any differin g national legal regulations regarding the use of child safety seats.
•If this is not done, a child seated on the front passenger seat may suffer severe or even fatal injuries if the front passenger airbag or airbags are deployed.
•You should have the front passenger ai rbag (or airbags) reactivated just as soon as you no longer use a child sa fety seat on the front passenger seat.
Child safety seats in Group 1
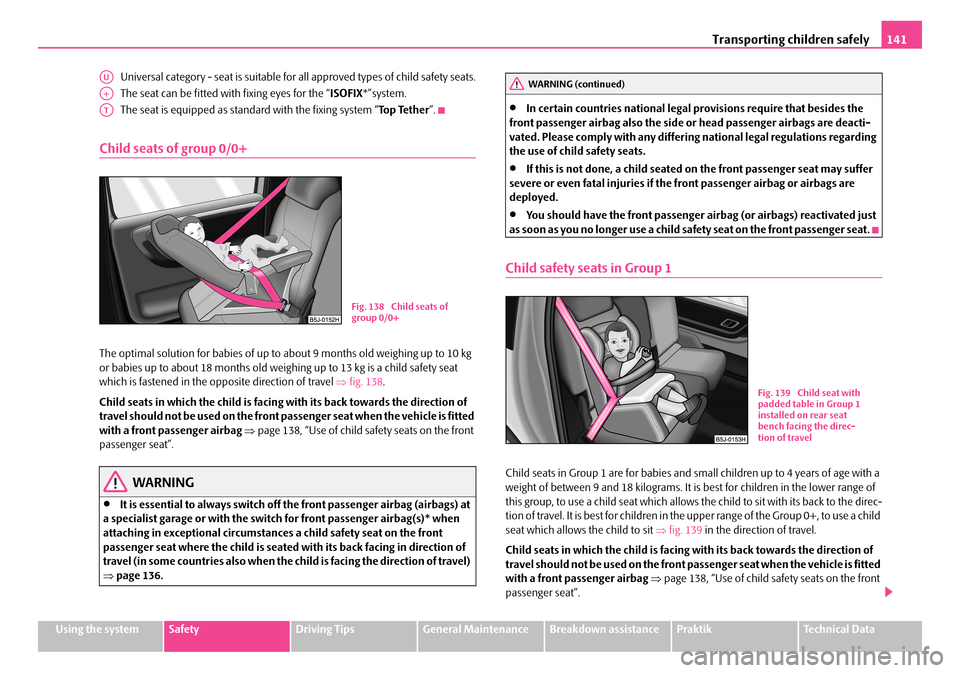
Child seats in Group 1 are for babies and small children up to 4 years of age with a weight of between 9 and 18 kilograms. It is best for children in the lower range of this group, to use a child seat which allows the child to sit with its back to the direc- tion of travel. It is best for children in the upper range of the Group 0+, to use a child seat which allows the child to sit ⇒fig. 139 in the direction of travel.
Child seats in which the child is facing with its back towards the direction of travel should not be used on the front pa ssenger seat when the vehicle is fitted with a front passenger airbag ⇒page 138, “Use of child safety seats on the front passenger seat”.
AU
A+
AT
Fig. 138 Child seats of group 0/0+
WARNING (continued)
Fig. 139 Child seat with padded table in Group 1 installed on rear seat bench facing the direc-tion of travel
NKO A05R 20 MR08.book Page 141 Wednesday, March 28, 2007 9:42 AM
Page 149 of 248
Intelligent Technology148
Brakes
What has a negative effect on braking efficiency?
Wear-and-tear
Wear-and-tear to the brake pads is greatly dependent on the operating conditions of the vehicle and your style of driving. Particularly if you drive a great deal in towns and over short distances or if you adopt a sporty style of driving, it may be neces- sary to have the thickness of the brake pads inspected at a specialist garage between the service inspections.
Wet roads or road salt
There may be a certain delay before the brakes take full effect under certain condi- tions such as when driving through water, during heavy rain showers or after the vehicle has been washed in an automatic vehicle wash, since the brake discs and brake pads may be moist or even have a coating of ice on them in winter. You should dry the brakes as soon as possib le (by applying and releasing the brakes several times, if the road conditions and the traffic situation allows it).
There also may be a certain delay before the full braking efficiency is available when driving on roads which have been treated wi th road salt if you have not used the brakes for some considerable time beforeha nd. The layer of salt on the brake discs and brake pads must first be rubb ed off when you apply the brakes.
Corrosion
Corrosion on the brake discs and dirt on th e bake pads occur if the vehicle has been parked for a long period and if you do not make much use of the braking system.
We recommend cleaning the brake discs by firmly applying the brakes at a fairly high speed if you do not make much use of the braking system or if surface corro- sion is present ⇒.
Faults in the brake surface
If you notice that the braking distance has suddenly become longer and that the brake pedal can be depressed further, it is possible that a brake circuit of the dual- circuit brake system has failed. Drive, in such cases, to the nearest specialist garage without delay in order to have the problem rectified. Drive at a reduced speed while on your way to the dealer and adapt your style of driving to the higher brake pedal pressure required.
Low brake fluid level
An insufficient level of brake fluid may result in problems in the brake system. The level of the brake fluid is monitored electronically ⇒page 28, “Brake system ”.
WARNING
•Only apply the brakes for the purpose of drying and cleaning the brake discs if the traffic conditions permit this. Do not place any other road users in jeopardy.
•When retrospectively mounting a front spoiler, solid wheel hubs etc. one must ensure that the air supply to the front wheel brakes is not reduced otherwise the braking sy stem could run too hot.
•Allow for the fact that new brake pads do not achieve their full braking efficiency until approximately 200 kilo metres. New brake pads must be first “run in” before they develop their optimal friction force. You can, however, compensate for this slightly reduced braking force by increasing the pres- sure on the brake pedal. This guidelin e also applies to any new brake pads installed at a future date.
Caution
•Never allow the brakes to ru b by applying slight pressure if you do not wish to brake the vehicle. This causes the brakes to overheat and can also result in a longer braking distance and excessive wear.
•Before negotiating a steep downhill section, please reduce your speed and shift down into the next lower gear (manual ge arbox) or select a lower driving stage (automatic gearbox). This enables you to make full use of the braking power of the vehicle and reduces the strain on the brakes . Any additional braking should be done intermittently, not continuously.
Brake booster
The brake booster boosts the pressure which you generate with the brake pedal. The necessary pressure is only gene rated when the engine is running.
NKO A05R 20 MR08.book Page 148 Wednesday, March 28, 2007 9:42 AM
Page 151 of 248
Intelligent Technology150
pedal firmly and hold it in this position in order to achieve the shortest possible braking distance.
The Brake Assist is able to help you achieve a shorter braking distance in emergency situations by rapidly producing the pressure required in the brake system. It fully exploits the attributes of the ABS. After you release the brake pedal, the function of the Brake Assist is automatically switched off and the brakes operate in the normal way.
The Brake Assist is part of the ESP system. If a fault occurs in the ESP, the Brake Assist function is also not available. Further information on the ESP ⇒page 145.
WARNING
•The Brake Assist is also not able to overcome the physical limits of your car in terms of the braking distance required.
•Adapt your speed to the conditions of the road surface and to the traffic situation.
•The increased safety offered by the Brake Assist must not tempt you to take a greater safety risk than otherwise.
Electrohydraulic power steering
The power steering enables you to steer the vehicle with less physical force.
The steering characteristics can be changed by a specialist garage.
You will place great stresses on the power st eering system if the steering is turned to full lock when the vehicle is stationary. Turning the steering to full lock in such a situation will be acco mpanied by noises.
It is still possible to fully steer the vehicle if the power steering fails or if the engine is not running (vehicle being towed in). The only difference is that greater physical effort is required.
It is possible that the hydraulic pump of the power steering will not run due to the low vehicle network voltage if the battery has gone flat and the engine must started with the help off jump leads. This conditio n will be indicated by lighting up of the warning light.
The power steering operates again if the battery is charged to a specific range when engine is running. It also operates again, if the engine can be started with its own battery.
Caution
Do not leave the steering at full lock fo r more than 15 seconds when the engine is running - risk of damagi ng the power steering!
Note
Have the steering inspected as soon as possible by a specialist garage if there is a leak or fault in the system.
Tyre inflation pressure-control system*
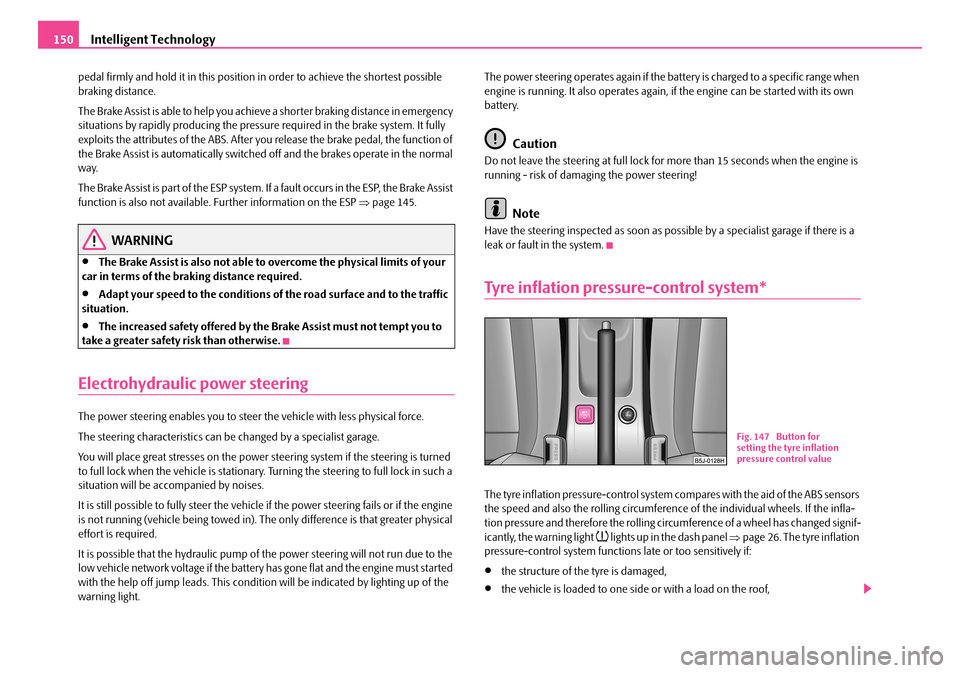
The tyre inflation pressure-control system compares with the aid of the ABS sensors the speed and also the rolling circumference of the individual wheels. If the infla- tion pressure and therefore the rolling circumference of a wheel has changed signif- icantly, the warning light lights up in the dash panel ⇒page 26. The tyre inflation pressure-control system function s late or too sensitively if:
•the structure of the tyre is damaged,
•the vehicle is loaded to one side or with a load on the roof,
Fig. 147 Button for setting the tyre inflation pressure control value
NKO A05R 20 MR08.book Page 150 Wednesday, March 28, 2007 9:42 AM
Page 152 of 248
Intelligent Technology151
Using the systemSafetyDriving TipsGeneral MaintenanceBreakdown assistancePraktikTechnical Data
•the wheels of an axle are loaded heavily (e.g. when towing a trailer or when driving uphill or downhill),
•the vehicle is operated in unfavourable winter conditions or on an unfirm ground,
•snow chains or emergency wheel are mounted,
•the driver has a sporty style of driving (with sharp acceleration and high speed when cornering).
Basic setting of tyre inflation pressure-control system
After changing the tyre inflation pressures or after changing one or several wheels, a basic setting of the system must be carried out as follows.
•Inflate all tyres to the specified inflation pressure ⇒page 187.
•Switch on the ignition.
•Press button ⇒page 150, fig. 147 for more than 2 seconds. While pressing the button, the warning light lights up. At the same time the basic values are stored, which is confirmed with an acoustic sound and then the warning light goes out.
•If the warning light does not go out after the basic setting, there is a fault in the system. Have the vehicle inspected by your nearest specialist garage.
Function description
After the basic setting of the system the “a daptation” of the tyre inflation pressures and then the tyre pressure control in the individual tyres are performed.
Warning light lights up
If the tyre inflation pressure of at least on e wheel is insufficiently inflated in compar- ison to the stored basic value, the warning light ⇒ lights up. Inflate all tyres to the specified inflation pressure ⇒page 187, “Tyre life” and then perform a basic setting of the system.
WARNING
•When the warning light lights up, immediately reduce the speed and avoid sudden steering and brake mano euvres. Please stop the vehicle
without delay at the nearest possible stop and inspect the tyres and their inflation pressures.
•The driver is responsible for the correc t tyre inflation pressures. For this reason, the tyre inflation pressures must be checked regularly.
•Under certain circumstances (e.g. sporty style of driving, wintry or unpaved roads) the warning light can be delayed or does not light up at all.
•The tyre inflation pressure-control system does not take away the responsability from the driver for the correct tyre inflation pressure.
Note
The tyre inflation pressure-control system:
•does not replace the regular tyre inflatio n pressure control, because the system cannot detect an even pressure loss,
•cannot warn in case of very rapid tyre inflation pressure loss, e.g. in case of sudden tyre damage. In this case carefully bring the vehicle to a standstill without sudden steering movements and without sharp braking.
WARNING (continued)
NKO A05R 20 MR08.book Page 151 Wednesday, March 28, 2007 9:42 AM
Page 154 of 248
Driving and the Environment153
Using the systemSafetyDriving TipsGeneral MaintenanceBreakdown assistancePraktikTechnical Data
Driving and the Environment
The first 1 500 kilometres and then afterwards
A new engine
The engine has to be run in during the first 1 500 kilometres.
Up to 1 000 kilometres
– Do not drive faster than 3/4 of the mamimum speed of the gear in use,
that is 3/4 of the maximum permissible engine speed.
– Do not use full throttle.
– Avoid high engine revolutions.
– Do not tow a trailer.
From 1 000 up to 1 500 kilometres
– Increase the power output of the engine gradually up to the full
speed of the gear engaged, that is up to the maximum permissible
engine revolutions.
During the first operating hours the engine has higher internal friction than later until all of the moving parts have harmonized. The driving style which you adopt during the first approx.1 500 kilometres plays a decisive part in the success of running in your car.
You should not drive at unnecessarily high engine revolutions even after the running-in period is complete. The maximum permissible engine speed is marked by the beginning of the red zone on the scale of the revolutions counter. Shift up into the next higher gear on a vehicle fitted with manual gearbox before the red zone is reached. Extremely high engine revolutions are automatically governed, by the way.
For a vehicle fitted with a manual gearbox the converse situation also applies: Do not drive at engine revolutions which are too low. Shift down as soon as the engine is no longer running smoothly.
Caution
All the speed and engine revolution figure s apply only when the engine is at its normal operating temperature. Never rev up an engine which is cold, neither when the vehicle is stationary nor when driving in individual gears.
For the sake of the environment
Not driving at unnecessarily high engine revolutions and shifting to a higher gear as early as possible are ways to minimise fu el consumption and operating noise levels and protects the environment.
New tyres
New tyres have to be “run in” since they do not offer optimal grip at first. You should take account of this fact for the first 500 kilometres and drive particularly carefully.
New brake pads
Allow for the fact that new brake pads do not achieve their full braking efficiency until approximately 200 kilometres. New brake pads must be first “run in” before they develop their optimal friction force. You can, however, compensate for this slightly reduced braking force by increa sing the pressure on the brake pedal.
This guideline also applies to any new brake pads installed at a future date.
During the running-in period , you should avoid excessive stresses on the brakes. This includes, for example, violent braking, particularly from very high speeds, and also when crossing mountain passes.
NKO A05R 20 MR08.book Page 153 Wednesday, March 28, 2007 9:42 AM
Page 155 of 248
Driving and the Environment154
Catalytic converter
Proper operation of the emission control system (catalytic converter)
is of major significance for drivin g your vehicle in an environmen-
tally conscious way.
Please refer to the following guidelines:
– For vehicles with petrol engine only refuel with unleaded petrol
⇒ page 170, “Grades of petrol”.
– Never run the fuel tank completely empty.
– Do not switch off the ignition while you are driving the vehicle.
– Do not pour too much oil into the engine ⇒page 178, “Replenishing
engine oil”.
– Do not tow-start the vehicle over a distance of more than 50 metres
⇒ page 205, “Tow-starting a vehicle”.
If you drive your vehicle in a country in which unleaded petrol is not available, you must have the catalytic converter replaced later when driving the vehicle into a country in which use of a cata lytic converter is mandatory.
WARNING
•In view of the high temperatures which may be produced in the catalytic converter, one should always park a vehicle in such a way that the catalytic converter cannot come into contact with easily flammable materials below the vehicle - a risk of fire!
•Never use additional underbody protection or corrosion-protection agents for the exhaust pipes, catalyti c converters or heat shields. Such substances might ignite when driving - risk of fire!
Caution
•Vehicles fitted with catalytic converter should never be allowed to let the fuel tank to run completely empty. An irregular fuel supply can result in poor ignition or
misfiring. Unburnt fuel may get into the exhaust system and damage the catalytic converter.
•Filling the tank even only once with le aded petrol will result in the catalytic converter being destroyed.
•If you detect misfiring, a drop in perf ormance or irregular engine running when driving, reduce your speed immediately and have the vehicle inspected by the nearest specialist garage. The symptoms described may be caused by a fault in the ignition system. Unburnt fuel may get in to the exhaust system and damage the catalytic converter.
For the sake of the environment
Even if the exhaust system is operating properly, a sulphur-like exhaust odour may be produced under certain operating condit ions of the engine. This depends on the sulphur content of the fuel. It is often su fficient to refuel with unleaded premium- grade petrol of a different brand or at a different filling station.
Driving in an economical and environmentally
conscious manner
General
Your personal style of driving is a major factor.
Your fuel consumption, any pollution of the environmental and the wear-and-tear to the engine, brakes and tyres, depend essentially on three factors:
•your personal style of driving,
•the conditions under which your vehicle is operated,
•technical aspects.
You can easily improve your fuel economy by 10 - 15 percent by driving in an economical way with foresight. This section is intended to provide you with a number of tips on how to protect the en vironment and at the same time save money.
NKO A05R 20 MR08.book Page 154 Wednesday, March 28, 2007 9:42 AM
Page 156 of 248
Driving and the Environment155
Using the systemSafetyDriving TipsGeneral MaintenanceBreakdown assistancePraktikTechnical Data
The fuel consumption can naturally also be influenced by factors which are beyond the driver's control. It is, for example, normal for the fuel consumption to increase in winter and under worsened conditions such as poor road conditions, towing a trailer, etc.
The technical requirements for low fuel usage and economic efficiency of the vehicle have already been built into the ve hicle at the works. Special attention has been given to minimising ne gative effects on the environment. It is necessary to take note of the guidelines given in this chapter in order to make best use of these characteristics and to maintain their effectiveness.
Looking ahead when driving
A vehicle's highest fuel consumption occurs it accelerates.
Avoid accelerating and brakin g unnecessarily. If you drive with forsight you will not need to brake so often and will also then not have to accelerate so much. Let your vehicle coast to a stop, for example, if this is possible, when you see that the next set of traffic lights is at red.
Shifting gears and saving energy
Shifting up early saves on fuel.
Manual gearbox
– Drive no more than about one length of your vehicle in first gear.
Always shift up into the next higher gear at approx. 2 000 to 2 500 revs.
Automatic gearbox
– Depress the accelerator pedal slowly. Do not depress it beyond the
kickdown position, however.
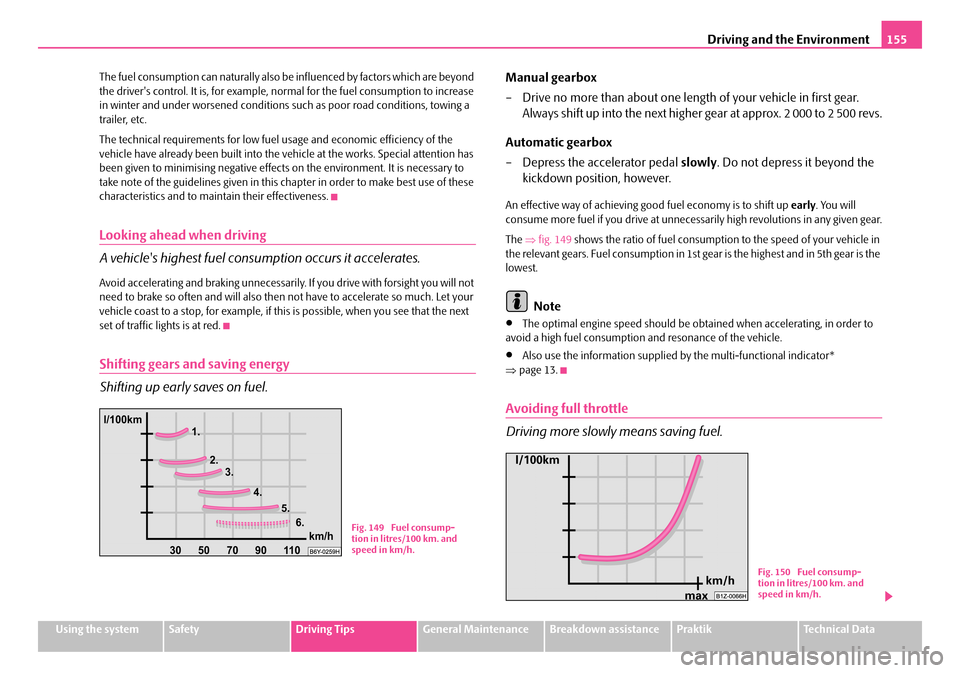
An effective way of achieving good fuel economy is to shift up early. You will consume more fuel if you drive at unnecessa rily high revolutions in any given gear.
The ⇒fig. 149 shows the ratio of fuel consumption to the speed of your vehicle in the relevant gears. Fuel consumption in 1st gear is the highest and in 5th gear is the lowest.
Note
•The optimal engine speed should be obtained when accelerating, in order to avoid a high fuel consumption and resonance of the vehicle.
•Also use the information supplied by the multi-functional indicator* ⇒ page 13.
Avoiding full throttle
Driving more slowly means saving fuel.
Fig. 149 Fuel consump- tion in litres/100 km. and speed in km/h.
Fig. 150 Fuel consump-tion in litres/100 km. and speed in km/h.
NKO A05R 20 MR08.book Page 155 Wednesday, March 28, 2007 9:42 AM