lock SKODA ROOMSTER 2008 1.G Owner's Manual
[x] Cancel search | Manufacturer: SKODA, Model Year: 2008, Model line: ROOMSTER, Model: SKODA ROOMSTER 2008 1.GPages: 248, PDF Size: 46.44 MB
Page 4 of 248
Contents3
Contents
Layout of this Owner's Manual
(explanations). . . . . . . . . . . . . . . . . . . . . . . . . .
Using the system. . . . . . . . . . . . . . . . . . . . . .
Cockpit. . . . . . . . . . . . . . . . . . . . . . . . . . . . . . . . . . . . . . . . General view . . . . . . . . . . . . . . . . . . . . . . . . . . . . . . . . .
Instruments and Indicator/Warning Lights. . . General view of the instrument cluster . . . . . . . . . Engine revolutions counter . . . . . . . . . . . . . . . . . . . . Coolant temperature gauge* . . . . . . . . . . . . . . . . . . Fuel gauge* . . . . . . . . . . . . . . . . . . . . . . . . . . . . . . . . . . Counter for distance driven . . . . . . . . . . . . . . . . . . . Service Interval Display . . . . . . . . . . . . . . . . . . . . . . . Digital clock . . . . . . . . . . . . . . . . . . . . . . . . . . . . . . . . . . Multi-functional indicato r (onboard computer)* Information display* . . . . . . . . . . . . . . . . . . . . . . . . . . Auto Check Control . . . . . . . . . . . . . . . . . . . . . . . . . . . Warning lights . . . . . . . . . . . . . . . . . . . . . . . . . . . . . . . .
Unlocking and locking . . . . . . . . . . . . . . . . . . . . . . . . Key . . . . . . . . . . . . . . . . . . . . . . . . . . . . . . . . . . . . . . . . . . Locking . . . . . . . . . . . . . . . . . . . . . . . . . . . . . . . . . . . . . . Child safety lock . . . . . . . . . . . . . . . . . . . . . . . . . . . . . . Central locking system* . . . . . . . . . . . . . . . . . . . . . . . Remote control* . . . . . . . . . . . . . . . . . . . . . . . . . . . . . . Anti-theft alarm system* . . . . . . . . . . . . . . . . . . . . . . Interior monitor* and Towing protection* . . . Power windows* . . . . . . . . . . . . . . . . . . . . . . . . . . . . . Panorama roof* . . . . . . . . . . . . . . . . . . . . . . . . . . . . . .
Lights and Visibility . . . . . . . . . . . . . . . . . . . . . . . . . . . Lights . . . . . . . . . . . . . . . . . . . . . . . . . . . . . . . . . . . . . . . . Interior lighting . . . . . . . . . . . . . . . . . . . . . . . . . . . . . . .
Visibility . . . . . . . . . . . . . . . . . . . . . . . . . . . . . . . . . . . . . Windshield wiper and wash system . . . . . . . . . . . . Rear mirror . . . . . . . . . . . . . . . . . . . . . . . . . . . . . . . . . .
Seats and Stowage. . . . . . . . . . . . . . . . . . . . . . . . . . . . Front seats . . . . . . . . . . . . . . . . . . . . . . . . . . . . . . . . . . . Head restraints . . . . . . . . . . . . . . . . . . . . . . . . . . . . . . . Heating the front seats* . . . . . . . . . . . . . . . . . . . . . . . Rear seats . . . . . . . . . . . . . . . . . . . . . . . . . . . . . . . . . . . . Pedals . . . . . . . . . . . . . . . . . . . . . . . . . . . . . . . . . . . . . . . luggage compartment . . . . . . . . . . . . . . . . . . . . . . . . Bicycle carrier* . . . . . . . . . . . . . . . . . . . . . . . . . . . . . . . The roof luggage rack system* . . . . . . . . . . . . . . . . . Front cup holder . . . . . . . . . . . . . . . . . . . . . . . . . . . . . Rear cup holder* . . . . . . . . . . . . . . . . . . . . . . . . . . . . . Note holder . . . . . . . . . . . . . . . . . . . . . . . . . . . . . . . . . . Ashtray* . . . . . . . . . . . . . . . . . . . . . . . . . . . . . . . . . . . . . Cigarette lighter* and power sockets* . . . . . . . . . . Storage compartments . . . . . . . . . . . . . . . . . . . . . . . .
Heating and air conditioning system. . . . . . . . . Heating . . . . . . . . . . . . . . . . . . . . . . . . . . . . . . . . . . . . . . Climatic (semi-automatic air conditioning system)* . . . . . . . . . . . . . . . . . . . . . . . . . . . . . . . . . . . . . Climatronic (automatic air conditioning)* . . . . . .
Starting-off and Driving. . . . . . . . . . . . . . . . . . . . . . . Setting steering wheel position* . . . . . . . . . . . . . . . Ignition lock . . . . . . . . . . . . . . . . . . . . . . . . . . . . . . . . . . Starting the engine . . . . . . . . . . . . . . . . . . . . . . . . . . . Switching off the engine . . . . . . . . . . . . . . . . . . . . . . . Shifting (manual gearbox) . . . . . . . . . . . . . . . . . . . . . Handbrake . . . . . . . . . . . . . . . . . . . . . . . . . . . . . . . . . . . Parking aid* . . . . . . . . . . . . . . . . . . . . . . . . . . . . . . . . . . Cruise control system (CCS)* . . . . . . . . . . . . . . . . . .
Automatic gearbox . . . . . . . . . . . . . . . . . . . . . . . . . . . 6-speed automatic gearbox* . . . . . . . . . . . . . . . . . .
Communication . . . . . . . . . . . . . . . . . . . . . . . . . . . . . . Operating the radio . . . . . . . . . . . . . . . . . . . . . . . . . . . Radio and mobile phone operation . . . . . . . . . . . . Universal telephone preinstallation with voice control* . . . . . . . . . . . . . . . . . . . . . . . . . . . . . . . . . . . . . Inserting the mobile phone and adapter . . . . . . . Mobile phone operation . . . . . . . . . . . . . . . . . . . . . . Voice commands . . . . . . . . . . . . . . . . . . . . . . . . . . . . . Enter PIN code . . . . . . . . . . . . . . . . . . . . . . . . . . . . . . . Select number . . . . . . . . . . . . . . . . . . . . . . . . . . . . . . . Repeat last call . . . . . . . . . . . . . . . . . . . . . . . . . . . . . . . Phone voice phonebook* . . . . . . . . . . . . . . . . . . . . . Bluetooth™* . . . . . . . . . . . . . . . . . . . . . . . . . . . . . . . . . Mobile phones and two-way radio systems . . . . . Input AUX-IN* . . . . . . . . . . . . . . . . . . . . . . . . . . . . . . . CD changer* . . . . . . . . . . . . . . . . . . . . . . . . . . . . . . . . .
Safety . . . . . . . . . . . . . . . . . . . . . . . . . . . . . . . . . . . . . .
Passive Safety . . . . . . . . . . . . . . . . . . . . . . . . . . . . . . . . . Basic information . . . . . . . . . . . . . . . . . . . . . . . . . . . . Correct seated position . . . . . . . . . . . . . . . . . . . . . . .
Seat belts. . . . . . . . . . . . . . . . . . . . . . . . . . . . . . . . . . . . . . Why seat belts? . . . . . . . . . . . . . . . . . . . . . . . . . . . . . . The physical principle of a frontal collision . . . . . Important safety information regarding the use of seat belts . . . . . . . . . . . . . . . . . . . . . . . . . . . . . . . . . . . . How are seat belts correctly fastened? . . . . . . . . . Belt tensioner . . . . . . . . . . . . . . . . . . . . . . . . . . . . . . . .
6
7
8 8
9 9 9101011111313161820
30 30 3232333739404043
44 44 48
49 5053
54 54 55565762626668696970707172
78 78
80 84
89 89 90909292939394
97 97
102 102 103
104 105105106107108108109111112113113
117
117 117 119
122 122 123
123 124126
NKO A05R 20 MR08.book Page 3 Wednesday, March 28, 2007 9:42 AM
Page 5 of 248
Contents4
Airbag system . . . . . . . . . . . . . . . . . . . . . . . . . . . . . . . . . Description of the airbag system . . . . . . . . . . . . . . . Front airbags . . . . . . . . . . . . . . . . . . . . . . . . . . . . . . . . . Side airbags* . . . . . . . . . . . . . . . . . . . . . . . . . . . . . . . . . Head airbags* . . . . . . . . . . . . . . . . . . . . . . . . . . . . . . . . Deactivating an airbag . . . . . . . . . . . . . . . . . . . . . . . .
Transporting children safely . . . . . . . . . . . . . . . . . . What you should know about transporting children! Child seat . . . . . . . . . . . . . . . . . . . . . . . . . . . . . . . . . . . . Attaching a child seat using the “ISOFIX” system*Attaching child seat using the “Top Tether” system
Driving Tips. . . . . . . . . . . . . . . . . . . . . . . . . . . . . .
Intelligent Technology . . . . . . . . . . . . . . . . . . . . . . . . Electronic stability programme (ESP)* . . . . . . . . . . Brakes . . . . . . . . . . . . . . . . . . . . . . . . . . . . . . . . . . . . . . . Brake booster . . . . . . . . . . . . . . . . . . . . . . . . . . . . . . . . Antilock brake system (ABS)* . . . . . . . . . . . . . . . . . . Brake Assist* . . . . . . . . . . . . . . . . . . . . . . . . . . . . . . . . . Electrohydraulic power steering . . . . . . . . . . . . . . . Tyre inflation pressure-control system* . . . . . . . . . Diesel particle filter* (diesel engine) . . . . . . . . . . . .
Driving and the Environment. . . . . . . . . . . . . . . . . The first 1 500 kilometres and then afterwards . . Catalytic converter . . . . . . . . . . . . . . . . . . . . . . . . . . . . Driving in an economical and environmentally conscious manner . . . . . . . . . . . . . . . . . . . . . . . . . . . . Environmental compatibility . . . . . . . . . . . . . . . . . . . Motoring abroad . . . . . . . . . . . . . . . . . . . . . . . . . . . . . Avoiding damage to your vehicle . . . . . . . . . . . . . .
To w i n g a t r a i l e r. . . . . . . . . . . . . . . . . . . . . . . . . . . . . . . . Towing a trailer . . . . . . . . . . . . . . . . . . . . . . . . . . . . . . .
General Maintenance. . . . . . . . . . . . . . .
Taking care of your vehicle and cleaning the vehicle. . . . . . . . . . . . . . . . . . . . . . . . . . . . . . . . . . . . . . . . . General . . . . . . . . . . . . . . . . . . . . . . . . . . . . . . . . . . . . . . Care of the exterior of vehicle . . . . . . . . . . . . . . . . . .Care of the interior of vehicle . . . . . . . . . . . . . . . . . .
Fuel. . . . . . . . . . . . . . . . . . . . . . . . . . . . . . . . . . . . . . . . . . . . Petrol . . . . . . . . . . . . . . . . . . . . . . . . . . . . . . . . . . . . . . . . Diesel . . . . . . . . . . . . . . . . . . . . . . . . . . . . . . . . . . . . . . . .Refuelling . . . . . . . . . . . . . . . . . . . . . . . . . . . . . . . . . . . .
Inspecting and Replenishing. . . . . . . . . . . . . . . . . . Engine compartment . . . . . . . . . . . . . . . . . . . . . . . . . Engine oil . . . . . . . . . . . . . . . . . . . . . . . . . . . . . . . . . . . .Cooling system . . . . . . . . . . . . . . . . . . . . . . . . . . . . . . .Brake fluid . . . . . . . . . . . . . . . . . . . . . . . . . . . . . . . . . . .Battery . . . . . . . . . . . . . . . . . . . . . . . . . . . . . . . . . . . . . . .Windshield washer system . . . . . . . . . . . . . . . . . . . .
Wheels and Tyres. . . . . . . . . . . . . . . . . . . . . . . . . . . . . . Wheels . . . . . . . . . . . . . . . . . . . . . . . . . . . . . . . . . . . . . .
Accessories, changes and replacement of partsAccessories and replacement parts . . . . . . . . . . . . . Technical changes . . . . . . . . . . . . . . . . . . . . . . . . . . . .
Breakdown assistance. . . . . . . . . . . . . .
Breakdown assistance . . . . . . . . . . . . . . . . . . . . . . . . First-aid box* and Warning triangle* . . . . . . . . . . . Fire extinguisher* . . . . . . . . . . . . . . . . . . . . . . . . . . . . .Vehicle tool kit . . . . . . . . . . . . . . . . . . . . . . . . . . . . . . . .Tyre repair kit* . . . . . . . . . . . . . . . . . . . . . . . . . . . . . . . .Spare wheel* . . . . . . . . . . . . . . . . . . . . . . . . . . . . . . . . .Changing a wheel . . . . . . . . . . . . . . . . . . . . . . . . . . . . .Jump-starting . . . . . . . . . . . . . . . . . . . . . . . . . . . . . . . .Tow-starting and towing vehicle . . . . . . . . . . . . . . .
Fuses and light bulbs. . . . . . . . . . . . . . . . . . . . . . . . . . Electric fuses . . . . . . . . . . . . . . . . . . . . . . . . . . . . . . . . . Bulbs . . . . . . . . . . . . . . . . . . . . . . . . . . . . . . . . . . . . . . . .
Praktik. . . . . . . . . . . . . . . . . . . . . . . . . . . . . . . . . . . . . .
Praktik . . . . . . . . . . . . . . . . . . . . . . . . . . . . . . . . . . . . . . . . . Lashing eyes . . . . . . . . . . . . . . . . . . . . . . . . . . . . . . . . . . Adjustable safety partition behind the front seatsFixing of the loading floor . . . . . . . . . . . . . . . . . . . . . .Adjustment of the safety partition . . . . . . . . . . . . . .Emergency unlocking of the loading area door . .
Technical Data . . . . . . . . . . . . . . . . . . . . . . . . . .
Technical Data. . . . . . . . . . . . . . . . . . . . . . . . . . . . . . . . . General comments . . . . . . . . . . . . . . . . . . . . . . . . . . . . Used abbreviations . . . . . . . . . . . . . . . . . . . . . . . . . . .Performances . . . . . . . . . . . . . . . . . . . . . . . . . . . . . . . . .Weight . . . . . . . . . . . . . . . . . . . . . . . . . . . . . . . . . . . . . . .Identification details . . . . . . . . . . . . . . . . . . . . . . . . . .Fuel consumption according to the regulations (99/100/EU) . . . . . . . . . . . . . . . . . . . . . . . . . . . . . . . . . . Dimensions . . . . . . . . . . . . . . . . . . . . . . . . . . . . . . . . . .1.2 l/51 kW - EU 4/EU 2DDK . . . . . . . . . . . . . . . . . . .1.4 l/63 kW - EU 4/EU 2DDK . . . . . . . . . . . . . . . . . . .1.6 l/77 kW - EU 4/EU 2DDK . . . . . . . . . . . . . . . . . . .1.4 l/51 kW TDI PD - EU 4 . . . . . . . . . . . . . . . . . . . . . .1.4 l/59 kW TDI PD - EU 4 . . . . . . . . . . . . . . . . . . . . . .1.9 l/77 kW TDI PD - EU 4 . . . . . . . . . . . . . . . . . . . . . .
Index . . . . . . . . . . . . . . . . . . . . . . . . . . . . . . . . . . . . . . . .
128 128 130132133135
137 137 140143144
145
145 145 148148149149150150152
153 153 154
154 157158159
160 160
163
163 163 163168
170 170 170171
173 173 176178181182186
187 187
193 193 193
195
195 195 195196196196197202203
207 207 211
219
219 219 219220220221
223
223 223 223223223223
224 225226228230232234236
239
NKO A05R 20 MR08.book Page 4 Wednesday, March 28, 2007 9:42 AM
Page 9 of 248
Cockpit8
Cockpit
General view
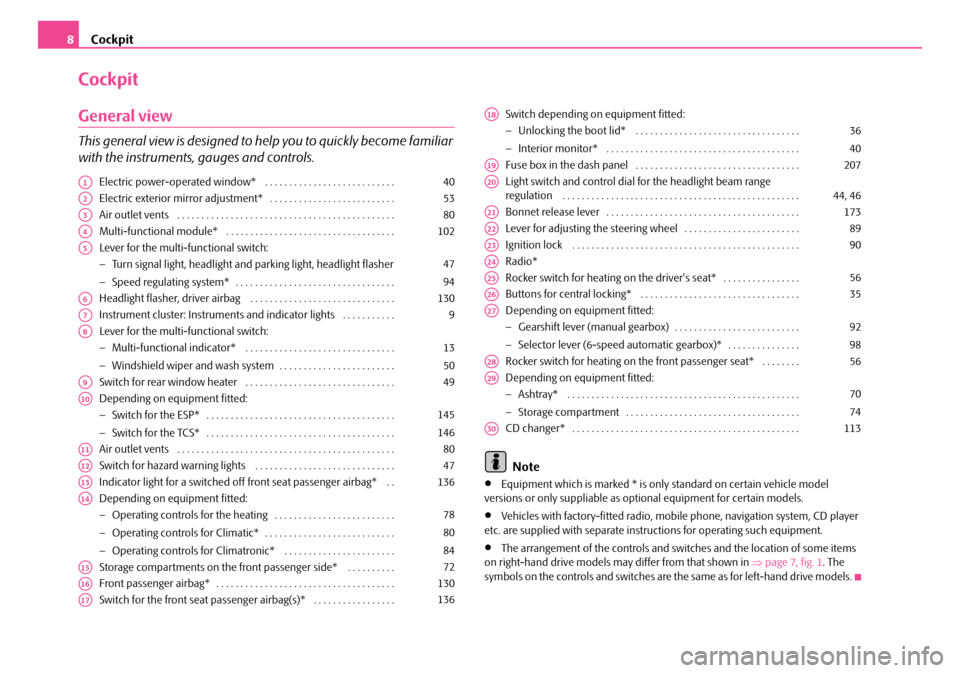
This general view is designed to help you to quickly become familiar
with the instruments, gauges and controls.
Electric power-operated window* . . . . . . . . . . . . . . . . . . . . . . . . . . .
Electric exterior mirror adjustment* . . . . . . . . . . . . . . . . . . . . . . . . . .
Air outlet vents . . . . . . . . . . . . . . . . . . . . . . . . . . . . . . . . . . . . . . . . . . . . .
Multi-functional module* . . . . . . . . . . . . . . . . . . . . . . . . . . . . . . . . . . .
Lever for the multi-functional switch:
− Turn signal light, headlight and parking light, headlight flasher
− Speed regulating system* . . . . . . . . . . . . . . . . . . . . . . . . . . . . . . . . .
Headlight flasher, driver airbag . . . . . . . . . . . . . . . . . . . . . . . . . . . . . .
Instrument cluster: Instruments and in dicator lights . . . . . . . . . . .
Lever for the multi-functional switch:
− Multi-functional indicator* . . . . . . . . . . . . . . . . . . . . . . . . . . . . . . .
− Windshield wiper and wash system . . . . . . . . . . . . . . . . . . . . . . . .
Switch for rear window heater . . . . . . . . . . . . . . . . . . . . . . . . . . . . . . .
Depending on equipment fitted:
− Switch for the ESP* . . . . . . . . . . . . . . . . . . . . . . . . . . . . . . . . . . . . . . .
− Switch for the TCS* . . . . . . . . . . . . . . . . . . . . . . . . . . . . . . . . . . . . . . .
Air outlet vents . . . . . . . . . . . . . . . . . . . . . . . . . . . . . . . . . . . . . . . . . . . . .
Switch for hazard warning lights . . . . . . . . . . . . . . . . . . . . . . . . . . . . .
Indicator light for a switched off front seat passenger airbag* . .
Depending on equipment fitted:
− Operating controls for the heating . . . . . . . . . . . . . . . . . . . . . . . . .
− Operating controls for Climatic* . . . . . . . . . . . . . . . . . . . . . . . . . . .
− Operating controls for Climatronic* . . . . . . . . . . . . . . . . . . . . . . .
Storage compartments on the front passenger side* . . . . . . . . . .
Front passenger airbag* . . . . . . . . . . . . . . . . . . . . . . . . . . . . . . . . . . . . .
Switch for the front seat passenger airbag(s)* . . . . . . . . . . . . . . . . .
Switch depending on equipment fitted:
− Unlocking the boot lid* . . . . . . . . . . . . . . . . . . . . . . . . . . . . . . . . . .
− Interior monitor* . . . . . . . . . . . . . . . . . . . . . . . . . . . . . . . . . . . . . . . .
Fuse box in the dash panel . . . . . . . . . . . . . . . . . . . . . . . . . . . . . . . . . .
Light switch and control dial for the headlight beam range regulation . . . . . . . . . . . . . . . . . . . . . . . . . . . . . . . . . . . . . . . . . . . . . . . . .
Bonnet release lever . . . . . . . . . . . . . . . . . . . . . . . . . . . . . . . . . . . . . . . .
Lever for adjusting the steering wheel . . . . . . . . . . . . . . . . . . . . . . . .
Ignition lock . . . . . . . . . . . . . . . . . . . . . . . . . . . . . . . . . . . . . . . . . . . . . . .
Radio*
Rocker switch for heating on the driver's seat* . . . . . . . . . . . . . . . .
Buttons for central locking* . . . . . . . . . . . . . . . . . . . . . . . . . . . . . . . . .
Depending on equipment fitted:
− Gearshift lever (manual gearbox) . . . . . . . . . . . . . . . . . . . . . . . . . .
− Selector lever (6-speed automatic gearbox)* . . . . . . . . . . . . . . .
Rocker switch for heating on the front passenger seat* . . . . . . . .
Depending on equipment fitted:
− Ashtray* . . . . . . . . . . . . . . . . . . . . . . . . . . . . . . . . . . . . . . . . . . . . . . . .
− Storage compartment . . . . . . . . . . . . . . . . . . . . . . . . . . . . . . . . . . . .
CD changer* . . . . . . . . . . . . . . . . . . . . . . . . . . . . . . . . . . . . . . . . . . . . . . .
Note
•Equipment which is marked * is only standard on certain vehicle model versions or only suppliable as optional equipment for certain models.
•Vehicles with factory-fitted radio, mobi le phone, navigation system, CD player etc. are supplied with separate inst ructions for operating such equipment.
•The arrangement of the controls and switches and the location of some items on right-hand drive models may differ from that shown in ⇒page 7, fig. 1. The symbols on the controls and switches are the same as for left-hand drive models.
A140
A253
A380
A4102
A5
47
94
A6130
A79
A8
13
50
A949
A10
145
146
A1180
A1247
A13136
A14
78
80
84
A1572
A16130
A17136
A18
36
40
A19207
A2044, 46
A21173
A2289
A2390
A24
A2556
A2635
A27
92
98
A2856
A29
70
74
A30113
NKO A05R 20 MR08.book Page 8 Wednesday, March 28, 2007 9:42 AM
Page 10 of 248
Instruments and Indicator/Warning Lights9
Using the systemSafetyDriving TipsGeneral MaintenanceBreakdown assistancePraktikTechnical Data
Instruments and Indicator/Warning Lights
General view of the instrument cluster
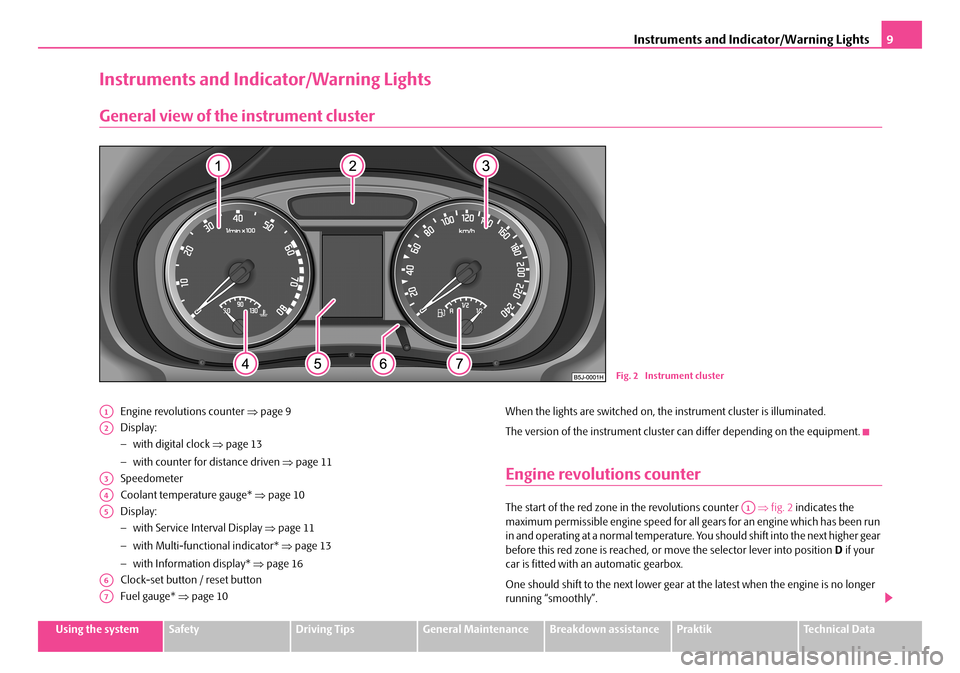
Engine revolutions counter ⇒page 9
Display:
− with digital clock ⇒page 13
− with counter for distance driven ⇒page 11
Speedometer
Coolant temperature gauge* ⇒page 10
Display:
− with Service Interval Display ⇒page 11
− with Multi-functional indicator* ⇒page 13
− with Information display* ⇒page 16
Clock-set button / reset button
Fuel gauge* ⇒page 10
When the lights are switched on, the instrument cluster is illuminated.
The version of the instrument cluster can differ depending on the equipment.
Engine revolutions counter
The start of the red zone in the revolutions counter ⇒fig. 2 indicates the maximum permissible engine speed for all gears for an engine which has been run in and operating at a normal temperature. Yo u should shift into the next higher gear before this red zone is reached, or move the selector lever into position D if your car is fitted with an automatic gearbox.
One should shift to the next lower gear at the latest when the engine is no longer running “smoothly”.
Fig. 2 Instrument cluster
A1
A2
A3
A4
A5
A6
A7
A1
NKO A05R 20 MR08.book Page 9 Wednesday, March 28, 2007 9:42 AM
Page 14 of 248
Instruments and Indicator/Warning Lights13
Using the systemSafetyDriving TipsGeneral MaintenanceBreakdown assistancePraktikTechnical Data
Digital clock
A reset button is installed on the left below beside the speedometer for
adjusting the clock ⇒page 9, fig. 2.
Set hours
– Turn the reset button to the left.
Setting minutes
– Turn the reset button to the right.
WARNING
The clock should not be adjusted while driving for safety reasons but only when the vehicle is stationary.
Multi-functional indicator (onboard computer)*
Introduction
The multi-functional indicator appears in the display ⇒fig. 5 or in the information display ⇒page 16, fig. 8 depending on the equipment fitted to your vehicle.
The multi-functional indicator offers you a range of useful information.
Note
In certain national versions the displays appear in the Imperial system of measures.
Memory
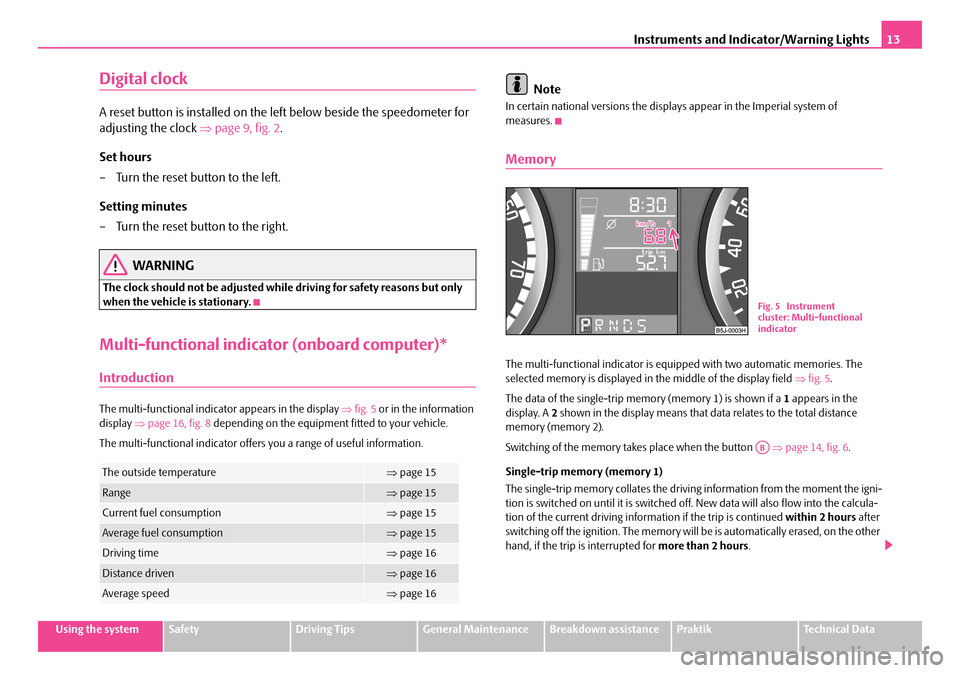
The multi-functional indicator is equi pped with two automatic memories. The selected memory is displayed in the middle of the display field ⇒fig. 5.
The data of the single-trip memo ry (memory 1) is shown if a 1 appears in the display. A 2 shown in the display means that data relates to the total distance memory (memory 2).
Switching of the memory takes place when the button ⇒page 14, fig. 6.
Single-trip memory (memory 1)
The single-trip memory collates the driving information from the moment the igni- tion is switched on until it is switched of f. New data will also flow into the calcula- tion of the current driving information if the trip is continued within 2 hours after switching off the ignition. The memory will be is automatically erased, on the other hand, if the trip is interrupted for more than 2 hours.
The outside temperature⇒page 15
Range⇒page 15
Current fuel consumption⇒page 15
Average fuel consumption⇒page 15
Driving time⇒page 16
Distance driven⇒page 16
Average speed⇒page 16
Fig. 5 Instrument cluster: Multi-functional indicator
AB
NKO A05R 20 MR08.book Page 13 Wednesday, March 28, 2007 9:42 AM
Page 22 of 248
Instruments and Indicator/Warning Lights21
Using the systemSafetyDriving TipsGeneral MaintenanceBreakdown assistancePraktikTechnical Data
WARNING
•If you do not pay attention to the warning lights coming on and the corre- sponding descriptions and warning notes, this may result in severe body injuries or major vehicle damage.
•The engine compartment of your car is a hazardous area. There is a risk of injuries, scalding, accidents and fire when working in the engine
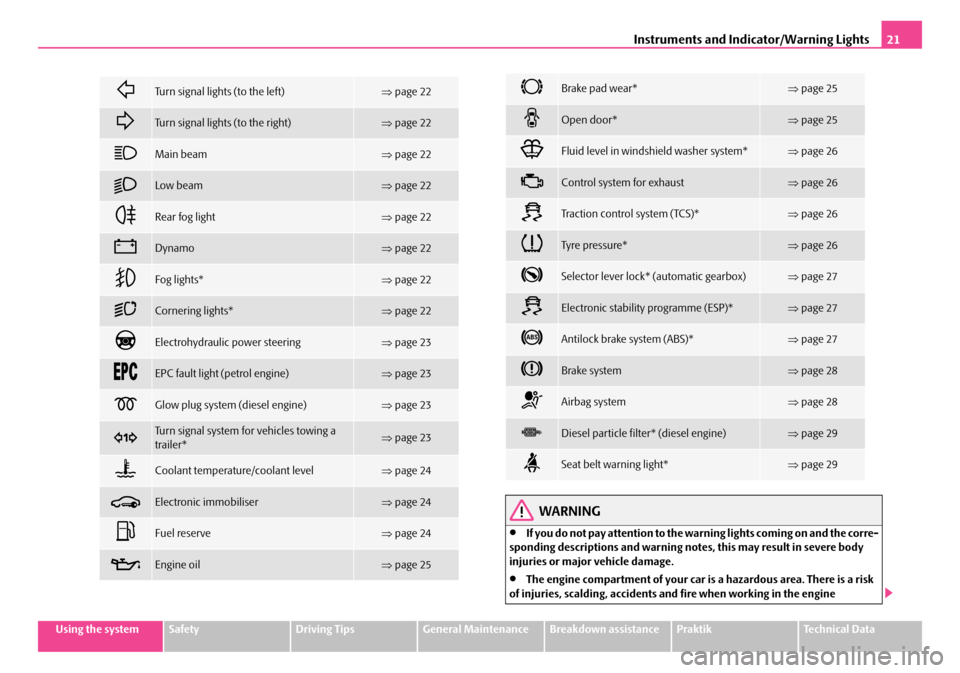
Turn signal lights (to the left)⇒page 22
Turn signal lights (to the right)⇒page 22
Main beam⇒page 22
Low beam⇒page 22
Rear fog light⇒page 22
Dynamo⇒page 22
Fog lights*⇒page 22
Cornering lights*⇒page 22
Electrohydraulic power steering⇒page 23
EPC fault light (petrol engine)⇒page 23
Glow plug system (diesel engine)⇒page 23
Turn signal system for vehicles towing a trailer*⇒ page 23
Coolant temperature/coolant level⇒page 24
Electronic immobiliser⇒page 24
Fuel reserve⇒page 24
Engine oil⇒page 25
Brake pad wear*⇒page 25
Open door*⇒page 25
Fluid level in windshield washer system*⇒page 26
Control system for exhaust⇒page 26
Tra c t i o n c o n t r o l s y s t e m ( TC S ) *⇒page 26
Tyre pressure*⇒page 26
Selector lever lock* (automatic gearbox)⇒page 27
Electronic stability programme (ESP)*⇒page 27
Antilock brake system (ABS)*⇒page 27
Brake system⇒page 28
Airbag system⇒page 28
Diesel particle filter* (diesel engine)⇒page 29
Seat belt warning light*⇒page 29
NKO A05R 20 MR08.book Page 21 Wednesday, March 28, 2007 9:42 AM
Page 28 of 248
Instruments and Indicator/Warning Lights27
Using the systemSafetyDriving TipsGeneral MaintenanceBreakdown assistancePraktikTechnical Data
Note
If the battery has been disconnected, the warning light comes on after switching on the ignition. The warning light must go out after driving a short distance.
Selector lever lock* (automatic gearbox)
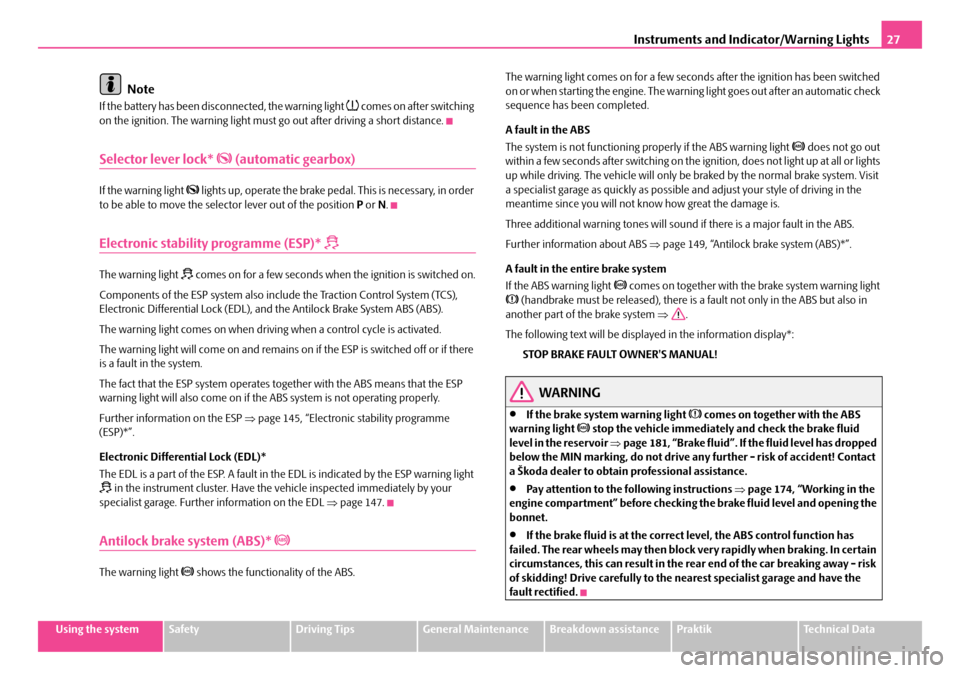
If the warning light lights up, operate the brake pedal. This is necessary, in order to be able to move the selector lever out of the position P or N.
Electronic stability programme (ESP)*
The warning light comes on for a few seconds when the ignition is switched on.
Components of the ESP system also include the Traction Control System (TCS), Electronic Differential Lock (EDL), an d the Antilock Brake System ABS (ABS).
The warning light comes on when drivin g when a control cycle is activated.
The warning light will come on and remains on if the ESP is switched off or if there is a fault in the system.
The fact that the ESP system operates together with the ABS means that the ESP warning light will also come on if the ABS system is not operating properly.
Further information on the ESP ⇒page 145, “Electronic stability programme (ESP)*”.
Electronic Differential Lock (EDL)*
The EDL is a part of the ESP. A fault in th e EDL is indicated by the ESP warning light in the instrument cluster. Have the vehicle inspected immediately by your specialist garage. Further information on the EDL ⇒page 147.
Antilock brake system (ABS)*
The warning light shows the functionality of the ABS.
The warning light comes on for a few second s after the ignition has been switched on or when starting the engine. The warnin g light goes out after an automatic check sequence has been completed.
A fault in the ABS
The system is not functioning properly if the ABS warning light does not go out within a few seconds after switching on the ig nition, does not light up at all or lights up while driving. The vehicle will only be braked by the normal brake system. Visit a specialist garage as quickly as possible and adjust your style of driving in the meantime since you will not know how great the damage is.
Three additional warning tones will sound if there is a major fault in the ABS.
Further information about ABS ⇒page 149, “Antilock brake system (ABS)*”.
A fault in the entire brake system
If the ABS warning light comes on together with the brake system warning light (handbrake must be released), there is a fault not only in the ABS but also in another part of the brake system ⇒.
The following text will be displayed in the information display*:
STOP BRAKE FAULT OWNER'S MANUAL!
WARNING
•If the brake system warning light comes on together with the ABS warning light stop the vehicle immediately and check the brake fluid level in the reservoir ⇒page 181, “Brake fluid”. If the fluid level has dropped below the MIN marking, do not drive any further - risk of accident! Contact a Škoda dealer to obtain professional assistance.
•Pay attention to the following instructions ⇒page 174, “Working in the engine compartment” before checking the brake fluid level and opening the bonnet.
•If the brake fluid is at the correct level, the ABS control function has failed. The rear wheels may then block ve ry rapidly when braking. In certain circumstances, this can result in the rear end of the car breaking away - risk of skidding! Drive carefully to the ne arest specialist garage and have the fault rectified.
NKO A05R 20 MR08.book Page 27 Wednesday, March 28, 2007 9:42 AM
Page 31 of 248
Unlocking and locking30
Unlocking and locking
Key
Description
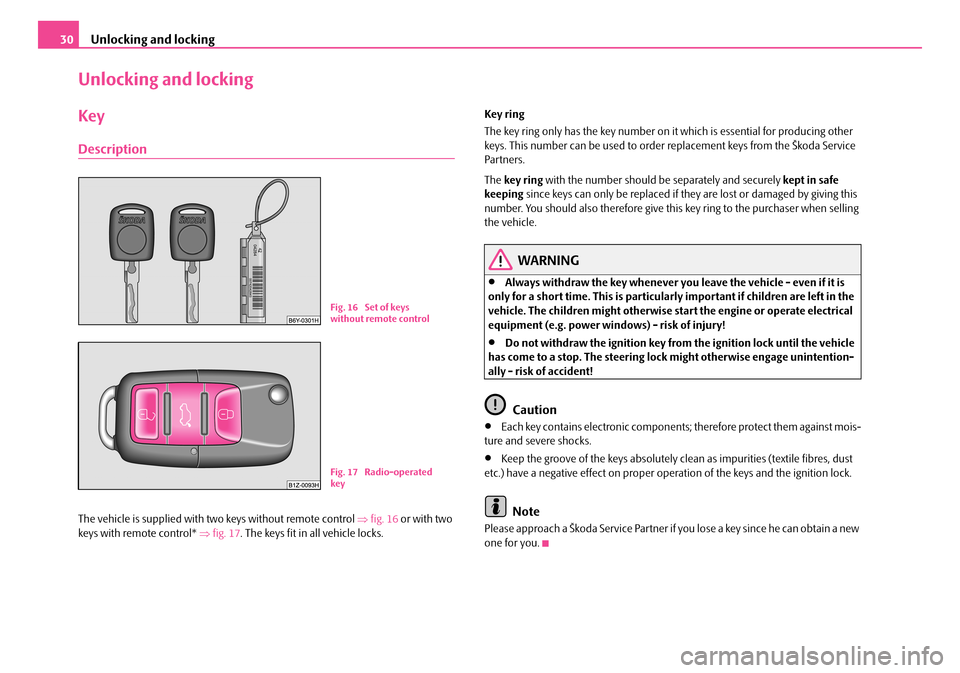
The vehicle is supplied with two keys without remote control ⇒fig. 16 or with two keys with remote control* ⇒fig. 17. The keys fit in all vehicle locks.
Key ring
The key ring only has the key number on it which is essential for producing other keys. This number can be used to order replacement keys from the Škoda Service Par tners.
The key ring with the number should be separately and securely kept in safe keeping since keys can only be replaced if they are lost or damaged by giving this number. You should also therefore give this key ring to the purchaser when selling the vehicle.
WARNING
•Always withdraw the key whenever you leave the vehicle - even if it is only for a short time. This is particularly important if children are left in the vehicle. The children might otherwise st art the engine or operate electrical equipment (e.g. power windows) - risk of injury!
•Do not withdraw the ignition key from the ignition lock until the vehicle has come to a stop. The steering lock might otherwise engage unintention- ally - risk of accident!
Caution
•Each key contains electronic components; therefore protect them against mois-ture and severe shocks.
•Keep the groove of the keys absolutely cl ean as impurities (textile fibres, dust etc.) have a negative effect on proper op eration of the keys and the ignition lock.
Note
Please approach a Škoda Service Partner if you lose a key since he can obtain a new one for you.
Fig. 16 Set of keys without remote control
Fig. 17 Radio-operated key
NKO A05R 20 MR08.book Page 30 Wednesday, March 28, 2007 9:42 AM
Page 32 of 248
Unlocking and locking31
Using the systemSafetyDriving TipsGeneral MaintenanceBreakdown assistancePraktikTechnical Data
Changing the key battery
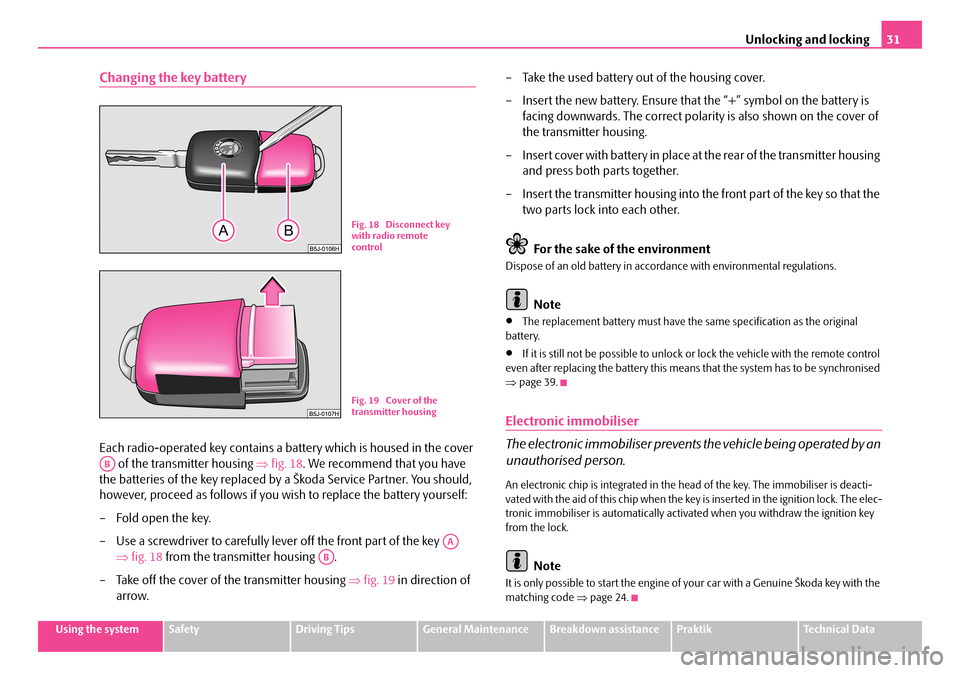
Each radio-operated key contains a battery which is housed in the cover
of the transmitter housing ⇒fig. 18. We recommend that you have
the batteries of the key replaced by a Škoda Service Partner. You should,
however, proceed as follows if you wi sh to replace the battery yourself:
– Fold open the key.
– Use a screwdriver to carefully lever off the front part of the key
⇒ fig. 18 from the transmitter housing .
– Take off the cover of the transmitter housing ⇒fig. 19 in direction of
arrow.
– Take the used battery out of the housing cover.
– Insert the new battery. Ensure that the “+” symbol on the battery is
facing downwards. The correct polarity is also shown on the cover of
the transmitter housing.
– Insert cover with battery in place at the rear of the transmitter housing
and press both parts together.
– Insert the transmitter housing into the front part of the key so that the
two parts lock into each other.
For the sake of the environment
Dispose of an old battery in accord ance with environmental regulations.
Note
•The replacement battery must have the same specification as the original battery.
•If it is still not be possible to unlock or lock the vehicle with the remote control even after replacing the battery this means that the system has to be synchronised ⇒ page 39.
Electronic immobiliser
The electronic immobiliser prevents the vehicle being operated by an
unauthorised person.
An electronic chip is integrated in the he ad of the key. The immobiliser is deacti- vated with the aid of this chip when the key is inserted in the ignition lock. The elec- tronic immobiliser is automatically activated when you withdraw the ignition key from the lock.
Note
It is only possible to start the engine of your car with a Genuine Škoda key with the matching code ⇒page 24.
Fig. 18 Disconnect key with radio remote control
Fig. 19 Cover of the transmitter housing
AB
AA
AB
NKO A05R 20 MR08.book Page 31 Wednesday, March 28, 2007 9:42 AM
Page 33 of 248
Unlocking and locking32
Locking
Valid for vehicles without a central locking system:
Locking from outside
The securing head will move upwards or downwards in the door when unlocking or locking.
Locking from inside
All closed vehicle doors are locked by pr essing in the securing knobs from the inside. The doors cannot be opened from the outside when the securing knobs have been pressed in. The vehicle doors ca n be opened from the inside as follows:
•The door is unlocked by actuating the door-opening lever.
•The door opens upon actuating the door-opening lever again.
Note
•The opened door cannot be locked with the securing knob. This prevents the possibility of forgetting the key in the locked vehicle.
•The opened side doors at the rear and the front passenger door are locked by pressing in the secu ring knob and slamming the door closed.
•Please refer to the safety guidelines ⇒ in “Description” on page 33.
Child safety lock
The child safety lock prevents the rear door from being opened from
the inside.
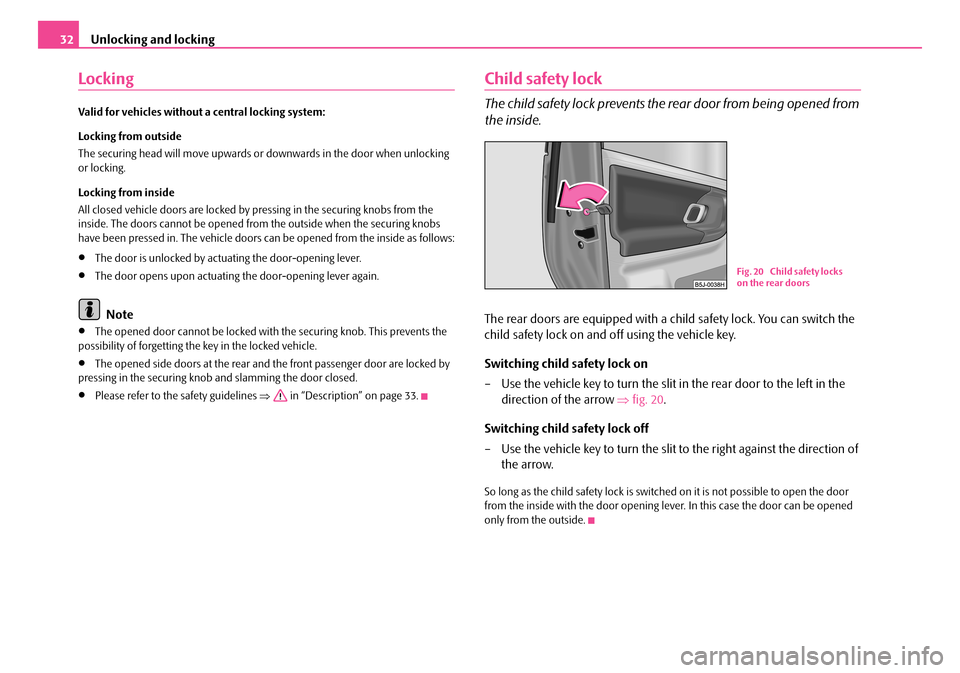
The rear doors are equipped with a child safety lock. You can switch the
child safety lock on and off using the vehicle key.
Switching child safety lock on
– Use the vehicle key to turn the slit in the rear door to the left in the
direction of the arrow ⇒fig. 20.
Switching child safety lock off
– Use the vehicle key to turn the slit to the right against the direction of
the arrow.
So long as the child safety lo ck is switched on it is not possible to open the door from the inside with the door opening leve r. In this case the door can be opened only from the outside.
Fig. 20 Child safety locks on the rear doors
NKO A05R 20 MR08.book Page 32 Wednesday, March 28, 2007 9:42 AM