engine SKODA ROOMSTER 2009 1.G Owner's Guide
[x] Cancel search | Manufacturer: SKODA, Model Year: 2009, Model line: ROOMSTER, Model: SKODA ROOMSTER 2009 1.GPages: 263, PDF Size: 32.25 MB
Page 47 of 263
Unlocking and locking 46•
Do not press on the rear window when closing the boot lid, it could crack
- risk of injury!Note
•
After closing the boot lid, it is automatically locked within 1 seconds and
the anti-theft alarm system* is activated. This applies only if the vehicle was
locked before closing the boot lid.
•
The function of the hand grip above the licence plate is deactivated when
starting off or as of a speed of more than 5 km/hour for vehicles with central
locking. The function of the hand grip is activated again when the vehicle has
stopped and a door is opened.
•
Hold the boot lid when opening.
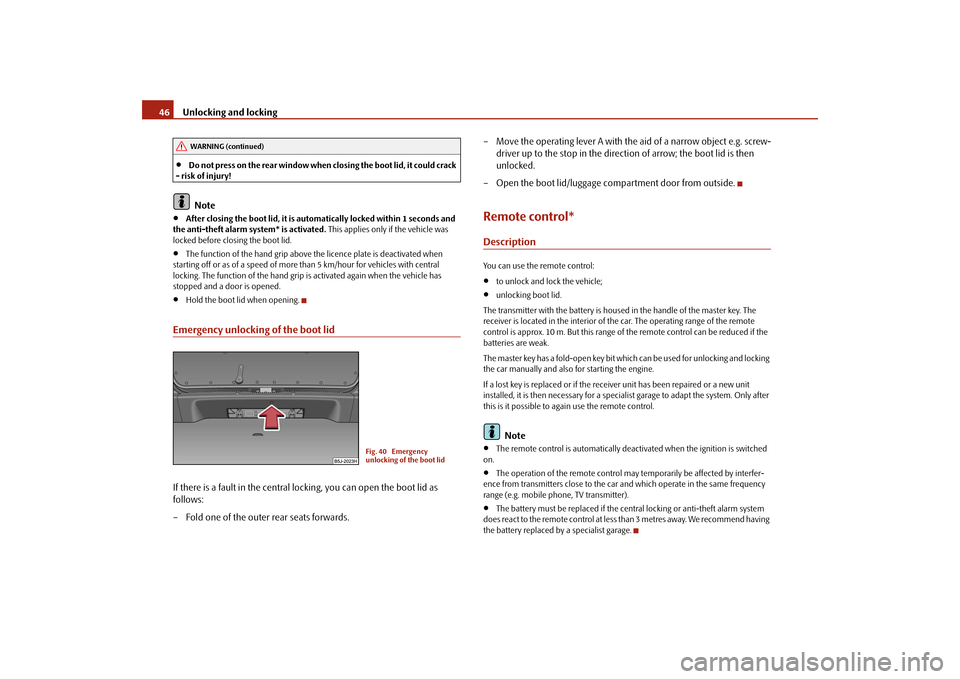
Emergency unlocking of the boot lidIf there is a fault in the central locking, you can open the boot lid as
follows:
– Fold one of the outer rear seats forwards.– Move the operating lever A with the aid of a narrow object e.g. screw-
driver up to the stop in the direction of arrow; the boot lid is then
unlocked.
– Open the boot lid/luggage compartment door from outside.
Remote control*DescriptionYou can use the remote control:•
to unlock and lock the vehicle;
•
unlocking boot lid.
The transmitter with the battery is housed in the handle of the master key. The
receiver is located in the interior of the car. The operating range of the remote
control is approx. 10 m. But this range of the remote control can be reduced if the
batteries are weak.
The master key has a fold-open key bit which can be used for unlocking and locking
the car manually and also for starting the engine.
If a lost key is replaced or if the receiver unit has been repaired or a new unit
installed, it is then necessary for a specialist garage to adapt the system. Only after
this is it possible to again use the remote control.Note
•
The remote control is automatically deactivated when the ignition is switched
on.
•
The operation of the remote control may temporarily be affected by interfer-
ence from transmitters close to the car and which operate in the same frequency
range (e.g. mobile phone, TV transmitter).
•
The battery must be replaced if the central locking or anti-theft alarm system
does react to the remote control at less than 3 metres away. We recommend having
the battery replaced by a specialist garage.
WARNING (continued)
Fig. 40 Emergency
unlocking of the boot lid
s29g.4.book Page 46 Wednesday, June 17, 2009 9:54 AM
Page 54 of 263
Lights and Visibility53
Using the system
Safety
Driving Tips
General Maintenance
Breakdown assistance
Praktik
Technical Data
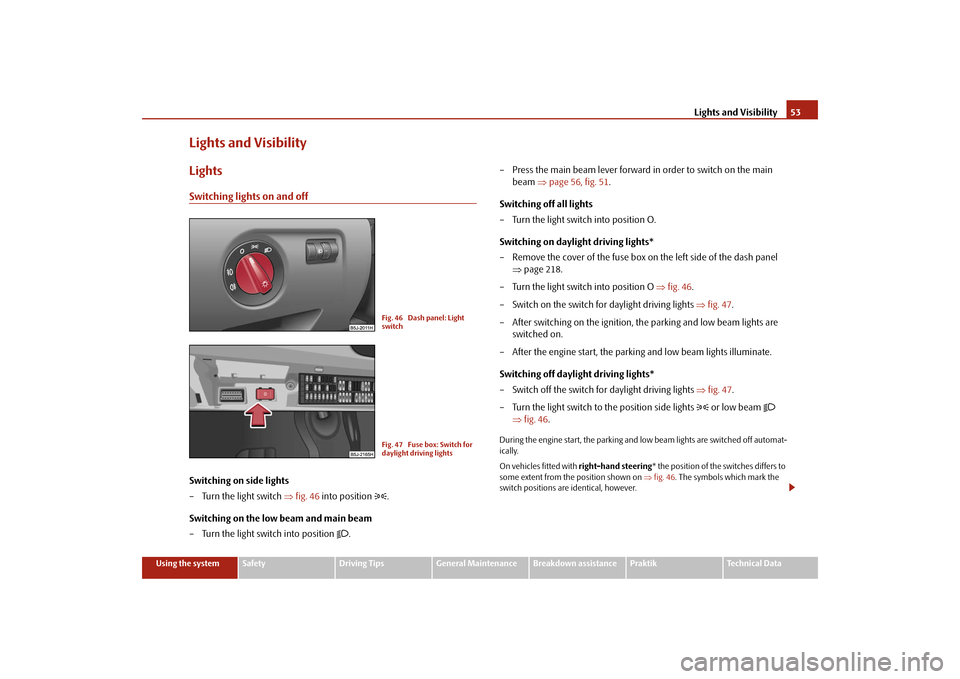
Lights and VisibilityLightsSwitching lights on and offSwitching on side lights
– Turn the light switch ⇒fig. 46 into position
.
Switching on the low beam and main beam
– Turn the light switch into position
.– Press the main beam lever forward in order to switch on the main
beam ⇒page 56, fig. 51.
Switching off all lights
– Turn the light switch into position O.
Switching on daylight driving lights*
– Remove the cover of the fuse box on the left side of the dash panel
⇒page 218.
– Turn the light switch into position O ⇒fig. 46.
– Switch on the switch for daylight driving lights ⇒fig. 47.
– After switching on the ignition, the parking and low beam lights are
switched on.
– After the engine start, the parking and low beam lights illuminate.
Switching off daylight driving lights*
– Switch off the switch for daylight driving lights ⇒fig. 47.
– Turn the light switch to the position side lights
or low beam
⇒fig. 46.
During the engine start, the parking and low beam lights are switched off automat-
ically.
On vehicles fitted with right-hand steering* the position of the switches differs to
some extent from the position shown on ⇒fig. 46. The symbols which mark the
switch positions are identical, however.
Fig. 46 Dash panel: Light
switchFig. 47 Fuse box: Switch for
daylight driving lights
s29g.4.book Page 53 Wednesday, June 17, 2009 9:54 AM
Page 56 of 263
Lights and Visibility55
Using the system
Safety
Driving Tips
General Maintenance
Breakdown assistance
Praktik
Technical Data
Fog lights with the function “Corner”*
The fog lights with the function “Corner” improve the illumination of
areas close to the vehicle when turning, parking etc.The fog lights with the function “Corner” are regulated according to the steering
angle or after switching on the turn signal light
4) in the following circumstances:
•
the vehicle is stationary and the engine is running or it moves with a speed of
maximum 40 km/h;
•
the daylight driving lights are not switched on;
•
low beam switched on;
•
no reverse gear engaged;
•
no hazard warning light system switched on.
A fault in the system of the fog lights with the function “Corner” is confirmed by the
warning light lighting up or flashing
.
Note
If the fog lights are switched on, the function of the lights “Corner” is not active.Rear fog light
Switching on the rear fog light
– First of all turn the light switch into position
or
⇒page 54,
fig. 48.
– Pull the light switch out to the second detent . The fog lights* light
up at the same time.
If the vehicle is not fitted with fog lights*, the rear fog light is switched on by turning
the light switch to the position
and is pulled out directly to the position . This
switch does not have two positions, but only one position.The rear fog light warning light
⇒page 29 lights up in the instrument cluster
when the fog light is switched off.
Only the rear fog light of the trailer lights up if the vehicle is fitted with a towing
device from Škoda original accessoriesand when you are towing a trailer which
is fitted with the rear fog light.
Caution
The rear fog light should only be switched on if visibility is particularly poor
(conform with any varying legal provisions) to avoid dazzling vehicles behind your
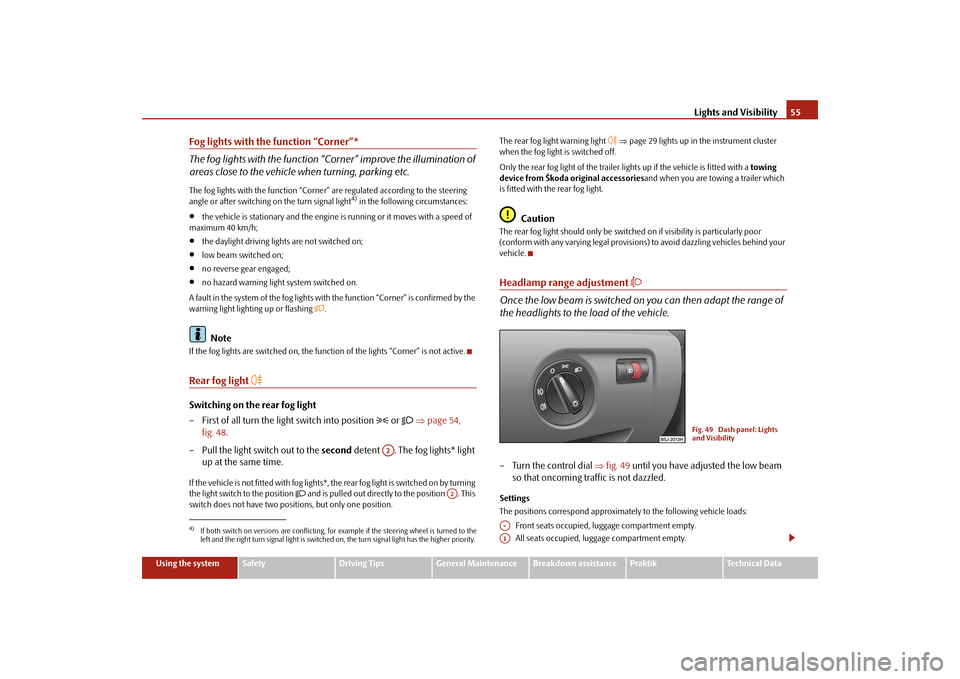
vehicle.Headlamp range adjustment
Once the low beam is switched on you can then adapt the range of
the headlights to the load of the vehicle.– Turn the control dial ⇒fig. 49 until you have adjusted the low beam
so that oncoming traffic is not dazzled.Settings
The positions correspond approximately to the following vehicle loads:
Front seats occupied, luggage compartment empty.
All seats occupied, luggage compartment empty.
4)If both switch on versions are conflicting, for example if the steering wheel is turned to the
left and the right turn signal light is switched on, the turn signal light has the higher priority.
A2
A2
Fig. 49 Dash panel: Lights
and Visibility
A-A1
s29g.4.book Page 55 Wednesday, June 17, 2009 9:54 AM
Page 59 of 263
Lights and Visibility 58
Lighting of storage compartment on the front passenger side
– When opening the flap of the storage compartment on the front
passenger side the lighting in the storage compartment comes on.
– The light switches on automatically when the parking light is switched
on and goes out when the flap is closed.On vehicles with central locking, the interior light is switched on for about 20
seconds when the vehicle is unlocked, when a door is opened or after withdrawing
the ignition key (if the relevant switch is in the door contact position). The inner light
goes out out immediately after the ignition is switched on.
A time delay switch* causes the inner lighting on vehicles without a central locking
system stays on for a few seconds after the doors have been closed. The inner light
goes out out immediately after the ignition is switched on.
The interior lighting is switched off after about 30 minutes when a door has been
left open in order to avoid discharging the battery of the vehicle.Rear interior lighting*The rear interior lighting ⇒fig. 53 is actuated by moving the switch to the symbol , O or to the middle position
.
The same principles apply for the interior lighting at the rear as for the for the inte-
rior lighting at the front ⇒page 57.
Note
We recommend having the bulb replaced by a specialist garage.Luggage compartment lightThe lighting comes on automatically when the boot lid is opened. The luggage
compartment lighting will switch off again automatically if the boot lid remains
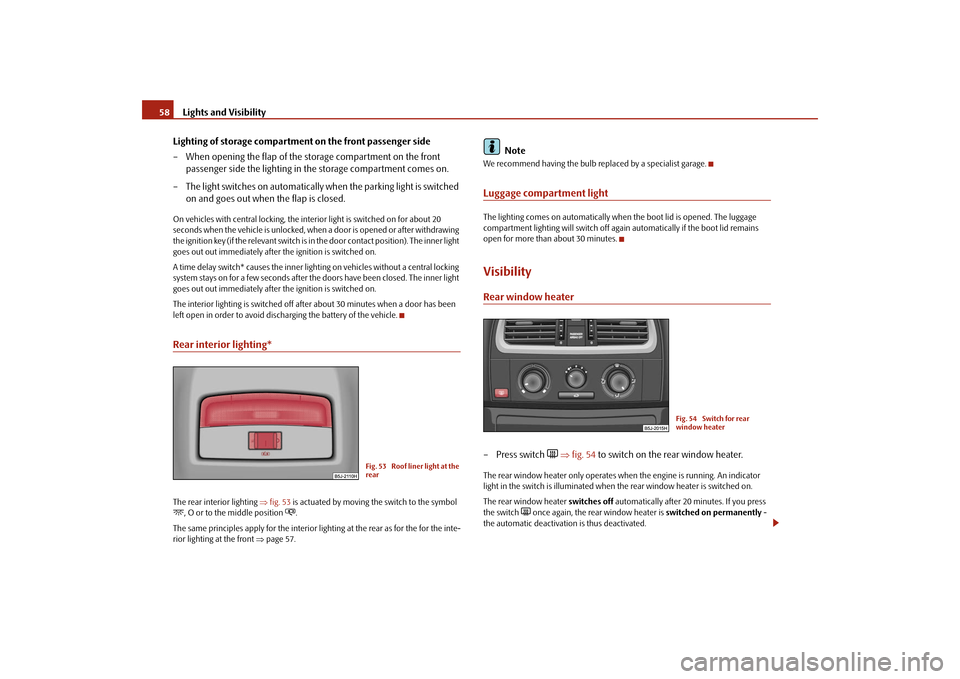
open for more than about 30 minutes.VisibilityRear window heater– Press switch
⇒fig. 54 to switch on the rear window heater.
The rear window heater only operates when the engine is running. An indicator
light in the switch is illuminated when the rear window heater is switched on.
The rear window heater switches off automatically after 20 minutes. If you press
the switch
once again, the rear window heater is switched on permanently -
the automatic deactivation is thus deactivated.
Fig. 53 Roof liner light at the
rear
Fig. 54 Switch for rear
window heater
s29g.4.book Page 58 Wednesday, June 17, 2009 9:54 AM
Page 63 of 263
Lights and Visibility 62
Attaching a wiper blade
– Position the wiper blade onto the wiper arm and lock the locking
button .
– Check whether the wiper blade is correctly attached.The same remarks apply here as for ⇒page 61.Rear mirrorYou can adjust the exterior mirrors electrically*.Adjust the rear mirror before commencing to drive so that there is a clear
view to the rear.
Dimming the interior mirror
– Pull the lever on the bottom edge of the mirror toward rear (the lever
on the interior mirror must point forwards in it home position).
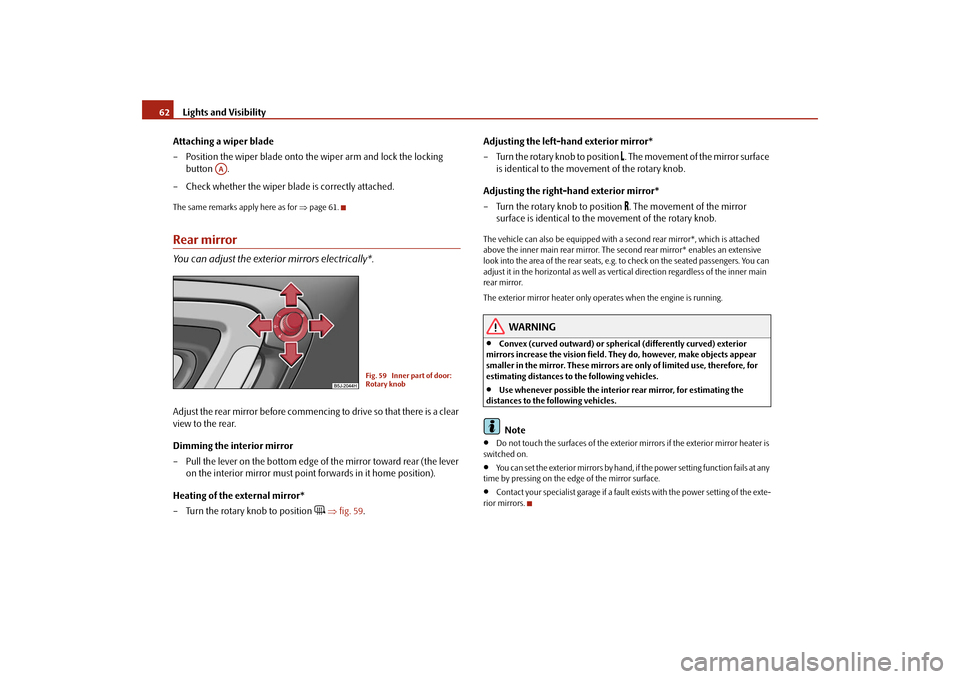
Heating of the external mirror*
– Turn the rotary knob to position
⇒fig. 59.Adjusting the left-hand exterior mirror*
– Turn the rotary knob to position
. The movement of the mirror surface
is identical to the movement of the rotary knob.
Adjusting the right-hand exterior mirror*
– Turn the rotary knob to position . The movement of the mirror
surface is identical to the movement of the rotary knob.
The vehicle can also be equipped with a second rear mirror*, which is attached
above the inner main rear mirror. The second rear mirror* enables an extensive
look into the area of the rear seats, e.g. to check on the seated passengers. You can
adjust it in the horizontal as well as vertical direction regardless of the inner main
rear mirror.
The exterior mirror heater only operates when the engine is running.
WARNING
•
Convex (curved outward) or spherical (differently curved) exterior
mirrors increase the vision field. They do, however, make objects appear
smaller in the mirror. These mirrors are only of limited use, therefore, for
estimating distances to the following vehicles.
•
Use whenever possible the interior rear mirror, for estimating the
distances to the following vehicles.Note
•
Do not touch the surfaces of the exterior mirrors if the exterior mirror heater is
switched on.
•
You can set the exterior mirrors by hand, if the power setting function fails at any
time by pressing on the edge of the mirror surface.
•
Contact your specialist garage if a fault exists with the power setting of the exte-
rior mirrors.
AA
Fig. 59 Inner part of door:
Rotary knob
s29g.4.book Page 62 Wednesday, June 17, 2009 9:54 AM
Page 67 of 263
Seats and Storage 66•
Do not use the seat heating if objects are fastened or stored on a seat for
example a child seat, a bag etc. A fault in the system of the seat heating can
occur.Caution
•
You should not kneel on the seats or otherwise apply pressure at specific points
in order to avoid damaging the heating elements of the seat heaters.
•
Do not clean the seats moist ⇒page 178.Note
The seat heating should only be switched on when the engine is running. This has
a significant effect of saving on the battery capacity.Rear seatsAdjusting seats in forward/back direction
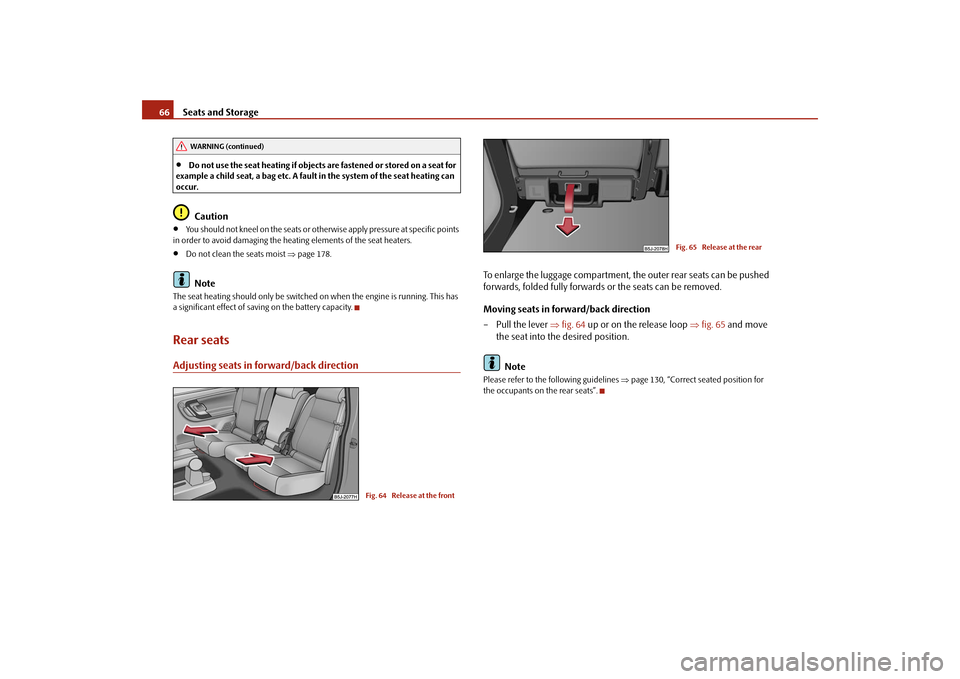
To enlarge the luggage compartment, the outer rear seats can be pushed
forwards, folded fully forwards or the seats can be removed.
Moving seats in forward/back direction
– Pull the lever ⇒fig. 64 up or on the release loop ⇒fig. 65 and move
the seat into the desired position.
NotePlease refer to the following guidelines ⇒page 130, “Correct seated position for
the occupants on the rear seats”.
WARNING (continued)
Fig. 64 Release at the front
Fig. 65 Release at the rear
s29g.4.book Page 66 Wednesday, June 17, 2009 9:54 AM
Page 84 of 263
Seats and Storage83
Using the system
Safety
Driving Tips
General Maintenance
Breakdown assistance
Praktik
Technical Data
WARNING
•
Take care when using the cigarette lighter! Not paying proper attention
or incorrect use the cigarette lighter in an uncontrolled manner may result in
burns.
•
The cigarette lighter and the power socket also operates when the igni-
tion is switched off or the ignition key withdrawn. This is why you should
never leave children unattended in the vehicle!Caution
Only use matching plugs, which fulfils the DIN - ISO Standard 4165, to avoid
damaging the power sockets.
Note
Connecting electrical components when the engine is not running will drain
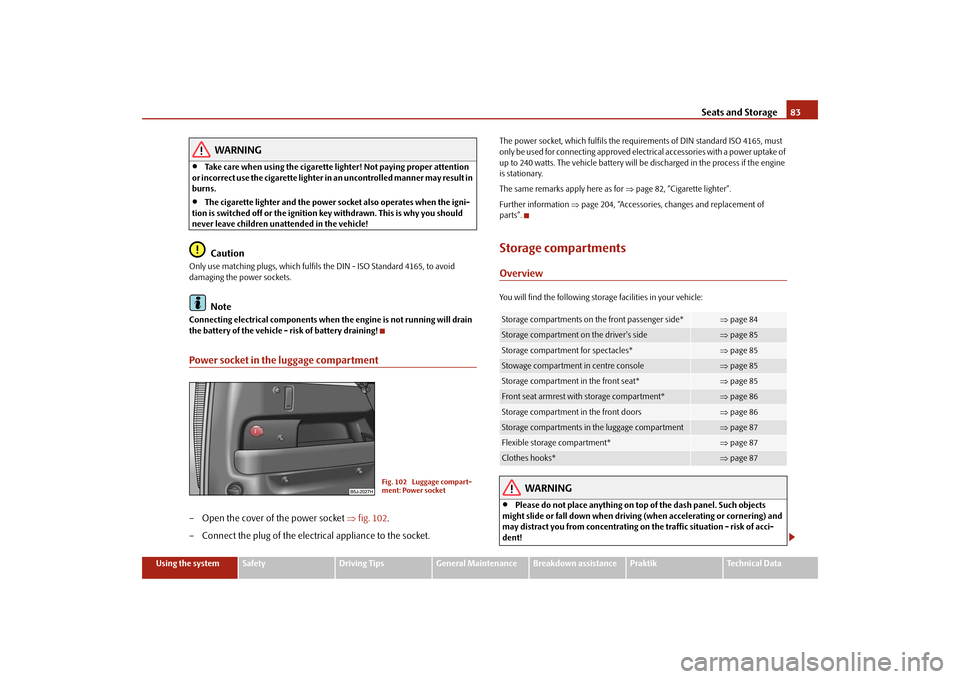
the battery of the vehicle - risk of battery draining!Power socket in the luggage compartment– Open the cover of the power socket ⇒fig. 102.
– Connect the plug of the electrical appliance to the socket.
The power socket, which fulfils the requirements of DIN standard ISO 4165, must
only be used for connecting approved electrical accessories with a power uptake of
up to 240 watts. The vehicle battery will be discharged in the process if the engine
is stationary.
The same remarks apply here as for ⇒page 82, “Cigarette lighter”.
Further information ⇒page 204, “Accessories, changes and replacement of
parts”.Storage compartmentsOverviewYou will find the following storage facilities in your vehicle:
WARNING
•
Please do not place anything on top of the dash panel. Such objects
might slide or fall down when driving (when accelerating or cornering) and
may distract you from concentrating on the traffic situation - risk of acci-
dent!
Fig. 102 Luggage compart-
ment: Power socket
Storage compartments on the front passenger side*
⇒page 84
Storage compartment on the driver's side
⇒page 85
Storage compartment for spectacles*
⇒page 85
Stowage compartment in centre console
⇒page 85
Storage compartment in the front seat*
⇒page 85
Front seat armrest with storage compartment*
⇒page 86
Storage compartment in the front doors
⇒page 86
Storage compartments in the luggage compartment
⇒page 87
Flexible storage compartment*
⇒page 87
Clothes hooks*
⇒page 87
s29g.4.book Page 83 Wednesday, June 17, 2009 9:54 AM
Page 91 of 263
Heating and air conditioning system 90HeatingUsing the system
The heating system delivers air into the interior of the vehicle and
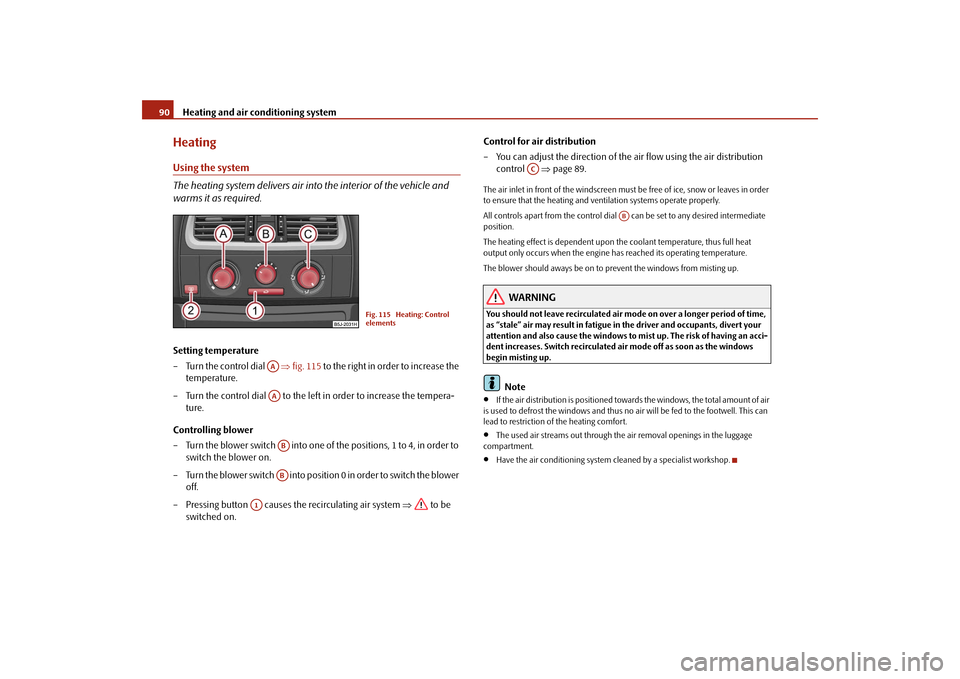
warms it as required.Setting temperature
– Turn the control dial ⇒fig. 115 to the right in order to increase the
temperature.
– Turn the control dial to the left in order to increase the tempera-
ture.
Controlling blower
– Turn the blower switch into one of the positions, 1 to 4, in order to
switch the blower on.
– Turn the blower switch into position 0 in order to switch the blower
off.
– Pressing button causes the recirculating air system ⇒ to be
switched on.Control for air distribution
– You can adjust the direction of the air flow using the air distribution
control ⇒page 89.
The air inlet in front of the windscreen must be free of ice, snow or leaves in order
to ensure that the heating and ventilation systems operate properly.
All controls apart from the control dial can be set to any desired intermediate
position.
The heating effect is dependent upon the coolant temperature, thus full heat
output only occurs when the engine has reached its operating temperature.
The blower should aways be on to prevent the windows from misting up.
WARNING
You should not leave recirculated air mode on over a longer period of time,
as “stale” air may result in fatigue in the driver and occupants, divert your
attention and also cause the windows to mist up. The risk of having an acci-
dent increases. Switch recirculated air mode off as soon as the windows
begin misting up.
Note
•
If the air distribution is positioned towards the windows, the total amount of air
is used to defrost the windows and thus no air will be fed to the footwell. This can
lead to restriction of the heating comfort.
•
The used air streams out through the air removal openings in the luggage
compartment.
•
Have the air conditioning system cleaned by a specialist workshop.
Fig. 115 Heating: Control
elements
AAAAABAB
A1
AC
AB
s29g.4.book Page 90 Wednesday, June 17, 2009 9:54 AM
Page 93 of 263
Heating and air conditioning system 92Climatic (semi-automatic air conditioning system)*Description
Climatic is a combined cooling and heating system with electronic
control of the convenience temperature in the vehicle interior. It
makes it possible to optimally control the air temperature at any
season of the year.Description of the Climatic
It is important for your safety and for your driving comfort that the Climatic is oper-
ating properly.
The air conditioning system operates when switch ⇒page 93, fig. 116 is
pressed and the following conditions are met:•
engine running,
•
outside temperature above +2°C and
•
blower switch switched on (positions 1 to 4).
If the cooling system is switched on, the temperature and air humidity drops in the
vehicle. The wellbeing of the occupants of the car is enhanced as a result of this
particularly at high outside temperatures and a high air humidity. The system
prevents the windows misting up during the cold season of the year.
The heating effect is dependent upon the coolant temperature, thus full heat
output only occurs when the engine has reached its operating temperature.
It is possible to briefly activate recirculated air mode in order to enhance the
cooling effect ⇒.
Air at a temperature of about 5°C may flow out of the vents under certain circum-
stances when the cooling system is operating. Lengthy and uneven distribution of
the air flow out of the vents (in particular at the leg area) and large differences in
temperature, for example when getting out of the vehicle, can result in chills in
sensitive persons.
The air inlet in front of the windscreen must be free of ice, snow or leaves in order
to ensure that the heating and cooling systems operate properly.After switching on the cooling Condensation from the evaporator of the air condi-
tioning may drip down and form a puddle below the vehicle. This is quite normal
and not an indication of a leak!
WARNING
•
For your own safety and that of other road users, ensure that all the
windows are free of ice, snow and misting. Please familiarize yourself about
how to correctly operate the heating and ventilation systems, how to demist
and defrost the windows, as well as with the cooling mode.
•
You should not leave recirculated air mode on over a longer period of
time, as “stale” air may result in fatigue in the driver and occupants, divert
your attention and also cause the windows to mist up. The risk of having an
accident increases. Switch recirculated air mode off as soon as the windows
begin misting up.Note
•
We recommend that you do not smoke in the vehicle when the recirculating air
mode is operating since the smoke which is drawn at the evaporator from the inte-
rior of the vehicle forms deposits in the evaporator of the air conditioning system.
This produces a permanent odour when the Climatic is operating which can only
be eliminated through considerable effort and expense (replacement of
compressor).
AC
AE
s29g.4.book Page 92 Wednesday, June 17, 2009 9:54 AM
Page 96 of 263
Heating and air conditioning system95
Using the system
Safety
Driving Tips
General Maintenance
Breakdown assistance
Praktik
Technical Data
Using the air conditioning system economicallyThe compressor on the Climatic uses power from the engine when in cooling mode
which will effect the fuel consumption.
It recommended to open the windows or the doors of a vehicle for which the inte-
rior has been strongly heated through the effect of direct sunlight in order to allow
the heated air to escape.
The cooling system should not be switched on while travelling when the window is
open.
The desired interior temperature can also be achieved without switching in the
cooling system just by switching to fresh air mode.
For the sake of the environment
When you economize on fuel, you also reduce pollutant emissions.Operational problemsIf the cooling system does not operate at outside temperatures higher than +2 °C,
there is a problem in the system. The reasons for this may be:•
The fuse of the Climatic is defective. Check the fuse, replace it if necessary
⇒page 218.
•
The cooling system has switched off automatically for a short time because the
coolant temperature of the engine is too hot ⇒page 19.
If you are not able to rectify the operational problem yourself, or if the cooling
capacity decreases, switch the cooling system off. Contact a specialist garage.
If there is a fault at the Climatronic, all symbols on the display flash after switching
on the ignition for 15 seconds. Contact a specialist garage.
Climatronic (automatic air conditioning)*Description
The Climatronic system is a combination of an automatic heating,
fresh air and cooling system which provides optimal comfort for the
occupants of the car.The Climatronic maintains a constant temperature fully automatically, once it has
been set. This is achieved by automatically varying the temperature of the
outflowing air, the blower stages and the air distribution. The system also takes into
account sunlight which eliminates the need to alter the settings manually. The
automatic mode ⇒page 97 ensures maximum wellbeing of the occupants at all
times of the year.
Description of Climatronic system
The cooling operates only if the following conditions are met:•
engine running,
•
outside temperature above +2°C,
•
the button is not pressed.
If the cooling system is switched on, the temperature and air humidity drops in the
vehicle. The wellbeing of the occupants of the car is enhanced as a result of this
particularly at high outside temperatures and a high air humidity. The system
prevents the windows misting up during the cold season of the year.
The heating effect is dependent upon the coolant temperature, thus full heat
output only occurs when the engine has reached its operating temperature.
It is possible to briefly activate recirculated air mode in order to enhance the
cooling effect ⇒.
The air inlet in front of the windscreen must be free of ice, snow or leaves in order
to ensure that the heating and cooling systems operate properly.
The AC compressor is switched off at a high coolant temperature in order to provide
cooling at a high load of the engine.
ECON
s29g.4.book Page 95 Wednesday, June 17, 2009 9:54 AM