towing SKODA ROOMSTER 2009 1.G Owner's Manual
[x] Cancel search | Manufacturer: SKODA, Model Year: 2009, Model line: ROOMSTER, Model: SKODA ROOMSTER 2009 1.GPages: 263, PDF Size: 32.25 MB
Page 4 of 263
Contents3
Using the system
Safety
Driving Tips
General Maintenance
Breakdown assistance
Praktik
Technical Data
ContentsLayout of this Owner's Manual
(explanations)
. . . . . . . . . . . . . . . . . . . . . . . . . .
Using the system
. . . . . . . . . . . . . . . . . . . . . .
Cockpit
. . . . . . . . . . . . . . . . . . . . . . . . . . . . . . . . . . . . . . . .
General view . . . . . . . . . . . . . . . . . . . . . . . . . . . . . . . . .
The brief instruction
. . . . . . . . . . . . . . . . . . . . . . . . . .
Basic functions and important information . . . . .
Instruments and Indicator/Warning Lights
. . .
General view of the instrument cluster . . . . . . . . .
Engine revolutions counter . . . . . . . . . . . . . . . . . . . .
Coolant temperature gauge* . . . . . . . . . . . . . . . . . .
Fuel gauge* . . . . . . . . . . . . . . . . . . . . . . . . . . . . . . . . . .
Counter for distance driven . . . . . . . . . . . . . . . . . . .
Service Interval Display . . . . . . . . . . . . . . . . . . . . . . .
Digital clock . . . . . . . . . . . . . . . . . . . . . . . . . . . . . . . . . .
Multi-functional indicator (onboard computer)*
Information display* . . . . . . . . . . . . . . . . . . . . . . . . . .
Auto Check Control . . . . . . . . . . . . . . . . . . . . . . . . . . .
Warning lights . . . . . . . . . . . . . . . . . . . . . . . . . . . . . . . .
Unlocking and locking
. . . . . . . . . . . . . . . . . . . . . . . .
Key . . . . . . . . . . . . . . . . . . . . . . . . . . . . . . . . . . . . . . . . . .
Locking . . . . . . . . . . . . . . . . . . . . . . . . . . . . . . . . . . . . . .
Child safety lock . . . . . . . . . . . . . . . . . . . . . . . . . . . . . .
Central locking system* . . . . . . . . . . . . . . . . . . . . . . .
Remote control* . . . . . . . . . . . . . . . . . . . . . . . . . . . . . .
Anti-theft alarm system* . . . . . . . . . . . . . . . . . . . . . .
Interior monitor* and towing protection
monitoring* . . . . . . . . . . . . . . . . . . . . . . . . . . . . . . . . . .
Electrical power windows* . . . . . . . . . . . . . . . . . . . .
Panorama roof* . . . . . . . . . . . . . . . . . . . . . . . . . . . . . .
Lights and Visibility
. . . . . . . . . . . . . . . . . . . . . . . . . . .
Lights . . . . . . . . . . . . . . . . . . . . . . . . . . . . . . . . . . . . . . . .
Interior lighting . . . . . . . . . . . . . . . . . . . . . . . . . . . . . . .
Visibility . . . . . . . . . . . . . . . . . . . . . . . . . . . . . . . . . . . . .
Windshield wiper and wash system . . . . . . . . . . . .
Rear mirror . . . . . . . . . . . . . . . . . . . . . . . . . . . . . . . . . .
Seats and Storage
. . . . . . . . . . . . . . . . . . . . . . . . . . . . .
Front seats . . . . . . . . . . . . . . . . . . . . . . . . . . . . . . . . . . .
Head restraints . . . . . . . . . . . . . . . . . . . . . . . . . . . . . . .
Heating the front seats* . . . . . . . . . . . . . . . . . . . . . . .
Rear seats . . . . . . . . . . . . . . . . . . . . . . . . . . . . . . . . . . . .
Pedals . . . . . . . . . . . . . . . . . . . . . . . . . . . . . . . . . . . . . . .
luggage compartment . . . . . . . . . . . . . . . . . . . . . . . .
Variable loading floor* . . . . . . . . . . . . . . . . . . . . . . . .
Bicycle carrier* . . . . . . . . . . . . . . . . . . . . . . . . . . . . . . .
The roof luggage rack system* . . . . . . . . . . . . . . . . .
Front cup holder . . . . . . . . . . . . . . . . . . . . . . . . . . . . .
Rear cup holder* . . . . . . . . . . . . . . . . . . . . . . . . . . . . .
Note holder . . . . . . . . . . . . . . . . . . . . . . . . . . . . . . . . . .
Ashtray* . . . . . . . . . . . . . . . . . . . . . . . . . . . . . . . . . . . . .
Cigarette lighter* and power sockets* . . . . . . . . . .
Storage compartments . . . . . . . . . . . . . . . . . . . . . . . .
Heating and air conditioning system
. . . . . . . . .
Air outlet vents . . . . . . . . . . . . . . . . . . . . . . . . . . . . . . .
Recirculated air mode . . . . . . . . . . . . . . . . . . . . . . . .
Heating . . . . . . . . . . . . . . . . . . . . . . . . . . . . . . . . . . . . . .
Climatic (semi-automatic air conditioning
system)* . . . . . . . . . . . . . . . . . . . . . . . . . . . . . . . . . . . . .
Climatronic (automatic air conditioning)* . . . . . .
Starting-off and Driving
. . . . . . . . . . . . . . . . . . . . . . .
Setting steering wheel position . . . . . . . . . . . . . . . .
Ignition lock . . . . . . . . . . . . . . . . . . . . . . . . . . . . . . . . . .
Starting the engine . . . . . . . . . . . . . . . . . . . . . . . . . . . Switching off the engine . . . . . . . . . . . . . . . . . . . . . .
Shifting (manual gearbox) . . . . . . . . . . . . . . . . . . . . .
Handbrake . . . . . . . . . . . . . . . . . . . . . . . . . . . . . . . . . . .
Parking aid* . . . . . . . . . . . . . . . . . . . . . . . . . . . . . . . . . .
Cruise control system (CCS)* . . . . . . . . . . . . . . . . . .
Automatic gearbox
. . . . . . . . . . . . . . . . . . . . . . . . . . .
6-speed automatic gearbox* . . . . . . . . . . . . . . . . . .
Communication
. . . . . . . . . . . . . . . . . . . . . . . . . . . . . .
Operating the radio . . . . . . . . . . . . . . . . . . . . . . . . . . .
Radio and mobile phone operation . . . . . . . . . . . .
Universal telephone preinstallation with voice
control* . . . . . . . . . . . . . . . . . . . . . . . . . . . . . . . . . . . . .
Inserting the mobile phone with the adapter* . .
Mobile phone operation . . . . . . . . . . . . . . . . . . . . . .
Voice commands . . . . . . . . . . . . . . . . . . . . . . . . . . . . .
Enter PIN code . . . . . . . . . . . . . . . . . . . . . . . . . . . . . . .
Dial number . . . . . . . . . . . . . . . . . . . . . . . . . . . . . . . . .
Repeat last call . . . . . . . . . . . . . . . . . . . . . . . . . . . . . . .
Phone voice phonebook* . . . . . . . . . . . . . . . . . . . . .
Bluetooth®* . . . . . . . . . . . . . . . . . . . . . . . . . . . . . . . . .
Mobile phones and two-way radio system . . . . .
Input AUX-IN* . . . . . . . . . . . . . . . . . . . . . . . . . . . . . . .
CD changer* . . . . . . . . . . . . . . . . . . . . . . . . . . . . . . . . .
Safety
. . . . . . . . . . . . . . . . . . . . . . . . . . . . . . . . . . . . . .
Passive Safety
. . . . . . . . . . . . . . . . . . . . . . . . . . . . . . . . .
Basic information . . . . . . . . . . . . . . . . . . . . . . . . . . . .
Correct seated position . . . . . . . . . . . . . . . . . . . . . . .
Seat belts
. . . . . . . . . . . . . . . . . . . . . . . . . . . . . . . . . . . . . .
Why seat belts? . . . . . . . . . . . . . . . . . . . . . . . . . . . . . .
The physical principle of a frontal collision . . . . . 6
9
11
11
12
12
18
18
18
19
19
20
20
22
22
25
27
29
39
39
41
41
42
46
48
49
49
5253
53
57
58
59
62
63
63
64
65
66
70
70
74
77
79
80
81
81
81
82
83
89
89
89
90
92
95
99
99
100
100102
102
103
103
104
107
107
112
112
113
114
115
116
117
117
118
118
119
121
122
123
123
127
127
127
128
132
132
133
s29g.4.book Page 3 Wednesday, June 17, 2009 9:54 AM
Page 5 of 263
Contents 4Important safety information regarding the use of seat
belts . . . . . . . . . . . . . . . . . . . . . . . . . . . . . . . . . . . . . . . . .
How are seat belts correctly fastened? . . . . . . . . . .
Belt tensioner . . . . . . . . . . . . . . . . . . . . . . . . . . . . . . . . Airbag system
. . . . . . . . . . . . . . . . . . . . . . . . . . . . . . . . .
Description of the airbag system . . . . . . . . . . . . . . .
Front airbags . . . . . . . . . . . . . . . . . . . . . . . . . . . . . . . . .
Side airbags* . . . . . . . . . . . . . . . . . . . . . . . . . . . . . . . . .
Head airbags* . . . . . . . . . . . . . . . . . . . . . . . . . . . . . . . .
Deactivating airbags . . . . . . . . . . . . . . . . . . . . . . . . . .
Transporting children safely
. . . . . . . . . . . . . . . . . .
What you should know about transporting children!
Child seat . . . . . . . . . . . . . . . . . . . . . . . . . . . . . . . . . . . .
Attaching a child seat using the “ISOFIX” system*
Attaching child seat using the “Top Tether” system
Driving Tips
. . . . . . . . . . . . . . . . . . . . . . . . . . . . . .
Intelligent Technology
. . . . . . . . . . . . . . . . . . . . . . . .
Electronic stability programme (ESP)* . . . . . . . . . .
Brakes . . . . . . . . . . . . . . . . . . . . . . . . . . . . . . . . . . . . . . .
Brake booster . . . . . . . . . . . . . . . . . . . . . . . . . . . . . . . .
Antilock brake system (ABS)* . . . . . . . . . . . . . . . . . .
Brake Assist* . . . . . . . . . . . . . . . . . . . . . . . . . . . . . . . . .
Electrohydraulic power steering . . . . . . . . . . . . . . .
Tyre inflation pressure-control system* . . . . . . . . .
Diesel particle filter* (diesel engine) . . . . . . . . . . . .
Driving and the Environment
. . . . . . . . . . . . . . . . .
The first 1 500 kilometres and then afterwards . .
Catalytic converter . . . . . . . . . . . . . . . . . . . . . . . . . . . .
Driving in an economical and environmentally
conscious manner . . . . . . . . . . . . . . . . . . . . . . . . . . . .
Environmental compatibility . . . . . . . . . . . . . . . . . . .
Motoring abroad . . . . . . . . . . . . . . . . . . . . . . . . . . . . .
Avoiding damage to your vehicle . . . . . . . . . . . . . .
To w i n g a t r a i l e r
. . . . . . . . . . . . . . . . . . . . . . . . . . . . . . . .
Towing a trailer . . . . . . . . . . . . . . . . . . . . . . . . . . . . . . .
General Maintenance
. . . . . . . . . . . . . . .
Taking care of your vehicle and cleaning the
vehicle
. . . . . . . . . . . . . . . . . . . . . . . . . . . . . . . . . . . . . . . . .
General . . . . . . . . . . . . . . . . . . . . . . . . . . . . . . . . . . . . . .
Care of the exterior of vehicle . . . . . . . . . . . . . . . . . .
Care of the interior of vehicle . . . . . . . . . . . . . . . . . .
Fuel
. . . . . . . . . . . . . . . . . . . . . . . . . . . . . . . . . . . . . . . . . . . .
Petrol . . . . . . . . . . . . . . . . . . . . . . . . . . . . . . . . . . . . . . . .
Diesel . . . . . . . . . . . . . . . . . . . . . . . . . . . . . . . . . . . . . . . .
Refuelling . . . . . . . . . . . . . . . . . . . . . . . . . . . . . . . . . . . .
Inspecting and replenishing
. . . . . . . . . . . . . . . . . .
Engine compartment . . . . . . . . . . . . . . . . . . . . . . . . .
Engine oil . . . . . . . . . . . . . . . . . . . . . . . . . . . . . . . . . . . .
Cooling system . . . . . . . . . . . . . . . . . . . . . . . . . . . . . . .
Brake fluid . . . . . . . . . . . . . . . . . . . . . . . . . . . . . . . . . . .
Battery . . . . . . . . . . . . . . . . . . . . . . . . . . . . . . . . . . . . . . .
Windshield washer system . . . . . . . . . . . . . . . . . . . .
Wheels and Tyres
. . . . . . . . . . . . . . . . . . . . . . . . . . . . . .
Wheels . . . . . . . . . . . . . . . . . . . . . . . . . . . . . . . . . . . . . .
Accessories, changes and replacement of partsAccessories and replacement parts . . . . . . . . . . . . .
Technical changes . . . . . . . . . . . . . . . . . . . . . . . . . . . .
Vehicles of the group N1 . . . . . . . . . . . . . . . . . . . . . .Breakdown assistance
. . . . . . . . . . . . . .
Breakdown assistance
. . . . . . . . . . . . . . . . . . . . . . . .
First-aid box* and Warning triangle* . . . . . . . . . . .
Fire extinguisher* . . . . . . . . . . . . . . . . . . . . . . . . . . . . .
Vehicle tool kit . . . . . . . . . . . . . . . . . . . . . . . . . . . . . . . .
Tyre repair kit* . . . . . . . . . . . . . . . . . . . . . . . . . . . . . . . .
Spare wheel* . . . . . . . . . . . . . . . . . . . . . . . . . . . . . . . . .
Changing a wheel . . . . . . . . . . . . . . . . . . . . . . . . . . . . .
Jump-starting . . . . . . . . . . . . . . . . . . . . . . . . . . . . . . . .
Tow-starting and towing vehicle . . . . . . . . . . . . . . .
Fuses and light bulbs
. . . . . . . . . . . . . . . . . . . . . . . . . .
Electric fuses . . . . . . . . . . . . . . . . . . . . . . . . . . . . . . . . .
Bulbs . . . . . . . . . . . . . . . . . . . . . . . . . . . . . . . . . . . . . . . .
Praktik
. . . . . . . . . . . . . . . . . . . . . . . . . . . . . . . . . . . . . .
Praktik
. . . . . . . . . . . . . . . . . . . . . . . . . . . . . . . . . . . . . . . . .
Lashing eyes . . . . . . . . . . . . . . . . . . . . . . . . . . . . . . . . . .
Adjustable safety partition behind the front seats
Fixing of the loading floor . . . . . . . . . . . . . . . . . . . . . .
Adjustment of the safety partition . . . . . . . . . . . . . .
Emergency unlocking of the loading area door . .
Technical Data
. . . . . . . . . . . . . . . . . . . . . . . . . .
Technical Data
. . . . . . . . . . . . . . . . . . . . . . . . . . . . . . . . .
General information . . . . . . . . . . . . . . . . . . . . . . . . . . .
Used abbreviations . . . . . . . . . . . . . . . . . . . . . . . . . . .
Performances . . . . . . . . . . . . . . . . . . . . . . . . . . . . . . . . .
Weight . . . . . . . . . . . . . . . . . . . . . . . . . . . . . . . . . . . . . . .
Identification details . . . . . . . . . . . . . . . . . . . . . . . . . .
Fuel consumption according to the regulations
(99/100/EU) . . . . . . . . . . . . . . . . . . . . . . . . . . . . . . . . . .
Dimensions . . . . . . . . . . . . . . . . . . . . . . . . . . . . . . . . . .
Engine oil specifications . . . . . . . . . . . . . . . . . . . . . . .
1.2 ltr./51 kW - EU 4/EU 2DDK . . . . . . . . . . . . . . . . .
1.4 ltr./63 kW - EU 4/EU 2DDK . . . . . . . . . . . . . . . . .
1.6 ltr./77 kW - EU 4/EU 2DDK . . . . . . . . . . . . . . . . .
1.4 ltr./51 kW TDI PD - EU 4 . . . . . . . . . . . . . . . . . . . .
1.4 ltr./59 kW TDI PD - EU 4 . . . . . . . . . . . . . . . . . . . .
1.9 ltr./77 kW TDI°PD - EU°4 . . . . . . . . . . . . . . . . . . .
Roomster - Vehicles of the group N1 . . . . . . . . . . .
Scout - Vehicles of the group N1 . . . . . . . . . . . . . . .
Index
. . . . . . . . . . . . . . . . . . . . . . . . . . . . . . . . . . . . . . . . 133
134
136
138
138
139
142
143
145
147
147
150
153
154
155
155
155
158
158
159
159
160
160
162
163
163
164
164
167
168
169
170
170173
173
173
173
178
181
181
181
182
184
184
187
189
191
192
196
198
198
204
204
204
205
207
207
207
207
208
208
208
209
213
215218
218
223
229
229
229
229
230
230
231
233
233
233
233
233
233
233
234
235
236
237
239
241
243
245
247
249
249
251
s29g.4.book Page 4 Wednesday, June 17, 2009 9:54 AM
Page 30 of 263
Instruments and Indicator/Warning Lights29
Using the system
Safety
Driving Tips
General Maintenance
Breakdown assistance
Praktik
Technical Data
Warning lightsOverview
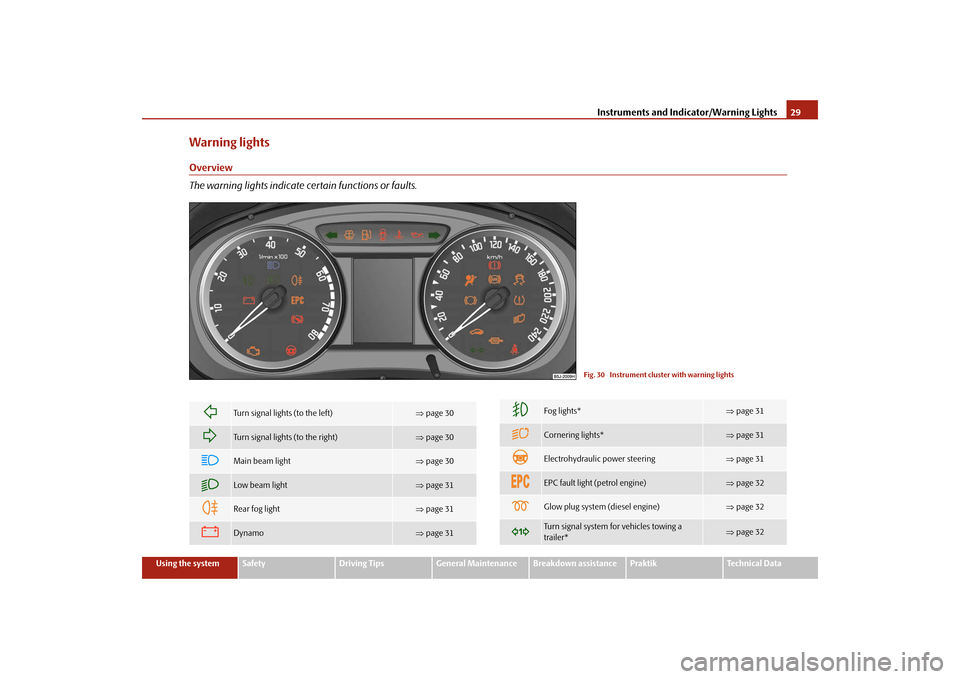
The warning lights indicate certain functions or faults.
Fig. 30 Instrument cluster with warning lights
Turn signal lights (to the left)
⇒page 30
Turn signal lights (to the right)
⇒page 30
Main beam light
⇒page 30
Low beam light
⇒page 31
Rear fog light
⇒page 31
Dynamo
⇒page 31
Fog lights*
⇒page 31
Cornering lights*
⇒page 31
Electrohydraulic power steering
⇒page 31
EPC fault light (petrol engine)
⇒page 32
Glow plug system (diesel engine)
⇒page 32
Turn signal system for vehicles towing a
trailer*
⇒page 32
s29g.4.book Page 29 Wednesday, June 17, 2009 9:54 AM
Page 31 of 263
Instruments and Indicator/Warning Lights 30
WARNING
•
If you do not pay attention to the warning lights coming on and the corre-
sponding descriptions and warning notes, this may result in severe body
injuries or major vehicle damage.
•
The engine compartment of your car is a hazardous area. There is a risk
of injuries, scalding, accidents and fire when working in the engine
compartment, e.g. inspecting and replenishing oil and other fluids. It is also
essential to observe all warnings ⇒page 185.Note
•
Arrangement of the indicator lights depends on the model and model version.
The symbols shown in the following functional description are to be found as indi-
cator lights in the instrument cluster.
•
Operational faults are shown in the instrument cluster as red symbols (priority
1 - danger) or yellow symbols (priority 2 - warning).
Turn signal system
Either the left
or right
indicator light flashes depending on the position of the
turn signal lever.
The indicator light flashes at twice its normal rate if a turn signal light fails. This does
not apply when towing a trailer.
Switching off the hazard warning light system is switched on will cause all of the
turn signal lights as well as both indicator lights to flash.
Further information about the turn signal system ⇒page 56.
Main beam
The indicator light
comes on when the main beam is selected or also when the
headlight flasher is operated.
Further information about the main beam ⇒page 56.
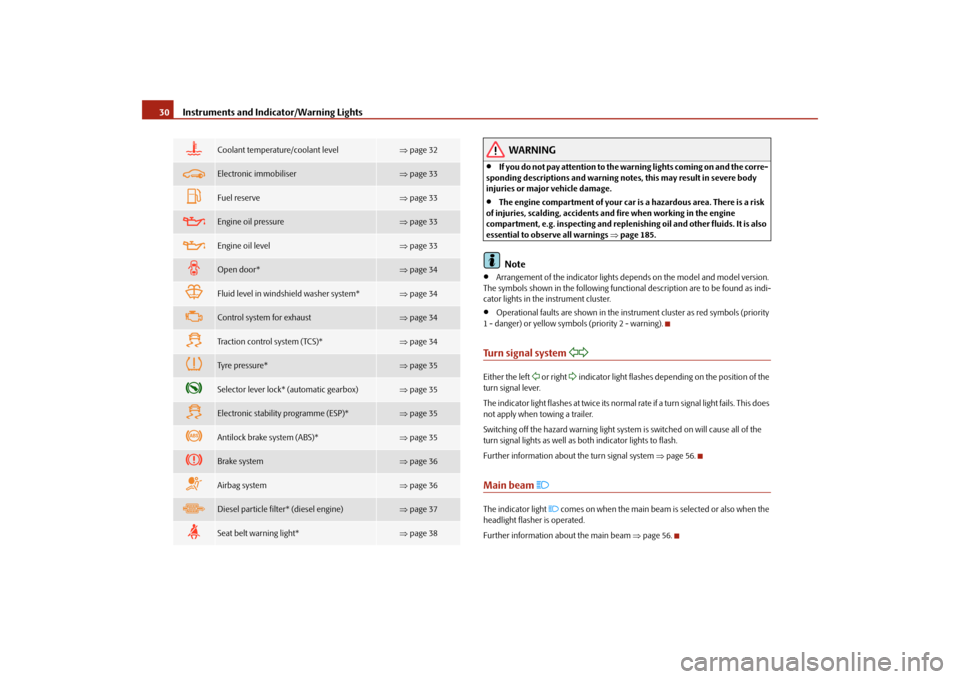
Coolant temperature/coolant level
⇒page 32
Electronic immobiliser
⇒page 33
Fuel reserve
⇒page 33
Engine oil pressure
⇒page 33
Engine oil level
⇒page 33
Open door*
⇒page 34
Fluid level in windshield washer system*
⇒page 34
Control system for exhaust
⇒page 34
Traction control system (TCS)*
⇒page 34
Tyre pressure*
⇒page 35
Selector lever lock* (automatic gearbox)
⇒page 35
Electronic stability programme (ESP)*
⇒page 35
Antilock brake system (ABS)*
⇒page 35
Brake system
⇒page 36
Airbag system
⇒page 36
Diesel particle filter* (diesel engine)
⇒page 37
Seat belt warning light*
⇒page 38
s29g.4.book Page 30 Wednesday, June 17, 2009 9:54 AM
Page 33 of 263
Instruments and Indicator/Warning Lights 32EPC fault light
(petrol engine)
The
(Electronic Power Control) warning light comes on for a few seconds when
the ignition is switched on.
There is a fault in the engine control system if the warning light
does not go out
or comes on or flashes while driving. The engine management system selects an
emergency programme which enables you to drive to the nearest specialist garage
by adopting a gentle style of driving.
The following text will be displayed in the information display*:
ENGINE FAULT WORKSHOP!
Glow plug system
(diesel engine)
The warning light
lights up for a cold engine when switching on the ignition
(pre-heat position) 2 ⇒page 100. Start the engine after the indicator light goes out.
The glow plug indicator light will come on for about 1 second if the engine is at a
normal operating temperature or if the outside temperature is above +5°C. This
means that you can start the engine right away.
There is a fault in the glow plug system if the warning light
does not come on or
lights up continuously, contact a specialist garage as soon as possible to obtain
assistance.
There is a system fault in the engine control system if the warning light
has
started to flash while driving. The engine management system selects an emer-
gency programme which enables you to drive to the nearest specialist garage by
adopting a gentle style of driving.
The following text will be displayed in the information display*:
ENGINE FAULT WORKSHOP!
Turn signal system for vehicles towing a trailer*
Only if a trailer is attached to the vehicle, the indicator light
flashes together with
the turn signals.The indicator light
does not flash if a turn signal light on the trailer or on the
vehicle is not operating.
Coolant temperature/coolant level
After the ignition is switched on the warning light lights up blue until the engine
reaches operating temperature
1). Avoid running at high engine speeds, at full
throttle and at severe engine loads. The blue warning light goes out once the oper-
ating temperature has been reached .
The coolant temperature is too high or the coolant level too low if the warning light
lights up red or flashes red while driving.
3 peeps sound as an additional warning signal.
In this case stop and switch the engine off and check the coolant level; top up the
coolant as necessary ⇒page 190, “Replenishing the coolant”.
Do not continue your journey if for some reason it is not possible under the
conditions prevailing to top up with coolant. Keep the engine switched off and
obtain professional assistance from a specialist garage, otherwise it could lead to
severe engine damage.
If the coolant is within the specified range, the increased temperature may be
caused by an operating problem at the coolant fan. Check the fuse for the coolant
fan, replace it if necessary ⇒page 221, “Fuse assignment at the battery (manual
gearbox)”.
Do not continue driving if the warning light does not go off although the fluid is at
the correct level and also the fuse of the fan is in proper order. Contact a specialist
garage to obtain assistance.
Please also refer to the additional instructions ⇒page 189, “Cooling system”.
The following text will be displayed in the information display*:
STOP CHECK COOLANT OWNER'S MANUAL!1)Not valid for vehicles with information display.
s29g.4.book Page 32 Wednesday, June 17, 2009 9:54 AM
Page 50 of 263
Unlocking and locking49
Using the system
Safety
Driving Tips
General Maintenance
Breakdown assistance
Praktik
Technical Data
Interior monitor*
and towing protection
monitoring*The interior monitor and the towing protection monitoring detect
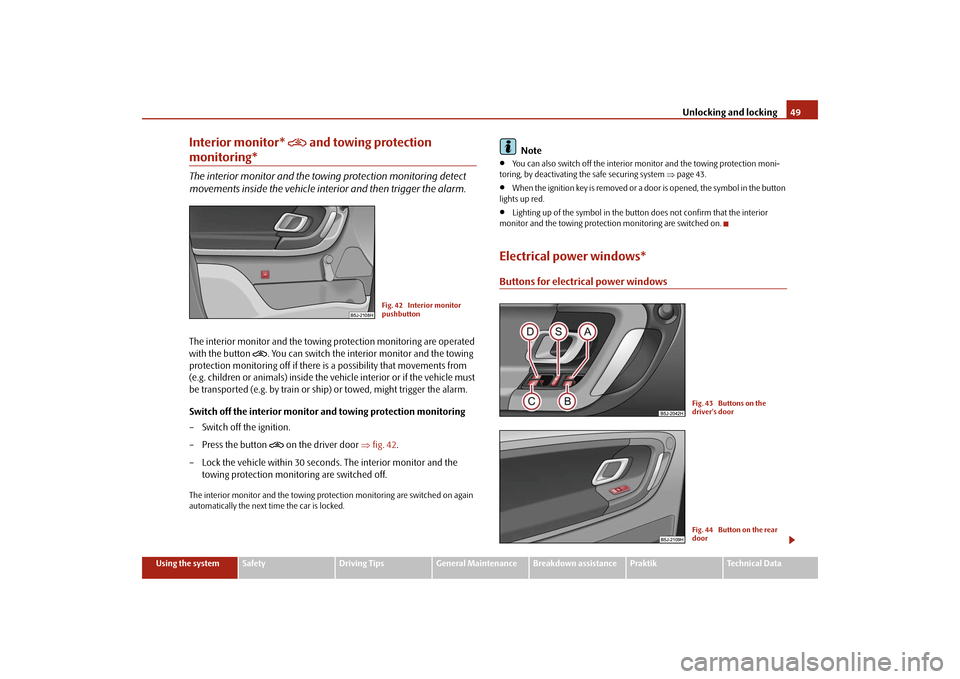
movements inside the vehicle interior and then trigger the alarm.The interior monitor and the towing protection monitoring are operated
with the button
. You can switch the interior monitor and the towing
protection monitoring off if there is a possibility that movements from
(e.g. children or animals) inside the vehicle interior or if the vehicle must
be transported (e.g. by train or ship) or towed, might trigger the alarm.
Switch off the interior monitor and towing protection monitoring
– Switch off the ignition.
– Press the button
on the driver door ⇒fig. 42.
– Lock the vehicle within 30 seconds. The interior monitor and the
towing protection monitoring are switched off.
The interior monitor and the towing protection monitoring are switched on again
automatically the next time the car is locked.
Note
•
You can also switch off the interior monitor and the towing protection moni-
toring, by deactivating the safe securing system ⇒page 43.
•
When the ignition key is removed or a door is opened, the symbol in the button
lights up red.
•
Lighting up of the symbol in the button does not confirm that the interior
monitor and the towing protection monitoring are switched on.
Electrical power windows*Buttons for electrical power windows
Fig. 42 Interior monitor
pushbutton
Fig. 43 Buttons on the
driver's doorFig. 44 Button on the rear
door
s29g.4.book Page 49 Wednesday, June 17, 2009 9:54 AM
Page 56 of 263
Lights and Visibility55
Using the system
Safety
Driving Tips
General Maintenance
Breakdown assistance
Praktik
Technical Data
Fog lights with the function “Corner”*
The fog lights with the function “Corner” improve the illumination of
areas close to the vehicle when turning, parking etc.The fog lights with the function “Corner” are regulated according to the steering
angle or after switching on the turn signal light
4) in the following circumstances:
•
the vehicle is stationary and the engine is running or it moves with a speed of
maximum 40 km/h;
•
the daylight driving lights are not switched on;
•
low beam switched on;
•
no reverse gear engaged;
•
no hazard warning light system switched on.
A fault in the system of the fog lights with the function “Corner” is confirmed by the
warning light lighting up or flashing
.
Note
If the fog lights are switched on, the function of the lights “Corner” is not active.Rear fog light
Switching on the rear fog light
– First of all turn the light switch into position
or
⇒page 54,
fig. 48.
– Pull the light switch out to the second detent . The fog lights* light
up at the same time.
If the vehicle is not fitted with fog lights*, the rear fog light is switched on by turning
the light switch to the position
and is pulled out directly to the position . This
switch does not have two positions, but only one position.The rear fog light warning light
⇒page 29 lights up in the instrument cluster
when the fog light is switched off.
Only the rear fog light of the trailer lights up if the vehicle is fitted with a towing
device from Škoda original accessoriesand when you are towing a trailer which
is fitted with the rear fog light.
Caution
The rear fog light should only be switched on if visibility is particularly poor
(conform with any varying legal provisions) to avoid dazzling vehicles behind your
vehicle.Headlamp range adjustment
Once the low beam is switched on you can then adapt the range of
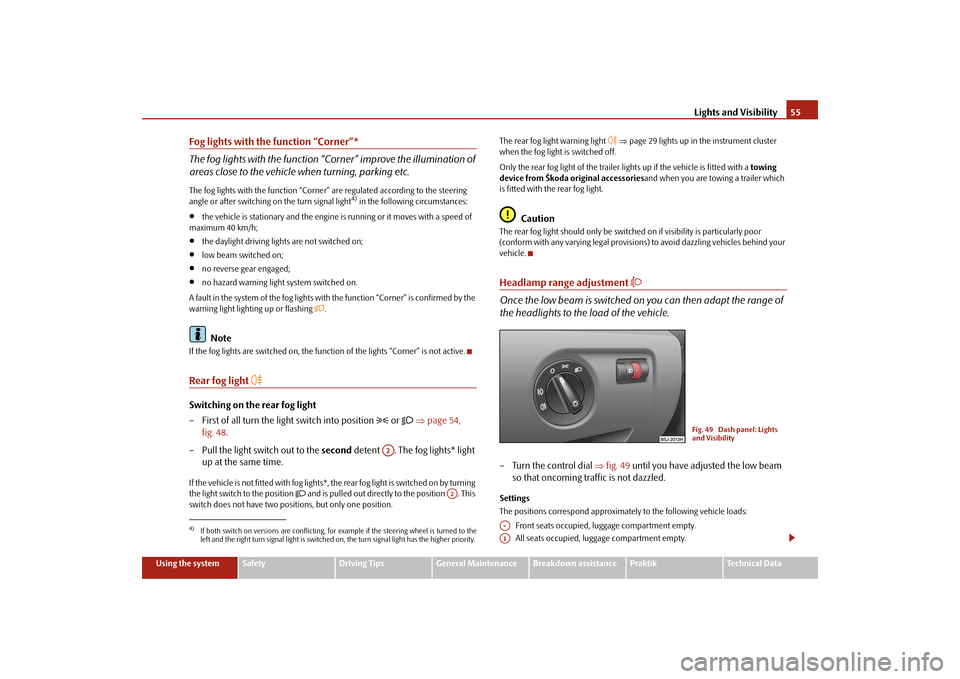
the headlights to the load of the vehicle.– Turn the control dial ⇒fig. 49 until you have adjusted the low beam
so that oncoming traffic is not dazzled.Settings
The positions correspond approximately to the following vehicle loads:
Front seats occupied, luggage compartment empty.
All seats occupied, luggage compartment empty.
4)If both switch on versions are conflicting, for example if the steering wheel is turned to the
left and the right turn signal light is switched on, the turn signal light has the higher priority.
A2
A2
Fig. 49 Dash panel: Lights
and Visibility
A-A1
s29g.4.book Page 55 Wednesday, June 17, 2009 9:54 AM
Page 110 of 263
Automatic gearbox109
Using the system
Safety
Driving Tips
General Maintenance
Breakdown assistance
Praktik
Technical Data In certain circumstances (e.g. when driving in mountainous regions or when towing
a trailer) it may be beneficial to select the manual shift programme ⇒page 110 for
a short time in order to adapt the gearbox ratios manually to the driving situations.
S - Position for sporty style of driving
Shifting up later into a higher gear makes it possible to fully exploit the power
potential of the engine. The gearbox also then shifts down at higher engine speeds
as in the position D.
The gearbox does not shift into the 6th gear in the position S, because the
maximum speed is achieved with the 5th gear.
The Shiftlock on the selector lever grip must be pressed when moving the selector
lever out of the position D into the position S.
WARNING
•
Never move the selector lever into position R or P when driving - risk of
an accident!
•
When the engine is running and the vehicle is stationary, it is necessary
to hold the car with the brake pedal in all the positions of the selector lever
(except P and N) since the power transmission is never completely inter-
rupted, also not when the engine is idling - the vehicle creeps.
•
You must on no account unintentionally operate the throttle (e.g. by
hand from the engine compartment) if a drive position is engaged when the
car is stationary. The vehicle would otherwise immediately start off - also
when the handbrake is firmly applied - risk of an accident!
•
You must move the selector lever into position P and firmly apply the
handbrake first before you or any other person opens the bonnet and starts
working on the engine when it is running - risk of accident! It is also essential
to observe all warnings ⇒page 185, “Working in the engine
compartment”.
Selector lever lockAutomatic selector lever lock
With the ignition on, the selector lever is locked when it is in the positions P and N.
You must first of all depress the brake pedal in order to move the selector lever out
of this position. The warning light
⇒page 35 lights up in the instrument cluster
as a reminder for the driver when the selector lever is in position P and N.
A time delay element ensures that the selector lever is not blocked when rapidly
switching over the position N (e.g. from R to D). This does, for example, allow one
to seesaw out a stuck vehicle. The selector lever lock will click into place if the lever
is in the N position for more than 2 seconds without the brake pedal being pressed.
The selector lever lock is only active if the vehicle is stationary or moving at speed
of less than 5 km/hour. The lock is switched off automatically into position N when
the car is travelling at a higher speed.
Shiftlock button
The Shiftlock button in the handle of selector lever prevents certain selector lever
positions being engaged inadvertently. The selector lever lock is cancelled when
you press the Shiftlock button.
Keylock
5)- Ignition key withdrawal lock
You can only withdraw the ignition key after switching off the ignition if the selector
lever is in position P. If the ignition key is withdrawn, the selector lever is blocked in
position P.
Note
On vehicles which are fitted with an automatic gearbox, you can withdraw the igni-
tion key after switching off the ignition in any position of the selector lever.5)This function is only valid for some countries.
s29g.4.book Page 109 Wednesday, June 17, 2009 9:54 AM
Page 112 of 263
Automatic gearbox111
Using the system
Safety
Driving Tips
General Maintenance
Breakdown assistance
Praktik
Technical Data
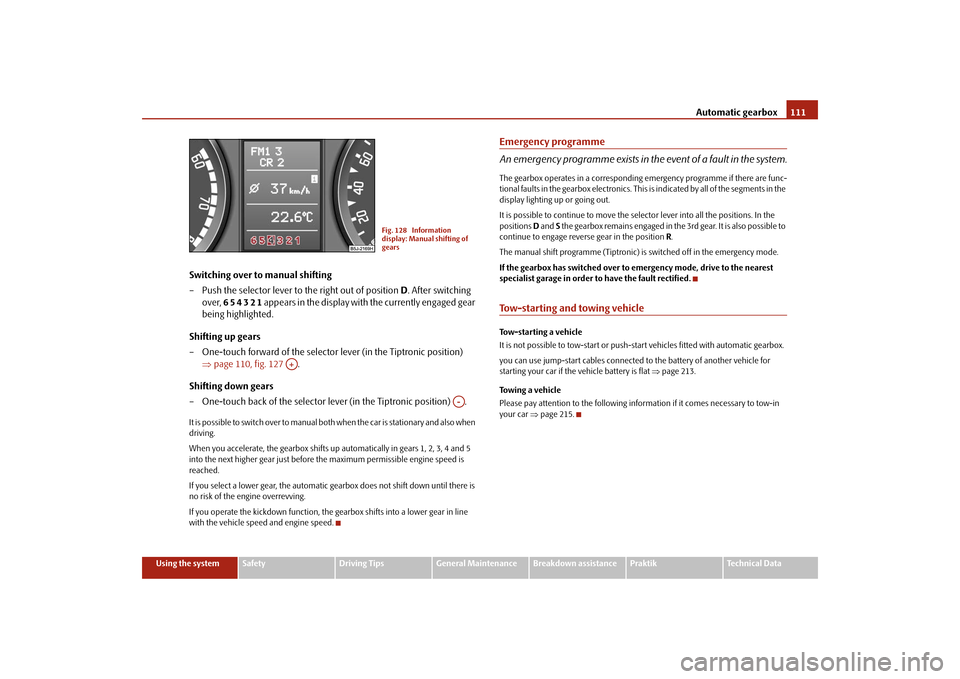
Switching over to manual shifting
– Push the selector lever to the right out of position D. After switching
over, 6 5 4 3 2 1 appears in the display with the currently engaged gear
being highlighted.
Shifting up gears
– One-touch forward of the selector lever (in the Tiptronic position)
⇒page 110, fig. 127 .
Shifting down gears
– One-touch back of the selector lever (in the Tiptronic position) .It is possible to switch over to manual both when the car is stationary and also when
driving.
When you accelerate, the gearbox shifts up automatically in gears 1, 2, 3, 4 and 5
into the next higher gear just before the maximum permissible engine speed is
reached.
If you select a lower gear, the automatic gearbox does not shift down until there is
no risk of the engine overrevving.
If you operate the kickdown function, the gearbox shifts into a lower gear in line
with the vehicle speed and engine speed.
Emergency programme
An emergency programme exists in the event of a fault in the system.The gearbox operates in a corresponding emergency programme if there are func-
tional faults in the gearbox electronics. This is indicated by all of the segments in the
display lighting up or going out.
It is possible to continue to move the selector lever into all the positions. In the
positions D and S the gearbox remains engaged in the 3rd gear. It is also possible to
continue to engage reverse gear in the position R.
The manual shift programme (Tiptronic) is switched off in the emergency mode.
If the gearbox has switched over to emergency mode, drive to the nearest
specialist garage in order to have the fault rectified.Tow-starting and towing vehicle Tow-starting a vehicle
It is not possible to tow-start or push-start vehicles fitted with automatic gearbox.
you can use jump-start cables connected to the battery of another vehicle for
starting your car if the vehicle battery is flat ⇒page 213.
Towing a vehicle
Please pay attention to the following information if it comes necessary to tow-in
your car ⇒page 215.
Fig. 128 Information
display: Manual shifting of
gears
A+
A-
s29g.4.book Page 111 Wednesday, June 17, 2009 9:54 AM
Page 162 of 263
Intelligent Technology161
Using the system
Safety
Driving Tips
General Maintenance
Breakdown assistance
Praktik
Technical Data
•
the structure of the tyre is damaged,
•
the vehicle is loaded to one side or with a load on the roof,
•
the wheels of an axle are loaded heavily (e.g. when towing a trailer or when
driving uphill or downhill),
•
the vehicle is operated in unfavourable winter conditions or on an unfirm
ground,
•
snow chains or emergency wheel are mounted,
•
the driver has a sporty style of driving (with sharp acceleration and high speed
when cornering).
Basic setting of tyre inflation pressure-control system
After changing the tyre inflation pressures or after changing one or several wheels,
a basic setting of the system must be carried out as follows.
•
Inflate all tyres to the specified inflation pressure ⇒page 198.
•
Switch on the ignition.
•
Press button
⇒page 160, fig. 167 for more than 2 seconds. While
pressing the button, the warning light
lights up. At the same time the basic
values are stored, which is confirmed with an acoustic sound and then the warning
light
goes out.
•
If the warning light
does not go out after the basic setting, there is a fault in
the system. Have the vehicle inspected by your nearest specialist garage.
Function description
After the basic setting of the system the “adaptation” of the tyre inflation pressures
and then the tyre pressure control in the individual tyres are performed.
Warning light
lights up
If the tyre inflation pressure of at least one wheel is insufficiently inflated in compar-
ison to the stored basic value, the warning light
⇒ lights up. Inflate all tyres
to the specified inflation pressure ⇒page 198, “Tyre life” and then perform a basic
setting of the system.
Warning light
flashes
If the warning light flashes, there is a system fault. Have the vehicle inspected by
your nearest specialist garage.
WARNING
•
When the warning light
lights up, immediately reduce the speed and
avoid sudden steering and brake manoeuvres. Please stop the vehicle
without delay at the nearest possible stop and inspect the tyres and their
inflation pressures.
•
The driver is responsible for the correct tyre inflation pressures. For this
reason, the tyre inflation pressures must be checked regularly.
•
Under certain circumstances (e.g. sporty style of driving, wintry or
unpaved roads) the warning light
can be delayed or does not light up at
all.
•
The tyre inflation pressure-control system does not take away the
responsability from the driver for the correct tyre inflation pressure.Note
The tyre inflation pressure-control system:•
does not replace the regular tyre inflation pressure control, because the system
cannot detect an even pressure loss;
•
cannot warn in case of very rapid tyre inflation pressure loss, e.g. in case of
sudden tyre damage. In this case carefully bring the vehicle to a standstill without
sudden steering movements and without sharp braking.
s29g.4.book Page 161 Wednesday, June 17, 2009 9:54 AM