battery SKODA ROOMSTER 2011 1.G User Guide
[x] Cancel search | Manufacturer: SKODA, Model Year: 2011, Model line: ROOMSTER, Model: SKODA ROOMSTER 2011 1.GPages: 212, PDF Size: 3.3 MB
Page 37 of 212
If the vehicle is locked by pressing the button
3 and some doors or the boot lid
are not closed, the turn signal lights flash only after closing. WARNING
If the vehicle is locked from the outside and the safe securing system is acti-
vated, there must not be any person in the vehicle as it is then not possible to
open either a door or a window from the inside. The locked doors make it
more difficult for rescuers to get into the vehicle in an emergency - hazard! Note
● Operate the radio remote control only when the doors and boot lid are closed
and you have visual contact with the vehicle.
● Once in the car, you must not press the lock button of the radio remote con-
trol before inserting the key into the ignition lock in order to avoid the car being
inadvertently locked and the alarm system being switched on. Should this happen,
press the unlock button of the radio remote control.
Synchronisation of the remote control If the vehicle cannot be unlocked by actuating the remote control system then it
is possible that the code in the key and the control unit in the vehicle are no lon-
ger synchronised. This can occur when the buttons on the radio-operated key are
actuated a number of times outside of the operative range of the equipment or
the battery on the remote control was replaced.
This means it is necessary to synchronise the code as follows:
● Press any button on the remote control.
● pressing of the button means that the door will unlock with the key within 1
minute.
Anti-theft alarm system
Description The anti-theft alarm system increases the level of protection against people seek-
ing to break into the vehicle. The system triggers audible and visual warning sig-
nals if an attempt is made to break into the vehicle. How is the alarm system activated?
The anti-theft alarm system is activated automatically when the vehicle is locked
with the key on the driver's door or by using the radio remote control. It is activa-
ted 30 seconds after locking the door.
How is the alarm system deactivated?
The anti-theft alarm system is deactivated if the vehicle is unlocked by only using
the radio remote control. The anti-theft alarm system is reactivated if the vehicle
is not opened within 30 seconds after transmitting the radio signal.
Once you unlock the vehicle by inserting the key into the driver door you then
have to insert the key into the ignition lock and switch the ignition on within 15
seconds after opening the door in order to deactivate the anti-theft alarm system.
The alarm will be triggered
if you do not switch on the ignition within 15 seconds.
When is the alarm triggered?
The following security areas of the locked vehicle are monitored:
● Bonnet,
● Boot lid,
● Doors,
● Ignition lock,
● Vehicle inclination ⇒ page 36,
● Vehicle interior ⇒ page 36,
● A drop in voltage of the on-board power supply,
● Socket of the factory-fitted towing device.
An alarm is immediately triggered if either of the two battery terminals is discon-
nected while the anti-theft alarm system is activated.
How is the alarm switched off?
You switch the alarm off if you unlock the vehicle with the radio remote control or
if you switch the ignition on. Note
● The working life of the alarm siren is 5 years. More detailed information is
available by a specialist garage.
● Before leaving the vehicle, check that all the doors and windows are closed in
order to ensure that the anti-theft alarm system is fully operational.
● Coding of the radio remote control and the receiver unit precludes the use of
the radio remote control from other vehicles. 35
Unlocking and locking Using the system Safety Driving Tips General Maintenance Breakdown assis-
tance Praktik Technical data
Page 40 of 212
Opening a window
–
Hold the key in the locking cylinder of the driver's door in the unlock position
or press the unlock button of the radio remote control until all the windows
are opened.
Closing a window
– Hold the key in the locking cylinder of the driver's door in the lock position or
press the lock button of the radio remote control until all the windows are
closed.
You can interrupt the opening or closing operation of the windows immediately by
releasing the key or the lock button. WARNING
The system is fitted with a force limiter ⇒ page 37. If there is an obstacle, the
closing process is stopped and the window goes down by several centimetres.
You should then take particular care when closing the windows! You may oth-
erwise suffer severe injuries as a result of getting an arm, for example, jam-
med in the window!
Operational faults Automatically operated power windows do not operate
If the battery of the car has been disconnected and then reconnected, the auto-
matically operated power windows do not operate. The system must be activated.
Proceed as follows in order to re-establish the function:
●
switch on the ignition,
● slightly pull on the upper edge of the relevant button and hold it until the win-
dow is closed,
● release the switch,
● you must pull the respective switch again in upward direction for approx. 3
seconds.
Operation in winter
Ice accumulating on the surface of the windows during the winter may result in a
greater resistance when closing the windows and the window may stop and move
back several centimetres It is necessary to put the force limiter out of operation in order to close the win-
dow ⇒ page 37
, Force limiter of the power windows. WARNING
The system is fitted with a force limiter ⇒ page 37. If there is an obstacle, the
closing process is stopped and the window goes down by several centimetres.
You should then take particular care when closing the windows! You may oth-
erwise suffer severe injuries as a result of getting an arm, for example, jam-
med in the window! CAUTION
● Keep the window glass clean to ensure correct function of the electric win-
dows.
● In the event of a freezing up of the windshield, first of all eliminate the ice
⇒
page 143 and then operate the power windows otherwise the power window
mechanism could be damaged.
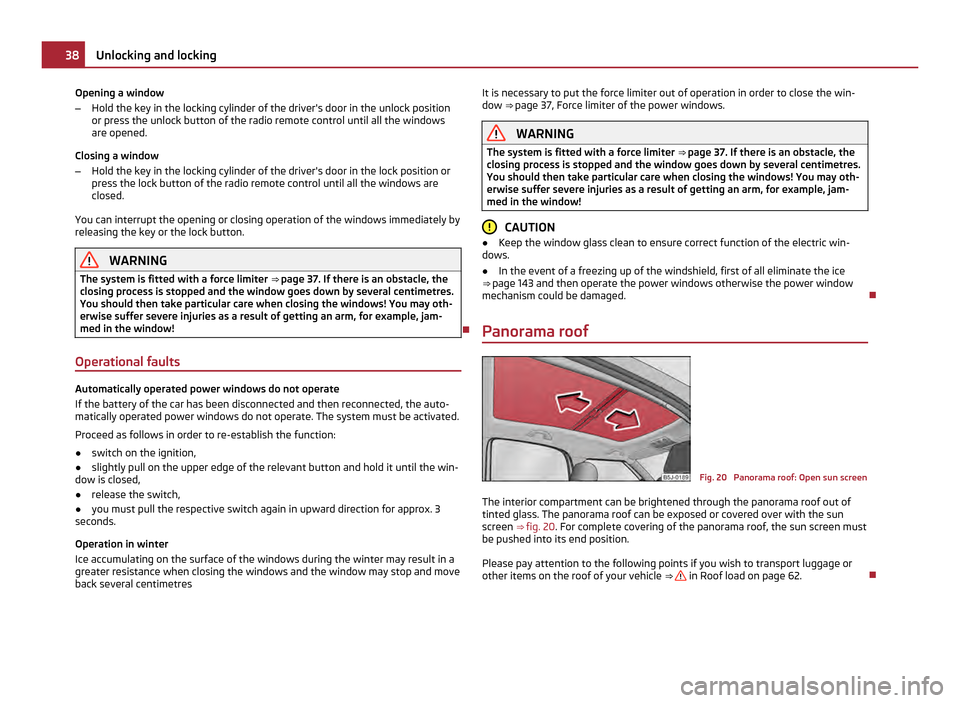
Panorama roof Fig. 20 Panorama roof: Open sun screen
The interior compartment can be brightened through the panorama roof out of
tinted glass. The panorama roof can be exposed or covered over with the sun
screen ⇒
fig. 20. For complete covering of the panorama roof, the sun screen must
be pushed into its end position.
Please pay attention to the following points if you wish to transport luggage or
other items on the roof of your vehicle ⇒ in Roof load on page 62.
38
Unlocking and locking
Page 46 of 212
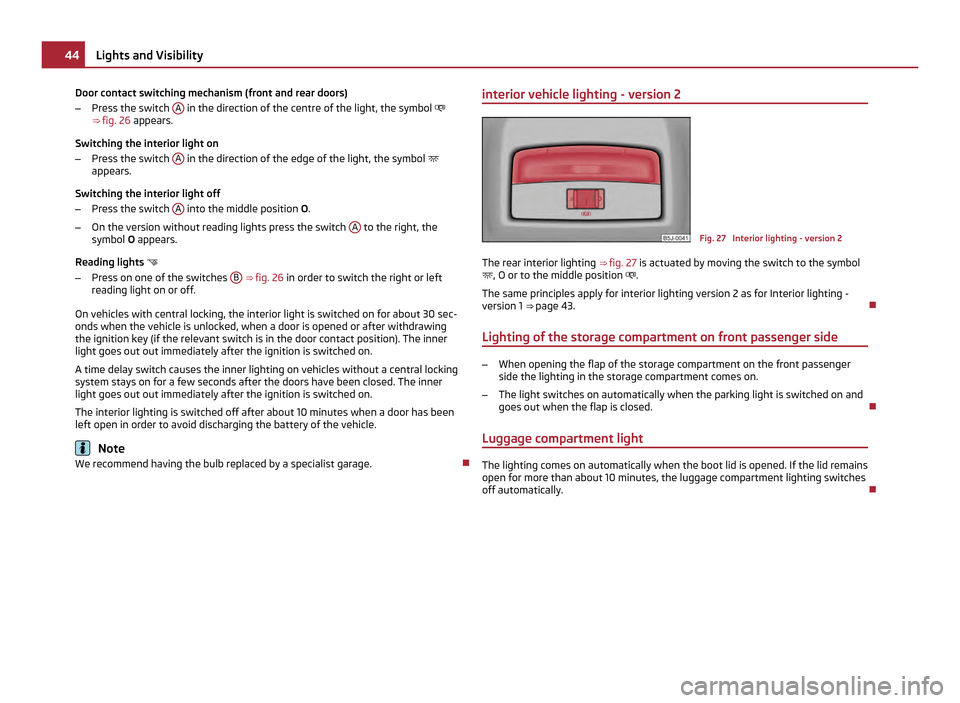
Door contact switching mechanism (front and rear doors)
– Press the switch A in the direction of the centre of the light, the symbol
⇒ fig. 26 appears.
Switching the interior light on
– Press the switch A in the direction of the edge of the light, the symbol
appears.
Switching the interior light off
– Press the switch A into the middle position
O.
– On the version without reading lights press the switch A to the right, the
symbol O appears.
Reading lights
– Press on one of the switches B
⇒ fig. 26 in order to switch the right or left
reading light on or off.
On vehicles with central locking, the interior light is switched on for about 30 sec-
onds when the vehicle is unlocked, when a door is opened or after withdrawing
the ignition key (if the relevant switch is in the door contact position). The inner
light goes out out immediately after the ignition is switched on.
A time delay switch causes the inner lighting on vehicles without a central locking
system stays on for a few seconds after the doors have been closed. The inner
light goes out out immediately after the ignition is switched on.
The interior lighting is switched off after about 10 minutes when a door has been
left open in order to avoid discharging the battery of the vehicle. Note
We recommend having the bulb replaced by a specialist garage. interior vehicle lighting - version 2 Fig. 27 Interior lighting - version 2
The rear interior lighting ⇒ fig. 27 is actuated by moving the switch to the symbol
, O or to the middle position .
The same principles apply for interior lighting version 2 as for Interior lighting -
version 1 ⇒
page 43.
Lighting of the storage compartment on front passenger side –
When opening the flap of the storage compartment on the front passenger
side the lighting in the storage compartment comes on.
– The light switches on automatically when the parking light is switched on and
goes out when the flap is closed.
Luggage compartment light The lighting comes on automatically when the boot lid is opened. If the lid remains
open for more than about 10 minutes, the luggage compartment lighting switches
off automatically.
44
Lights and Visibility
Page 54 of 212
You can electrically heat the seat cushions and the seat backrests of the front
seats.
– By pressing the rocker switch in the position 1 or 2 switch on the front seat
heating to 25 % or 100 % of its power output ⇒ fig. 36.
– To switch off the heating shift the rocker switch into the horizontal position. WARNING
● If, as an occupant, you have a subdued pain and/or temperature sensitivi-
ty, e.g. through medication, paralysis or because of chronic illness (e.g. diabe-
tes), we recommend not to use the seat heating of the driver or front passen-
ger seat. This can lead to burns on the back, the posterior and the legs which
are difficult to heal. If the seat heating is used, we recommend to make regu-
lar breaks in your journey when driving long distances, so that the body can
recuperate from the stress of the journey. Please consult your doctor, who can
evaluate your specific condition. CAUTION
● You should not kneel on the seats or otherwise apply pressure at specific
points in order to avoid damaging the heating elements of the seat heaters.
● Do not use the seat heating if the seats are not occupied by persons or if ob-
jects are fastened or stored on them, for example a child seat, a bag etc. A fault of
the heating elements in the seat heating can occur.
● Do not clean the seats moist ⇒ page 145.Note
The seat heating should only be switched on when the engine is running. This has
a significant effect of saving on the battery capacity. Rear seats
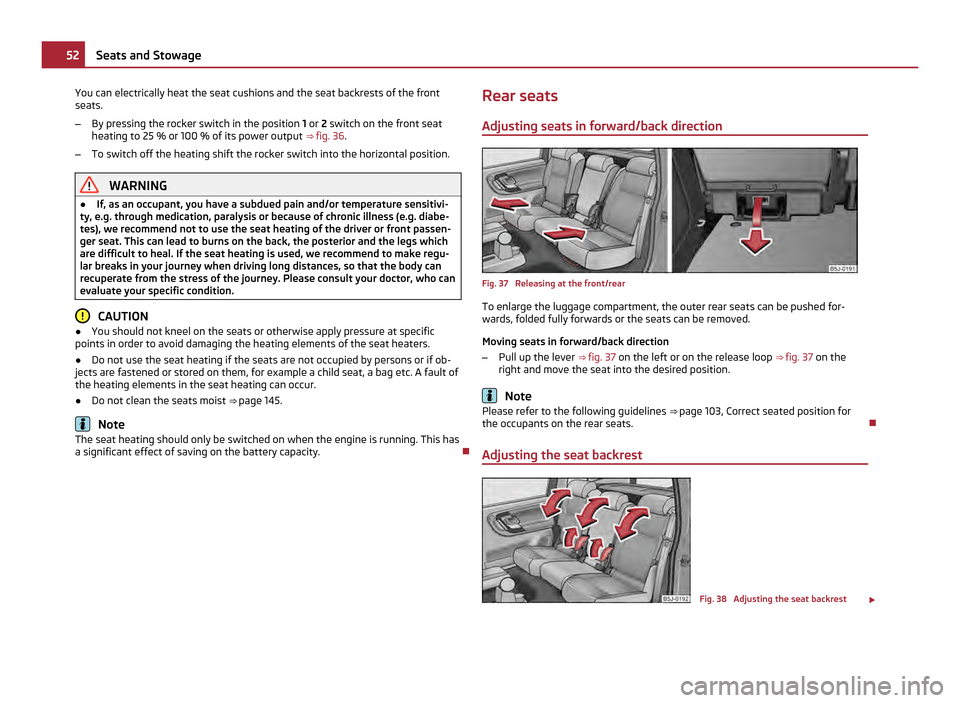
Adjusting seats in forward/back direction Fig. 37 Releasing at the front/rear
To enlarge the luggage compartment, the outer rear seats can be pushed for-
wards, folded fully forwards or the seats can be removed.
Moving seats in forward/back direction
– Pull up the lever ⇒ fig. 37 on the left or on the release loop ⇒ fig. 37 on the
right and move the seat into the desired position. Note
Please refer to the following guidelines ⇒ page 103, Correct seated position for
the occupants on the rear seats.
Adjusting the seat backrest Fig. 38 Adjusting the seat backrest
£52
Seats and Stowage
Page 66 of 212
Cigarette lighters and power sockets
Cigarette lighter You can also use the socket on the cigarette lighter for other elec-
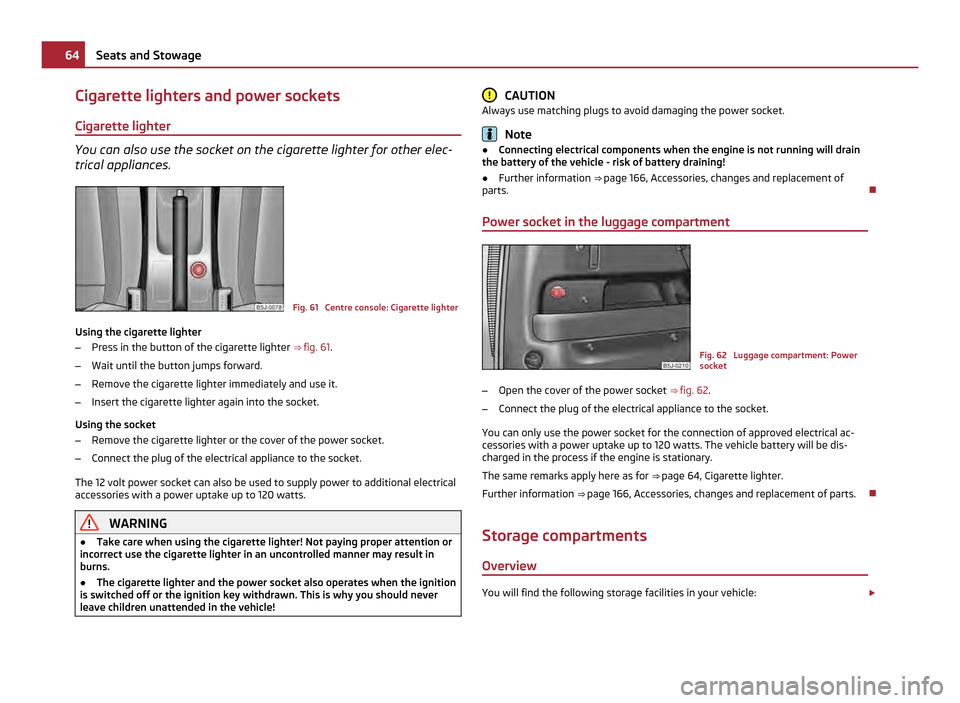
trical appliances. Fig. 61 Centre console: Cigarette lighter
Using the cigarette lighter
– Press in the button of the cigarette lighter ⇒ fig. 61 .
– Wait until the button jumps forward.
– Remove the cigarette lighter immediately and use it.
– Insert the cigarette lighter again into the socket.
Using the socket
– Remove the cigarette lighter or the cover of the power socket.
– Connect the plug of the electrical appliance to the socket.
The 12 volt power socket can also be used to supply power to additional electrical
accessories with a power uptake up to 120 watts. WARNING
● Take care when using the cigarette lighter! Not paying proper attention or
incorrect use the cigarette lighter in an uncontrolled manner may result in
burns.
● The cigarette lighter and the power socket also operates when the ignition
is switched off or the ignition key withdrawn. This is why you should never
leave children unattended in the vehicle! CAUTION
Always use matching plugs to avoid damaging the power socket. Note
● Connecting electrical components when the engine is not running will drain
the battery of the vehicle - risk of battery draining!
● Further information ⇒ page 166 , Accessories, changes and replacement of
parts.
Power socket in the luggage compartment Fig. 62 Luggage compartment: Power
socket
– Open the cover of the power socket ⇒
fig. 62.
– Connect the plug of the electrical appliance to the socket.
You can only use the power socket for the connection of approved electrical ac-
cessories with a power uptake up to 120 watts. The vehicle battery will be dis-
charged in the process if the engine is stationary.
The same remarks apply here as for ⇒ page 64
, Cigarette lighter.
Further information ⇒ page 166, Accessories, changes and replacement of parts.
Storage compartments Overview You will find the following storage facilities in your vehicle:
£64
Seats and Stowage
Page 80 of 212
Starting-off and Driving
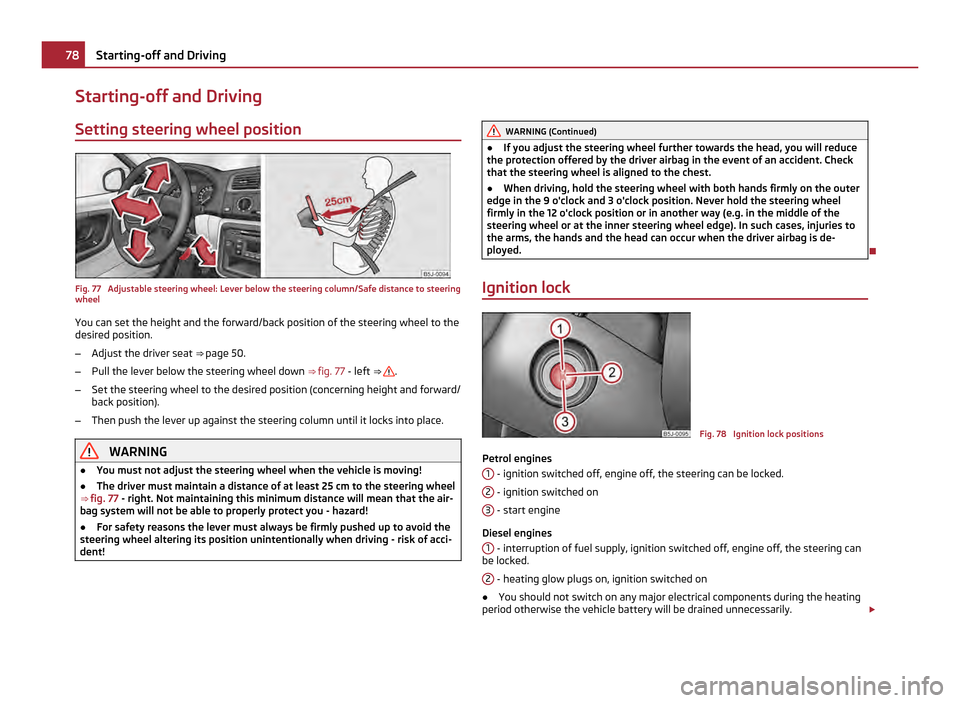
Setting steering wheel position Fig. 77 Adjustable steering wheel: Lever below the steering column/Safe distance to steering
wheel
You can set the height and the forward/back position of the steering wheel to the
desired position.
– Adjust the driver seat ⇒ page 50.
– Pull the lever below the steering wheel down ⇒ fig. 77 - left ⇒ .
– Set the steering wheel to the desired position (concerning height and forward/
back position).
– Then push the lever up against the steering column until it locks into place. WARNING
● You must not adjust the steering wheel when the vehicle is moving!
● The driver must maintain a distance of at least 25 cm to the steering wheel
⇒ fig. 77 - right. Not maintaining this minimum distance will mean that the air-
bag system will not be able to properly protect you - hazard!
● For safety reasons the lever must always be firmly pushed up to avoid the
steering wheel altering its position unintentionally when driving - risk of acci-
dent! WARNING (Continued)
● If you adjust the steering wheel further towards the head, you will reduce
the protection offered by the driver airbag in the event of an accident. Check
that the steering wheel is aligned to the chest.
● When driving, hold the steering wheel with both hands firmly on the outer
edge in the 9 o'clock and 3 o'clock position. Never hold the steering wheel
firmly in the 12 o'clock position or in another way (e.g. in the middle of the
steering wheel or at the inner steering wheel edge). In such cases, injuries to
the arms, the hands and the head can occur when the driver airbag is de-
ployed.
Ignition lock Fig. 78 Ignition lock positions
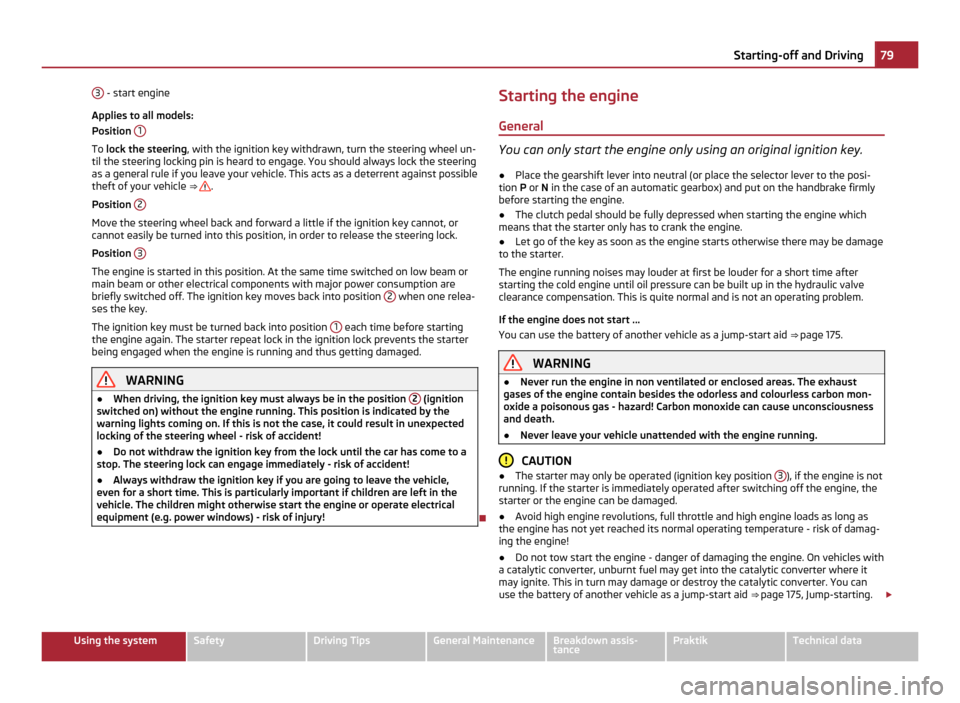
Petrol engines 1 - ignition switched off, engine off, the steering can be locked.
2 - ignition switched on
3 - start engine
Diesel engines 1 - interruption of fuel supply, ignition switched off, engine off, the steering can
be locked.
2 - heating glow plugs on, ignition switched on
● You should not switch on any major electrical components during the heating
period otherwise the vehicle battery will be drained unnecessarily. £78
Starting-off and Driving
Page 81 of 212
3
- start engine
Applies to all models:
Position 1 To
lock the steering , with the ignition key withdrawn, turn the steering wheel un-
til the steering locking pin is heard to engage. You should always lock the steering
as a general rule if you leave your vehicle. This acts as a deterrent against possible
theft of your vehicle ⇒ .
Position 2 Move the steering wheel back and forward a little if the ignition key cannot, or
cannot easily be turned into this position, in order to release the steering lock.
Position
3 The engine is started in this position. At the same time switched on low beam or
main beam or other electrical components with major power consumption are
briefly switched off. The ignition key moves back into position
2 when one relea-
ses the key.
The ignition key must be turned back into position 1 each time before starting
the engine again. The starter repeat lock in the ignition lock prevents the starter
being engaged when the engine is running and thus getting damaged. WARNING
● When driving, the ignition key must always be in the position 2 (ignition
switched on) without the engine running. This position is indicated by the
warning lights coming on. If this is not the case, it could result in unexpected
locking of the steering wheel - risk of accident!
● Do not withdraw the ignition key from the lock until the car has come to a
stop. The steering lock can engage immediately - risk of accident!
● Always withdraw the ignition key if you are going to leave the vehicle,
even for a short time. This is particularly important if children are left in the
vehicle. The children might otherwise start the engine or operate electrical
equipment (e.g. power windows) - risk of injury! Starting the engine
General You can only start the engine only using an original ignition key.
● Place the gearshift lever into neutral (or place the selector lever to the posi-
tion P or N in the case of an automatic gearbox) and put on the handbrake firmly
before starting the engine.
● The clutch pedal should be fully depressed when starting the engine which
means that the starter only has to crank the engine.
● Let go of the key as soon as the engine starts otherwise there may be damage
to the starter.
The engine running noises may louder at first be louder for a short time after
starting the cold engine until oil pressure can be built up in the hydraulic valve
clearance compensation. This is quite normal and is not an operating problem.
If the engine does not start ...
You can use the battery of another vehicle as a jump-start aid ⇒
page 175. WARNING
● Never run the engine in non ventilated or enclosed areas. The exhaust
gases of the engine contain besides the odorless and colourless carbon mon-
oxide a poisonous gas - hazard! Carbon monoxide can cause unconsciousness
and death.
● Never leave your vehicle unattended with the engine running. CAUTION
● The starter may only be operated (ignition key position 3 ), if the engine is not
running. If the starter is immediately operated after switching off the engine, the
starter or the engine can be damaged.
● Avoid high engine revolutions, full throttle and high engine loads as long as
the engine has not yet reached its normal operating temperature - risk of damag-
ing the engine!
● Do not tow start the engine - danger of damaging the engine. On vehicles with
a catalytic converter, unburnt fuel may get into the catalytic converter where it
may ignite. This in turn may damage or destroy the catalytic converter. You can
use the battery of another vehicle as a jump-start aid ⇒ page 175, Jump-starting
.£ 79
Starting-off and Driving Using the system Safety Driving Tips General Maintenance Breakdown assis-
tance Praktik Technical data
Page 82 of 212
For the sake of the environment
Never warm up the engine when the vehicle is standing. Drive off right away.
When driving the engine reaches its operating temperature more rapidly and the
pollutant emissions are lower.
Petrol engines These engines are fitted with a starter system which selects the correct fuel-air
mixture for every external air temperature.
●
Do not operate accelerator before and when starting engine.
● Interrupt the attempt at starting after 10 seconds if the engine does not start
right away and wait for about 30 seconds before repeating the attempt.
● It is possible that the fuse on the electrical fuel pump is defect if the engine
still does not start. Check the fuse and replace it if necessary ⇒ page 179.
● If the engine does not start, contact the nearest specialist garage to obtain
professional assistance.
It may be necessary, if the engine is very hot, to slightly depress the accelerator
after the engine has started.
Diesel engines Glow plug system
Diesel engines are equipped with a glow plug system, the pre-glow period being
controlled automatically in line with the coolant temperature and outside temper-
ature.
The pre-glow indicator light comes on after the ignition has been switched on.
You should not switch on any major electrical components during the heating
period otherwise the vehicle battery will be drained unnecessarily.
● You should start the engine immediately after the glow plug warning light
has gone out.
● The glow plug warning light will come on for about one second if the engine is
at a normal operating temperature or if the outside temperature is above +5 °C.
This means that you can start the engine right away.
● Interrupt the attempt at starting after 10 seconds if the engine does not start
right away and wait for about 30 seconds before repeating the attempt. ●
It is possible that the fuse on the diesel pre-glow system is defect if the en-
gine still does not start. Check the fuse and replace it if necessary ⇒ page 179.
● Contact the nearest specialist garage to obtain professional assistance.
Starting the engine after fuel tank has run dry
It may take longer than normal to start the engine after refuelling if the fuel tank
has run completely dry - up to one minute. This is because the fuel system must
first of all be filled while the attempting to start the engine.
Switching off the engine –
The engine can be switched off by turning the ignition key into position 1 ⇒
fig. 78 . WARNING
● Never switch off the engine before the vehicle is stationary - risk of acci-
dent!
● The brake booster only operates when the engine is running. Greater
physical effort for braking is required when engine is switched off. Because if
you do not stop as normal, this can cause an accident and severe injuries. CAUTION
you should not switch the engine off right away at the end of your journey after
the engine has been operated for a lengthy period at high loads but should be al-
lowed it to run at idling speed for about 2
minutes. This prevents any accumula-
tion of heat when the engine is switched off. Note
● The radiator fan may continue running for a further 10 minutes or so after the
engine and the ignition have been switched off. The coolant fan may, however, al-
so switch on again after some time if the coolant temperature rises because of an
accumulation of heat in the engine or if the engine is warm and the engine com-
partment is additionally heated by strong sunlight.
● This is why particular care is required when carrying out any work in the en-
gine compartment ⇒
page 150, Working in the engine compartment. 80
Starting-off and Driving
Page 87 of 212
WARNING
First ensure that it is not too high for the traffic conditions which exist at that
moment before resuming the stored speed.
Switching off the cruise control system completely –
Press the switch A
⇒ fig. 82 to the right into position OFF.
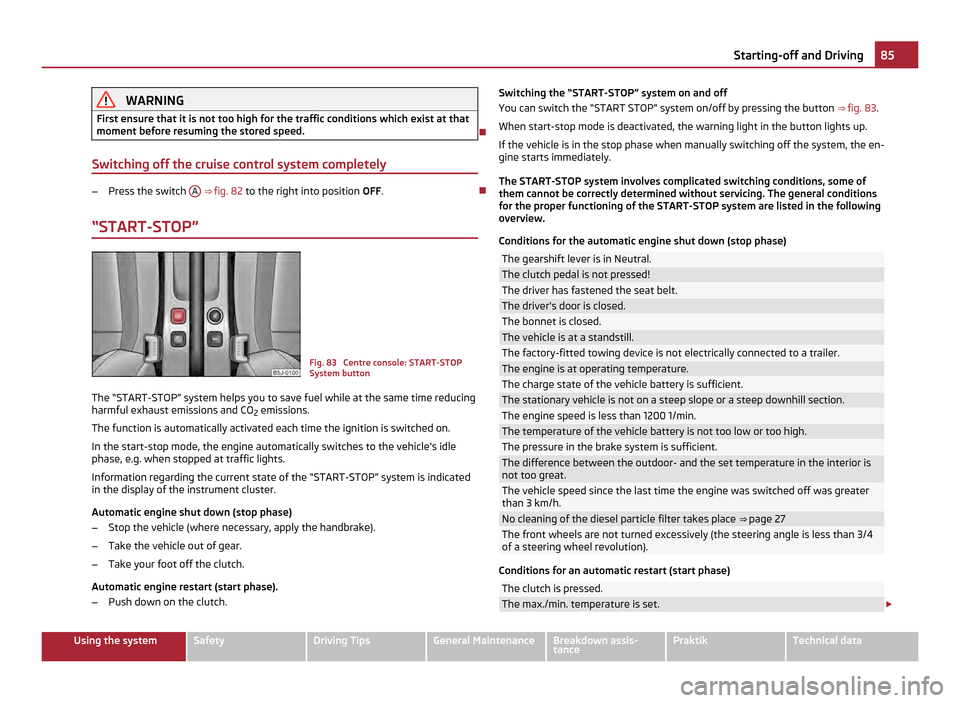
“START-STOP” Fig. 83 Centre console: START-STOP
System button
The “START-STOP” system helps you to save fuel while at the same time reducing
harmful exhaust emissions and CO 2 emissions.
The function is automatically activated each time the ignition is switched on.
In the start-stop mode, the engine automatically switches to the vehicle's idle
phase, e.g. when stopped at traffic lights.
Information regarding the current state of the
“START-STOP” system is indicated
in the display of the instrument cluster.
Automatic engine shut down (stop phase)
– Stop the vehicle (where necessary, apply the handbrake).
– Take the vehicle out of gear.
– Take your foot off the clutch.
Automatic engine restart (start phase).
– Push down on the clutch. Switching the “START-STOP” system on and off
You can switch the
“START STOP” system on/off by pressing the button ⇒ fig. 83.
When start-stop mode is deactivated, the warning light in the button lights up.
If the vehicle is in the stop phase when manually switching off the system, the en-
gine starts immediately.
The START-STOP system involves complicated switching conditions, some of
them cannot be correctly determined without servicing. The general conditions
for the proper functioning of the START-STOP system are listed in the following
overview.
Conditions for the automatic engine shut down (stop phase) The gearshift lever is in Neutral.
The clutch pedal is not pressed!
The driver has fastened the seat belt.
The driver's door is closed.
The bonnet is closed.
The vehicle is at a standstill.
The factory-fitted towing device is not electrically connected to a trailer.
The engine is at operating temperature.
The charge state of the vehicle battery is sufficient.
The stationary vehicle is not on a steep slope or a steep downhill section.
The engine speed is less than 1200 1/min.
The temperature of the vehicle battery is not too low or too high.
The pressure in the brake system is sufficient.
The difference between the outdoor- and the set temperature in the interior is
not too great.
The vehicle speed since the last time the engine was switched off was greater
than 3 km/h.
No cleaning of the diesel particle filter takes place
⇒ page 27 The front wheels are not turned excessively (the steering angle is less than 3/4
of a steering wheel revolution). Conditions for an automatic restart (start phase)
The clutch is pressed.
The max./min. temperature is set.
£ 85
Starting-off and Driving Using the system Safety Driving Tips General Maintenance Breakdown assis-
tance Praktik Technical data
Page 88 of 212
The Defrost function for the windshield is switched on.
A high blower stage has been selected.
Button for the START-STOP system is pressed
Conditions for an automatic restart without driver intervention
The vehicle moves at a speed of more than 3 km/h.
The difference between the outdoor- and the set temperature in the interior is
too great.
The charge state of the vehicle battery is not sufficient.
The pressure in the brake system is not sufficient.
Messages in the instrument cluster display (valid for vehicles without
Information display) ERROR: START STOP
Error in the START-STOP system
START STOP NOT POSSIBLE Automatic engine shut down is not
possible
START STOP ACTIVE Automatic engine shut down (stop
phase)
SWITCH OFF IGNITION
Switch off the ignition
START MANUALLY
Start the engine manually
WARNING
● If the engine is switched off, neither the brake booster nor the electrohy-
draulic power steering operates.
● Never let the vehicle roll with the engine switched off. CAUTION
If the “START-STOP” system is used at very high outside temperatures over a very
long period of time, the vehicle battery can be damaged. Note
● Changes to the outdoor temperature can have an effect on the internal tem-
perature of the vehicle battery even after several hours. For example, if the vehi-
cle is standing outside for a long period of time at a temperature below freezing
or is in direct sunlight, it may take several hours until the temperature inside the
battery reaches the appropriate temperature for the START-STOP system.
● In some instances it may be necessary to start the engine manually with the
ignition key (e.g. when the seat belt is not inserted or the driver's door is opened
for more than 30 seconds). Follow the messages in the instrument cluster display.
● If the Climatronic is running in automatic mode, under certain conditions, the
engine may not switch off automatically. 86
Starting-off and Driving