brake light SKODA ROOMSTER 2012 1.G Owner's Manual
[x] Cancel search | Manufacturer: SKODA, Model Year: 2012, Model line: ROOMSTER, Model: SKODA ROOMSTER 2012 1.GPages: 194, PDF Size: 4.8 MB
Page 5 of 194
Table of Contents
Abbreviations
Using the system
Cockpit 7
Overview 6
Instruments and Indicator Lights 8
Instrument cluster 8
Multifunction display (onboard computer) 12
MAXI DOT (information display) 15
Warning lights 17
Unlocking and locking 25
Vehicle key 25
Locking/unlocking the vehicle without central
locking 26
Central locking system 27
Remote control 29
Anti-theft alarm system 30
Interior monitor and towing protection 31
Emergency locking of the doors 31
Boot lid 32
Electrical power windows 33
Panorama roof 35
Lights and visibility 36
Lights 36
Interior light 41
Visibility 42
Windscreen wipers and washers 42
Rear window 45
Seats and Stowage 47
Front seats 47
Head restraints 48
Rear seats 49Boot 51
Variable loading floor in the boot 55
Bicycle carrier in the luggage compartment 56
Roof rack system 58
Cup holders 59
Ashtray 60
Cigarette lighter, 12-volt power socket 60
Storage compartments 61
Clothes hooks 65
Parking ticket holder 66
Heating and air conditioning system 67
Heating and air conditioning system 67
Air outlet vents 68
Heating 68
Air conditioning system (manual air conditioning
system) 70
Climatronic (automatic air conditioning
system) 73
Starting-off and Driving 76
Starting and stopping the engine 76
Brakes and brake assist systems 78
Shifting (manual gearbox) 82
pedals 82
Parking aid 82
Cruise control system (CCS) 83
START/STOP 85
Automatic gearbox 87
Automatic gearbox 87
Communication 92
Mobile phones and two-way radio systems 92
Universal telephone preinstallation GSM II 92
Voice control 96
Multimedia 97 Safety
Passive Safety 100
General information 100
Correct seated position 101
Seat belts 104
Seat belts 104
Airbag system 109
Description of the airbag system 109
Front airbags 110
Side airbags 111
Head airbags 112
Deactivating airbags 113
Transporting children safely 115
Child seat 115
Driving Tips
Driving and the Environment 119
The first 1 500 km 119
Catalytic converter 119
Economical and environmentally friendly
driving 120
Environmental compatibility 122
Driving abroad 123
Avoiding damage to your vehicle 123
Driving through water on the street 124
Towing a trailer 125
Towing a trailer 125
General Maintenance
Taking care of and cleaning the vehicle 127
Taking care of your vehicle 127
3
Table of Contents
Page 19 of 194
WARNING
If you have to stop for technical reasons, then park the vehicle at a safe dis-
tance from the traffic, switch off the engine and activate the hazard warning
light system » page 40. Note
■ If warning messages are shown in the information display, you need to confirm
these messages with the button B
» Fig. 7
on page 15 in order to call up the main
menu.
■ As long as the operational faults are not rectified, the symbols are always indi-
cated again. After they are displayed for the first time, the symbols continue to be
indicated without any extra messages for the driver. ÐWarning lights
Overview
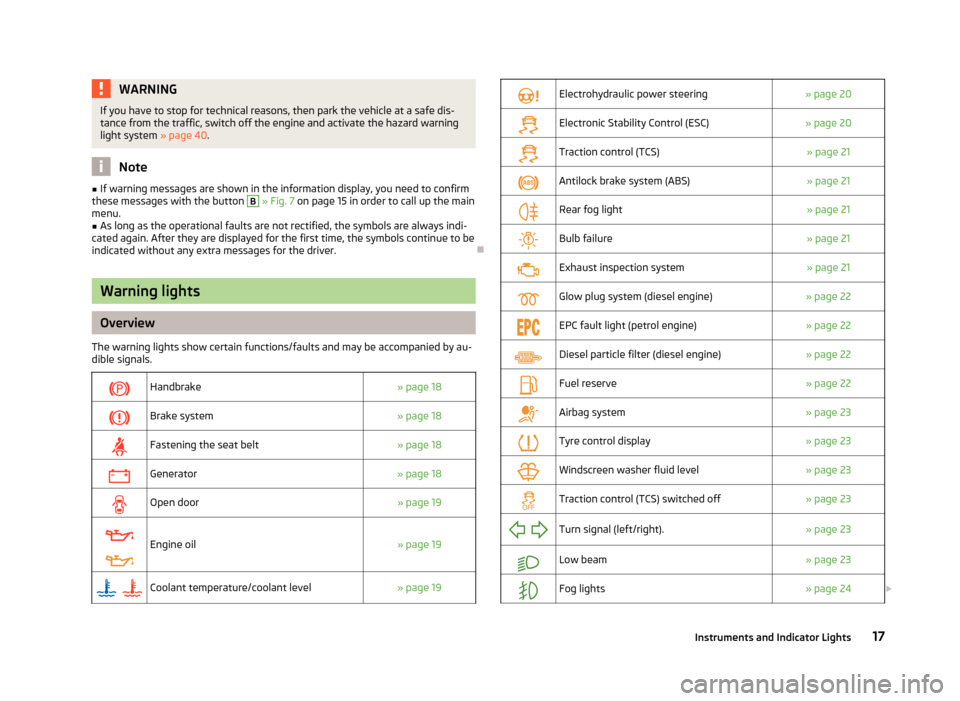
The warning lights show certain functions/faults and may be accompanied by au-
dible signals.
Handbrake
» page 18
Brake system
» page 18
Fastening the seat belt
» page 18
Generator
» page 18
Open door
» page 19
Engine oil
» page 19
Coolant temperature/coolant level
» page 19
Electrohydraulic power steering
» page 20
Electronic Stability Control (ESC)
» page 20
Traction control (TCS)
» page 21
Antilock brake system (ABS)
» page 21
Rear fog light
» page 21
Bulb failure
» page 21
Exhaust inspection system
» page 21
Glow plug system (diesel engine)
» page 22
EPC fault light (petrol engine)
» page 22
Diesel particle filter (diesel engine)
» page 22
Fuel reserve
» page 22
Airbag system
» page 23
Tyre control display
» page 23
Windscreen washer fluid level
» page 23
Traction control (TCS) switched off
» page 23
Turn signal (left/right).
» page 23
Low beam
» page 23
Fog lights
» page 24£ 17
Instruments and Indicator Lights
Page 20 of 194
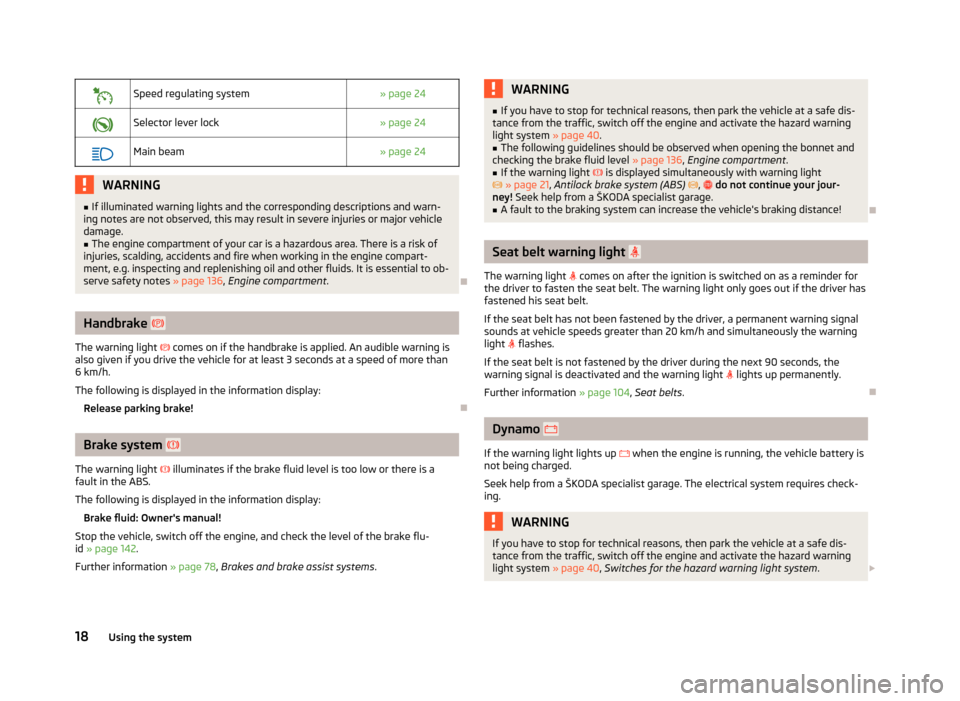
Speed regulating system
» page 24
Selector lever lock
» page 24
Main beam
» page 24WARNING
■ If illuminated warning lights and the corresponding descriptions and warn-
ing notes are not observed, this may result in severe injuries or major vehicle
damage.
■ The engine compartment of your car is a hazardous area. There is a risk of
injuries, scalding, accidents and fire when working in the engine compart-
ment, e.g. inspecting and replenishing oil and other fluids. It is essential to ob-
serve safety notes »
page 136, Engine compartment . ÐHandbrake
The warning light comes on if the handbrake is applied. An audible warning is
also given if you drive the vehicle for at least 3
seconds at a speed of more than
6 km/h.
The following is displayed in the information display:
Release parking brake! ÐBrake system
The warning light illuminates if the brake fluid level is too low or there is a
fault in the ABS.
The following is displayed in the information display:
Brake fluid: Owner's manual!
Stop the vehicle, switch off the engine, and check the level of the brake flu-
id » page 142.
Further information » page 78, Brakes and brake assist systems. WARNING
■ If you have to stop for technical reasons, then park the vehicle at a safe dis-
tance from the traffic, switch off the engine and activate the hazard warning
light system » page 40.
■ The following guidelines should be observed when opening the bonnet and
checking the brake fluid level » page 136, Engine compartment .
■ If the warning light is displayed simultaneously with warning light
» page 21, Antilock brake system (ABS) , do not continue your jour-
ney! Seek help from a ŠKODA specialist garage. ■ A fault to the braking system can increase the vehicle's braking distance! Ð Seat belt warning light
The warning light comes on after the ignition is switched on as a reminder for
the driver to fasten the seat belt. The warning light only goes out if the driver has
fastened his seat belt.
If the seat belt has not been fastened by the driver, a permanent warning signal
sounds at vehicle speeds greater than 20 km/h and simultaneously the warning
light flashes.
If the seat belt is not fastened by the driver during the next 90 seconds, the
warning signal is deactivated and the warning light lights up permanently.
Further information » page 104, Seat belts. Ð Dynamo
If the warning light lights up when the engine is running, the vehicle battery is
not being charged.
Seek help from a ŠKODA
specialist garage. The electrical system requires check-
ing. WARNING
If you have to stop for technical reasons, then park the vehicle at a safe dis-
tance from the traffic, switch off the engine and activate the hazard warning
light system » page 40, Switches for the hazard warning light system .£
18 Using the system
Page 23 of 194
Traction control system (TCS)
The warning light flashes to show that the ASR is currently operating.
If the warning light comes on immediately after starting the engine, the ASR
can be switched off for technical reasons. Switch the ignition off and on again. If
the warning light does not light up after you switch the engine back on, the ASR
is fully functional again.
If the warning light lights up, there is a fault in the ASR.
The following is displayed in the information display: Error: traction control (ASR)
Seek help from a ŠKODA
specialist garage.
The fact that the TCS system operates together with the ABS means that the TCS
warning light will also come on if the ABS system is not operating properly.
Further information » page 81, Traction control system (TCS). Note
If the vehicle's battery has been disconnected and reconnected, the warning light comes on after switching on the ignition. The warning light should go out after
driving a short distance. ÐAntilock brake system (ABS)
If the warning light lights up, there is a fault in the ABS.
The following is displayed in the information display: Error: ABS
The vehicle will only be braked by the normal brake system without the ABS.
Seek help from a
ŠKODA specialist garage. WARNING
■ If you have to stop for technical reasons, then park the vehicle at a safe dis-
tance from the traffic, switch off the engine and activate the hazard warning
light system » page 40.
■ If the warning light » page 18 is displayed simultaneously with the ABS
warning light , do not continue your journey! Seek help from a
ŠKODA
specialist garage. ■ A fault to the ABS system or the braking system can increase the vehicle's
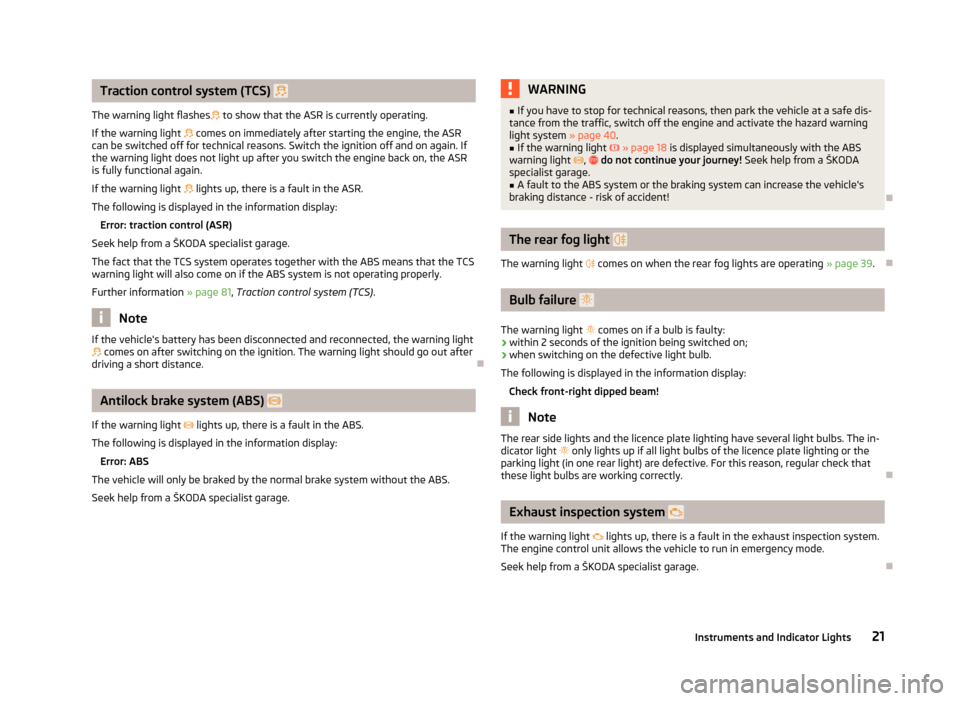
braking distance - risk of accident! Ð The rear fog light
The warning light comes on when the rear fog lights are operating » page 39.Ð Bulb failure
The warning light comes on if a bulb is faulty:
› within 2 seconds of the ignition being switched on;
› when switching on the defective light bulb.
The following is displayed in the information display: Check front-right dipped beam! Note
The rear side lights and the licence plate lighting have several light bulbs. The in-
dicator light only lights up if all light bulbs of the licence plate lighting or the
parking light (in one rear light) are defective. For this reason, regular check that
these light bulbs are working correctly. Ð Exhaust inspection system
If the warning light lights up, there is a fault in the exhaust inspection system.
The engine control unit allows the vehicle to run in emergency mode.
Seek help from a
ŠKODA specialist garage. Ð
21
Instruments and Indicator Lights
Page 26 of 194
Fog lights
The warning light comes on when the fog lights are operating » page 38.ÐSpeed regulating system
The warning light comes on when the cruise control is operating » page 83.ÐSelector lever lock
If the warning light lights up, operate the brake pedal. This is necessary, to be
able to move the selector lever from position P or N » page 89. ÐMain beam
The warning light comes on when the main beam or headlight flasher are se-
lected » page 40. Ð24
Using the system
Page 49 of 194
Seats and Stowage
Front seats
ä
Introduction
This chapter contains information on the following subjects:
Adjusting the front seats 47
Front seat heating 48
The driver's seat should be adjusted in such a way that the pedals can be fully
pressed to the floor with slightly bent legs.
The seat backrest on the driver's seat should be adjusted in such a way that the
upper point of the steering wheel can be easily reached with slightly bent arms.
Correct adjustment of the seats is particularly important for:
› safely and quickly reaching the controls;
› a relaxed, fatigue-free body position;
› achieving the maximum protection offered by the seat belts and the airbag
system. WARNING
■ Only adjust the driver's seat when the vehicle is stationary - risk of accident!
■ Caution when adjusting the seat! You may suffer injuries or bruises as a re-
sult of adjusting the seat without paying proper attention. ■ The seat backrests must not be angled too far back when driving otherwise
this will affect proper operation of the seat belts and of the airbag system -
risk of injury! ■ Never carry more people than the number of seats in the vehicle.
■ Each occupant must correctly fasten the seat belt belonging to the seat.
Children must be fastened » page 115, Transporting children safely with a
suitable restraint system.
■ The front seats and the head restraints must always be adjusted to match
the body size of the seat occupant as well as the seat belts must always be
correctly fastened in order to provide an optimal protection for you and your
occupants. WARNING (Continued)
■ Always keep your feet in the footwell when the car is being driven - never
place your feet on the instrument panel, out of the window or on the surfaces
of the seats. This is particularly important for the front seat passenger. You
will be exposed to increased risk of injury if it becomes necessary to apply the
brake or in the event of an accident. If an airbag is deployed, you may suffer
fatal injuries when adopting an incorrect seated position!
■ It is important for the driver and front passenger to maintain a distance of at
least 25 cm from the steering wheel or dash panel. Not maintaining this mini-
mum distance will mean that the airbag system will not be able to properly
protect you - hazard!
■ Ensure that there are no objects in the footwell as they may get caught be-
hind the pedals when driving or applying the braking. You would then no lon-
ger be able to operate the clutch, brake or accelerate.
■ Do not transport any objects on the front passenger seat except objects
(e.g. child safety seat) provided for this purpose - risk of accident! Note
After a certain time, play can develop within the adjustment mechanism of the
backrest angle. Ð Adjusting the front seats
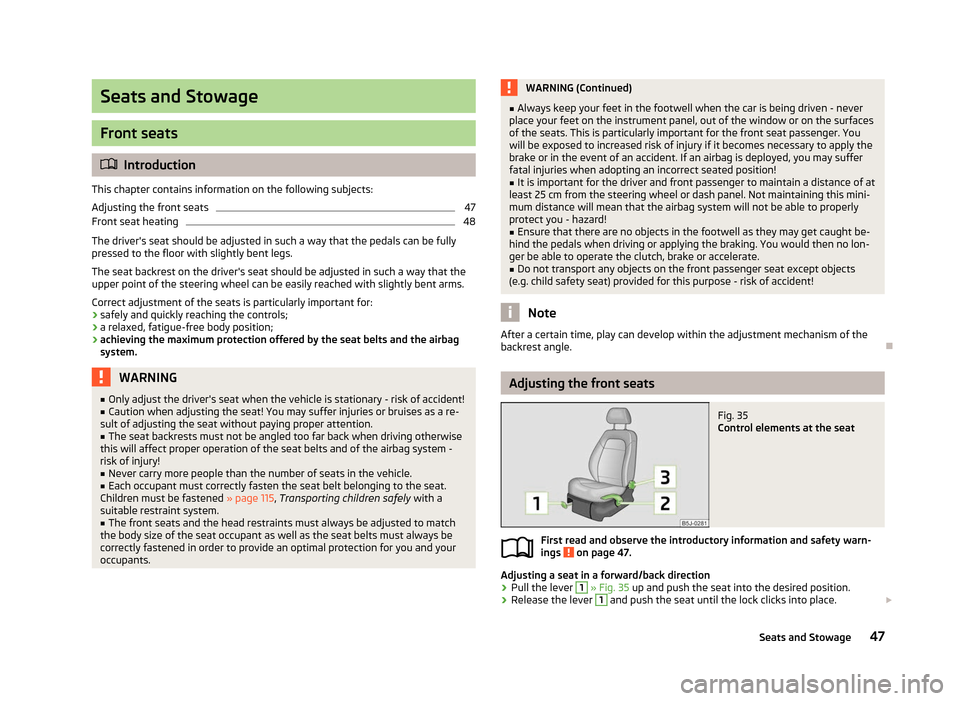
Fig. 35
Control elements at the seat
First read and observe the introductory information and safety warn-
ings on page 47.
Adjusting a seat in a forward/back direction
›
Pull the lever 1
» Fig. 35 up and push the seat into the desired position.
› Release the lever 1
and push the seat until the lock clicks into place.
£
ä
47
Seats and Stowage
Page 63 of 194
12-volt power socket
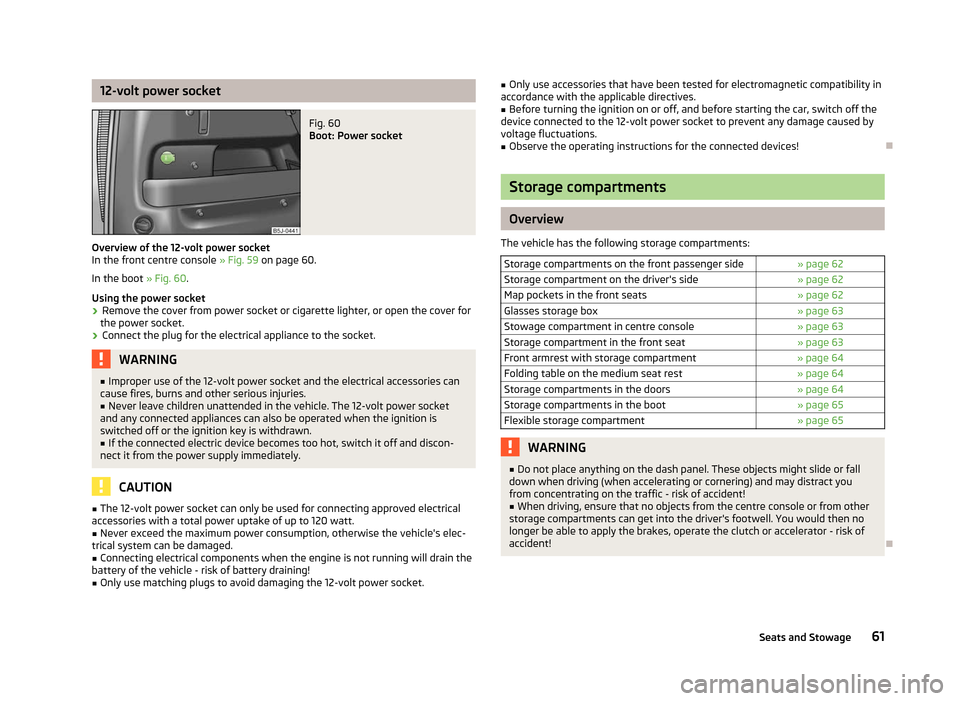
Fig. 60
Boot: Power socket
Overview of the 12-volt power socket
In the front centre console » Fig. 59 on page 60.
In the boot » Fig. 60.
Using the power socket
› Remove the cover from power socket or cigarette lighter, or open the cover for
the power socket.
› Connect the plug for the electrical appliance to the socket. WARNING
■ Improper use of the 12-volt power socket and the electrical accessories can
cause fires, burns and other serious injuries.
■ Never leave children unattended in the vehicle. The 12-volt power socket
and any connected appliances can also be operated when the ignition is
switched off or the ignition key is withdrawn.
■ If the connected electric device becomes too hot, switch it off and discon-
nect it from the power supply immediately. CAUTION
■ The 12-volt power socket can only be used for connecting approved electrical
accessories with a total power uptake of up to 120
watt.
■ Never exceed the maximum power consumption, otherwise the vehicle's elec-
trical system can be damaged.
■ Connecting electrical components when the engine is not running will drain the
battery of the vehicle - risk of battery draining! ■ Only use matching plugs to avoid damaging the 12-volt power socket. ■
Only use accessories that have been tested for electromagnetic compatibility in
accordance with the applicable directives.
■ Before turning the ignition on or off, and before starting the car, switch off the
device connected to the 12-volt power socket to prevent any damage caused by
voltage fluctuations.
■ Observe the operating instructions for the connected devices! Ð Storage compartments
Overview
The vehicle has the following storage compartments: Storage compartments on the front passenger side » page 62
Storage compartment on the driver's side » page 62
Map pockets in the front seats » page 62
Glasses storage box » page 63
Stowage compartment in centre console » page 63
Storage compartment in the front seat » page 63
Front armrest with storage compartment » page 64
Folding table on the medium seat rest » page 64
Storage compartments in the doors » page 64
Storage compartments in the boot » page 65
Flexible storage compartment » page 65 WARNING
■ Do not place anything on the dash panel. These objects might slide or fall
down when driving (when accelerating or cornering) and may distract you
from concentrating on the traffic - risk of accident!
■ When driving, ensure that no objects from the centre console or from other
storage compartments can get into the driver's footwell. You would then no
longer be able to apply the brakes, operate the clutch or accelerator - risk of
accident! Ð
61
Seats and Stowage
Page 78 of 194
Starting-off and Driving
Starting and stopping the engine
ä
Introduction
This chapter contains information on the following subjects:
Adjusting the steering wheel position 77
Electrohydraulic power steering 77
Electronic immobiliser 77
Ignition lock 78
Starting engine 78
Switching the engine off 78
WARNING
■ Never adjust the steering wheel when the vehicle is moving only when the
vehicle is stationary!
■ Maintain a distance of 25 cm 1
to the steering wheel
» Fig. 78 on page 77
- . Not maintaining this minimum distance will mean that the airbag system
will not be able to properly protect you - hazard!
■ The lever for adjusting the steering wheel must be locked whilst driving so
that the position of the steering wheel cannot accidently change during the
journey - risk of accident!
■ If the steering wheel is adjusted further towards the head, the protection
provided by the driver airbag in the event of an accident is reduced. Check
that the steering wheel is aligned to the chest. ■ When driving, hold the steering wheel with both hands firmly on the outer
edge in the 9 o'clock and 3 o'clock position. Never hold the steering wheel in
the 12 o'clock position or in any other way (e.g. in the middle or inner edge of
the steering wheel). In such cases, you could injure the arms, hands and head
when the driver airbag is deployed.
■ When driving, the ignition key must always be in the position 2
» Fig. 79 on
page 78 (ignition switched on) without the engine running. This position is
indicated by the warning lights coming on. If this is not the case, it could result
in unexpected locking of the steering wheel - risk of accident! WARNING (Continued)
■ Only pull the ignition key from the ignition lock when the vehicle has come
to a complete stop (by applying the handbrake). Otherwise the steering wheel
could block - risk of accident!
■ When leaving the vehicle, the ignition must always be removed. This is par-
ticularly important if children are left in the vehicle. Otherwise the children
could, for example, start the engine - risk of accident or injury!
■ Never leave the engine running in unventilated or closed rooms. The ex-
haust gases of the engine contain besides the odorless and colourless carbon
monoxide a poisonous gas - hazard! Carbon monoxide can cause unconscious-
ness and death. ■ Never leave the vehicle unattended with the engine running.
■ Never switch off the engine before the vehicle is stationary - risk of acci-
dent! CAUTION
■ You will place great stresses on the power steering system if the steering is
turned to full lock when the vehicle is stationary. Turning the steering to full lock
in such a situation will be accompanied by noises. Never leave the steering wheel
at full lock for more than 15
seconds when the engine is running - risk of damag-
ing the power steering!
■ The starter may only be operated (ignition key position 3
» Fig. 79 on
page 78), if the engine is not running. The starter or engine can be damaged if
the starter is activated when the engine is running. ■ Let go of the ignition key as soon as the engine starts otherwise the starter
could be damaged. ■ Avoid high engine revolutions, full throttle and high engine loads as long as the
engine has not yet reached its operating temperature - risk of damaging the en-
gine!
■ Do not tow start the engine - danger of damaging the engine! On vehicles with
a catalytic converter, unburnt fuel may get into the catalytic converter where it
may ignite. This in turn may damage the catalytic converter. The battery from an-
other vehicle can be used as a jump-start aid » page 163, Jump-starting.
■ Do not switch the engine off immediately at the end of your journey after the
engine has been operated over a prolonged period at high loads but leave it to
run at an idling speed for about 1
minute. This prevents any possible accumulation
of heat when the engine is switched off. £
76 Using the system
Page 80 of 194
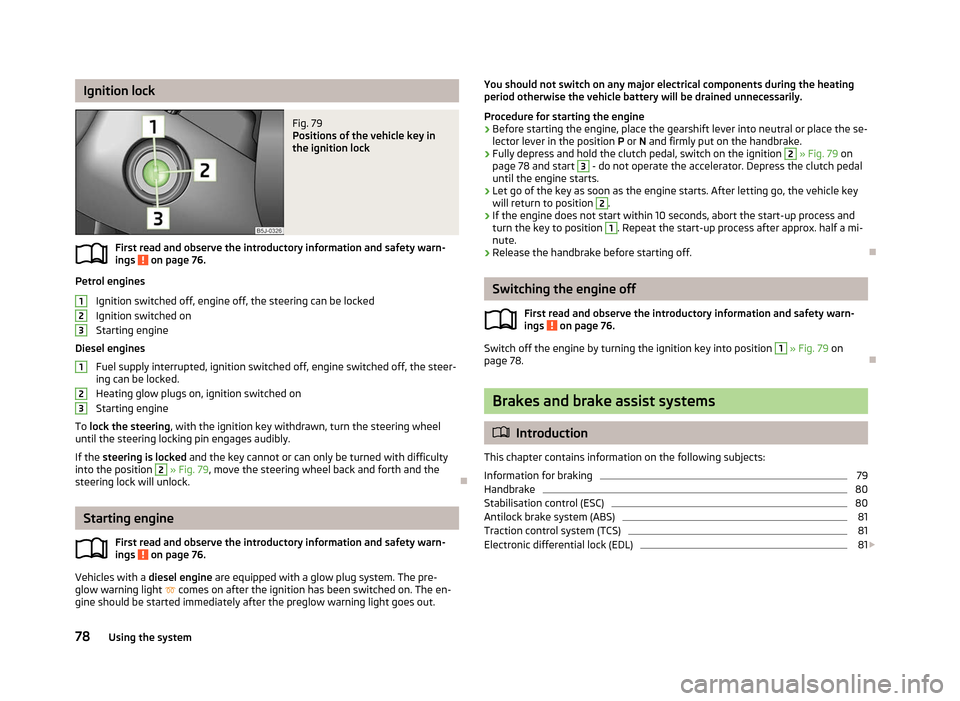
Ignition lock
Fig. 79
Positions of the vehicle key in
the ignition lock
First read and observe the introductory information and safety warn-
ings on page 76.
Petrol engines
Ignition switched off, engine off, the steering can be locked
Ignition switched on
Starting engine
Diesel engines Fuel supply interrupted, ignition switched off, engine switched off, the steer-
ing can be locked.
Heating glow plugs on, ignition switched on
Starting engine
To lock the steering , with the ignition key withdrawn, turn the steering wheel
until the steering locking pin engages audibly.
If the steering is locked and the key cannot or can only be turned with difficulty
into the position 2
» Fig. 79, move the steering wheel back and forth and the
steering lock will unlock. ÐStarting engine
First read and observe the introductory information and safety warn-
ings on page 76.
Vehicles with a diesel engine are equipped with a glow plug system. The pre-
glow warning light comes on after the ignition has been switched on. The en-
gine should be started immediately after the preglow warning light goes out.
ä 1
2
3
1
2
3
ä You should not switch on any major electrical components during the heating
period otherwise the vehicle battery will be drained unnecessarily.
Procedure for starting the engine
› Before starting the engine, place the gearshift lever into neutral or place the se-
lector lever in the position P or N and firmly put on the handbrake.
› Fully depress and hold the clutch pedal, switch on the ignition 2
» Fig. 79 on
page 78 and start 3
- do not operate the accelerator. Depress the clutch pedal
until the engine starts.
› Let go of the key as soon as the engine starts. After letting go, the vehicle key
will return to position 2
.
› If the engine does not start within 10
seconds, abort the start-up process and
turn the key to position 1
. Repeat the start-up process after approx. half a mi-
nute.
› Release the handbrake before starting off. Ð Switching the engine off
First read and observe the introductory information and safety warn-
ings on page 76.
Switch off the engine by turning the ignition key into position 1
» Fig. 79 on
page 78. Ð Brakes and brake assist systems
ä
Introduction
This chapter contains information on the following subjects:
Information for braking 79
Handbrake 80
Stabilisation control (ESC) 80
Antilock brake system (ABS) 81
Traction control system (TCS) 81
Electronic differential lock (EDL) 81
£
ä
78 Using the system
Page 81 of 194
WARNING
■ The brake booster only operates when the engine is running. Greater physi-
cal effort for braking is required when the engine is switched off - risk of acci-
dent!
■ Depress the clutch pedal when stopping or braking a vehicle with a petrol
engine and manual transmission in the low rev range. If you fail to do so, the
functionality of the brake booster can be impaired - risk of accident!
■ If a front spoiler, full wheel trim, etc. is mounted retrospectively, it must be
ensured that the air supply to the front wheel brakes is not reduced. Other-
wise, the functionality of the brake system could be impaired - risk of acci-
dent! ■ Please note that the handbrake must be fully released. A handbrake which
is only partially released can result in the rear brakes overheating, which can
have a negative effect on the operation of the brake system - risk of accident!
■ Never leave children unattended in the vehicle. The children might, for ex-
ample, release the handbrake or take the vehicle out of gear. The vehicle
might then move off - risk of accident!
■ A lack of fuel can cause irregular engine running or cause the engine to shut
down. The brake assist systems would then be without function - risk of acci-
dent! ■ Adjust the speed and driving style to the current visibility, weather, road and
traffic conditions. The increased safety offered by the brake assist systems
must not tempt you to take greater risks than otherwise - risk of an accident!
■ The normal braking system is still fully functional if there is an ABS fault.
Visit a ŠKODA specialist garage immediately and adjust your style of driving
according to the damage to the ABS as you will not know how great the dam-
age is and the limitation it is placing on the braking efficiency. CAUTION
■ Observe the recommendations on the new brake pads » page 119.
■ Never let the brakes slip with light pressure on the pedal if braking is not neces-
sary. This causes the brakes to overheat and can also result in a longer braking
distance and excessive wear. ■ All four wheels must be fitted with the same tyres approved by the manufactur-
er to ensure the brake assist systems operate correctly. Note
■ If the brakes are applied in full and the control unit for the braking system con-
siders the situation to be dangerous for the following traffic, the brake light
flashes automatically. After the speed was reduced below around 10 km/h or the
vehicle was stopped, the brake light stops flashing and the hazard warning light
system switches on. The hazard warning light system is switched off automatical-
ly after accelerating or driving off again. ■ Before negotiating a steep downhill section, reduce the speed, shift down into
the next lower gear (manual gearbox) or select a lower drive position (automatic
gearbox). As a result, the braking effect of the engine will be used, reducing the
load on the brakes. Any additional braking should be completed intermittently,
not continuously. ■ Changes to the vehicle (e.g. to the engine, brakes, chassis or another combina-
tion of tyres and wheels) can influence the functionality of the brake assist sys-
tems.
■ If a fault occurs in the ABS system, the ESC, ASR and EDL also do not work. A
warning light » page 21 comes on if a fault occurs in the ABS system. Ð Information for braking
First read and observe the introductory information and safety warn-
ings on page 78.
Wear-and-tear
The wear of the brake pads is dependent on the operating conditions and driving
style. The brake pads wear more quickly if a lot of journeys are completed in
towns and over short distances or if a very sporty style of driving is adopted. If
operated under severe conditions, the thickness of the brake pads must be
checked by a ŠKODA specialist garage before the next service appointment.
Wet roads or road salt
The performance of the brakes can be delayed as the brake discs and brake pads
may be moist or have a coating of ice or layer of salt on them in winter. The
brakes are cleaned and dried by applying the brakes several times.
Corrosion
Corrosion on the brake discs and dirt on the bake pads occur if the vehicle has
been parked for a long period and if you do not make much use of the braking
system. If the brake system is not used much or if there is corrosion on the sur-
face, we recommend cleaning the brake discs by firmly applying the brakes from a
fairly high speed. £
ä
79
Starting-off and Driving