winter tyres SKODA ROOMSTER 2012 1.G Owner's Manual
[x] Cancel search | Manufacturer: SKODA, Model Year: 2012, Model line: ROOMSTER, Model: SKODA ROOMSTER 2012 1.GPages: 194, PDF Size: 4.8 MB
Page 17 of 194
MAXI DOT (information display)
ä
Introduction
This chapter contains information on the following subjects:
Main menu 15
Settings 15
Door, boot lid and bonnet warning 16
Auto Check Control 16
The information display provides you with information on the current operating
state of your vehicle . The information system also provides you with data (de-
pending on the equipment installed in the vehicle) relating to the radio, mobile
phone, multi-functional indicator, navigation system, the unit connected to the
MDI input and the automatic gearbox » page 87.
Certain functions and operating conditions are always being checked on the vehi-
cle when the ignition is switched on and also while driving.
Lighting up of certain symbols is combined with an acoustic warning signal. WARNING
Concentrate fully at all times on your driving! As the driver you are fully re-
sponsible for road safety. ÐMain menu
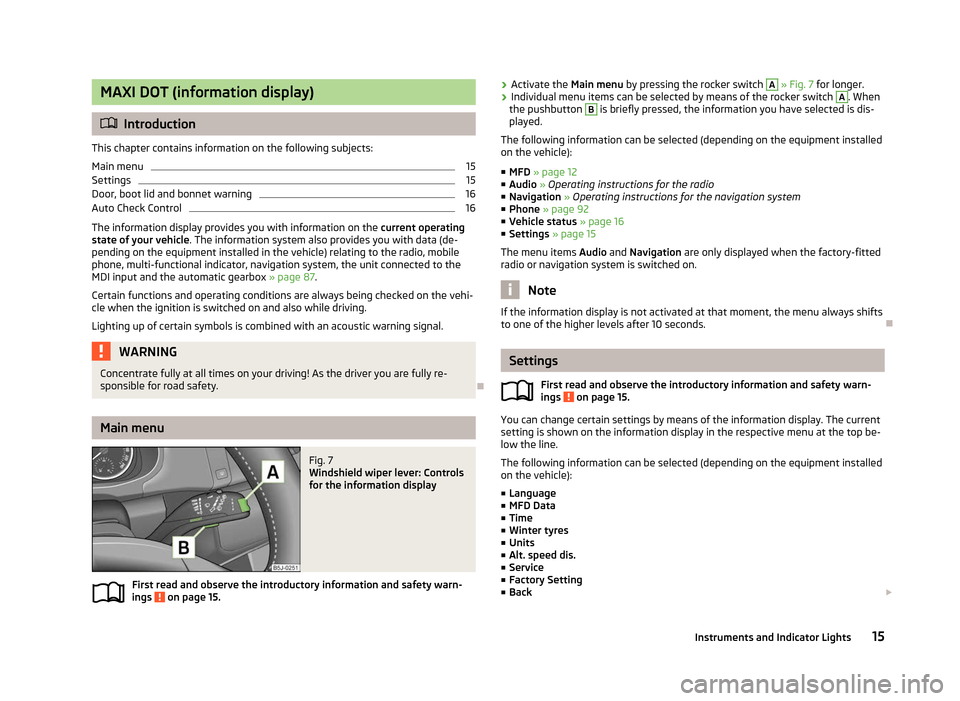
Fig. 7
Windshield wiper lever: Controls
for the information display
First read and observe the introductory information and safety warn-
ings on page 15.
ä ›
Activate the Main menu
by pressing the rocker switch A
» Fig. 7 for longer.
› Individual menu items can be selected by means of the rocker switch A
. When
the pushbutton B
is briefly pressed, the information you have selected is dis-
played.
The following information can be selected (depending on the equipment installed
on the vehicle):
■ MFD » page 12
■ Audio » Operating instructions for the radio
■ Navigation » Operating instructions for the navigation system
■ Phone »
page 92
■ Vehicle status » page 16
■ Settings » page 15
The menu items Audio and Navigation are only displayed when the factory-fitted
radio or navigation system is switched on. Note
If the information display is not activated at that moment, the menu always shifts
to one of the higher levels after 10
seconds. Ð Settings
First read and observe the introductory information and safety warn-
ings on page 15.
You can change certain settings by means of the information display. The current
setting is shown on the information display in the respective menu at the top be-
low the line.
The following information can be selected (depending on the equipment installed
on the vehicle):
■ Language
■ MFD Data
■ Time
■ Winter tyres
■ Units
■ Alt. speed dis.
■ Service
■ Factory Setting
■ Back £
ä
15
Instruments and Indicator Lights
Page 18 of 194
Select the menu item
Back to return to one level higher in the menu.
Language
You can set the language for the warning and information texts here.
MFD displays
Activate or deactivate certain displays of the multifunction display here.
Time
The time, time format (12 or 24 hour indicator) and the changeover between sum-
mer/winter time can be set here.
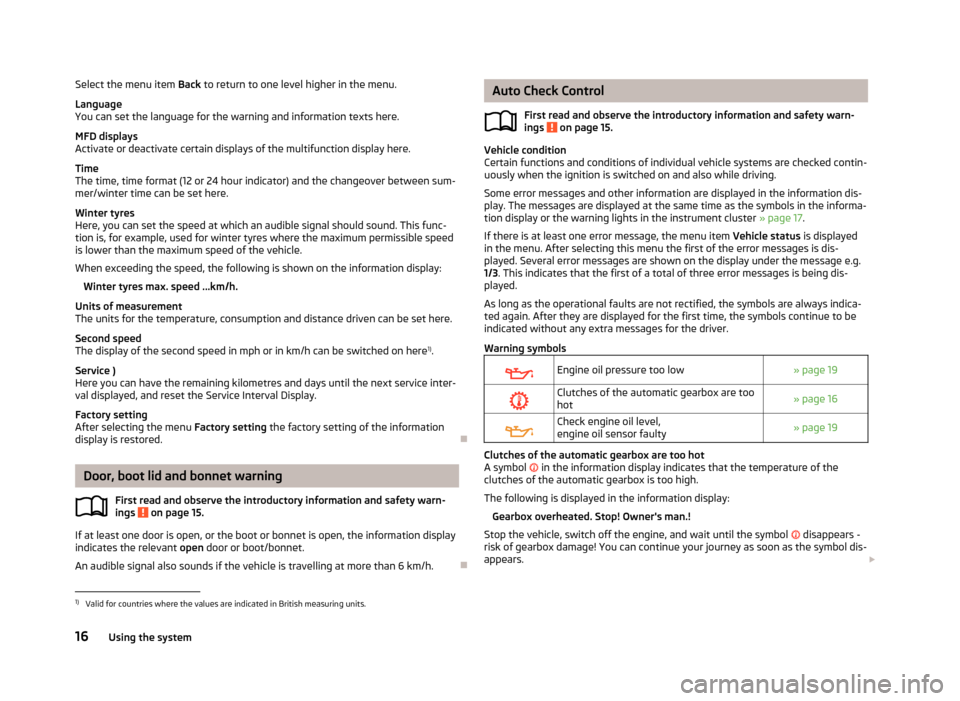
Winter tyres
Here, you can set the speed at which an audible signal should sound. This func-
tion is, for example, used for winter tyres where the maximum permissible speed
is lower than the maximum speed of the vehicle.
When exceeding the speed, the following is shown on the information display:
Winter tyres max. speed ...km/h.
Units of measurement
The units for the temperature, consumption and distance driven can be set here.
Second speed
The display of the second speed in mph or in km/h can be switched on here 1)
.
Service )
Here you can have the remaining kilometres and days until the next service inter-
val displayed, and reset the Service Interval Display.
Factory setting
After selecting the menu Factory setting
the factory setting of the information
display is restored. ÐDoor, boot lid and bonnet warning
First read and observe the introductory information and safety warn-
ings on page 15.
If at least one door is open, or the boot or bonnet is open, the information display
indicates the relevant
open door or boot/bonnet.
An audible signal also sounds if the vehicle is travelling at more than 6
km/h.Ð
ä Auto Check Control
First read and observe the introductory information and safety warn-
ings on page 15.
Vehicle condition
Certain functions and conditions of individual vehicle systems are checked contin-
uously when the ignition is switched on and also while driving.
Some error messages and other information are displayed in the information dis-
play. The messages are displayed at the same time as the symbols in the informa-
tion display or the warning lights in the instrument cluster » page 17.
If there is at least one error message, the menu item Vehicle status is displayed
in the menu. After selecting this menu the first of the error messages is dis-
played. Several error messages are shown on the display under the message e.g.
1/3. This indicates that the first of a total of three error messages is being dis-
played.
As long as the operational faults are not rectified, the symbols are always indica-
ted again. After they are displayed for the first time, the symbols continue to be
indicated without any extra messages for the driver.
Warning symbols
Engine oil pressure too low
» page 19
Clutches of the automatic gearbox are too
hot » page 16
Check engine oil level,
engine oil sensor faulty
» page 19 Clutches of the automatic gearbox are too hot
A symbol in the information display indicates that the temperature of the
clutches of the automatic gearbox is too high.
The following is displayed in the information display: Gearbox overheated. Stop! Owner's man.!
Stop the vehicle, switch off the engine, and wait until the symbol disappears -
risk of gearbox damage! You can continue your journey as soon as the symbol dis-
appears. £
ä
1)
Valid for countries where the values are indicated in British measuring units.
16 Using the system
Page 81 of 194
WARNING
■ The brake booster only operates when the engine is running. Greater physi-
cal effort for braking is required when the engine is switched off - risk of acci-
dent!
■ Depress the clutch pedal when stopping or braking a vehicle with a petrol
engine and manual transmission in the low rev range. If you fail to do so, the
functionality of the brake booster can be impaired - risk of accident!
■ If a front spoiler, full wheel trim, etc. is mounted retrospectively, it must be
ensured that the air supply to the front wheel brakes is not reduced. Other-
wise, the functionality of the brake system could be impaired - risk of acci-
dent! ■ Please note that the handbrake must be fully released. A handbrake which
is only partially released can result in the rear brakes overheating, which can
have a negative effect on the operation of the brake system - risk of accident!
■ Never leave children unattended in the vehicle. The children might, for ex-
ample, release the handbrake or take the vehicle out of gear. The vehicle
might then move off - risk of accident!
■ A lack of fuel can cause irregular engine running or cause the engine to shut
down. The brake assist systems would then be without function - risk of acci-
dent! ■ Adjust the speed and driving style to the current visibility, weather, road and
traffic conditions. The increased safety offered by the brake assist systems
must not tempt you to take greater risks than otherwise - risk of an accident!
■ The normal braking system is still fully functional if there is an ABS fault.
Visit a ŠKODA specialist garage immediately and adjust your style of driving
according to the damage to the ABS as you will not know how great the dam-
age is and the limitation it is placing on the braking efficiency. CAUTION
■ Observe the recommendations on the new brake pads » page 119.
■ Never let the brakes slip with light pressure on the pedal if braking is not neces-
sary. This causes the brakes to overheat and can also result in a longer braking
distance and excessive wear. ■ All four wheels must be fitted with the same tyres approved by the manufactur-
er to ensure the brake assist systems operate correctly. Note
■ If the brakes are applied in full and the control unit for the braking system con-
siders the situation to be dangerous for the following traffic, the brake light
flashes automatically. After the speed was reduced below around 10 km/h or the
vehicle was stopped, the brake light stops flashing and the hazard warning light
system switches on. The hazard warning light system is switched off automatical-
ly after accelerating or driving off again. ■ Before negotiating a steep downhill section, reduce the speed, shift down into
the next lower gear (manual gearbox) or select a lower drive position (automatic
gearbox). As a result, the braking effect of the engine will be used, reducing the
load on the brakes. Any additional braking should be completed intermittently,
not continuously. ■ Changes to the vehicle (e.g. to the engine, brakes, chassis or another combina-
tion of tyres and wheels) can influence the functionality of the brake assist sys-
tems.
■ If a fault occurs in the ABS system, the ESC, ASR and EDL also do not work. A
warning light » page 21 comes on if a fault occurs in the ABS system. Ð Information for braking
First read and observe the introductory information and safety warn-
ings on page 78.
Wear-and-tear
The wear of the brake pads is dependent on the operating conditions and driving
style. The brake pads wear more quickly if a lot of journeys are completed in
towns and over short distances or if a very sporty style of driving is adopted. If
operated under severe conditions, the thickness of the brake pads must be
checked by a ŠKODA specialist garage before the next service appointment.
Wet roads or road salt
The performance of the brakes can be delayed as the brake discs and brake pads
may be moist or have a coating of ice or layer of salt on them in winter. The
brakes are cleaned and dried by applying the brakes several times.
Corrosion
Corrosion on the brake discs and dirt on the bake pads occur if the vehicle has
been parked for a long period and if you do not make much use of the braking
system. If the brake system is not used much or if there is corrosion on the sur-
face, we recommend cleaning the brake discs by firmly applying the brakes from a
fairly high speed. £
ä
79
Starting-off and Driving
Page 122 of 194
WARNING
■ In view of the high temperatures which can be produced in the catalytic con-
verter, the vehicle should be parked in such a way that the catalytic converter
cannot come into contact with easily flammable materials under the vehicle -
risk of fire!
■ Never use additional underbody protection or anti-corrosion agents for ex-
haust pipes, catalytic converters or heat shields - risk of fire! CAUTION
■ Never drive until the fuel tank is completely empty! The irregular supply of fuel
can cause misfiring, which can result in considerable damage to parts of the en-
gine and exhaust system. ■ Just filling the tank with leaded petrol once will damage the exhaust system! ÐEconomical and environmentally friendly driving
Introductory information
Your fuel consumption, any pollution of the environmental and the wear-and-tear
to the engine, brakes and tyres, depend essentially on three factors:
› your personal style of driving;
› the conditions under which your vehicle is operated;
› technical aspects.
The fuel economy by can be improved by 10
-15 % by always looking ahead and
driving in an economical way.
Fuel consumption is also be influenced by external factors which are beyond the
driver's control. Consumption increases during the winter or under difficult condi-
tions, on poor roads, etc.
Fuel consumption can vary considerably from the manufacturer's data, as a result
of outside temperatures, the weather and driving style.
The technical requirements for low fuel usage and economic efficiency of the ve-
hicle have already been built into the vehicle at the works. ŠKODA places a partic-
ular emphasis on minimising negative effects on the environment. It is necessary
to take note of the guidelines given in this chapter in order to make best use of
these characteristics and to maintain their effectiveness. The optimal engine speed should be obtained when accelerating, in order to
avoid a high fuel consumption and resonance of the vehicle.
Ð Looking ahead when driving
A vehicle's highest fuel consumption occurs when accelerating, therefore unnec-
essary accelerating and braking should be avoided. If looking ahead when driving,
less braking and consequently less accelerating are required. If possible, let your
vehicle coast to a stop, or use the engine brake, if you can see that the next set
of traffic lights is on red, for example. Ð Shifting to save energy
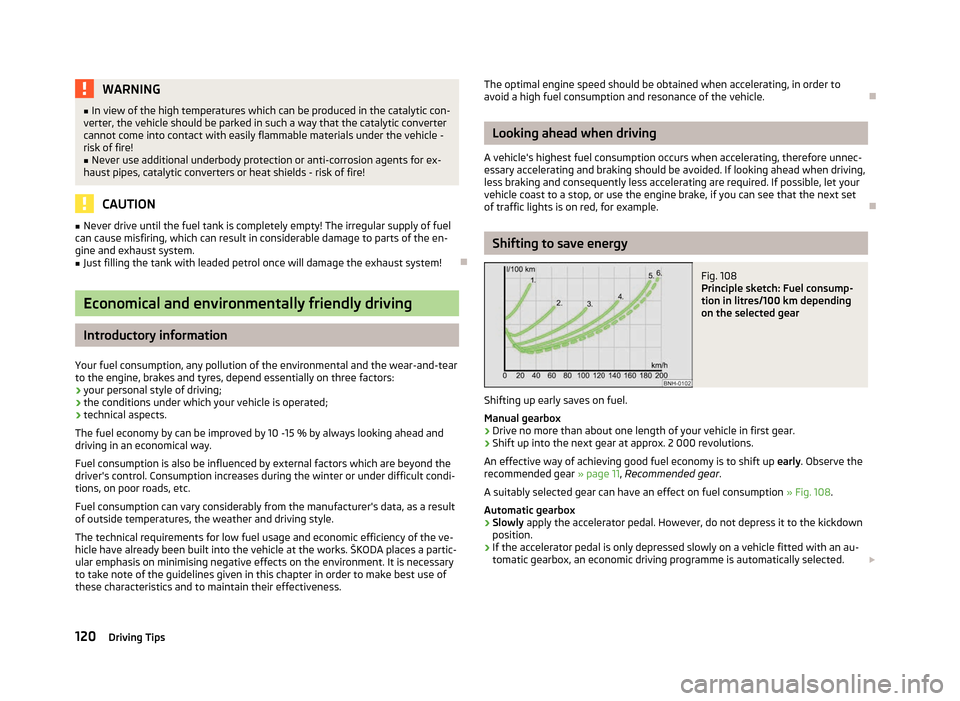
Fig. 108
Principle sketch: Fuel consump-
tion in litres/100 km depending
on the selected gear
Shifting up early saves on fuel.
Manual gearbox › Drive no more than about one length of your vehicle in first gear.
› Shift up into the next gear at approx. 2
000 revolutions.
An effective way of achieving good fuel economy is to shift up early. Observe the
recommended gear » page 11, Recommended gear .
A suitably selected gear can have an effect on fuel consumption » Fig. 108.
Automatic gearbox › Slowly
apply the accelerator pedal. However, do not depress it to the kickdown
position.
› If the accelerator pedal is only depressed slowly on a vehicle fitted with an au-
tomatic gearbox, an economic driving programme is automatically selected.
£
120 Driving Tips
Page 124 of 194
Avoid short distances
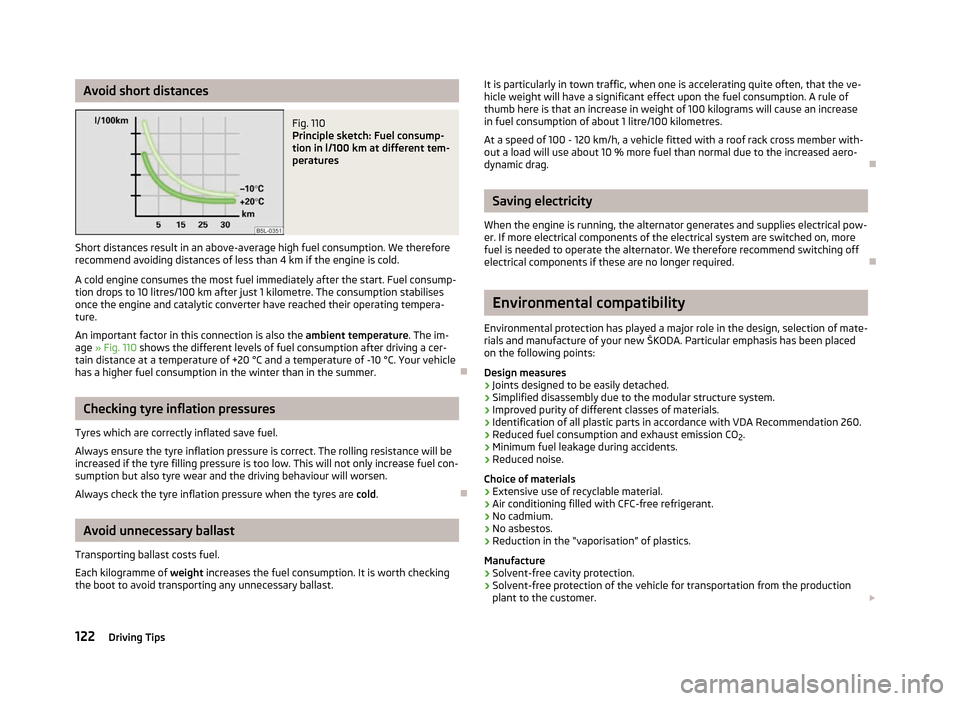
Fig. 110
Principle sketch: Fuel consump-
tion in l/100 km at different tem-
peratures
Short distances result in an above-average high fuel consumption. We therefore
recommend avoiding distances of less than 4 km if the engine is cold.
A cold engine consumes the most fuel immediately after the start. Fuel consump-
tion drops to 10 litres/100 km after just 1 kilometre. The consumption stabilises
once the engine and catalytic converter have reached their operating tempera-
ture.
An important factor in this connection is also the ambient temperature. The im-
age » Fig. 110 shows the different levels of fuel consumption after driving a cer-
tain distance at a temperature of +20 °C and a temperature of -10 °C. Your vehicle
has a higher fuel consumption in the winter than in the summer. ÐChecking tyre inflation pressures
Tyres which are correctly inflated save fuel.
Always ensure the tyre inflation pressure is correct. The rolling resistance will be
increased if the tyre filling pressure is too low. This will not only increase fuel con-
sumption but also tyre wear and the driving behaviour will worsen.
Always check the tyre inflation pressure when the tyres are cold. ÐAvoid unnecessary ballast
Transporting ballast costs fuel.
Each kilogramme of weight increases the fuel consumption. It is worth checking
the boot to avoid transporting any unnecessary ballast. It is particularly in town traffic, when one is accelerating quite often, that the ve-
hicle weight will have a significant effect upon the fuel consumption. A rule of
thumb here is that an increase in weight of 100 kilograms will cause an increase
in fuel consumption of about 1 litre/100 kilometres.
At a speed of 100 - 120 km/h, a vehicle fitted with a roof rack cross member with-
out a load will use about 10
% more fuel than normal due to the increased aero-
dynamic drag. Ð Saving electricity
When the engine is running, the alternator generates and supplies electrical pow-
er. If more electrical components of the electrical system are switched on, more
fuel is needed to operate the alternator. We therefore recommend switching off
electrical components if these are no longer required. Ð Environmental compatibility
Environmental protection has played a major role in the design, selection of mate-
rials and manufacture of your new
ŠKODA. Particular emphasis has been placed
on the following points:
Design measures
› Joints designed to be easily detached.
› Simplified disassembly due to the modular structure system.
› Improved purity of different classes of materials.
› Identification of all plastic parts in accordance with VDA Recommendation 260.
› Reduced fuel consumption and exhaust emission CO
2.
› Minimum fuel leakage during accidents.
› Reduced noise.
Choice of materials › Extensive use of recyclable material.
› Air conditioning filled with CFC-free refrigerant.
› No cadmium.
› No asbestos.
› Reduction in the “vaporisation” of plastics.
Manufacture › Solvent-free cavity protection.
› Solvent-free protection of the vehicle for transportation from the production
plant to the customer. £
122 Driving Tips
Page 150 of 194
Wheels and Tyres
Tyres
ä
Introduction
This chapter contains information on the following subjects:
Service life of tyres 149
Handling wheels and tyres 150
New wheels and tyres 150
Unidirectional tyres 151
Spare wheel 151
Full wheel trim 152
Wheel bolts 152
Wheel trim caps 152
Tyre control display 153
Wheel bolts 154
Winter tyres 154
Snow chains 154
WARNING
■ During the first 500 km, new tyres do not offer optimum grip and appropri-
ate care should therefore be taken when driving - risk of accident!
■ Never drive with damaged tyres - risk of accident!
■ Only use those tyres or wheel rims which have been approved by ŠKODA for
your model of vehicle. Failure to observe this instruction will adversely affect
the road safety of your vehicle - risk of accident!
■ The maximum permissible speed for your tyres must not be exceeded under
any circumstances - risk of an accident resulting from tyre damage and loss of
control of the vehicle.
■ If the inflation pressure is too low, the tyre must perform a higher rolling re-
sistance. At higher speeds the tyre will warm up as a result of this. This can
result in tread separation and a tyre blowout. WARNING (Continued)
■ Do not, where possible, replace individual tyres but at least replace them on
both wheels of a given axle at the same time. Always fit the tyres with the
deeper tread depth to the front wheels.
■ Never use tyres if you do not know anything about the condition and age.
■ You must have your tyres replaced with new ones at the latest when the
wear indicators have been worn down.
■ Worn tyres do not provide the necessary adhesion to the road surface at
high speeds on wet roads. One could experience
“aquaplaning” (uncontrolled
movements of the vehicle - “swimming” on a wet road surface).
■ Immediately replace damaged wheel rims or tyres.
■ Do not use summer or winter tyres that are older than 6 years or 4 years re-
spectively.
■ The wheel bolts must be clean and must turn easily. However, they must
never be treated with grease or oil.
■ If the wheel bolts are tightened to a too low tightening torque, the rim can
come loose when the car is moving - risk of accident! A tightening torque
which is too high can damage the bolts and threads and this can result in per-
manent deformation of the contact surfaces on the rim.
■ In case of incorrect treatment of the wheel bolts, the wheel can loosen
when the car is moving - risk of accident!
■ Observe the national legal regulations relating to the use of tyres and snow
chains. CAUTION
■ If a spare wheel is used that is not identical to the fitted tyres, the following
must be observed » page 151, Spare wheel.
■ The prescribed tightening torque of the wheel bolts for steel and light alloy
wheels is 120 Nm.
■ Protect the tyres from contact with oil, grease and fuel.
■ Replace any lost valve caps immediately. For the sake of the environment
Tyres which are insufficiently inflated increase your fuel consumption. £
148 General Maintenance
Page 151 of 194
Note
■ We recommend that any work on the wheels or tyres is carried out by a ŠKODA
Service Partner. ■ We recommend that you use wheel rims, tyres, full wheel trims and snow chains
from
ŠKODA Original Accessories. ÐService life of tyres
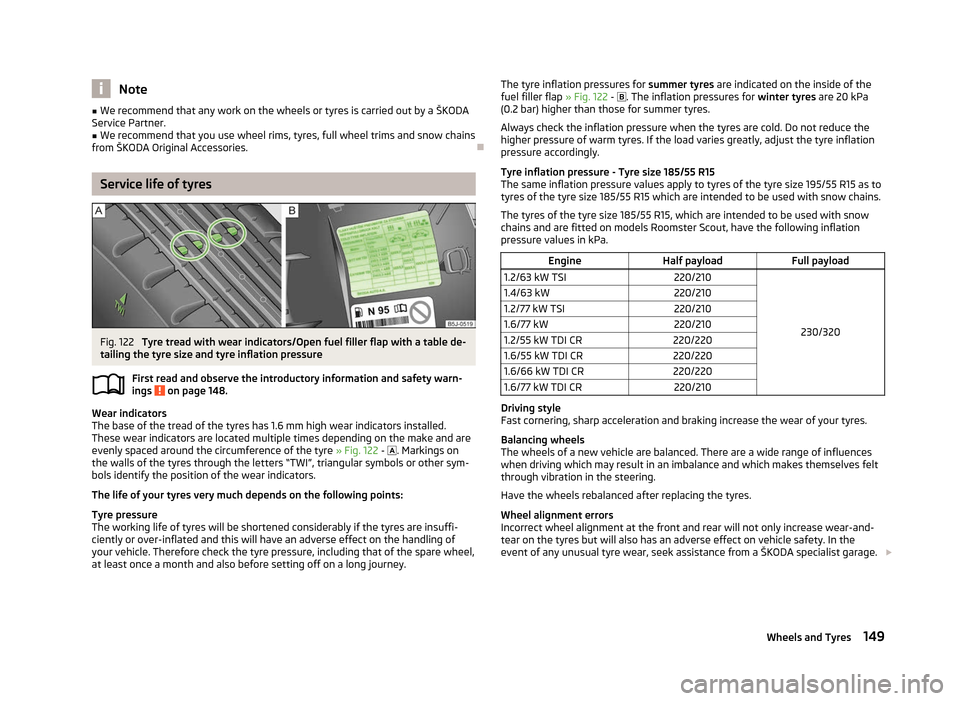
Fig. 122
Tyre tread with wear indicators/Open fuel filler flap with a table de-
tailing the tyre size and tyre inflation pressure
First read and observe the introductory information and safety warn-
ings on page 148.
Wear indicators
The base of the tread of the tyres has 1.6 mm high wear indicators installed.
These wear indicators are located multiple times depending on the make and are
evenly spaced around the circumference of the tyre » Fig. 122 - . Markings on
the walls of the tyres through the letters
“TWI”, triangular symbols or other sym-
bols identify the position of the wear indicators.
The life of your tyres very much depends on the following points:
Tyre pressure
The working life of tyres will be shortened considerably if the tyres are insuffi-
ciently or over-inflated and this will have an adverse effect on the handling of
your vehicle. Therefore check the tyre pressure, including that of the spare wheel,
at least once a month and also before setting off on a long journey.
ä The tyre inflation pressures for
summer tyres are indicated on the inside of the
fuel filler flap » Fig. 122 - . The inflation pressures for winter tyres are 20 kPa
(0.2
bar) higher than those for summer tyres.
Always check the inflation pressure when the tyres are cold. Do not reduce the
higher pressure of warm tyres. If the load varies greatly, adjust the tyre inflation
pressure accordingly.
Tyre inflation pressure - Tyre size 185/55 R15
The same inflation pressure values apply to tyres of the tyre size 195/55 R15 as to
tyres of the tyre size 185/55 R15 which are intended to be used with snow chains.
The tyres of the tyre size 185/55 R15, which are intended to be used with snow
chains and are fitted on models Roomster Scout, have the following inflation
pressure values in kPa.
Engine Half payload Full payload
1.2/63 kW TSI 220/210
230/320
1.4/63 kW
220/210
1.2/77 kW TSI 220/210
1.6/77 kW 220/210
1.2/55 kW TDI CR 220/220
1.6/55 kW TDI CR 220/220
1.6/66 kW TDI CR 220/220
1.6/77 kW TDI CR 220/210 Driving style
Fast cornering, sharp acceleration and braking increase the wear of your tyres.
Balancing wheels
The wheels of a new vehicle are balanced. There are a wide range of influences
when driving which may result in an imbalance and which makes themselves felt
through vibration in the steering.
Have the wheels rebalanced after replacing the tyres.
Wheel alignment errors
Incorrect wheel alignment at the front and rear will not only increase wear-and-
tear on the tyres but will also has an adverse effect on vehicle safety. In the
event of any unusual tyre wear, seek assistance from a
ŠKODA specialist garage.£
149
Wheels and Tyres
Page 153 of 194
The date of manufacture
is also stated on the tyre wall (possibly only on the in-
side of wheel ): e.g.
DOT ... 20 12...
means, for example, that the tyre was manufactured in the 20th week of 2012.
The following must be observed if only one temporary spare wheel is availa-
ble » page 151. ÐUnidirectional tyres
First read and observe the introductory information and safety warn-
ings on page 148.
The direction of rotation of the tyres is marked by arrows on the wall of the tyre
.
The so specified running direction must absolutely be complied with. Only then
are the tyres able to provide the optimal properties in terms of grip, low noise,
wear-and-tear and aquaplaning.
If, in the event of a puncture, it is necessary to fit a spare wheel with a tyre with-
out a dedicated running direction or the opposite running direction, drive carefully
as the optimum characteristics of the tyre are no longer applicable in this situa-
tion. ÐSpare wheel
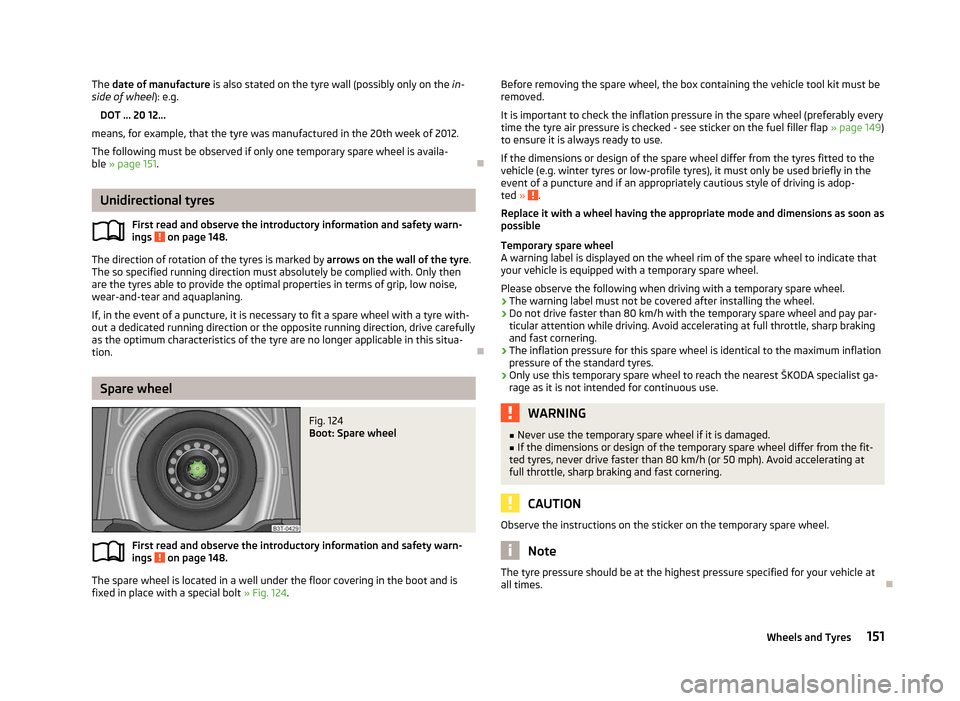
Fig. 124
Boot: Spare wheel
First read and observe the introductory information and safety warn-
ings on page 148.
The spare wheel is located in a well under the floor covering in the boot and is
fixed in place with a special bolt
» Fig. 124.
ä
ä Before removing the spare wheel, the box containing the vehicle tool kit must be
removed.
It is important to check the inflation pressure in the spare wheel (preferably every
time the tyre air pressure is checked - see sticker on the fuel filler flap » page 149)
to ensure it is always ready to use.
If the dimensions or design of the spare wheel differ from the tyres fitted to the
vehicle (e.g. winter tyres or low-profile tyres), it must only be used briefly in the
event of a puncture and if an appropriately cautious style of driving is adop-
ted » .
Replace it with a wheel having the appropriate mode and dimensions as soon as
possible
Temporary spare wheel
A warning label is displayed on the wheel rim of the spare wheel to indicate that
your vehicle is equipped with a temporary spare wheel.
Please observe the following when driving with a temporary spare wheel.
› The warning label must not be covered after installing the wheel.
› Do not drive faster than 80
km/h with the temporary spare wheel and pay par-
ticular attention while driving. Avoid accelerating at full throttle, sharp braking
and fast cornering.
› The inflation pressure for this spare wheel is identical to the maximum inflation
pressure of the standard tyres.
› Only use this temporary spare wheel to reach the nearest ŠKODA specialist ga-
rage as it is not intended for continuous use. WARNING
■ Never use the temporary spare wheel if it is damaged.
■ If the dimensions or design of the temporary spare wheel differ from the fit-
ted tyres, never drive faster than 80
km/h (or 50 mph). Avoid accelerating at
full throttle, sharp braking and fast cornering. CAUTION
Observe the instructions on the sticker on the temporary spare wheel. Note
The tyre pressure should be at the highest pressure specified for your vehicle at
all times. Ð
151
Wheels and Tyres
Page 156 of 194
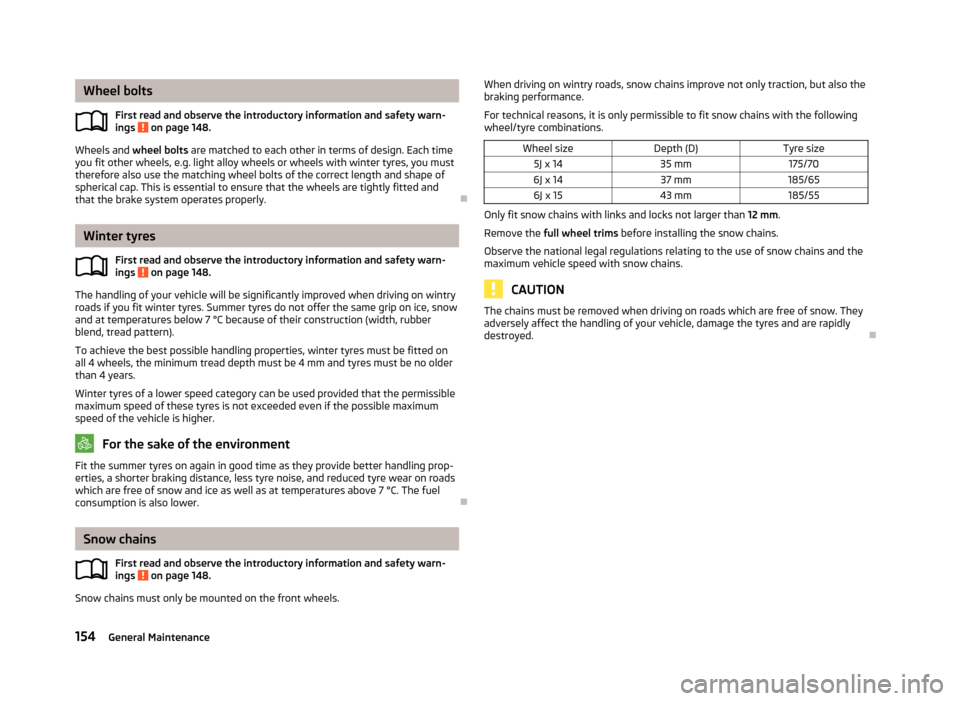
Wheel bolts
First read and observe the introductory information and safety warn-
ings on page 148.
Wheels and
wheel bolts are matched to each other in terms of design. Each time
you fit other wheels, e.g. light alloy wheels or wheels with winter tyres, you must
therefore also use the matching wheel bolts of the correct length and shape of
spherical cap. This is essential to ensure that the wheels are tightly fitted and
that the brake system operates properly. ÐWinter tyres
First read and observe the introductory information and safety warn-
ings on page 148.
The handling of your vehicle will be significantly improved when driving on wintry
roads if you fit winter tyres. Summer tyres do not offer the same grip on ice, snow
and at temperatures below 7 °C because of their construction (width, rubber
blend, tread pattern).
To achieve the best possible handling properties, winter tyres must be fitted on
all 4 wheels, the minimum tread depth must be 4
mm and tyres must be no older
than 4 years.
Winter tyres of a lower speed category can be used provided that the permissible
maximum speed of these tyres is not exceeded even if the possible maximum
speed of the vehicle is higher. For the sake of the environment
Fit the summer tyres on again in good time as they provide better handling prop-
erties, a shorter braking distance, less tyre noise, and reduced tyre wear on roads
which are free of snow and ice as well as at temperatures above 7
°C. The fuel
consumption is also lower. ÐSnow chains
First read and observe the introductory information and safety warn-
ings on page 148.
Snow chains must only be mounted on the front wheels.ä
ä
ä When driving on wintry roads, snow chains improve not only traction, but also the
braking performance.
For technical reasons, it is only permissible to fit snow chains with the following
wheel/tyre combinations.
Wheel size Depth (D)Tyre size
5J x 14 35 mm 175/70
6J x 14 37 mm 185/65
6J x 15 43 mm 185/55 Only fit snow chains with links and locks not larger than
12 mm.
Remove the full wheel trims before installing the snow chains.
Observe the national legal regulations relating to the use of snow chains and the
maximum vehicle speed with snow chains. CAUTION
The chains must be removed when driving on roads which are free of snow. They
adversely affect the handling of your vehicle, damage the tyres and are rapidly
destroyed. Ð154
General Maintenance
Page 189 of 194
O
Oil refer to Engine oil 139
Onboard computer see Multifunction display 12
Operation in winter De-icing windows 130
Diesel fuel 136
Vehicle battery 145
Outside temperature 13
Overview Engine compartment 138
Warning lights 17
P
Paint see Paint damage 129
Paint damage 129
Panorama roof 35
Parking Parking aid 82
Parking ticket holder 66
Passive Safety 100
Periodic wiping 43
Petrol refer to Fuel 135
Polishing the paintwork refer to Taking care of your vehicle 129
Power steering 77
Preservation refer to Taking care of your vehicle 129
R
Radiator fan 142
Radio reception Aerial 130
Functional fault 130Raise vehicle 159
Rear mirror Exterior mirror 45
Manual dimming interior mirror 45
Recirculated air mode Manual air conditioning system 72
Recommended gear 11
Refuelling 134
Fuel 134
Regulation Headlight beam 39
Remote control 29
Synchronisation process 30
Remote control key Replacing the battery 25
Replacement of parts 155
Replacing bulbs 169
Fuses 166
Vehicle battery 146
Windscreen wiper blade 44
Replenishing Coolant 141
Engine oil 139
Windscreen washer fluid 143
Running in Brake pads 119
Engine 119
The first 1 500 km 119
Tyres 119
S
Safe securing system 27
Safety 100
Child safety 115
Child safety seats 115
Head restraints 48
ISOFIX 117
TOP TETHER 118
Save electrical energy 120Seat
Adjusting 47
Seat belt Warning light 18
Seat belt height adjuster 107
Seat belts 104
Cleaning 133
fastening and unfastening 106
Height adjustment 107
Seats folding forward 49
Head restraints 48
Heating 48
Removing seats 50
Selector lever see selector lever positions 88
Selector lever positions 88
Service display 10
Setting Manual air conditioning system 72
Manual dimming interior mirror 45
Steering wheel 77
Setting temperature Heating 68
Setting the clock Clock 11
Shifting Diving economically 120
Gearshift lever 82
Side airbag 111
Snow chains 154
Spare wheel 151
Speedometer 9
START/STOP Function 85
Starting and stopping the engine 76
Starting engine Jump-starting 163
START STOP Jump-starting 164
187
Index