check engine light SKODA ROOMSTER 2014 1.G Owner's Guide
[x] Cancel search | Manufacturer: SKODA, Model Year: 2014, Model line: ROOMSTER, Model: SKODA ROOMSTER 2014 1.GPages: 204, PDF Size: 14.15 MB
Page 154 of 204
CapacityRead and observe
and on page 150 first.
Coolant capacity (in litres) 1)
Petrol enginesCapacity1.2 l/51 kW5.51.2l/63 kW TSI7.71.2l/77 kW TSI7.71.4 l/63 kW5.51.6 l/77 kW5.5Diesel enginesCapacity1.2 ltr./55 kW TDI CR DPF6.61.6 litres/66 kW TDI CR DPF8.41.6 litres/77 kW TDI CR DPF8.4
Checking the coolant level
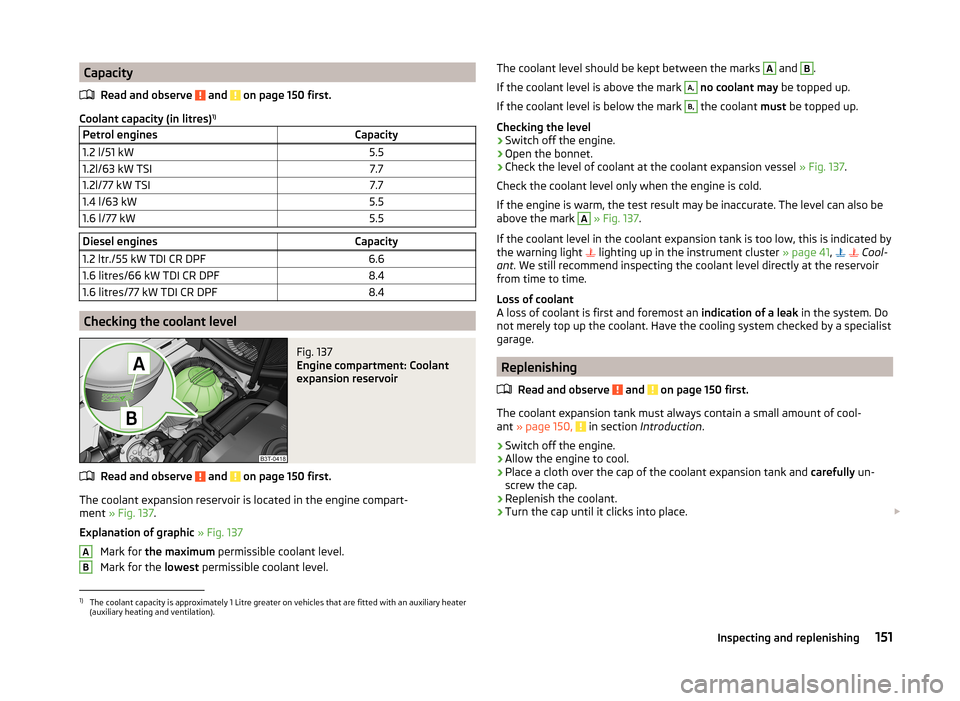
Fig. 137
Engine compartment: Coolant
expansion reservoir
Read and observe and on page 150 first.
The coolant expansion reservoir is located in the engine compart-
ment » Fig. 137 .
Explanation of graphic » Fig. 137
Mark for the maximum permissible coolant level.
Mark for the lowest permissible coolant level.
ABThe coolant level should be kept between the marks A and B.
If the coolant level is above the mark A,
no coolant may be topped up.
If the coolant level is below the mark
B,
the coolant must be topped up.
Checking the level
›
Switch off the engine.
›
Open the bonnet.
›
Check the level of coolant at the coolant expansion vessel » Fig. 137.
Check the coolant level only when the engine is cold.
If the engine is warm, the test result may be inaccurate. The level can also be
above the mark
A
» Fig. 137 .
If the coolant level in the coolant expansion tank is too low, this is indicated by
the warning light lighting up in the instrument cluster
» page 41,
Cool-
ant . We still recommend inspecting the coolant level directly at the reservoir
from time to time.
Loss of coolant
A loss of coolant is first and foremost an indication of a leak in the system. Do
not merely top up the coolant. Have the cooling system checked by a specialist
garage.
Replenishing
Read and observe
and on page 150 first.
The coolant expansion tank must always contain a small amount of cool-
ant » page 150, in section Introduction .
›
Switch off the engine.
›
Allow the engine to cool.
›
Place a cloth over the cap of the coolant expansion tank and carefully un-
screw the cap.
›
Replenish the coolant.
›
Turn the cap until it clicks into place.
1)
The coolant capacity is approximately 1 Litre greater on vehicles that are fitted with an auxiliary heater
(auxiliary heating and ventilation).
151Inspecting and replenishing
Page 155 of 204
CAUTION■Only top up with new coolant.■Do not use an alternative additive if the specified coolant is not available. In
this case, use only water and have the correct mixing ratio of water and cool-
ant additive restored by a specialist garage as soon as possible.
Brake fluid
Introduction
This chapter contains information on the following subjects:
Checking the brake fluid level
152
Changing
152WARNING■ The engine compartment of your car is a hazardous area. The following
warning instructions must be followed at all times when working in the en-
gine compartment » page 145.■
Do not continue your journey if the fluid level has fallen below the MIN
marking » Fig. 138 on page 152 - there is a risk of an accident. Seek help
from a specialist garage.
■
Do not use used brake fluid - the function of the brake system may be im-
paired – risk of accident!
CAUTION
Brake fluid damages the paintwork of the vehicle.
Note
■ The brake fluid is changed as part of a compulsory inspection service.■We recommend using brake fluids from the ŠKODA Original Accessories
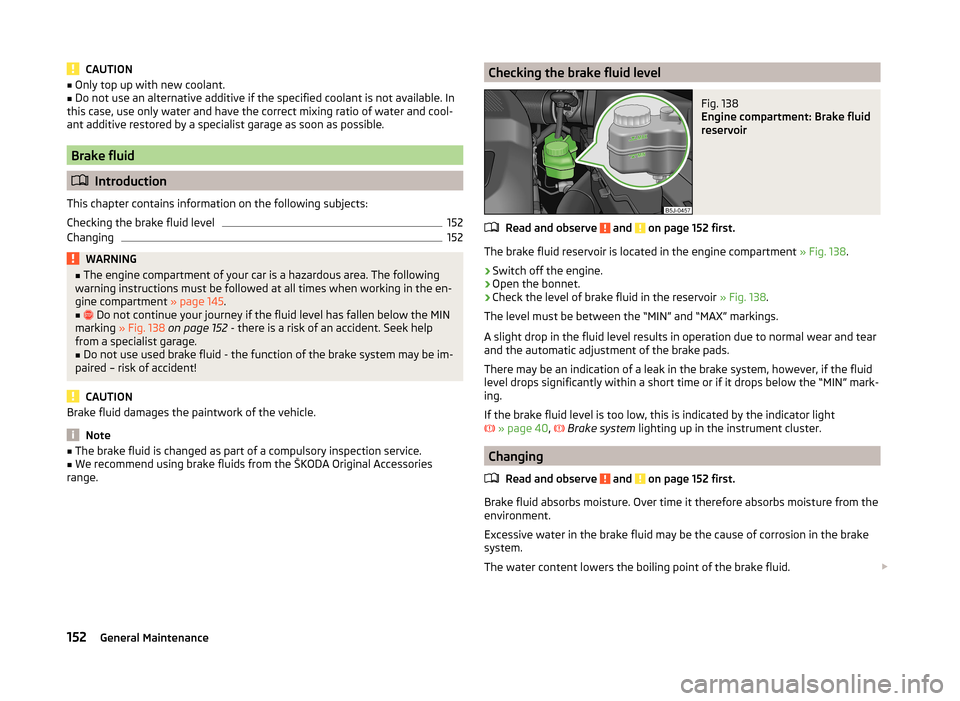
range.Checking the brake fluid levelFig. 138
Engine compartment: Brake fluid
reservoir
Read and observe and on page 152 first.
The brake fluid reservoir is located in the engine compartment » Fig. 138.
›
Switch off the engine.
›
Open the bonnet.
›
Check the level of brake fluid in the reservoir » Fig. 138.
The level must be between the “MIN” and “MAX” markings.
A slight drop in the fluid level results in operation due to normal wear and tear
and the automatic adjustment of the brake pads.
There may be an indication of a leak in the brake system, however, if the fluid level drops significantly within a short time or if it drops below the “MIN” mark-
ing.
If the brake fluid level is too low, this is indicated by the indicator light
» page 40 ,
Brake system
lighting up in the instrument cluster.
Changing
Read and observe
and on page 152 first.
Brake fluid absorbs moisture. Over time it therefore absorbs moisture from theenvironment.
Excessive water in the brake fluid may be the cause of corrosion in the brake
system.
The water content lowers the boiling point of the brake fluid.
152General Maintenance
Page 157 of 204
WARNING (Continued)■Avoid creating sparks when working with cables and electrical devices.
Strong sparking represents a risk of injury.■
Before carrying out any work on the electrical system, switch off the en-
gine, the ignition and all electrical components and disconnect the negative
terminal (-) on the battery.
CAUTION
Improper handling of the battery can lead to damage. We recommend having
all work on the vehicle battery carried out by a specialist garage.
CAUTION
■ The vehicle battery must only be disconnected if the ignition is switched off,
otherwise the vehicle's electrical system (electronic components) can be dam-
aged. When disconnecting the battery from the electrical system, first of all
disconnect the negative terminal (-) of the battery, and then the positive ter-
minal (+).■
When connecting the battery to the electrical system, first of all connect the
positive terminal (+) of the battery, and then the negative terminal (-). Under
no circumstances must the battery cables be connected incorrectly – risk of a
cable fire.
■
Ensure that battery acid does not come into contact with the bodywork – risk
of damage to the paintwork.
■
Do not place the battery in direct daylight in order to protect the vehicle bat-
tery housing from the effects of ultra-violet light.
■
If the vehicle has not been driven for more than 3 to 4 weeks, the battery will
discharge. This is because certain electrical components consume electricity
(e. g. control units) also in idle state. Prevent the battery from discharging by
disconnecting the battery's negative terminal (-) or continuously charging the
battery with a very low charging current.
■
If the vehicle is frequently used for making short trips, the vehicle battery
will not have time to charge up sufficiently and may discharge.
For the sake of the environment
A vehicle battery that has been removed is a special type of hazardous waste.
These must be disposed of in accordance with national legal regulations.
Note
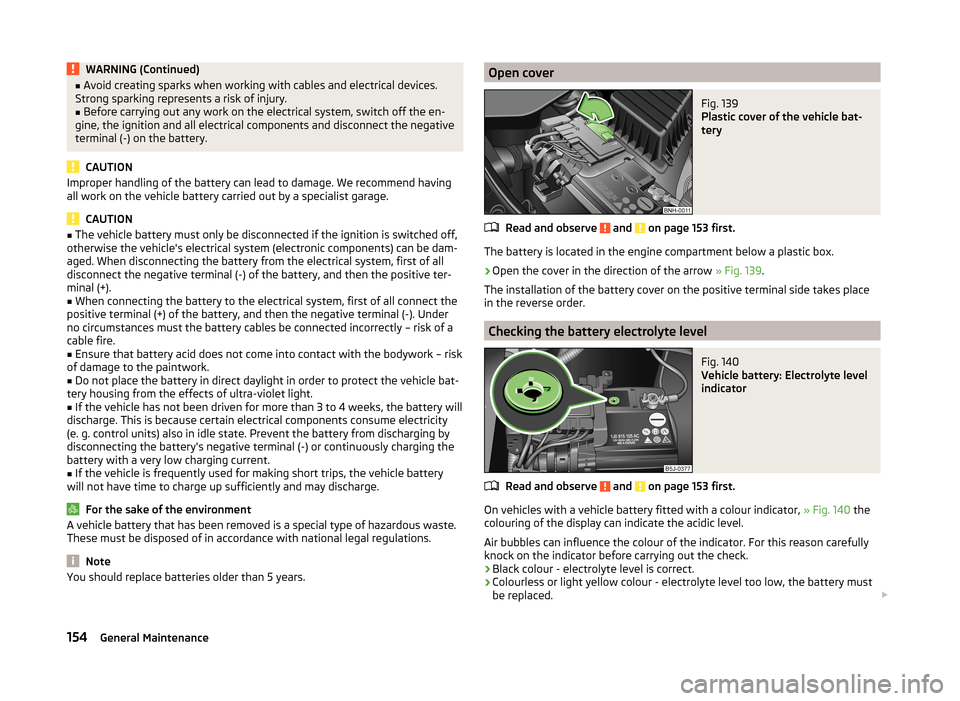
You should replace batteries older than 5 years.Open coverFig. 139
Plastic cover of the vehicle bat-
tery
Read and observe and on page 153 first.
The battery is located in the engine compartment below a plastic box.
›
Open the cover in the direction of the arrow » Fig. 139.
The installation of the battery cover on the positive terminal side takes place
in the reverse order.
Checking the battery electrolyte level
Fig. 140
Vehicle battery: Electrolyte level
indicator
Read and observe and on page 153 first.
On vehicles with a vehicle battery fitted with a colour indicator, » Fig. 140 the
colouring of the display can indicate the acidic level.
Air bubbles can influence the colour of the indicator. For this reason carefully knock on the indicator before carrying out the check.
› Black colour - electrolyte level is correct.
› Colourless or light yellow colour - electrolyte level too low, the battery must
be replaced.
154General Maintenance
Page 159 of 204
OperationOperating measureElectrical power window (operational faults)» page 57Enter the radio/navigation system code
number» User manual of the radio
or » user manual of the naviga-
tion systemSetting the clock» page 32Data in the multifunction display are de-
leted.» page 33
Note
We recommend having the vehicle checked by a specialist garage in order to
ensure full functionality of all electrical systems.
Automatic load deactivation
Read and observe
and on page 153 first.
The vehicle voltage control unit automatically prevents the battery from dis-
charging when the battery is put under high levels of strain. This may be no-
ticed from the following.
› The idling speed is raised to allow the generator to deliver more electricity to
the electrical system.
› Where necessary, large convenience consumers such as seat heaters and
rear window heaters have their power limited or are shut off completely in
the event of an emergency.
CAUTION
■ Despite such intervention by the vehicle electric system management, the
vehicle battery may be drained. For example, when the ignition is switched on
a long time with the engine turned off or the side or parking lights are turned
on during longer parking.■
Consumers that are supplied via a 12-V power socket can cause the vehicle
battery to discharge when the ignition is switched off.
Note
Driving comfort is not impaired by consumers being deactivated. The driver is
often not aware of it having taken place.Wheels
Tyres and wheel rims
Introduction
This chapter contains information on the following subjects:
Service life of tyres
157
Unidirectional tyres
158
Spare and temporary spare wheel
159
Full wheel trim
159
Wheel bolts
160
Only use tyres or wheel rims that have been approved by ŠKODA for your mod-
el of vehicle.
WARNINGThe national legal regulations must be observed for the use of tyres.WARNINGInstructions for the use of tyres■For the first 500 km, new tyres do not yet provide optimum grip, and ap-
propriate care should therefore be taken when driving – risk of accident!■
For reasons of driving safety, do not replace tyres individually.
■
Never exceed the maximum permissible load bearing capacity of moun-
ted tyres.
■
Never exceed the maximum permissible speed for the mounted tyres.
■
An incorrect wheel alignment at the front or rear impairs handling.
■
Unusual vibrations or pulling of the vehicle to one side could be a sign of
tyre damage. If there is any doubt that a wheel is damaged, immediately re-
duce your speed and stop! If no external damage is evident, drive slowly
and carefully to the nearest specialist garage to have the vehicle checked.
WARNINGInformation regarding tyre damage or wear■Never use tyres if you do not know anything about the condition and age.■
Never drive with damaged tyres – there is the risk of an accident occur-
ring.
156General Maintenance
Page 170 of 204
WARNING (Continued)■If the wheel bolts are tightened to a too low tightening torque, the rim
can come loose when the car is moving. A tightening torque which is too
high can damage the bolts and threads and this can result in permanent
deformation of the contact surfaces on the rim.■
In case of incorrect treatment of the wheel bolts, the wheel can loosen
when the car is moving.
Note
The national legal requirements must be observed when changing a wheel.
Preliminary work
Read and observe
on page 166 first.
Before changing the wheel, the following work must be carried out.
›
Have all the occupants get out. The passengers should not stand on the
road (instead they should remain behind a crash barrier, for instance) while
the wheel is being changed.
›
Switch off the engine.
›
Engage the 1st gear or place the selector lever of the automatic transmission
in the P-position .
›
Apply the handbrake firmly.
›
Uncouple a trailer.
›
Remove the vehicle tool kit » page 166 and the spare wheel » page 159 ,
Spare and temporary spare wheel from the boot.
Changing a wheel
Read and observe
on page 166 first.
When changing a wheel, the following instructions must be followed.
›
Remove the full wheel trim or the caps of the wheel bolts.
›
First of all slacken the anti-theft wheel bolt and then the other wheel bolts.
›
Jack up the vehicle until the wheel that needs changing is clear of the
ground.
›
Unscrew the wheel bolts and place them on a clean surface (cloth, paper, etc.).
›
Remove the wheel carefully.
›
Attach the spare wheel and slightly screw on the wheel bolts.
›
Lower the vehicle.
› Tighten the opposite wheel bolts alternately (cross-wise) with the wheel
wrench. Tighten the anti-theft wheel bolt last.›
Replace the wheel trim or the caps.
WARNING■ If it is established when changing a wheel that the wheel bolts are corro-
ded and difficult to move, then these must be replaced.■
When fitting unidirectional tyres, ensure that the direction of rotation is
correct » page 156 .
Follow-up work
Read and observe
on page 166 first.
After changing the wheel, the following work must be carried out.
›
Stow and attach the replaced wheel in the spare wheel well using a special
screw » page 159 , Spare and temporary spare wheel .
›
Stow the tool kit in the space provided and secure using the strap.
›
Check the tyre pressure on the installed spare wheel as soon as possible.
›
Have the tightening torque of the wheel bolts checked with a torque
wrench as soon as possible.
After changing the wheel, the tyre pressure should be adjusted. In vehicles
with tyre pressure monitoring, tyre pressure values are to be stor-
ed » page 125 .
Replace the damaged wheel or consult a specialist garage about repair op-
tions.
WARNINGDrive cautiously and only at a moderate speed until the tightening torque
has been checked.167Emergency equipment and self-help
Page 181 of 204
No.Consumer6Glow plugs, radiator fan7Electro-hydraulic power steering8ABS or TCS or ESC9Radiator fan10Automatic gearbox11ABS or TCS or ESC12Central control unit13Electrical auxiliary heating system
Note
Fuses 1-7 are replaced by a specialist garage.
Replacing bulbs
Introduction
This chapter contains information on the following subjects:
Headlights
179
Changing the low beam and high beam bulb (halogen headlights)
179
Changing the high beam bulb (halogen projector headlights)
179
Changing the high beam bulb (halogen projector headlights)
180
Changing the front turn signal bulb
180
Changing the front parking light bulb
180
Fog lights and daytime running lights
180
Fog light, Roomster Scout
181
Replacing the bulb for the licence plate light
181
Rear Light
181
Some manual skills are required to change a bulb. For this reason, we recom-
mend having bulbs replaced by a specialist garage or seeking other expert help
in the event of any uncertainties.
› Switch off the ignition and all of the lights before replacing a bulb.
› Faulty bulbs must only be replaced with the same type of bulbs. The designa-
tion is located on the light socket or the glass bulb.
› A stowage compartment for replacement bulbs is located in a plastic box in
the spare wheel or underneath the floor covering in the boot.
WARNING■ Always read and observe the warnings before completing any work in the
engine compartment » page 145.■
Accidents can be caused if the road in front of the vehicle is not suffi-
ciently illuminated and the vehicle cannot or can only be seen with difficul-
ty by other road users.
■
Bulbs H7 and H4 are pressurised and may burst when changed - there is a
risk of injury. We therefore recommended wearing gloves and safety
glasses when changing a bulb.
■
Switch off the respective vehicle light when changing the bulb.
CAUTION
■ Do not take hold of the glass bulb with naked fingers (even the smallest
amount of dirt reduces the working life of the light bulb). Use a clean cloth,
napkin, or similar.■
When removing and installing the number plate light and tail light make sure
that the paintwork of the vehicle and the tail light are not damaged.
Note
■ This Owner's Manual only describes the replacement of bulbs where it is pos-
sible to replace the bulbs on your own without any complications arising. Other
bulbs must be replaced by a specialist garage.■
We recommend that a box of replacement bulbs always be carried in the ve-
hicle. Replacement bulbs can be purchased from ŠKODAOriginal Accessories.
■
We recommend having the headlight settings checked by a specialist garage
after replacing a bulb in the main beam, low beam or fog lights.
■
Visit a specialist garage if an LED is faulty.
178Do-it-yourself
Page 194 of 204
Central locking system49
lock51
unlock51
Changing brake fluid
152
bulbs178
Changing the bulb for fog light (Scout)181
Fog lights and daytime running lights bulbs180
Front parking light bulb180
Front turn signal bulb180
High beam bulb - halogen projector headlights 179, 180
light bulb in tail light
181
Low beam and high beam bulb - halogen head- lights
179
Wheels166
Changing a wheel Follow-up work
167
Preliminary work167
Remove and attaching a wheel167
Changing brake fluid
152
Charging a vehicle battery155
Check Fit ball head properly
128
Checking Battery electrolyte level
154
Brake fluid152
Coolant151
Engine oil149
Oil level149
Windscreen washer fluid147
Checks Statutory checks
132
Children and safety22
Child safety Side airbag
24
Child safety lock48
Child seat Classification
24
ISOFIX25
on the front passenger seat23
TOP TETHER26
Use of child seats24
Use of ISOFIX child seats25
Chrome parts refer to Taking care of your vehicle
137
Cigarette lighter82
Cleaning Alcantara
141
Covers of electrically heated seats141
Fabrics141
Headlight lenses138
Natural leather140
Plastic parts137
Synthetic leather141
Wheels139
Cleaning vehicle135
Climatronic95
automatic mode96
Control elements95
Controlling blower96
Defrosting windscreen97
Recirculated air mode96
Setting the temperature96
Clock32
Clothes hook83
Cockpit 12-volt power outlet
82
Ashtray81
Cigarette lighter82
General view29
Lighting63
Storage compartments83
Compartments83
Components of the puncture repair kits170
Computer see Multifunction display
33
Convenience turn signal61
Coolant150
Checking151
Display messages41
Replenishing151
Warning light41
Coolant temperature gauge display
31
Correct seated position9
Driver9
Front passenger10
Instructions11
Rear seats11
Counter for distance driven32
Cruise Control System121
Cupholders81
D
DAY LIGHT see Daylight running lights
60
Daylight running lights60
Deactivating an airbag20
Decorative films137
Defrosting rear window64
Delayed locking of the boot lid see boot lid
55
Diesel refer to Fuel
144
Diesel fuel Operation in winter
144
Diesel particulate filter43
display messages43
Digital clock32
Dimmed headlights59
Dipstick149
Display Service interval
36
Distance driven32
191Index
Page 195 of 204
DoorChild safety lock48
Closing48
Indicator light for an open door40
Opening48
Doors Emergency locking
49
Driving Abroad
118
Driving through water on streets117
Emissions184
Fuel consumption184
Maximum speed186
Driving economically Economical gear changing
114
Driving through water117
E
Economical and environmentally friendly driv- ing
113
Economical driving Ballast
115
Driving at full throttle115
Idling115
Looking ahead114
Regular maintenance116
Saving energy116
Short distances115
Tyre pressure115
EDL120
Electrical power windows Button in the driver's door
55, 56
Button in the rear door56
Central locking system57
Operational faults57
Electronic Differential Lock120
Electronic immobilizer107
emergency opening the loading door (Praktik)
89
EmergencyChanging a wheel166
Hazard warning light system63
jump-starting172
Jump-starting172
locking of the doors49
Selector lever-unlocking112
Towing the vehicle173
Towing the vehicle using the tow hitch174
tyre repair169
Unlocking the boot lid55
Emergency equipment Fire extinguisher
165
First aid kit165
Jack166
Vehicle tool kit166
Warning triangle165
Emissions184
Engine Running in
113
Starting and stopping the engine106
Switching off the engine107
Engine compartment145
Brake fluid152
Coolant151
Overview147
Vehicle battery153
Engine number183
Engine oil148
Capacity148
Checking149
Replenishing150
Specifications148
Warning light40
Engine revolutions counter31
Environment113
Environmental compatibility116
Environmentally friendly driving113
ESC Function119
Warning light42
F
Films
137
Fire extinguisher165
First aid kit165
Flashers61
Fog lights61
Folding down the seats
70
Footmats109
see Footmats109
Front airbag18
Front seats69
Fuel142
Diesel144
Fuel gauge31
gauge31
refer to Fuel142
Refuelling143
Unleaded petrol143
Fuel consumption113, 184
Fuses Assignment
175
Colour coding175
Replacing175
G
Gear Recommended gear
32
Gearbox Display messages
38
Gear changing Gear stick
109
General view Cockpit
29
Genuine parts133
192Index