boot SKODA SUPERB 2003 1.G / (B5/3U) User Guide
[x] Cancel search | Manufacturer: SKODA, Model Year: 2003, Model line: SUPERB, Model: SKODA SUPERB 2003 1.G / (B5/3U)Pages: 259
Page 48 of 259
Unlocking and locking47
Using the systemSafetyDriving TipsGeneral MaintenanceBreakdown assistanceTechnical Data
the boot lid within the next 30 seconds, the car locks again automatically.
This function is intended to prevent the vehicle being unlocked uninten-
tionally.
The safe securing system along with the anti-theft alarm system* are,
however, deactivated during these 30 seconds.
If the
single door opening function has been activated on your car, you
unlock only the driver door by pressing button once and the complete
vehicle by pressing the button twice ⇒page 43.
In addition, when the car is unlocked, the power seats and exterior
mirrors* move into the position assigned to this key. The stored setting of
driver seat and exterior mirrors is retrieved automatically.
When the vehicle is unlocked or locked, the interior lights in the door
contact are automatically switched on or off.
The turn signal lights flash once to confirm that the vehicle has been
correctly locked.
Note
•Operate the radio remote control only when the doors and boot lid are
closed and you have visual contact with the vehicle.
•Once in the car, you must not press the lock button of the master key
before inserting the key into the ignition lock in order to avoid the car being
inadvertently locked and, in addition, the anti-theft alarm system being switched on. Should this happen, press the unlock button
of the master
key.
Synchronisation of the vehicle key code
If the vehicle cannot be unlocked by actuating the remote control system
then it is possible that the code in the key and the control unit in the vehicle
are no longer synchronised. This can occur when the buttons on the radio-
operated key are actuated a number of times outside of the operative
range of the equipment or the battery on the remote control was replaced.
This means it is necessary to synchronise the code as follows:
•Press any button on the remote control.
•Pressing of the button means that the door will open with the key within
1 minute.
Anti-theft alarm system
Description
The anti-theft alarm system increases the level of protection against
people seeking to break into the vehicle. The system triggers audible and
visual warning signals if an attempt is made to break into the vehicle.
How is the alarm system switched on?
The anti-theft alarm system is activated automatically when the vehicle is
locked with the key on the closed driver's door or by using the remote
control. It is activated 30 seconds after closing the door.
WARNING
If the vehicle is locked from the outside and the safe securing
system is activated, there must not be any person in the vehicle as
it is then not possible to open either a door or a window from the
inside. The locked doors make it more difficult for rescuers to get
into the vehicle in an emergency - hazard!
AA
Page 49 of 259
Unlocking and locking
48
How is the alarm system switched off?
The anti-theft alarm system is switched off if the vehicle is unlocked by
only using the remote control. The vehicle is automatically locked again if
the vehicle is not opened within 30 seconds after reactivating the anti-theft
alarm system.
Once you unlock the vehicle by inserting the key into the driver door you
then have to insert the key into the ignition lock and switch the ignition on
within 15 seconds after opening the door in order to deactivate the anti-
theft alarm system. The alarm will be triggered if you do not switch on
the ignition within 15 seconds.
When is the alarm triggered?
The following security areas of the locked vehicle are monitored:
•Bonnet
•Boot lid
•Doors
•Ignition lock
•Vehicle interior* ⇒page 49.
•A drop in voltage of the on-board power supply
An alarm is immediately triggered if either of the two battery terminals is
disconnected while the anti-theft alarm system is activated.
If you unlock and open the boot lid with the key, the alarm is immediately
triggered.
How is the alarm switched off?
You switch the alarm off if you unlock the car with the radio remote control
in the key or if you switch the ignition on.
Turn signals
All of the turn signal lights flash once to indicate that the doors, the bonnet
and the boot lid have been correctly closed when locking the car. If the turn signal lights do not flash, check the doors, bonnet and boot lid
again to ensure that they are closed. If the doors, the bonnet or the boot
lid remain open when the anti-theft alarm system is activated, the turn
signal lights do not flash until after they have been closed.
Indicator light (LED)
The LED in the top of the door trim on the driver door first of all flashes
rapidly after the car is locked, then slowly. This indicates that the anti-theft
alarm system
including the interior monitor* is activated.
Note
•Before leaving the car, check that all the doors, windows and the elec-
tric sliding/tilting roof* are properly closed in order to ensure that the anti-
theft alarm system is fully operational.
•Power supply for the remote control operation is provided by a battery.
The battery must be replaced, ideally by the Škoda dealer, if the central
locking or anti-theft alarm system does react to the remote control at less
than 3 metres away.
Page 63 of 259
Lights and Visibility
62
The lights without interior monitoring sensors ⇒ page 61, fig. 42 are actu-
ated by pressing the glass on the symbol O or by switching to the
middle position .
The functions are the same as for the interior lighting at the front of the car
⇒ page 60.
Luggage compartment light
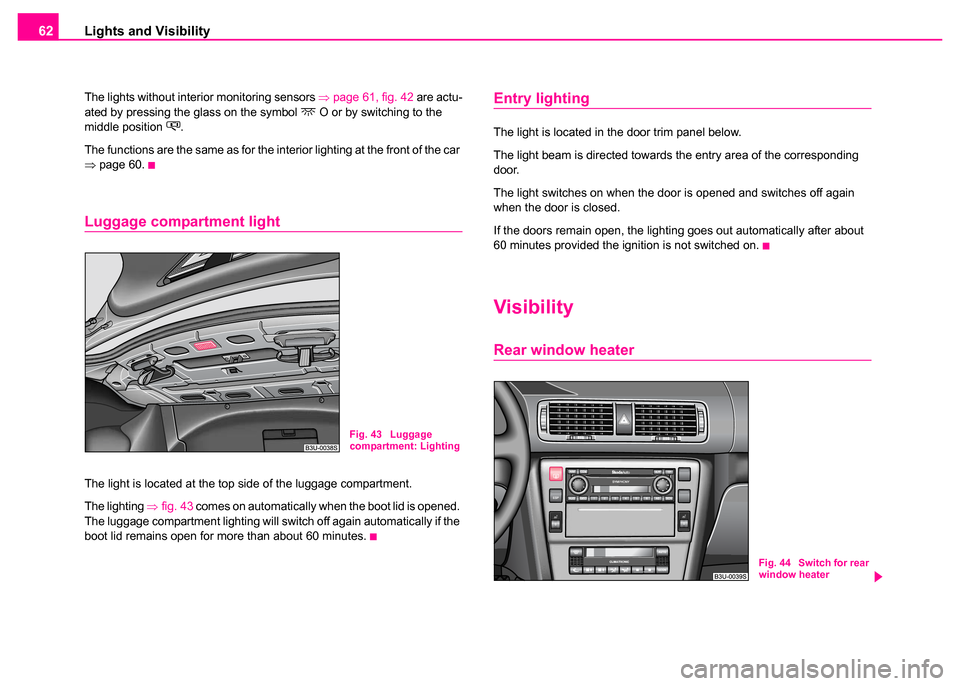
The light is located at the top side of the luggage compartment.
The lighting ⇒ fig. 43 comes on automatically when the boot lid is opened.
The luggage compartment lighting will switch off again automatically if the
boot lid remains open for more than about 60 minutes.
Entry lighting
The light is located in the door trim panel below.
The light beam is directed towards the entry area of the corresponding
door.
The light switches on when the door is opened and switches off again
when the door is closed.
If the doors remain open, the lighting goes out automatically after about
60 minutes provided the ignition is not switched on.
Visibility
Rear window heater
Fig. 43 Luggage
compartment: Lighting
Fig. 44 Switch for rear
window heater
Page 80 of 259
Seats and Stowage79
Using the systemSafetyDriving TipsGeneral MaintenanceBreakdown assistanceTechnical Data
Note
•You have to adjust the inflation pressure of the tyres to the load of the
car - refer to tyre inflation pressure sticker on the inside of the fuel filler
flap.
•The backrest of the rear seats is a fixed element and can therefore not
be folded forward to increase the size of the luggage compartment!
Lashing eyes
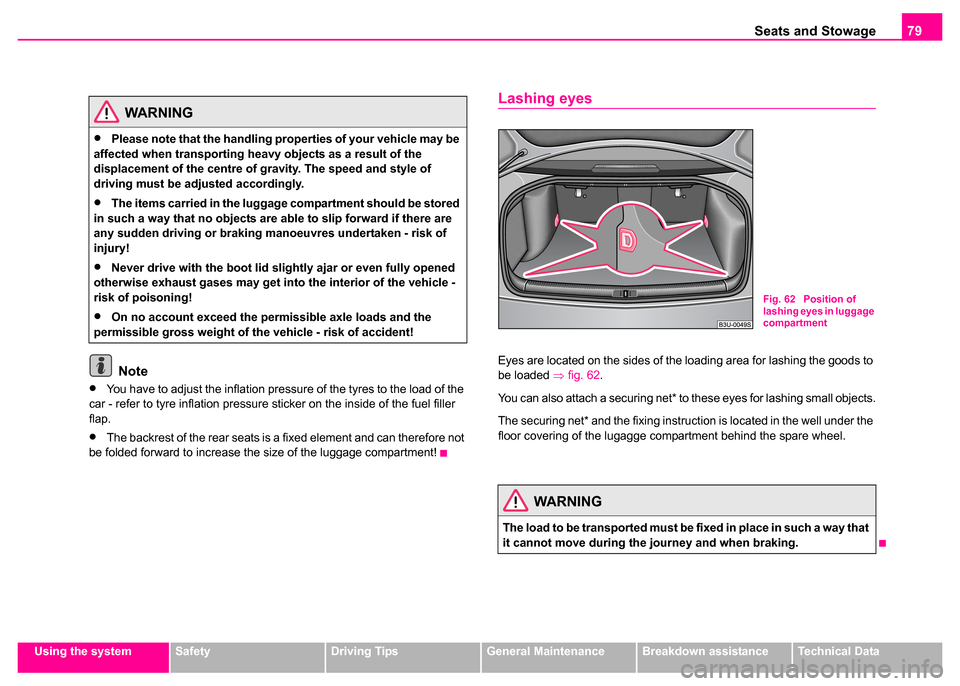
Eyes are located on the sides of the loading area for lashing the goods to
be loaded ⇒fig. 62 .
You can also attach a securing net* to these eyes for lashing small objects.
The securing net* and the fixing instruction is located in the well under the
floor covering of the lugagge compartment behind the spare wheel.
WARNING
•Please note that the handling properties of your vehicle may be
affected when transporting heavy objects as a result of the
displacement of the centre of gravity. The speed and style of
driving must be adjusted accordingly.
•The items carried in the luggage compartment should be stored
in such a way that no objects are able to slip forward if there are
any sudden driving or braking manoeuvres undertaken - risk of
injury!
•Never drive with the boot lid slightly ajar or even fully opened
otherwise exhaust gases may get into the interior of the vehicle -
risk of poisoning!
•On no account exceed the permissible axle loads and the
permissible gross weight of th e vehicle - risk of accident!
WARNING
The load to be transported must be fixed in place in such a way that
it cannot move during the journey and when braking.
Fig. 62 Position of
lashing eyes in luggage
compartment
Page 82 of 259

Seats and Stowage81
Using the systemSafetyDriving TipsGeneral MaintenanceBreakdown assistanceTechnical Data
Caution
Please ensure that the heating elements of the rear window heater are not
damaged as a result of objects placed in this area.
Through-loading bag*
The through-loading bag enables you to conveniently
transport long objects (such as skis) without damaging the
interior of the car.
Loading
– Fold down the armrest of the rear seats to the front.
– Press the unlock button for the cover of the through-loading
bag in the interior of the car and swivel it down.
– Pull the bag out and unfold it.
– Open the boot lid/luggage compartment door.
– Press the unlock button for the cover of the through-loading bag ⇒fig. 65 and swivel it down.
– Push the objects into the through-loading bag from the boot ⇒ .
Securing
– Insert the belt ⇒fig. 66 into the middle seat belt buckle .
WARNING
No objects should be placed on the luggage compartment cover,
the vehicle occupants could be endangered if there is sudden
braking or the vehicle collides with something.
Fig. 65 Luggage
compartment: cover for
through-loading bag
Fig. 66 Attaching
through-loading bag to
middle seat belt buckle
of rear seats
AAAB
Page 83 of 259

Seats and Stowage
82
– Pull the seat belt tight in direction of arrow ⇒page 81,
fig. 66 .
Stowing
– Close the cover for the through-loading bag in the boot.
– Carefully fold the through-loading bag together (approx. 11 cm packet).
– Close the cover in the interior of the car.
– Move the armrest back into its original position.
Note
Never fold the though-loading bag together if it is moist.
The cool box in the armrest of rear seats*
Using the system
The contents of the cool box is cooled to a temperature of about
20 °C below the ambient temperature, but to a maximum of
approx.+ 5 °C.
Opening and Closing
– Pull the handle ⇒fig. 67 and pull the lid downwards.
– Open up the lid of the cool box upwards until it is heard to lock.
Switching on and off
– The cooling action of the cool box is switched on and off using switch ⇒fig. 67 . It is signalised by the lighting up of the
indicator light on the switch.
WARNING
After placing items into the through-loading bag, you must secure
the bag with the belt .
AC
AAFig. 67 Cool box
AA
Page 193 of 259
Care and cleaning
192
Paint damage
Slight damage to paintwork such as scratches, scuffs or traces of chip
damage must be touched up immediately with paint (Skoda painting pen)
before any corrosion can result. You can of course have this work carried
out by a Škoda dealer.
Škoda dealers have a range of matching touch-up pens or spray cans
available for your vehicle.
The paint number of the original paintwork of your vehicle is indicated on
the vehicle data sticker ⇒page 249.
Any corrosion which has already have formed must be removed thor-
oughly. Apply a corrosion protection primer and then the paint to the
affected point. You can of course have this work carried out by a Škoda
dealer.
Plastic parts
External plastic parts are cleaned by normal washing. Plastic parts and
synthetic leather can also be treated with special solvent-free plastic
cleaning agents if a damp cloth is not sufficient. Paint care products are
not suitable for plastic parts.
Windows
Only use a plastic ice scraper for removing snow and ice from the
windows and mirrors. You should not move the ice scraper forward and
backward but in one direction on the window which you are cleaning in
order to avoid any damage to the surface of the glass. You can best remove residues of rubber, oil, grease, wax or silicone by
using a special window cleaner or a special silicone remover.
You should also clean the windows regularly from the inside.
Do not use window leathers which you have used to polish the vehicle
body to dry off the windows. Residues of preservatives in the window
leather can dirty the window and reduce visibility.
Do not affix any stickers over the inside of the rear window to avoid
damage to the
heating elements of the rear window heater .
We recommend using a preservative from the range of accessories
offered by your Skoda dealer.
The headlight lenses
Please do not use any aggressive cleaning or chemical solvent products
- risk of damage to the plastic lenses Please use soap and clean warm
water.
Caution
Never wipe the headlights dry and do not use any sharp objects for
cleaning the plastic lenses, this may result in damage to the protective
paintwork and consequently in formation of cracks on the headlight
lenses, e.g through effect of chemical products.
Door and window seals
The rubber seals on the doors, boot lid, bonnet, sliding roof and windows
remain supple and last longer if you treat them from time to time with a
rubber care product (e.g. silicone spray). You also avoid premature wear
Page 202 of 259

Fuel201
Using the systemSafetyDriving TipsGeneral MaintenanceBreakdown assistanceTechnical Data
•Vehicles fitted with catalytic converter should never be allowed to let
the fuel tank to run completely empty. An irregular supply of fuel to the
engine can result in misfiring and unburnt fuel may get into the exhaust
system, which may result in overheating and damage to the catalytic
converter.
For the sake of the environment
The fuel tank is full just as soon as the pump nozzle switches off for the
first time, provided the nozzle has been operated properly. You should not
continue refuelling - otherwise the expansion chamber in the fuel tank will
also be filled with fuel. Fuel might flow out of the tank when it heats up.
Emergency release of fuel filler flap
If the electric lock is faulty, you can also unlock the fuel filler flap
manually. – Open the boot lid/luggage compartment door.
– Unscrew the clip attaching the right-hand side trim panel and
pull the trim panel off the body.
– Pull on the loop in direction of arrow in order to unlock the fuel filler flap ⇒fig. 152 .
Fig. 152 Luggage
compartment: Emer-
gency release of fuel
filler flap
WARNING
Reel up the belt webbing once again until it is fitted snugly against
the child seat.
Page 228 of 259

Breakdown assistance227
Using the systemSafetyDriving TipsGeneral MaintenanceBreakdown assistanceTechnical Data
Breakdown assistance
Breakdown assistance
First-aid box*
First-aid box
The compartment for stowing the first-aid box is located in the left of the
luggage compartment ⇒fig. 168 .
Note
Pay attention to the use-by-date of the contents of the first-aid box.
Warning triangle
– To remove the warning triangle, turn the rotary lock in direc-
tion of arrow ⇒fig. 169 and fold the fixture down.
Fig. 168 Compartment
for stowing first-aid
boxFig. 169 Warning
triangle fitted inside
boot lid
Page 246 of 259

Fuses and light bulbs245
Using the systemSafetyDriving TipsGeneral MaintenanceBreakdown assistanceTechnical Data
Note
This Owner's Manual only describes the replacement of bulbs where it is
assumed that no major complications will arise. Other light bulbs should
be changed by your Škoda dealer.
Rear light unit
– Open the boot lid/luggage compartment door.
– Raise the floor covering.
– Press the catch in direction of arrow and pull out the light
fixture.
– Press the defect light bulb in to the holder, turn anti-clockwise and remove. – Insert the new light bulb and turn it fully to the right.
– Insert the light bulb holder again, the plastic tongue must lock
in place.
Licence plate light
– Open the boot lid/luggage compartment door.
– Unscrew the glass cover of the light ⇒fig. 185.
– Take the faulty bulb out of the fixture and insert a new one.
– Replace the the glass cover of the light and press it down to the stop - ensure that the glass cover is correctly installed.
– Screw the glass cover tight.
Fig. 184 Luggage
compartment: Remove
light bulb holderFig. 185 Luggage
compartment door
Licence plate light