brakes SKODA SUPERB 2003 1.G / (B5/3U) Owner's Manual
[x] Cancel search | Manufacturer: SKODA, Model Year: 2003, Model line: SUPERB, Model: SKODA SUPERB 2003 1.G / (B5/3U)Pages: 259
Page 5 of 259
Contents
4
Driving Tips . . . . . . . . . . . . . . . . . . . . . .
Intelligent Technology . . . . . . . . . . . . . . . . . .
Electronic stability programme (ESP)* . . . . . .
Brakes . . . . . . . . . . . . . . . . . . . . . . . . . . . . . .
Antilock brake system (ABS) . . . . . . . . . . . . .
Brake Assist* . . . . . . . . . . . . . . . . . . . . . . . . .
Power steering . . . . . . . . . . . . . . . . . . . . . . . .
Driving and the Environment. . . . . . . . . . . .
The first 1 500 kilometres and then afterwards
Catalytic converter . . . . . . . . . . . . . . . . . . . . .
Motoring abroad . . . . . . . . . . . . . . . . . . . . . . .
Avoiding damage to your vehicle . . . . . . . . . .
Driving in an economical and environmentally
conscious manner . . . . . . . . . . . . . . . . . . . . .
Environmental compatibility . . . . . . . . . . . . . .
Towing a trailer . . . . . . . . . . . . . . . . . . . . . . . .
Towing a trailer . . . . . . . . . . . . . . . . . . . . . . . .
Detachable towing device* . . . . . . . . . . . . . .
General Maintenance . . . . . . . . . .
Care and cleaning . . . . . . . . . . . . . . . . . . . . .
General . . . . . . . . . . . . . . . . . . . . . . . . . . . . .
Care of the exterior of vehicle . . . . . . . . . . . .
Care of the interior of vehicle . . . . . . . . . . . . .
Engine compartment . . . . . . . . . . . . . . . . . . .
Fuel. . . . . . . . . . . . . . . . . . . . . . . . . . . . . . . . . .
Petrol . . . . . . . . . . . . . . . . . . . . . . . . . . . . . . .
Diesel . . . . . . . . . . . . . . . . . . . . . . . . . . . . . . .
Refuelling . . . . . . . . . . . . . . . . . . . . . . . . . . . .
Inspecting and Replenishing. . . . . . . . . . . .
Engine compartment . . . . . . . . . . . . . . . . . . .
Overview of the engine compartment . . . . . .
Engine oil . . . . . . . . . . . . . . . . . . . . . . . . . . . .
Cooling system . . . . . . . . . . . . . . . . . . . . . . . Brake fluid . . . . . . . . . . . . . . . . . . . . . . . . . . .
The battery . . . . . . . . . . . . . . . . . . . . . . . . . .
Windscreen Wiper and Washer System . . . .
Spark plugs . . . . . . . . . . . . . . . . . . . . . . . . . .
V-ribbed belts . . . . . . . . . . . . . . . . . . . . . . . . .
The dust and pollen filter* . . . . . . . . . . . . . . .
Wheels and Tyres . . . . . . . . . . . . . . . . . . . . .
Wheels . . . . . . . . . . . . . . . . . . . . . . . . . . . . .
Accessories, changes and replacement of
parts . . . . . . . . . . . . . . . . . . . . . . . . . . . . . . . . .
General . . . . . . . . . . . . . . . . . . . . . . . . . . . . .
Breakdown assistance . . . . . . . .
Breakdown assistance . . . . . . . . . . . . . . . . .
First-aid box* . . . . . . . . . . . . . . . . . . . . . . . . .
Warning triangle . . . . . . . . . . . . . . . . . . . . . .
Fire extinguisher* . . . . . . . . . . . . . . . . . . . . . .
Vehicle tool kit . . . . . . . . . . . . . . . . . . . . . . . .
Spare wheel . . . . . . . . . . . . . . . . . . . . . . . . . .
Changing a wheel . . . . . . . . . . . . . . . . . . . . .
Jump-starting . . . . . . . . . . . . . . . . . . . . . . . . .
Tow-starting and towing vehicle . . . . . . . . . . .
Fuses and light bulbs . . . . . . . . . . . . . . . . . .
Electric fuses . . . . . . . . . . . . . . . . . . . . . . . . .
Bulbs . . . . . . . . . . . . . . . . . . . . . . . . . . . . . . .
Technical Data. . . . . . . . . . . . . . . . . . .
General . . . . . . . . . . . . . . . . . . . . . . . . . . . . . .
Vehicle identification data . . . . . . . . . . . . . . .
Index. . . . . . . . . . . . . . . . . . . . . . . . . . . . . . .
169
169
169
172
173
174
174
176
176
177
178
178
179
183
184
184
186
189
189
189
189
194
196
198
198
198
200
202
202
204
205
208 210
212
217
217
218
218
219
219
226
226
227
227
227
227
228
228
229
229
236
238
241
241
243
249
249
249
251
Page 34 of 259
Instruments and Indicator/Warning Lights33
Using the systemSafetyDriving TipsGeneral MaintenanceBreakdown assistanceTechnical Data
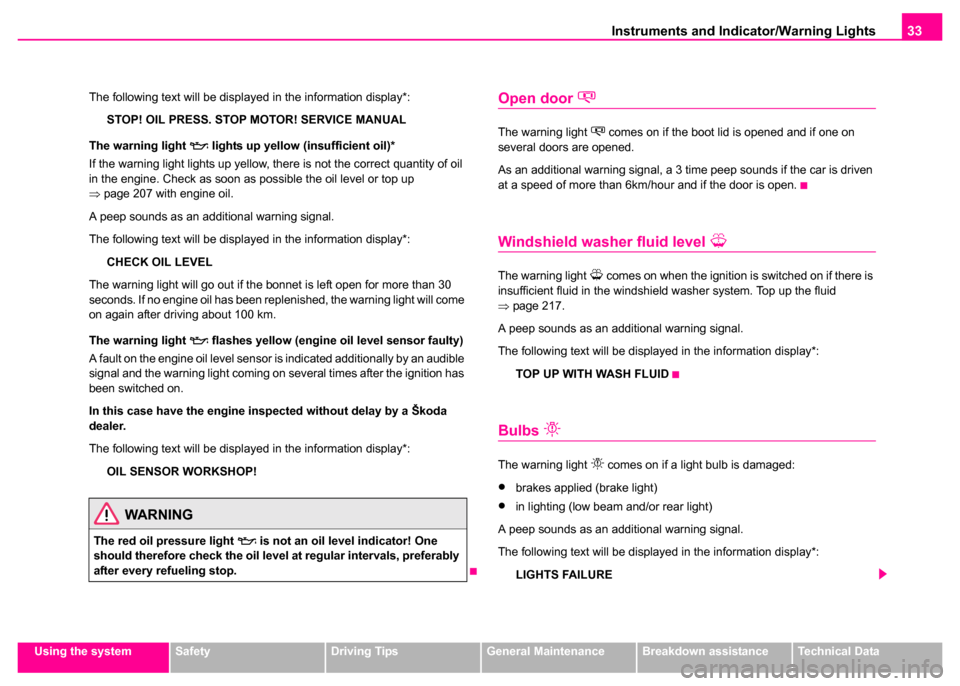
The following text will be displayed in the information display*:
STOP! OIL PRESS. STOP MOTOR! SERVICE MANUAL
The warning light
lights up yellow (insufficient oil)*
If the warning light lights up yellow, there is not the correct quantity of oil
in the engine. Check as soon as possible the oil level or top up
⇒ page 207 with engine oil.
A peep sounds as an additional warning signal.
The following text will be displayed in the information display*:
CHECK OIL LEVEL
The warning light will go out if the bonnet is left open for more than 30
seconds. If no engine oil has been replenished, the warning light will come
on again after driving about 100 km.
The warning light
flashes yellow (engine oil level sensor faulty)
A fault on the engine oil level sensor is indicated additionally by an audible
signal and the warning light coming on several times after the ignition has
been switched on.
In this case have the engine inspected without delay by a Škoda
dealer.
The following text will be displayed in the information display*:
OIL SENSOR WORKSHOP!
Open door
The warning light comes on if the boot lid is opened and if one on
several doors are opened.
As an additional warning signal, a 3 time peep sounds if the car is driven
at a speed of more than 6km/hour and if the door is open.
Windshield washer fluid level
The warning light comes on when the ignition is switched on if there is
insufficient fluid in the windshield washer system. Top up the fluid
⇒ page 217.
A peep sounds as an additional warning signal.
The following text will be displayed in the information display*:
TOP UP WITH WASH FLUID
Bulbs
The warning light comes on if a light bulb is damaged:
•brakes applied (brake light)
•in lighting (low beam and/or rear light)
A peep sounds as an additional warning signal.
The following text will be displayed in the information display*:
LIGHTS FAILUREWARNING
The red oil pressure light is not an oil level indicator! One
should therefore check the oil level at regular intervals, preferably
after every refueling stop.
Page 79 of 259
Seats and Stowage
78
Front seats
– You can switch on and adjust the heaters of the driver and front passenger seats by turning the rotary controls and
⇒page 77, fig. 60 , respectively.
Rear seats
– You can switch on and adjust the heaters of the left and right rear seats by turning the rotary controls and
⇒page 77, fig. 61 , respectively.
If the rotary controls are in the 0 position, the seat heater is switched off.
When the seat heater is switched on, the numerical marking of the rotary
control is illuminated. The control range extends from 1 to 5.
Caution
•You should not kneel on the seats and avoid applying pressure at
specific points in order to avoid damaging the heating elements of the seat
heaters.
•Do not clean the seats moist ⇒page 194.
Note
The seat heating should only be switched on when the engine is running.
This has a significant effect of saving on the battery capacity.
Pedals
You should use only footmats which do not obstruct the movement of the
pedals and have an anti-slip protection. Operation of the pedals must not be hindered!
Luggage compartment
Loading the luggage compartment
Please observe the following in the interest of having good
handling characteristics of your vehicle:
– Distribute the items of luggage as evenly as possible.
– Place heavy objects as far forward as possible.
– Attach the items of luggage with the safety net* or with
tensioning straps attached to the lashing eyes ⇒page 79.
A1A2
AAAB
WARNING
•Greater pedal distances may be needed when there is a fault in
the brake system.
•Do not place any footmats or other additional floor coverings in
the area of the pedals in order to ensure that all the pedals can be
fully depressed and are able to return unobstructed to their initial
position - risk of accident!
•There must be no objects on the floor which could roll under the
pedals. You would then no longer be able to apply the brakes,
operate the clutch or accelerator - risk of accident!
Page 120 of 259

Starting-off and Driving119
Using the systemSafetyDriving TipsGeneral MaintenanceBreakdown assistanceTechnical Data
Applying the handbrake
– Pull the handbrake lever up fully.
Releasing the handbrake
– Pull the handbrake lever up slightly and at the same time
press in the locking button ⇒page 118, fig. 109 .
– Hold the button pressed and push the handbrake lever down fully ⇒ .
The handbrake warning light lights up when the handbrake is applied,
provided the ignition is on.
A warning signal (buzzer) sounds and the following text appears in the
display* if you have inadvertently driven off with the handbrake applied:
"Handbrake on"
The handbrake warning is activated if you drive at a speed of more than 5
km/h for more than 3 seconds.
Caution
After the car has come to a stop, always first of all apply the handbrake
firmly before then additionally engaging a gear (manual gearbox) or
moving the selector lever into position P (automatic gearbox).
Parking aid*
The parking aid provides a warning of obstacles behind
the vehicle.
The audible parking aid at the rear determines the distance to an obstacle
behind the car with the aid of ultrasound sensors. The sensors are inte-
grated in the rear bumper.
The parking aid is activated automatically when reverse gear is engaged
and the ignition is turned on. This is confirmed by a brief signal.
The clearance warning begins at a distance of about 160 cm from the
obstacle. The interval between the warning signals becomes shorter as
the clearance is reduced.
A continuous tone sounds from a clearance of just 30 cm - danger area.
You should not reverse any further after this signal sounds.
WARNING
•Please note that the handbrake must be fully released. A hand-
brake which is only partially released can result in the rear brakes
overheating which will have a negative effect on the operation of
the brake system - risk of accident!
•Never leave children unattended in the vehicle. The children
might, for example, release the ha ndbrake or take the vehicle out
of gear. The vehicle might then move off - risk of accident!WARNING
•The parking aid is not a substitute for the driver paying proper
attention. It is always the driver's responsibility to take care when
parking the vehicle or carrying out similar manoeuvres.
Page 142 of 259

Seat belts141
Using the systemSafetyDriving TipsGeneral MaintenanceBreakdown assistanceTechnical Data
How are seat belts correctly fastened?
Fastening a three-point seat belt
Fasten your seat belt before starting!
– Correctly adjust the front seat and the head restraint before
fastening your seat belt ⇒page 69, “Front seats”.
– Slowly pull the belt webbing at the tongue of the lock over your chest and pelvis ⇒.
– Insert the tongue of the lock into the seat belt buckle belonging to the seat until it is heard to lock in place.
– Pull on the belt to check that it has also reliably engaged in the lock.
Each three-point seat belt is equipped with an inertia reel. This inertia reel
offers you complete freedom of movement if the belt is unreeled slowly. If
the brakes are applied suddenly, the inertia reel will block. It also blocks
the belts when the car accelerates, when driving uphill and when
cornering.
Expectant mothers must also wear the seat belt ⇒.
Fig. 123 Routing of
webbing over the
shoulders and the lap
belt
Fig. 124 Routing of
belt webbing for an
expectant mother
WARNING
•The shoulder part of the seat belt must never run across your
neck but must run approximately over the middle of the shoulder
and fit snugly against the chest. The lap part of the belt must run
across the hip and must never be routed across the stomach. It
must always fit snugly ⇒fig. 123. Adjust the belt webbing as
required.
•The lap part of the belt should be positioned as low as possible
at the pelvis of an expectant mother in order to avoid exerting any
pressure on the lower abdomen.
•Always ensure that the webbing of the seat belts is properly
routed. Seat belts which are not correctly adjusted can themselves
cause injuries even in minor accidents.
Page 171 of 259
Intelligent Technology
170
The ESP warning light ⇒page 34 lights up in the instrument cluster when
there is a fault on the ESP.
Switching off
You can switch the ESP off and on again as you wish, by pressing the
button ⇒page 169, fig. 145 . The ESP warning light ⇒page 34 lights up
in the instrument cluster when the ESP is switched off.
The ESP should normally always be switched on. It may be good practice
to switch the system off only in particular exceptional situations if you
desire wheel slip.
Examples:
•when driving with snow chains
•when driving in deep snow or on a loose surface
•when it is necessary to rock a car free when it has become stuck
then you should switch on the ESP again.
Note
•All four wheels must be fitted with the same tyres in order to achieve
problem-free operation of the ESP. Differing rolling circumferences of the
tyres can lead to an undesirable reduction in the engine output.
•Changes to vehicle (e.g. on engine, on the brakes, on chassis or other
assignment of tyres and wheels) can influence the function of the ESP
⇒ page 226.
Traction control system (TCS)*
The traction control system prevents the driven wheels
from spinning when accelerating.
General
The TCS makes it much easier, and sometimes at all possible, to start off,
accelerate and climb a steep hill when the conditions of the road surface
are unfavourable.
Operating principle
The TCS switches on automatically when the engine is started and then
conducts a self-test. The system monitors the speeds of the driven wheels
with the aid of the ABS sensors. If the wheels are spinning, the force trans-
WARNING
It is also not possible for the ESP to overcome the physical limits
of the vehicle. Even if a vehicle fitted with ESP you should still
always adapt your style of driving to the condition of the road
surface and the traffic situation. This particularly applies when
driving on slippery and wet roads. The increased safety offered
must not tempt you to take greater risks than otherwise - risk of an
accident!
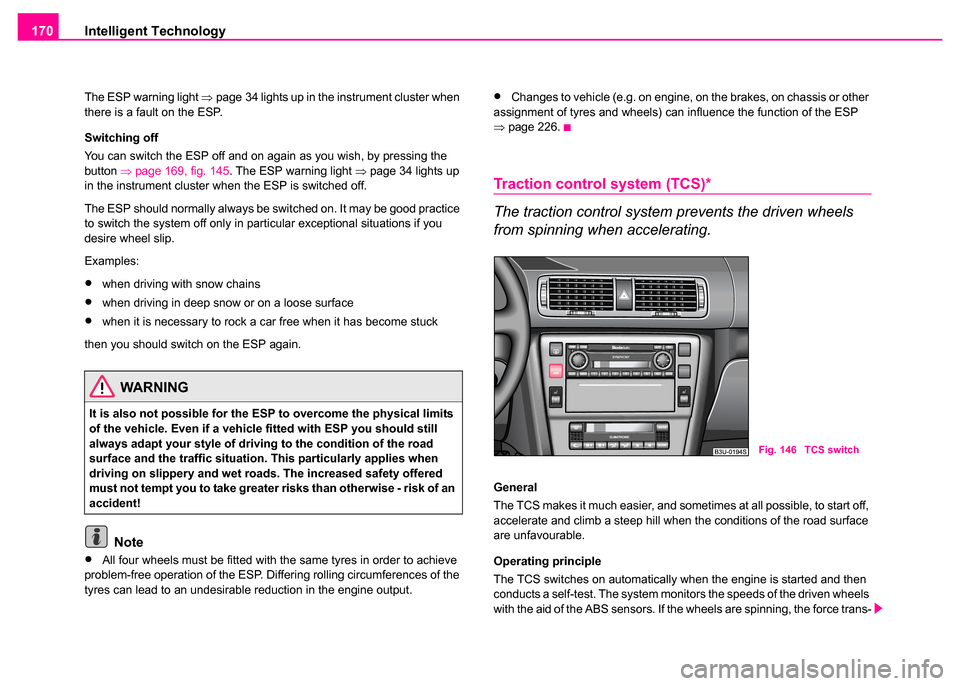
Fig. 146 TCS switch
Page 172 of 259
Intelligent Technology171
Using the systemSafetyDriving TipsGeneral MaintenanceBreakdown assistanceTechnical Data
mitted to the road surface is automatically adapted by reducing the engine
speed. This occurs at all speeds.
The TCS operates in combination with the ABS
⇒page 173. The TCS will
not function if a fault exists in the ABS system.
The TCS warning light ⇒page 34 lights up in the instrument cluster when
there is a fault on the TCS.
Switching off
You can switch the TCS off and on again as you wish by pressing the
button ⇒page 170, fig. 146 . The TCS warning light ⇒page 28 lights up
in the instrument cluster when the TCS is switched off.
The TCS should normally always be switched on. It may be good practice
to switch the system off only in particular exceptional situations if you
desire wheel slip.
Examples:
•when driving with snow chains
•when driving in deep snow or on a loose surface
•when it is necessary to rock a car free when it has become stuck
then you should switch on the TCS again.
The EDL ⇒page 171 is a part of the TCS. THE EDL operates independ-
ently of the TCS (also when the TCS has been switched off using the TCS
button).
Note
•All four wheels must be fitted with the same tyres in order to achieve
problem-free operation of the TCS. Differing rolling circumferences of the
tyres can lead to an undesirable reduction in the engine output.
•Changes to vehicle (e.g. on engine, on the brakes, on chassis or other
assignment of tyres and wheels) can influence the function of the TCS
⇒ page 226.
Electronic Differential Lock (EDL)*
The electronic differential lock prevents an individual
wheel from slipping.
General
The EDL makes it much easier, and sometimes at all possible, to start off,
accelerate and climb a steep hill when the conditions of the road surface
are unfavourable.
Operating principle
The EDL is activated automatically, that is without any action on the part
of the driver. It monitors the speeds of the driven wheels with the aid of the
ABS sensors. Should only one drive wheel begin spinning on a slippery
surface there will be an appreciable difference in the speed of the driven
wheels. The EDL function brakes the slipping wheel and the differential
transmits a greater driving force to the other driven wheel. This control
process is also accompanied by noises.
Overheating of the brakes
The EDL switches off automatically if unusually severe stresses exist in
order to avoid excessive heat generation in the disc brake on the wheel
which is being braked. The vehicle can continue to be driven and has the
same characteristics as a vehicle not fitted with EDL.
WARNING
You should always adjust your style of driving to the conditions of
the road surface and the traffic situation. The increased safety
offered must not tempt you to take greater risks than otherwise -
risk of an accident!
Page 173 of 259
Intelligent Technology
172
The EDL switches on again automatically as soon as the brake has cooled
down.
Note
•If the ABS warning light comes on, this may also indicate a fault in the
EDL. Please have the vehicle inspected as soon as possible by a Škoda
dealer.
•Changes to vehicle (e.g. on engine, on the brakes, on chassis or other
assignment of tyres and wheels) can influence the function of the EDL
⇒ page 226.
Brakes
What has a negative effect on braking efficiency?
Wear-and-tear
Wear-and-tear to the brake pads is greatly dependent on the operating
conditions of the vehicle and your style of driving. Particularly if you drive
a great deal in towns and over short distances or if you adopt a sporty style of driving, it may be necessary to have the thickness of the brake pads
inspected at a Škoda Dealer between the service inspections.
Wet roads or road salt
There may be a certain delay before the brakes take full effect under
certain conditions such as when driving through water, during heavy rain
showers or after the vehicle has been washed in an automatic vehicle
wash, since the brake discs and brake pads may be moist or even have a
coating of ice on them in winter. You should dry the brakes as soon as
possible (by applying and releasing the brakes several times, if the road
conditions and the traffic situation allows it).
There also may be a certain delay before the full braking efficiency is
available when driving on roads which have been treated with road salt if
you have not used the brakes for some considerable time beforehand.
The layer of salt on the brake discs and brake pads must first be rubbed
off when you apply the brakes.
Corrosion
We recommend cleaning the brake discs by firmly applying the brakes at
a fairly high speed if you do not make much use of the braking system or
if surface corrosion is present
⇒.
Faults in the brake surface
The brake booster operates using vacuum which is only generated
when the engine is running. This is why you should not drive off with
engine switched off!
The brake pedal has to be depressed with a significantly greater force if
the brake booster is not operating because the vehicle has to be towed or
because there is damage to the brake booster, in order to balance out the
missing brake boosting effect.
If you notice that the braking distance has suddenly become longer and
that the brake pedal can be depressed further, it is possible that a brake
circuit of the dual-circuit brake system has failed. Drive, in such cases, to
the nearest Škoda dealer without delay in order to have the problem recti-
WARNING
•Depress the accelerator carefully when accelerating on
uniformly slippery road surfaces, such as ice and snow. The driven
wheels might still spin despite the EDL and affect the stability of
the vehicle - risk of an accident!
•You should always adapt your style of driving to the condition
of road surface and to the traffic situation even when your vehicle
is fitted with EDL. The increased safety offered must not tempt you
to take greater risks than otherwise - risk of an accident!
Page 174 of 259
Intelligent Technology173
Using the systemSafetyDriving TipsGeneral MaintenanceBreakdown assistanceTechnical Data
fied. Drive at a reduced speed while on your way to the dealer and adapt
your style of driving to the higher brake pedal pressure required.
Low brake fluid level
An insufficient level of brake fluid may result in problems in the brake
system. The level of the brake fluid is monitored electronically
⇒page 35.
Caution
•Never allow the brakes to rub by applying slight pressure if you do not
wish to brake the vehicle. This causes the brakes to overheat and can also
result in a longer braking distance and excessive wear.
•Before negotiating a steep downhill section, please reduce your
speed, shift down into the next lower gear (manual gearbox) or select a
lower driving stage (automatic gearbox). This enables you to make full use
of the braking power of the vehicle and reduces the strain on the brakes.
Any additional braking should be done intermittently, not continuously.
Antiblock brake system (ABS)
ABS prevents the wheels locking when braking.
General
The ABS contributes significantly to enhancing the active safety of your
vehicle. Compared to a car not fitted with the ABS brake system, you are
able to retain optimal steering ability even during a full brake application
on a slippery road surface because the wheels do not lock up.
You must not expect, however, that the braking distance will be shorter
under all circumstances as a result of the ABS The braking distance for
example on gravel and fresh snow, when you should anyway be driving
slowly and cautiously, will be longer.
Operating principle
As soon as the vehicle speed has increased to about 6 km/hour an auto-
matic test procedure is conducted during which you will be able to hear a
pumping noise for about 1 second.
The brake pressure will be reduced on a wheel which is rotating at a speed
which is too low for the speed of the vehicle and tending to lock. This
control cycle is noticeable from a pulsating movement of the brake
pedal which is accompanied by noises. This is consciously intended to
provide the driver with the information that the wheels are tending to lock
(ABS control range). You must always keep the brake pedal depressed to
enable the ABS to optimally control the brake application in this braking
range. Never interrupt the application of the brakes!
WARNING
•Only apply the brakes for the purpose of drying and cleaning
the brake discs if the traffic conditions permit this. Do not place
any other road users in jeopardy.
•When retrospectively mounting a front spoiler, solid wheel
hubs etc. one must ensure that the air supply to the front wheel
brakes is not reduced otherwise the braking system could run too
hot.
•Allow for the fact that new brake pads do not achieve their full
braking efficiency until approximately 200 kilometres. New brake
pads must be first “run in” before they develop their optimal fric-
tion force. You can, however, compensate for this slightly reduced
braking force by increasing the pressure on the brake pedal. This
guideline also applies to any new brake pads installed at a future
date.
Page 175 of 259
Intelligent Technology
174
Note
•A warning light comes on if a fault occurs in the ABS system
⇒ page 34.
•Changes to vehicle (e.g. on engine, on the brakes, on chassis or other
assignment of tyres and wheels) can influence the function of the ABS
⇒ page 226.
Brake Assist*
During a severe brake application (e.g. if a hazard exists), the Brake
Assist increases the braking force and thus makes it possible to rapidly
produce the pressure required in the brake system.
The majority of drivers do apply the brakes in good time in dangerous situ-
ations, but do not depress the brake pedal with sufficient pressure. Conse-
quently, it is not possible for the car to achieve its maximum deceleration
and the car covers a greater distance than necessary. The Brake Assist is activated by the very quick operation of the brake
pedal. In such cases, a much greater braking pressure exists than during
a normal brake application. This makes it possible, even with a relatively
low resistance of the brake pedal, to produce an adequate pressure in the
brake system in the shortest possible time, which is required for maximum
deceleration of the car. You must apply the brake pedal firmly and hold it
in this position in order to achieve the shortest possible braking distance.
The Brake Assist is able to help you achieve a shorter braking distance in
emergency situations by rapidly producing the pressure required in the
brake system. It fully exploits the attributes of the ABS. After you release
the brake pedal, the function of the Brake Assist is automatically switched
off and the brakes operate in the normal way.
The Brake Assist is part of the ESP system. If a fault occurs in the ESP,
the Brake Assist function is also not available. Further information on the
ESP
⇒page 169.
Power steering
Power steering assists the driver in steering the vehicle and reduces the
physical force needed for steering.
WARNING
•The ABS can also not overcome the physical limits of your
vehicle. Please do not forget this, particularly when driving on icy
or wet road surfaces. If the ABS is operating within the control
range, adapt your speed immediately to the conditions of the road
surface and the traffic situation. The increased safety offered by
the ABS must not tempt you to take greater risks than otherwise -
risk of an accident!
•The normal braking system is still fully functional if there is an
ABS fault. Visit a Skoda dealer as quickly as possible and adjust
your style of driving to take account of the ABS fault in the mean-
time since you will not know how great the damage is.
WARNING
•The Brake Assist is also not able to overcome the physical
limits of your car in terms of the braking distance required.
•Adapt your speed to the conditions of the road surface and to
the traffic situation.
•The increased safety offered by the Brake Assist must not
tempt you to take a greater safety risk than otherwise.