mirror SKODA SUPERB 2004 1.G / (B5/3U) Owner's Manual
[x] Cancel search | Manufacturer: SKODA, Model Year: 2004, Model line: SUPERB, Model: SKODA SUPERB 2004 1.G / (B5/3U)Pages: 270
Page 6 of 270
Contents5
Contents
Layout of this Owner's Manual
(symbol explanation)
. . . . . . . . . . .
Using the system . . . . . . . . . . . . . . .
Cockpit . . . . . . . . . . . . . . . . . . . . . . . . . . . . . . .
An overview . . . . . . . . . . . . . . . . . . . . . . . . . .
Instruments and Indicator/Warning LightsInstrument cluster . . . . . . . . . . . . . . . . . . . . . .
Engine revolutions counter . . . . . . . . . . . . . . .
Coolant temperature gauge . . . . . . . . . . . . . .
Fuel gauge . . . . . . . . . . . . . . . . . . . . . . . . . . .
Digital clock . . . . . . . . . . . . . . . . . . . . . . . . . .
Speedometer with counter for distance driven
Service Interval Display . . . . . . . . . . . . . . . . .
Multi-functional indicator (onboard computer)
Information display* . . . . . . . . . . . . . . . . . . . .
Auto Check Control . . . . . . . . . . . . . . . . . . . .
Warning lights . . . . . . . . . . . . . . . . . . . . . . . . .
Unlocking and locking . . . . . . . . . . . . . . . . . .
Keys . . . . . . . . . . . . . . . . . . . . . . . . . . . . . . . .
Child safety locks . . . . . . . . . . . . . . . . . . . . . .
Central locking system . . . . . . . . . . . . . . . . . .
Remote control . . . . . . . . . . . . . . . . . . . . . . . .
Anti-theft alarm system* . . . . . . . . . . . . . . . . .
Power windows . . . . . . . . . . . . . . . . . . . . . . .
Electric sliding/tilting roof* . . . . . . . . . . . . . . .
Lights and Visibility. . . . . . . . . . . . . . . . . . . . .
Lights . . . . . . . . . . . . . . . . . . . . . . . . . . . . . . .
Interior lighting . . . . . . . . . . . . . . . . . . . . . . . .
Visibility . . . . . . . . . . . . . . . . . . . . . . . . . . . . . The windscreen wiper and washing system .
Rear-view mirror . . . . . . . . . . . . . . . . . . . . . .
Seats and Stowage . . . . . . . . . . . . . . . . . . . .
Front seats . . . . . . . . . . . . . . . . . . . . . . . . . . .
Adjusting front seats manually . . . . . . . . . . . .
Adjusting front seats electrically* . . . . . . . . . .
Front passenger seat with a folding central back
rest* . . . . . . . . . . . . . . . . . . . . . . . . . . . . . . . .
Footrest at the rear* . . . . . . . . . . . . . . . . . . . .
Seat heaters* . . . . . . . . . . . . . . . . . . . . . . . . .
Pedals . . . . . . . . . . . . . . . . . . . . . . . . . . . . . .
Luggage compartment . . . . . . . . . . . . . . . . . .
The cool box in the armrest of rear seats* . . .
CargoFlex folding box* . . . . . . . . . . . . . . . . . .
The roof luggage rack system . . . . . . . . . . . .
Drinks can holder . . . . . . . . . . . . . . . . . . . . . .
Ashtray . . . . . . . . . . . . . . . . . . . . . . . . . . . . . .
Cigarette lighters and power sockets . . . . . . .
Storage facilities . . . . . . . . . . . . . . . . . . . . . . .
Heating and air conditioning system . . . . .
The air conditioning system . . . . . . . . . . . . . .
Climatronic* (automatic air conditioning) . . . .
Starting-off and Driving. . . . . . . . . . . . . . . . .
Setting steering wheel position . . . . . . . . . . .
Ignition lock . . . . . . . . . . . . . . . . . . . . . . . . . .
Starting engine . . . . . . . . . . . . . . . . . . . . . . . .
Switching the engine off . . . . . . . . . . . . . . . . .
Shifting (manual gearbox) . . . . . . . . . . . . . . .
Handbrake . . . . . . . . . . . . . . . . . . . . . . . . . . .
Parking aid* . . . . . . . . . . . . . . . . . . . . . . . . . .
Cruise control system (CCS)* . . . . . . . . . . . .
Automatic gearbox*. . . . . . . . . . . . . . . . . . . .
5-speed automatic gearbox . . . . . . . . . . . . . .
Communicating and Navigating . . . . . . . . .
Multifunction steering wheel* . . . . . . . . . . . . .
Mobile phone, two-way radio system and
navigation system . . . . . . . . . . . . . . . . . . . . .
Safety. . . . . . . . . . . . . . . . . . . . . . . . . . . . . .
Passive Safety . . . . . . . . . . . . . . . . . . . . . . . .
Basic information . . . . . . . . . . . . . . . . . . . . . .
Correct seated position . . . . . . . . . . . . . . . . .
Seat belts. . . . . . . . . . . . . . . . . . . . . . . . . . . . .
Why seat belts? . . . . . . . . . . . . . . . . . . . . . . .
The physical principle of a frontal collision . .
Important safety information regarding the use
of seat belts . . . . . . . . . . . . . . . . . . . . . . . . . .
How are seat belts correctly fastened? . . . . .
Belt tensioners . . . . . . . . . . . . . . . . . . . . . . . .
Airbag system. . . . . . . . . . . . . . . . . . . . . . . . .
Description of the airbag system . . . . . . . . . .
Front airbags . . . . . . . . . . . . . . . . . . . . . . . . .
Side airbags . . . . . . . . . . . . . . . . . . . . . . . . . .
Head airbags* . . . . . . . . . . . . . . . . . . . . . . . .
Deactivating an airbag . . . . . . . . . . . . . . . . . .
Transporting children safely . . . . . . . . . . . .
What you should know about transporting
children! . . . . . . . . . . . . . . . . . . . . . . . . . . . . .
Child seat . . . . . . . . . . . . . . . . . . . . . . . . . . . .
Attaching child safety seat . . . . . . . . . . . . . . .
8
9
11
11
13
13
14
14
14
15
16
16
18
22
24
28
38
38
41
41
46
48
50
53
56
56
60
62 64
66
69
69
70
71
76
77
78
79
79
84
87
90
92
93
95
97
104
104
109 11 6
11 6
11 7
11 8
11 9
120
121
122
123
126
126 132
132
136
139
139
139
141
145
145
146
147
148
150
152
152
154
157
159
161
164
164
168
171
Page 12 of 270
Cockpit11
Using the systemSafetyDriving TipsGeneral MaintenanceBreakdown assistanceTechnical Data
Cockpit
An overview
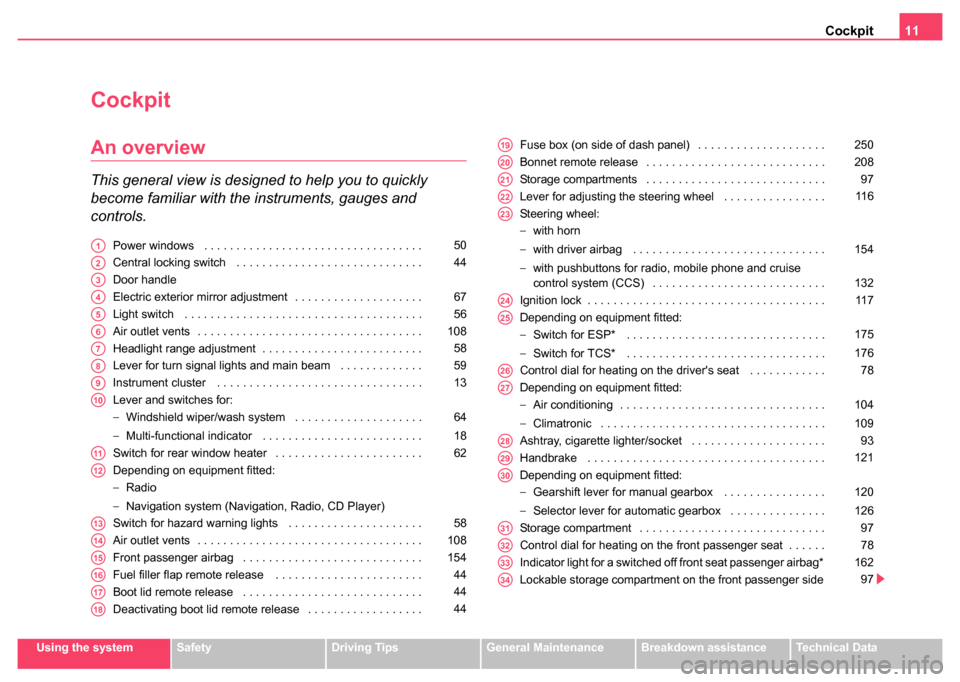
This general view is designed to help you to quickly
become familiar with the instruments, gauges and
controls.
Power windows . . . . . . . . . . . . . . . . . . . . . . . . . . . . . . . . . .
Central locking switch . . . . . . . . . . . . . . . . . . . . . . . . . . . . .
Door handle
Electric exterior mirror adjustment . . . . . . . . . . . . . . . . . . . .
Light switch . . . . . . . . . . . . . . . . . . . . . . . . . . . . . . . . . . . . .
Air outlet vents . . . . . . . . . . . . . . . . . . . . . . . . . . . . . . . . . . .
Headlight range adjustment . . . . . . . . . . . . . . . . . . . . . . . . .
Lever for turn signal lights and main beam . . . . . . . . . . . . .
Instrument cluster . . . . . . . . . . . . . . . . . . . . . . . . . . . . . . . .
Lever and switches for:
−Windshield wiper/wash system . . . . . . . . . . . . . . . . . . . .
− Multi-functional indicator . . . . . . . . . . . . . . . . . . . . . . . . .
Switch for rear window heater . . . . . . . . . . . . . . . . . . . . . . .
Depending on equipment fitted:
− Radio
− Navigation system (Navigation, Radio, CD Player)
Switch for hazard warning lights . . . . . . . . . . . . . . . . . . . . .
Air outlet vents . . . . . . . . . . . . . . . . . . . . . . . . . . . . . . . . . . .
Front passenger airbag . . . . . . . . . . . . . . . . . . . . . . . . . . . .
Fuel filler flap remote release . . . . . . . . . . . . . . . . . . . . . . .
Boot lid remote release . . . . . . . . . . . . . . . . . . . . . . . . . . . .
Deactivating boot lid remote release . . . . . . . . . . . . . . . . . . Fuse box (on side of dash panel) . . . . . . . . . . . . . . . . . . . .
Bonnet remote release . . . . . . . . . . . . . . . . . . . . . . . . . . . .
Storage compartments . . . . . . . . . . . . . . . . . . . . . . . . . . . .
Lever for adjusting the steering wheel . . . . . . . . . . . . . . . .
Steering wheel:
−
with horn
− with driver airbag . . . . . . . . . . . . . . . . . . . . . . . . . . . . . .
− with pushbuttons for radio, mobile phone and cruise
control system (CCS) . . . . . . . . . . . . . . . . . . . . . . . . . . .
Ignition lock . . . . . . . . . . . . . . . . . . . . . . . . . . . . . . . . . . . . .
Depending on equipment fitted:
− Switch for ESP* . . . . . . . . . . . . . . . . . . . . . . . . . . . . . . .
− Switch for TCS* . . . . . . . . . . . . . . . . . . . . . . . . . . . . . . .
Control dial for heating on the driver's seat . . . . . . . . . . . .
Depending on equipment fitted:
− Air conditioning . . . . . . . . . . . . . . . . . . . . . . . . . . . . . . . .
− Climatronic . . . . . . . . . . . . . . . . . . . . . . . . . . . . . . . . . . .
Ashtray, cigarette lighter/socket . . . . . . . . . . . . . . . . . . . . .
Handbrake . . . . . . . . . . . . . . . . . . . . . . . . . . . . . . . . . . . . .
Depending on equipment fitted:
− Gearshift lever for manual gearbox . . . . . . . . . . . . . . . .
− Selector lever for automatic gearbox . . . . . . . . . . . . . . .
Storage compartment . . . . . . . . . . . . . . . . . . . . . . . . . . . . .
Control dial for heating on the front passenger seat . . . . . .
Indicator light for a switched off front seat passenger airbag*
Lockable storage compartment on the front passenger sideA150
A244
A3
A467
A556
A6108
A758
A859
A913
A10
64
18
A1162
A12
A1358
A14108
A15154
A1644
A1744
A1844
A19250
A20208
A2197
A2211 6
A23
154
132
A2411 7
A25
175
176
A2678
A27
104
109
A2893
A29121
A30
120
126
A3197
A3278
A33162
A3497
Page 48 of 270
Unlocking and locking47
Using the systemSafetyDriving TipsGeneral MaintenanceBreakdown assistanceTechnical Data
Note
•The remote control is automatically deactivated when the ignition is
switched on.
•The operation of the remote control may temporarily be affected by
interference from transmitters close to the car and which operate in the
same frequency range (e.g. mobile phone, TV transmitter).
•The battery must be replaced, ideally by the Škoda dealer, if the
central locking or anti-theft alarm system does react to the remote control
at less than 3 metres away.
Unlocking and locking car
Unlocking the vehicle
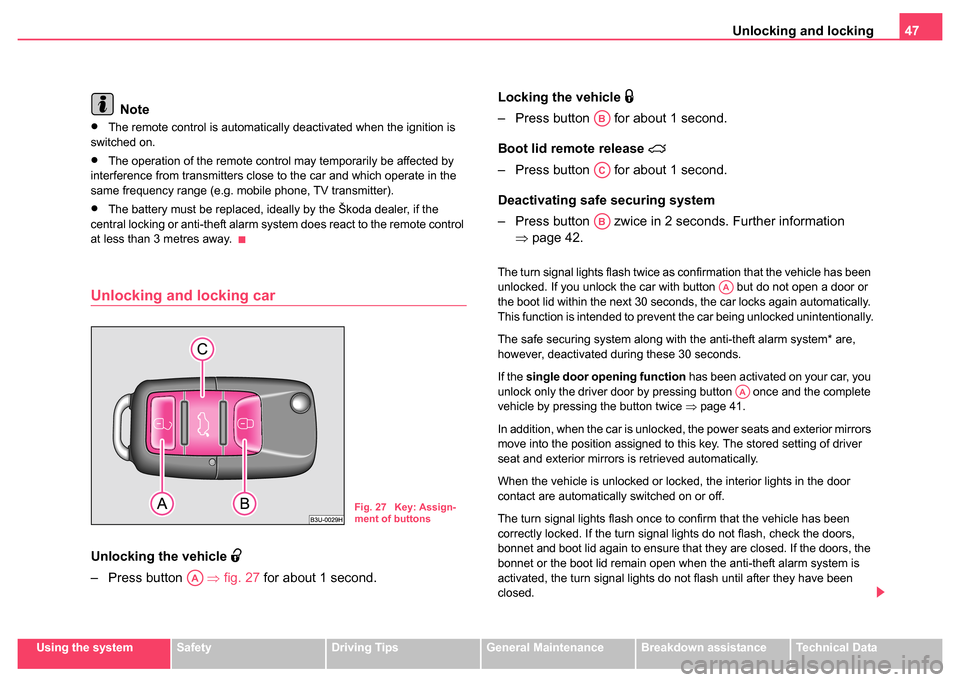
– Press button ⇒fig. 27 for about 1 second. Locking the vehicle
– Press button for about 1 second.
Boot lid remote release
– Press button for about 1 second.
Deactivating safe securing system
– Press button zwice in 2 seconds. Further information
⇒page 42.
The turn signal lights flash twice as confirmation that the vehicle has been
unlocked. If you unlock the car with button but do not open a door or
the boot lid within the next 30 seconds, the car locks again automatically.
This function is intended to prevent the car being unlocked unintentionally.
The safe securing system along with the anti-theft alarm system* are,
however, deactivated during these 30 seconds.
If the single door opening function has been activated on your car, you
unlock only the driver door by pressing button once and the complete
vehicle by pressing the button twice ⇒page 41.
In addition, when the car is unlocked, the power seats and exterior mirrors
move into the position assigned to this key. The stored setting of driver
seat and exterior mirrors is retrieved automatically.
When the vehicle is unlocked or locked, the interior lights in the door
contact are automatically switched on or off.
The turn signal lights flash once to confirm that the vehicle has been
correctly locked. If the turn signal lights do not flash, check the doors,
bonnet and boot lid again to ensure that they are closed. If the doors, the
bonnet or the boot lid remain open when the anti-theft alarm system is
activated, the turn signal lights do not flash until after they have been
closed.
Fig. 27 Key: Assign-
ment of buttons
AA
AB
AC
AB
AA
AA
Page 64 of 270
Lights and Visibility63
Using the systemSafetyDriving TipsGeneral MaintenanceBreakdown assistanceTechnical Data
– Press switch ⇒page 62, fig. 43 to switch on the rear window
heater.
The rear window heater operates only if the ignition is switched on. An
indicator light in the switch is illuminated when the rear window heater is
switched on.
The rear window heater switches off automatically after a few minutes.
For the sake of the environment
You should switch off the rear window heater as soon as the rear window
is clear. The reduced current consumption will have a favourable effect on
fuel economy ⇒page 189.
Sun visors
Using the sun visors can contribute to increasing road
safety.
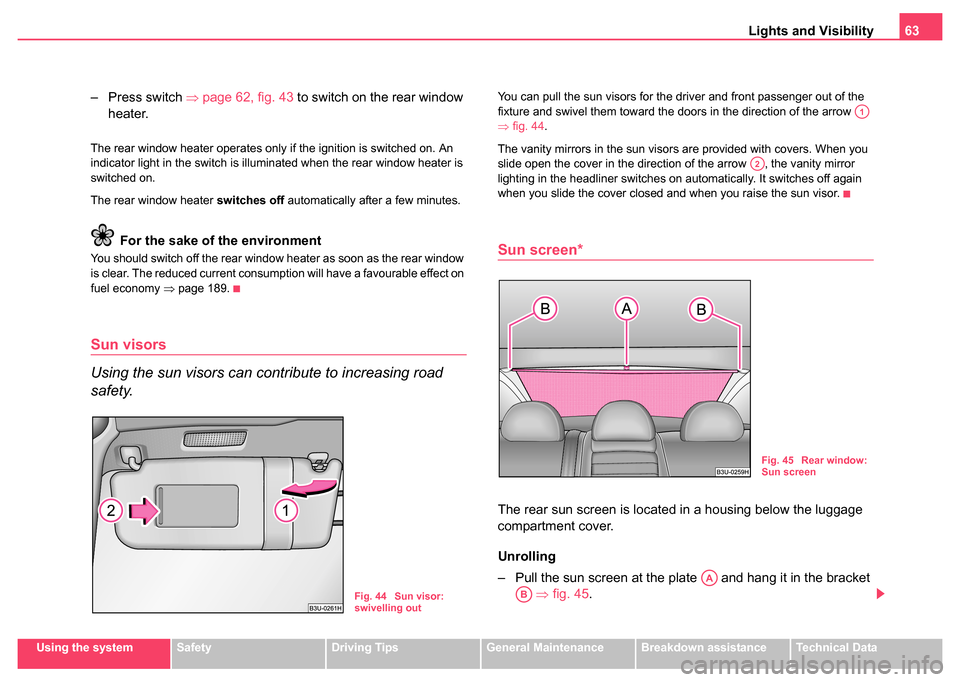
You can pull the sun visors for the driver and front passenger out of the
fixture and swivel them toward the doors in the direction of the arrow
⇒fig. 44 .
The vanity mirrors in the sun visors are provided with covers. When you
slide open the cover in the direction of the arrow , the vanity mirror
lighting in the headliner switches on automatically. It switches off again
when you slide the cover closed and when you raise the sun visor.
Sun screen*
The rear sun screen is located in a housing below the luggage
compartment cover.
Unrolling
– Pull the sun screen at the plate and hang it in the bracket ⇒ fig. 45 .
Fig. 44 Sun visor:
swivelling out
A1
A2
Fig. 45 Rear window:
Sun screen
AA
AB
Page 67 of 270
Lights and Visibility
66
Replacing windscreen wiper blades
Taking off the wiper blade
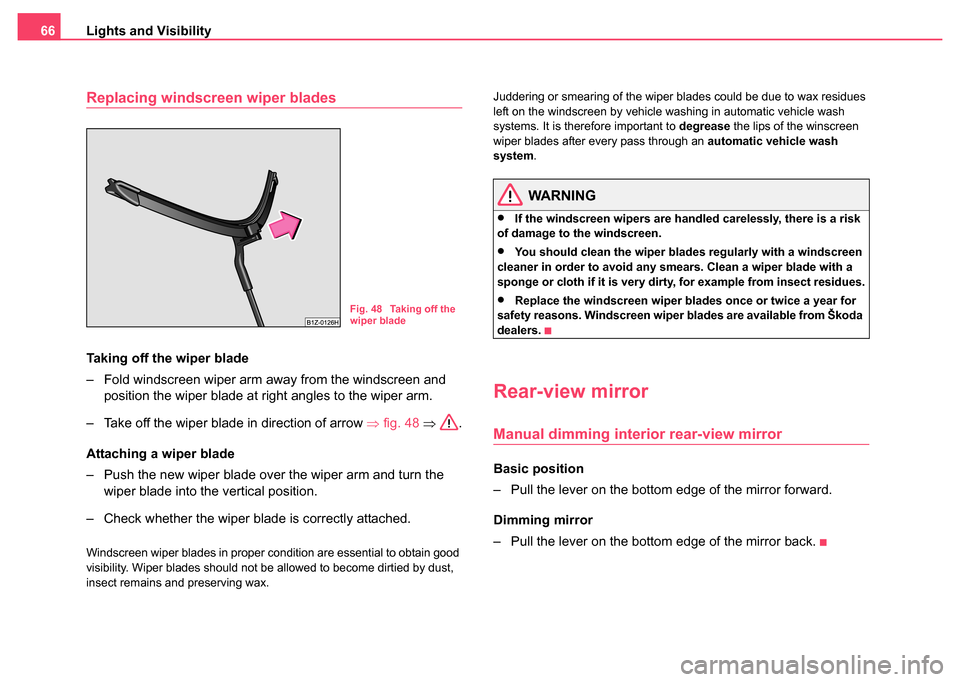
– Fold windscreen wiper arm away from the windscreen and
position the wiper blade at right angles to the wiper arm.
– Take off the wiper blade in direction of arrow ⇒fig. 48 ⇒ .
Attaching a wiper blade
– Push the new wiper blade over the wiper arm and turn the wiper blade into the vertical position.
– Check whether the wiper blade is correctly attached.
Windscreen wiper blades in proper condition are essential to obtain good
visibility. Wiper blades should not be allowed to become dirtied by dust,
insect remains and preserving wax. Juddering or smearing of the wiper blades could be due to wax residues
left on the windscreen by vehicle washing in automatic vehicle wash
systems. It is therefore important to
degrease the lips of the winscreen
wiper blades after every pass through an automatic vehicle wash
system .
WARNING
•If the windscreen wipers are handled carelessly, there is a risk
of damage to the windscreen.
•You should clean the wiper blades regularly with a windscreen
cleaner in order to avoid any smears. Clean a wiper blade with a
sponge or cloth if it is very dirty, for example from insect residues.
•Replace the windscreen wiper blades once or twice a year for
safety reasons. Windscreen wiper blades are available from Škoda
dealers.
Rear-view mirror
Manual dimming interior rear-view mirror
Basic position
– Pull the lever on the bottom edge of the mirror forward.
Dimming mirror
– Pull the lever on the bottom edge of the mirror back.
Fig. 48 Taking off the
wiper blade
Page 68 of 270
Lights and Visibility67
Using the systemSafetyDriving TipsGeneral MaintenanceBreakdown assistanceTechnical Data
Automatic dimming interior rear-view mirror*
The mirror is dimmed automatically depending on the light striking the
mirror from the rear provided the ignition is switched on. The mirror has no
lever on the bottom edge of the mirror. When the interior lights are
switched on or the reverse gear is engaged, the mirror always moves back
into the basic position (not dimmed).
Note
Automatic mirror dimming operates only properly if the sun screen* for the
rear window is not in use or the light striking the rear of the interior rear-
view mirror is not affected by other objects.
Exterior mirror with entry lighting*
The lighting is positioned on the bottom edge of the exte-
rior mirror.
The light beam is aimed at the entry area of the front doors after the car is
unlocked.
The light comes on after the doors have been locked or on opening the
front door. The lighting goes out about 30 seconds after the doors are
closed or if the ignition is switched on.
If the doors remain open, the lighting goes out automatically after about
10 minutes provided the ignition is not switched on.
Electrically adjustable rear mirror
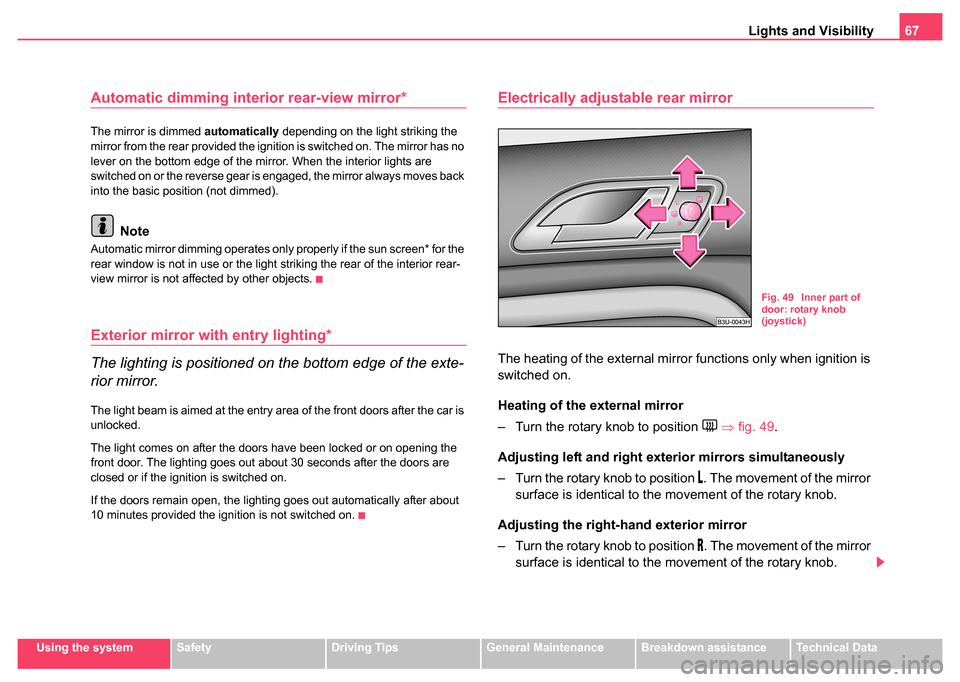
The heating of the external mirror functions only when ignition is
switched on.
Heating of the external mirror
– Turn the rotary knob to position
⇒ fig. 49 .
Adjusting left and right ext erior mirrors simultaneously
– Turn the rotary knob to position
. The movement of the mirror
surface is identical to the movement of the rotary knob.
Adjusting the right-hand exterior mirror
– Turn the rotary knob to position
. The movement of the mirror
surface is identical to the movement of the rotary knob.
Fig. 49 Inner part of
door: rotary knob
(joystick)
Page 69 of 270
Lights and Visibility
68
Folding in both exterior mirrors*
– Turn the rotary knob to position
.
Tilting surface of front passenger exterior mirror*
When the rotary knob is in position
⇒ page 67, fig. 49 and the reverse
gear is engaged, the surface of the mirror tilts down slightly. This provides
an aid in seeing the kerb of the pavement when parking the car.
If you shift out of reverse gear, or switch over to the driver exterior mirror
in position
, the mirror surface on the passenger side moves back into the
original position.
Memory for exterior mirrors*
On vehicles fitted with a memory for the driver seat, the relevant setting of
the exterior mirror is also stored automatically when the seat position is
stored ⇒page 72.
WARNING
•Convex (curved outward) or aspherical exterior mirrors
increase the vision field. They do, however, make objects appear
smaller in the mirror. These mirrors are only of limited use, there-
fore, for estimating distances to the following vehicles.
•Use whenever possible the interior rear mirror, for estimating
the distances to the following vehicles.
Caution
If the mirror housing has been shifted out of position as a result of external
force (e.g. striking an object when parking), the mirror must then be folded
in fully with the electric motor. On no account attempt to move the mirror
housing back by hand otherwise proper operation of the mirror mecha-
nism will be affected. This applies only to models fitted with the fold-in
function for both exterior mirrors*.
Note
•Do not touch the surface of the exterior mirrors if the exterior mirror
heater is switched on.
•You can set the exterior mirrors by hand, if the power setting function
fails at any time, by pressing on the edge of the mirror surface.
•Contact your Škoda dealer if a fault exists with the power setting of the
exterior mirrors.
Page 73 of 270
Seats and Stowage
72
Memory for the seat
Memory buttons
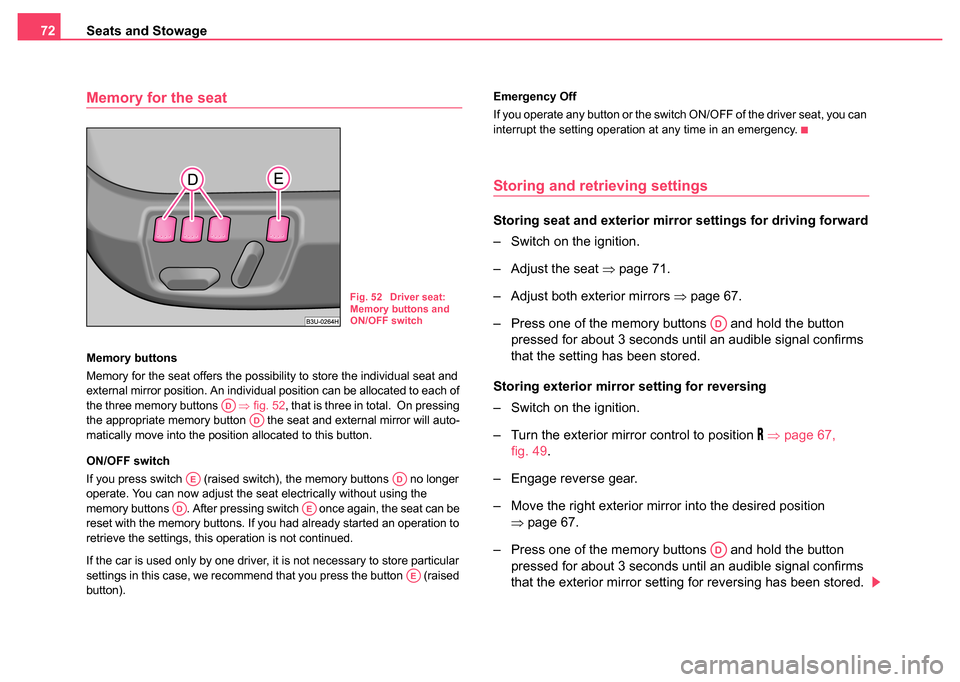
Memory for the seat offers the possibility to store the individual seat and
external mirror position. An individual position can be allocated to each of
the three memory buttons ⇒ fig. 52, that is three in total. On pressing
the appropriate memory button the seat and external mirror will auto-
matically move into the position allocated to this button.
ON/OFF switch
If you press switch (raised switch), the memory buttons no longer
operate. You can now adjust the seat electrically without using the
memory buttons . After pressing switch once again, the seat can be
reset with the memory buttons. If you had already started an operation to
retrieve the settings, this operation is not continued.
If the car is used only by one driver, it is not necessary to store particular
settings in this case, we recommend that you press the button (raised
button). Emergency Off
If you operate any button or the switch ON/OFF of the driver seat, you can
interrupt the setting operation at any time in an emergency.
Storing and retrieving settings
Storing seat and exterio
r mirror settings for driving forward
– Switch on the ignition.
– Adjust the seat ⇒page 71.
– Adjust both exterior mirrors ⇒page 67.
– Press one of the memory buttons and hold the button pressed for about 3 seconds until an audible signal confirms
that the setting has been stored.
Storing exterior mirror setting for reversing
– Switch on the ignition.
– Turn the exterior mirror control to position
⇒ page 67,
fig. 49 .
– Engage reverse gear.
– Move the right exterior mirror into the desired position ⇒page 67.
– Press one of the memory buttons and hold the button pressed for about 3 seconds until an audible signal confirms
that the exterior mirror setting for reversing has been stored.
Fig. 52 Driver seat:
Memory buttons and
ON/OFF switch
ADAD
AEAD
ADAE
AE
AD
AD
Page 74 of 270
Seats and Stowage73
Using the systemSafetyDriving TipsGeneral MaintenanceBreakdown assistanceTechnical Data
Note
•When storing settings with the memory buttons, we recommend that
you begin with the front button and assign a memory button to each addi-
tional driver.
•Each new setting stored with the same button erases the previous
setting.
•Each time you store the seat and exterior mirror settings for driving
forward you also have to re-store the individual setting of the exterior
mirror on the passenger side for reversing.
Assigning remote control to the memory buttons
After storing the settings of the seat and exterior mirrors, you
have 10 seconds in order to assign the remote control to the
appropriate memory button.
– Withdraw the ignition key.
– Press the release button ⇒page 47 and hold it pressed for 1
second until an audible signal confirms that the setting has
been stored. The setting is stored with the memory button
which you have selected.
If you wish to be able to retrieve the settings which are stored in the
memory by also using the remote control, you have to assign the remote
control to a memory button in each case.
We recommend that you assign one of the two remote controls supplied
with your car, to the front memory button, and the other remote control key
to the middle memory button. If you wish, you can obtain an additional key with radio remote control from
a Škoda dealer and then assign the radio remote control to the rear
memory button.
Note
•If the remote control had previously been assigned to another memory
button, this setting is then erased by the new assignment.
•If you assign the remote control to a memory button which has already
been assigned to a remote control, the old assignment is also replaced by
a new assignment in this case.
•The assignment of the remote control to a memory button is retained,
however, after reassigning the seats and exterior mirrors.
Retrieving seat and exterior mirror settings for driving
forward
You can retrieve the stored settings either with the
memory buttons or with the remote control*.
Retrieving settings with memory buttons
– For safety reasons, you can only retrieve the seat and mirror
settings if the ignition is switched off. You have a choice of two
different ways of retrieving the settings:
– One-touch automatic memory: with the driver door open,
operate the desired memory button ⇒ page 72, fig. 52
with one-touch. The seat and the exterior mirrors now move
automatically into the stored position.
AD
Page 75 of 270
Seats and Stowage
74
–Memory keying : with the driver door open or closed, press
and hold the desired memory button until the seat and the
exterior mirrors have moved into the stored position.
Retrieving settings with remote control
– If the driver door is closed and the ignition is switched off, briefly press the unlock button of the remote control
⇒page 47 and then open the door.
– The seat and exterior mirrors now move automatically into the stored positions.
Retrieving setting of exterior mirror for reversing*
– Turn the rotary knob for the exterior mirror setting into the position
⇒ page 67 before engaging the reverse gear.
Emergency Off
You can interrupt any memory retrieval operation in an emergency by
pressing the switch ⇒page 72, fig. 52 , by one-touch of a memory
button or by pressing the seat setting switch.
Head restraintsAD
AE
Fig. 53 Adjusting head
restraint
Fig. 54 Removing a
head restraint