fuel SKODA SUPERB 2006 1.G / (B5/3U) User Guide
[x] Cancel search | Manufacturer: SKODA, Model Year: 2006, Model line: SUPERB, Model: SKODA SUPERB 2006 1.G / (B5/3U)Pages: 281, PDF Size: 12.67 MB
Page 22 of 281
Instruments and Indicator/Warning Lights21
Using the systemSafetyDriving TipsGeneral MaintenanceBreakdown assistanceTechnical Data
The display appears in litres/hour if the vehicle is stationary or driving at a
low speed.
Average fuel consumption
The average fuel consumption since the memory was last erased is
shown in the display in litres/100 km
⇒page 18. This information can help
you to adapt your style of driving to the fuel consumption you wish to
achieve.
If you wish to determine the average fuel consumption over a certain
period of time you must first erase the memory at the start of the new
measurement using the button ⇒page 19, fig. 8 . A zero appears in
the display for the first 300 m you drive after erasing the memory.
The indicated value will be updated every 30 metres while you are driving.
Note
The amount of fuel consumed will not be indicated.
Driving time
The driving time which has elapsed since the memory was last erased,
appears in the display ⇒page 18. If you wish to calculate the driving time
from a particular time of day you must first erase the memory at this
moment in time by pressing the button ⇒page 19, fig. 8 .
The maximum time indicated in both switch positions is 99 hours and 59
minutes. The indicator is set back to null if this period is exceeded.
Distance driven
The distance driven since the memory was last erased appears in the
display ⇒page 18. If you wish to calculate the distance driven from a
particular time of day you must first erase the memory at this moment in
time by pressing the button ⇒page 19, fig. 8 .
The maximum distance indicated in both switch positions is 9 999 km. The
indicator is set back to null if this period is exceeded.
Average speed
The average speed since the memory was last erased is shown in the
display in km/hour ⇒page 18. If you wish to determine the average speed
over a certain period of time you must first erase the memory at the start
of the new measurement using the button ⇒page 19, fig. 8 .
A zero appears in the display for the first 100 m you drive after erasing the
memory.AB
AB
AB
AB
NKO B5 20.book Page 21 Monday, July 3, 2006 2:09 PM
Page 24 of 281
Instruments and Indicator/Warning Lights23
Using the systemSafetyDriving TipsGeneral MaintenanceBreakdown assistanceTechnical Data
Menu
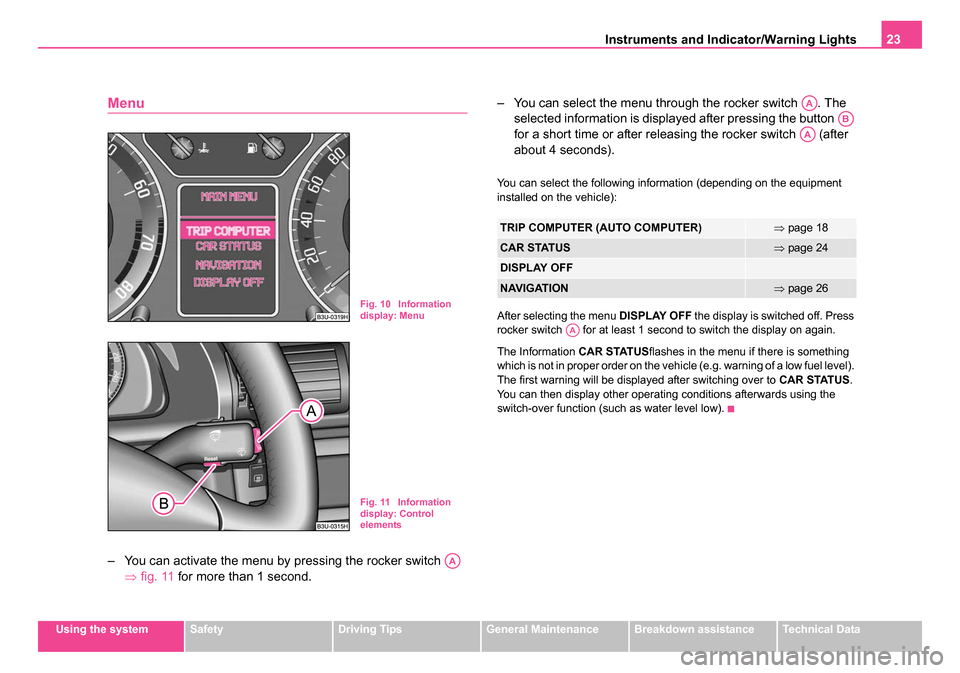
– You can activate the menu by pressing the rocker switch
⇒fig. 11 for more than 1 second. – You can select the menu through the rocker switch . The
selected information is displayed after pressing the button
for a short time or after releasing the rocker switch (after
about 4 seconds).
You can select the following information (depending on the equipment
installed on the vehicle):
After selecting the menu DISPLAY OFF the display is switched off. Press
rocker switch for at least 1 second to switch the display on again.
The Information CAR STATUSflashes in the menu if there is something
which is not in proper order on the vehicle (e.g. warning of a low fuel level).
The first warning will be displayed after switching over to CAR STATUS.
You can then display other operating conditions afterwards using the
switch-over function (such as water level low).
Fig. 10 Information
display: Menu
Fig. 11 Information
display: Control
elements
AA
TRIP COMPUTER (AUTO COMPUTER)⇒ page 18
CAR STATUS⇒page 24
DISPLAY OFF
NAVIGATION⇒page 26
AA
AB
AA
AA
NKO B5 20.book Page 23 Monday, July 3, 2006 2:09 PM
Page 27 of 281
Instruments and Indicator/Warning Lights
26
Meaning of the red symbols:
Three successive warning signals will sound if a red symbol appears. The
symbol continues flashing until the fault is rectified.
If several operational faults of priority 1 exist, the symbols appear one after
the other and are each illuminated for about 2 seconds.
Yellow symbols
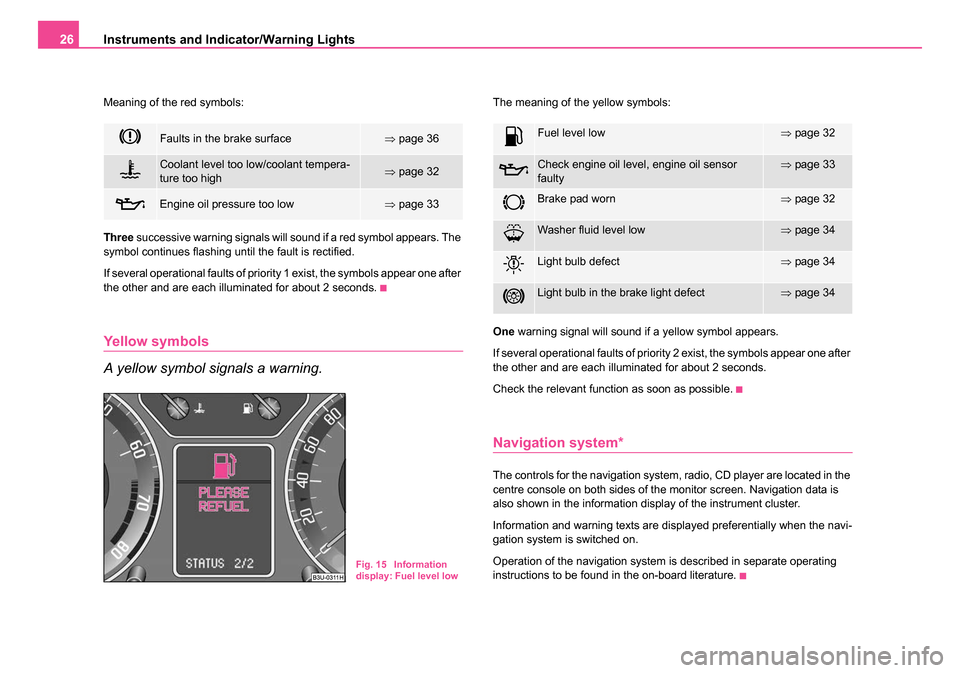
A yellow symbol signals a warning.
The meaning of the yellow symbols:
One warning signal will sound if a yellow symbol appears.
If several operational faults of priority 2 exist, the symbols appear one after
the other and are each illuminated for about 2 seconds.
Check the relevant function as soon as possible.
Navigation system*
The controls for the navigation system, radio, CD player are located in the
centre console on both sides of the monitor screen. Navigation data is
also shown in the information display of the instrument cluster.
Information and warning texts are displayed preferentially when the navi-
gation system is switched on.
Operation of the navigation system is described in separate operating
instructions to be found in the on-board literature.
Faults in the brake surface⇒ page 36
Coolant level too low/coolant tempera-
ture too high⇒page 32
Engine oil pressure too low⇒page 33
Fig. 15 Information
display: Fuel level low
Fuel level low⇒page 32
Check engine oil level, engine oil sensor
faulty⇒page 33
Brake pad worn⇒page 32
Washer fluid level low⇒page 34
Light bulb defect⇒page 34
Light bulb in the brake light defect⇒page 34
NKO B5 20.book Page 26 Monday, July 3, 2006 2:09 PM
Page 29 of 281
Instruments and Indicator/Warning Lights
28
WARNING
•If you do not pay attention to the warning lights coming on and
the corresponding descriptions and warning notes, this may result
in severe body injuries or major vehicle damage.
•The engine compartment of your car is a hazardous area. There
is a risk of injuries, scalding, accid ents and fire when working in the
engine compartment, e.g. inspecting and replenishing oil and other
fluids. It is also essential to observe all warnings ⇒page 219.
Note
•Arrangement of the indicator lights depends on the model and model
version. The symbols shown in the following functional description are to
be found as indicator lights in the instrument cluster.
•Operational faults are shown in the display of the instrument cluster as
red symbols (priority 1 - danger) or yellow symbols (priority 2 - warning).
Turn signal system
Either the left or right indicator light flashes depending on the posi-
tion of the turn signal lever.
The indicator light flashes at twice its normal rate if a turn signal light fails.
This does not apply when towing a trailer.
EPC fault light (petrol engine)⇒ page 30
Diesel particle filter (diesel engine)⇒page 30
Glow plug system (diesel engine)⇒page 31
Coolant temperature/coolant level⇒page 32
Brake pad wear⇒page 32
Bonnet⇒page 32
Fuel reserve⇒page 32
Engine oil⇒page 33
Open door⇒page 34
Fluid level in windshield washer system⇒page 34
Bulbs⇒page 34
Control system for exhaust⇒page 34
Electronic stability programme (ESP)*⇒page 34
Traction control system (TCS)*⇒page 35
Antilock brake system (ABS)⇒page 35
Electronic immobiliser⇒page 36
Brake system⇒page 36
Dynamo⇒page 37
Seat belt warning light⇒page 37
NKO B5 20.book Page 28 Monday, July 3, 2006 2:09 PM
Page 31 of 281
Instruments and Indicator/Warning Lights
30
Fog lights
The warning light comes on when the fog lights are operating
⇒ page 57.
Rear fog light
The warning light comes on when the rear fog lights are operating
⇒ page 57.
EPC fault light (petrol engine)
The (Electronic Power Control) warning light comes on for a few
seconds when the ignition is switched on.
There is a system fault in the engine control system if the warning light
does not go out or comes on or flashes while driving. The engine manage-
ment system selects an emergency programme which enables you to
drive to the nearest specialist garage by adopting a gentle style of driving.
The following text will be displayed in the information display*:
ENGINE WORKSHOP! (ENGINE FAULT WORKSHOP!)
Diesel particle filter (diesel engine)
In the diesel particle filter the resulting soot particles are
collected and burnt during the combustion of diesel fuel.
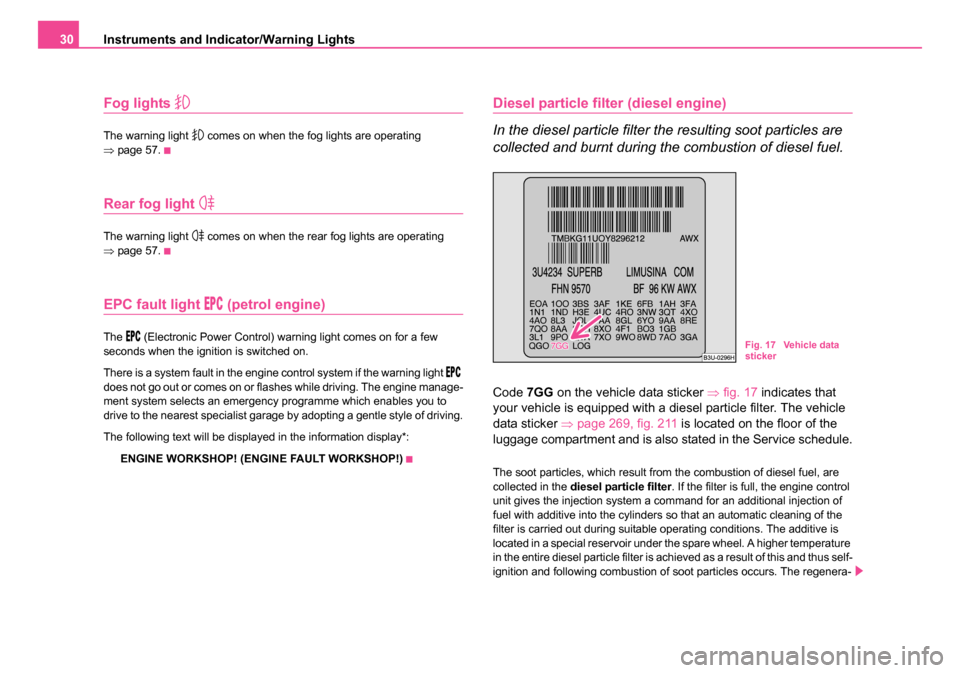
Code 7GG on the vehicle data sticker ⇒fig. 17 indicates that
your vehicle is equipped with a diesel particle filter. The vehicle
data sticker ⇒page 269, fig. 211 is located on the floor of the
luggage compartment and is also stated in the Service schedule.
The soot particles, which result from the combustion of diesel fuel, are
collected in the diesel particle filter . If the filter is full, the engine control
unit gives the injection system a command for an additional injection of
fuel with additive into the cylinders so that an automatic cleaning of the
filter is carried out during suitable operating conditions. The additive is
located in a special reservoir under the spare wheel. A higher temperature
in the entire diesel particle filter is achieved as a result of this and thus self-
ignition and following combustion of soot particles occurs. The regenera-
Fig. 17 Vehicle data
sticker
NKO B5 20.book Page 30 Monday, July 3, 2006 2:09 PM
Page 32 of 281
Instruments and Indicator/Warning Lights31
Using the systemSafetyDriving TipsGeneral MaintenanceBreakdown assistanceTechnical Data
tion procedure lasts about 2 to 3 minutes and is performed without driver
interference.
If the engine control unit detects that the operating conditions for a regen-
eration (combustion of deposited soot particles) of the diesel particle fiter
are not optimal, e.g. slow city driving, a warning light in the instrument
cluster is illuminated
. In order to clean the diesel particle filter, the
vehicle should be driven at an even speed of at least 60 km/h for approx.
5 - 10 minutes. The diesel particle filter is most effectively cleaned if the
vehicle is driven in the 4th or 5th gear within the range of 2 000 to 3 000
rpm.
If these conditions are not met, the warning light
does not go out and
after 10 minutes the warning light begins to flash. ENGINE
WORKSHOP! is shown in the information display*. Afterwards the engine
control unit shifts the engine into the emergency mode, which only has a
reduced power output. After switching the ignition off and on again the
warning light
comes on.
Have the vehicle inspected without delay by your specialist garage.
WARNING
•Please pay attention to the traffic regulations and speed limits.
•The diesel particle filter achieves very high temperatures.
Therefore do not park at points where the hot filter comes into
direct contact with dry grass or other combustible materials - risk
of fire!
•Use neither protective paint for chassis nor anti-corrosion
agent, in order to treat the exhaust system, the heat shields or the
diesel particle filter. The high temperatures can cause the coating
to ignite!
Note
•The servicing of the diesel particle filter and the replenishing of the
additive are performed by a specialist garage in the framework of the
regular inspection, see Service shedule.
•It is prohibited to use biofuel (RME) and diesel fuel mixture for diesel
vehicles which are fitted with diesel particle filter.
Glow plug system (diesel engine)
The indicator light lights up for a cold engine when switching on the
ignition (pre-heat position) 2 ⇒ page 121. Start the engine just as soon as
the indicator light goes out.
The glow plug indicator light will come on for about 1 second if the engine
is at a normal operating temperature or if the outside temperature is
above +5°C. This means that you can start the engine right away.
There is a fault in the glow plug system if the indicator light
does not
come on at all or lights up continuously. Contact a specialist garage as
soon as possible to obtain assistance.
There is a system fault in the engine control system if the warning light
has started to flash while driving. The engine management system selects
an emergency programme which enables you to drive to the nearest
specialist garage by adopting a gentle style of driving.
The following text will be displayed in the information display*:
ENGINE WORKSHOP! (ENGINE FAULT WORKSHOP!)
NKO B5 20.book Page 31 Monday, July 3, 2006 2:09 PM
Page 33 of 281
Instruments and Indicator/Warning Lights
32
Coolant temperature, Coolant quantity
The warning light comes on for a few seconds 1) when the ignition is
switched on.
The coolant temperature is too high or the coolant level too low if the
warning light
does not go out after the engine is started or flashes while
driving.
3 peeps sound as an additional warning signal.
In this case stop and switch the engine off and check the coolant level;
top up the coolant as necessary. Please also refer to the additional
instructions ⇒page 226, “Replenishing the coolant”.
Do not continue your journey if for some reason it is not possible under
the conditions prevailing to top up with coolant. Keep the engine
switched off and obtain professional assistance from a specialist garage,
otherwise it could lead to severe engine damage.
If the coolant is within the specified range, the increased temperature may
be caused by an operating problem at the coolant fan. Check the fuse for
the coolant fan, replace it if necessary ⇒page 260, “Replacing fuses”.
Do not continue driving if the warning light does not go off although the
fluid is at the correct level and also the fuse of the fan is in proper order.
Contact a specialist garage to obtain assistance.
Please also refer to the additional instructions ⇒page 226, “Replenishing
the coolant”.
The following text will be displayed in the information display*:
STOP CHECK COOLANT SERVICE MANUAL (STOP! CHECK
COOLANT! OWNER'S MANUAL)
WARNING
•If you must stop for technical reasons, then park the vehicle at
a safe distance from the traffic and switch off the engine and switch
on the hazard warning light system ⇒page 59.
•Take care when opening the coolant expansion bottle. If the
engine is hot, the cooling system is pressurized - risk of scalding!
It is best to allow the engine to cool down before removing the cap.
•Do not touch the coolant fan! The coolant fan may switch on
automatically even if the ignition is off.
Thickness of the brake pads
If the warning light comes on, contact a specialist garage immediately
and have the brake pads on all of the wheels inspected.
A peep sounds as an additional warning signal.
The following text will be displayed in the information display*:
CHECK BRAKE PADS
Bonnet
The warning light comes on when the ignition is switched on if the
bonnet is unlocked.
Fuel reserve
The warning light comes on, if the fuel level is still below 8 litres.
1)The warning light on vehicles fitted with information display does not come on
after switching the ignition on, but only if the coolant temperature is too high or the
coolant level is too low.
NKO B5 20.book Page 32 Monday, July 3, 2006 2:09 PM
Page 34 of 281
Instruments and Indicator/Warning Lights33
Using the systemSafetyDriving TipsGeneral MaintenanceBreakdown assistanceTechnical Data
A peep sounds as an additional warning signal.
The following text will be displayed in the information display*:
PLEASE REFUEL
Engine oil
The warning light lights up red (low oil pressure)
The warning light comes on for a few seconds 2) when the ignition is
switched on.
Stop the vehicle and switch the engine off if the warning light does not
go off after the engine has started or flashes while driving. Check the oil
level and top up with oil as necessary ⇒ page 223.
3 peeps sound as an additional warning signal.
Do not continue your journey if for some reason it is not possible under
the conditions prevailing to top up with oil. Keep the engine switched off
and obtain professional assistance from a specialist garage, otherwise it
could lead to severe engine damage.
Do not drive any further if the warning light remains on even if the oil is
at the correct level. Do not run the engine not at idling speed either.
Contact the nearest specialist garage to obtain professional assistance.
The following text will be displayed in the information display*:
STOP! OIL PRESS. STOP MOTOR! SERVICE MANUAL (STOP! OIL
PRESSURE STOP ENGINE! OWNER'S MANUAL) The warning light
lights up yellow* (oil quantity too low)
If the warning light lights up yellow, there is not the correct quantity of oil
in the engine. Check as soon as possible the oil level or top up
⇒ page 223 with engine oil.
A peep sounds as an additional warning signal.
The following text will be displayed in the information display*:
CHECK OIL LEVEL
The warning light will go out if the bonnet is left open for more than 30
seconds. If no engine oil has been replenished, the warning light will come
on again after driving about 100 km.
The warning light
flashes yellow* (engine oil level sensor faulty)
A fault on the engine oil level sensor is indicated additionally by an audible
signal and the warning light coming on several times after the ignition has
been switched on.
In this case have the engine inspected without delay by a specialist
garage.
The following text will be displayed in the information display*:
OIL SENSOR WORKSHOP!
WARNING
•If you must stop for technical reasons, then park the vehicle at
a safe distance from the traffic and switch off the engine and switch
on the hazard warning light system ⇒page 59.
•The red oil pressure light is not an oil le vel indicator! One
should therefore check the oil level at regular intervals, preferably
after every refueling stop.
2)The warning light on vehicles fitted with information display does not come on
after switching the ignition on, but only if a fault exists or the engine oil level is too
low.
NKO B5 20.book Page 33 Monday, July 3, 2006 2:09 PM
Page 42 of 281
Unlocking and locking41
Using the systemSafetyDriving TipsGeneral MaintenanceBreakdown assistanceTechnical Data
So long as the child safety lock is switched on it is not possible to open the
door from the inside with the door opening lever. In this case the door can
be opened only from the outside.
Central locking system
Description
Unlocking or locking the vehicle causes
all doors to be unlocked or locked
at the same time by the central locking system. The boot lid is unlocked
when opening. It can be opened by pressing the hand grip above the
licence plate.
Operation of the central locking system is possible:
•from the outside using the vehicle key ⇒page 42
•using the buttons for the central locking system ⇒page 43
•by using the radio remote control ⇒page 46
Convenience operation of windows
One can open and close the electrically powered windows when unlocking
and locking the vehicle ⇒page 51, “Window convenience operation”. The
electric sliding/tilting roof* can only be closed by the central locking
system.
Opening a single door*
This function allows one to just unlock the driver's door. The other doors
remain locked and are only unlocked when the command is repeated. The
single door opening function can be first activated by recoding the control
unit of the central locking system. This work is undertaken by a Škoda
Service Partner can give you more information. Automatic locking*
All the doors and the boot lid are locked automatically once the car
reaches a speed of about 15 km/h.
If the ignition key is withdrawn, the car is then automatically unlocked
again. In addition, it is possible for the driver to unlock the car by pressing
the central locking button
or by pulling the door opening lever.
If you wish, your Škoda Service Partner can convert the central locking
system of your car to the automatic locking mode.
WARNING
Locking the doors prevents involuntary opening in an exceptional
situation (an accident). Locked doors prevent unwanted entry into
the vehicle from outside, for example at road crossings. Locked
doors do, however, make it more difficult for rescuers to get into
the vehicle in an emergency - danger to life!
Note
•After unlocking the vehicle see, if the securing knobs are located on all
doors at the bottom.
•In the event of an accident in which the airbags are deployed, the
locked doors are automatically unlocked in order to enable rescuers to
gain access to the vehicle.
•Should the central locking system not operate properly, you can lock
and unlock the front doors and the boot lid with the key. Emergency
unlocking of fuel filler flap ⇒page 217.
NKO B5 20.book Page 41 Monday, July 3, 2006 2:09 PM
Page 44 of 281
Unlocking and locking43
Using the systemSafetyDriving TipsGeneral MaintenanceBreakdown assistanceTechnical Data
•The safe securing system is deactivated.
•The windows are opened provided the key is held in the opening posi-
tion.
•The indicator light in the driver's door stops flashing if the vehicle is not
fitted with an anti-theft alarm system* ⇒page 48.
Note
If the vehicle is equipped with an anti-theft alarm system*, you must
unlock the vehicle by inserting the key into the driver door you then have
to insert the key into the ignition lock and switch the ignition on within 15
seconds after opening the door. The alarm will be triggered if you do not
switch on the ignition within 15 seconds.
Closing the vehicle with the key
– Turn the key in the lock of the driver door to the right into the
closing position ⇒page 42, fig. 23.
•All doors and the boot lid are locked (the securing knobs must move
downwards).
•The switched on interior lights go out over the door contact.
•The windows and the electric sliding/tilting roof* are closed provided
the key is held in the locking position.
•The safe securing system is activated immediately.
•The indicator light in the driver door begins flashing.
Note
The opened driver door cannot be locked. It must be locked separately
after closing it.
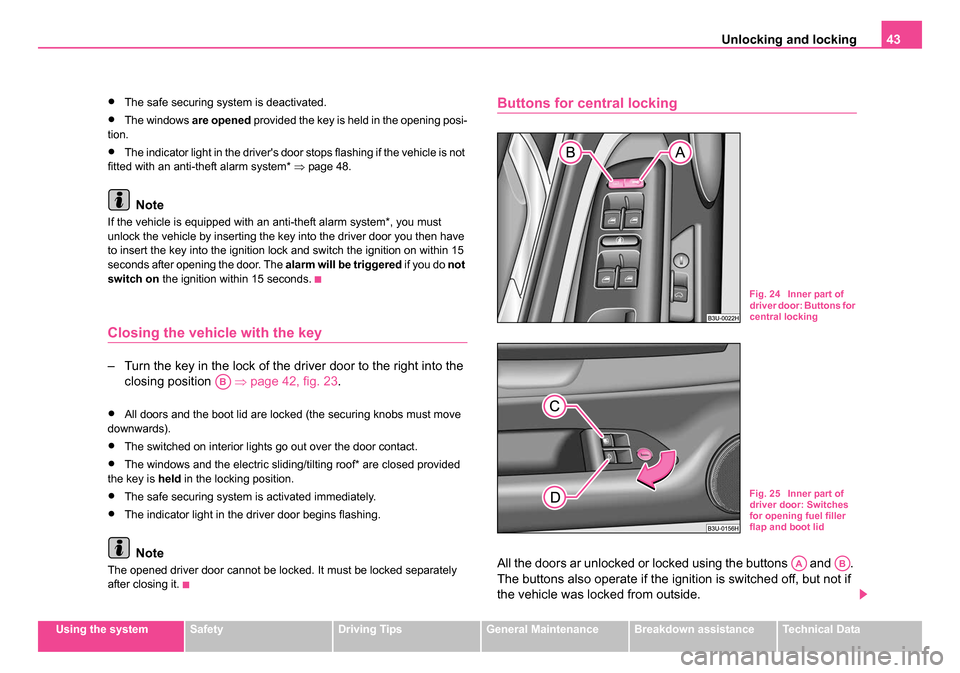
Buttons for central locking
All the doors ar unlocked or locked using the buttons and .
The buttons also operate if the ignition is switched off, but not if
the vehicle was locked from outside.
AB
Fig. 24 Inner part of
driver door: Buttons for
central locking
Fig. 25 Inner part of
driver door: Switches
for opening fuel filler
flap and boot lid
AAAB
NKO B5 20.book Page 43 Monday, July 3, 2006 2:09 PM