engine coolant SKODA SUPERB 2006 1.G / (B5/3U) Owner's Manual
[x] Cancel search | Manufacturer: SKODA, Model Year: 2006, Model line: SUPERB, Model: SKODA SUPERB 2006 1.G / (B5/3U)Pages: 281, PDF Size: 12.67 MB
Page 6 of 281
Contents5
Contents
Layout of this Owner's Manual
(explanations)
. . . . . . . . . . . . . . . . . . .
Using the system . . . . . . . . . . . . . . .
Cockpit . . . . . . . . . . . . . . . . . . . . . . . . . . . . . . .
General view . . . . . . . . . . . . . . . . . . . . . . . . .
Instruments and Indicator/Warning LightsGeneral view of the instrument cluster . . . . . .
Engine revolutions counter . . . . . . . . . . . . . . .
Coolant temperature gauge . . . . . . . . . . . . . .
Fuel gauge . . . . . . . . . . . . . . . . . . . . . . . . . . .
Digital clock . . . . . . . . . . . . . . . . . . . . . . . . . .
Speedometer with counter for distance driven
Service Interval Display . . . . . . . . . . . . . . . . .
Multi-functional indicator (onboard computer)
Information display* . . . . . . . . . . . . . . . . . . . .
Auto Check Control . . . . . . . . . . . . . . . . . . . .
Warning lights . . . . . . . . . . . . . . . . . . . . . . . . .
Unlocking and locking . . . . . . . . . . . . . . . . . .
Key . . . . . . . . . . . . . . . . . . . . . . . . . . . . . . . . .
Changing the key battery . . . . . . . . . . . . . . . .
Electronic immobiliser . . . . . . . . . . . . . . .
Child safety lock . . . . . . . . . . . . . . . . . . . . . . .
Central locking system . . . . . . . . . . . . . . . . . .
Remote control . . . . . . . . . . . . . . . . . . . . . . . .
Anti-theft alarm system* . . . . . . . . . . . . . . . . .
Power windows . . . . . . . . . . . . . . . . . . . . . . .
Electric sliding/tilting roof* . . . . . . . . . . . . . . .
Lights and Visibility. . . . . . . . . . . . . . . . . . . . .
Lights . . . . . . . . . . . . . . . . . . . . . . . . . . . . . . .
Interior lighting . . . . . . . . . . . . . . . . . . . . . . . . Visibility . . . . . . . . . . . . . . . . . . . . . . . . . . . . .
Windshield wiper and wash system . . . . . . . .
Rear-view mirror . . . . . . . . . . . . . . . . . . . . . .
Seats and Stowage . . . . . . . . . . . . . . . . . . . .
Front seats . . . . . . . . . . . . . . . . . . . . . . . . . . .
Adjusting front seats manually . . . . . . . . . . . .
Adjusting front seats electrically* . . . . . . . . . .
Front passenger seat with a folding central back
rest* . . . . . . . . . . . . . . . . . . . . . . . . . . . . . . . .
Footrest at the rear* . . . . . . . . . . . . . . . . . . . .
Seat heaters* . . . . . . . . . . . . . . . . . . . . . . . . .
Pedals . . . . . . . . . . . . . . . . . . . . . . . . . . . . . .
Luggage compartment . . . . . . . . . . . . . . . . . .
The cool box behind the armrest of the rear
seats* . . . . . . . . . . . . . . . . . . . . . . . . . . . . . . .
CargoFlex folding box* . . . . . . . . . . . . . . . . . .
The roof luggage rack system . . . . . . . . . . . .
Cup holder . . . . . . . . . . . . . . . . . . . . . . . . . . .
Ashtrays . . . . . . . . . . . . . . . . . . . . . . . . . . . . .
Cigarette lighters and power sockets . . . . . . .
Storage facilities . . . . . . . . . . . . . . . . . . . . . . .
Heating and air conditioning system . . . . .
Air conditioning system . . . . . . . . . . . . . . . . .
Climatronic* (automatic air conditioning) . . . .
Starting-off and Driving. . . . . . . . . . . . . . . . .
Setting steering wheel position . . . . . . . . . . .
Ignition lock . . . . . . . . . . . . . . . . . . . . . . . . . .
Starting the engine . . . . . . . . . . . . . . . . . . . . .
Switching the engine off . . . . . . . . . . . . . . . . .
Shifting (manual gearbox) . . . . . . . . . . . . . . .
Handbrake . . . . . . . . . . . . . . . . . . . . . . . . . . .
Parking aid* . . . . . . . . . . . . . . . . . . . . . . . . . . Front and rear parking aid* . . . . . . . . . . . . . .
Cruise control system (CCS)* . . . . . . . . . . . .
Automatic gearbox*. . . . . . . . . . . . . . . . . . . .
5-speed automatic gearbox . . . . . . . . . . . . . .
Communicating and Navigating . . . . . . . . .
Multifunction steering wheel* . . . . . . . . . . . . .
CD changer* . . . . . . . . . . . . . . . . . . . . . . . . .
Mobile phone, two-way radio system and
navigation system . . . . . . . . . . . . . . . . . . . . .
Safety. . . . . . . . . . . . . . . . . . . . . . . . . . . . . .
Passive Safety . . . . . . . . . . . . . . . . . . . . . . . .
Basic information . . . . . . . . . . . . . . . . . . . . . .
Correct seated position . . . . . . . . . . . . . . . . .
Seat belts. . . . . . . . . . . . . . . . . . . . . . . . . . . . .
Why seat belts? . . . . . . . . . . . . . . . . . . . . . . .
The physical principle of a frontal collision . .
Important safety information regarding the use
of seat belts . . . . . . . . . . . . . . . . . . . . . . . . . .
How are seat belts correctly fastened? . . . . .
Belt tensioners . . . . . . . . . . . . . . . . . . . . . . . .
Airbag system. . . . . . . . . . . . . . . . . . . . . . . . .
Description of the airbag system . . . . . . . . . .
Front airbag . . . . . . . . . . . . . . . . . . . . . . . . . .
Side airbag . . . . . . . . . . . . . . . . . . . . . . . . . .
Head airbags* . . . . . . . . . . . . . . . . . . . . . . . .
Deactivating an airbag . . . . . . . . . . . . . . . . . .
8
9
11
11
13
13
14
14
15
15
16
16
18
22
24
27
38
38
39
40
40
41
46
48
49
52
56
56
61 63
65
67
71
71
72
73
78
79
80
81
81
88
91
94
96
97
99
101
108
108 11 3
120
120
121
122
123
124
125
126 127
128
131
131
137
137
141
145
149
149
149
151
155
155
156
157
158
160
162
162
164
166
169
171
NKO B5 20.book Page 5 Monday, July 3, 2006 2:09 PM
Page 14 of 281
Instruments and Indicator/Warning Lights13
Using the systemSafetyDriving TipsGeneral MaintenanceBreakdown assistanceTechnical Data
Instruments and Indicator/Warning Lights
General view of the instrument cluster
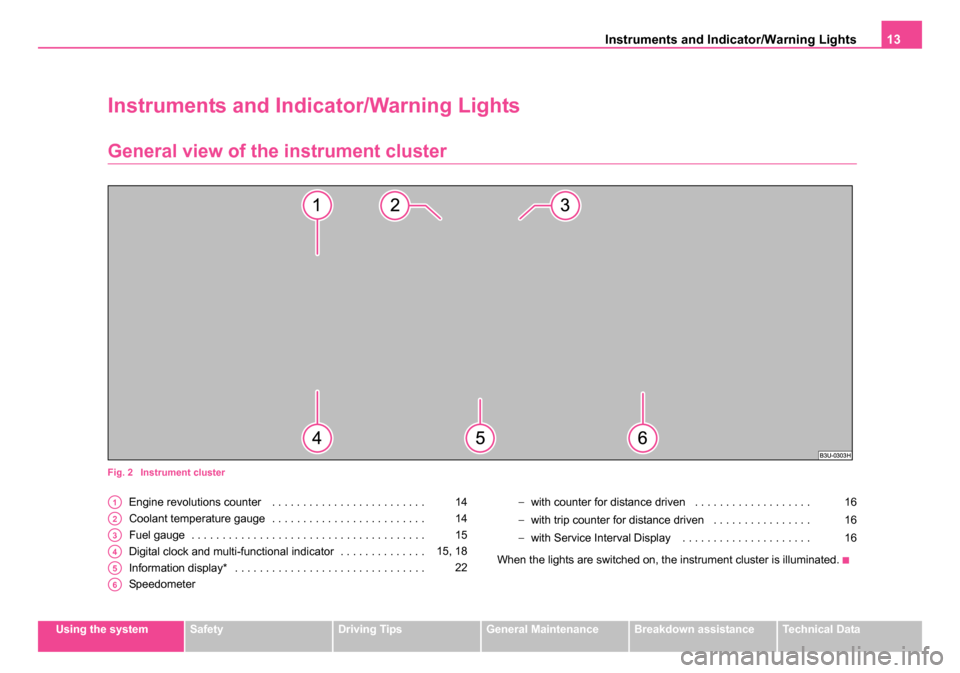
Fig. 2 Instrument cluster
Engine revolutions counter . . . . . . . . . . . . . . . . . . . . . . . . .
Coolant temperature gauge . . . . . . . . . . . . . . . . . . . . . . . . .
Fuel gauge . . . . . . . . . . . . . . . . . . . . . . . . . . . . . . . . . . . . . .
Digital clock and multi-functional indicator . . . . . . . . . . . . . .
Information display* . . . . . . . . . . . . . . . . . . . . . . . . . . . . . . .
Speedometer −
with counter for distance driven . . . . . . . . . . . . . . . . . . .
− with trip counter for distance driven . . . . . . . . . . . . . . . .
− with Service Interval Display . . . . . . . . . . . . . . . . . . . . .
When the lights are switched on, the instrument cluster is illuminated.A114
A214
A315
A415, 18
A522
A6
16
16
16
NKO B5 20.book Page 13 Monday, July 3, 2006 2:09 PM
Page 15 of 281
Instruments and Indicator/Warning Lights
14
Engine revolutions counter
The start of the red zone in the revolutions counter ⇒page 13, fig. 2
indicates the maximum permissible engine speed for all gears for an
engine which has been run in and operating at a normal temperature. You
should shift into the next higher gear before this red zone is reached, or
move the selector lever into position D if your car is fitted with an automatic
gearbox.
One should shift to the next lower gear at the latest when the engine is no
longer running “smoothly”.
Avoid high engine speeds during the running-in period ⇒page 192.
Caution
The needle of the revolutions counter must on no account move into the
red zone of the scale - risk of engine damage!
For the sake of the environment
Shifting up early helps you save fuel and reduce the operating noise of
your vehicle.
Coolant temperature gauge
The coolant temperature gauge ⇒page 13, fig. 2 operates only when
the ignition is switched on.
In order to avoid any damage to the engine, please pay attention to the
following notes regarding the temperature ranges: Cold range
If the pointer is in the left-hand area of the scale it means that the engine
has not yet reached its operating temperature. Avoid running at high
engine speeds, at full throttle and at severe engine loads.
The operating range
The engine has reached its operating temperature as soon as the pointer
moves into the mid-range of the scale. The pointer may also move further
to the right at high engine loads and high outside temperatures. This is not
critical provided the warning symbol
in the instrument cluster does not
flash.
If the symbol
in the instrument cluster flashes it means that either the
coolant temperature is too high or the coolant level is too low. Please
refer to the guidelines ⇒page 32, “Coolant temperature, Coolant quantity
”.
WARNING
Pay attention to the warning notes ⇒page 219, “Working in the
engine compartment” before opening the bonnet and inspecting
the coolant level.
Caution
Additional headlights and other attached components in front of the fresh
air inlet impair the cooling efficiency of the coolant. There is then a risk of
the engine overheating at high outside temperatures and high engine
loads!
A1
A2
NKO B5 20.book Page 14 Monday, July 3, 2006 2:09 PM
Page 27 of 281
Instruments and Indicator/Warning Lights
26
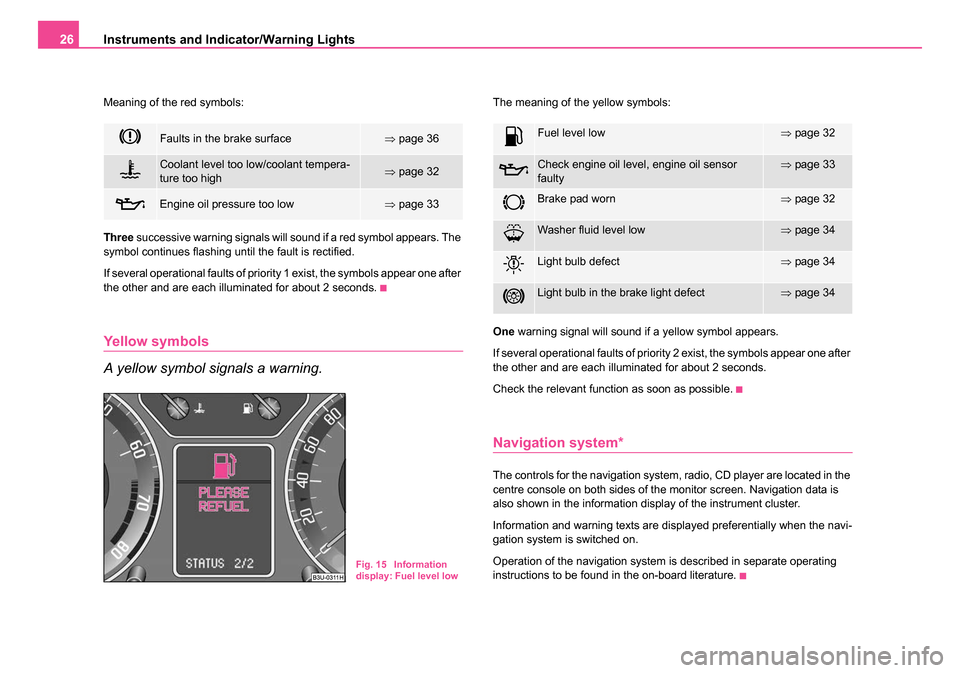
Meaning of the red symbols:
Three successive warning signals will sound if a red symbol appears. The
symbol continues flashing until the fault is rectified.
If several operational faults of priority 1 exist, the symbols appear one after
the other and are each illuminated for about 2 seconds.
Yellow symbols
A yellow symbol signals a warning.
The meaning of the yellow symbols:
One warning signal will sound if a yellow symbol appears.
If several operational faults of priority 2 exist, the symbols appear one after
the other and are each illuminated for about 2 seconds.
Check the relevant function as soon as possible.
Navigation system*
The controls for the navigation system, radio, CD player are located in the
centre console on both sides of the monitor screen. Navigation data is
also shown in the information display of the instrument cluster.
Information and warning texts are displayed preferentially when the navi-
gation system is switched on.
Operation of the navigation system is described in separate operating
instructions to be found in the on-board literature.
Faults in the brake surface⇒ page 36
Coolant level too low/coolant tempera-
ture too high⇒page 32
Engine oil pressure too low⇒page 33
Fig. 15 Information
display: Fuel level low
Fuel level low⇒page 32
Check engine oil level, engine oil sensor
faulty⇒page 33
Brake pad worn⇒page 32
Washer fluid level low⇒page 34
Light bulb defect⇒page 34
Light bulb in the brake light defect⇒page 34
NKO B5 20.book Page 26 Monday, July 3, 2006 2:09 PM
Page 29 of 281
Instruments and Indicator/Warning Lights
28
WARNING
•If you do not pay attention to the warning lights coming on and
the corresponding descriptions and warning notes, this may result
in severe body injuries or major vehicle damage.
•The engine compartment of your car is a hazardous area. There
is a risk of injuries, scalding, accid ents and fire when working in the
engine compartment, e.g. inspecting and replenishing oil and other
fluids. It is also essential to observe all warnings ⇒page 219.
Note
•Arrangement of the indicator lights depends on the model and model
version. The symbols shown in the following functional description are to
be found as indicator lights in the instrument cluster.
•Operational faults are shown in the display of the instrument cluster as
red symbols (priority 1 - danger) or yellow symbols (priority 2 - warning).
Turn signal system
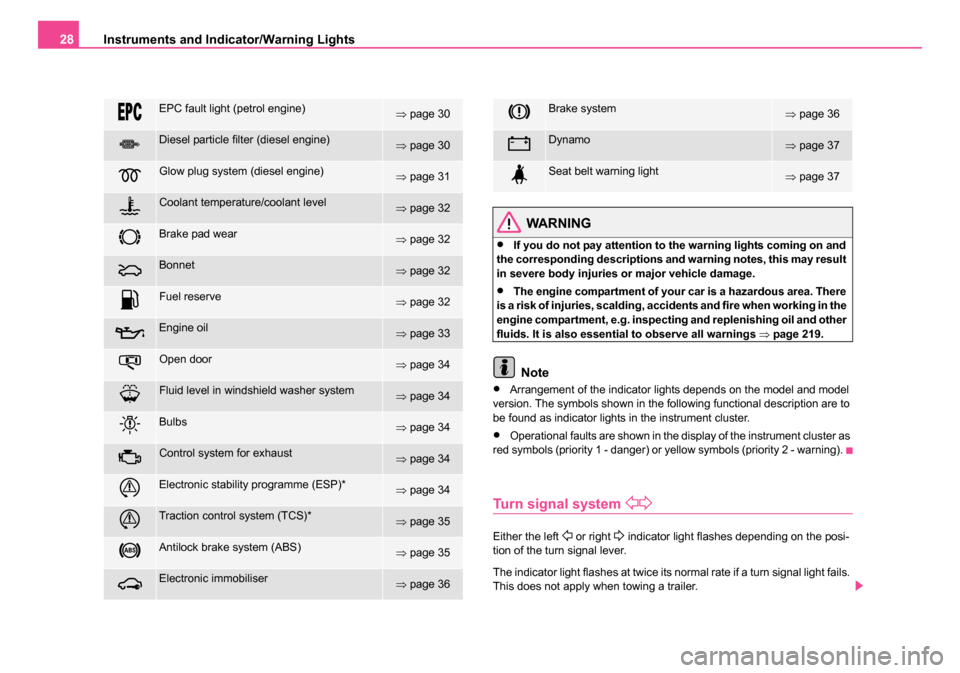
Either the left or right indicator light flashes depending on the posi-
tion of the turn signal lever.
The indicator light flashes at twice its normal rate if a turn signal light fails.
This does not apply when towing a trailer.
EPC fault light (petrol engine)⇒ page 30
Diesel particle filter (diesel engine)⇒page 30
Glow plug system (diesel engine)⇒page 31
Coolant temperature/coolant level⇒page 32
Brake pad wear⇒page 32
Bonnet⇒page 32
Fuel reserve⇒page 32
Engine oil⇒page 33
Open door⇒page 34
Fluid level in windshield washer system⇒page 34
Bulbs⇒page 34
Control system for exhaust⇒page 34
Electronic stability programme (ESP)*⇒page 34
Traction control system (TCS)*⇒page 35
Antilock brake system (ABS)⇒page 35
Electronic immobiliser⇒page 36
Brake system⇒page 36
Dynamo⇒page 37
Seat belt warning light⇒page 37
NKO B5 20.book Page 28 Monday, July 3, 2006 2:09 PM
Page 33 of 281
Instruments and Indicator/Warning Lights
32
Coolant temperature, Coolant quantity
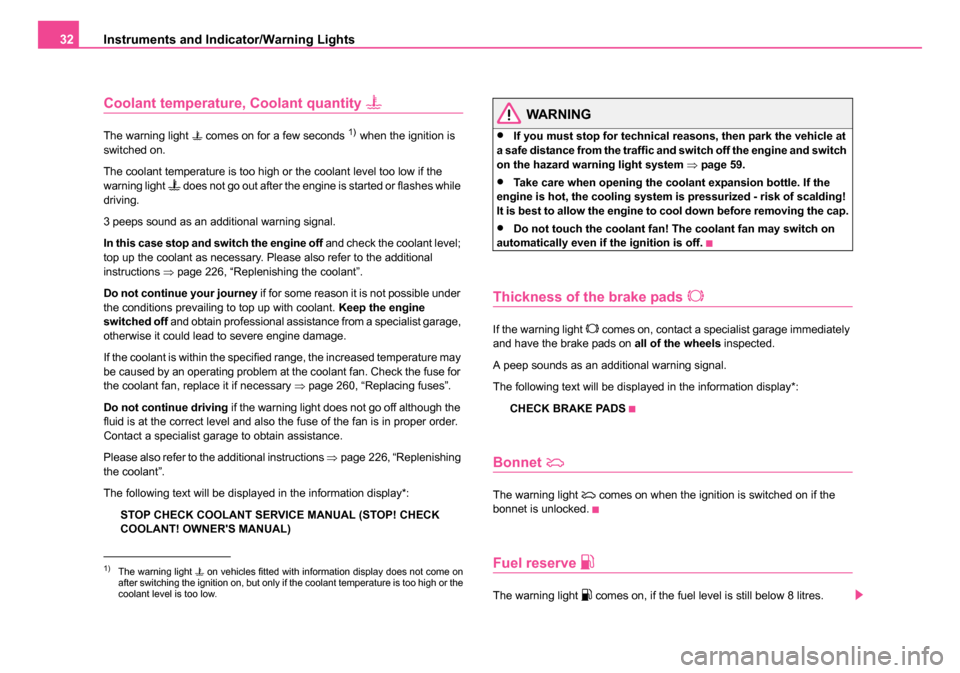
The warning light comes on for a few seconds 1) when the ignition is
switched on.
The coolant temperature is too high or the coolant level too low if the
warning light
does not go out after the engine is started or flashes while
driving.
3 peeps sound as an additional warning signal.
In this case stop and switch the engine off and check the coolant level;
top up the coolant as necessary. Please also refer to the additional
instructions ⇒page 226, “Replenishing the coolant”.
Do not continue your journey if for some reason it is not possible under
the conditions prevailing to top up with coolant. Keep the engine
switched off and obtain professional assistance from a specialist garage,
otherwise it could lead to severe engine damage.
If the coolant is within the specified range, the increased temperature may
be caused by an operating problem at the coolant fan. Check the fuse for
the coolant fan, replace it if necessary ⇒page 260, “Replacing fuses”.
Do not continue driving if the warning light does not go off although the
fluid is at the correct level and also the fuse of the fan is in proper order.
Contact a specialist garage to obtain assistance.
Please also refer to the additional instructions ⇒page 226, “Replenishing
the coolant”.
The following text will be displayed in the information display*:
STOP CHECK COOLANT SERVICE MANUAL (STOP! CHECK
COOLANT! OWNER'S MANUAL)
WARNING
•If you must stop for technical reasons, then park the vehicle at
a safe distance from the traffic and switch off the engine and switch
on the hazard warning light system ⇒page 59.
•Take care when opening the coolant expansion bottle. If the
engine is hot, the cooling system is pressurized - risk of scalding!
It is best to allow the engine to cool down before removing the cap.
•Do not touch the coolant fan! The coolant fan may switch on
automatically even if the ignition is off.
Thickness of the brake pads
If the warning light comes on, contact a specialist garage immediately
and have the brake pads on all of the wheels inspected.
A peep sounds as an additional warning signal.
The following text will be displayed in the information display*:
CHECK BRAKE PADS
Bonnet
The warning light comes on when the ignition is switched on if the
bonnet is unlocked.
Fuel reserve
The warning light comes on, if the fuel level is still below 8 litres.
1)The warning light on vehicles fitted with information display does not come on
after switching the ignition on, but only if the coolant temperature is too high or the
coolant level is too low.
NKO B5 20.book Page 32 Monday, July 3, 2006 2:09 PM
Page 109 of 281
Heating and air conditioning system
108
Heating and air conditioning system
Air conditioning system
Description
The air conditioning system is a combined cooling and
heating system. It makes it possible to optimally control
the air temperature at any season of the year.
Description of the air conditioning system
It is important for your safety and for your driving comfort that the air condi-
tioning system is operating properly.
The air conditioning system operates when switch ⇒page 109,
fig. 107 is pressed and the following conditions are met:
•engine running,
•outside temperature above +5 °C,
•blower switch switched on (positions 1 to 4).
If the cooling system is switched on, the temperature and air humidity
drops in the vehicle. The wellbeing of the occupants of the car is enhanced
as a result of this particularly at high outside temperatures and a high air
humidity. The system prevents the windows misting up during the cold
season of the year.
The heating effect is dependent upon the coolant temperature, thus full
heat output only occurs when the engine has reached its operating
temperature.
It is possible to briefly activate recirculated air mode in order to enhance
the cooling effect ⇒. Air at a temperature of about 5°C may flow out of the vents under certain
circumstances when the cooling system is operating. Lengthy and uneven
distribution of the air flow out of the vents (in particular at the leg area) and
large differences in temperature, for example when getting out of the
vehicle, can result in chills in sensitive persons.
The air inlet in front of the windscreen must be free of ice, snow or leaves
in order to ensure that the heating and ventilation systems operate prop-
erly.
After switching on the cooling
Condensation from the evaporator of the
air conditioning may drip down and form a puddle below the vehicle. This
is quite normal and not an indication of a leak!
Aeration of the vehicle when ignition is switched off*
On models fitted with power sliding/tilting roof with sollar cells, the fresh
air blower is automatically switched over to “solar mode ” if the sun ray's
are sufficient after switching off the ignition. The solar cells on the
sliding/tilting roof deliver power for the fresh air blower. This supplies the
interior of the car with fresh air.
For an optimum ventilation, the air outlet vents 3 and 4 must be opened
⇒ page 112.
The ventilation functions only when the sliding/tilting roof is closed.
WARNING
•For your own safety and that of other road users, ensure that all
the windows are free of ice, snow and misting. Please familiarize
yourself about how to correctly operate the heating and ventilation
systems, how to demist and defrost the windows, as well as with
the cooling mode.
ACAE
NKO B5 20.book Page 108 Monday, July 3, 2006 2:09 PM
Page 114 of 281
Heating and air conditioning system 113
Using the systemSafetyDriving TipsGeneral MaintenanceBreakdown assistanceTechnical Data
The desired interior temperature can also be achieved without switching
in the cooling system just by switching to fresh air mode.
For the sake of
the environment
When you economize on fuel, you also reduce pollutant emissions.
Operational problems
If the cooling system does not operate at outside temperatures higher
than +5 °C, there is a problem in the system. The reasons for this may be:
•The fuse of the air conditioning system is defective ⇒page 260.
Check the fuse, replace it if necessary.
•The cooling system has switched off automatically for a short time
because the coolant temperature of the engine is too hot.
If you are not able to rectify the operational problem yourself, or if the
cooling capacity decreases, switch the cooling system off. Contact a
specialist garage.
Climatronic* (automatic air conditioning)
Description
The Climatronic system is a combination of an automatic heating, fresh air
and cooling system which provides optimal comfort for the occupants of
the car.
The Climatronic maintains a constant temperature fully automatically,
once it has been set. This is achieved by automatically varying the temperature of the outflowing air, the blower stages and the air distribu-
tion. It is not necessary to manually alter the settings. The
automatic
mode ⇒ page 115 ensures maximum wellbeing of the occupants at all
times of the year.
Description of Climatronic system
The Climatronic can only operate if the following conditions are met:
•engine running,
•outside temperature above +5 °C,
•the button is not pressed.
If the Climatronic system is switched on, the temperature and air humidity
drops in the vehicle. The wellbeing of the occupants of the car is enhanced
as a result of this particularly at high outside temperatures and a high air
humidity. The system prevents the windows misting up during the cold
season of the year.
It is possible to briefly activate recirculated air mode in order to enhance
the cooling effect ⇒.
The heating effect is dependent upon the coolant temperature, thus full
heat output only occurs when the engine has reached its operating
temperature.
Puddle of water below car
After switching on the cooling Condensation from the evaporator of the
air conditioning may drip down and form a puddle below the vehicle. This
is quite normal and not an indication of a leak!
Switching over between degrees Celsius and degrees Fahrenheit
First of all press and hold the button ⇒page 114, fig. 110 and then
press the button . The temperature measuring unit appears in the
display.ECON
ECONAUTO
NKO B5 20.book Page 113 Monday, July 3, 2006 2:09 PM
Page 124 of 281

Starting-off and Driving123
Using the systemSafetyDriving TipsGeneral MaintenanceBreakdown assistanceTechnical Data
For the sake of the environment
Never warm up the engine when the vehicle is standing. Drive off right
away. Through this the engine reaches its operating temperature more
rapidly and the pollutant emissions are lower.
Petrol engines
These engines are fitted with a starter system which selects the correct
fuel/air mixture for every external air temperature.
•Do not operate accelerator before and when starting engine.
•Interrupt the attempt at starting after 10 seconds if the engine does not
start right awayand wait for about 30 seconds before repeating the
attempt.
•It is possible that the fuse on the electrical fuel pump is defect if the
engine still does not start. Check the fuse and replace it if necessary
⇒ page 260.
•If the engine does not start, contact the nearest specialist garage to
obtain professional assistance.
It may be necessary, if the engine is very hot, to slightly depress the
accelerator after the engine has started.
Diesel engines
Glow plug system
Diesel engines are equipped with a glow plug system, the preglow period
being controlled automatically in line with the coolant temperature and
outside temperature. The preglow indicator light
comes on after the ignition has been
switched on.
You should not switch on any major electrical components during
the heating period otherwise the vehicle battery will be drained
unnecessarily.
•You should start the engine immediately after the glow plug warning
light has gone out.
•The glow plug warning light will come on for about one second if the
engine is at a normal operating temperature or if the outside temperature
is above +5°C. This means that you can start the engine right away.
•Interrupt the attempt at starting after 10 seconds if the engine does not
start right awayand wait for about 30 seconds before repeating the
attempt.
•It is possible that the fuse on the diesel preglow system is defect if the
engine still does not start. Check the fuse and replace it if necessary
⇒ page 260.
•If the engine does not start, contact the nearest specialist garage to
obtain professional assistance.
Starting the engine after fuel tank has run dry
It may take longer than normal to start the engine after refuelling if the fuel
tank has run completely dry - up to one minute. This is because the fuel
system must first of all be filled while the attempting to start the engine.
Switching the engine off
– Turn the ignition key into position ⇒page 121, fig. 115 .A1
NKO B5 20.book Page 123 Monday, July 3, 2006 2:09 PM
Page 125 of 281

Starting-off and Driving
124
WARNING
•Never switch off the engine before the vehicle is stationary - risk
of accident!
•The brake booster only operates when the engine is running.
Greater physical effort for braking is required when engine is
switched off. Because if you do not stop as normal, this can cause
an accident and severe injuries.
Caution
you should not switch the engine off right away at the end of your journey
after the engine has been operated for a lengthy period at high loads but
should be allowed it to run at idling speed for about 2 minutes. This
prevents any accumulation of heat when the engine is switched off.
Note
•The radiator fan may continue running for a further 10 minutes or so
after the engine and the ignition have been switched off. The coolant fan
may, however, also switch on again after some time if the coolant temper-
ature rises because of an accumulation of heat in the engine or if the
engine is warm and the engine compartment is additionally heated by
strong sunlight.
•This is why particular care is required when carrying out any work in
the engine compartment ⇒page 219, “Working in the engine
compartment”.
Shifting (manual gearbox)
Shift into reverse only when the car is stationary. Depress the clutch pedal
and hold it fully depressed. Wait a moment before engaging reverse gear
in order to avoid any shift noises.
Fig. 116 Shift pattern
on models fitted with 5-
speed manual gearbox
Fig. 117 Shift pattern
on models fitted with 6-
speed manual gearbox
NKO B5 20.book Page 124 Monday, July 3, 2006 2:09 PM