instrument panel SKODA SUPERB 2006 1.G / (B5/3U) Owner's Manual
[x] Cancel search | Manufacturer: SKODA, Model Year: 2006, Model line: SUPERB, Model: SKODA SUPERB 2006 1.G / (B5/3U)Pages: 281, PDF Size: 12.67 MB
Page 12 of 281
Cockpit11
Using the systemSafetyDriving TipsGeneral MaintenanceBreakdown assistanceTechnical Data
Cockpit
General view
This general view is designed to help you to quickly
become familiar with the instruments, gauges and
controls.
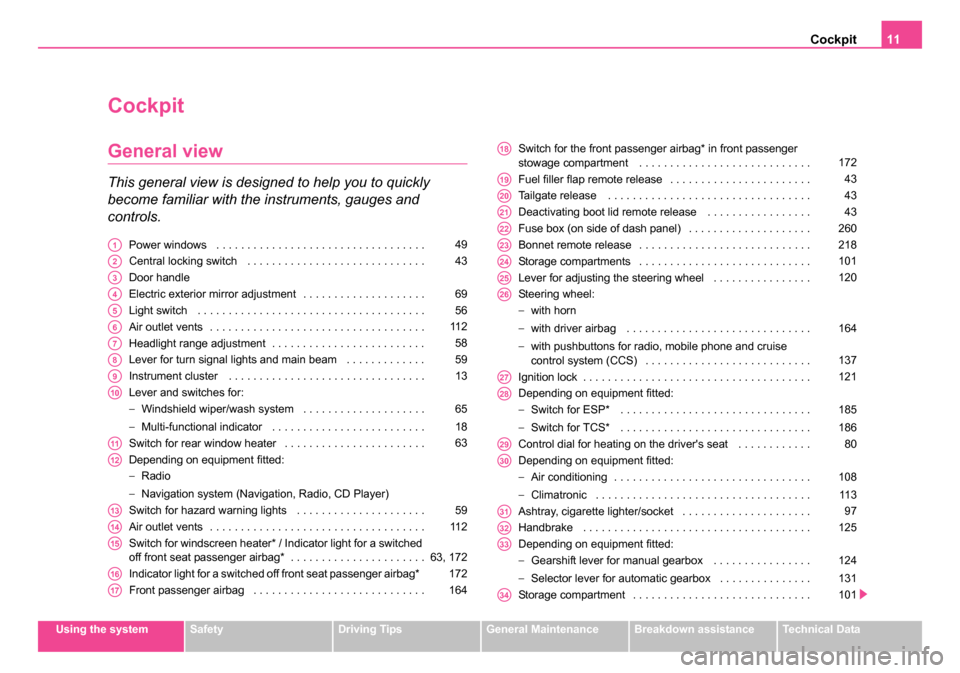
Power windows . . . . . . . . . . . . . . . . . . . . . . . . . . . . . . . . . .
Central locking switch . . . . . . . . . . . . . . . . . . . . . . . . . . . . .
Door handle
Electric exterior mirror adjustment . . . . . . . . . . . . . . . . . . . .
Light switch . . . . . . . . . . . . . . . . . . . . . . . . . . . . . . . . . . . . .
Air outlet vents . . . . . . . . . . . . . . . . . . . . . . . . . . . . . . . . . . .
Headlight range adjustment . . . . . . . . . . . . . . . . . . . . . . . . .
Lever for turn signal lights and main beam . . . . . . . . . . . . .
Instrument cluster . . . . . . . . . . . . . . . . . . . . . . . . . . . . . . . .
Lever and switches for:
−Windshield wiper/wash system . . . . . . . . . . . . . . . . . . . .
− Multi-functional indicator . . . . . . . . . . . . . . . . . . . . . . . . .
Switch for rear window heater . . . . . . . . . . . . . . . . . . . . . . .
Depending on equipment fitted:
− Radio
− Navigation system (Navigation, Radio, CD Player)
Switch for hazard warning lights . . . . . . . . . . . . . . . . . . . . .
Air outlet vents . . . . . . . . . . . . . . . . . . . . . . . . . . . . . . . . . . .
Switch for windscreen heater* / Indicator light for a switched
off front seat passenger airbag* . . . . . . . . . . . . . . . . . . . . . .
Indicator light for a switched off front seat passenger airbag*
Front passenger airbag . . . . . . . . . . . . . . . . . . . . . . . . . . . . Switch for the front passenger airbag* in front passenger
stowage compartment . . . . . . . . . . . . . . . . . . . . . . . . . . . .
Fuel filler flap remote release . . . . . . . . . . . . . . . . . . . . . . .
Tailgate release . . . . . . . . . . . . . . . . . . . . . . . . . . . . . . . . .
Deactivating boot lid remote release . . . . . . . . . . . . . . . . .
Fuse box (on side of dash panel) . . . . . . . . . . . . . . . . . . . .
Bonnet remote release . . . . . . . . . . . . . . . . . . . . . . . . . . . .
Storage compartments . . . . . . . . . . . . . . . . . . . . . . . . . . . .
Lever for adjusting the steering wheel . . . . . . . . . . . . . . . .
Steering wheel:
−
with horn
− with driver airbag . . . . . . . . . . . . . . . . . . . . . . . . . . . . . .
− with pushbuttons for radio, mobile phone and cruise
control system (CCS) . . . . . . . . . . . . . . . . . . . . . . . . . . .
Ignition lock . . . . . . . . . . . . . . . . . . . . . . . . . . . . . . . . . . . . .
Depending on equipment fitted:
− Switch for ESP* . . . . . . . . . . . . . . . . . . . . . . . . . . . . . . .
− Switch for TCS* . . . . . . . . . . . . . . . . . . . . . . . . . . . . . . .
Control dial for heating on the driver's seat . . . . . . . . . . . .
Depending on equipment fitted:
− Air conditioning . . . . . . . . . . . . . . . . . . . . . . . . . . . . . . . .
− Climatronic . . . . . . . . . . . . . . . . . . . . . . . . . . . . . . . . . . .
Ashtray, cigarette lighter/socket . . . . . . . . . . . . . . . . . . . . .
Handbrake . . . . . . . . . . . . . . . . . . . . . . . . . . . . . . . . . . . . .
Depending on equipment fitted:
− Gearshift lever for manual gearbox . . . . . . . . . . . . . . . .
− Selector lever for automatic gearbox . . . . . . . . . . . . . . .
Storage compartment . . . . . . . . . . . . . . . . . . . . . . . . . . . . . A149
A243
A3
A469
A556
A611 2
A758
A859
A913
A10
65
18
A1163
A12
A1359
A1411 2
A1563, 172
A16172
A17164
A18172
A1943
A2043
A2143
A22260
A23218
A24101
A25120
A26
164
137
A27121
A28
185
186
A2980
A30
108
11 3
A3197
A32125
A33
124
131
A34101
NKO B5 20.book Page 11 Monday, July 3, 2006 2:09 PM
Page 18 of 281
Instruments and Indicator/Warning Lights17
Using the systemSafetyDriving TipsGeneral MaintenanceBreakdown assistanceTechnical Data
Depending on the equipment installed in the vehicle, the information
appears in the display of the counter for distance driven or in the informa-
tion display
⇒page 16, fig. 5 .
Service Interval Display
If the due date for the service is reached, the following text appears after
switching on the ignition:
in the display of the trip counter Service 1 500 km
in information display SERVICE in 1500 km
Prior to the due date for the service the kilometre readout decreases in
steps of 100 km. As soon as the due date for the service is reached, the
following text appears:
in the display of the trip counter Service
in information display SERVICE NOW
The display disappears within 20 seconds after starting the engine. The
trip counter is also displayed after pressing the reset button of the trip
counter (for more than 1 second).
Resetting Service Interval Display
We recommend having this resetting performed by a specialist garage.
The specialist garage:
•resets the memory of the display after the appropriate inspection,
•makes an entry in the Service schedule,
•affix the sticker with the entry of the following service interval to the
side of the dash panel on the driver's side. It is also possible for you to reset the Service Interval Display with the
reset button
⇒page 16, fig. 5 as follows (does not apply to models
with fixed service intervals - QG2).
•Switch off the ignition (if not already off), press the reset button and
hold it down.
•Switch the ignition on and release the reset button . The text
Service or service now appears in the display.
•Turn the button for resetting the clock to the right - the display is
reset.
Caution
We recommend that you do not reset the Service Interval Display yourself
otherwise this can result in the service interval display being incorrectly
set, which may also result in problems with operation of your vehicle.
Note
•Never reset the display between service intervals otherwise this may
result in incorrect readouts.
•Information is retained in the Service Interval Display also after the
battery of the vehicle is disconnected.
•It is necessary to re-code the Service Interval Display if a new instru-
ment cluster is installed during repair work. This work is carried out by a
specialist garage.
•After resetting the display with flexible service intervals (QG1) using
the reset button , the data displayed are the same as for a car with fixed
service intervals (QG2). We therefore recommend having the Service
Interval Display reset only by a Škoda Service Partner who is familiar with
the procedure for resetting the display with a vehicle system tester.
•Please refer to the brochure Service schedule for extensive informa-
tion about the service intervals.
AB
AB
AB
AA
AB
NKO B5 20.book Page 17 Monday, July 3, 2006 2:09 PM
Page 30 of 281
Instruments and Indicator/Warning Lights29
Using the systemSafetyDriving TipsGeneral MaintenanceBreakdown assistanceTechnical Data
Switching off the hazard warning light system is switched on will cause all
of the turn signal lights as well as both indicator lights to flash.
Further information about the turn signal system
⇒page 59.
Main beam
The indicator light comes on when the main beam is selected or also
when the headlight flasher is operated.
Further information about the main beam ⇒page 59.
Airbag system
Monitoring the airbag system
The warning light
comes on for a few seconds when the ignition is
switched on.
There is a fault in the system if the warning light does not go out or comes
on or flashes while driving ⇒. This also applies if the warning light
does not come on when the ignition is switched on.
The following text will be displayed in the information display*:
AIRBAG FAULT
The functionality of the airbag system is also monitored electronically,
when one airbag has been switched off
Front, side or head front passenger airbags which have been
switched off using the vehicle system tester:
•The warning light lights up for 3 seconds after switching on the igni-
tion and then flashes for 12 seconds afterwards in 2 second intervals. Front, side or head passenger airbags which have been switched off
using the switch (for switching off airbags)* in the storage compart-
ment on the front passenger side:
•The warning light comes on for 3 seconds after the ignition has
been switched on.
•Switching off airbags is indicated in the middle of the dash panel by the
lighting up of the indicator light (airbag switched off)
⇒ page 172.
WARNING
Have the airbag system checked immediately by a specialist
garage if a fault exists. Otherwise, there is a risk of the airbag not
being activated in the event of an accident!
Note
Further information about switching off airbags ⇒page 171, “Deactivating
an airbag”.
Turn signal system for vehicles towing a trailer
The indicator light on vehicles towing a trailer flashes together with the
respective indicator light for the turn signal system.
The indicator light
does not flash if a turn signal light on the trailer or
on the vehicle is not operating.
Low beam
The indicator light comes on when low beam is selected ⇒page 56.
NKO B5 20.book Page 29 Monday, July 3, 2006 2:09 PM
Page 58 of 281
Lights and Visibility57
Using the systemSafetyDriving TipsGeneral MaintenanceBreakdown assistanceTechnical Data
•The switching on of the described lights should only be undertaken in
accordance with the legal requirements.
•In the event of cool or humid weather conditions, the headlights can be
misted up from inside.
−The temperature difference between interior and external area of
the headlight lenses is decisive.
− When the driving lights are switched on, the light outlet surfaces are
free from mist after a short period. The headlight lenses can possibly
mist up at the border areas.
− It also concerns reverse light and turn signal lights.
− This mist has no influence on the life of the lighting system.
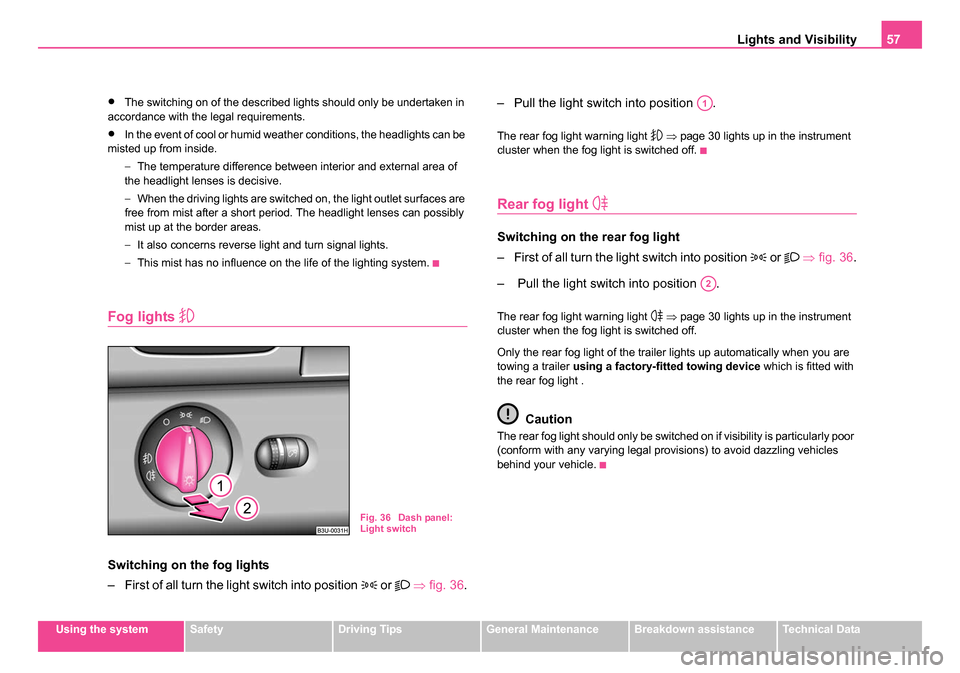
Fog lights
Switching on the fog lights
– First of all turn the light switch into position
or ⇒ fig. 36. – Pull the light switch into position .
The rear fog light warning light
⇒ page 30 lights up in the instrument
cluster when the fog light is switched off.
Rear fog light
Switching on the rear fog light
– First of all turn the light switch into position
or ⇒ fig. 36.
– Pull the light switch into position .
The rear fog light warning light ⇒ page 30 lights up in the instrument
cluster when the fog light is switched off.
Only the rear fog light of the trailer lights up automatically when you are
towing a trailer using a factory-fitted towing device which is fitted with
the rear fog light .
Caution
The rear fog light should only be switched on if visibility is particularly poor
(conform with any varying legal provisions) to avoid dazzling vehicles
behind your vehicle.
Fig. 36 Dash panel:
Light switch
A1
A2
NKO B5 20.book Page 57 Monday, July 3, 2006 2:09 PM
Page 59 of 281
Lights and Visibility
58
Instrument lighting
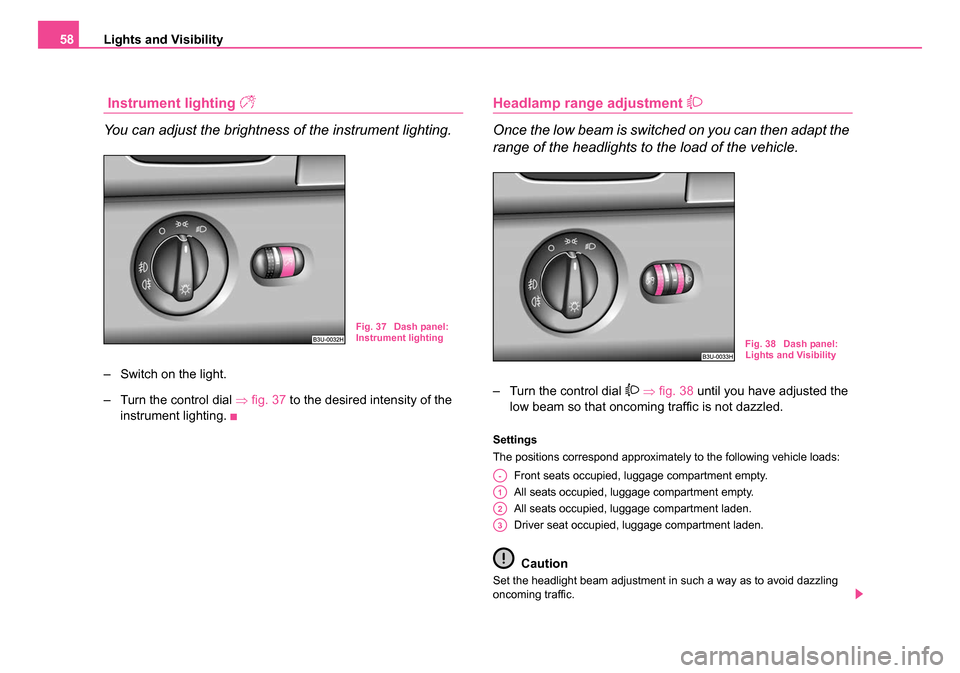
You can adjust the brightness of the instrument lighting.
– Switch on the light.
– Turn the control dial ⇒fig. 37 to the desired intensity of the
instrument lighting.
Headlamp range adjustment
Once the low beam is switched on you can then adapt the
range of the headlights to the load of the vehicle.
– Turn the control dial ⇒ fig. 38 until you have adjusted the
low beam so that oncoming traffic is not dazzled.
Settings
The positions correspond approximately to the following vehicle loads:
Front seats occupied, luggage compartment empty.
All seats occupied, luggage compartment empty.
All seats occupied, luggage compartment laden.
Driver seat occupied, luggage compartment laden.
Caution
Set the headlight beam adjustment in such a way as to avoid dazzling
oncoming traffic.
Fig. 37 Dash panel:
Instrument lighting
Fig. 38 Dash panel:
Lights and Visibility
A-
A1
A2
A3
NKO B5 20.book Page 58 Monday, July 3, 2006 2:09 PM
Page 72 of 281
Seats and Stowage71
Using the systemSafetyDriving TipsGeneral MaintenanceBreakdown assistanceTechnical Data
Seats and Stowage
Front seats
Basic information
The front seats have a wide range of different settings and can thus be
matched to the physical characteristics of the driver and front passenger.
Correct adjustment of the seats is particularly important for
•safely and quickly reaching the controls,
•a relaxed, fatigue-free body position,
•achieving the maximum protection offered by the seat belts and
the airbag system.
The chapters which follow describe the procedure which you should adopt
for adjusting the seats.
WARNING
•Never transport more occupants than the maximum seating in
the vehicle.
•Each occupant must correctly fasten the seat belt belonging to
the seat. Children must be fastened ⇒page 174, “Transporting
children safely” with a suitable restraint system.
•The front seats and the head restraints must always be adjusted
to match the body size of the seat occupant as well as the seat belts
must always be correctly fastened in order to provide an optimal
protection for you and your occupants.
•Always keep your feet in the footwell when the car is being
driven - never place your feet on the instrument panel, out of the
window or on the surfaces of the seats. This is particularly impor- tant for the front seat passenger. You will be exposed to increased
risk of injury if it becomes necessary to apply the brake or in the
event of an accident. If an airbag is deployed, you may suffer fatal
injuries when adopting an incorrect seated position!
•It is important for the driver and front passenger to maintain a
distance of at least 25 cm from the steering wheel or dash panel.
Not maintaining this minimum distance will mean that the airbag
system will not be able to properl y protect you - hazard! The front
seats and the head restraints must always also be correctly
adjusted to match the body size of the occupant.
•Ensure that there are no objects in the footwell as any objects
may get behind the pedals during a driving or braking manoeuvre.
You would then no longer be able to operate the clutch, to brake or
accelerate.
WARNING (continued)
NKO B5 20.book Page 71 Monday, July 3, 2006 2:09 PM
Page 153 of 281
Passive Safety
152
WARNING
•The front seats and the head restraints must always be adjusted
to match the body size of the seat occupant as well as the seat belts
must always be correctly fastened in order to provide an optimal
protection for you and your occupants.
•The driver must maintain a distan ce of at least 25 cm to the
steering wheel ⇒page 151, fig. 136 . Not maintaining this minimum
distance will mean that the airbag system will not be able to prop-
erly protect you - hazard!
•When driving, hold the steering wheel with both hands firmly on
the outer edge in the 9 o'clock and 3 o'clock position. Never hold
the steering wheel firmly in the 12 o'clock position or in another
way (e.g. in the middle of the steering wheel or at the inner steering
wheel edge). In such cases, injuries to the arms, the hands and the
head can occur when the driver airbag is deployed.
•The backrests must not be angled too far back when driving
otherwise this will affect proper operation of the seat belts and of
the airbag system - risk of injury!
•Ensure that there are no objects in the footwell as any objects
may get behind the pedals during a driving or braking manoeuvre.
You would then no longer be able to operate the clutch, to brake or
accelerate.
Correct seated position for the front passenger
The front passenger must maintain a distance of at least
25 cm from the dash panel so that the airbag offers the
greatest possible safety when an airbag is deployed.
For the safety of the front passenger and to reduce the risk of injury in the
event of an accident, we recommend the following setting.
•Adjust the front passenger seat as far as possible to the rear.
•Adjust the head restraint so that the top edge of the head restraint is
at the same level as the upper part of your head ⇒page 151, fig. 137 .
•Fasten the seat belt correctly ⇒page 158.
In exceptional cases the front passenger airbag can be deactivated
⇒ page 171, “Deactivating an airbag”.
Manual front passenger adjustment ⇒page 72, “Adjusting front seats
manually”.
Electrical front passenger seat adjustment ⇒page 73, “Adjusting seats”.
WARNING
•The front seats and the head restraints must always be adjusted
to match the body size of the seat occupant as well as the seat belts
must always be correctly fastened in order to provide an optimal
protection for you and your occupants.
•The front passenger must maintain a distance of at least 25 cm
to the dash panel. Not maintaining this minimum distance will mean
that the airbag system will not be able to properly protect you -
hazard!
•Always keep your feet in the footwell when the car is being
driven - never place your feet on the instrument panel, out of the
window or on the surfaces of the seats. You will be exposed to
increased risk of injury if it becomes necessary to apply the brake
or in the event of an accident. If an airbag is deployed, you may
suffer fatal injuries when adopting an incorrect seated position!
•The backrests must not be angled too far back when driving
otherwise this will affect proper operation of the seat belts and of
the airbag system - risk of injury!
NKO B5 20.book Page 152 Monday, July 3, 2006 2:09 PM
Page 163 of 281

Airbag system
162
Airbag system
Description of the airbag system
General information on the airbag system
The front airbag system is complementary to the three-point seat belts
and offers additional protection for the head and chest area of the driver
and passenger in the event of a frontal collision.
In the case of a violent side crash, the side and head airbags* reduce the
risk of injuries to the occupants on the part of the body facing the side of
the accident ⇒.
The airbag system is only functional after the ignition has been switched
on.
The operational readiness of the airbag system is monitored electroni-
cally. The airbag warning light comes on for a few seconds each time the
ignition is switched on.
The airbag system (according to vehicle equipment) essentially
consists of:
•an electronic control unit,
•the two front airbags,
•the side airbags,
•head airbags*
•an airbag warning light in the instrument cluster,
•a front passenger airbag switch* ⇒page 172,
•an indicator light for a switched off front seat passenger airbag* in the
middle of the dash panel ⇒page 172. A fault in the airbag system exists if:
•the airbag indicator light does not light up when the ignition is switched
on,
•the warning light does not go out after about 3 seconds after the igni-
tion is switched on,
•the airbag indicator light goes out and comes on again after the ignition
is switched on,
•the airbag indicator light comes on or flickers when driving,
•an airbag indicator light showing a switched-off front passenger
airbag* in the middle of the dash panel flashes.
WARNING
•To enable the occupants of a car to be protected with the
greatest possible effect when the airbag is deployed, the front
seats must be ⇒page 151, “Correct seated position” correctly
adjusted to match the body size of the occupant.
•If you do not fasten the seat belts when driving, lean too far
forward or adopt an incorrect seated position, you are exposing
yourself to increased risk of injury in the event of an accident.
•Have the airbag system checked immediately by a specialist
garage if a fault exists. Otherwise, there is a risk of the airbag not
being activated in the event of an accident.
•No modifications of any kind may be made to parts of the airbag
system.
•It is prohibited to manipulate individual parts of the airbag
system as this might result in the airbag being deployed.
NKO B5 20.book Page 162 Monday, July 3, 2006 2:09 PM
Page 172 of 281

Airbag system171
Using the systemSafetyDriving TipsGeneral MaintenanceBreakdown assistanceTechnical Data
Deactivating an airbag
Deactivating airbags
If any airbags have been deactivated, switch them on
again as soon as possible so that they are able to again
provide their proper protection.
There is the technical means installed within your vehicle to switch off the
front, side or head airbag (take out of commission).
This is why you should have the deactivation of the airbags carried out by
a specialist garage.
On vehicles equipped with the switch for deactivation of the airbags, you
can deactivate the front and side passenger airbag by means of this
switch ⇒page 172.
Deactivation of airbags is envisaged only for particular instances,
such as if:
•you must in exceptional cases use a child seat on the front
passenger seat where the child has its back to the direction of travel of the
vehicle (in some countries this must be in the direction of travel due to
other legal regulations applying) ⇒page 174, “Important safety informa-
tion regarding the use of child safety seats”
•you are not able to maintain the distance of at least 25 cm between
middle of steering wheel and chest, despite the driver seat being correctly
adjusted,
•special attachments are required in the area of the steering wheel
because of a physical disability,
•you have installed other seats (e.g. orthopaedic seats without side
airbags). Monitoring the airbag system
The functionality of the airbag system is also monitored electronically,
when one airbag has been switched off
If the airbag was switched off using diagnostic equipment:
•The warning light for the airbag system lights up for 3 seconds after
switching on the ignition and then flashes for 12 seconds afterwards in 2
second intervals.
Front passenger airbags switched off using the switch for front
passenger airbags* in stowage compartment on the front passenger
side:
•The airbag warning light comes on in the instrument cluster for about
3 seconds each time the ignition is switched on.
•Switching off airbags is indicated in the middle of the dash panel by the
lighting up of the indicator light ⇒ page 172, fig. 154 .
Note
Your Škoda Service Partner will be able to advise you whether national
legislation in your country allows airbags in your vehicle to be deactivated,
and which ones.
NKO B5 20.book Page 171 Monday, July 3, 2006 2:09 PM